Easiest DIY Curtain Rods (High-End Hack for 2024!)
Conduit Curtain Rods That Look Like the Real Thing!
Why spend a fortune on curtain rods & finials? Check out how to make DIY curtain rods for ANY window length!
I saved over $500 by learning how to make curtain rods out of inexpensive electrical conduit. In this step-by-step tutorial, I share an easy way to make finials out of furniture knobs giving you endless style options! By saving so much on curtain rods, you can put more of your budget toward more exciting aspects of your home decor!
This process will show you how to make the perfect curtain rod for every window in your home whether you have small windows or you need your own extra large curtain rods for larger windows.
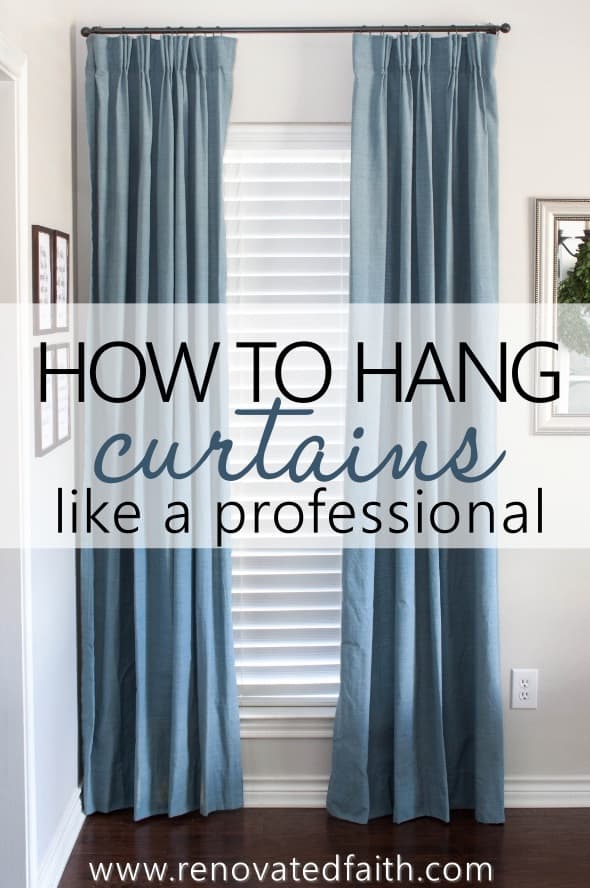
How to Hang Curtain Rods Cheaply
When we moved into our house, the previous owner’s curtains looked like something out of a 1960 Sears catalog and they had to go. Knowing I had 16 windows to buy curtain hardware for, I realized that curtain hardware and window treatments would be one of our biggest expenses.
Since I wanted to spend more money on curtains, paint, and accessories, I decided to figure out a way to make my own DIY custom curtain rods.
We moved into this house a few years ago knowing we had a LOT of projects ahead. Every room was crying out for a makeover, but honestly, I wouldn’t have it any other way as I enjoyed several DIY projects in our last home. Making curtain rods was another opportunity to put our own touch on a house we love so much.
The most expensive curtain rods online were the ones for extra-long windows. However, this DIY curtain rod project allows you to make long curtain rods for the same price as short ones!
What Can I Use Instead of a Curtain Rod? – The Best DIY Curtain Rod Options
When making DIY custom rods, there are a few different alternatives to curtain rods you buy in a store. Options include electrical conduit, black steel pipe, wooden dowels, and also PVC pipe.
I decided against the wooden dowel rods because they are three times the cost of conduit and PVC and they also don’t come in longer lengths for long curtain rods.
When it comes to electrical conduit versus PVC, I chose the conduit because although they are both cheap and come in long lengths, PVC requires more brackets. That’s because the PVC is much less rigid and can sag easily – not a look you want.
Black plumbing pipe rods are a great idea if you want an industrial look but it’s pretty heavy and more expensive than electrical conduit.
Electrical Conduit Curtain Rod
Electrical conduit and wood rods are the better options overall but wood dowels can sometimes look cheap. Electrical conduit can easily mimic the look of custom curtains for a very low cost.
The beauty of making DIY curtain rods out of electrical conduit is that you also gain the professional look of custom curtain rods!
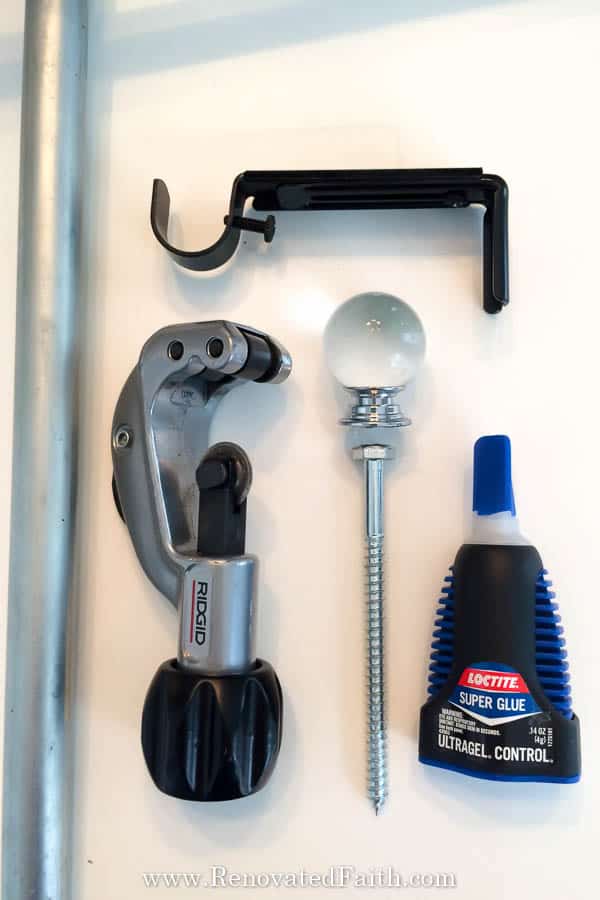
How to Make Easy DIY Curtain Rods – Supplies
- Electrical Conduit – You can find it at your local hardware store (I used ½ inch which is actually ¾ in. in diameter).
- Cabinet Knobs – These Round Glass Cabinet Knobs are my favorite and remember you can spray paint the whole knob or just the base in any color!
- Pipe Cutter – This is what I use as my curtain rod cutter and it’s incredibly easy to use! Just put the pipe cutter where you want to make the cut, tighten it and spin it around until the piece falls off.
- Rustoleum Universal Spray Paint in Oil-Rubbed Bronze – This is my absolute favorite spray paint and it comes in any color, whether you want copper, black, gold, satin nickel curtain rods, or my favorite, oil-rubbed bronze!
- Curtain Brackets – These perfectly fit the electrical conduit we are using in this tutorial.
- Drywall Anchors and Screws
- Electrical Tape
- Super Glue with Ultra Gel Control
- Hot Glue (optional)
- Rod Connectors for Bay Window Rods (optional)- This one provides a seamless look with the size of the conduit we are using!
- My Best Spray Painting Tips – Check out the form at the end of this post for a free spray painting checklist to give you a flawless finish with spray paint every time
RELATED: How to Transform Your Home Decor with Spray Paint
As you get your shopping list together, be sure to check out my blog post on DIY Pinch Pleat Curtains where I show you how to make your own curtain rings that are almost free!
How to Make Cheap Curtain Rods That Look High-End – The Process
Step 1: Get the Right Electrical Conduit for Your DIY Curtain Rods
First, go to the electrical section in your favorite home improvement store for electrical conduit. As I said, I had considered wood dowels, but you would see the wood grain when it was spray painted. PVC was another option, but it was too flexible, which is why the electrical conduit was a perfect choice.

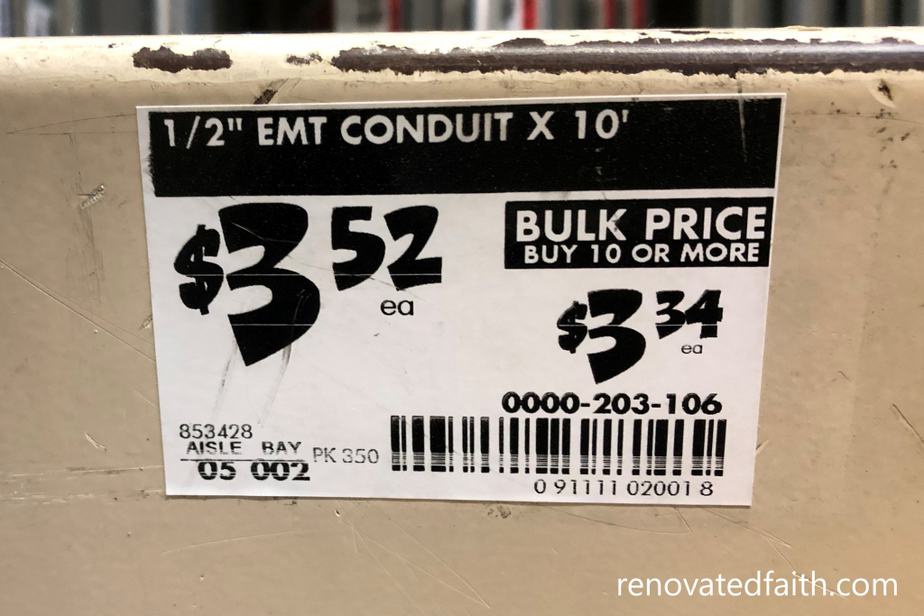
Electrical conduit is my new best friend. Not only is it durable, and easy to cut, but it is also extremely cheap.
A 10’ piece of 1/2” electrical conduit will run you less than $4.00! Compare to the Amazon Basics Curtain Rods of the same size that will run you almost $30 each and that’s just for a basic rod. These will look just like Restoration Hardware’s basic rods that will cost almost $200.
It’s a good idea to only pick conduit that is straight as some can be a little bent.
I found curtain rod brackets at Amazon but you can also find them at Home Depot. Make sure your bracket will fit your rod diameter. These worked nicely with the ½” conduit.
Step 2: The Easiest Way to Hang Curtains – Finding the Right Height and Width
Before you buy your new curtains, there are some size options to consider:
How to Determine the Best Width for Curtains
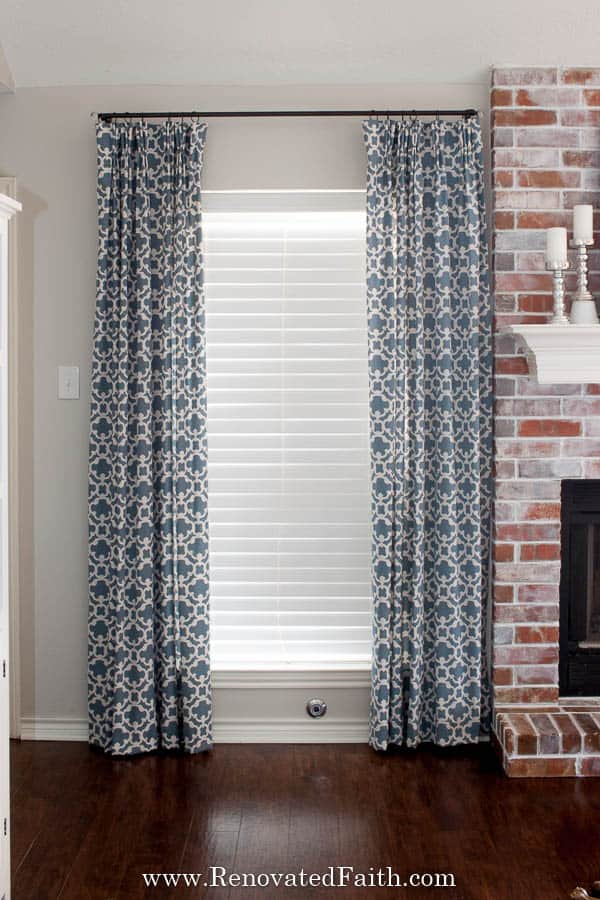
You don’t want the length of your rod to be the same or even close to the same as the width of your window alone. We want the curtains to accentuate the window and make it look larger than it really is while letting in as much light as possible!
In other words, you want the inside edge of the curtain to just barely cover the inside of the window frame or edge. This gives the illusion of a MUCH larger window.
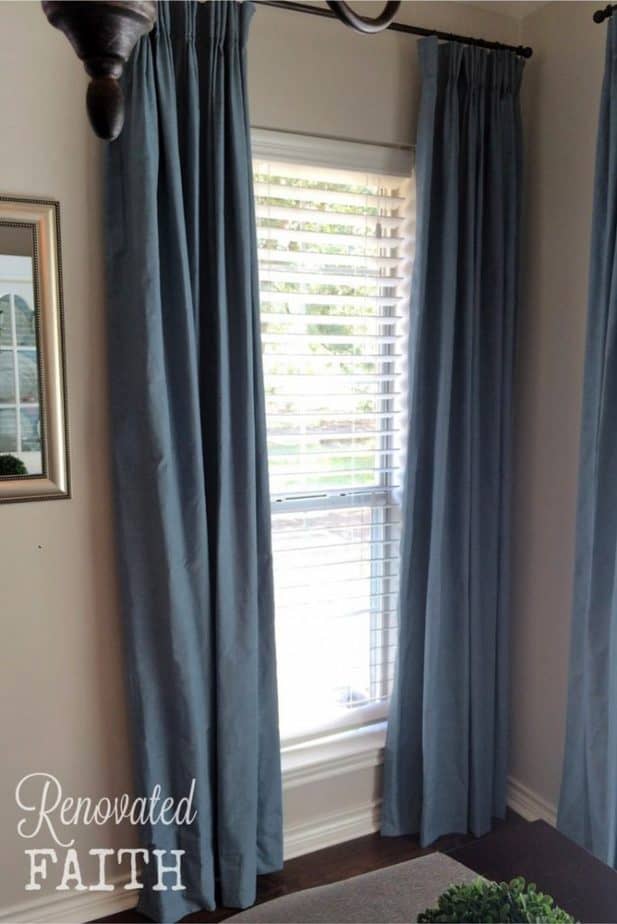
In several cases, I extended my rods over a foot on each side of my windows. I did this to make the windows look larger than they actually are and to allow more light in!
Notice how tiny this window is but it looks so much larger when I extended the curtains out as far as they would go.
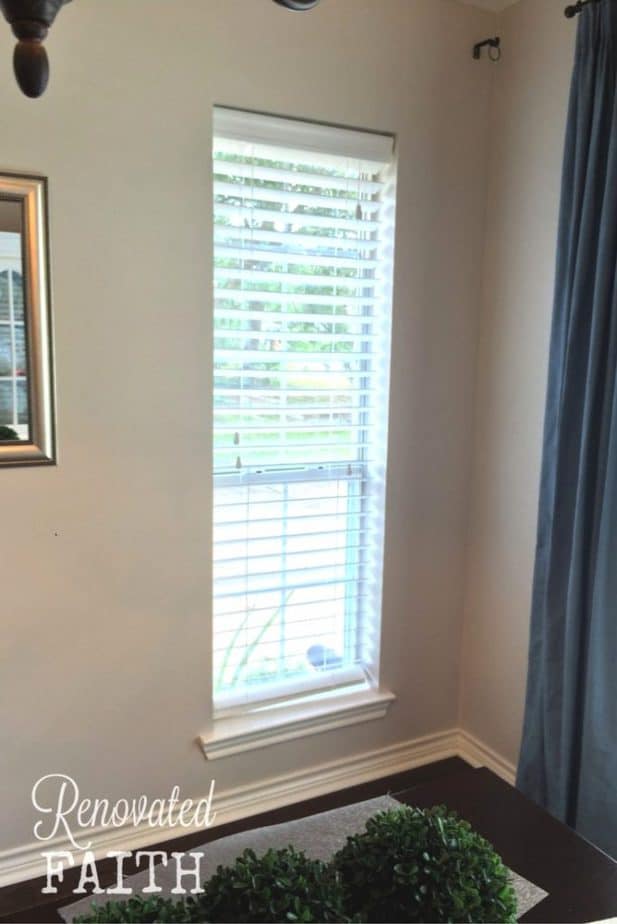
No one would be able to guess how small these windows actually are!
How to Determine the Best Length for Curtains
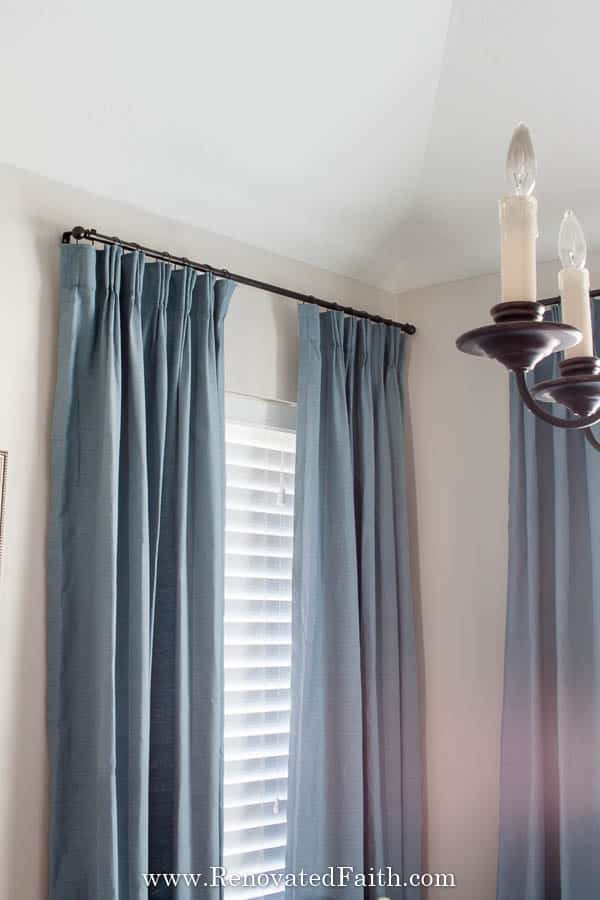
I like to hang my curtains so they are 4 to 6 inches from the ceiling. Measure away from the ceiling and make a small mark with your pencil there.
Should Curtains Hang All The Way To The Floor?
Now you want to install your curtain rod brackets at the width you decided on earlier and at this height.
Hemming Curtains for the Perfect Height For Your Window
In determining the length of my curtains, I like to add approximately 4 inches to this length (from the rod to the floor) because I will actually hang up my curtains on the rod, pin them to the correct length of 1/2″ off the ground and then hem them.
I know what you are thinking, my friend. It sounds like a lot of extra work to rehem curtains but for me, it is easier than the possibility of making a lot of extra holes in the wall trying to get the brackets to be the right height for the rod. Oftentimes when I get curtains, one end is longer than the other but this method customizes my curtain to my window.
Finding Curtains at the Perfect Height (NO-Hem Option)
If you don’t want to go to the trouble of hemming your new curtains, I get it. Fortunately, since writing this post, I have found some curtains online that are sold in SEVERAL height options instead of the standard two. Check them out here:
CURTAINS IN SEVERAL HEIGHT OPTIONS
To recap: Measure from 4-6 inches from the ceiling and install your brackets. Next, measure from the rod to 1/2 inch off the floor. Buy curtains at the link above or buy curtains that are longer than you can pin and hem to the exact height. (If you don’t sew, use this hem tape!)
For example, I bought 110″ curtains from Target which was much easier and cheaper than making them from scratch or getting them custom-made.
This method is the one sure-fire way to get your curtains the right length without adding a lot of screw holes in the wall because of misplaced brackets. Plus you have professional-looking curtains that don’t cost much money!
Here are the three different curtains I bought for this project!

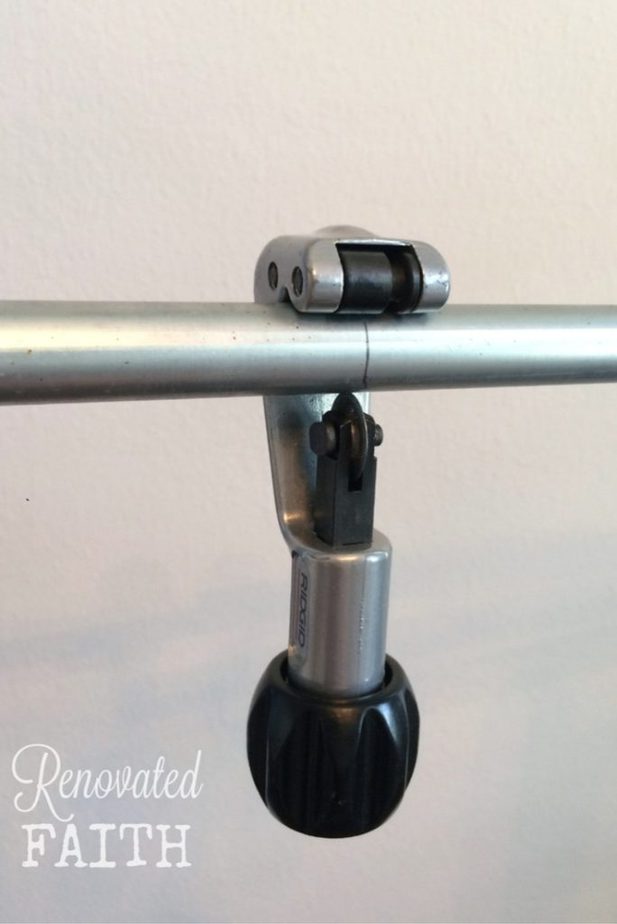
Step 3: The Best Curtain Rod Cutter for Making Easy Curtain Rods
Mark the new rod size with a pencil so you know where to cut. To cut the rod, you simply tighten the pipe cutter so the round blade is in line with the line you marked.

![]()
The Best Curtain Rod Cutter (Pipe Cutter)
Tighten it just enough that you can still rotate it around the rod with some tension. Keep rotating the pipe cutter around the rod until it gets loose again, tighten slightly, and continue to spin it. Do this until the groove in the rod is deep enough that the end pops off at the cut. It might take a minute or two but I promise it works!

Be sure to check around to see if you can borrow a pipe cutter. They are not very expensive but I bought one for myself, only to find out my husband already had one and my dad had two. Woopsie!
Step 4: How to Make Unique DIY Curtain Rod Finials Out of Furniture Knobs
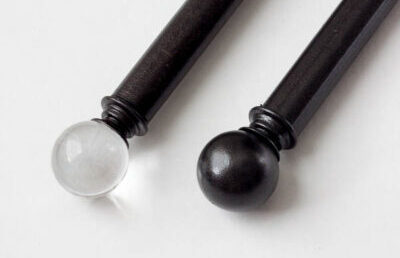
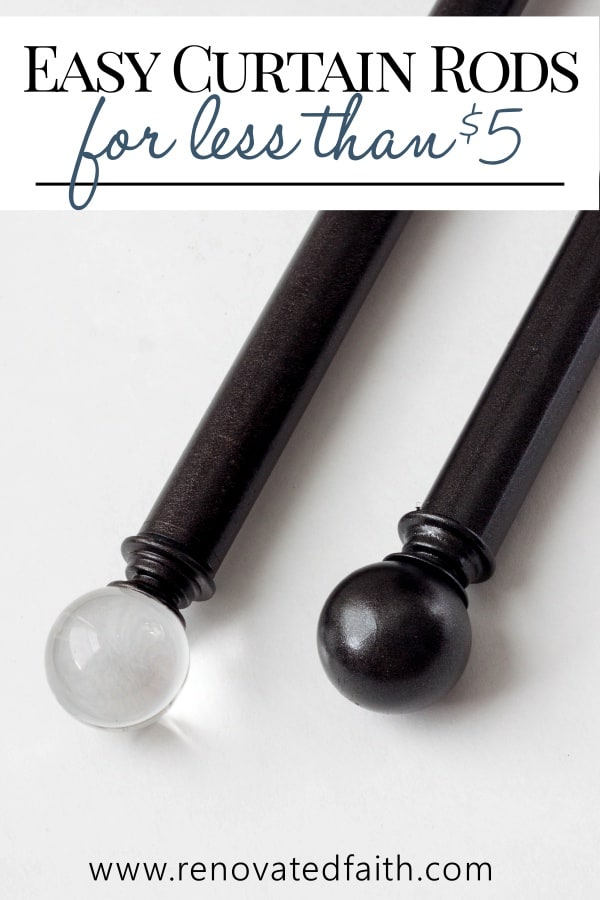
Now it’s time to work on the knobs! For the windows in the kitchen and living room, I wanted the look of these round glass finials at Restoration Hardware but wasn’t about to pay $80 a pair, especially when I would need so many. So, I stumbled upon these 30mm Glass Cabinet Knobs for just over $1 each. Jackpot!
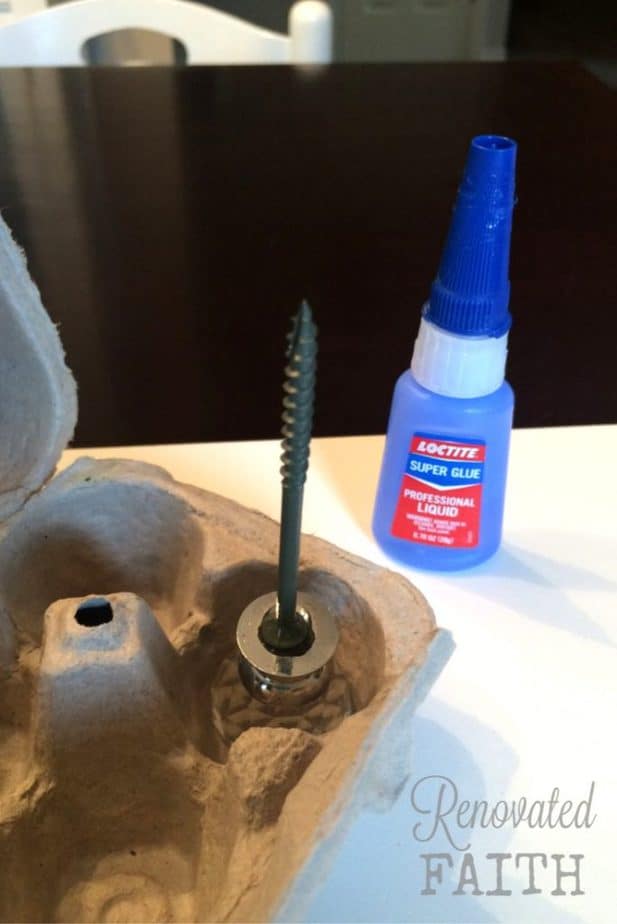
Superglue the head of the screw to the bottom of the knob.
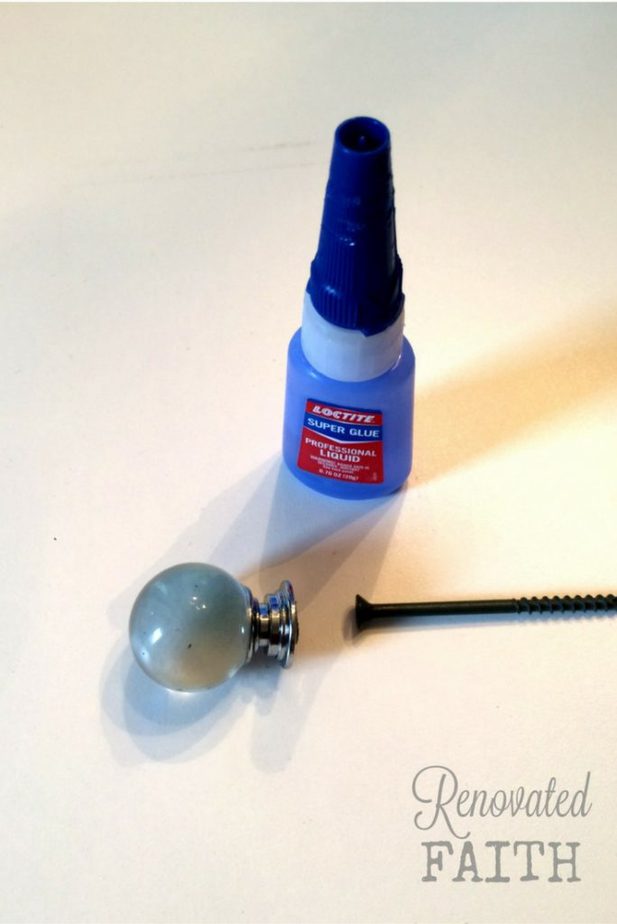
I applied an ample amount of super glue and used an empty egg carton to hold them in place as they dried. As they dry, you will see some white residue from the glue on the base of the knob but the paint will cover that. Let the finials dry for 48 hours to be on the safe side.
DIY Curtain Rod End Caps
Instead of finials, you can make DIY Curtain rod end caps by buying PVC end caps and spray painting them. Just super glue them onto the ends and no one will know you made them yourself.
Step 5: Painting DIY Curtain Rods
We saved this step until now so we didn’t ruin the paint finish when cutting the rod or gluing the knobs.
My favorite spray paint for curtain hardware is Rustoleum Oil Rubbed Bronze (click here for the current price). It’s very forgiving but read the information on the back about recoat times.
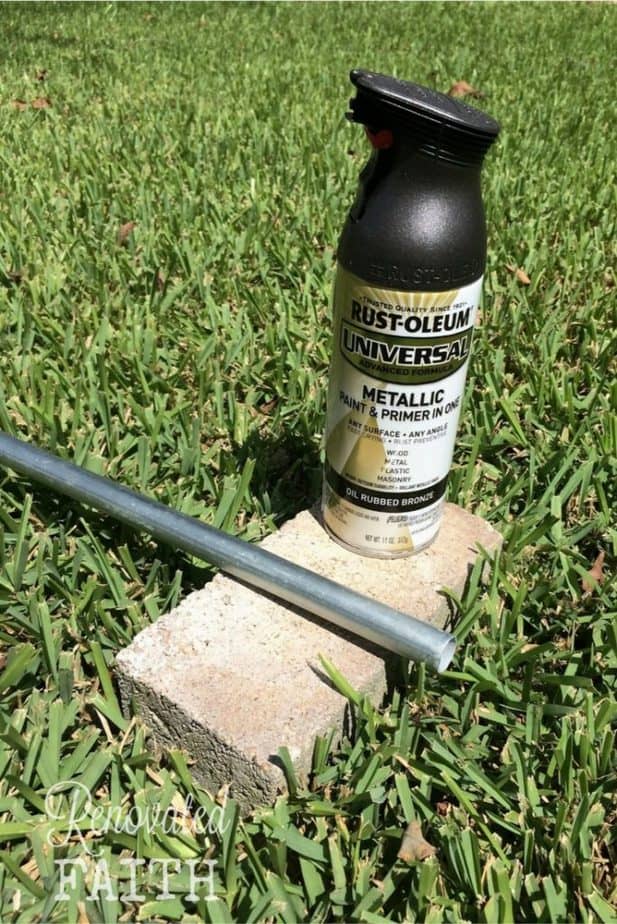
At the same time, you paint your rods, you will also want to spray paint your finials (cabinet knobs) and any other hardware.
Be sure to shake the can of spray paint and spray in several very light coats to get the best finish possible: My Best Spray Painting Tips and Tricks
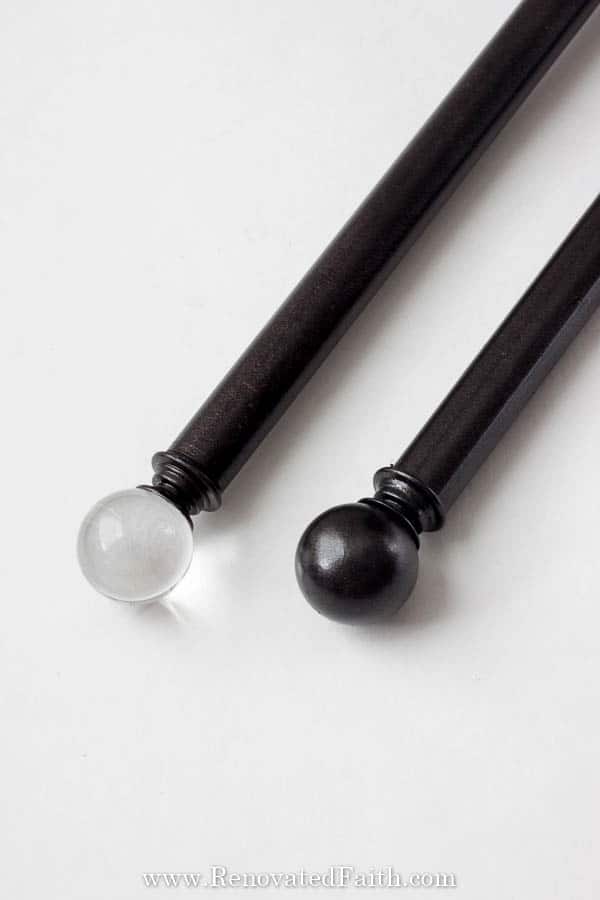
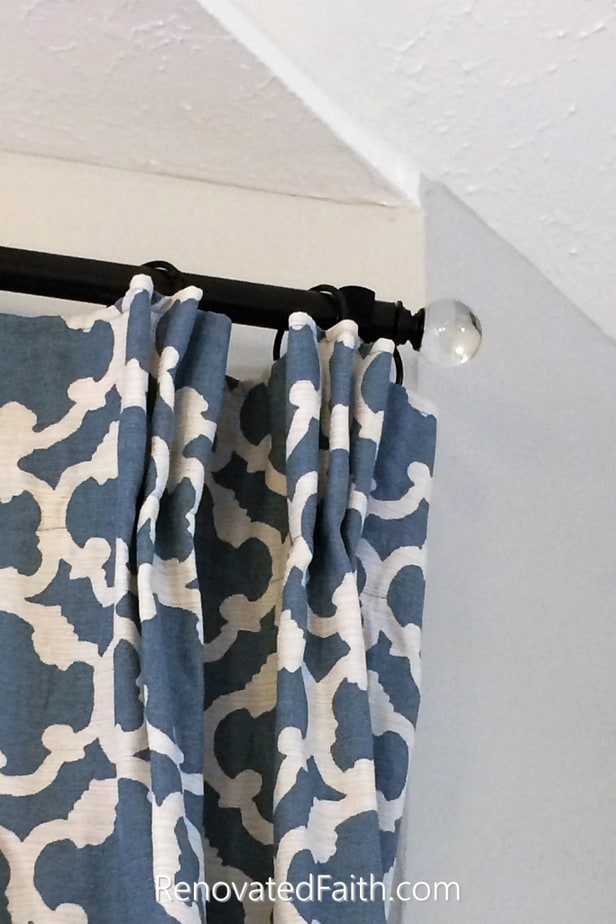
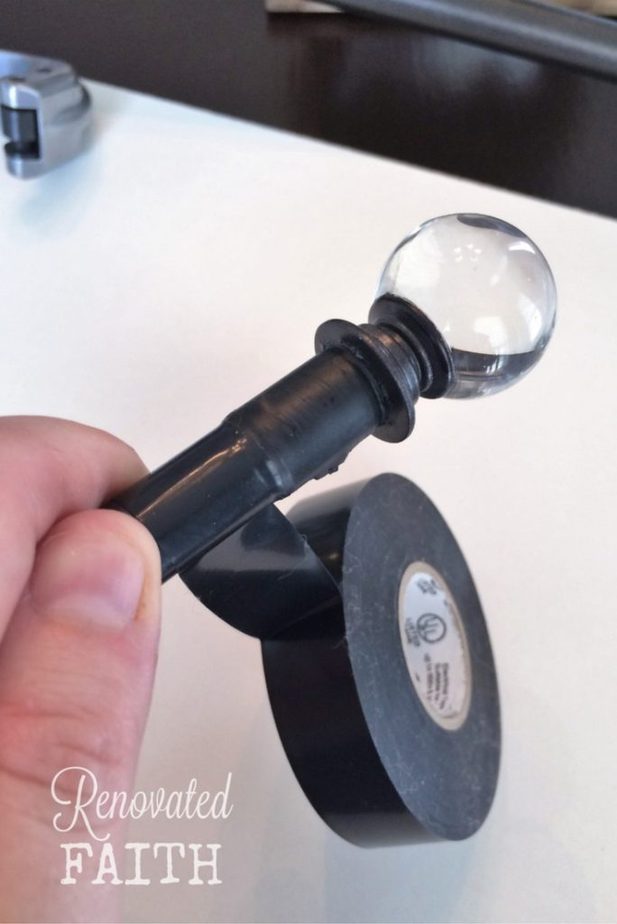
DIY Glass Curtain Rod Finials – To get the look of the Restoration Hardware Glass Ball Finials, you want to tape off the round glass portion with painter’s tape, before spray painting.
DIY Oil-Rubbed Bronze Finials – For solid oil-rubbed bronze finials, you will spray paint the entire thing. No one will be able to tell that part of it is metal and the rest of the finial is glass. Once it’s spray-painted, the whole finial and rod will look like dark bronze. To get my best spray painting tips to get a flawless finish every time, fill out the form below!
If I had to do this over again, I would have painted the brackets too so they are exactly the same color.
Free Spray Painting Tips & Tricks
To get my free tips on spray painting anything, fill out the form below to get the free checklist and access to my free printable library:
Step 6: How to Make Cheap Curtain Rods Out of Electrical Conduit – Installation
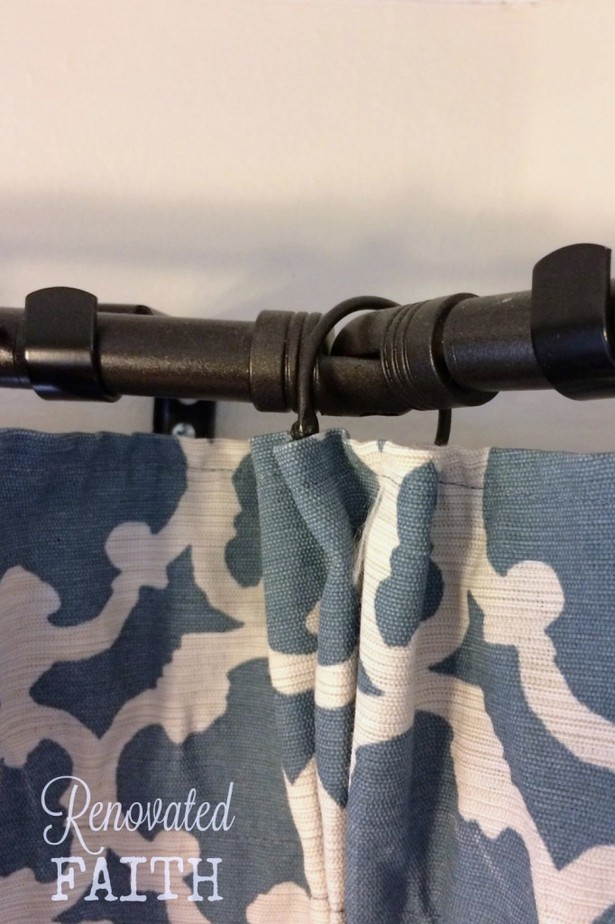
After the paint has have dried overnight, I wrapped electrical tape around the screw so it would fit snugly into the end of the conduit. Be sure to wrap at least 2 rows of tape around the screw. This will take some trial and error as you find the right amount of tape so the finial end fits. You want a snug enough fit so that the finial stays in place.
I just kept adding tape until it was tight enough. Secure it with hot glue if that helps.
Hang your brackets and rods and you are ready to add your curtains!!!
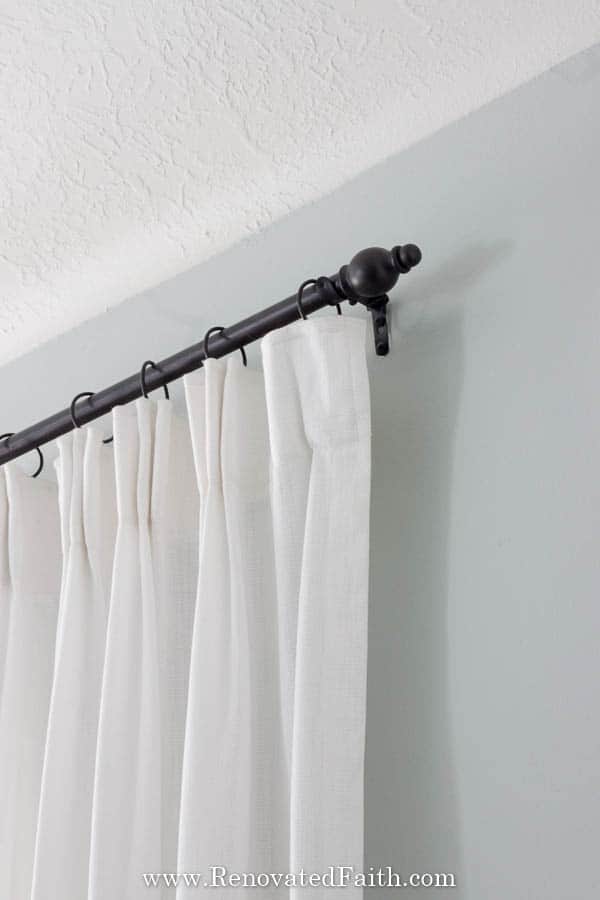
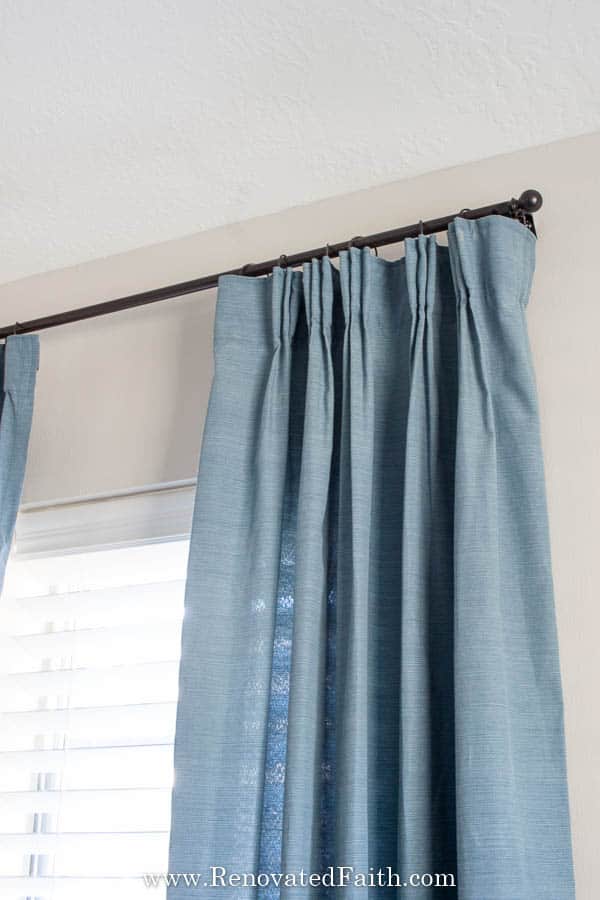
Here are the rods I made when I made over our master bedroom in Master Bedroom Makeover in Sherwin Williams Silver Strand.
After attaching the finials to the rods, I hung my curtains. I repeated this project for all 16 windows in our house and estimate that I saved a minimum of $500 if I bought all Target curtain rods.
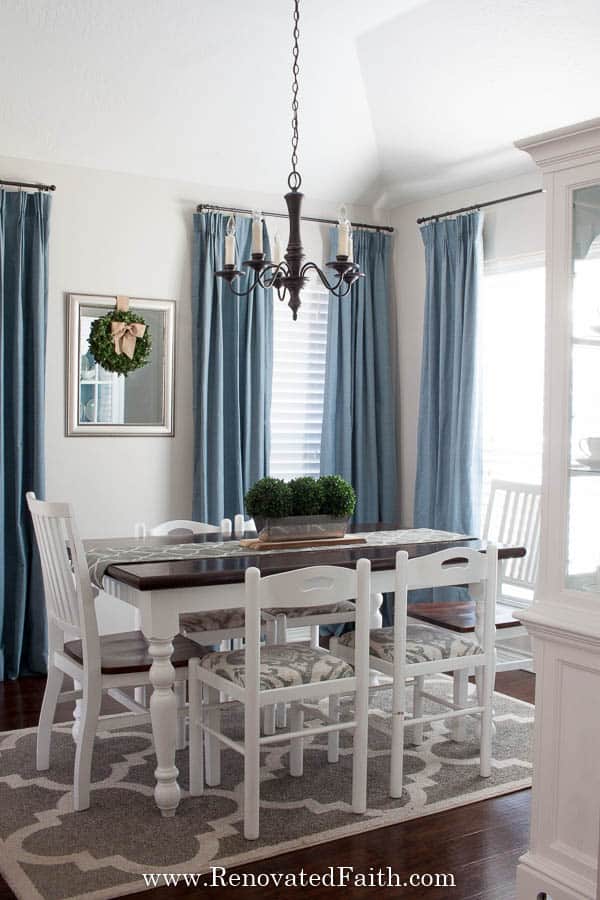
Can you imagine how much I would have saved at a high-end store like Pottery Barn or Restoration Hardware? I’m willing to bet you can’t tell the difference between my glass finials and the ones at Restoration Hardware below.
It’s hard to believe that each curtain rod with brackets and finials cost me about $10.
To see how I made my own DIY Curtain Rings and also made pinch pleats the EASY way, check out my post How to Add Pinch Pleats to Store-Bought Curtains.
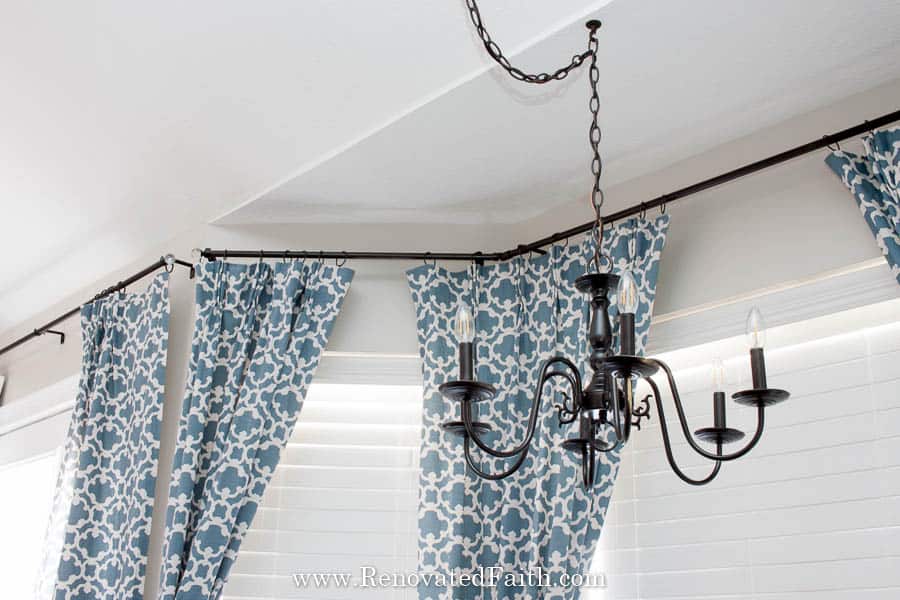
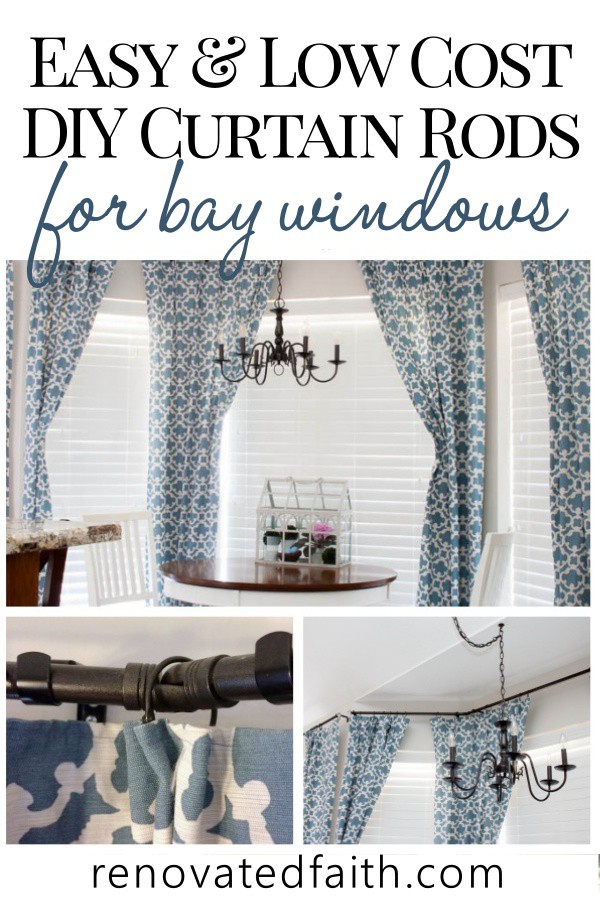
How to Make DIY Curtain Rods For Bay Windows and Sliding DOors
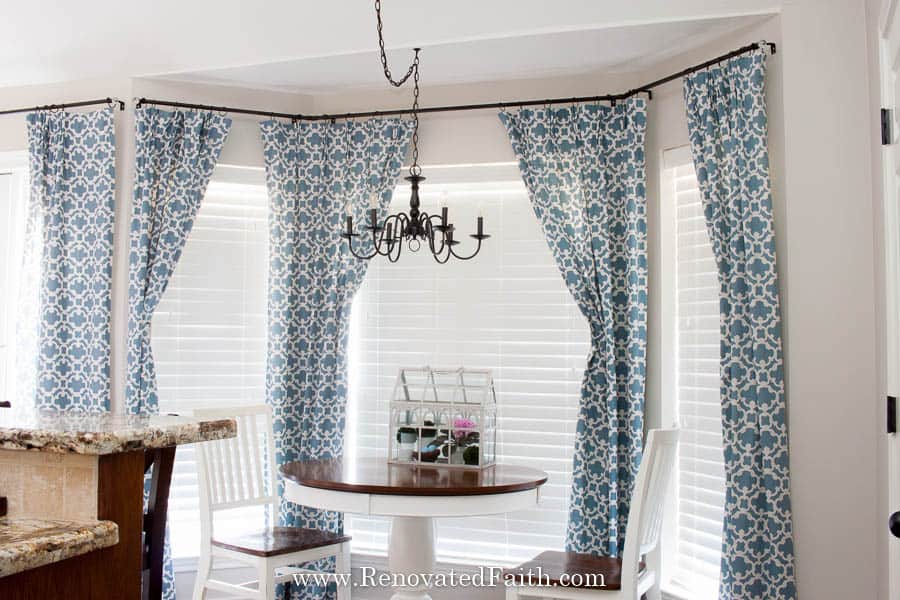
How to Make A Conduit Curtain Rod For A Bay Window
To make a custom curtain rod for a bay window, you don’t have to fork out the high cost of custom bay window curtain hardware. Instead, cut the electrical conduit into three different sections according to the length of each window.
Then you will join each rod with this connector here. To ensure the end of the connector fits into the curtain rod, you are going to wrap the end with electrical tape as you did above.
Once your brackets are installed and you are sure everything is cut to the right size and fits properly, you can spray paint your connectors to match the rods.
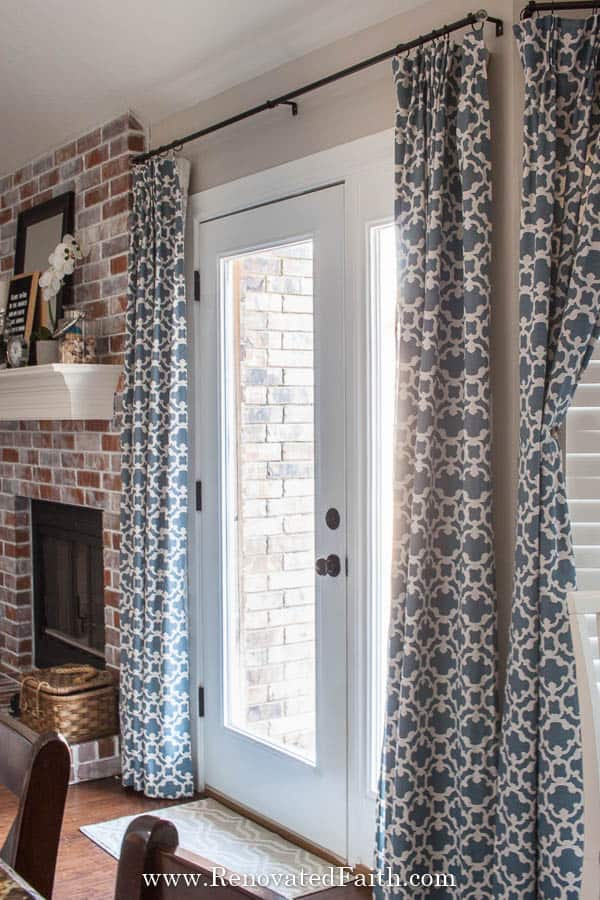
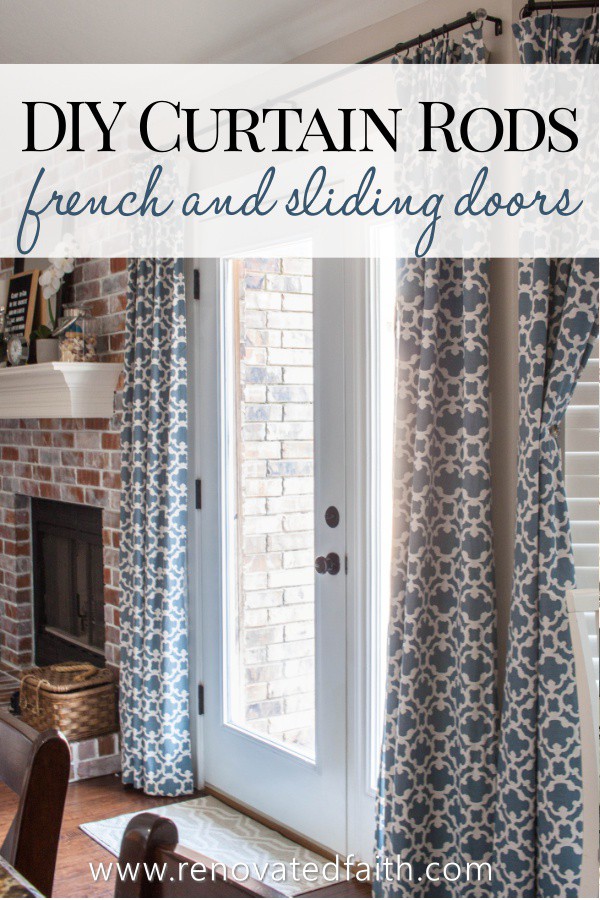
DIY Curtain Rods for Sliding Glass Doors
To continue the look of the long curtains in our living room, I used the same process above to make some curtains for our french doors. This would also work well for sliding glass doors, where you want to ensure privacy but don’t want the look of verticle blinds.
FAQ’s: DIY Curtain Rod Finials and Easy Curtain Rods Out of Electrical Conduit
How Do You Make a Curtain Rod Longer?
Because the electrical conduit comes in lengths up to 10 feet and sometimes longer, you have a lot of options for extra long curtain rods. You just want to make sure to add enough brackets as any curtain rod will sag without enough support in the middle.
How to Extend a Curtain Rod That is TOO Short
If you have an existing curtain rod that is too short and needs extending, it will be easy to cut a piece of electrical conduit and spray paint it to the color of your existing brackets and finials. For less than $4 you now have a longer curtain rod that fits with your existing style.
DIY Corner Curtain Rods
If you have corner windows and need an easy solution for DIY corner curtain rods, use the same connector as I used in the bay window instructions but only cut two pieces of conduit. Now you will hang them so that there are three curtains (one on each side and one in the middle with your connector in the middle. It is best to use 4 brackets (two on each wall) and use rings for your curtains since you are using the connector.
DIY Double Curtain Rods
If you like the look of sheers behind your curtains, you will want to make a DIY double curtain rod which is just as easy as making a single. You will just cut double the pieces of conduit and need double the finials but for brackets, you will use these double brackets that will work well with the 1/2″ conduit.
When Do Curtain Rods Need a Center Support?
A curtain rod needs center support if the curtain rod is over 6 feet long. If you feel like you will see some sag, even for curtain rods less than 6 feet, go ahead and add a center support. It is better to add one to be on the safe side than to not add one and risk the conduit sagging. Fortunately, the electrical conduit is very rigid, unlike PVC pipe which almost always needs a center support.
How To Make Curtains for Doors
To make curtains for doors, follow the same steps above, I used the same tutorial to make curtains on rings for my French doors and after 5 years, the paint is not scraped off the rod – even though it’s pulled open and close every day.
What are alternatives to curtain rod brackets?
For unique alternatives to traditional brackets, try checking a local thrift store for the cheapest options for vintage and wood brackets. You can also add a little style with leather straps.
What are other attractive Diy curtain rod ideas?
There are some more fun alternatives to traditional curtain rods that don’t cost much money. You can use tree branches as opposed to wood curtain rods for a rustic look but know you will not have perfect curtain rods and the first side of your curtain panels might be longer than the other.
Copper curtain rods can give you a unique look to industrial pope curtain rods but copper pipes can be cost-prohibitive. A great option is to use the process in this blog post but paint them with copper spray paint.
Related Posts to DIY Electrical Conduit Curtain Rods
old knobs entire house
The Best Way to Make Pinch-Pleat Curtains (No Sewing Required!)
The Ultimate Guide to Painting Kitchen Cabinets White
The Best White Paint for Furniture
21 Tips for Flawless Spray Painting
A Beginner’s Guide to Furniture Painting (Vanity Reveal)
Why I No Longer Use Chalk Paint on Furniture (Chalk Paint and Dark Wax Alternative)
Benjamin Moore Hale Navy Review
Sherwin Williams Silver Strand Review
Easy Pinch Pleat Curtains Without The Hassel
How to Repaint Old Knobs In Your Entire House For Cheap
The Perfect Way to Make DIY Conduit Curtain Rods
By making your own curtain rods with inexpensive materials, not only do you save a lot of money on new curtain rods but it’s a great way to express your own style with any window size. The best part is that it doesn’t take much time even if you are making hardware for lots of windows!
Traditional curtain rods can be hundreds of dollars but by making your own diy curtain rods, gorgeous-looking windows are no longer a pipe dream! Good luck and let me know if you have any questions in the comments section!
Blessings,

Be sure to follow the fun here!
Email Subscription | Instagram | Pinterest | Facebook | Twitter
How TO Make Electrical Conduit Curtain Rods Any Length

Karin Peters is a DIY expert and the creator of Renovated Faith. She is a furniture painter, a home design consultant, and a tenacious problem solver determined to help you transform your house into a home. With 17 years of experience with DIY home improvement, she researches and analyses professional processes to adapt them to be easy and cost-effective for DIYers. She then tests every project and product before it appears on the site in a detailed, step-by-step format. After attending Texas A&M University, she received her Master of Divinity with Biblical Languages at Southwestern Baptist Theology Seminary. Her passions unite in Renovated Faith, which shows readers how to create a home that serves them so they can pursue their God-given purposes. About Renovated Faith | Editorial Policy | Facebook | Twitter | LinkedIn
I am grateful to have found you/your blog–precisely when I needed curtain rods! Thank you so much for your innovative thinking. And your generosity to share with us–in a manner that’s easy to understand. Count me as your new fan.
KZ, your comment made my day! Thanks so much for taking the time to share that the curtain rod hack helped. Let me know if you ever have any questions!
Love your blog and thanks for the great article. I love DIY projects and always enjoy reading what you have to say. I think that’s how most businesses actually get started from DIY project ideas.
Hi! I’ve recently found your blog & love it! I’m interested in the conduit rods & look forward to doing this very soon. With spray painting the conduit & then using rings to hang the curtains will paint scratch off w/the daily opening & closing of the curtains? Lmk. Thanks!
Great question Beverly! I wondered this too but after several years of using these curtain rods, they have not scratched the paint off the conduit. Let me know if you have any other questions. Thanks Beverly!
Ty! Just one more question. My husband wondered if we need to sand the rod before painting?
Hi Karin!
I just found your site and I love it! Many projects to come : ) I am planning to add this curtain rod to our bedroom but I just don’t understand the final after you glue the screw on. Do you add a PVC end cap and work the screw in and do you drill a hole in it then push the screw wrapped in tape through it?
Hey Jaime, The PVC end cap idea is great. All I did was wrap enough electrical tape around the screw attached to the finial until it was a snug fit. I’m sure there is a better way to do it but it worked. Let me know if you have any other questions Jaime!
Wow, Karin! Thank you for sharing your amazing ideas, and your presentation is great! I don’t have many windows, but they are all very wide. I’m diy’ing my window coverings because it costs a fortune to cover wide windows.
I need a 12ft curtain rod and can only find 10ft conduit pipe. How would you lengthen the conduit?
Do you think that inserting a wooden dowel or would work to support the join, if I can find a dowel the right diameter? Then there would be the matter of how to make the the curtain rings would glide nicely over seam.
By the way, your ideas would work for customizing the lengths of towel rods.
Hey Kolleen, You are definitely on the right track. I think I would cut two conduits to 6 feet and join them in the middle with a dow rod that is the right diameter to fit in them snugly. Then, line up where they join right over the middle support which will hide the line where they join. I don’t see why this wouldn’t work as long as the dow rod is pretty long and fits snugly inside. I hope this helps! Thanks for taking the time to comment! – Karin
Karin, I just wanted you know that this is the easiest to follow diy post I think I’ve ever read! You didn’t skip a thing, very detailed instructions with just enough personality…yes, to me, too much personality is a thing 😁 I think the kids nowadays are calling that “extra” lol. Anyway, I’m starting my own blog soon and I can only hope my posts are even half as great as this one! Now, off to make and hang some curtains 😉 Thanks so much!
Your comment made my whole week Amy. I want to be super detailed because I know that DIY can be pretty intimidating for most people and if they are trusting me with their time and resources the least I can do is give them good instructions. Best of luck with your blog. Don’t hesitate to ask me any questions about blogging or otherwise. Thank you again!
Hi Karin!
We are about to move into a new house so this is very timely!! I love putting my own mark on things, so DIY curtain rods are perfect.
Question: in step 6 of the electrical conduit rods, you say to wrap the screw with electrical tape so it fits in well, yet the photo shows you wrapping the outside of the pipe instead…help!
Thank you so much 🙂
Jane
I’m so sorry. I need to correct that. Yes, I wrapped electrical tape around the screw so that it was just snug enough for the wrapped screw to fit inside the electrical conduit. Then, I put a little bit of hot glue at the end to have it adhere. Let me know if you have any other questions at all Jane! 🙂
Hello there! I’m getting ready to do a similar project and ran into your post. Your results look fantastic!!!!! I realize it’s been a few years now, but I was hoping you might still remember the type of corner connectors you used. There is no link tied to where it says “then you will join each rod with this connector here.” I hope that doesn’t mean the link no longer works! The biggest issue I’m having is finding proper corner connectors. Please help!
Hi there Dora,
Here is the affiliate link to the connector I used: https://amzn.to/33uHUeY Thank you for letting me know!
Karin
Great tutorial…I plan to make two rods for the windows in my sunroom. They are very large windows and I was looking for inexpensive rods diy.
One question on the finials… you said to glue the screw to the base of the cabinet knob. I understand that. Then you say to wrap that screw with tape until fit snugly into the conduit. What are you showing in the pic where it looks like you are wrapping tape around the outside of the conduit rod? That I didn’t understand.
I probably missed that step but couldn’t see why you were doing that. Please let me know if I am understanding about correctly about wrapping tape around the screw on the end of the cabinet knob.
Thanks!
I think that is the part where I use some electrical tape to help fuill the gap between the nail/screw connected to the cabinet know and the piece of cobinet. It is just to make it a little bigger so there is a snug fit. I hope that answered your question and if it didn’t, let me know! Thanks Pamela!
Not having any spray paint experience, do I need to do anything to prep the conduit pole to spray paint it besides clean it? Does it need to be prepped with anything before I actually spray it with the metallic spray paint you recommend? How many coats of spray paint does it need to be durable? The curtains will be opened and closed daily?
Good questions Diana! The Rustoleum Universal spray paint I recommend in the post does not need a primer. For extra adhesion you can get some sandpaper (around 120-200 grit) and rough up the surface of the pole. But I haven’t had any problem with my with mine over my french door scratching and I open and close them everyday. With spray paint, it works best to do lots of light coats a few minutes apart. You lightly spray it and resist the temptation to get it all covered the first time. Then I wait 15-30 minutes and do another light coat. You can do another one to make sure it is well covered. Then, let them dry 48 hours. Let me know if you have ANY other questions. Please send me a pic when you are done! renovatedfaith@gmail.com
Thank you for this info. I’m so excited to do this to show my husband it can be done economically. I assessed the window areas again this morning and all your helpful info on how to hang the curtain rods and curtains flashed through my mind. I will send you the pictures when done. Thanks again the helpful info.
Thank you for this tutorial. I love what you did. I am in the process of updating my home and I am so glad you included an easy tutorial for the bay window. This is perfect for my dining room.
Thank you so much Teresa. Be sure to check out my post after this one about using binder rings for curtains rings. They make it SO much easier with a bay window when you are getting the actual curtain hung on it. Thank you for your sweet comment!
Thanks for sharing this great tutorial. I also have lots of windows, and being able to dress them and save money, is a must. You are a lifesaver. I will make sure to send you a photo, when I do this, and tag you if I post photos. Have a Blessed and Prosperous day.
Thank you so much Brenda. I would LOVE to see a picture. Thanks again!
Thank you so much for this detailed post! I don’t have near that many windows to dress, but I do have three windows side by side in my living that requires a really long rod. The current large golden oak curtain pole needs to go, and I have a handy husband and a love for oil rubbed bronze spray paint and pretty knobs, so I think is what we need! You did an amazing job!
Thank you so much for your sweet comment Vicki. Glad the post provided you with some inspiration. Isn’t Oil Rubbed Bronze the best?!?
Wow it looks really good!
Thank you Mihaela! I had a lot of fun doing it.
Absolutely beautiful!!! Can’t wait to see them!!!
Thank you so much! I can’t wait for you to see it.
Okay, the “tie back” rod idea is amazing!!! I love this and I love that you can customize the look with whatever knobs and paint color you want. Genius!!
Thank you so much Keri! It is really a flexible concept and can go with whatever decor.
So many great tips! Thank you Karin!
Thanks so much Chris! I got so many strange looks in Home Depot, carrying 10 foot conduit through the store. It was fun!
Wow! Those look great and I love all the pictures. A friend of ours used electrical conduit for deck rails and it looked amazing. Thanks for thinking out of the box.
It is super versatile! I can totally see it for deck rails. I also thought about using it somehow for those industrial looking shelves. Thanks for reading Christina!
Absolutely love everything about this as a new home owner I’m quickly realizing how expensive something as simple as a curtain rod can cost. I am curious though when you pull the curtians do the rings scrape off the paint on the rod?
Great question. I wondered the same too but I pull back the curtains in front of my french doors every single day/night and after 4 years so paint has scratche off! Thanks for your comment Kayla!
Wow! You did a fantastic job! That is such a spectacular savings to boot! Thanks for teaching us how to do this. Btw…your bay window is divine!
Thanks so much Natalie! I’m amazed at how similar our styles are! Thank you for your sweet encouragement as always.