How to Paint Table Legs (The EASIEST WAY!)
Painting Curvy Furniture Legs: Tips and Tricks
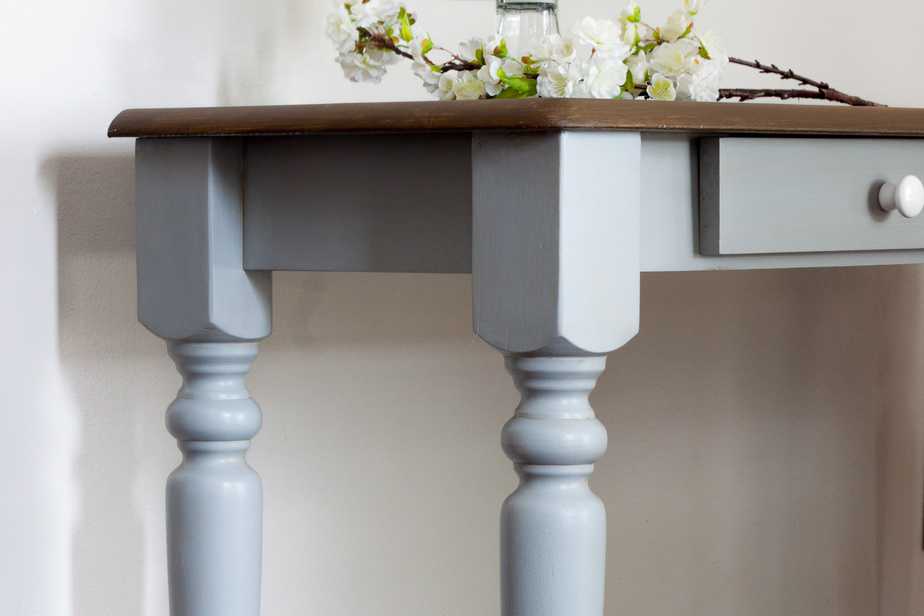
If you have ever tried to paint curved furniture legs, you know it can be painfully slow and drippy. Check out these clever tips on how to paint table legs the quick and easy way!
Until recently, I’d scan the Facebook Marketplace ads only to cringe when I saw those curvy farmhouse furniture legs. They are absolutely beautiful, but they can be very time-consuming to paint, and their curves make them prone to drips.
And if you don’t catch those drips, they can be around for a long, long time as they are hard to sand off!
But painting milled furniture legs doesn’t have to be a hassle with some of these time-saving tips. These tricks will make your project go much more smoothly and save you time for more exciting DIY projects ahead. Fortunately, I’ll never have to paint curvy furniture legs or chair spindles the same way again!
Related: The Ultimate Guide to Refinishing Furniture (The ONLY Tutorial You’ll Ever Need!)
How to Paint Table Legs – Supplies:
A Good Brush
Sander with a FINE Grit Sanding Pad – Check the link above or a list of my favorite sanders and reviews here!
Spray Primer – Zinnser Cover Stain or Zinnser Bullseye 123 Primer
Paint with Good Coverage – After testing dozens of paints, I use Benjamin Moore Advance
How To Refinish Table Legs
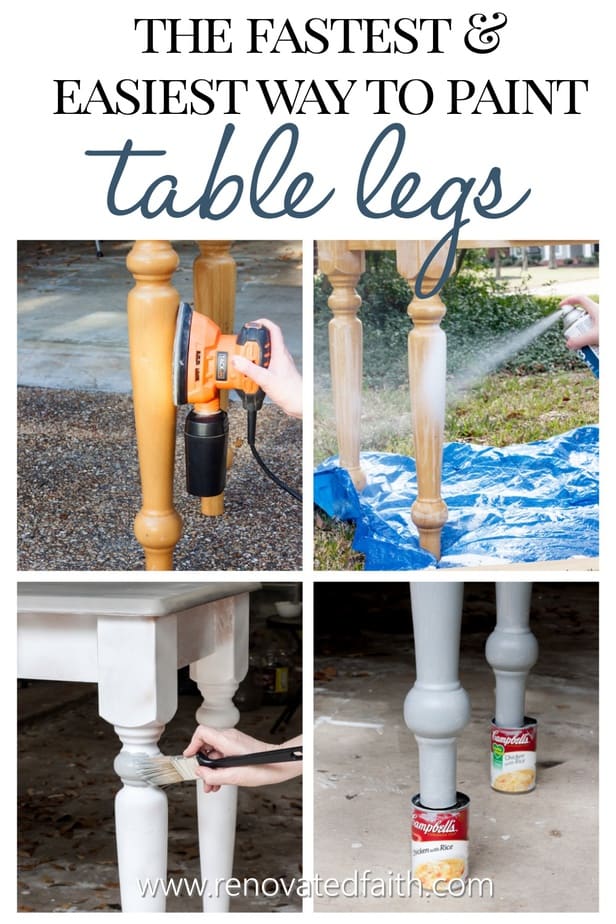
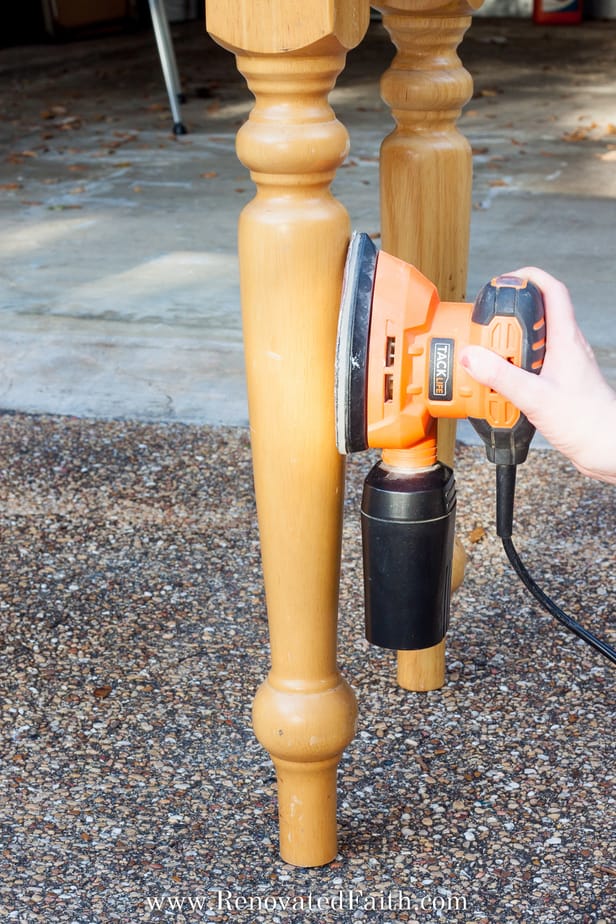
Step 1: How To Sand Table Legs
Stop! Before you do anything…take a before pic. When you are done, post the before and after pics here, so I can see the amazing work you’ve done! ❤️
You might be wondering why this process on how to paint table legs the easy way includes sanding. But it’s important to make sure and do the right prep work so you don’t have to redo your entire project! Ask me how I know!
Fortunately, you can still use a flat sander on a curved surface. Using a sander is so much quicker than sanding turned furniture legs by hand.
Without a doubt, it is much less time consuming than the alternative of stripping paint off table legs. Ain’t nobody got time for that!
Make sure to use a finer sandpaper pad (higher grit number – 220 or above) on your sander. To see my sandpaper grit chart for the right number, go here: How to Sand Furniture in Less Than 5 Minutes
The finer sandpaper is important because we don’t want to use a rough sanding pad that starts sanding into the wood, changing the shape of it. We just want to rough up the existing surface to accept paint.
Move the sander up and down, not staying in one place too long and without applying a lot of force. Again, you are not sanding off the old surface, you just want to make the old stain or paint not as smooth.
Time-saving Tip: You don’t have to sand every square centimeter. Just make sure you sand over most of the surface of the legs.
When you are done sanding, wipe down the legs with a damp cloth.
The Best Way to Paint Table Legs That Are Extremely Detailed
If your spindles are VERY ornate, you want to fold a piece of sandpaper length-wise and sand back and forth the way I describe here: How to Sand Spindles.
Step 2: Priming Curved Furniture Legs the Fast Way
Pick your color or colors first because this will determine what primer color you use. Check out this link for some ideas: Farmhouse Style Dining Tables
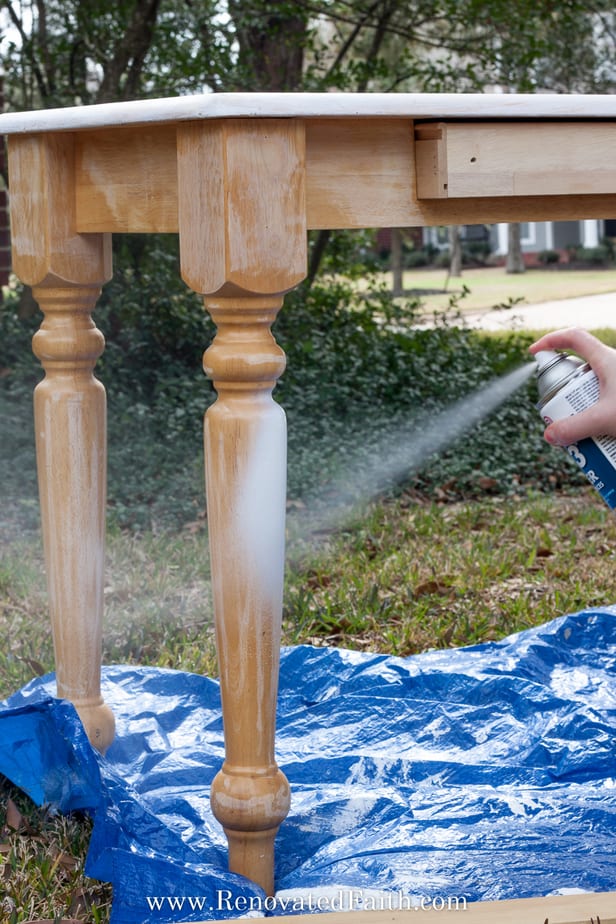
Painting furniture legs is really time-consuming and tedious so I recommend spraying the legs with primer first. Also, spray them with a color slightly lighter than your paint color.
Why I Spray Paint Table Legs with Primer
You have to use a primer on table legs because it’s just too risky not to. If you don’t use a primer and your final surface starts to peel, it will be nearly impossible to sand off all the old paint back to the original smooth surface. Or you would have to use a furniture stripper. Either way, they will take a lot more time than spray priming the first go around.
The only time I wouldn’t mess with a primer is if the legs were unfinished but even then I would sand. You definitely want to use a primer over stained wood or a previously painted piece
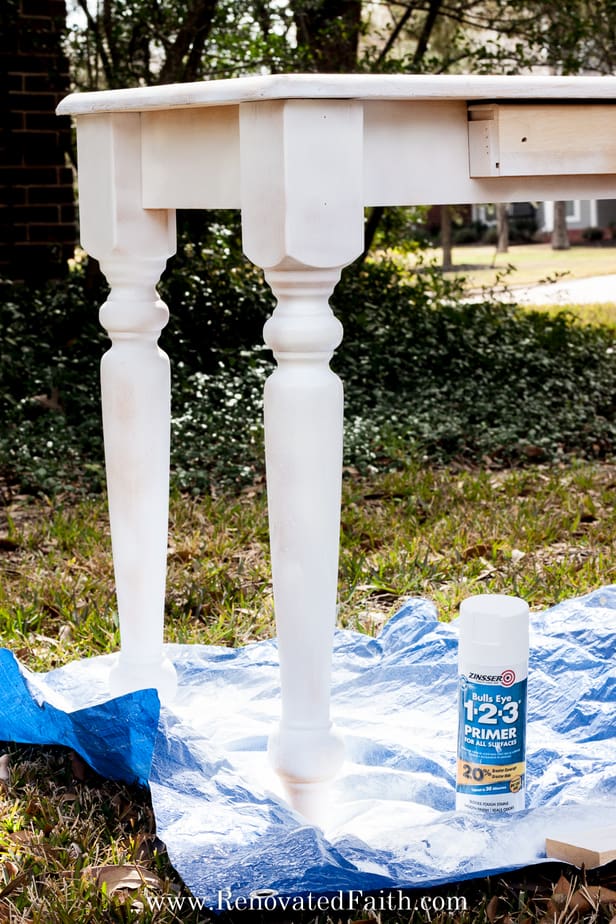
Since my final color was LIGHT gray, I just sprayed the legs with this white primer. The white primer is ideal for white furniture pieces or other light colors. But if you are painting the furniture piece a dark color like dark gray, black, or navy, you can use this gray primer.
You can use this primer on the rest of the piece, not just the legs.
So why is it a good idea to spray the legs with a colored primer? Because if your primer is close to your paint color, there’s a good chance you won’t have to do as many final coats with your final paint color and that means significantly less time painting by hand!
Spray the legs like so and you actually don’t want FULL coverage. You want just a light layer of primer that still might be transparent in places. Believe it or not, a light primer coat will make your final paint adhere best.
For getting a smooth and even finish every time with spray paint, check out my best tips here: 21 Spray Painting Tips & Tricks
Free Spray Painting Tips & Tricks
To get my free tips on spray painting anything, fill out the form below to get the free checklist and access to my free printable library:
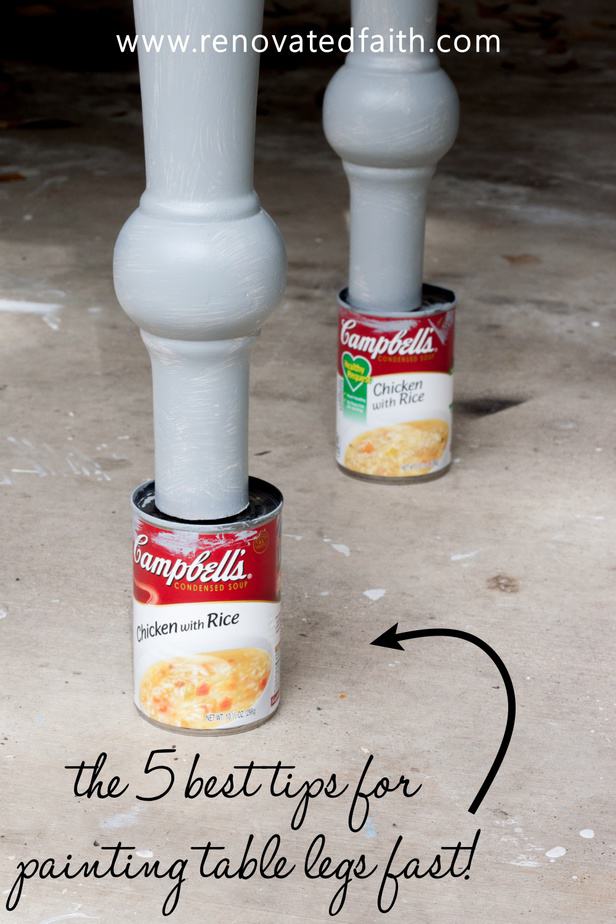
Step 3: The Easy Way to Paint Table Legs
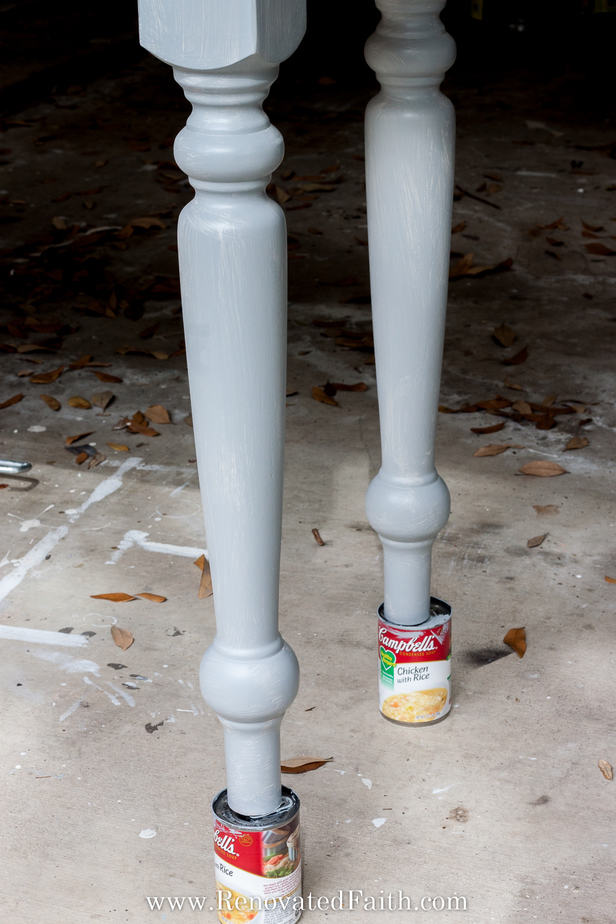
Put soup cans or paint cans under your legs to give them some height off the ground. This makes getting under your furniture piece easier and also keeps paint off the floor that could drip down the legs.
I added a little Floetrol to my paint for the whole piece to minimize brush strokes. Basically, it makes the paint a little more workable for a longer period of time. That way the paint has more time to settle out flat. It does take a little longer for the paint to dry but the smoother finish is worth it.
This is an optional step but I included it in this “how to paint table legs” tutorial for one main reason. Basically, since curved furniture legs are prone to drips, you have more time to correct any drips after they happen. In other words, they won’t dry up on you too fast.
Just mix the Floetrol with your paint as the instructions describe.

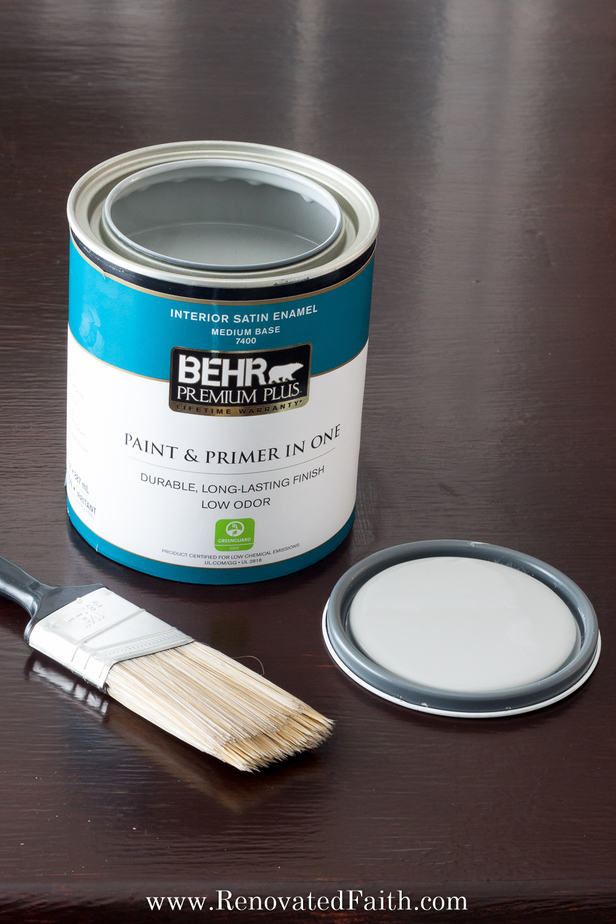
What is the best paint for table legs?
Any latex paint with good coverage is great for furniture legs. I like to use Behr Premium Plus Ultra or Sherwin Williams Pro-Choice. Both have really good adhesion and minimal brush strokes.
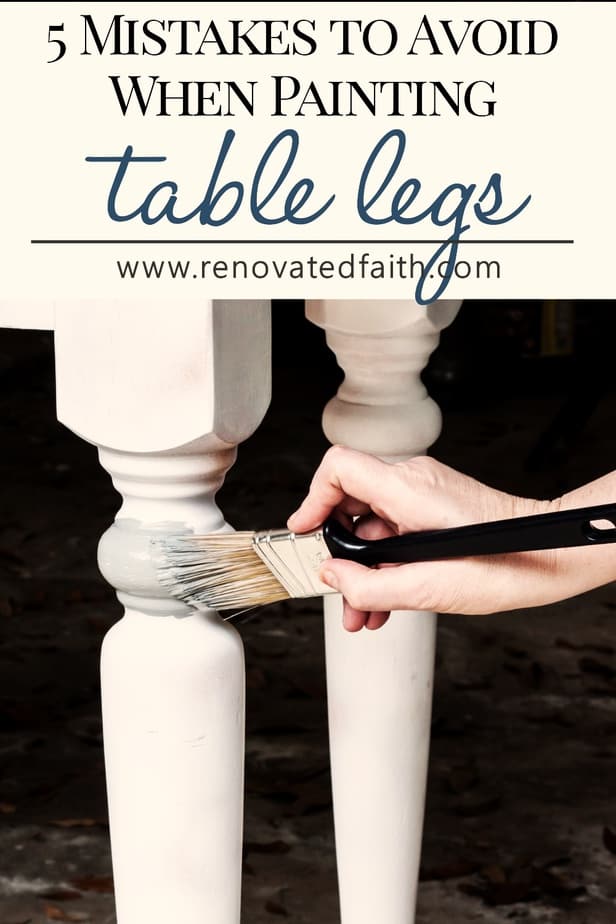
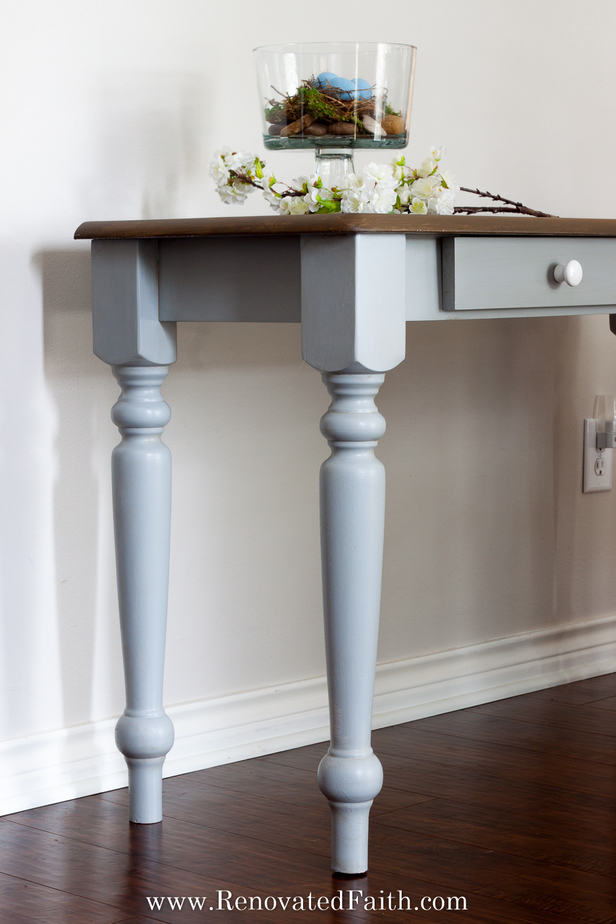
Paint the legs with a brush painting the long parts vertically and any more rounded parts horizontally.
Paint each leg and check for drips before going to the next. When you are done painting all four, check for drips again.
If you leave any drips to dry, they will be difficult, if not impossible, to sand off perfectly later on.
While you still have to use a brush on your table legs, you only have to paint by hand with one or two coats max.
Normally, I would have painted on a primer, painted on two coats of latex, and then usually a third.
With this process, I only painted on a coat of latex and then a light coat to touch up.
You might be wondering why I didn’t spray paint the table legs for the final coat. It’s because spray paint can get expensive for a whole furniture piece. But if it’s a small piece, spray painting is definitely an option. You could use a paint sprayer on the table but that’s not the cheapest option and there’s a learning curve with using one of those.
DON’T FORGET TO TAKE A PICTURE!
Now that you are done, I’d love to see how it turned out! Post your before and after photos here!
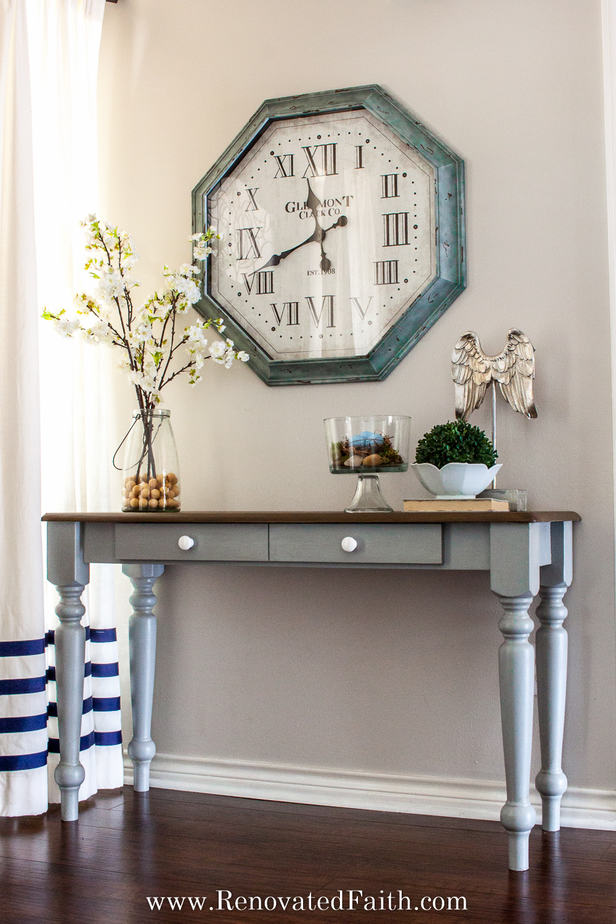
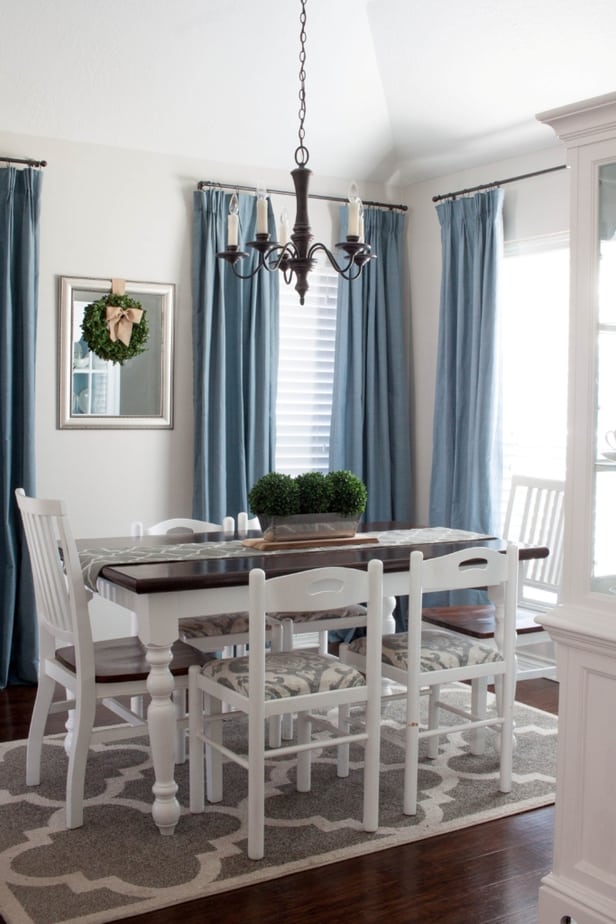
How to Paint a Dining Table
For this tutorial I focused on the legs but here’s the overall process for painting a typical dining table (or in this case an accent table).
For painted farm table ideas, click here.
- Spray the whole piece with spray primer (or roll on the primer if the piece doesn’t have curved legs.)
- Sand the whole piece lightly
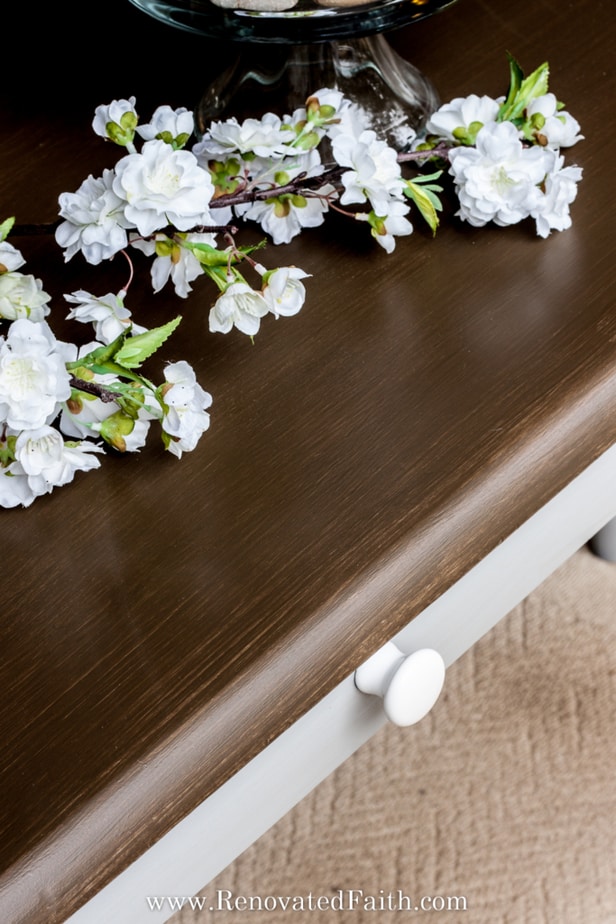
- I like to work on the top first so for this piece, I did the Faux Barnwood Stain.
- While parts of the top were drying I put a coat of latex on the bottom
- I finished the top and added the knobs after it dried.
For the process in detail, check out my post A Better Alternative to Chalk Paint.
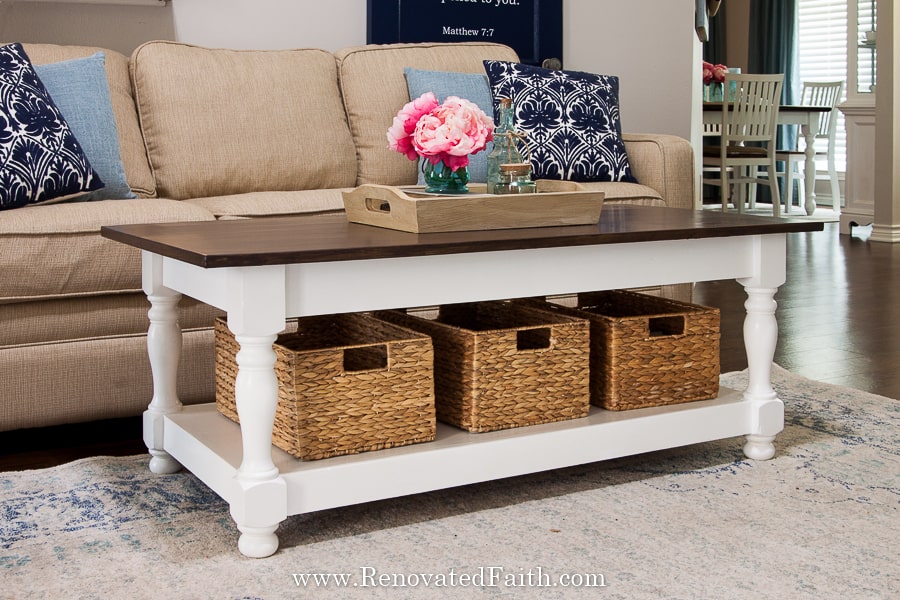
Here are pics of my farmhouse dining table and also my turned leg coffee table:
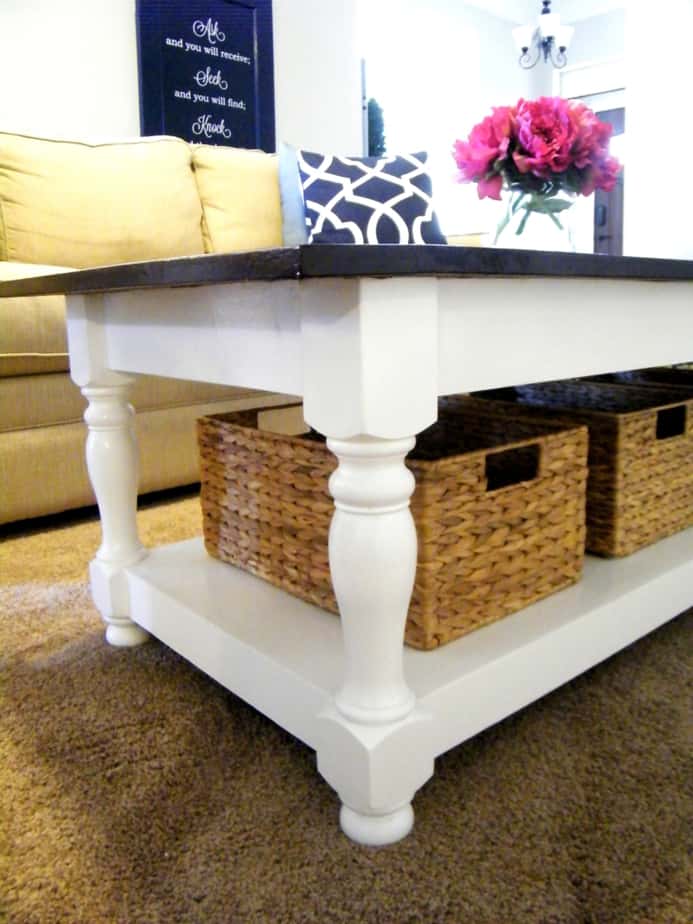
DIY Farmhouse Coffee Table with Turned Legs
I used the same tips to paint my coffee table. It saved so much time and the finish on the turned legs is much smoother. You can see the full post here: Easy DIY Coffee Table with Bottom Shelf
What About Dining Chairs?
If you are in the market for some dining chairs to match your newly painted table, I highly recommend cross back chairs. They work well with any rustic decor and come in several different colors so you can coordinate with your table finish. For the best cross back chairs under $100, click here: Inexpensive X Back Chairs: A Buyer’s Guide.
Want more Furniture Painting Tips?
Click below for my best time-saving tips on painting furniture!
|
How to Paint Turned Table Legs – FAQ’s
Here are some common questions about painting turned table legs:
How to Stain Table Legs
A reader recently asked me the easiest method on how to stain table legs. This gets tricky if you are using traditional stain on a completely unfinished piece of furniture. If you are staining the entire piece the same shade, you might run into problems because oftentimes the legs are made from a different type of wood than the top or apron. If that’s the case, they will take stain differently leaving you with a piece of furniture that is two different colors.
This is a common problem and even high-end furniture makers like Pottery Barn will use a base on furniture before the final stain.
Fortunately, I have a solution using similar processes to high-end furniture companies! For a slightly glossy, more traditional stain, use this process here. For a more matte, Barnwood style stain, use this process here. I’ve had fantastic results with both of these processes and will never use traditional stain again!
How to Glaze Table Legs
Turned table legs look even more beautiful when they are glazed or dark waxed because the darker color settles into the details, giving the piece more dimension and drama. If you want to add an antique look to your furniture piece, you can glaze it. With this furniture glazing process, you can get the look of dark wax without the effort and learning cover – not to mention the expense!
How to Paint Metal Table Legs
If you are wondering how to paint metal table legs, you are in luck! Painting metal surfaces is far easier than painting wood table legs and all you need is some spray paint. My favorite spray paint for metal is Rustoleum Universal Metallics which comes in a variety of colors. Just spray it on in a few LIGHT coats that are about 20 minutes apart.
How to Paint a Kitchen Table Without Sanding
If your furniture piece is unfinished and you know that no oil-based cleaners or sealants have been used on it, you might be able to get away without sanding. However, in most cases, I would sand the furniture first because the risk of your furniture piece peeling because you didn’t sand is just too great. Having to refinish a piece that is peeling will take four times the time and effort as just sanding the first time around.
When I refer to sanding, I don’t mean sanding off the old finish. That’s counterproductive. You just want to sand it enough to rough up the surface slightly and here I show you how to sand furniture in less than 5 minutes.
How to Paint Chair Legs
Painting chair legs is just as tricky as painting table legs. Fortunately you can use this process to save you time on when painting chair spindles or legs. Just spray it with primer, watch for drips and then brush on light coats with a brush, checking for drips along the way.
Why I Don’t Use Chalk Paint on Table Legs
A reader asked me why I don’t use chalk paint on table legs and that poor reader opened a can of worms. I go into this topic a lot in my post Why I Don’t Use Chalk Paint but for table legs specifically, they can make the process a whole lot more work!
For one thing, chalk paint does not adhere as well to furniture as a primer. That’s why it’s great for distressing because it’s not on there very well. Also, it will take at least two coats of chalk paint on table legs and then another coat of wax. Also, chalk paint and wax are much more expensive than spray primer and water-based paint, even if you have to buy a sander (see the cost comparison here)! (stepping off my soapbox now…)
More Posts Related to How to Paint Table Legs
My Best Painting Tips for Furniture (with Free Checklist!)
Best Tips for Spray Painting Metal Furniture (Get a Flawless Finish Every Time!)
The Best Water and Oil-Based Paints for Furniture
How to Sand Furniture in Less Than 5 Minutes
How to Build a Dining Room Table with Farmhouse Style
My Better Alternative to Chalk Paint
How To Gel Stain Painted Furniture (No Stripping Required!)
How to Stencil Furniture (Without Bleedthrough!)
The Best Top Coat for Furniture
How to Restore Metal Outdoor Furniture
How to Paint a Kitchen Table & Chairs:
This is a great video on how to save time and effort painting chair spindles:
Final Thoughts on Painting Furniture Legs
Painting turned table legs is no longer the chore it has to be. In this post, I laid out some time-saving tips that give you fabulous results in very little time in comparison to doing multiple coats by hand. I used to cringe upon seeing those curvy furniture legs when I was considering a piece of furniture to refinish. But now, I don’t hesitate at all with this faster process. Now, go grab some soup cans and start painting!
If you want to save this post for later, pin it here:

What are your thoughts, my friend? Do you think these tips are helpful? I would love to hear your thoughts! Scroll down to leave a comment and I WILL reply! ❤️
Blessings,

Be sure to follow the fun here!
Email Subscription | Instagram | Pinterest | Facebook | Twitter
Quick Links to Information in this Post
- 1 Painting Curvy Furniture Legs: Tips and Tricks
- 2 How to Paint Table Legs – Supplies:
- 3 How To Refinish Table Legs
- 4 How to Paint a Dining Table
- 5 What About Dining Chairs?
- 6 Want more Furniture Painting Tips?
- 7 How to Paint Turned Table Legs – FAQ’s
- 8
- 9 More Posts Related to How to Paint Table Legs
- 10
- 11 How to Paint a Kitchen Table & Chairs:
- 12 Final Thoughts on Painting Furniture Legs
- 13 How to Paint Table Legs the Quick and Easy Way
How to Paint Table Legs the Quick and Easy Way

Karin Peters is a DIY expert and the creator of Renovated Faith. She is a furniture painter, a home design consultant, and a tenacious problem solver determined to help you transform your house into a home. With 17 years of experience with DIY home improvement, she researches and analyses professional processes to adapt them to be easy and cost-effective for DIYers. She then tests every project and product before it appears on the site in a detailed, step-by-step format. After attending Texas A&M University, she received her Master of Divinity with Biblical Languages at Southwestern Baptist Theology Seminary. Her passions unite in Renovated Faith, which shows readers how to create a home that serves them so they can pursue their God-given purposes. About Renovated Faith | Editorial Policy | Facebook | Twitter | LinkedIn
Very nice post.
Thanks
Thanks for your sharing. I’m going to replace my sofa legs, do you have any advises?
I have some stair spindles to paint – they came primed. Do you think I need to sand them a bit before painting? Also, I’m hoping to paint them before they’re installed, so I don’t make a mess all over the new stair treads, but the installed thinks I should wait. What would you do?
Actually, I would wait to paint them after they are installed because if you do them ahead of time, you’re going to have a hard time positioning them while you paint them so they aren’t laying down. I hope that makes sense. Having them installed will be the perfect “setup” for holding them while you paint. Just tape off the edges and put lots of drop cloths down. You might sand them a little bit. Just take a piece of sandpaper and wipe up and down so you rough them up slightly. Usually paint adheres to spindles well though. I hope this helps. Let me know if you have any other questions Sandra!
Hi, Karin,
I am new to painting furniture and enjoy reading your inspirational spiritual posts and advice for projects. I have 2 pecan colored satined end tables and coffee table at our lakehouse that I want to do in your methods so that they will be durable not only for use but to the extremes of temperature when we are not there. However, I was wanting to do a chalky gray distressed look or “stone” look. I have a couple of floor lamps there that I took pictures of that I could show you if you email me. Thank you for your time! Laine Angelo
Hey Laine, My email is karin@renovatedfaith.com. I’d be happy to take a look! – Karin
I am finishing a vanity that we saved from the roadside 15 years ago I am using it as a sewing table and I would like to ask can we use a paint and primer in one Sherwin Williams paint? I stopped it already except they have large stubby ankles on the piece. Impossible to strip… I’ll post when done
I have four comments. I have found that turning a table upside down on top of another table, heavy or plastic boxes, etc makes painting the table legs and apron much easier. Also in regards to primer: 1) grey primer is also best to use under any reds/purples, 2) if you use a separate primer first, it’s best to use a Behr paint with NO primer in it, and 3) if you use a paint with no primer it might not be necessary to use Floetrol (paint & primer mixes and heavy pigment paints…dark…are thicker than lighter paints and paints with no primer). Just some bits of experience to share.
Thank you so much for your helpful insights. I really appreciate it!
I’m curious as to why you don’t just flip the table upside down and paint it, rather than trying to work under the table?
That’s a great question. I do this for a couple reasons. For one thing, it gets the ends of the legs off the ground so I don’t get paint on the foor. It also, elevates the height so that it’s easier to access the top, which is where I spend most of the time painting. I have tried flipping tables over but then it get’s precarious with touching wet paint when I don’t want to wait for the underneath to dry. I hope this answers you question and have a great week!
interesting to lift the piece onto cans and i like the outcome. however as i am a little chronologically challenged, and find bending down a major pain, consequently i do lift my piece up, turn it over and do the legs upside down first.
another interesting point, we don’t get Campbells chicken and rice here in Queensland, would make a nice change from me cooking it. LOL. have a good day and stay safe in what you do
Luci – I love your attitude! Great idea about turning the piece upside down! I’ll have to do that next time. Also, I too wish you could get Cambell’s Chicken and Rise in CA! LOL Thank you for stopping by!