DIY Cotton Stems
Cotton stems are a fun addition to almost any home decor style and they work well for every season. But whether the stems are real or faux, they can be quite pricey. Here I show you how to make your own DIY Cotton Stems with regular household items!
I’m not great keeping up with trends… Therefore, I’m kind of late to get on the whole cotton stem band wagon. Fixer Upper definitely cemented their decorative status in mainstream home decor and the rest of America followed suit.
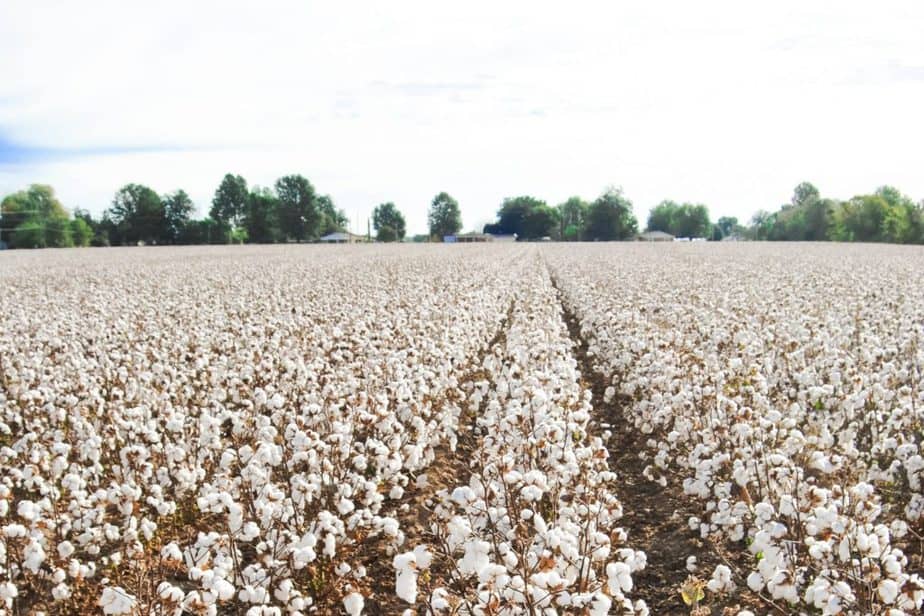
Recently, my mom recalled how my grandmother grew up on a cotton farm. As a poor family in the south, her and her many siblings had to help pick cotton bolls when it was harvest time. She knew the meaning of a hard day’s work and picked until her fingers bled, as I recounted in my post Why You Struggle To Rest and What To Do About It.
So, since cotton stems are not only adorable but also apart of my family heritage, I knew I had to have some! As I looked on Amazon for cotton stems, I was a little surprised by the price. I wanted to make some cotton stems and also a big cotton wreath for my door, which would have put my budget way in the red.
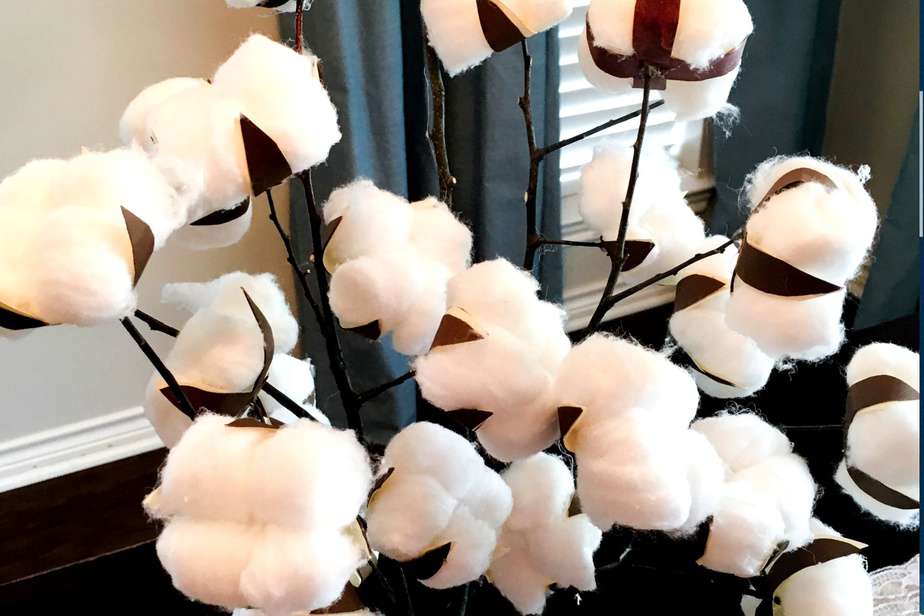
Fortunately, the combination of my “cheapness” and stubbornness prevailed and I figured out a way to make my own! These lovely cotton stems and bolls (apparently that’s what the cotton portion is called) are just a cute and a fraction of the price of the real thing!
Let’s get started, shall we?!?
Supplied Needed
Quick Links to Information in this Post
- 1 Supplied Needed
- 2
- 3 1. Make A Stencil
- 4 2. Cut Out The Leaves
- 5 3. Make A Hole
- 6 4. Glue Them Together
- 7
- 8
- 9 5. Glue To The Stems
- 10
- 11 6. Make Your Cotton Bolls
- 12
- 13
- 14 7. Attach the Bolls To the Stems
- 15 8. Spray The Bolls
- 16
- 17 If you want to save this post for later, pin it here:
- 18 Be sure to follow the fun here!
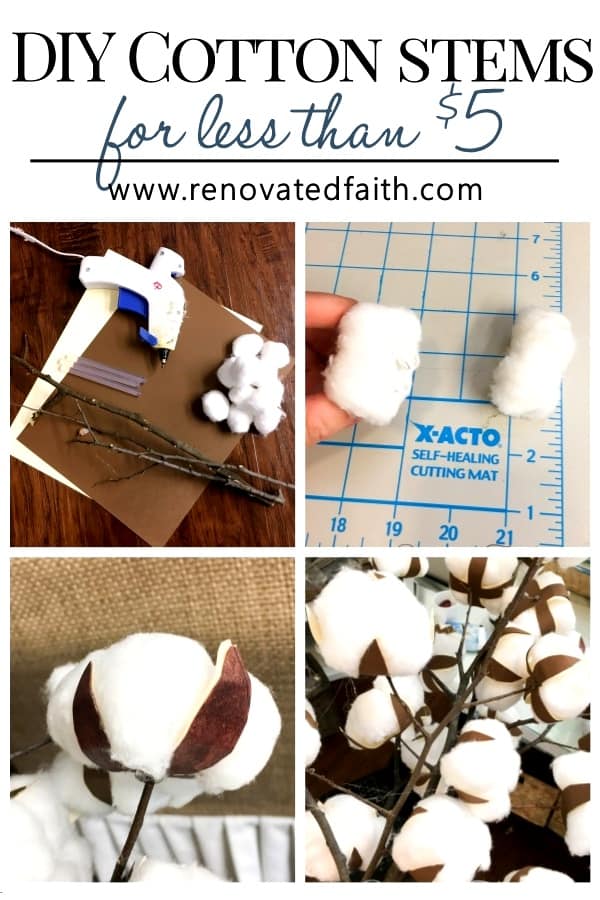
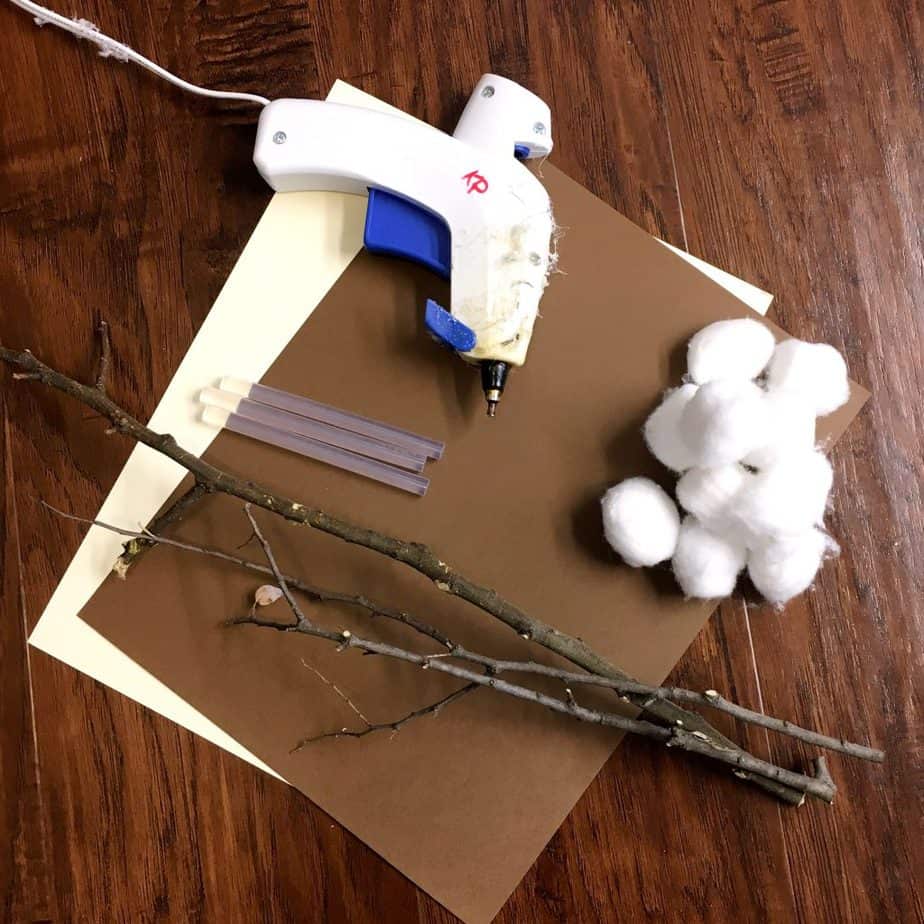
- Jumbo cotton balls – Really any size will do. You will need 4 per cotton stem. http://amzn.to/2hpauIK
- Cream Cardstock or Manilla File Folders – You can use any manilla file folders you have laying around and I personally think they work better
- Dark Brown Construction Paper
- Hot Glue Gun
- Hot Glue Sticks
- Scissors
- Hairspray – THIS is what I used but any will work.
- Long sticks from your yard – You can use faux flower stems if you can’t find sticks.
1. Make A Stencil
Download the template and print it on any color cardstock to make a stencil. Trace the two sets of cotton “leaves” and cut them out.
How To Download The Template: If you are a subscriber to my newsletter, go HERE and enter your password. (The password is on the bottom of your last newsletter you received). If you are new to Renovated Faith, you can subscribe HERE. You will get the password in your confirmation email and you will be directed to the free printables page.
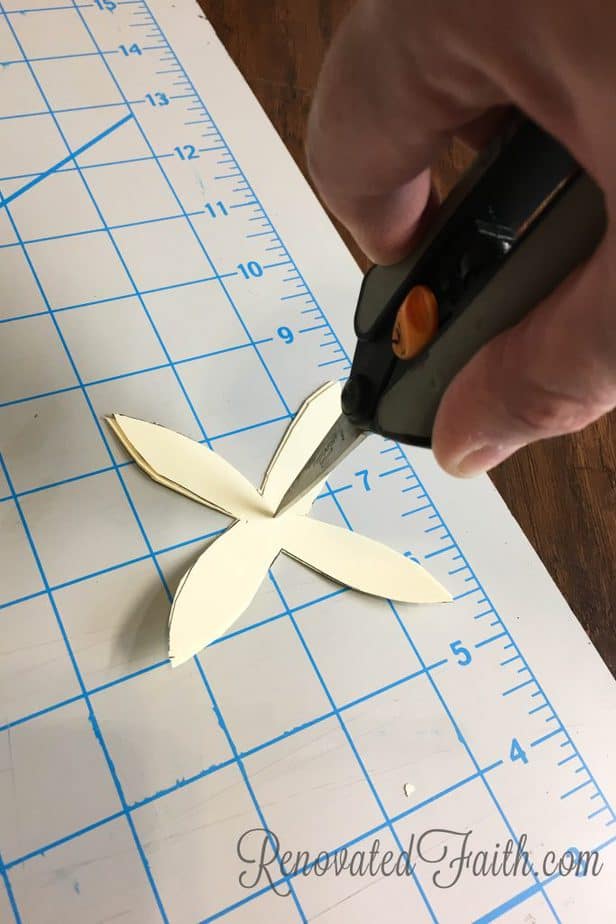
2. Cut Out The Leaves
You will need one cream leaf set (from cream cardstock) and one brown leaf set (from brown CONSTRUCTION PAPER) per stem. Trace your stencils and cut out your leaf sets. You might notice that the cream leaf sets are slightly larger. I cut three layers of paper out of time to make the process go faster. I highly recommend these scissors! They are fabulous for making detailed projects go quickly. If I was stranded on a desert island and could only bring three items, these scissors would be one of the items…along with my Bible and Reese’s cups. #priorities
3. Make A Hole
Once you cut out all your leaf sets, leave them in their groups of three. Use your scissors or a sharp nail to make a whole in the middle. I just rotated my scissors until I had a big enough hole.
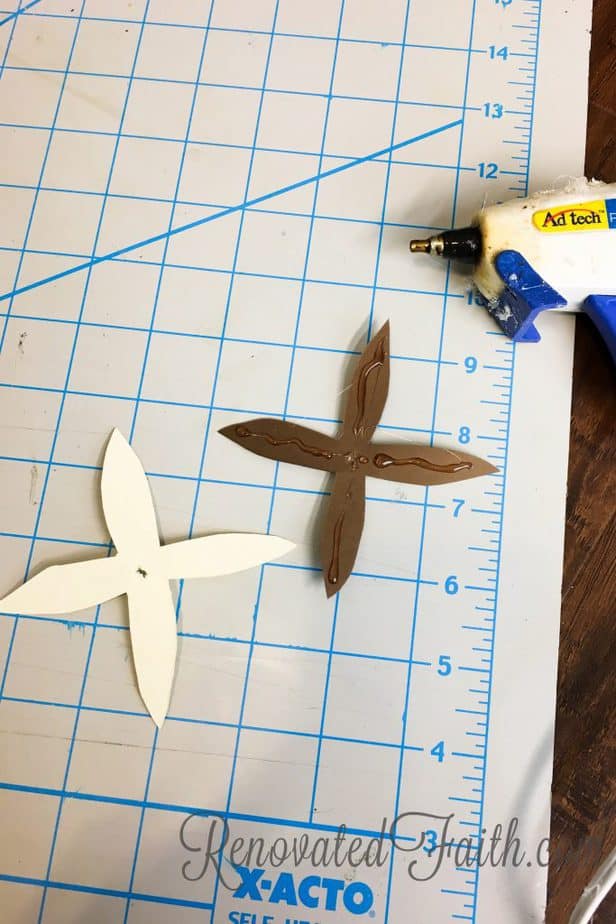
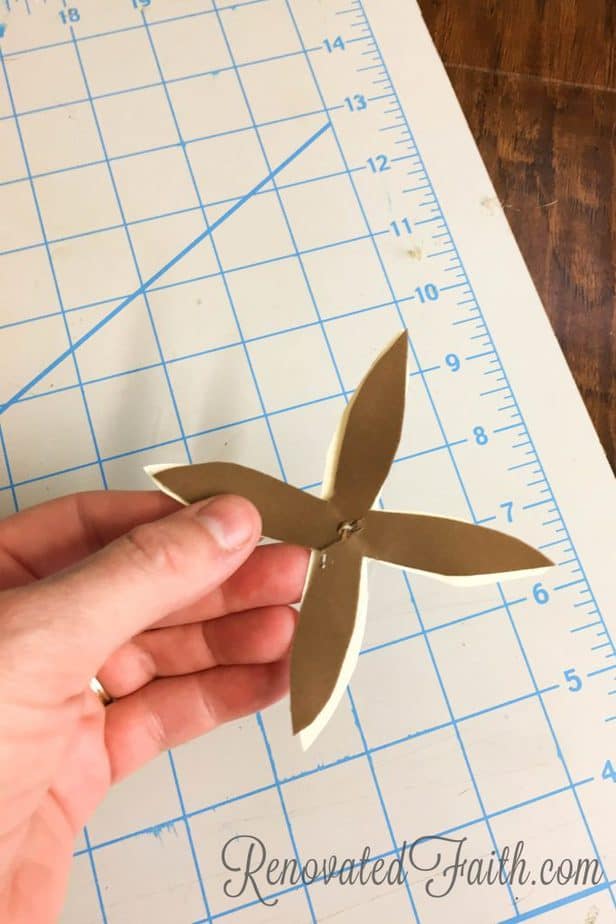
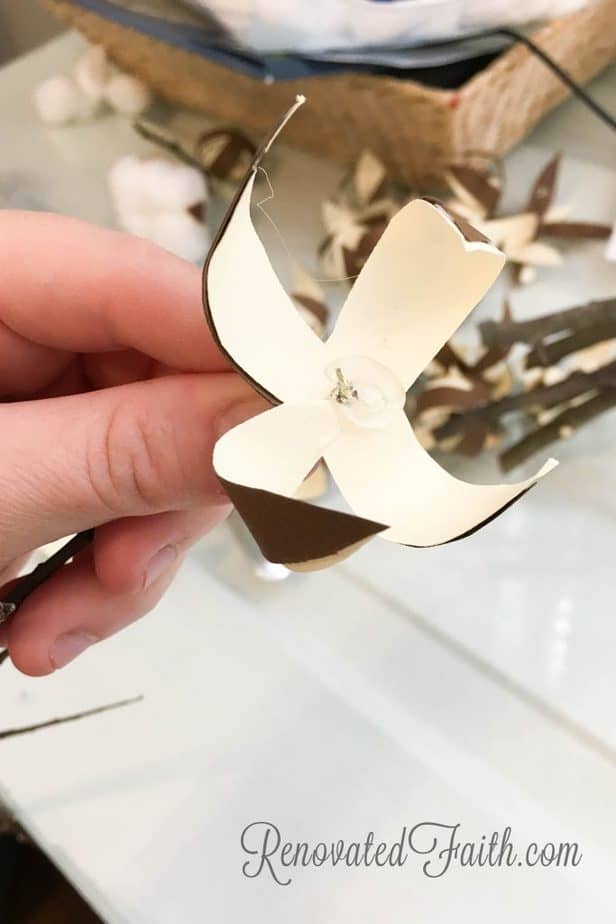
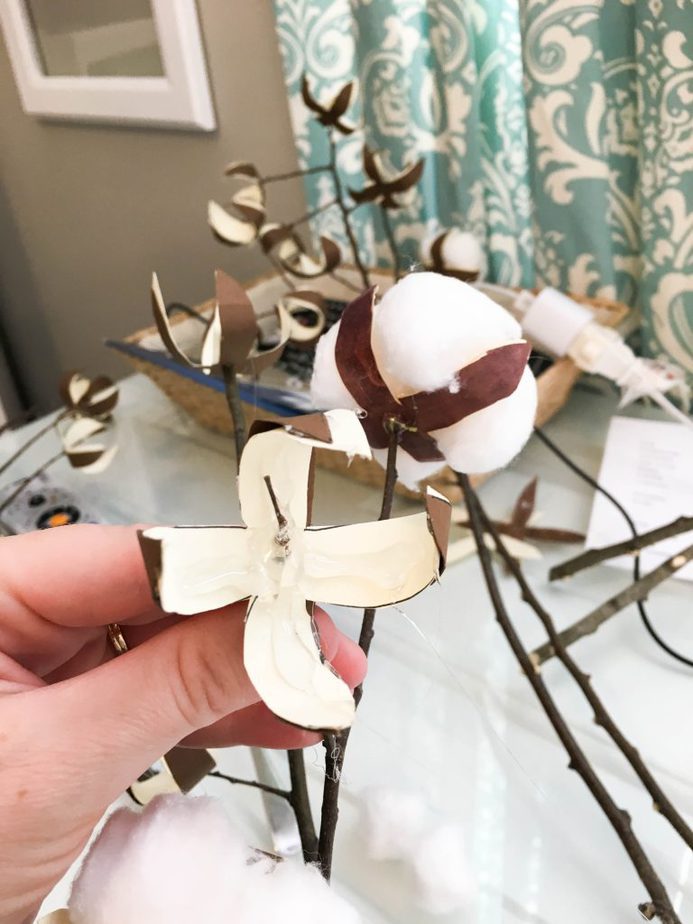
4. Glue Them Together
Separate out your leaf sets and put them in a pile of brown and a pile of cream so they are all facing the same way. This will make assembly go faster. Hot glue down the middle of each brown leaf set making sure to go to the tip. (Notice I’m not putting glue right over the hole.) Immediately, glue it to the cream leaf set, making sure they match up. While the glue is still warm, curl in the leaves and hold them curled in for about 30 seconds. By doing this, you are using the warm glue to help you curl the leaves/burs in the direction they need to go. Don’t burn yourself!
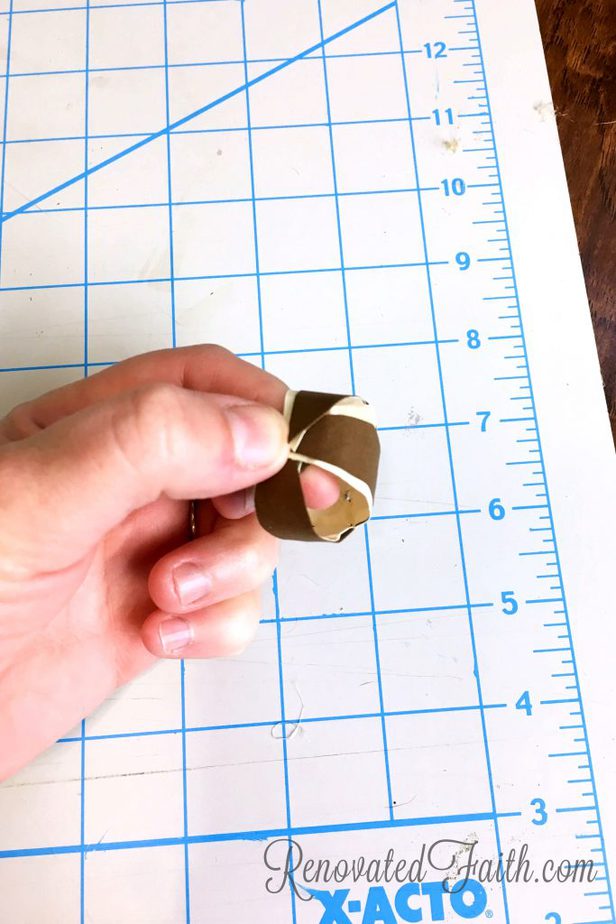
5. Glue To The Stems
After you have made all your lovely cotton burs, you want to stick the end of your branches into center holes and add a dab of hot glue. Sometimes I added a little to the bottom of the bur too if my hole was too big. No one will know! Let the glue dry a few minutes.
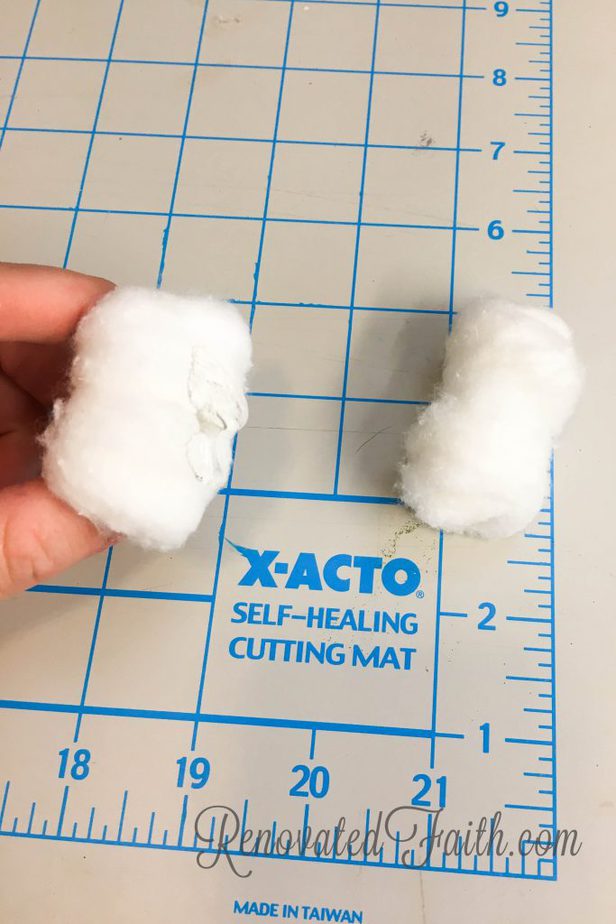
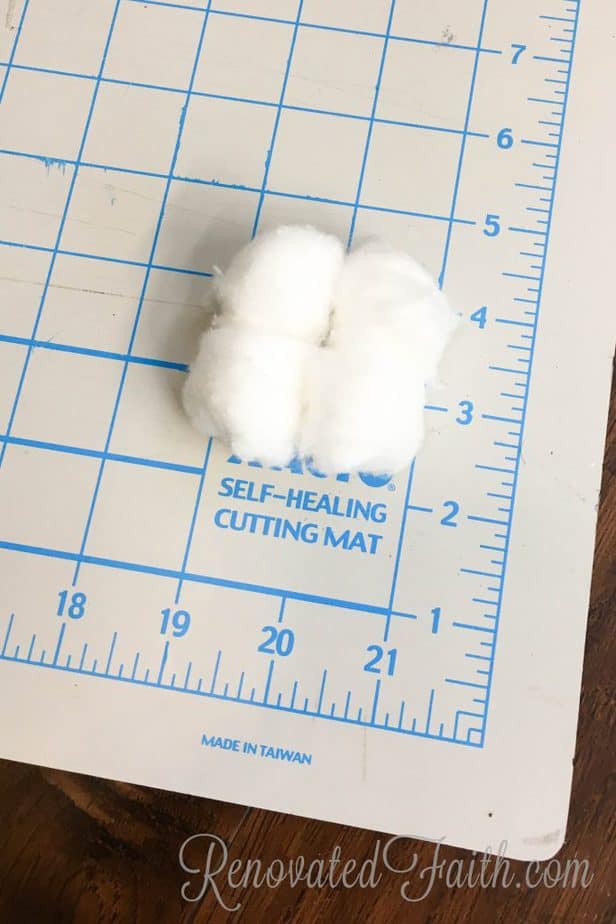
6. Make Your Cotton Bolls
Take four pieces of cotton and fluff them a little. Stick two side by side in one hand and put a line of hot glue on them. Stick the other two cotton balls to them making a set of four cotton balls. Set them on wax paper to let the glue cool.
7. Attach the Bolls To the Stems
Open up your cotton bur leaves a little. Apply lots of glue to the inside of each bur leaf and the bottom center. Trim the branch if you need to. Then, stick in your cotton cluster and press down a little. Let the glue cool.
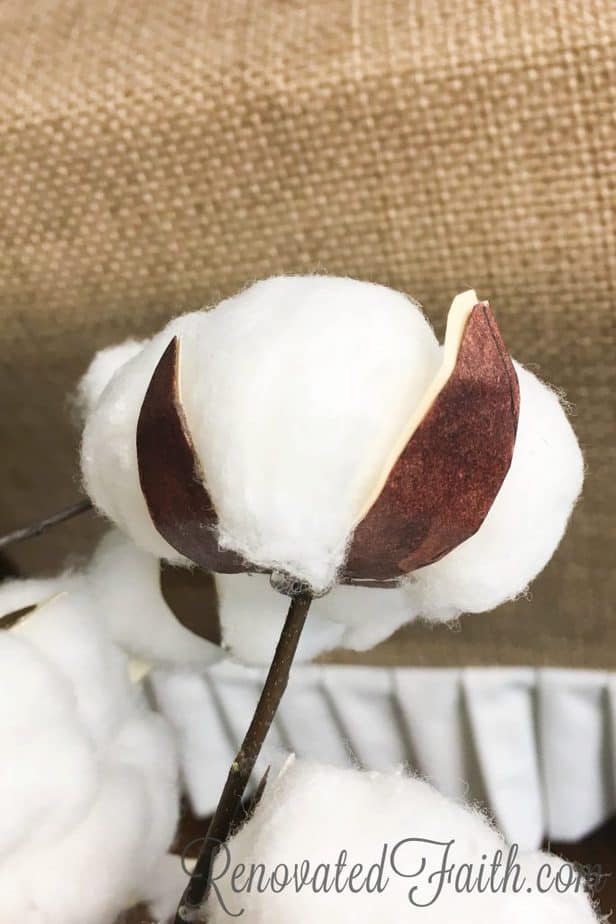
8. Spray The Bolls
Once the glue has completely cooled, you will want to hold the bouquet of stems upside down and LIGHTLY spray the burs (brown and cream leafy parts ) with hairspray. It’s fine if it gets on the cotton. This gives the bolls a much more natural look so they look less like paper. IMPORTANT: I would spray a blank piece of your brown construction paper to make sure you are getting the desired effect. I tried spraying brown cardstock and nothing really happened so that’s why I suggested using construction paper because it gives you the look you want.
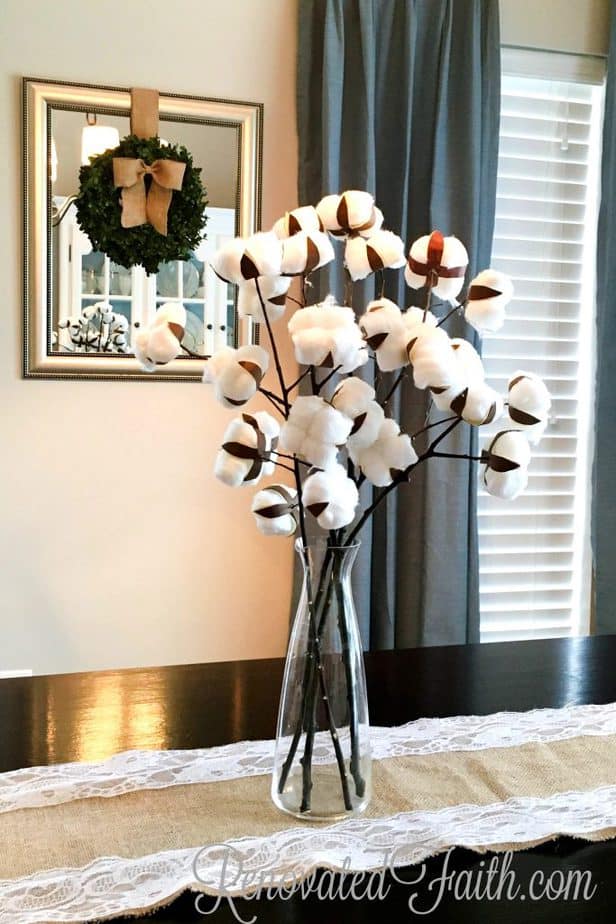
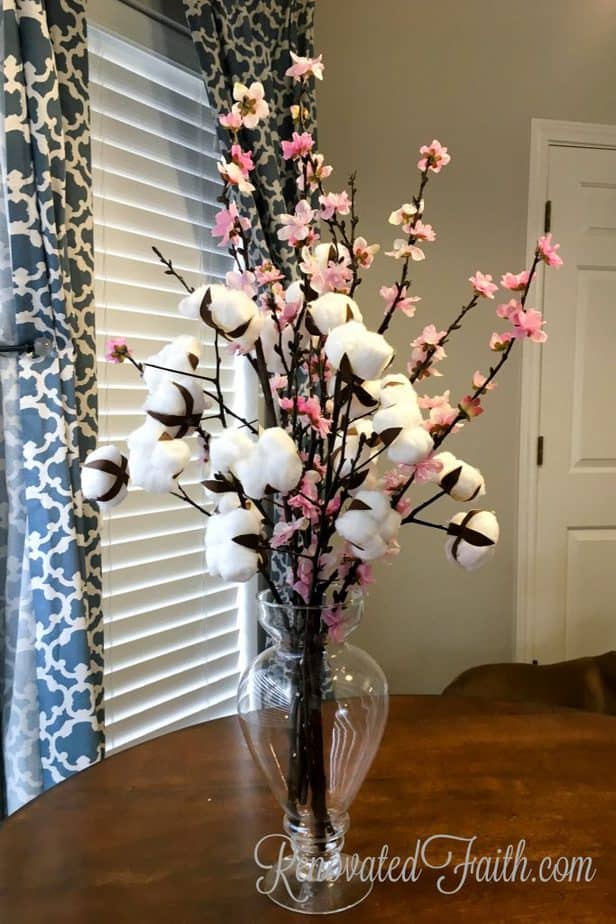
Now, stick your DIY Cotton Stems in a vase and you are done!!!
How do you like how they turned out?
I spent all of $2.50 for the entire bouquet of cotton stems because I already had cotton balls.
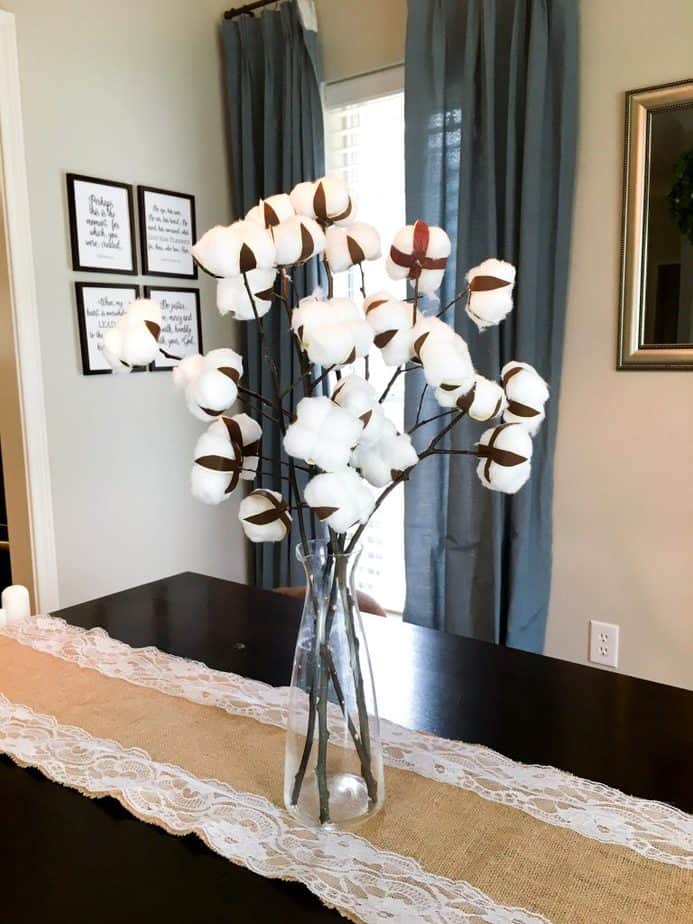
I love how these look on our table! In the background you can see my Faux Painted Signs. When you subscribe to Renovated Faith you can see how to make these signs and have access to over 30 verse printables.
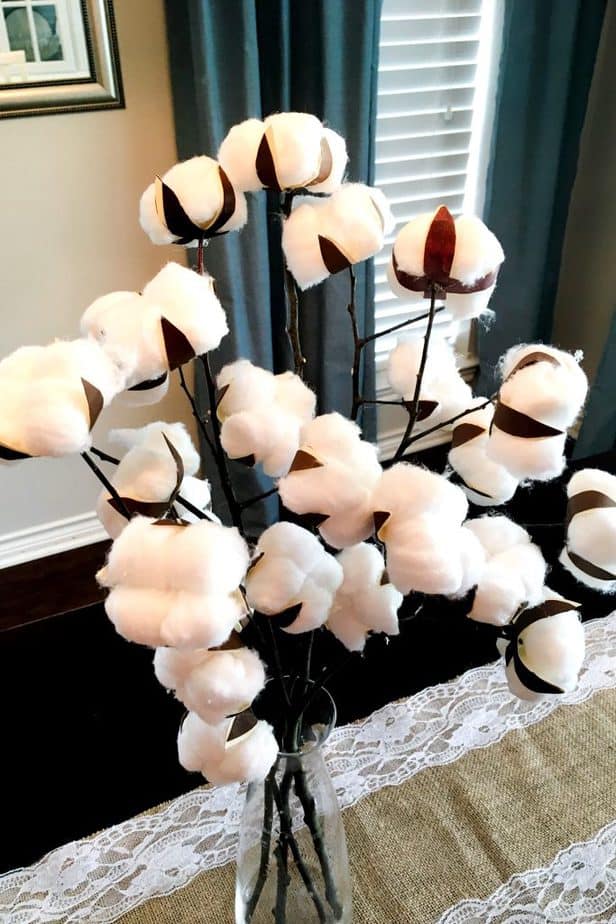

I absolutely love how versatile cotton stems are for any season!
Last week’s post Coping When Your Child Is Different was a little more serious in nature so it was fun to get back to some crafting this weekend. I probably got more than I bargained for because I also spent a lot of time making this costume for our dog Jake. And yes, you are reading that correctly…it’s a Poop Factory.
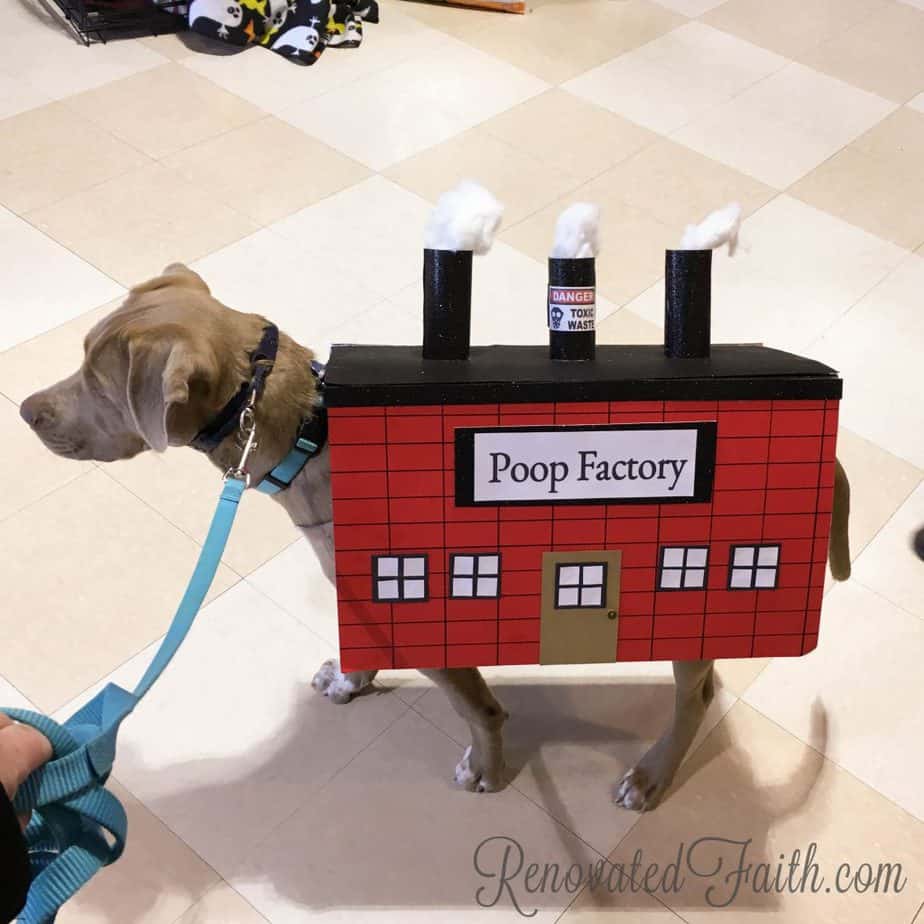
I had high hopes to win the dog contest in order to get the grand prize – 10 large bags of dog food, and donate it to the rescue organization where we got Jake – Urgent Animals of Hearne and Roberterson County. It be a small way to give back after what an amazing job they did with him.
So, we didn’t even place in the contest but our six-month old puppy was such a trooper. We also take comfort in knowing that ours was the only dog costume that was fully functional. 😉
Training a six-month old puppy to wear a box on his bag was no easy endeavor. We spent lots of time working with him and giving him treats as we walked him around the living room wearing his costume. Jake was more than a little annoyed at the inconvenience of the box on his back, and if he could read, he would have been humiliated. I remember thinking, “I know this doesn’t make sense to him at the moment, but if only he understood that there was a much greater plan in place……”

Then it hit me that God must feel the same way. Sometimes we find ourselves in awkward or difficult circumstances and we want to dig our feet in and question why God is making us wear a proverbial poop factory costume. Instead we need to realize that God has already orchestrated an all-encompassing plan for our uncomfortable circumstances. If we just walk with Him, we will eventually see His plan come to fruition and the role our obedience played.
So yeah, leave it to me to glean spiritual insight from a poop factory costume… SMH
Whether you find yourself making cotton stems or a ridiculous dog costume this week, remember that if God has you in an awkward and uncomfortable circumstance, He probably has a BIG plan in the works!
Have a fabulous week!
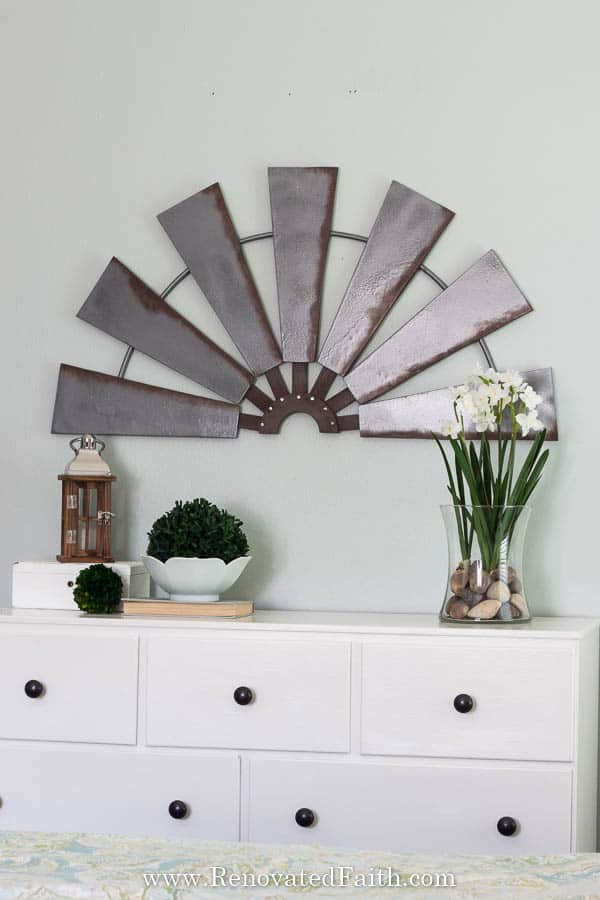
For more budget-friendly farmhouse decor, check out my DIY Windmill Wall Decor here:
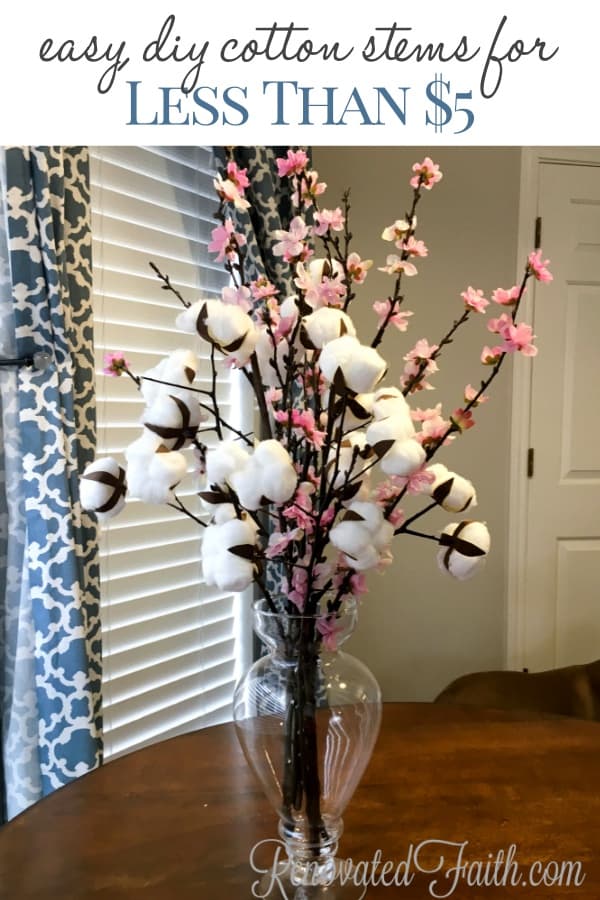
If you want to save this post for later, pin it here:

Blessings,

Be sure to follow the fun here!
Email Subscription | Instagram | Pinterest | Facebook | Twitter

Karin Peters is a DIY expert and the creator of Renovated Faith. She is a furniture painter, a home design consultant, and a tenacious problem solver determined to help you transform your house into a home. With 17 years of experience with DIY home improvement, she researches and analyses professional processes to adapt them to be easy and cost-effective for DIYers. She then tests every project and product before it appears on the site in a detailed, step-by-step format. After attending Texas A&M University, she received her Master of Divinity with Biblical Languages at Southwestern Baptist Theology Seminary. Her passions unite in Renovated Faith, which shows readers how to create a home that serves them so they can pursue their God-given purposes. About Renovated Faith | Editorial Policy | Facebook | Twitter | LinkedIn
Best diy faux cotton I’ve found. Four cotton balls make it look realistic as this is how cotton looks in the field. And…love the doggy costume.