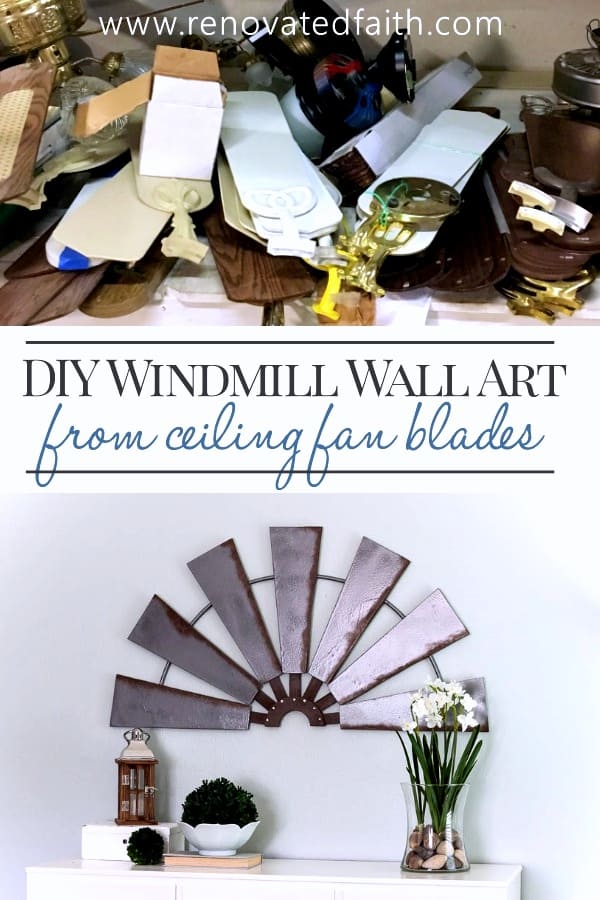
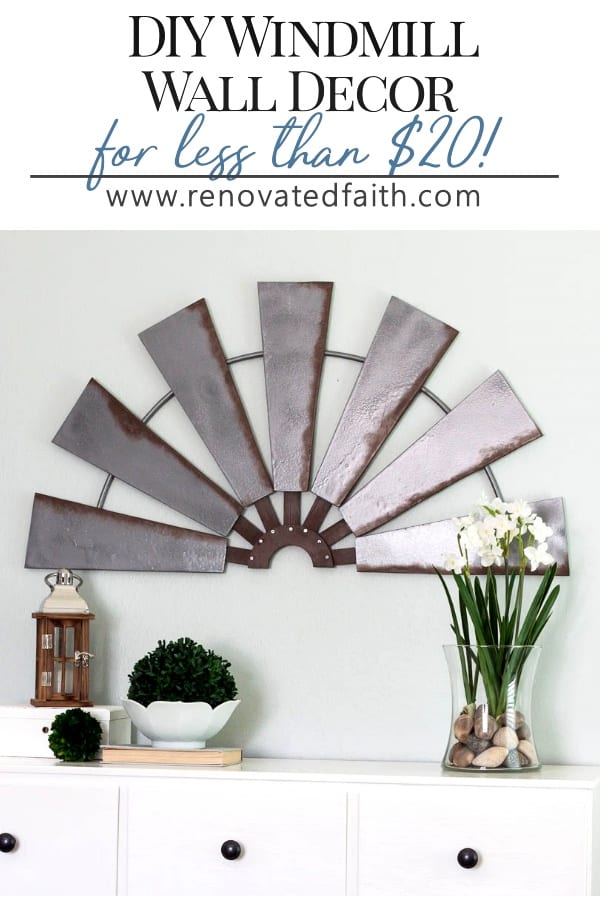
The Easy Way to Make DIY Windmill Wall Decor for Less than $20
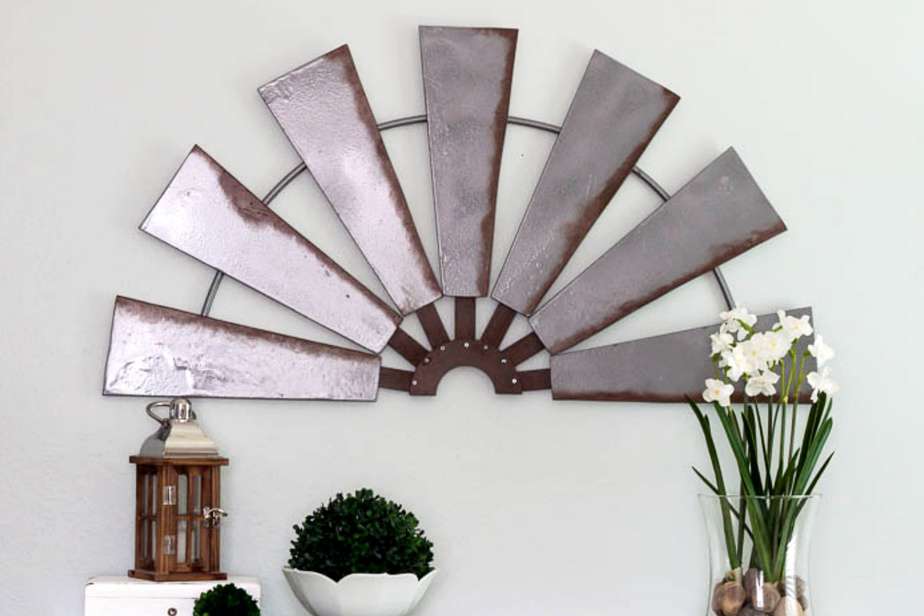
With this step-by-step guide, I show you how to make your own farmhouse style windmill wall decor for less than $20. This tutorial is easily customizable for whatever size you need to fit your home’s decor. By using ceiling fan blades and a floral craft ring, you can make this beautiful windmill wall art to hang in any room of your house or even outside on your porch.
You see them everywhere! Whether you are a farmhouse fanatic or not, windmill decor is such a cute way to decorate your home. I’ve had my eye on one of these for a while now but oftentimes, the size wasn’t just right, or the price was way too high. I also wanted a half-windmill for over a dresser in our Master Bathroom and didn’t want one that looked too “rustic-y”. Is that even a word?
So I put my thinking cap on and found out how to build a decorative windmill with the following supplies:
Quick Links to Information in this Post
- 1
- 2 DIY Windmill Art – Supplies Needed:
- 3 To print out my pre-made template, click here.
- 4 Free Spray Painting Cheat Sheet
- 5 It’s hard to believe I spent less than $20 on mine!
- 6 Related Posts to DIY Windmill Wall Art
- 7 To save this post for later, pin it here:
- 8 Blessings,
- 9 Be sure to follow the fun here!
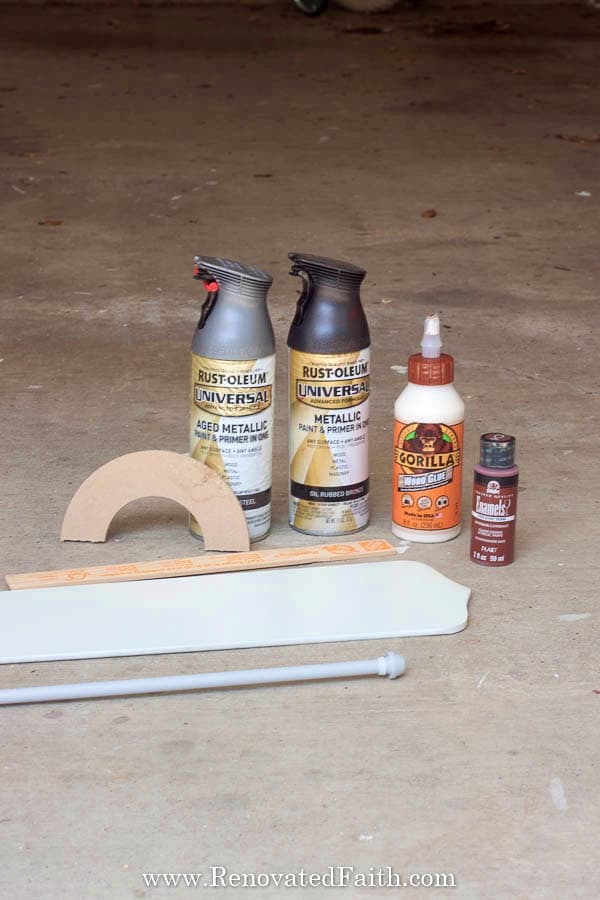
DIY Windmill Art – Supplies Needed:
- 2 Sheets of Card Stock or Construction Paper
- 7 Ceiling Fan Blades from your local Restore.
- Jig Saw – I love this Black and Decker Jig Saw.
- Rustoleum Universal in Weathered Steel
- Rustoleum Universal in Hammered Brown
- Acrylic Paint in Rust Brown Color
- 6″ Floral Craft Ring
- 7 FREE Paint Stir Sticks from Lowe’s or Home Depot (Do not use the thin ones at Walmart.) – They don’t mind if you grab them and are not buying paint. I asked!
- Gorilla Wood Glue
- 30″, 3/8″ Faucet Connector (flexible faucet supply line) at Lowe’s
- Spouncer or Foam brush
- 3/4″ Wood Screws and Screwdriver
- Duck Tape
Farmhouse Windmill Instructions:
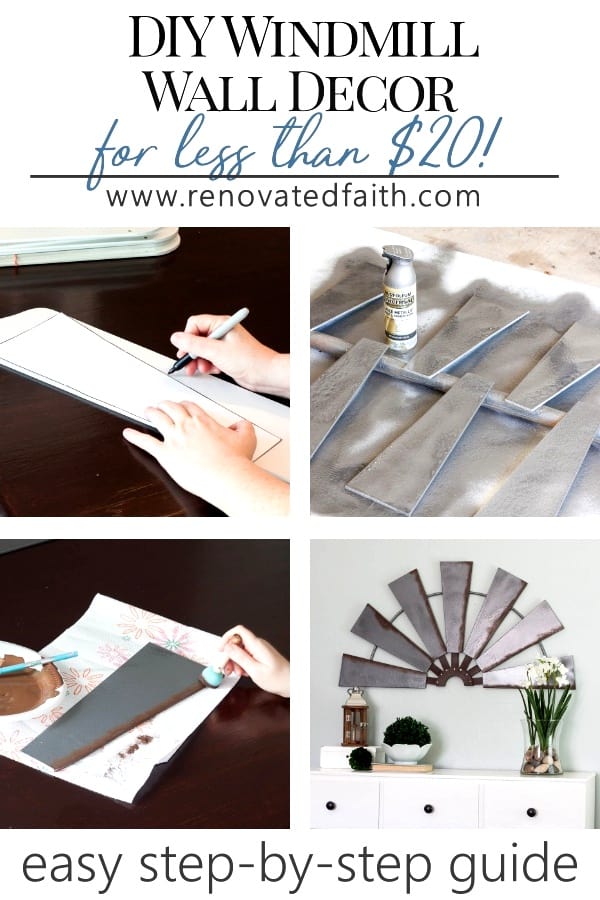
Step 1: Make a Template for your DIY Decorate Windmill Blades
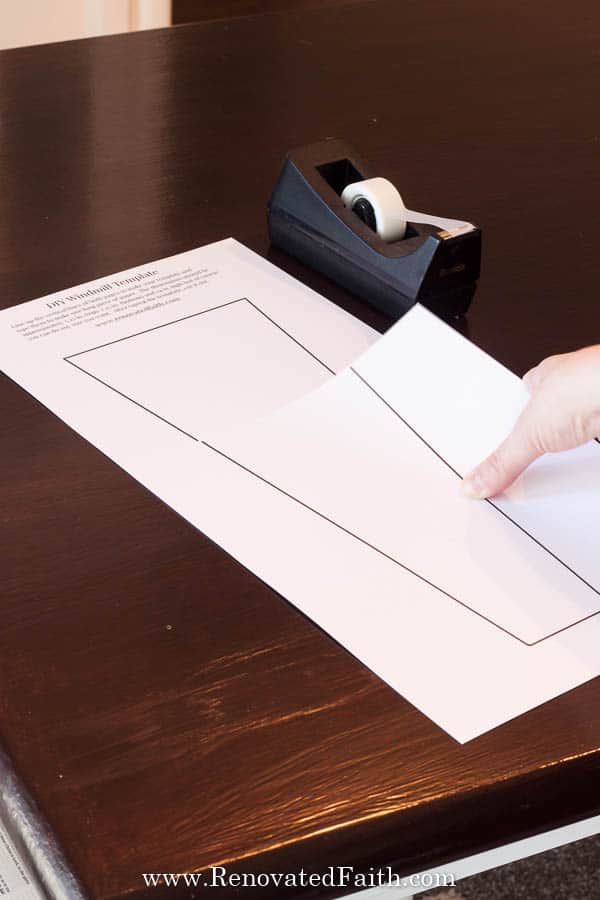
First, you need a template for cutting your ceiling fan blades to size.
To print out my pre-made template, click here.
Print the two-page template on card stock or other heavy paper that is easier to use for tracing. Tape the two pieces of paper together so the two long sides of the blade line up evenly. The pieces of paper will overlap; just line up the black vertical lines.
Cut out the template on the black lines.
Step 2: Make DIY Windmill Blades
To make a DIY windmill, ceiling fan blades seemed to be the easiest choice of material. I got mine at Restore for only $2 for a set of six! I’m using 7 for my DIY windmill wall art and I got a couple extra in case I messed up.
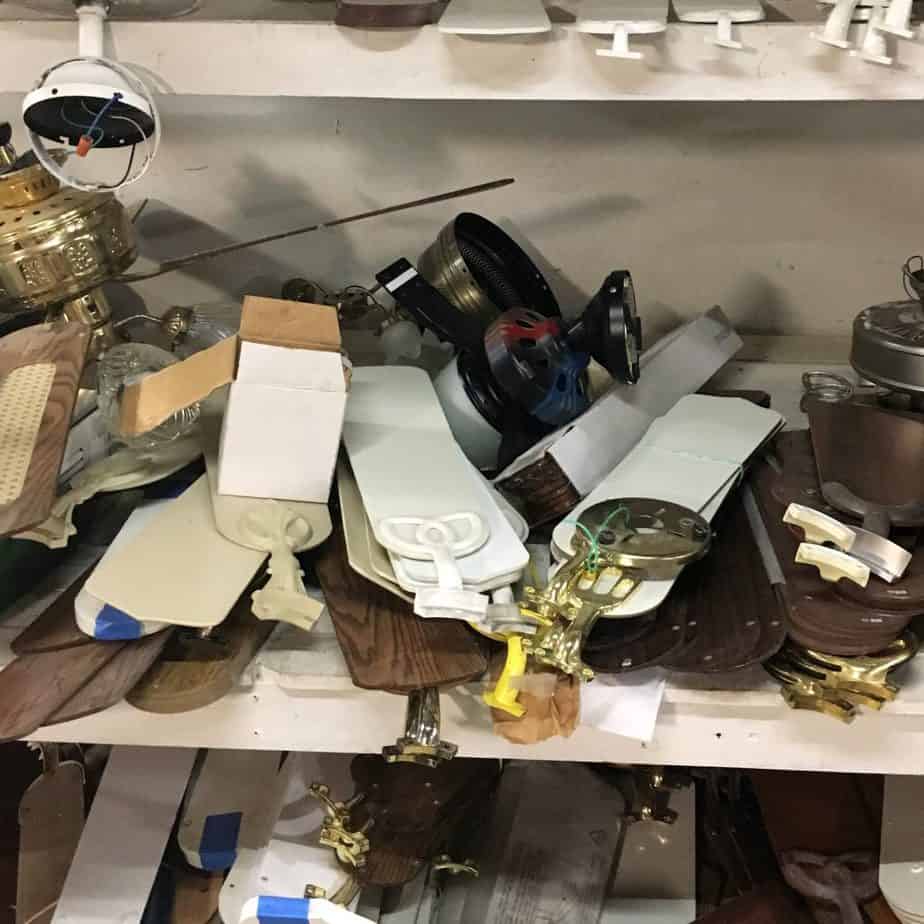
Click here to find your local Restore. You’ll be surprised by all they have to offer.
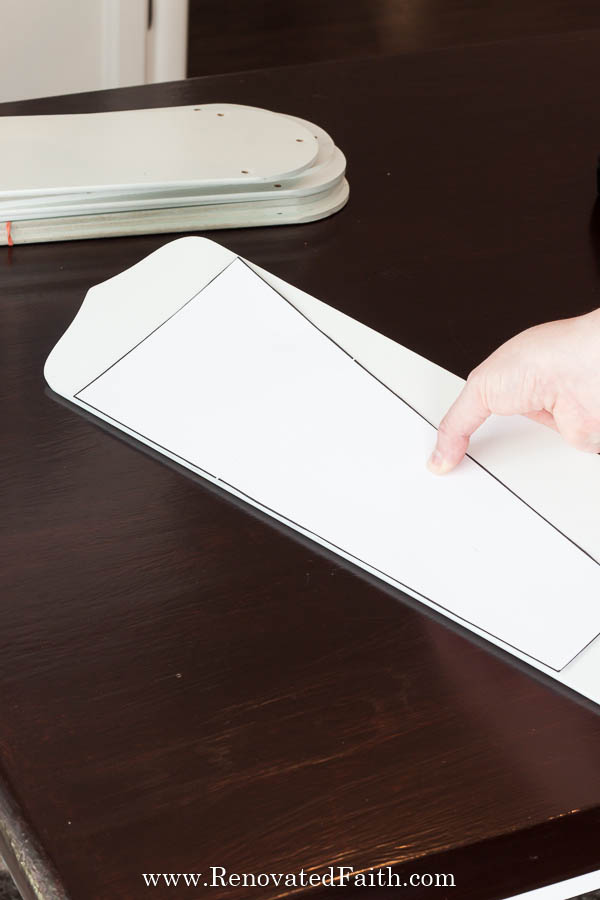
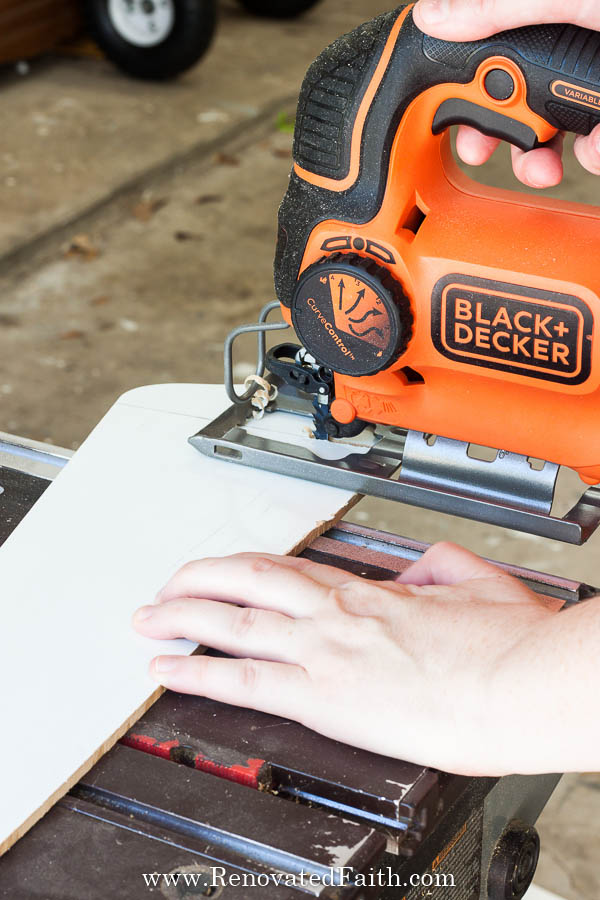
Line up your template to an edge of the ceiling fan blade so that it’s one less edge to cut. Trace the template onto all 7 blades with a pencil. You can use more or fewer blades for your DIY windmill wall decor.
I’m happy to say that this was the first time to ever use a jigsaw and it went surprisingly well. Yay for power tools that aren’t intimidating! If I can do it, I promise, anyone can. I highly recommend this jigsaw here to cut out your DIY windmill blades. I also wrote a post on how to use a jigsaw and made a video below to help you out with using a jigsaw if you haven’t used one before.
If you are interested in adding to your power tool collection, you can check out my post Best Sanders for Wood Furniture 2018.
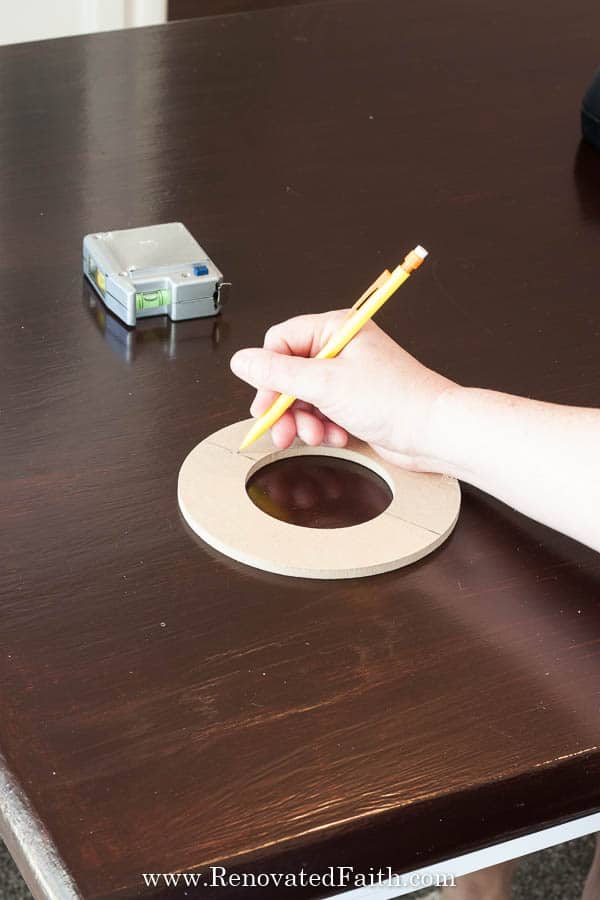
After you have cut out your fan blades along each line you also want to cut your floral craft ring in half so you have two semi-circles. You will only use one…which is good because my dog Jake managed to chew up the other half.
Step Three: Painting Your Windmill Blades Wall Decor
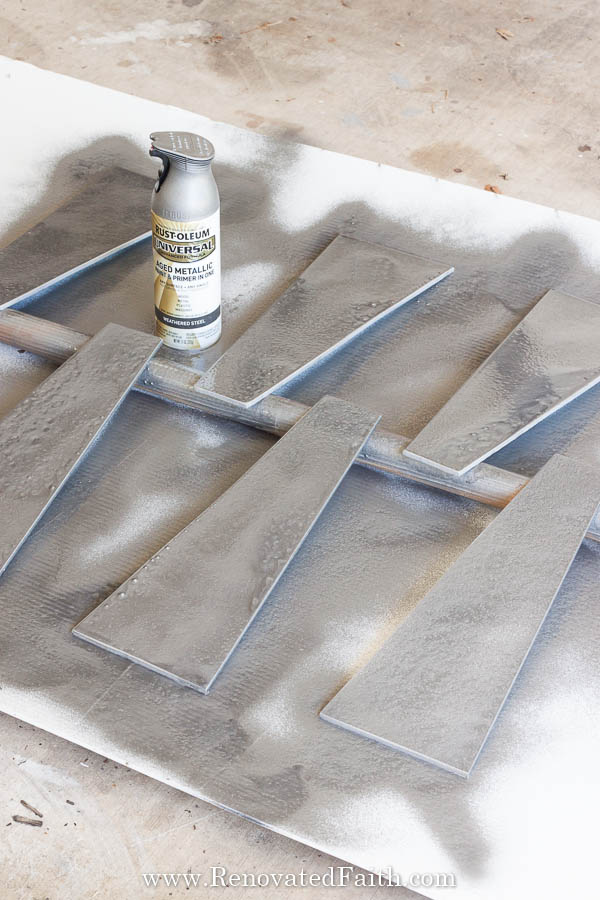
Now that all seven of your blades are cut, it’s time to do some spray painting! Be sure to lay down an old sheet or piece of poster board and spray in a well-ventilated area.
Spray the blades and the pieces of faucet supply line in the Weathered Steel Spray Paint here. I highly recommend using this brand because it looks just like galvanized steel when you are done! It makes ALL the difference in making those ceiling fan blades look like galvanized metal for your DIY windmill wall decor. For my best spray painting tips for a flawless finish every time, fill out the form below.
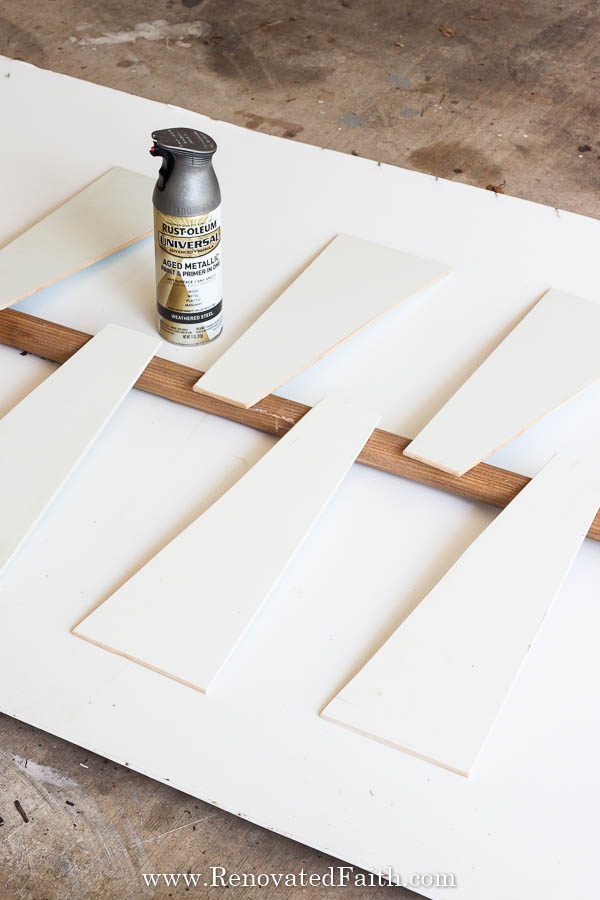
Not shown in the image above is the faucet supply line that you also want to spray paint in the weathered steel paint.
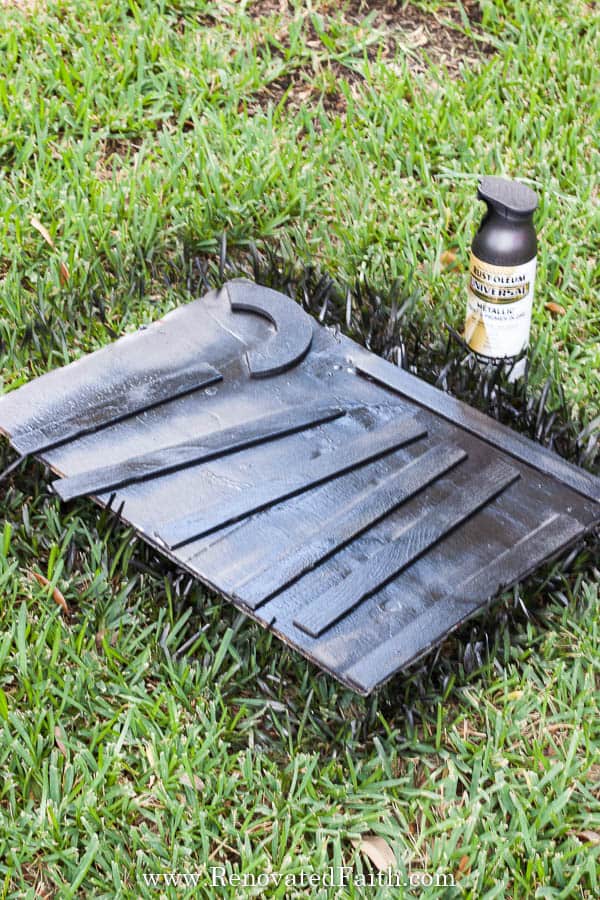
You also want to spray paint the 7 stir sticks and half of the floral craft ring in the Brown Spray Paint here. Be sure to separate these items from the other items while spray painting so you don’t have any over-spray.
Let them dry for at least 24 hours.
Free Spray Painting Cheat Sheet
If you aren’t used to spray painting, I have good news! Find out all my best tips and spray painting hacks by downloading this free checklist of Best Spray Painting Tips and Tricks. Get the password for the library with all of my free printables including wall art, checklists, and templates by filling out this form:
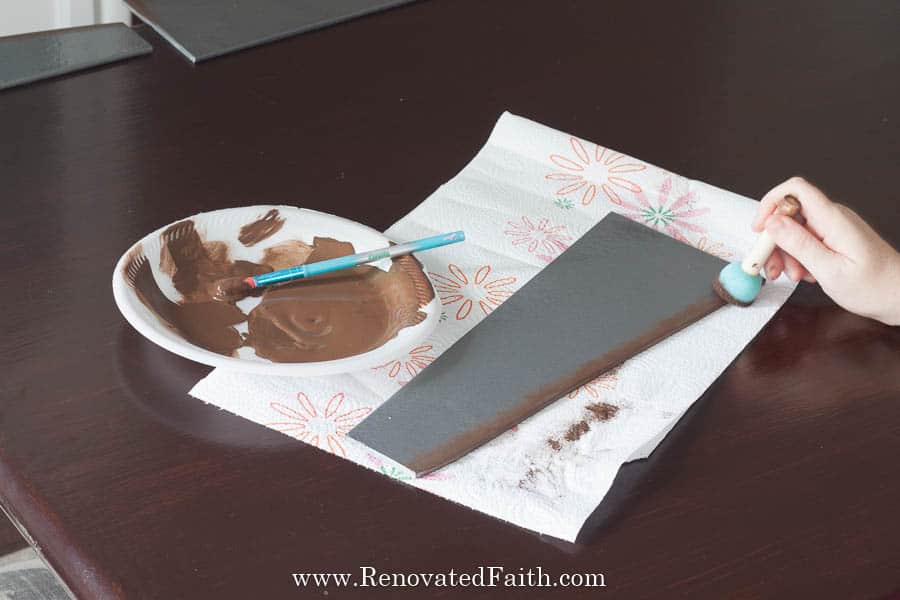
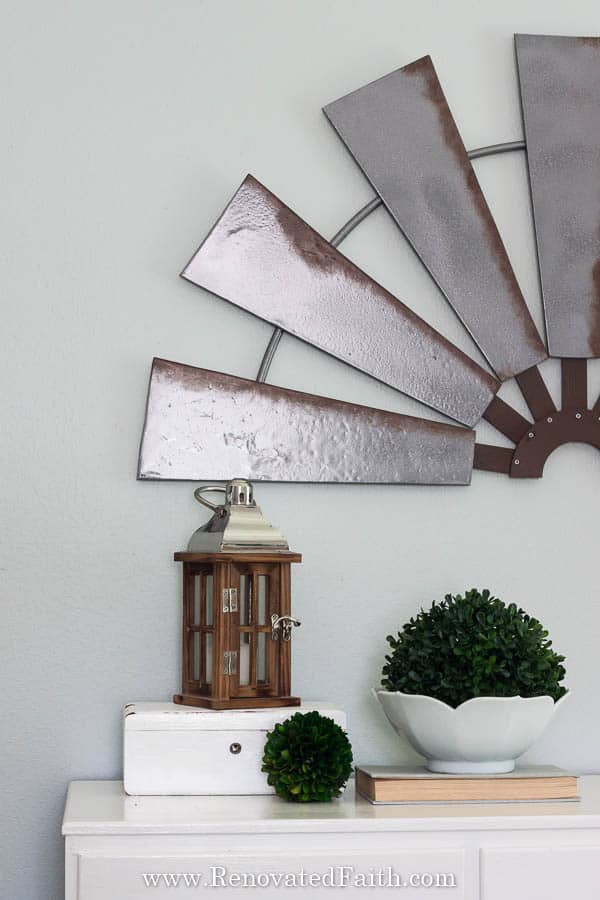
Step 4: Adding Faux Rust to the Windmill Blades.
I wanted to add a little rust to my windmill blades but didn’t want to go crazy with the rustic look. I used a spouncer and 1/3 of a burnt sienna acrylic paint and 2/3 dark brown acrylic paint to give it that rusty look.
I mixed the paint and put a little on my spouncer. Then, I wiped most of the paint off the spouncer so there was only a tiny bit of paint left on it. Then I just kept dabbing the edge to get the look I wanted. I was unsure about this part but it went really smoothly and I think it looks just like real rust! Here is a video to help you out!
Also, you’ll notice I only put rust on one side of each blade. This is to give it some dimension to look like the blades are angled like real windmills instead of flat.
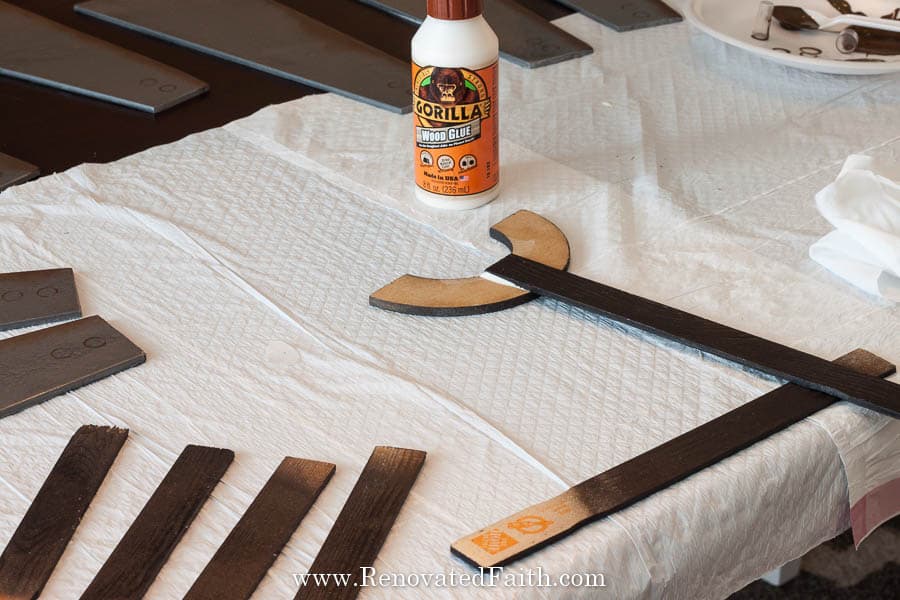
Step 5: Gluing Together Your DIY Windmill Wall Decor
Now it’s time to get your Gorilla Wood Glue. I strongly suggest you use this instead of regular wood glue because it has a much tighter bond.
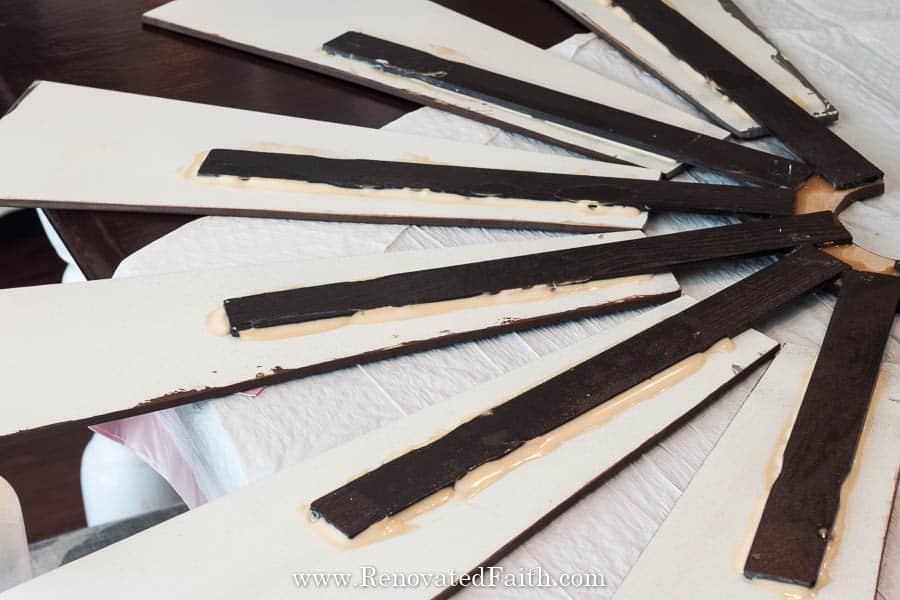
Glue the end of the stir sticks to the craft ring and let them dry a day.
Then glue the fan blades to the ends of the sticks and let them dry. Don’t be shy with the glue! After the glue underneath dried, I actually came back and “caulked” the edges with glue to make sure it had a really strong bond.
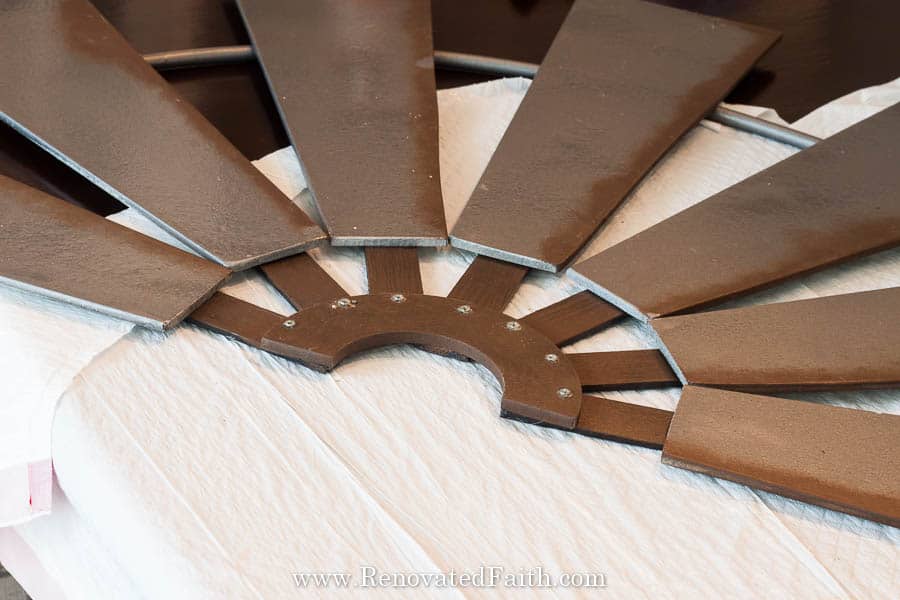
Step 6: Add Screws
After your glue has hardened, carefully flip over the windmill and you want to add a wood screw below each stir stick into the craft ring to give it extra support.
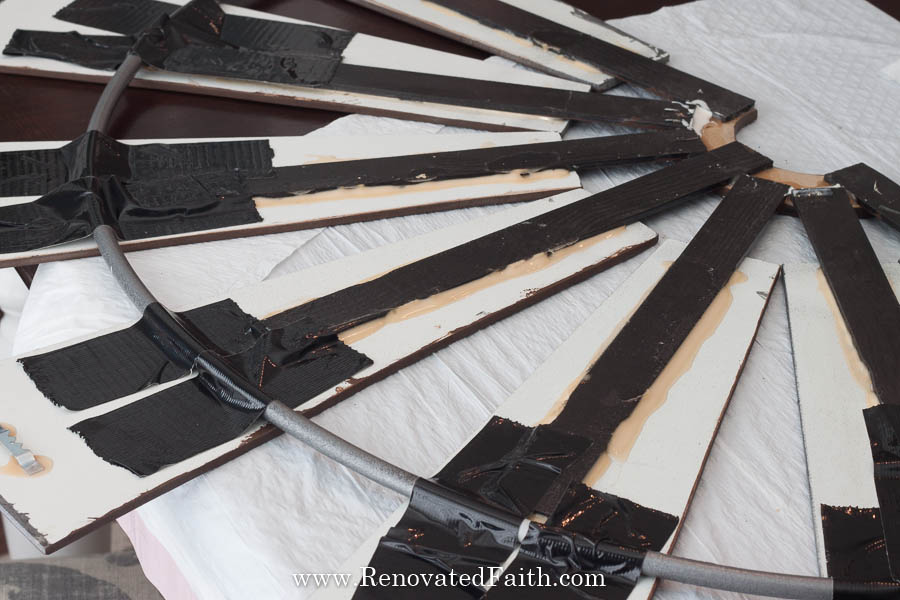
Step 7: Add the Supply Line.
Tape on the faucet supply line to complete the look of your DIY windmill wall decor. I cut the ends off my faucet supply lines with some heavy-duty scissors or you can use branch trimmers. Then, I simply duck taped them to the back of my fan blades. My duck tape happens to be black.
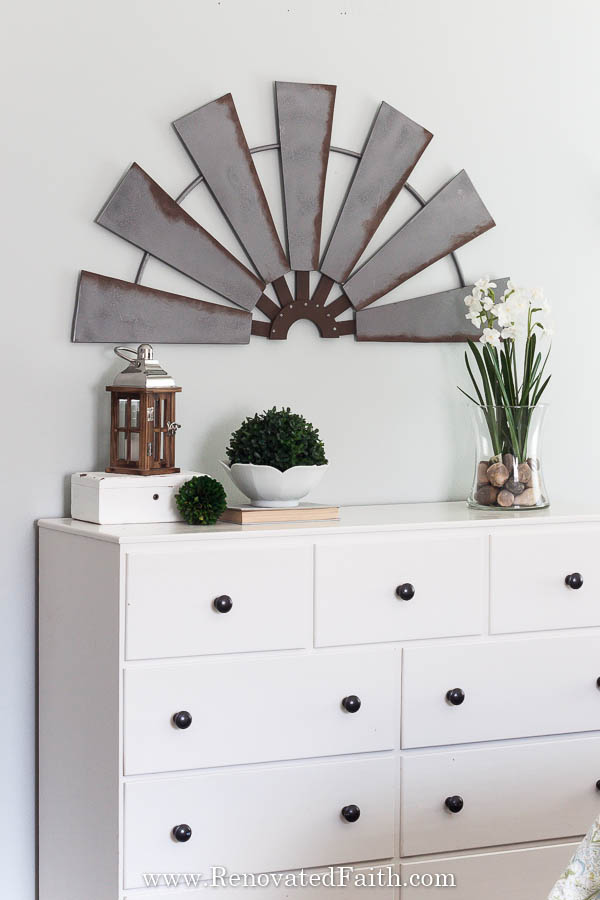
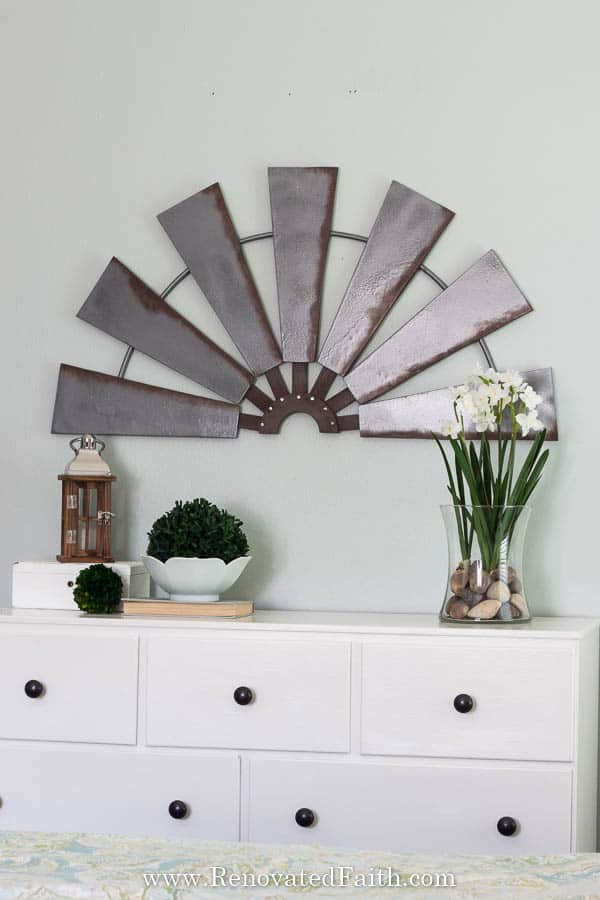
Now you have beautiful windmill wall art that even Joanna Gaines would be proud of! This wall art is easily customizable and it rivals the look of some found in stores for a fraction of the price.
It’s hard to believe I spent less than $20 on mine!
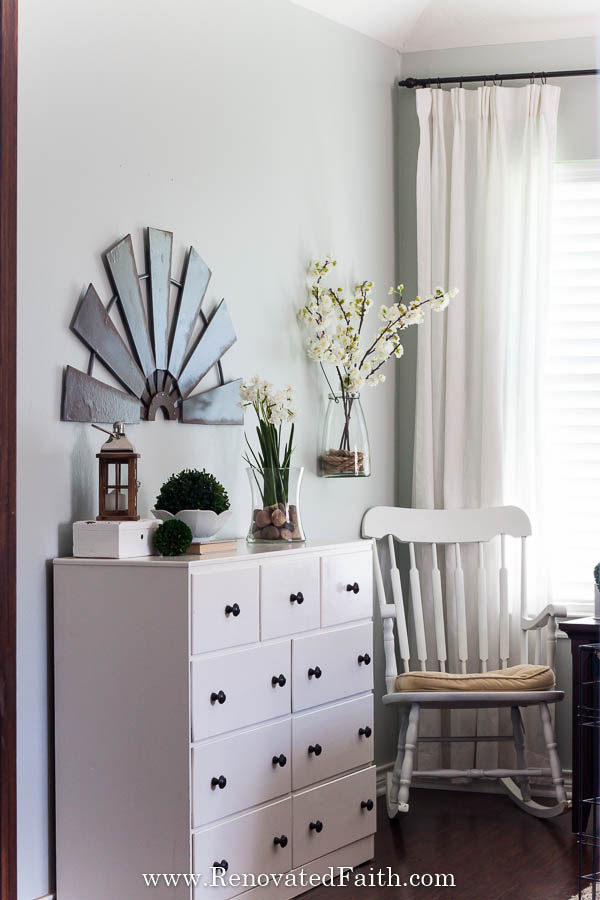
You might remember those curtain rods from my post on How to Make DIY Custom Curtain Rods from Electrical Conduit. They are still goin’ strong!
Even Jake likes it despite trying to chew up the floral craft ring. Hasn’t he grown since you first saw him in this post?

Related Posts to DIY Windmill Wall Art
Easy DIY Hanging Art Rail (Low-Cost and Hassle-Free)
21 Spray Painting Tips & Tricks for a Flawless Finish
Must-Have Tips for Painting Furniture
The Best Way to Paint Mason Jars
Best Gifts for Christian Women (What They Actually Want!)
Pinch Pleat Curtains the Easy Way
Sherwin Williams Silver Strand Review
To save this post for later, pin it here:
Did you like this post? Be sure to share it with others. Have a wonderful week!
Blessings,

Be sure to follow the fun here!
Email Subscription | Instagram | Pinterest | Facebook | Twitter


Karin Peters is a DIY expert and the creator of Renovated Faith. She is a furniture painter, a home design consultant, and a tenacious problem solver determined to help you transform your house into a home. With 17 years of experience with DIY home improvement, she researches and analyses professional processes to adapt them to be easy and cost-effective for DIYers. She then tests every project and product before it appears on the site in a detailed, step-by-step format. After attending Texas A&M University, she received her Master of Divinity with Biblical Languages at Southwestern Baptist Theology Seminary. Her passions unite in Renovated Faith, which shows readers how to create a home that serves them so they can pursue their God-given purposes. About Renovated Faith | Editorial Policy | Facebook | Twitter | LinkedIn
I love it. I have some fan blades and have been wanting to do this but, age and my health caught with me.
Great job with a thumbs up.
Thank you so much for that Carol!
Hello, no matter what I do I can’t find a form to get a password. Could you please send me that to: sunedaze983@comcast.net? The form’s no where to be found. Thank you!
Hey Tess, I’m embarassed it’s taken so long for me to see this comment so I’m sorry for the delay but I just added you as a subscriber. If you have any questions at all, email me at karin@renovatedfaith.com. So sorry again for the wait!
The template for the blades isn’t working for me and I signed up via email. Other than that, I love this windmill.
Hey Jody! Sorry about that. Go here and put in the password and it’s under wall decor. If you have any issues at all, email at karin@renovatedfaith.com. Thanks! Blessings, Karin
Wow!! This is so great! I’ve been wanting one of these but they are pricey! Plus, I enjoy projects— especially when they involve power tools! Thank you for this tutorial, I’m definitely going to make it:-)
Thanks so much. Let me know if you have any questions Alicia!
I love your tutorial. Thank you so much for sharing. What is the diameter using your template?
I just got through with mine, and was wanting to know how and what you used to hang it?
Hey Angie – great question! I attached one of those little sawtooth hangers to the back of the semi-circle. I just nailed it on with the nails included. Let me know if you have any other questions! – Karin
Hi Karen – I really love this! I just made one for myself and can’t wait to hang it which is my question. What did you use to hang it and how, can you show a picture of that on the back?
I have everything I need for this project except the 6” floral craft ring. Where did you get your’s?
I got mine on Amazon. You might try Michael’s, Consumer Crafts or Joanne’s online. Thanks Jodi!
We did you but your craft floral ring?
You can also get them at Michael’s here: https://rstyle.me/+edKu2vGddGqhocEgJkCbMQ
Template for the windmill no longer available. Is there another link?? Thanks! 🙂
It looks like it is working now. If it isn’t on your end, email me at Karin@renovatedfaith.com and I’ll send it. Thansk Jen!
Absolutely love this! What a great job you did–you’d never know it wasn’t real metal! I’ve been eyeing a gorgeous windmill at HL for quite a while (have to go gaze at it every time I’m there! LOL), but even at 50% off, it’s just too much for me to justify, so I was really happy to find your tutorial! One question, though–approximately how big is the finished windmill? Can’t wait to check out some of your other projects!
Thank you so much Deb! I really appreciate that. I’d say it’s about three feet wide when finished. Thanks again.
Wow! That is amazing! And genius! I love how it turned out!!!
Thank you so much Elizebeth!
Wow! What a great job you did in making your decorative half windmill! It is beautiful! Your step by step instructions are clear and easy to understand! Loving your DIY projects!