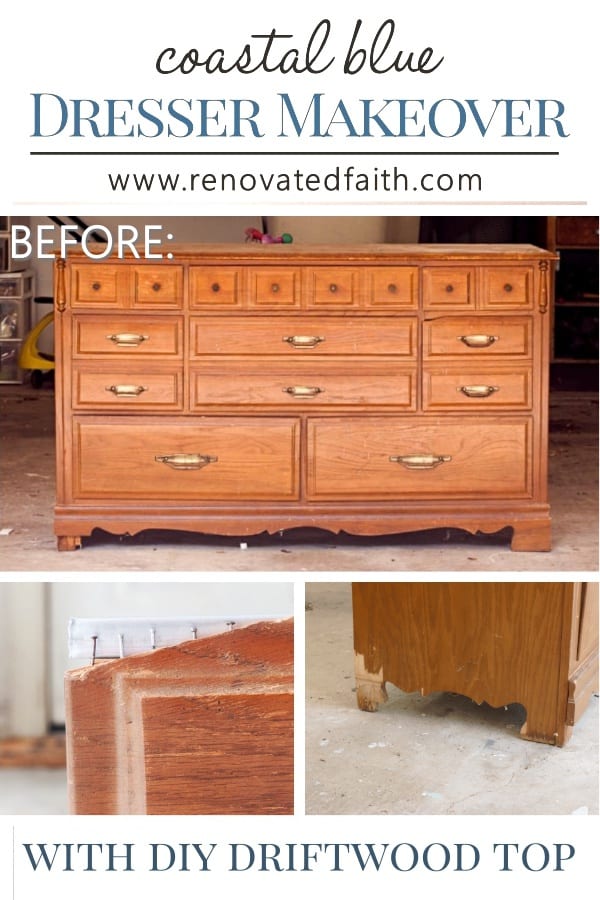
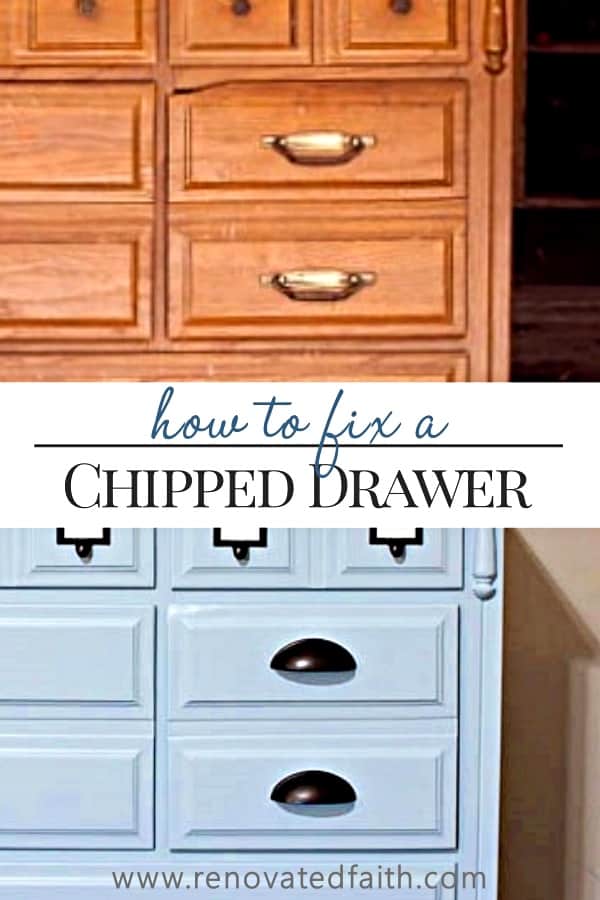
Coastal Blue Dresser Makeover with Driftwood Top
A smelly, broken down dresser gets an unforgettable makeover that seemed all too familiar. The smell was horrendous, three drawers were broken and another had a chipped corner. However, there was incredible potential in this old piece and reminded me a lot about how God sees us and transforms us into His own creations of beauty. In my blue dresser makeover, see how I turned this resale reject into a fabulous coastal blue statement piece with diy driftwood accents.
Quick Links to Information in this Post
If you have been watching my Instagram stories, I’ve posted on the process of the dresser and even used it to write a post on How to Remove a Stinky Smell from Old Furniture. In that post I recounted the incident where on the way to the storage facility to pick up the dresser, I felt something move in my shoe.
I kicked off my shoe to find a tree frog that hopped around in the floorboard until I somehow managed to pull over the car. You can read the full account of our freak-out moment here.
Needless to say, we were late meeting my husband at the storage facility. Therefore, the dresser was already loaded up and I didn’t get to do my usual 20 point inspection before bringing her home.
But here she is… She has some of the details of a french provincial dresser but the hardware is more mid-century modern.
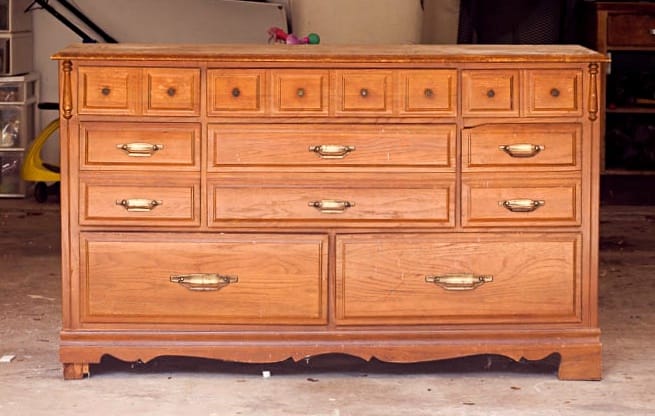
I think it’s safe to say she’s endured some abuse in her long lifetime including a broken front and chipped drawer…
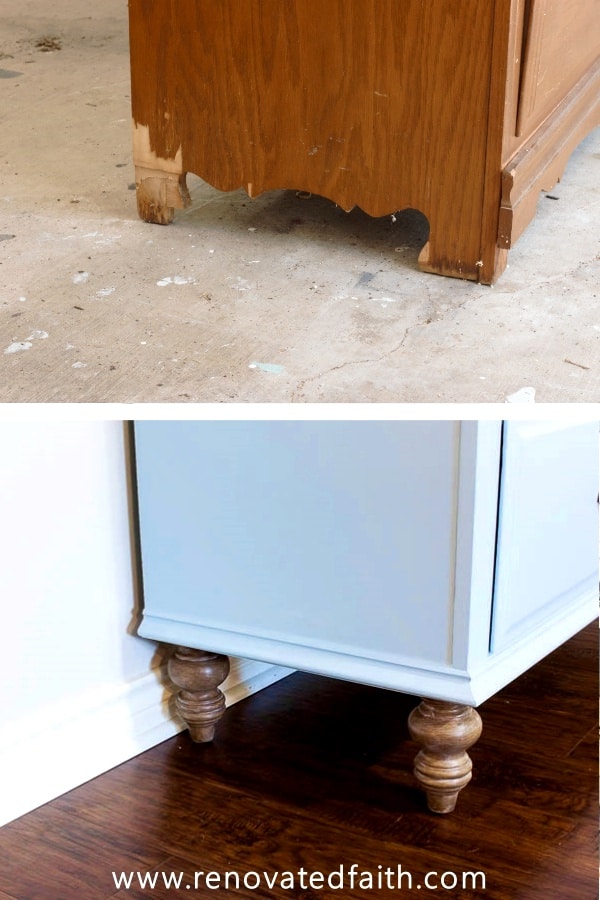
And let’s not forget the water damage to the bottom which was probably at least partly to blame for the smell. If there was a furniture abuse hotline, I would have called it days ago!
If only someone could have just come and taken her away for me. My sweet neighbor Terri said on Instagram, “You’re braver than me. I would have kicked it back to the curb from the smell alone…”
And YES…that’s absolutely what I should have done. It needed to be thrown out…it was dirty, broken and WAY more trouble than it was worth. I would never fully recoup the cost I’d but I bought it and wanted to transform it into it’s fullest potential….
So the transformation began…
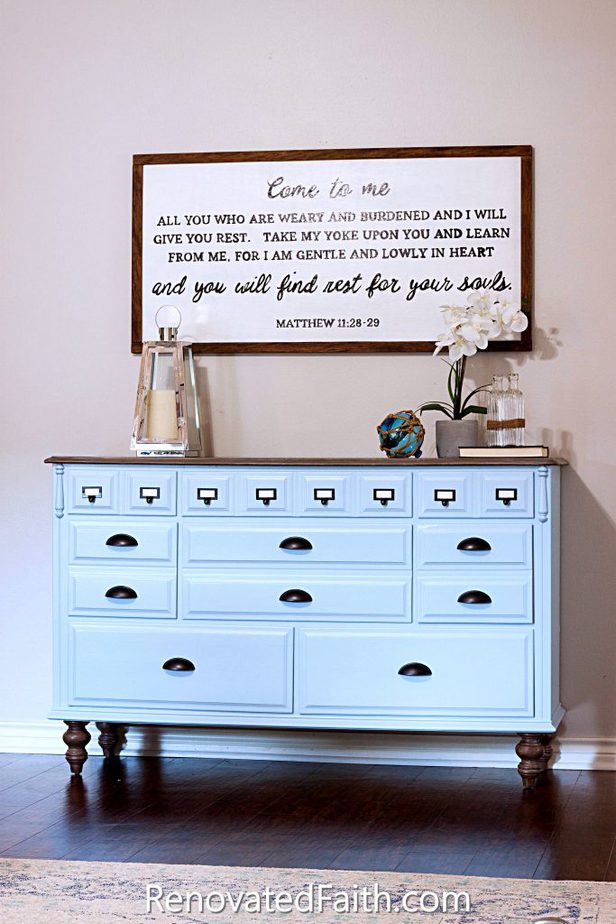
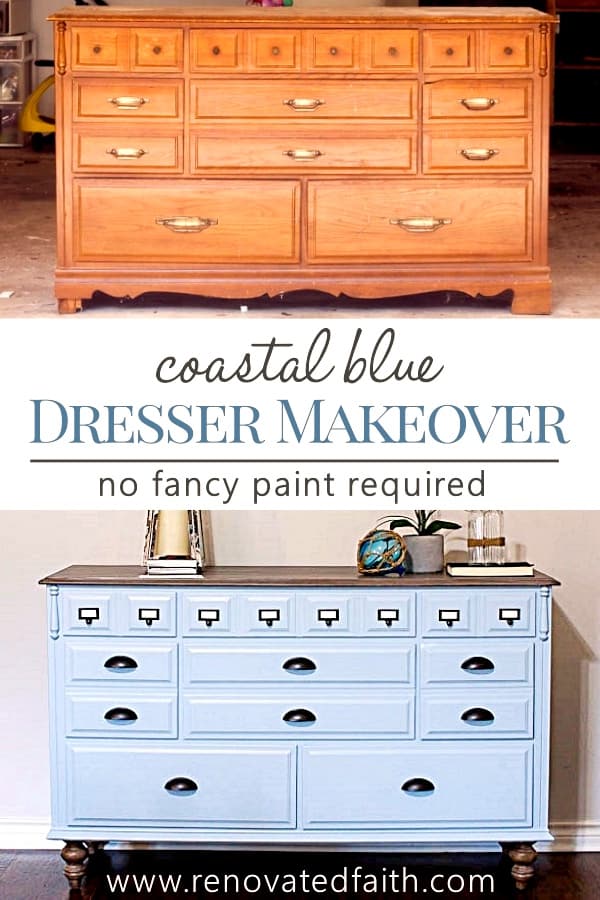
DIY Dresser Makeover Before and After
After I triaged my patient, I realized that miraculous interventions would have to take place in order to save it.
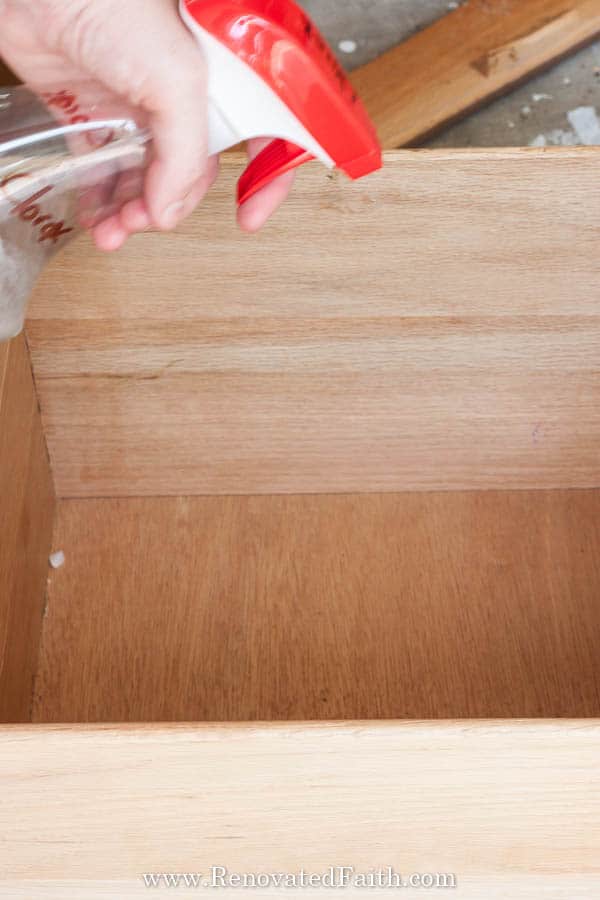
Problem #1: The Smell
I was able to get rid of the smell using some things around the house that I describe here.
Problem #2: The Water damage
Unfortunately I had to amputate some legs with my new found jig saw skills. There was no point in salvaging old legs with water damage so added trim and found these super cute legs here.
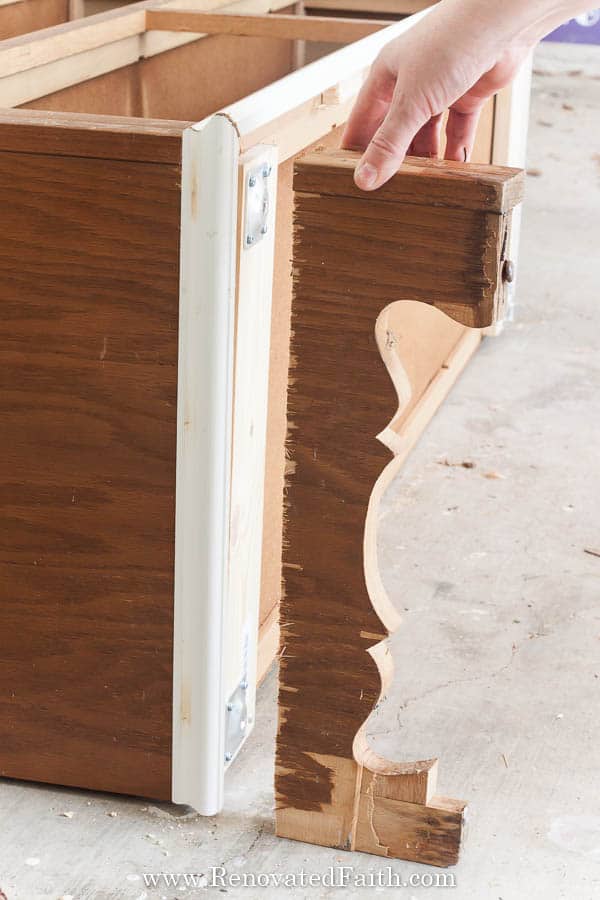
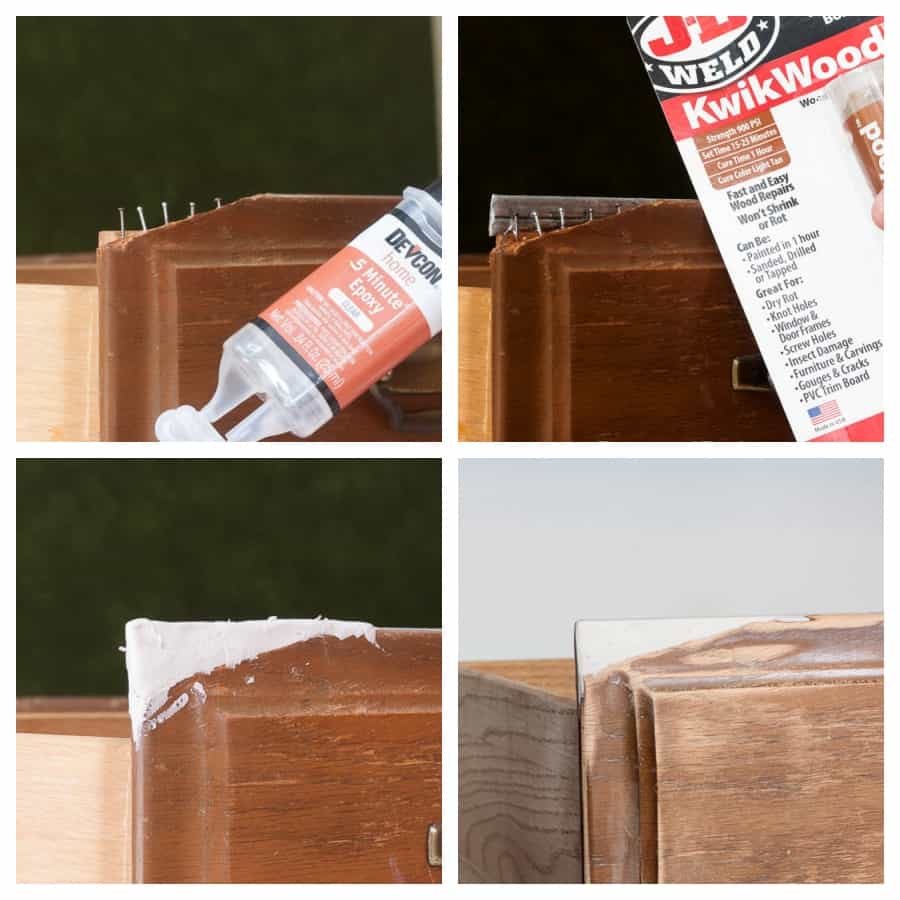
Problem #3: Massive Chip in Drawer
Someone must have kicked it or it fell off a truck because I don’t understand how you chip a drawer like that.
I got a little creative and did some plastic surgery for the drawer corner. I put in some trim nails to create a new structure for the drawer (kind of like rebar in concrete) and then epoxyed a file folder rod behind it (because that’s what I had on hand). Then I filled in the area with wood epoxy putty and sanded after it dried. Not too shabby!
Problem #4: Broken Drawer Guides – Three of the plastic drawer guides were broken. This was another fun surprise but was able to buy some replacements on here on Amazon fortunately.

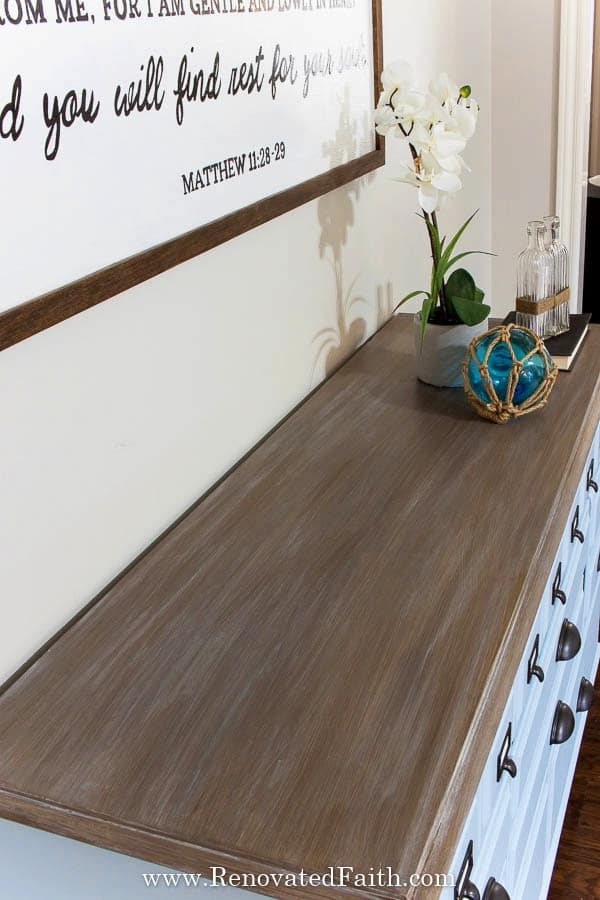
To give the top and legs some added contrast, I did a faux driftwood finish on this oak dresser makeover. This finish can be done on any surface, not just raw wood. See how to do it in my post on how to do a diy driftwood finish here.
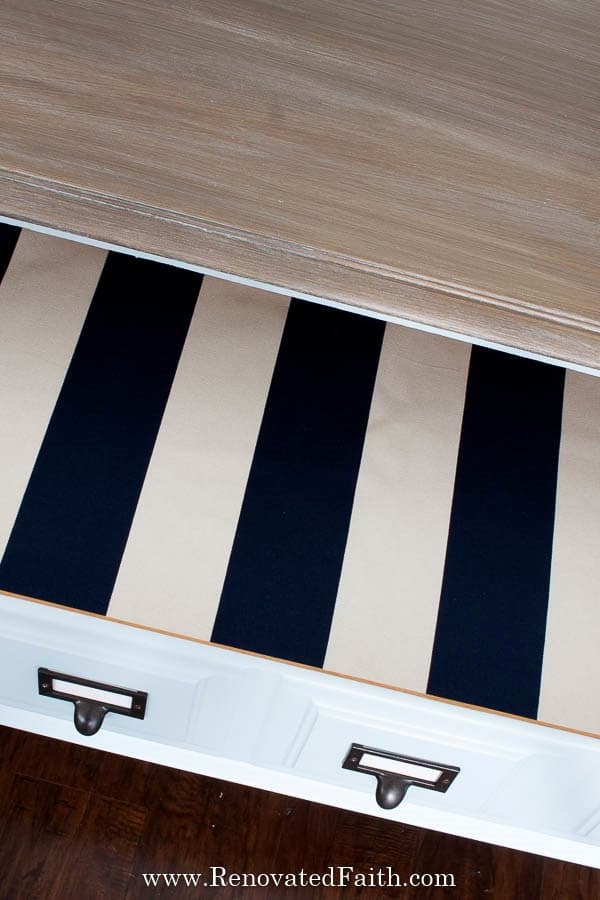
I even added some fabric drawer liners like I did on the marble end tables a few weeks ago.
My Best Tips for Spray Painting
For my favorite tips and tricks on getting a flawless finish every time with spray paint, click here for your free checklist: Best Tips & Tricks for Spray Painting Anything
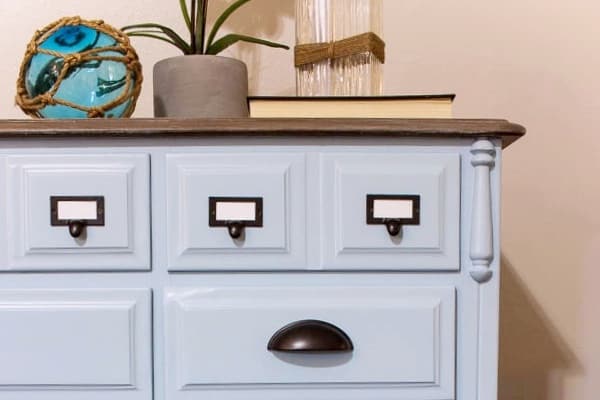
The hardware was replaced with these card catalog style pulls, spray painted in Rustoleum Universal’s Soft Iron.
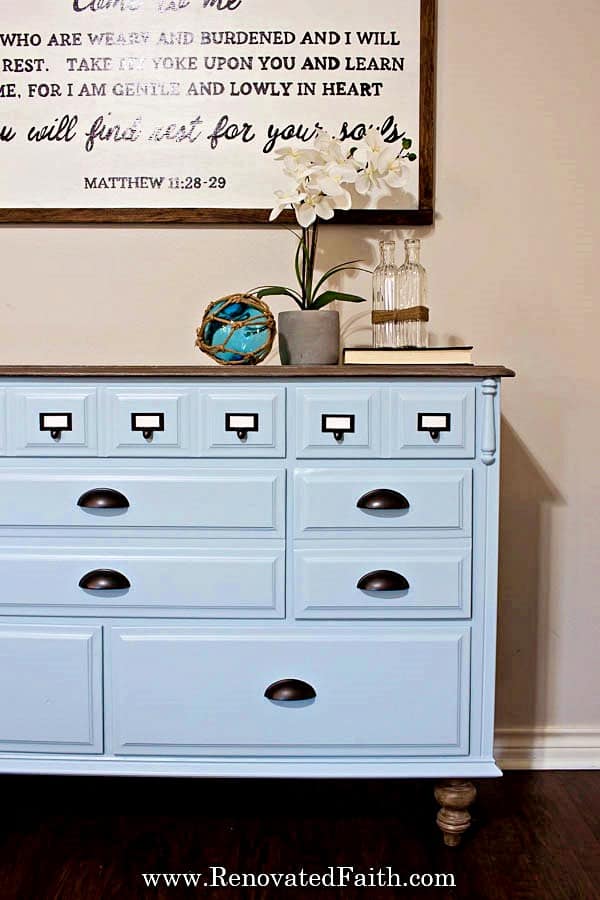
French Blue Dresser Makeover – I’m a pushover for french blue painted furniture so the paint I used was what was leftover from the inside of my china cabinet and media center shelves – Behr Sonata Blue. Instead of french blue chalk paint I opted for latex because it gives a better and more durable finish (Why I don’t Use Chalk Paint on Furniture.)
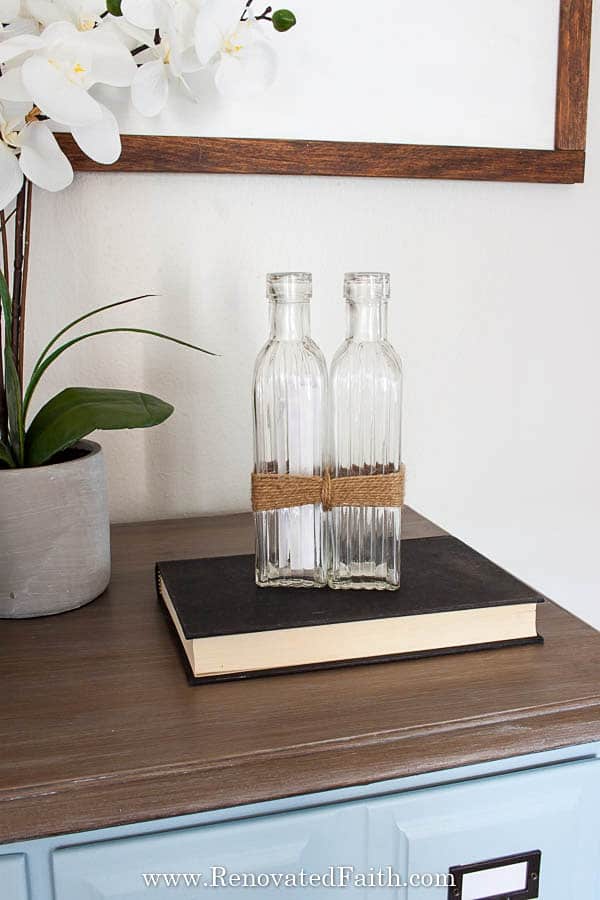
What do you think? I love the way it turned out and how the driftwood finish looks against the french blue. It even looks good with the diy farmhouse sign I made here.

RENOVATE YOUR FAITH
So many of the furniture pieces I’ve refinished, should have been thrown in the trash a lot time ago. They weren’t worth my time, my effort and they cost me more than I could ever get in return. But in each one I was inspired by their potential…
But fortunately, God works differently. He doesn’t love us for what we one day will become. He loves us in our initial tattered state. God goes “all-in” for us when we are the “before image” of our greatest life transformation
Our heavenly Father sacrificed His only Son to pull us out of the trash heap to allow us to walk out our greatest potential as His beloved children. There’s no way we could ever pay him back for His tremendous sacrifice even if we tried. We cost him more than He will ever get in return.
But in spite of that, He loves us and wants a relationship with us to grow us into who He has created us to be. Thankfully, regardless of what we may deserve or who has rejected us in the past, the only ONE who should have rejected us didn’t. In Him, we can have new life and purpose, if we trust in Him.
If you want to save this post for later, pin it here:

Did you like this post? Be sure to share it with others. Have a wonderful week!
Blessings,

Be sure to follow the fun here!
Email Subscription | Instagram | Pinterest | Facebook | Twitter

Karin Peters is a DIY expert and the creator of Renovated Faith. She is a furniture painter, a home design consultant, and a tenacious problem solver determined to help you transform your house into a home. With 17 years of experience with DIY home improvement, she researches and analyses professional processes to adapt them to be easy and cost-effective for DIYers. She then tests every project and product before it appears on the site in a detailed, step-by-step format. After attending Texas A&M University, she received her Master of Divinity with Biblical Languages at Southwestern Baptist Theology Seminary. Her passions unite in Renovated Faith, which shows readers how to create a home that serves them so they can pursue their God-given purposes. About Renovated Faith | Editorial Policy | Facebook | Twitter | LinkedIn
Also, if i understand correctly, when we mix, we just add 1 tablespoon of water, 1 tablespoon of Glaze and 2 heaping spoons of the color. Did you say if it is too dark, we can add more glaze, is that correct?
Yes and yes, if it is too thick/dark, add a little more glaze. If it is too dark after that, dry brush it lightly with white paint. Hope this helps!
Hi Karin,
I was looking for the base coat and could not find it. Do you mind post the can for me to see it?
Hey Sonya, It’s Valspar Coastal Villa. Hope this helps!
Karin, that dresser turned out darling. You’ve such an imagination. Love it.
Wonderful post
Hi Karin! I too have recently become a big renovated faith fan and have tried 4 times to achieve the driftwood finish however, I always seem to get gummy ends, thicker, blotchy. I have tried a few different methods but I cannot seem to get it right. I may have too much paint on my brush but removing it gives me a lighter finish and I am trying to get a little darker one. I feel like if I do not have enough paint on the brush, it will not give me as smooth as a stroke line on the wood… UGH! What am I doing wrong? I end up priming and starting all over again.
Ugh, I feel your frustration. I am so sorry. Do you live in a dry climate by chance? My first thought is that maybe your glaze mixture is too thick. Try adding some more of the glaze to it until the mixture is watery. If you can’t get it to that consistency with the clear glaze, add a little water. You want it to be pretty thin to the point that it drizzles if you were to pour it – not so much like salad dressing. (You can tell what I just had for dinner). If your glaze mixture is too thin you’ll brush it on and you’ll see dots where the glaze mixture seems thinner. (You’ll know what I mean if you see them). You might make sure to use a separate primer and a separate base coat. I know I mention in the post to use a tinted primer but if you use the latex paint as a base coat, it will probably be smoother so your paint glides better. Experiment on a board some to see if this is the problem. Let me know if this doesn’t work and we will figure something else out. Also, take note that I changed the last step of the driftwood step to dry brushing the white on because it’s easier.
Love the dresser. I too love blue! Question, you mentioned you had to redo the top because u didn’t let dry before adding top coat. I was wandering how to re paint if I didn’t get the color I was wanting? Do u just paint over? I’m afraid the paint will look thick, if you know what I mean?
The dresser is beautiful! Did you also do the sign above? That’s my favorite scripture!
That is one of my favorite verses too Kim! I did a post on how I made it: https://renovatedfaith.com/easy-diy-farmhouse-sign/
Karin the dresser is beautiful! I can’t believe this is the same dresser you were describing and bought several months ago! I love the shade of blue! Great job on perfecting all of its imperfections.