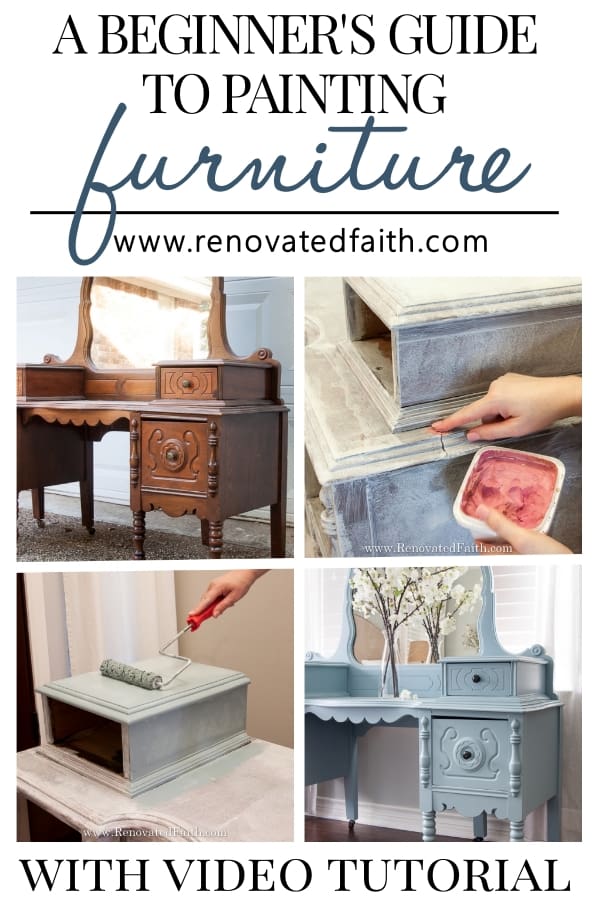
The BEST Way to Paint Furniture (Vintage Vanity Makeover)
How to Paint Furniture without Brush Marks
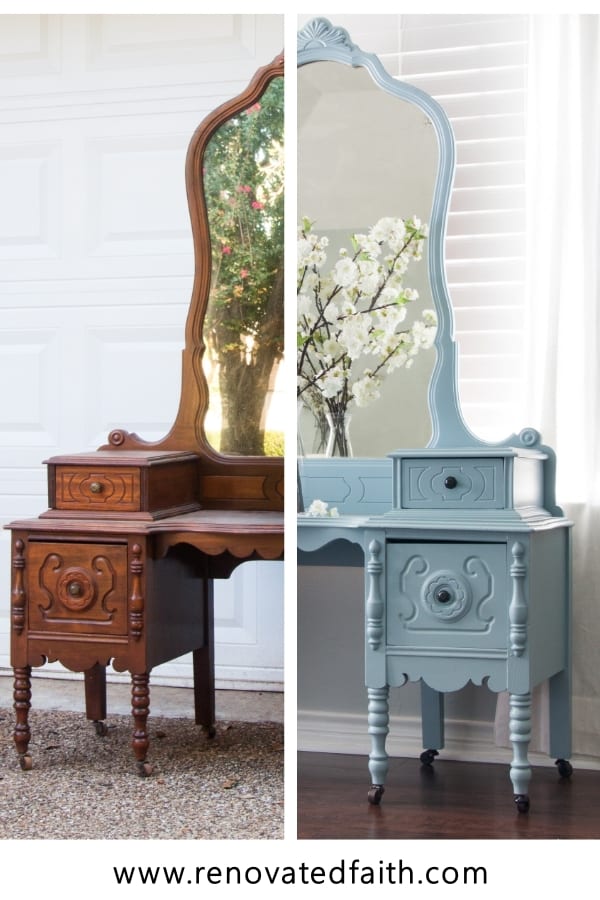
Wondering how to paint furniture without brush marks? I’ll show you the hands-down best way to paint furniture so it lasts and looks stunning!
Whether you are updating a family heirloom or restoring a roadside rescue, you want to make sure your furniture piece will last for years to come by updating it the right way. There are lots of products on the market that promise a durable finish but only certain ones can really deliver on that promise. And they won’t cost you an arm and a leg!
In this post, I will share with you all of my tried and true furniture painting tips and tricks and use the form at the bottom of the post for a free checklist! Hopefully, this process will save you from some of the mistakes I have made throughout the years, saving you time and money.
More importantly, these simple steps will help you make over your furniture piece so that it’s even more beautiful and durable than the day it came off the factory floor.
This is a great post for you if you:
- Are brand new to furniture refinishing and need detailed instructions
- Want to know how to update a family heirloom like my vintage vanity
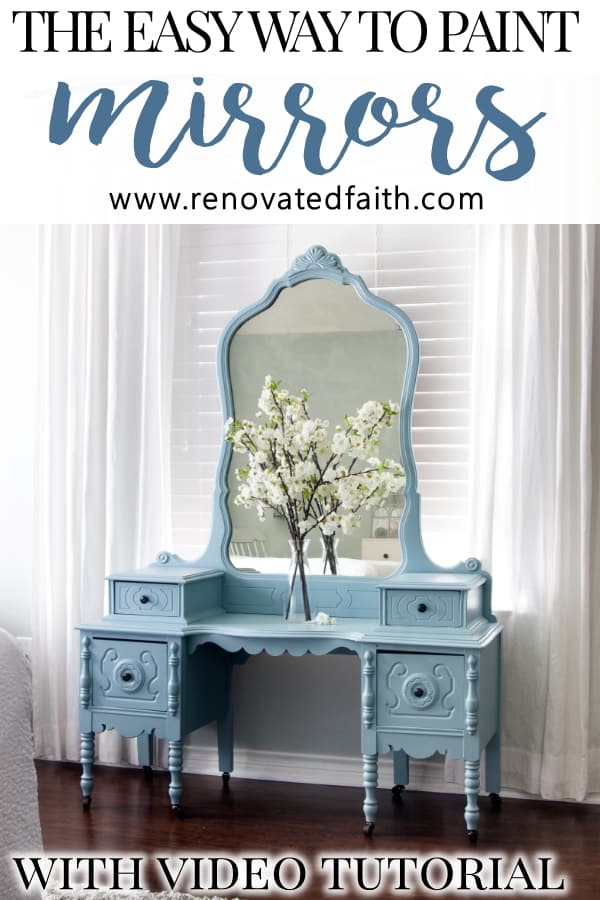
- Need the best tips for quickly and easily painting a curvy mirror
- Want to know the best products and brushes for furniture refinishing that won’t break your budget!
Quick Links to Information in this Post
- 1 How to Paint Furniture without Brush Marks
- 2 What is the Best Way to Paint Furniture?
- 3 The Best Way to Paint Furniture – Supplies Needed:
- 4 How to Paint Furniture Without Strokes: A Step-By-Step Tutorial
- 5 RENOVATE YOUR FAITH: God’s Handiwork
- 6 FAQ’s: How Do You Paint Furniture Without Leaving Brushstrokes?
- 7 The Best Way to Paint Furniture Without Brush Strokes – Related Posts:
- 8 The Best Way to Paint Furniture (Vintage Vanity Makeover): YouTube Video
- 9 Final Thoughts on How to Paint Furniture Without Brush Marks
- 10 The Best Way to Paint Furniture (Vintage Vanity Makeover)
What is the Best Way to Paint Furniture?
While there is more than one way to paint furniture, if you want to paint furniture in a way that gives it a smoother finish on a budget, you are in the right place. This process does require some prep work but I show you how to do it in the fastest easiest way possible. After testing 24 top brands of furniture paint, I know the best paints to use that won’t break your budget.
Redoing a furniture piece means more than making it look great for that “After” pic. Whether you are refinishing a priceless family heirloom or a thrift store find, I’ll show you how to give old furniture new life so it lasts for decades to come!
Related: The Best Paint for Furniture | Why I Don’t Use Chalky Paint on Furniture | How to Sand Furniture in Less Than 5 Minutes!
Vintage Vanity Makeover – Why This Piece is So Special
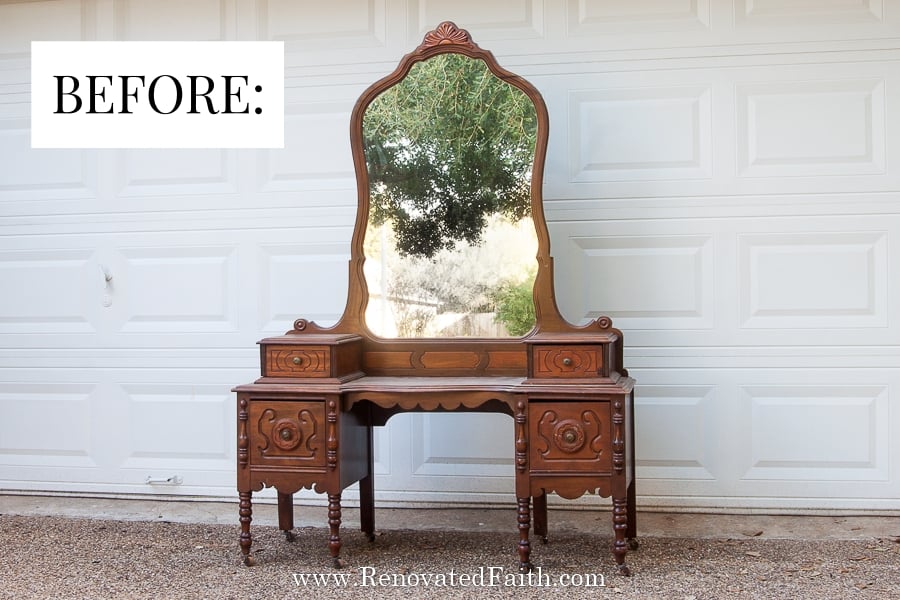
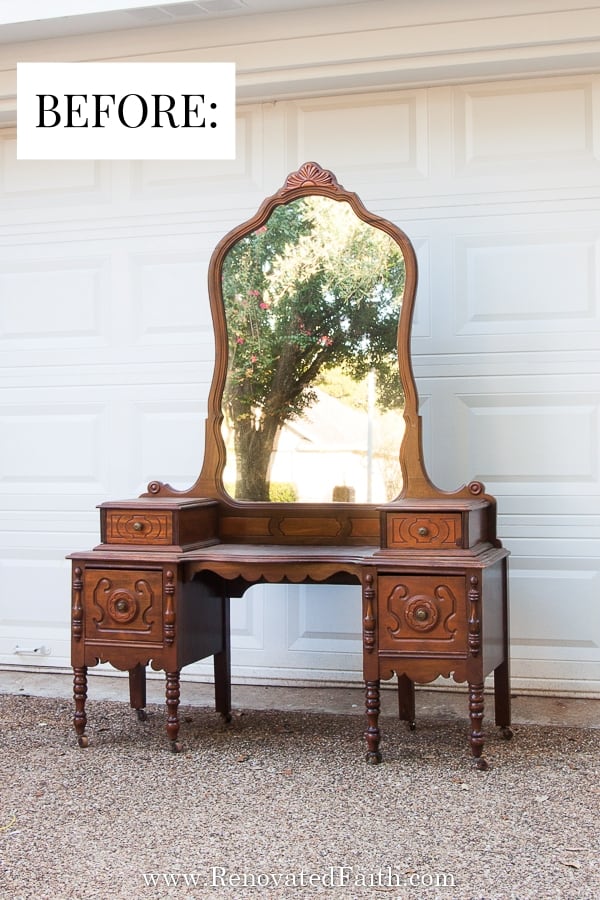
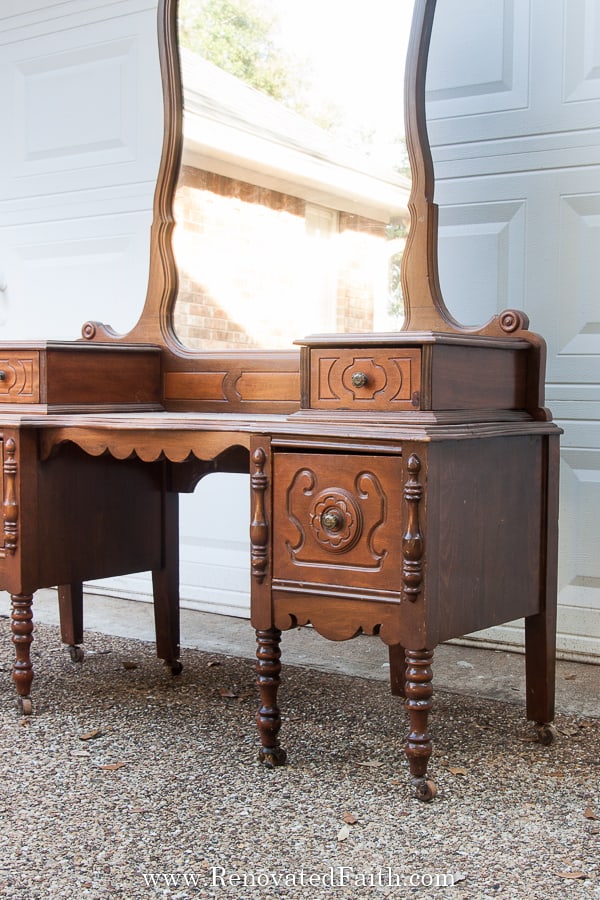
A couple of months ago, my uncle drove down three pieces of furniture in a U-Haul van all the way from New Mexico to Central Texas. These furniture pieces included this vanity, a tallboy dresser, and a small china hutch – all of which belonged to my grandparents in their house in Beaumont, Texas.
They had been in storage for decades and when I learned about them, I knew I had to get my hands on these beauties!
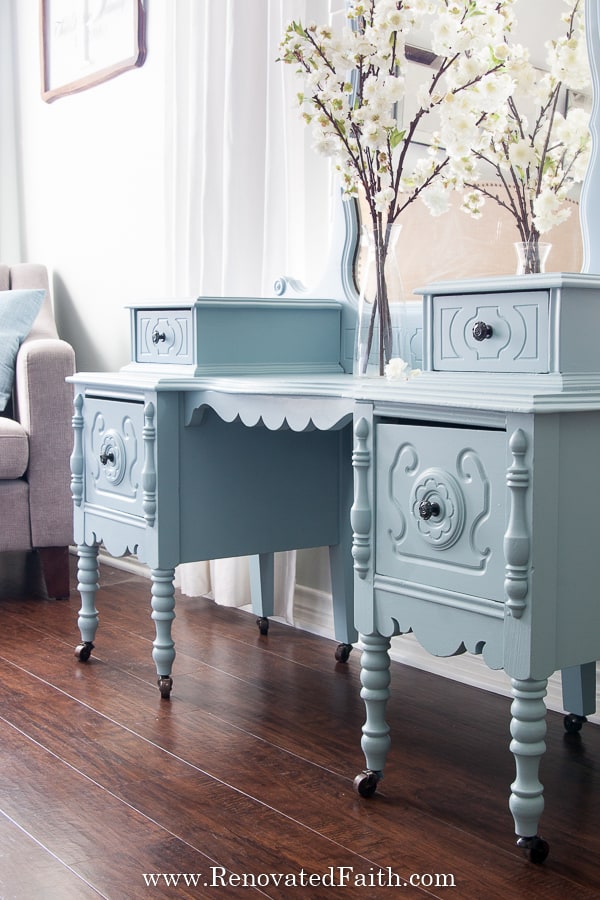
All three pieces are stunning, each with long spindle-y legs and gorgeous details. But more importantly, they have immeasurable sentimental value.
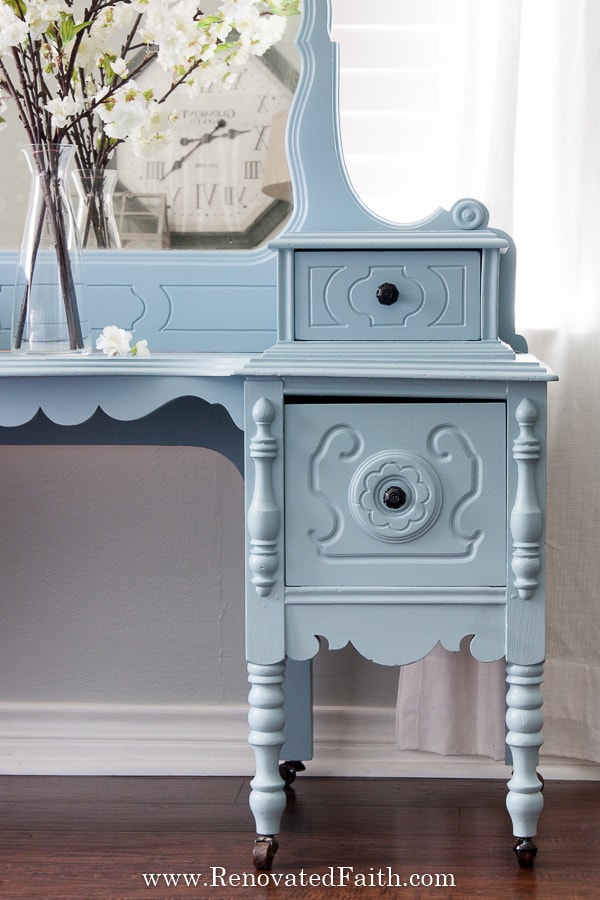
This vanity in particular is special to me because my grandfather is the one that used it. He and I had a strong relationship and were absolutely inseparable! He would get home from his job at the refinery and put his keys and wallet (he called it a ‘billfold’) in the top right drawer of the vanity. I remember going over to their house and sitting at it as I pretended to put makeover on.
My mom would sit at it when she was little and do the exact same. She also remembers running her fingers along the scroll details in the drawers.
What an amazing opportunity that presented itself when my uncle said he would drive all three furniture pieces down to Texas! THANK YOU, UNCLE DON!
The Best Way to Paint Furniture – Supplies Needed:
IMPORTANT STEP: Does your furniture piece have any damage like deep scratches, gaps, or chipped drawers? Check out this post for an easy fix: The Ultimate Guide to Fixing Wood Furniture Before Refinishing
For my top tips on installing hardware and filling old holes, be sure to visit this post: How to Install Hardware Handles and Knobs (The Easy Way!)
How to Paint Furniture Without Strokes: A Step-By-Step Tutorial
Here is a full step-by-step video showing you the process from start to finish:
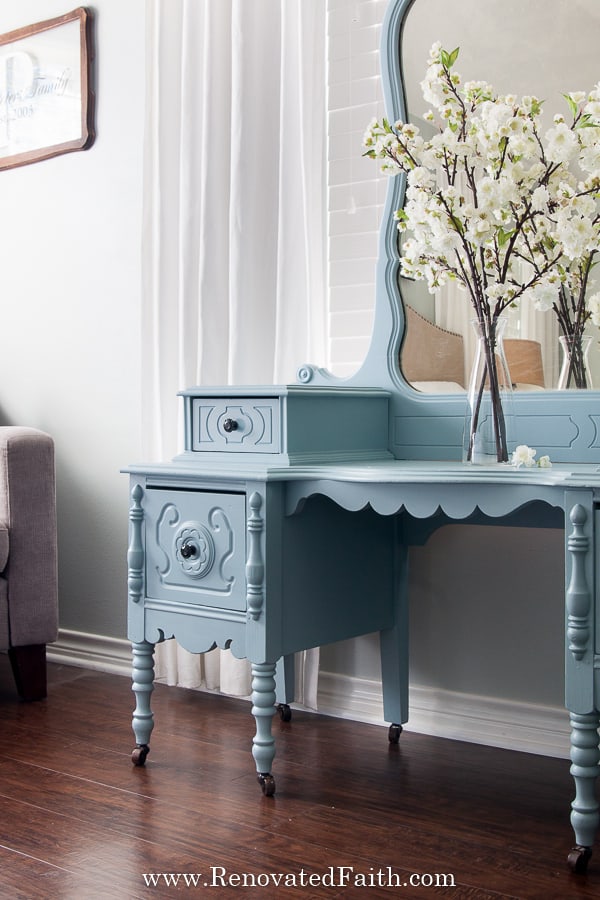
Because of the exquisite accents and milled legs on this piece, I wanted the color to live up to its beautiful detail. I love the look of old-world furniture but you don’t have to be an expert at painting furniture to achieve that look. BUT you do have to have a plan!
As with any DIY project, I recommend you look online so you can know exactly what you want your piece to look like when it’s done.
This makes the entire process easier because it rules out any guesswork. When you aren’t sure what color to paint the hardware or maybe what sheen of paint, you just look at your image. Here are a few ideas to get you started:
Furniture Restoration Ideas
Want to “Stain” Over the Old Stain without Stripping?
Another option for redoing your furniture piece is to stain it. But staining using involves stripping off the old finish with a furniture stripper. However, this post will show you several options for faux stains with paint: The Easy Way To Stain Furniture With Latex Paint You can even do a faux driftwood, Restoration Hardware or raw wood finish
To paint your furniture piece a solid color, continue with the rest of the tutorial below.
Step 1: How to Prep Furniture Before Painting
Stop! Before you do anything…take a before pic. When you are done, post the before and after pics here, so I can see the amazing work you’ve done! ❤️
First things first. Always, always start by sanding your piece. Some people will tell you that you don’t have to sand but you don’t want to risk having to completely refinish your whole piece later on only because you didn’t spend 5 minutes sanding the first time around.

Also, as I mention in my post How to Sand Furniture in 5 Minutes, you are not sanding off the old paint or stain. You are just merely roughing up the surface so that it is not as slick. Paint does not stick well to slick surfaces so you are giving the paint something to stick to.
Use a higher grit (60-80) sandpaper for this first sanding, I like to use my electric sander. If you can use an iron, I promise you can use an electric sander and it’s much more fun! Trust me, it’s amazing and you can see my favorites here – The Best Sander for Furniture.
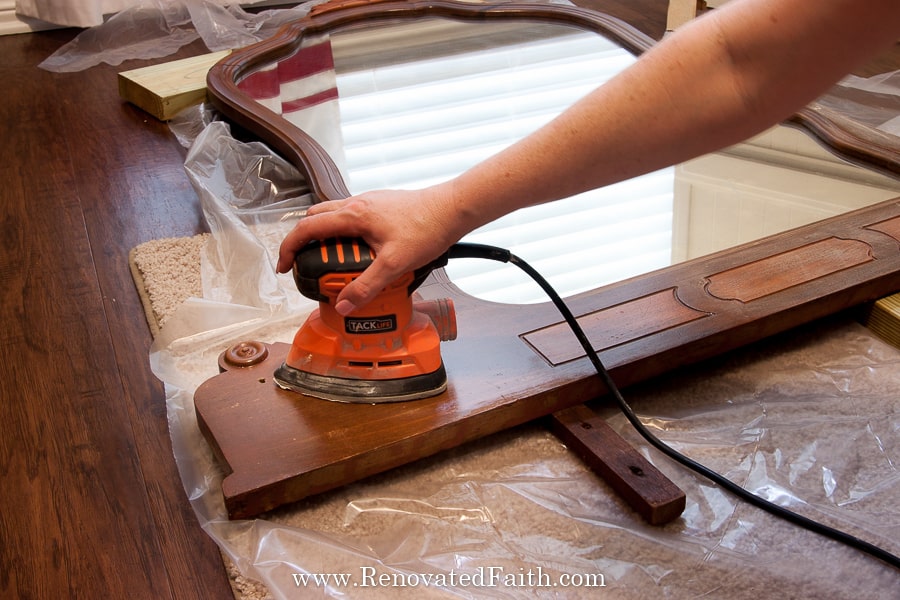
Just run the sander over the surface as you see in the video. Parts of the mirror were pretty curvy so I just barely went over them with a piece of sandpaper.
Now that you have sanded, you can wipe off the sanding dust with a damp rag. I like to use baby wipes for this because they are so convenient!
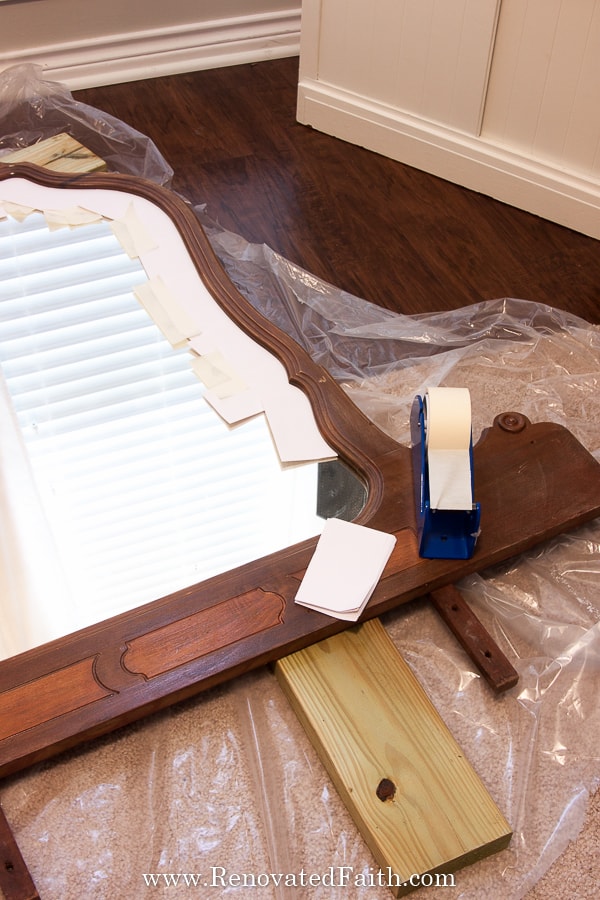
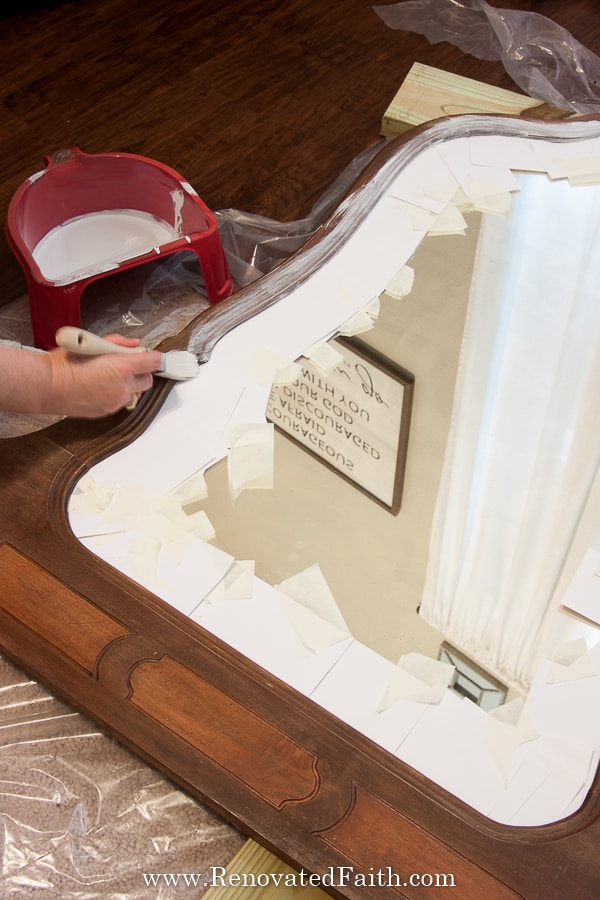
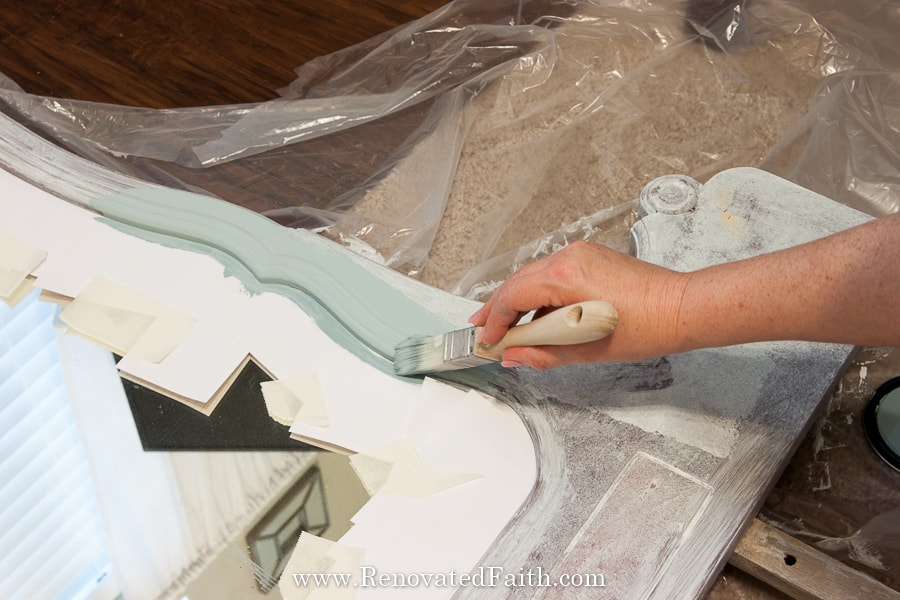
How to Prep the Vanity Mirror for Primer and Paint
To avoid getting paint on the vanity mirror, I used index cards and tucked them under the edges, and added painter’s tape just to keep them in place. I didn’t use painter’s tape on the edge of the mirror because it can be really time-consuming and frustrating to apply on a curved edge. You can see exactly how I used the index cards as a paint guard in the video.
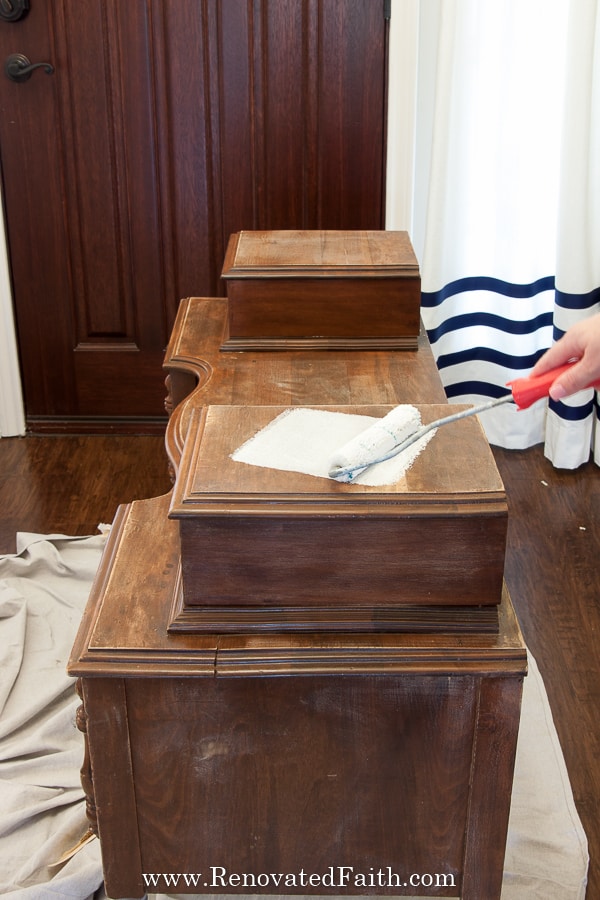
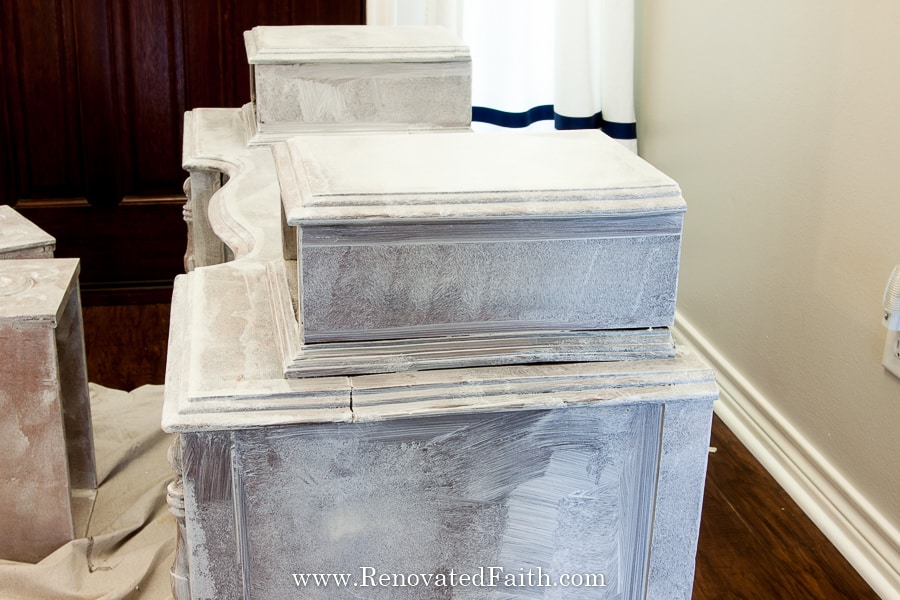
Step 2: How to Prime Furniture So It Never Peels
Now that you have sanded, you can brush on some primer. This will be sure to block any stains that might otherwise soak through your paint. Also, it helps the paint adhere well to the piece. Remember, primer sticks to things, and paint sticks to primer. If you don’t prime, you will have to do an extra coat of paint anyway to get enough coverage – so it’s not really any extra work.
The primer I used for my vintage vanity makeover is Zinsser Bullseye 123. It is water-based so it isn’t very messy, settles out well for a smooth surface and there are very few fumes.
Zibra brushes (see the current price here) are my favorite paint brushes they hold a lot of paint without getting gloppy. You can also get a cheaper set of brushes here that work well also.
TIP: If your final paint color is dark, have your primer tinted a color slightly lighter than your paint. This will give you better coverage and save you from having to paint on an extra coat of your latex paint. Just ask the person at the paint counter for help.
Step 3: How to Repair Furniture So It Looks LIke New
TIP: You might be wondering why we primed first before making repairs. That’s because the white color of the primer brings to light any irregularities with the surface. It literally highlights any holes that need to be filled or cracks that can be caulked later.


Sometimes after getting furniture home, you realize it needs a little more help than you previously thought. But don’t let that discourage you!
Most of the time you can easily fix structural issues. Don’t let repairs deter you from refinishing a piece you love.
Because my vanity looks like it might have sustained some water damage, the entire frame was loose and coming apart. Fortunately, it was nothing a few metal brackets couldn’t handle. I just screwed them into the bottom where joints were loose to tighten everything up. You can see how I do this in the video.
Most of the time, you won’t have to go to these lengths to fix furniture but I wanted to mention what I did in case your piece needs some extra love! If you have different issues with your piece and need some advice on how to repair it, just ask me in the comments below.
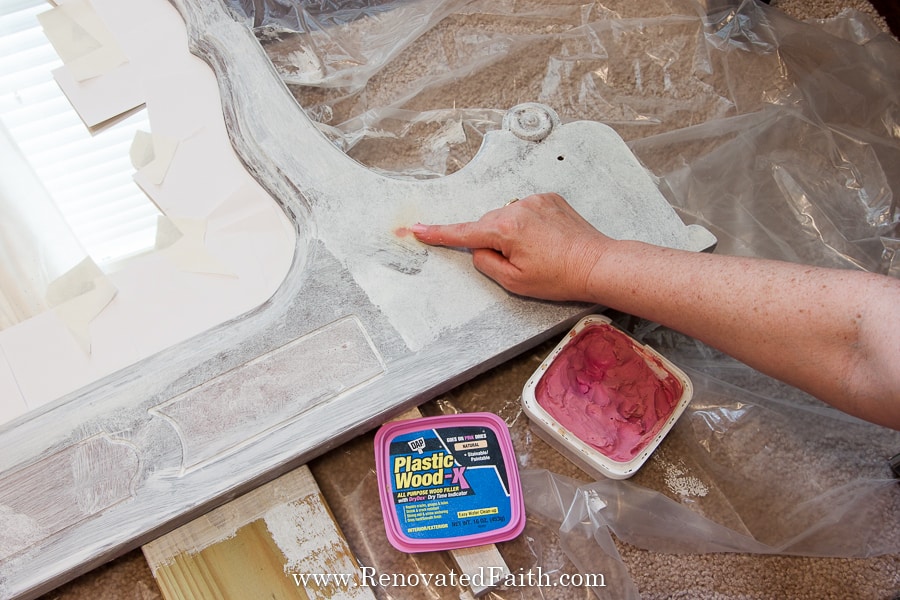
How to Refinish wood Furniture That’s Cracked
There was also an area where the top was cracked. It was structurally stable but the crack was very noticeable.
So, I just used some wood filler to fill those areas, applying it so it was a little higher than the surface of my piece. I let it dry and sanded it level at the same time I sanded the rest of the piece. You can see what I did in the video.
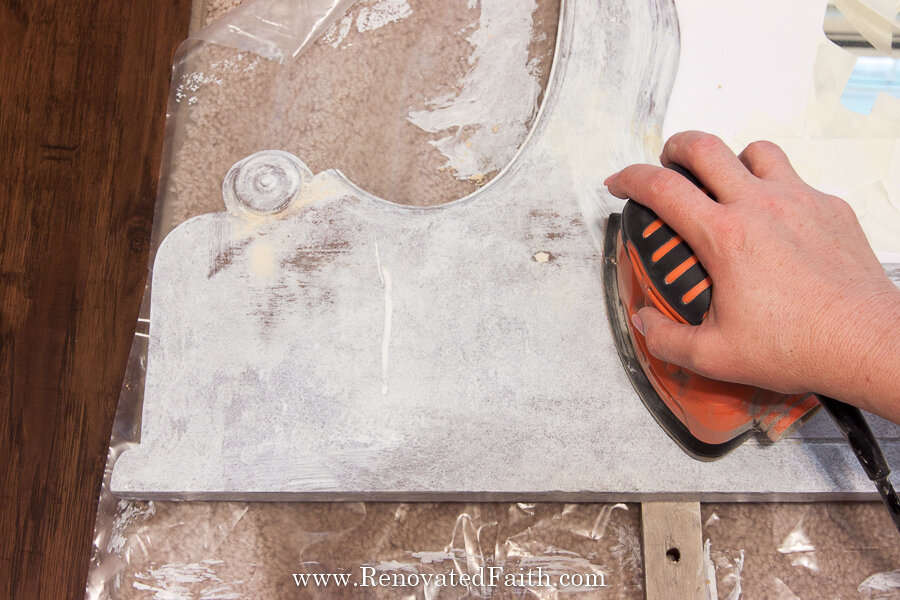
Step 4: LIGHTLY Sand Again for a Super Smooth Finish
Now you want to take a second to sand over the primer and any places you have used wood filler with a higher grit sanding pad (200+). This will only take a couple of minutes and will give you a finish so smooth it looks sprayed-on. Sand over the flat surfaces very lightly (don’t worry about the curvier parts & molding).
On areas that you filled with wood filler, take this time to sand those flat with your high-grit sanding pad. As you can see in the video, rub your finger along the filled area to make sure you are not sanding off too much filler. Once you are done, wipe down your vanity with a damp cloth or baby wipe to remove any dust.
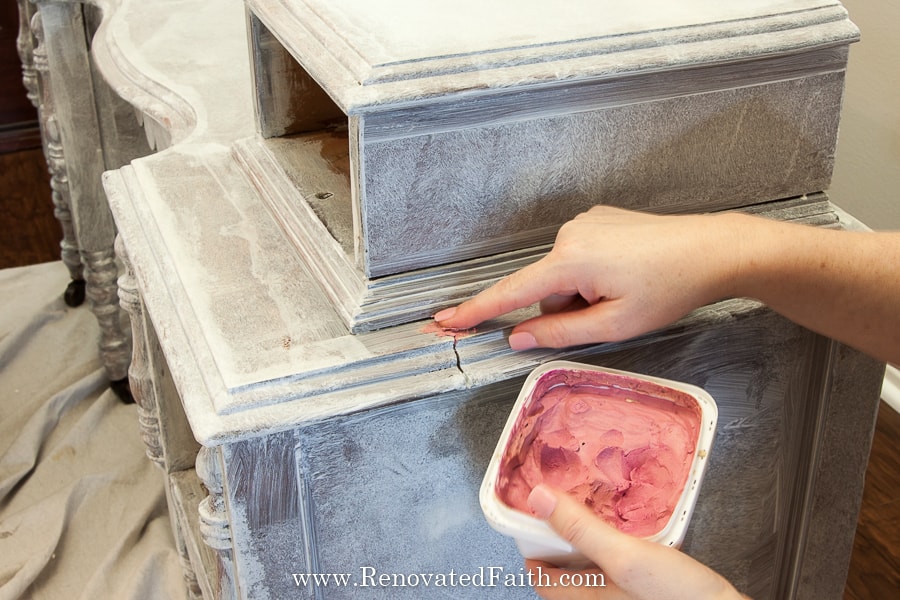
Step 5: How to Caulk Furniture To Fill SEams (OPtional)
My vintage vanity had lots of seams coming apart and cracks so after my first coat, I caulked those long gaps with white caulk. Caulking is entirely optional but it makes a HUGE difference in the final look of the piece. Whenever you caulk furniture, you want to have two things on hand at all times: 1) baby wipes and 2) a trash can.
Apply your white caulk to the crack in one long bead. It’s ok if your caulk is messy when it goes on – you are going to wipe most of it off anyway! You can see exactly how I do this in the video.
After applying it, moisten your index finger with a baby wipe and then smooth the caulk out. Wipe any excess on the wipe and put the wipe in the trash. (If you get distracted and throw the wipe on the floor, you might have dried caulk on your floor the next day – which is a nightmare to get up. Ask me how I know!)
As you can see in the video, keep smoothing and wiping off your finger until the caulk just fills in that crack. Let it dry overnight and you are ready for your final coat!

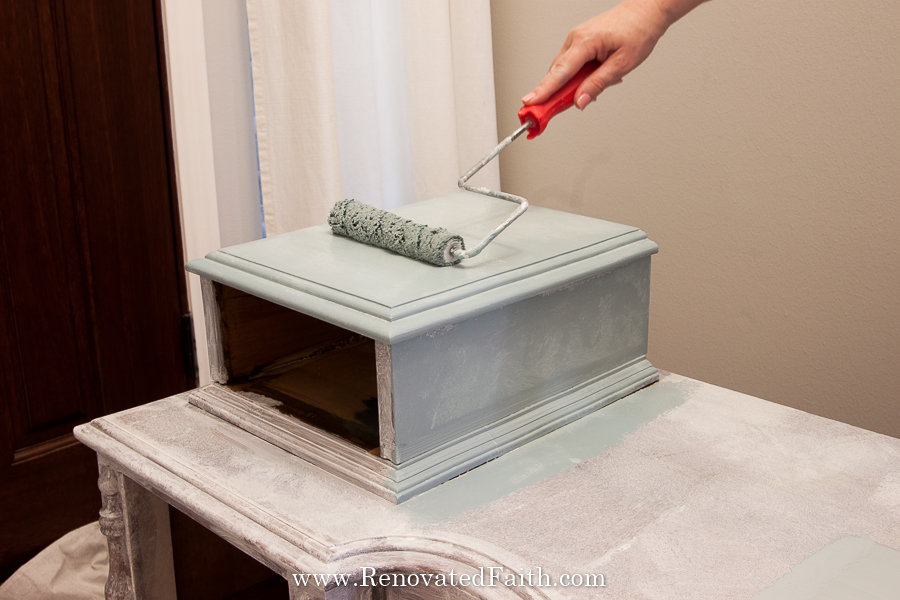
Step 6: How to Paint Furniture without Brush Marks
Now it’s time to paint! As I mentioned in my post the Best Paint for Furniture, I Benjamin Moore Advance. It is a water-based paint but has a lot of the properties of oil-based, meaning it does not leave brush marks and is super durable! Also, the satin sheet looks just like chalk paint if you like that look!
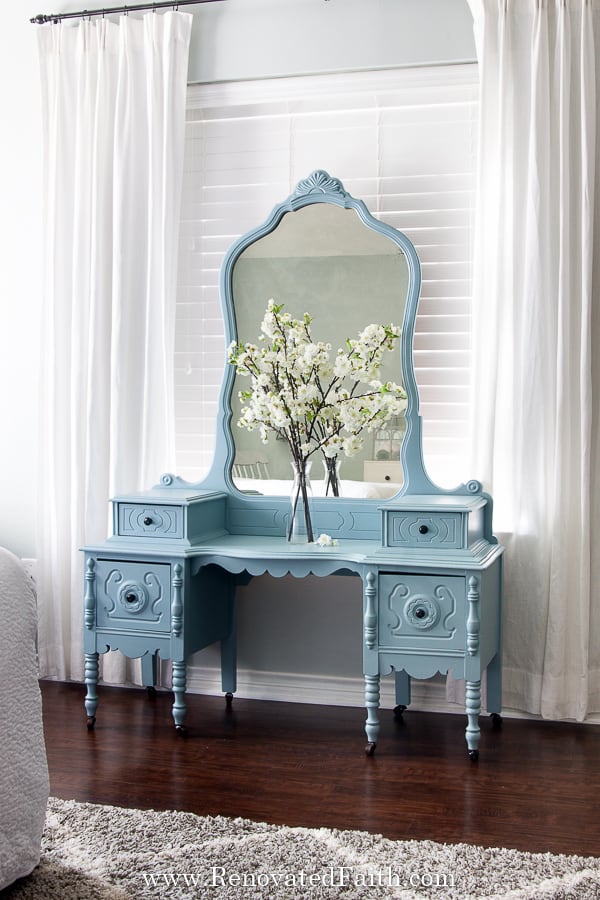
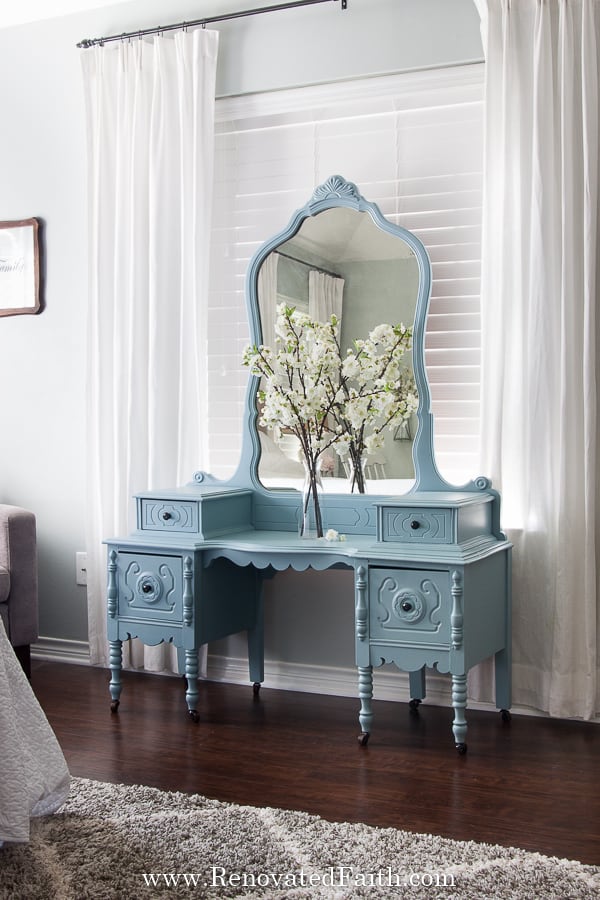
The Best Light Blue Paint for Furniture: Sherwin Williams Meditative
If you have followed the blog for any amount of time, you’ll know that I have an obsession with painting things blue, whether a desk, china cabinet, or pumpkins!
UPDATE: Since writing this post, I did a lot of testing to find out that Benjamin Moore Advance is actually the best furniture paint (The Absolute Best Paints for Furniture) but you can always have your Benjamin Moore paint color matched to Sherwin Williams colors. They have them in their computer!
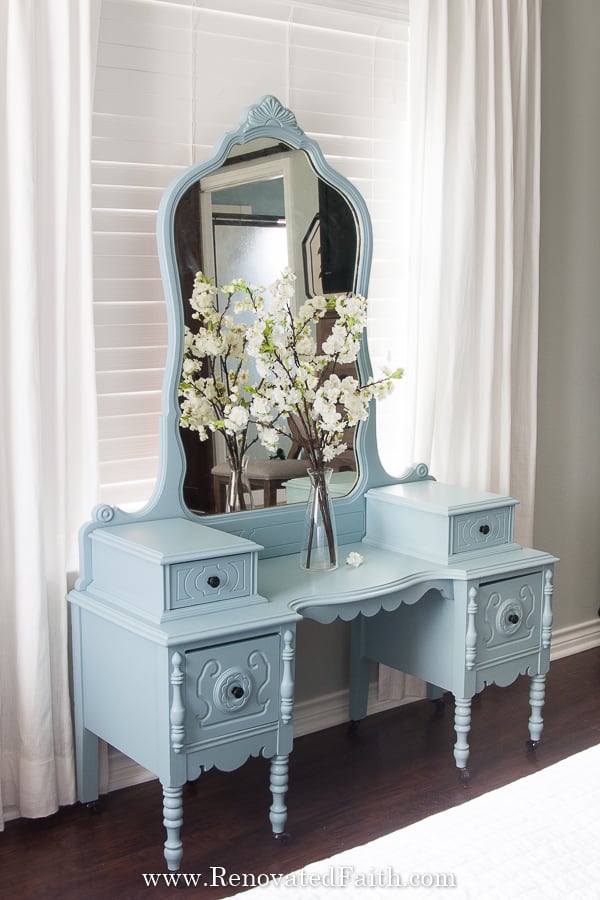
But after much deliberation, I’ve finally found the perfect light blue for furniture. Sherwin Williams Meditative is a cool blue that isn’t very bright but saturated enough that it doesn’t look gray. I absolutely love it and it plays nicely with the Sherwin Williams Silver Strand on our master bedroom walls.
I like to apply my paint, first with a roller (as you see in the video) and then I like to catch any details that the roller may have missed with my 1-inch Zibra brush (check the current price here).
You might need a second coat depending on how dark your piece was before you started and how light your paint is. I could have gotten away with one coat for my vintage vanity makeover, but I decided that since this was such a special piece, I wanted to give it two coats to give it extra protection.
Does Furniture Need a Clear Coat?
If you are using a high-end paint, you shouldn’t need a top coat for extra protection. However, if you are refinishing a heavy-use piece of furniture that gets a lot of wear, you might consider it, By heavy use, I mean coffee tables, kitchen tables, etc.
After testing the best clear coats to keep your furniture in good shape, I like to use Varathane Water-based Polyurethane (Click here to see the current price.) The satin finish is slightly more protective but you can find the matte finish here: Varathane WaterBased Clear Coat in Matte
For a smooth paint finish, don’t sand before applying the clear coat even though the instructions on the can might say to. Just brush on the top coat in thin layers with a foam brush.
Step 7: How to Refinish Furniture Hardware
I like to spray paint most of my hardware instead of cleaning it. My favorite brand is Rustoleum Universal Metallics. You can use it on just about any material and it’s will protect your finish long-term. I used oil rubbed bronze and just sprayed on a light coat every 15-20 minutes or so until I got full coverage. You can see how I spray the knobs in the video.
After allowing the knobs to dry for 48 hours, I added them back to the drawers. I also attached the mirror to the back with new screws.
DON’T FORGET TO TAKE A PICTURE!
Now that you are done, I’d love to see how it turned out! ❤️ Post your before and after photos here!
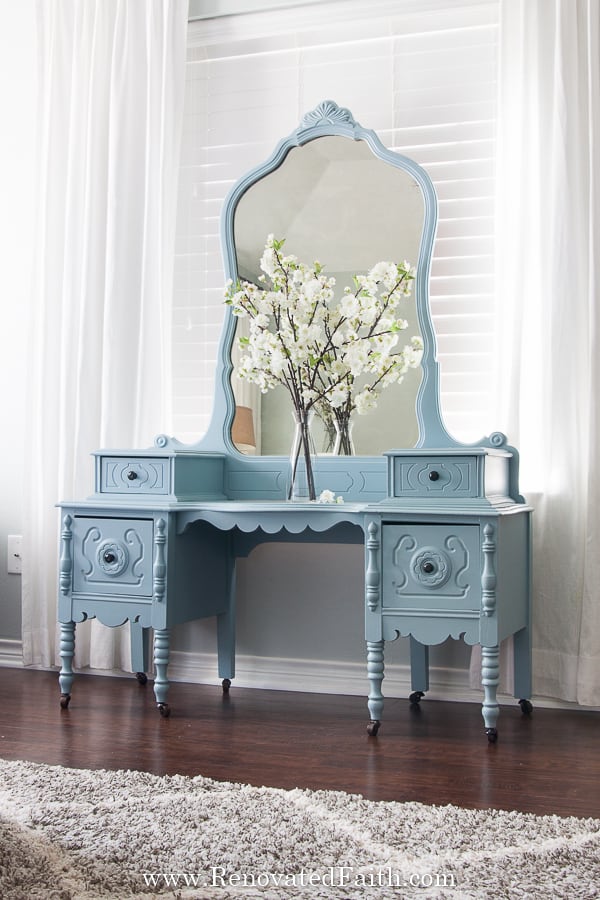
Here’s how the vanity turned out! What a transformation. I think it would make my grandparents proud! What do you think!?!

To see the full bedroom transformation, check out my post here: Master Bedroom Makeover in Sherwin Williams Silver Strand.
Vintage Vanity Accessories
If you want to add to the look of your vintage vanity makeover, you can add some of the accessories below:
Vintage Vanity Brush and Mirror Set
Makeup Mirrors with a Light
Vintage Vanity Stool
Makeup Organizer
Vintage Vanity Tray Set
RENOVATE YOUR FAITH: God’s Handiwork
Every time I refinish a piece of furniture, I am reminded of the makeover God does in the life of every single one of His children regularly.
From the time that I asked Him to forgive me of my sin and come into my life, He set a process in motion in which He has been intimately involved. This process is called redemption, where He uses my brokenness to transform me and teach me to depend on Him.
He realized I was damaged and deeply in need of repair. But my broken and tarnished state didn’t discourage Him. On the contrary, He sought me out, already fully aware of what my transformation had cost Him.
So, He cleaned me off, and braced me with His own strength, making me far stronger than I could have ever been on my own.
My Heavenly Father realized I had some rough edges that needed sanding. While not always pleasant, He peeled away things in my life that tried to fill His place, showing me how He could smooth my worries and calm my anxieties with a peace that comes only from Him.
He prepped and primed me for what was ahead, always going before me in every trial I would endure, while simultaneously walking beside me during the entire process.
Just like pouring a fresh coat of clean white paint on an antique, He covered my sin with the sacrifice of His only Son.
Like pulling a broken piece of furniture out of a trash heap, He rescues us, mends our broken places, and transforms our lives to have a new beauty and purpose that would have never been possible apart from His grace.
“For we are God’s handiwork, created in Christ Jesus to do good works, which God prepared in advance for us to do.” Ephesians 2:10
For more spiritual encouragement, click here for the rest of my Renovate Your Faith Posts.
Free Must-Have Painting Tips for Furniture!
Get the password for the library with the free pattern and SVG files here by filling out this form:
FAQ’s: How Do You Paint Furniture Without Leaving Brushstrokes?
How do you paint furniture without paint marks? How do you get the smoothest finish when painting furniture?
The first thing to consider when trying to prevent brush marks when painting wood is using a good paint that levels well AND also using the right brush. Cheap paint is usually chalky and will always leave tons of brush strokes in the finish.
What’s the best type of brush for furniture?
You also need a good brush that minimizes paint strokes. My favorite brush is the Zinnser brush (Check the options here!) which gives you a good quality finish without the extra cost of most professional paint brushes. It’s a great option even though it is has synthetic bristles. Most quality paint brushes have natural bristes but the Zinnser paint brush combined with the right paint will give you better results every time.
How to Remove Brush Strokes from Painted Furniture
It’s inevitable that you will get a few brush marks on your furniture project. If you noticed brush strokes in the finish, do not touch it. Let it dry completely according to the drying time on your paint can.
Once it is completely dry, very lightly sand that area without using much pressure. Then wipe off the sanding dust. The next step is to brush or roll on a thin coat of paint in the direction of the wood grain. This won’t take much paint so wipe off any excess paint from the tip of the brush or roller. Let the new paint dry and you’ll have a super smooth paint finish without brush marks.
Should you use a paint additive to eliminate brush strokes?
I used to use Floetrol on water-based latex paints to extend the drying time and help the paint finish to dry smoother. However, after testing paints and using Benjamin Moore Advance, there was no need to use an additive because I could get the same smooth finish and skip the extra finish. If you decide to use an additive, it’s a good idea to use the type recommended for your paint. Furniture paints are either water-based, oil-based or hybrids and you want to use the correct additive so you don’t ruin your paint.
What kind of paint do you use on wood furniture? What is the best paint for upcycling furniture? furniture paint
There is more than one type of paint to use on furniture. Options include chalk paint, mineral paint, milk paint and latex paint which makes deciding on the best paint about as clear as mud. Fortunately, I have done the hard work for you and have blind-tested 24 furniture paints: Testing the Best Furniture Paints. Also, here’s an explanation on the different types of paints (click here).
What I found was that Benjamin Moore Advance surpassed the competition in several categories. Latex paints have come a LONG way and this is actually an oil-based / water-based hybrid paint that has the positives of both but none of the negatives!
Is chalk paint better for furniture?
Chalk paint has been very popular but I’ve found that while it is one of the most expensive options, it will give you some of the worst results. Because of it’s thick chalky consistency, it leaves tons of brush strokes. Also, it takes the same number of coats of paint as any other paint brand. Overall, it doesn’t give you a smooth finish but it is great for distressing furniture. Here are some more reasons I steer clear from chalk paint: 7 Reasons I Don’t Use Chalk Paint on Furniture
How do you paint furniture like a pro on a budget?
You don’t have to be an expert in professional furniture painting did get a professional paint finish on old furniture. With a little bit of prep work like a light sanding and painting on a coat of primer, you can get a gorgeous smooth finish on every one of your painting projects. I’ve used this same process in all of my furniture makeovers and have gotten the best results without taking a long time.
How to Paint Furniture Without Sanding
The main reason we scuff sand furniture is to help the first coat of primer and paint adhere to the surface. If your piece is in pretty good condition, doesn’t get lots of everyday use or doesn’t have a glossy finish, you can get away with using a deglosser instead of doing a light sanding. But to get the best finish that will last a long time, I recommend scuff sanding with medium or fine grit sandpaper over the entire piece. To see how little effort it takes to sand furniture, click here: How to Sand Furniture in 5 Minutes or Less
The Best Way to Paint Furniture Without Brush Strokes – Related Posts:
The Absolute Best Paint for Furniture (24 Brands Blind Tested & Reviewed)
How to Paint Wrought Iron Furniture With Spray Paint
How to Paint Cabinets without Brush Strokes
What To Know Before Refinishing Furniture (The ONLY Tutorial You’ll Ever Need!)
Benjamin Moore Hale Navy Dresser Reveal – How to Paint a Dresser
How to Build a Farmhouse Kitchen Table
The Best Tips for Painting Furniture White
The Ultimate Guide to The Best Paint Shades for White Furniture and Cabinets
How to Transform Acrylic Paint into Fabric Paint
Master Bedroom Reveal in Sherwin Williams Silver Strand
Best Spray Painting Tips (Free Checklist!)
How to Sand Furniture in 5 Minutes
Why I Don’t Use Chalk Paint on Furniture
The Best Paint for Furniture – Chalk Paint vs. Milk Paint vs. Latex
How to Fix Damaged Wood Furniture (The Ultimate Guide)
The Easiest Way To Add Ribbon To a Christmas Tree (The Ultimate Guide!)
How to Add Legs to Furniture Pieces (The Easy Way!)
The Best Way to Paint Furniture (Vintage Vanity Makeover): YouTube Video
Final Thoughts on How to Paint Furniture Without Brush Marks
It’s truly amazing what a fresh coat of paint can accomplish to give furniture new life! Because of your hard work on its paint job, your furniture won’t just have a smoother finish but will last a long time!
This vintage vanity makeover goes to prove that any piece of furniture, no matter how damaged or worn can be restored and refinished. Using the right products and these easy tips, you can update furniture so it not only has the best finish possible but lasts for years to come!

I love to hear your thoughts and questions! Scroll down to leave a comment and I WILL reply! ❤️
Blessings,

Be sure to follow the fun here!
Email Subscription | Instagram | Pinterest | Facebook | Twitter

The Best Way to Paint Furniture (Vintage Vanity Makeover)

Karin Peters is a DIY expert and the creator of Renovated Faith. She is a furniture painter, a home design consultant, and a tenacious problem solver determined to help you transform your house into a home. With 17 years of experience with DIY home improvement, she researches and analyses professional processes to adapt them to be easy and cost-effective for DIYers. She then tests every project and product before it appears on the site in a detailed, step-by-step format. After attending Texas A&M University, she received her Master of Divinity with Biblical Languages at Southwestern Baptist Theology Seminary. Her passions unite in Renovated Faith, which shows readers how to create a home that serves them so they can pursue their God-given purposes. About Renovated Faith | Editorial Policy | Facebook | Twitter | LinkedIn
39 Comments