Easy DIY Orchid Arrangement (For Less Than $50)
Create an easy diy orchid arrangement that will cost you less than $50 but look like it came from a high-end boutique.
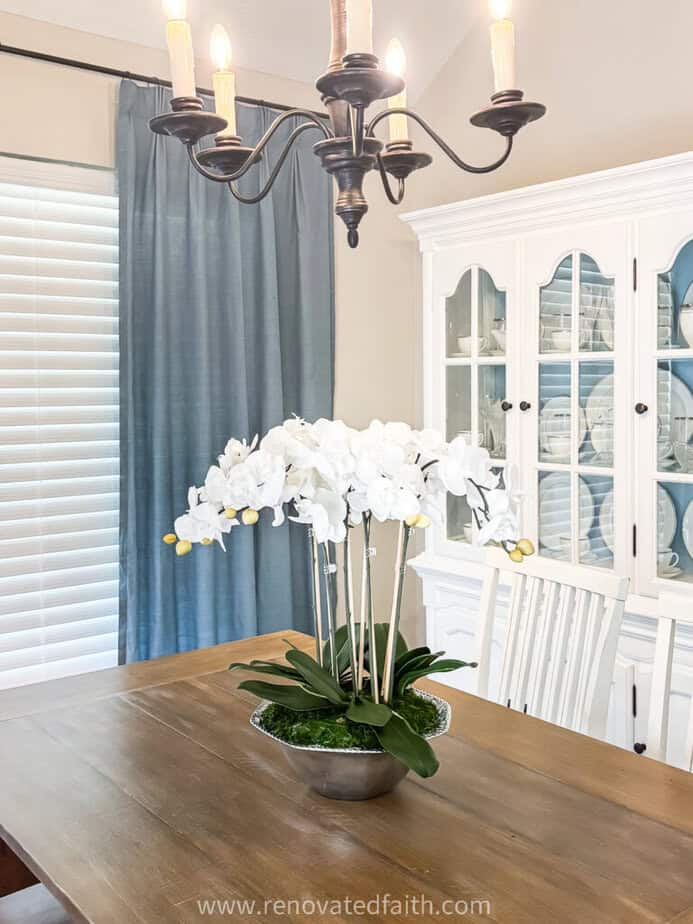
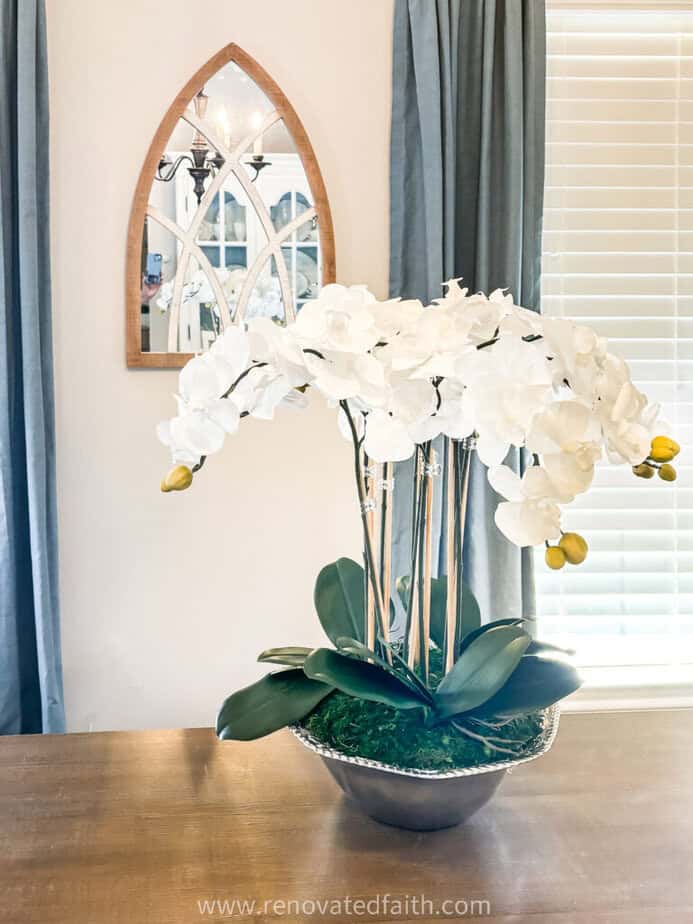
After admiring so many beautiful orchid arrangements online, I decided I wanted one of my own for my dining room table. But when I looked at the actual cost of one, I was stunned that most of the large orchid bowls usually run in the $200-$400 range.
I decided that there HAD to be a better way so I found low-cost faux orchid stems that looked like the real thing, along with all the other supplies. When my orchid centerpiece came together, I was so impressed that such a stunning arrangement cost me less than $50!
And if you are a beginner, know that this is a super easy tutorial, and I walk with you through every single step of this simple tutorial!
(As an Amazon affiliate I earn from qualifying purchases. Please see my full disclosure HERE).
Quick Links to Information in this Post
Supplies Needed for a Large Faux Orchid Arrangement
Bowl or Planter – I used a silver bowl I had, but here are some other low-cost options: Sienna Planter | Arcadia Planter | Silver Pedestal Bowl
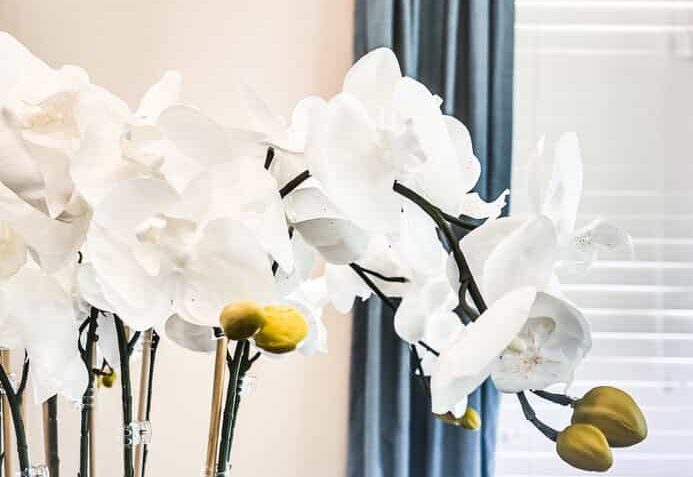
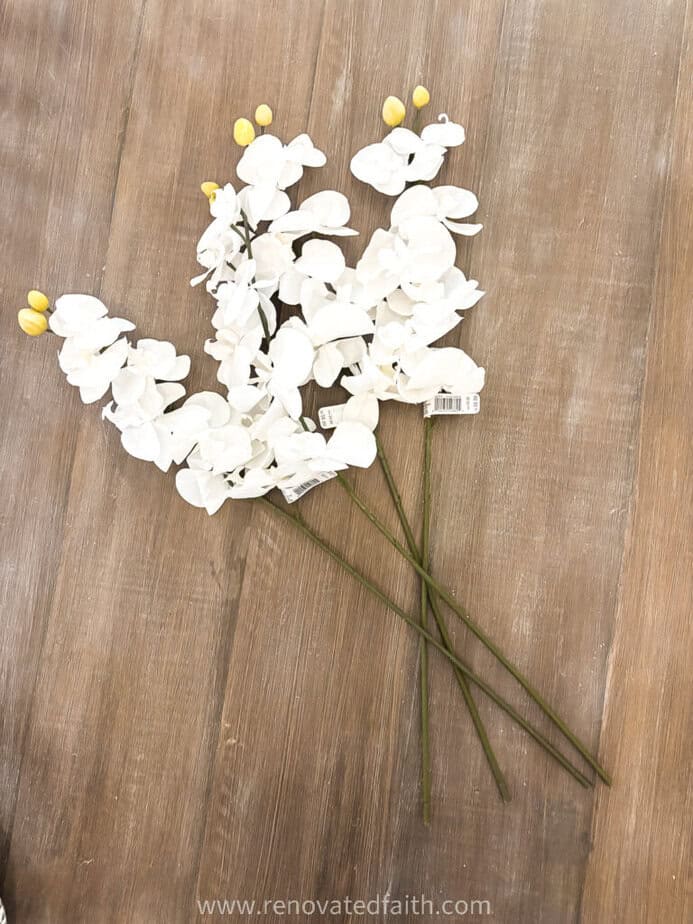
Orchid Stems – After scouring the interwebs, the cheapest AND most realistic orchid stems I found are these Ashland Orchid Stems on sale for $3.49 each. Amazon also has some good options: Orchid Stems on Amazon You need 6 stems to make your arrangement look full enough. I used 8 in mine.
Orchid Leaves: I got these but you can find some cheaper options HERE.
1/4 inch Dow Rods: I got mine at Michaels, but they are also at Hobby Lobby or any big box store. Get one for each orchid stem in your arrangement.
Orchid Centerpiece Ideas
Before you get started, check out some diy orchid arrangement ideas on Pinterest here. Be sure to find a couple images of orchid bowls you love.
These will be important to keep on hand as you put together your orchid wreath. Having a visual goal in front of you is the key to getting the exact look you want! (Shameless Plug: And while you’re there, check out Renovated Faith’s Pinterest Page.)
How To Make A DIY Orchid Arrangement
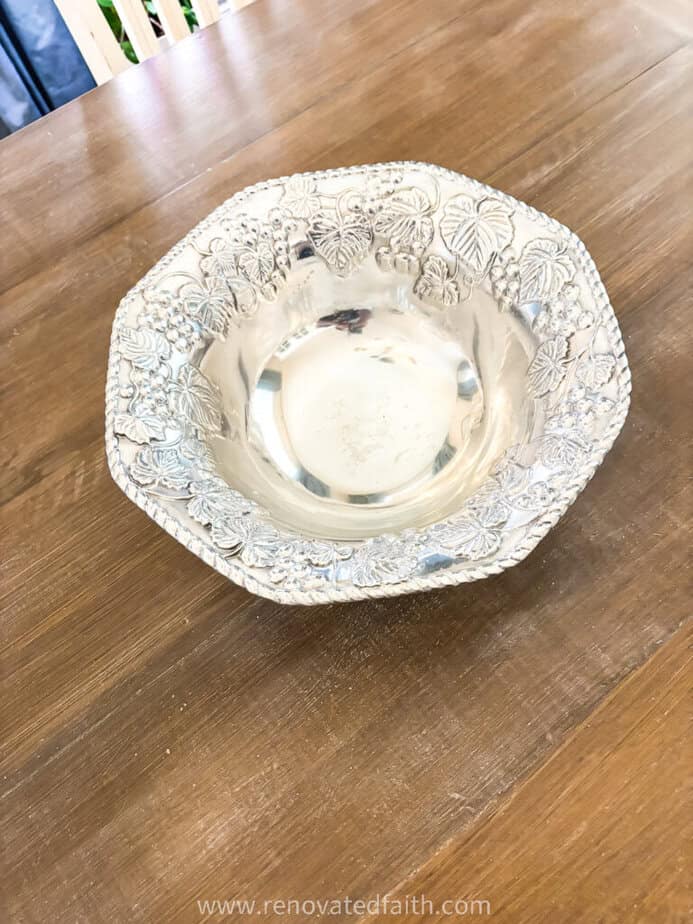
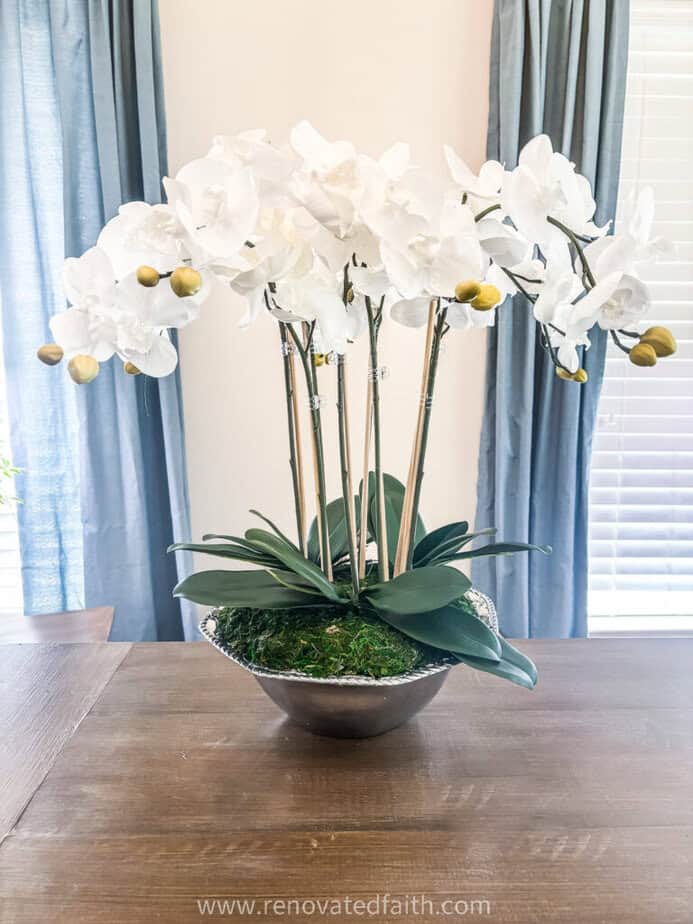
For this tutorial, I using beautiful but dated silver salad bowl that I found burried in the bottom of my china cabinet for the last 20+ years. I wasn’t a huge fan of grapes back then and I’m still not, but we are going to cover most of them with moss.
Disclaimer: If the person who gave me this salad bowl as a wedding gift is reading this post, please know that I’m sorry I haven’t used it and called it “dated”, but rest assured it will now be the centerpiece of my dining room for the foreseeable future.
Step 1: Prep Your ORchid Bowl With Foam
Cut pieces of floral foam to fit the inside of your bowl. Glue them together with hot glue.
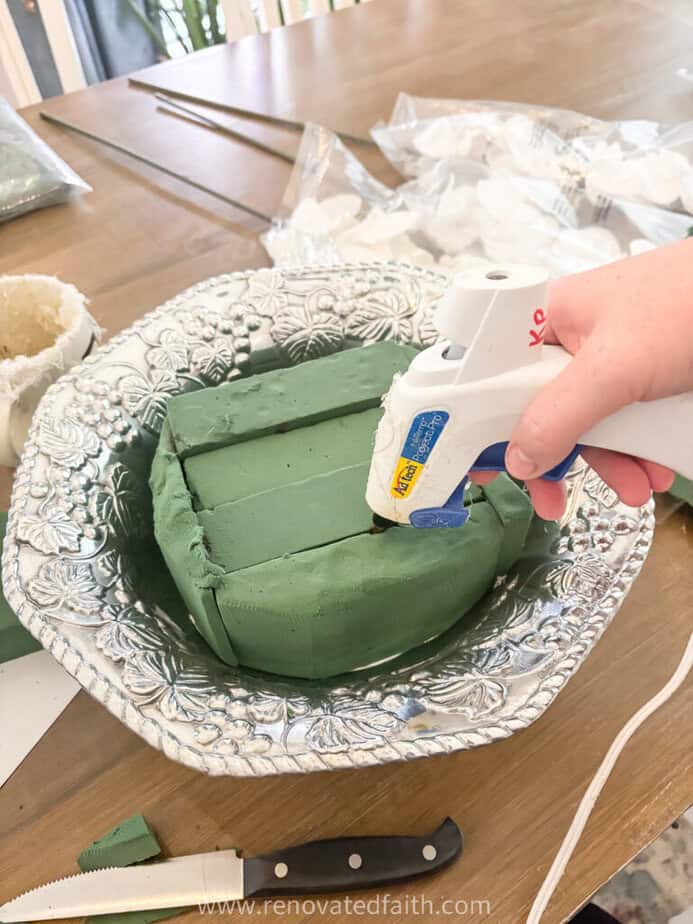
Use a knife to shave off pieces of foam that don’t match the shape of the bowl.
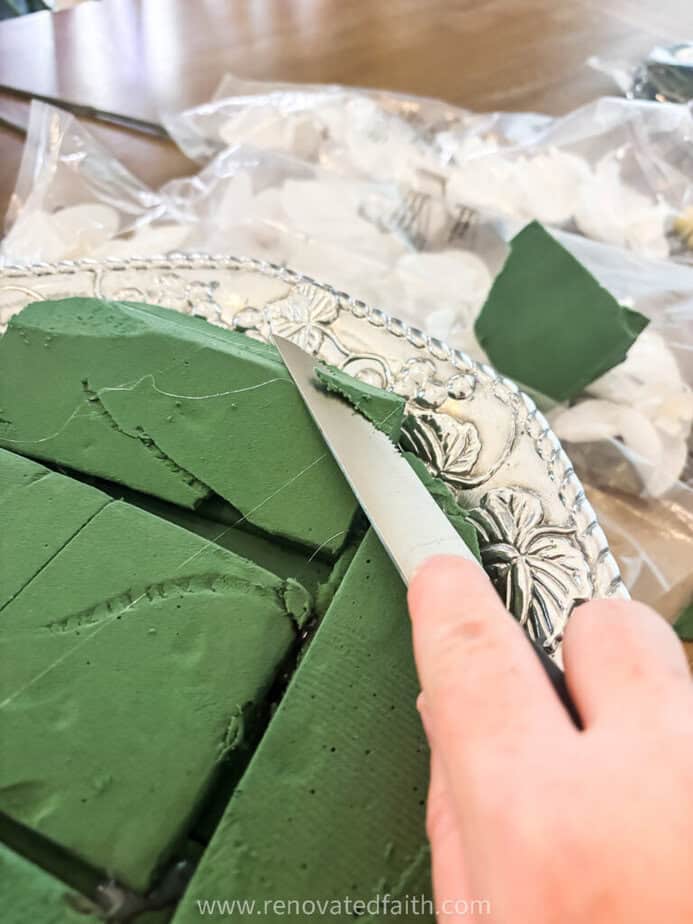
This would have been faster with larger blocks of foam, but as long as it is the right general shape, it doesn’t have to be perfect or pretty.
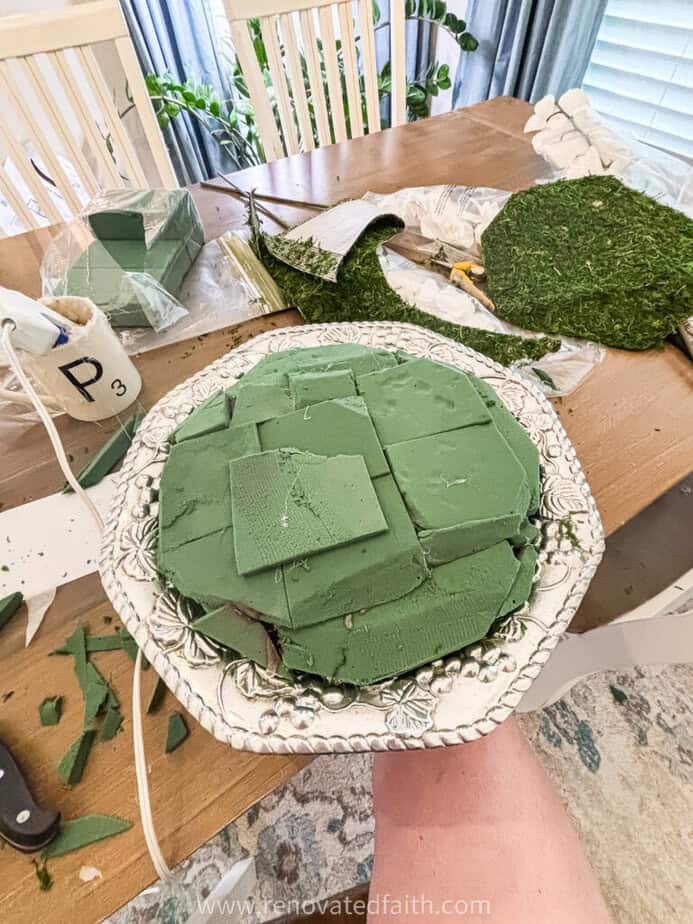
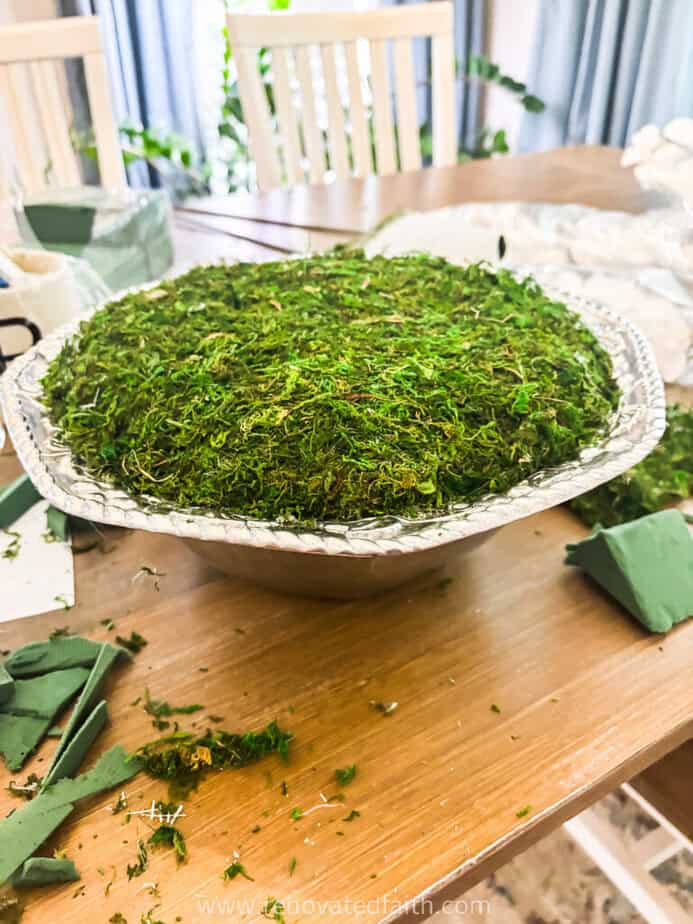
In the inspiration images I liked, I noticed the moss was higher than the edge of the bowl, so I built up my floral foam to match that shape.
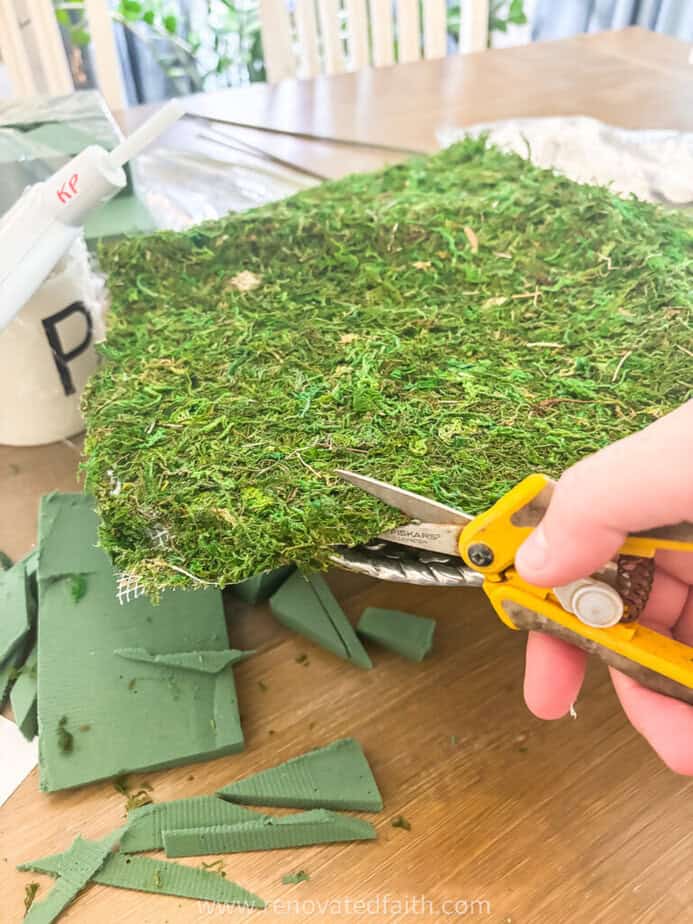
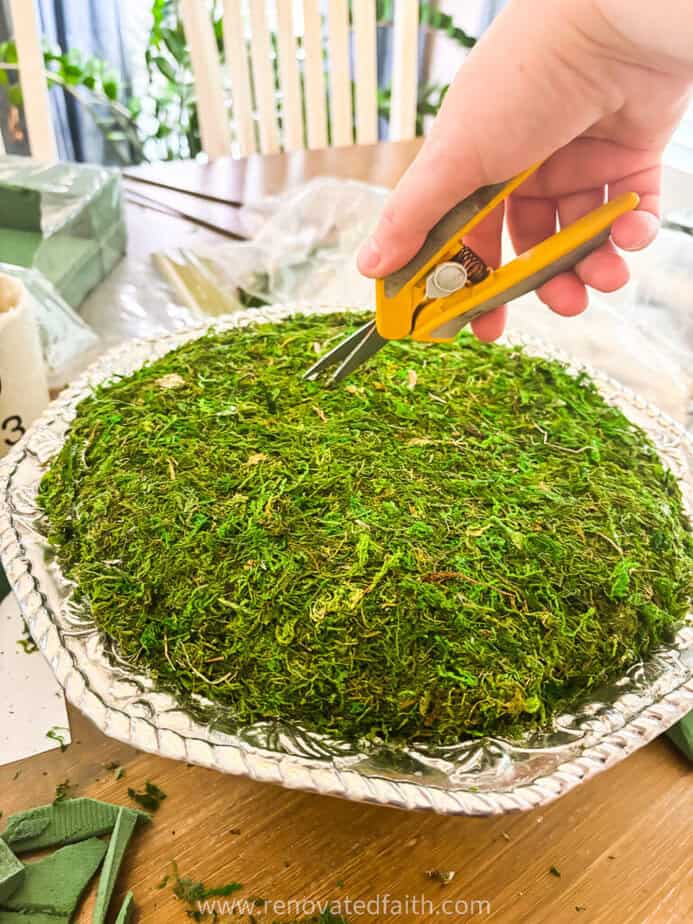
Step 2: Add Moss to Your Faux Orchid Arrangement
Cut a circle of miss just a little larger than the area of foam in your orchid bowl.
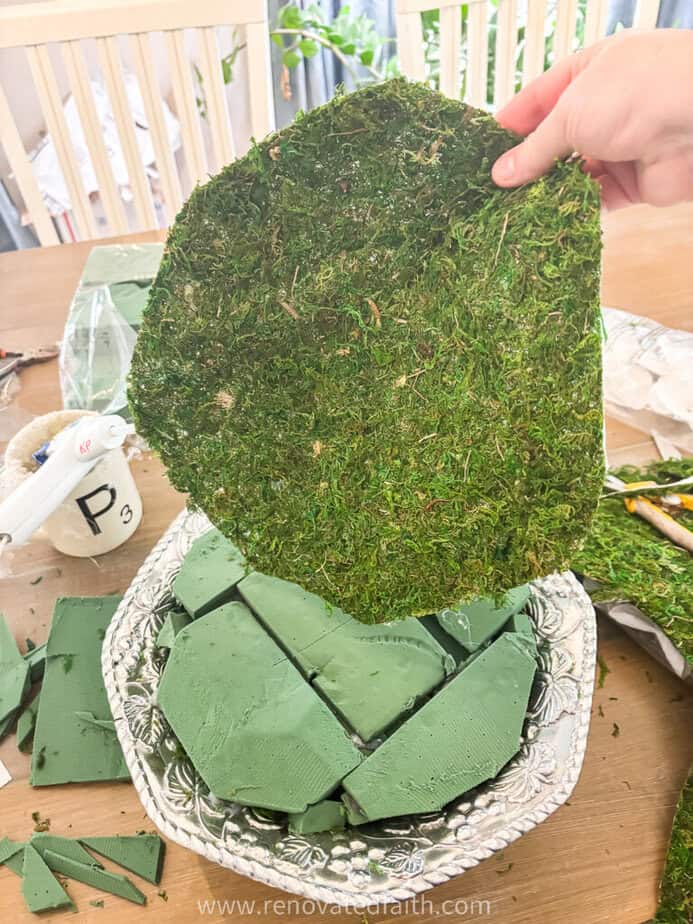
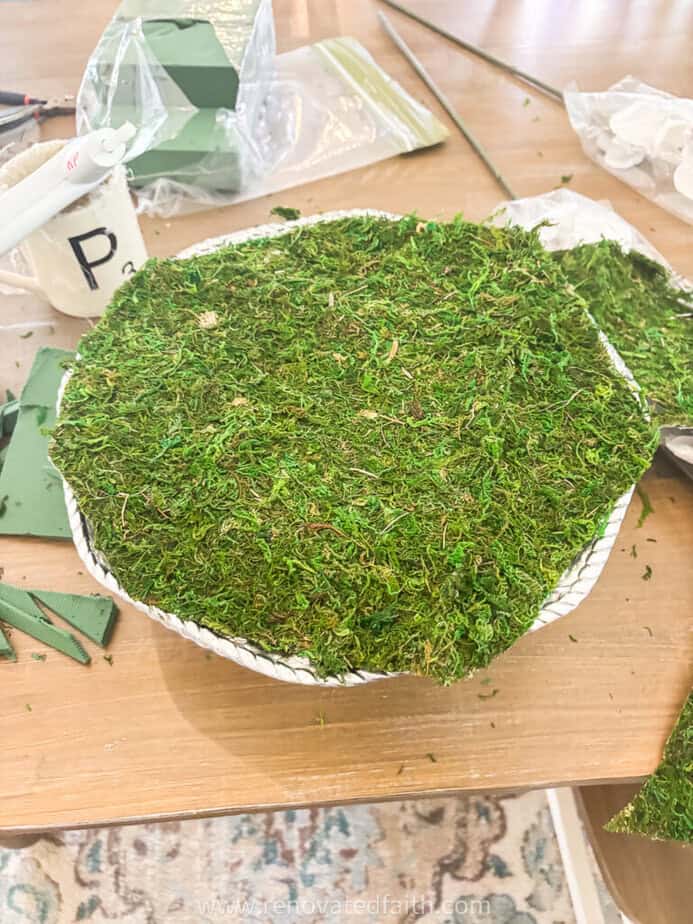
Glue the center of your moss circle on the foam to keep it in place.
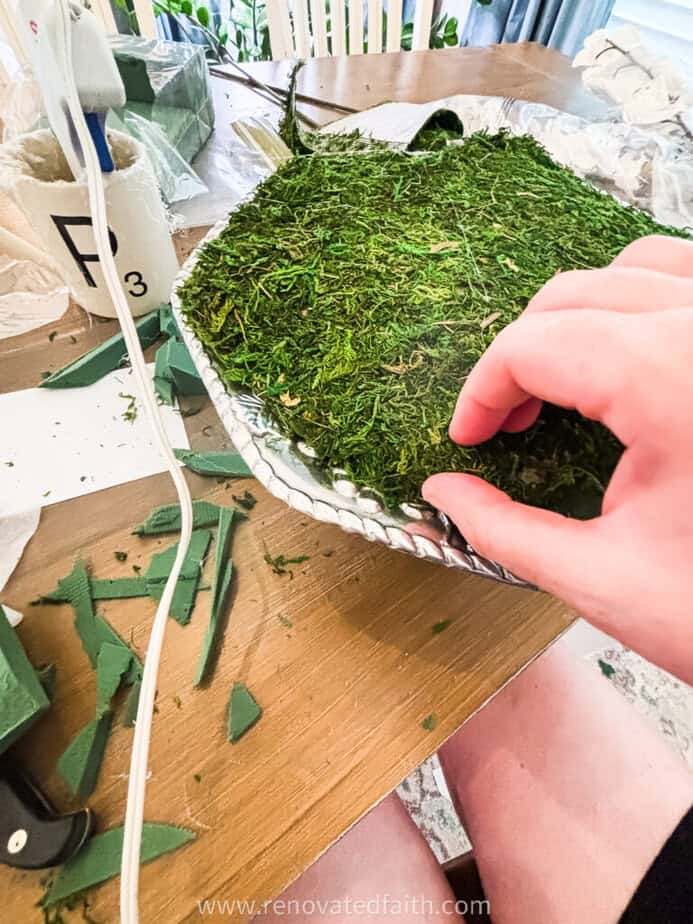
Run a few inches of hot glue under the edge of the moss and tuck it under a little at a time. Be careful not to burn your fingers.
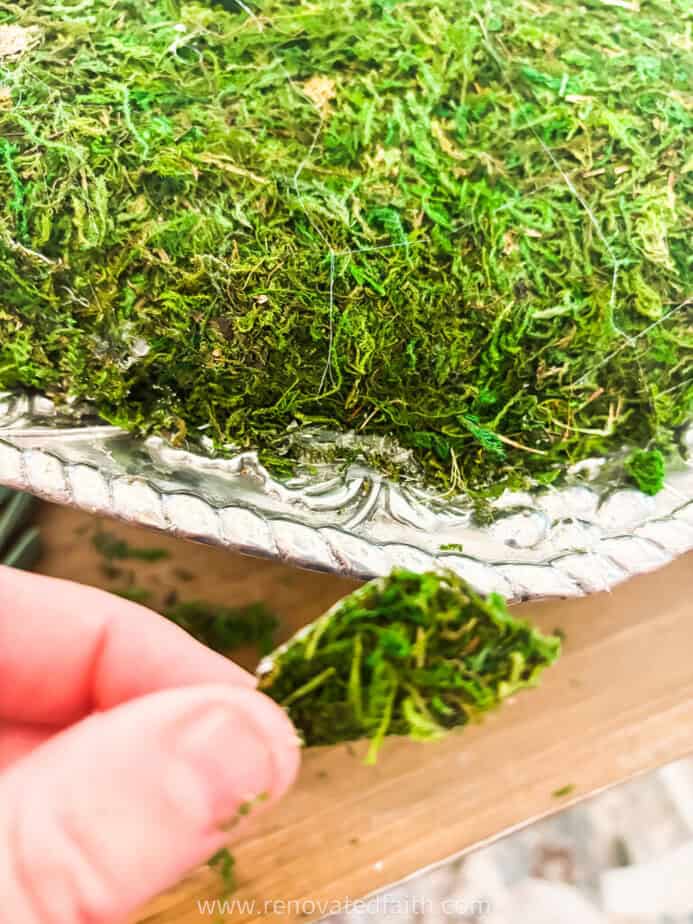
If you have a section that doesn’t look so great, cut a small piece of moss and just glue it over that area. Easy peasy!
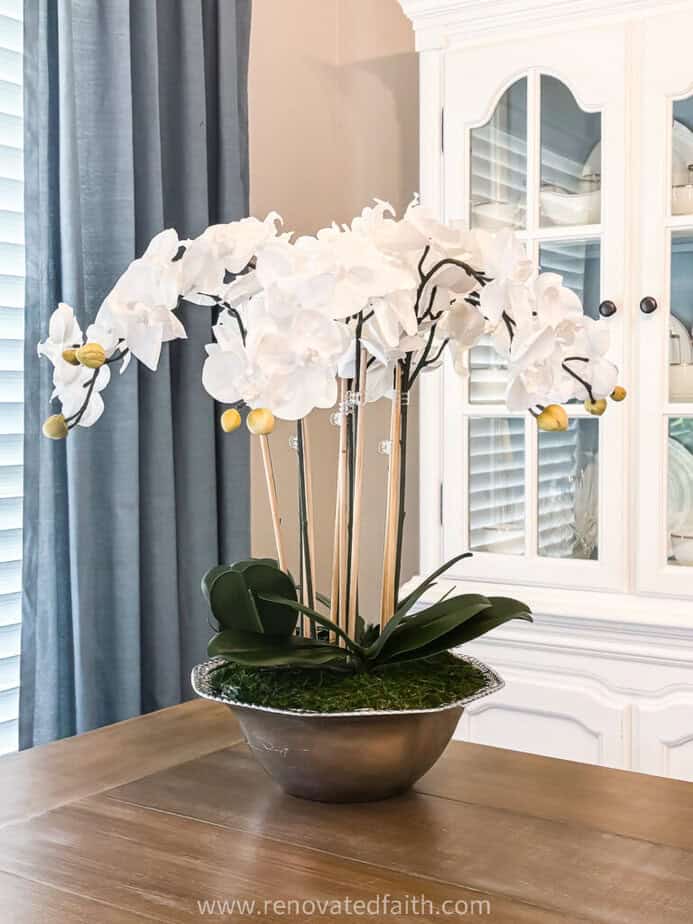
Step 3: Start Adding Faux Orchid Stems
To add your first orchid stem, cut a small hole in the surface of the moss sheet.
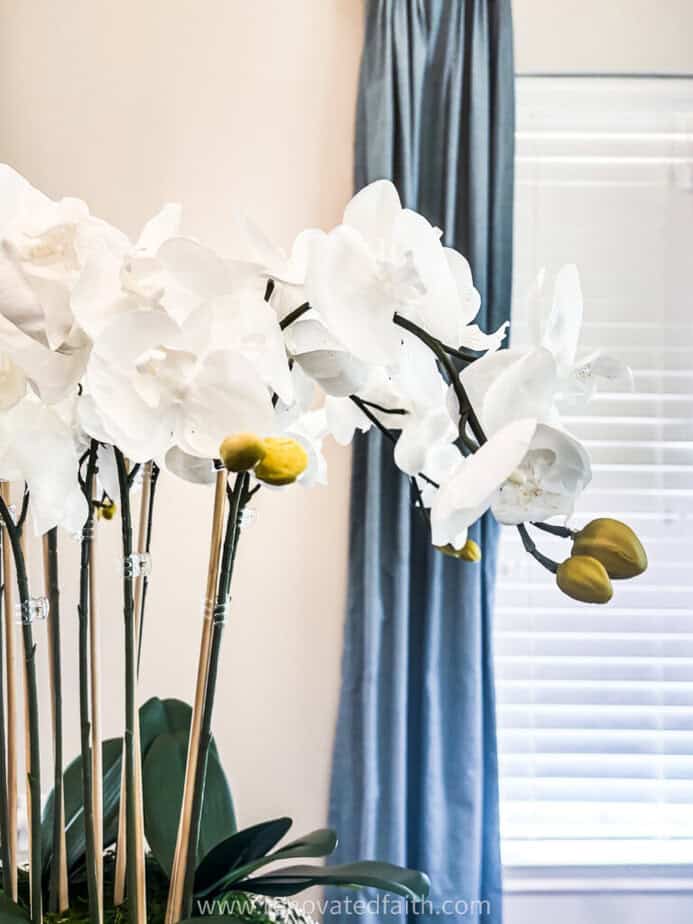
Push both the orchid stem and dow rod into the hole at the same time.
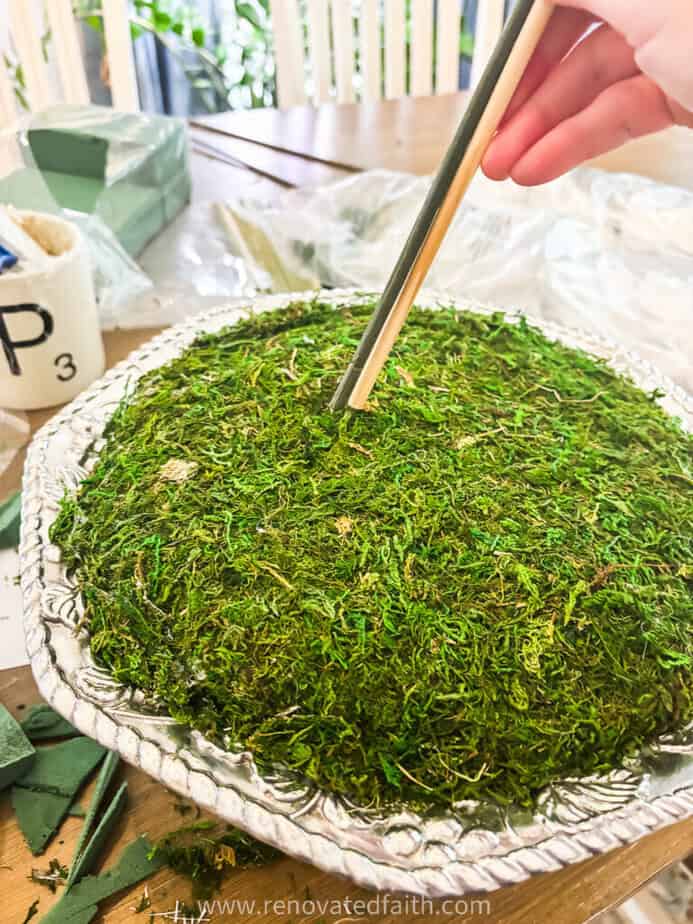
See if you like the height of the orchid stem, and if it’s too tall, trim a little bit off the end. The length of my orchid stems was fine without trimming.
Add one of the small hair clips to keep the orchid stem and down rod together.
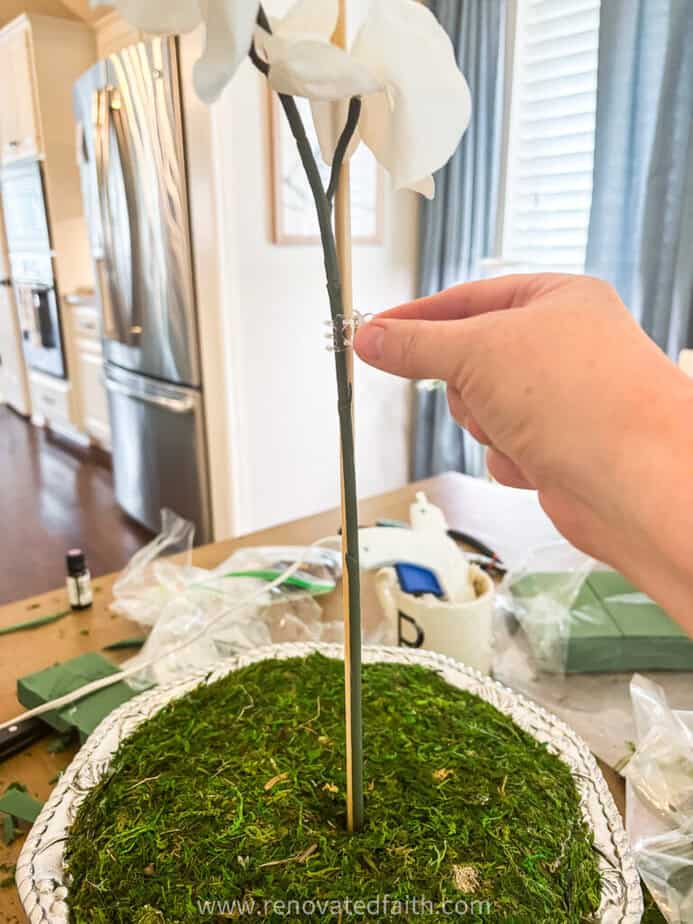
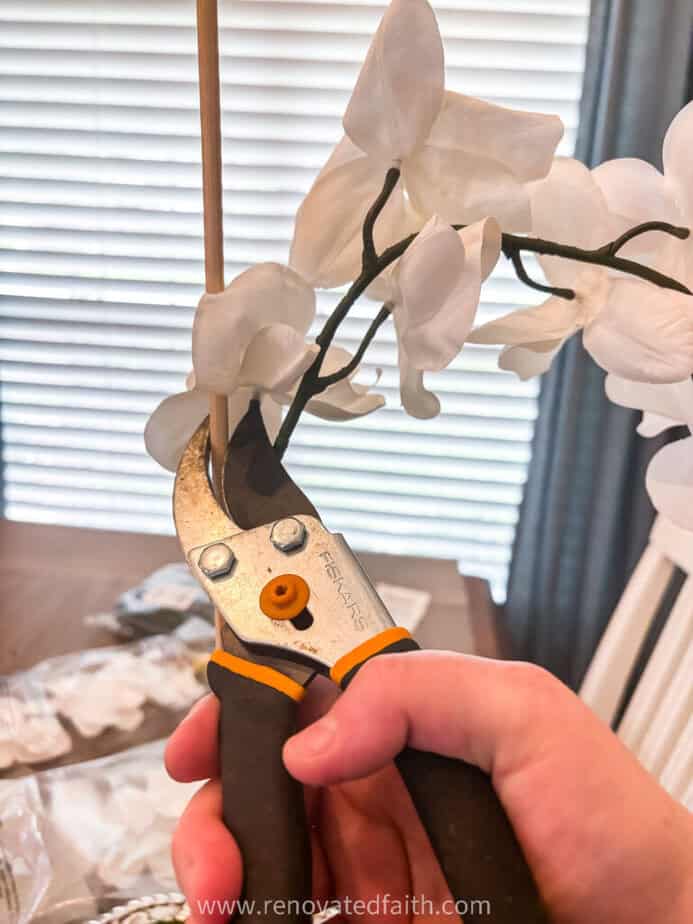
Cut the dow rod to the point where the orchid stem will start to curve. Do the same to the rest of your orchid stems.
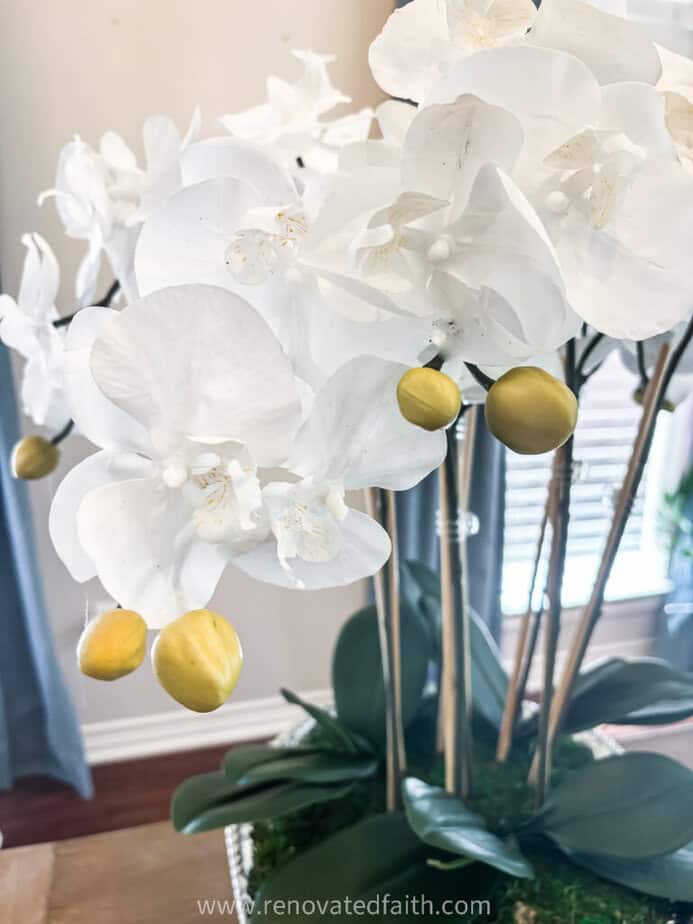
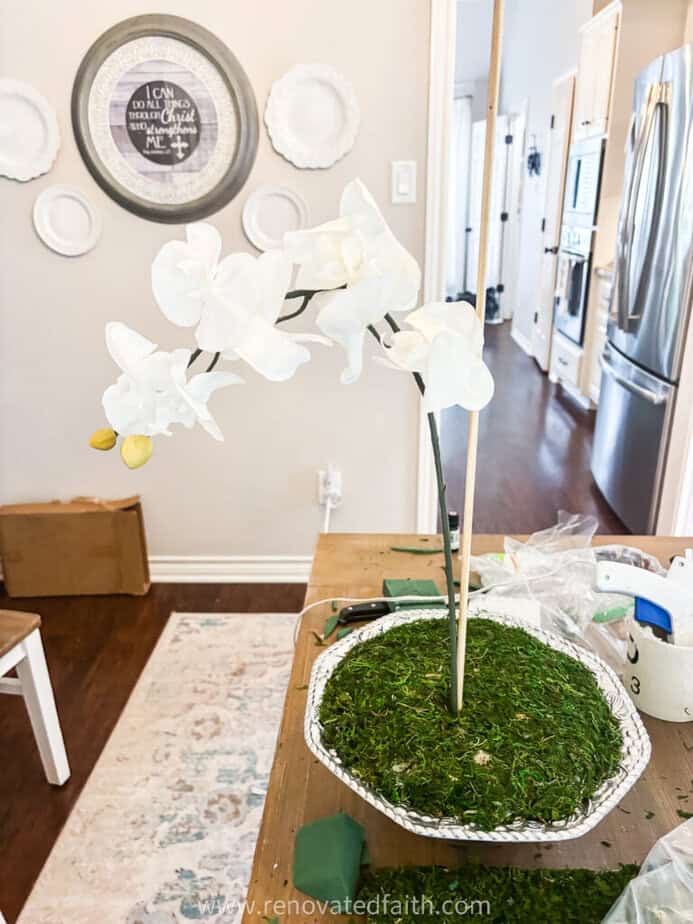
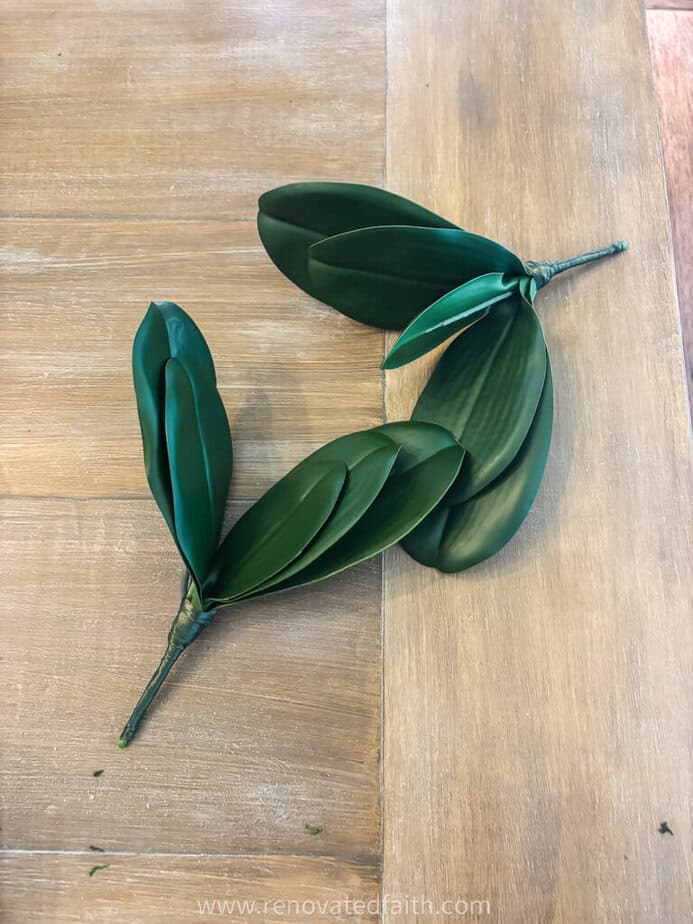
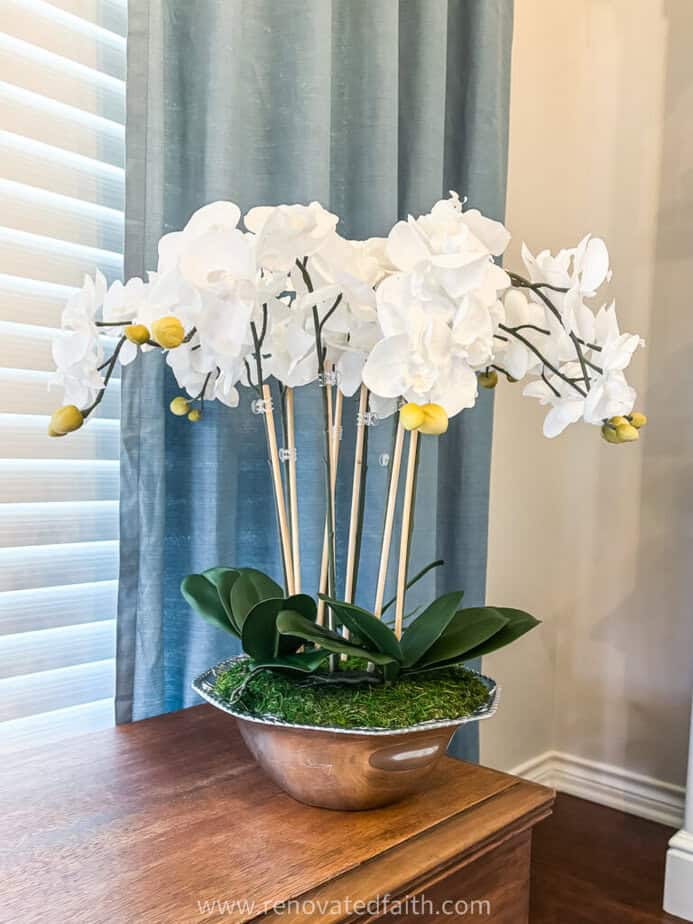
Step 4: Add Leaves To Your DIY Orchid Centerpiece
The last step is to add leaves to the bottom of your orchids. I picked three sets of leaves and stuck them in on opposite sides of the stems.
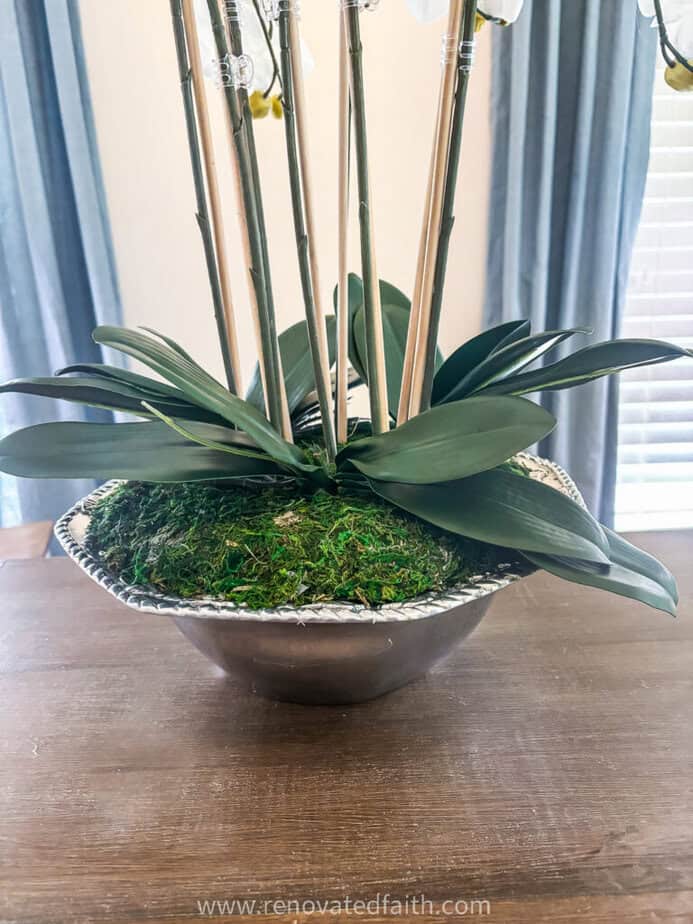
Step 5: Curve the Stems of Your DIY Orchid Arrangement
Last, refer back to your inspiration pictures to see how to curve your orchid stems so they are pointing slightly downward. Don’t be afraid to be a little rough when binding the stems into place. If you curve them too much, you can just as easily bend them back.
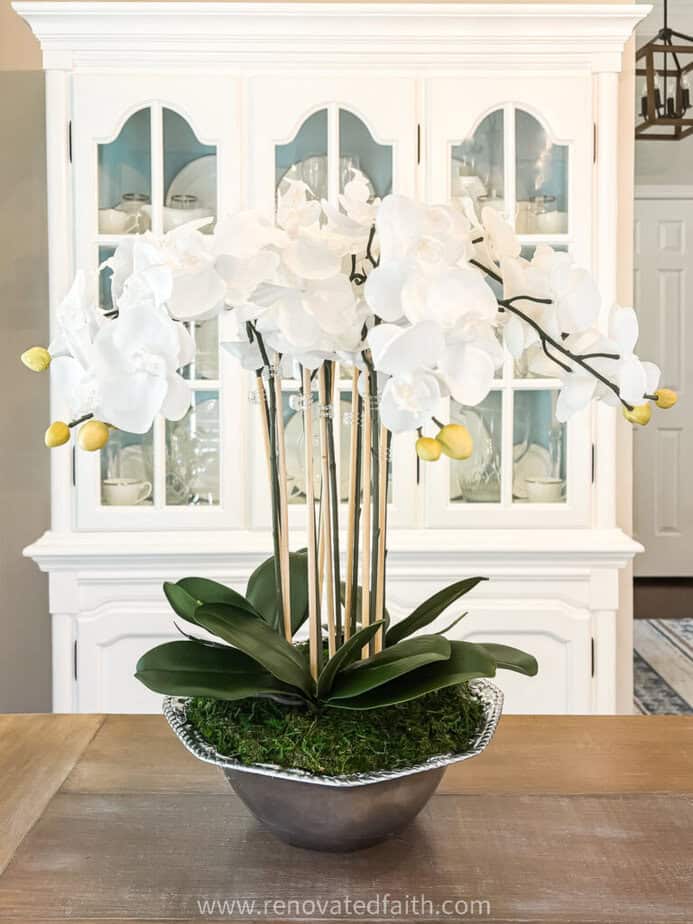
RENOVATE YOUR FAITH: Made Over, Inside and Out
I mentioned how I found the silver bowl for the orchids in my china cabinet, but what I didn’t mention is how the china cabinet has a story of it’s own…
It had been a long, hard day at the hospital with my mom during her cancer treatments. On the way home, something in my rearview mirror caught my eye — a massive, towering piece of furniture sitting on the curb, hours away from the trash truck.
Most people would have kept driving. But something made me turn around.
What I found was a dingy, damaged, smell-it-from-the-street oak china cabinet with broken doors, water damage, and an outdated finish that had seen better days. To everyone else, it was junk. But I saw something in that broken old piece that others had completely missed — potential.
And as I started the process of cleaning it up, repairing what was broken, and sanding down its rough edges, God began to whisper something to my heart that I wasn’t expecting.
It turns out, a beat-up china cabinet on the side of the road has a lot more in common with you and me than we might think.
If you’ve ever felt overlooked, broken, or beyond repair — you are going to want to read this one: Made Over, Inside and Out
Most of my projects include a corresponding devotional. For more spiritual encouragement, click here for the rest of my project posts that also include Renovate Your Faith devotionals.

More Posts Related to How to An Orchid Arrangement
How to Make a Peony Wreath for Your Front Door
Easy DIY China Cabinet Transformation
How to Decorate A Console Table Like a Pro
Easy DIY Doormat with Removable Layers
How to Build a DIY Farmhouse Table (Great Beginner Tutorial!)
Create the Faux Restoration Hardware Stain Finish for Furniture
Final Thoughts on the DIY Orchid Arrangement for Beginners
Now that you know just how easy it is to create a stunning faux orchid arrangement, there’s nothing stopping you from transforming any planter or bowl you already own into a gorgeous display. Whether you want a single-stem piece or a full diy orchid bowl, these budget-friendly orchids prove that beautiful flower arrangements don’t have to cost a fortune. So gather your supplies, trust the process, and create a centerpiece that will put a smile on your face every day!
I love to hear your thoughts and questions! Scroll down to leave a comment and I WILL reply! ❤️
Blessings,

Be sure to follow the fun here!
Email Subscription | Instagram | Pinterest | Facebook | Twitter


Karin Peters is a DIY expert and the creator of Renovated Faith. She is a furniture painter, a home design consultant, and a tenacious problem solver determined to help you transform your house into a home. With 17 years of experience with DIY home improvement, she researches and analyses professional processes to adapt them to be easy and cost-effective for DIYers. She then tests every project and product before it appears on the site in a detailed, step-by-step format. After attending Texas A&M University, she received her Master of Divinity with Biblical Languages at Southwestern Baptist Theology Seminary. Her passions unite in Renovated Faith, which shows readers how to create a home that serves them so they can pursue their God-given purposes. About Renovated Faith | Editorial Policy | Facebook | Twitter | LinkedIn
Hi Karin,
You are such a talented Christian lady, and I think you are a beautiful person inside and out. I did so much of what you are doing at your young age.(My Darling late husband & I had a dairy farm in NYS.along with raising 2 sons & a daughter PTL) You see Now that I am nearly 94 and live for the LORD I am not able to do that much anymore. I do so look at ALL your rennovations and am in awe of you. May GOD Keep his healing hand upon you. Have a Blessed day and Always know that JESUS loves you,& your family.
What a beautiful centerpiece you have created!!!
Thanks for all the inspiration!