How to Make A Peony Wreath (Step-By-Step Tutorial)

Want a gorgeous peony wreath without the high price tag? I’ll walk you through how to make a peony wreath with this simple step-by-step tutorial, for a fraction of the cost.
Every spring I admire those designer pre-made wreaths on Etsy, but the $200 price tag always stops me in my tracks. Fortunately, I’ve learned how to create a gorgeous spring wreath with faux peony blooms for under $40.
This peony wreath takes less than 30 minutes to make and it will put a smile on your face everytime you see your front door!
(As an Amazon affiliate I earn from qualifying purchases. Please see my full disclosure HERE).
Nothing welcomes welcomes this time of year like a gorgeous spring wreath on your front door. I have always loved the look of peonies. And because peonies don’t grow well in Central Texas, I have a whole yard full of roses that look like peonies.
With this easy tutorial, you can enjoy the look of peonies every day by making your own DIY peony wreath that looks every bit as good as designer wreaths online.
Quick Links to Information in this Post
Supplies Needed: Tips for Hanging Your Free Blue Botanical Prints
Hot Glue Gun – This is my favorite brand and it has a temperature control switch.
Hot Glue Sticks – You will need a lot of hot glue for this project so get two bags to be safe.
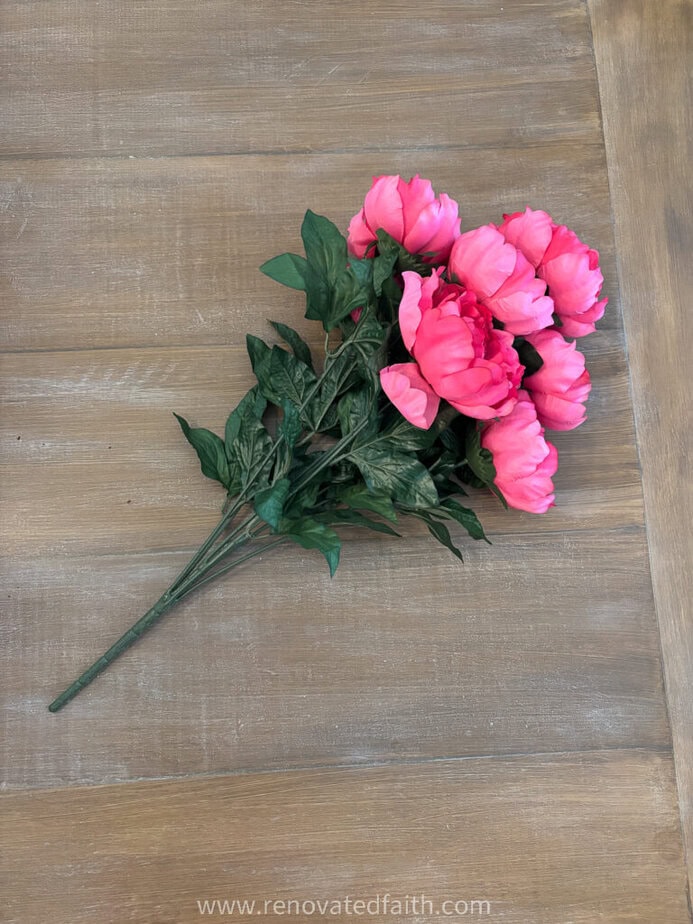
Faux Peony Flowers – I really like these at Hobby Lobby because the leaves are great too. If you can go when the florals on sale, you will get 40% off. I got 3 stems of them in the dark pink. Here is the link but they are cheaper in the store for some reason.
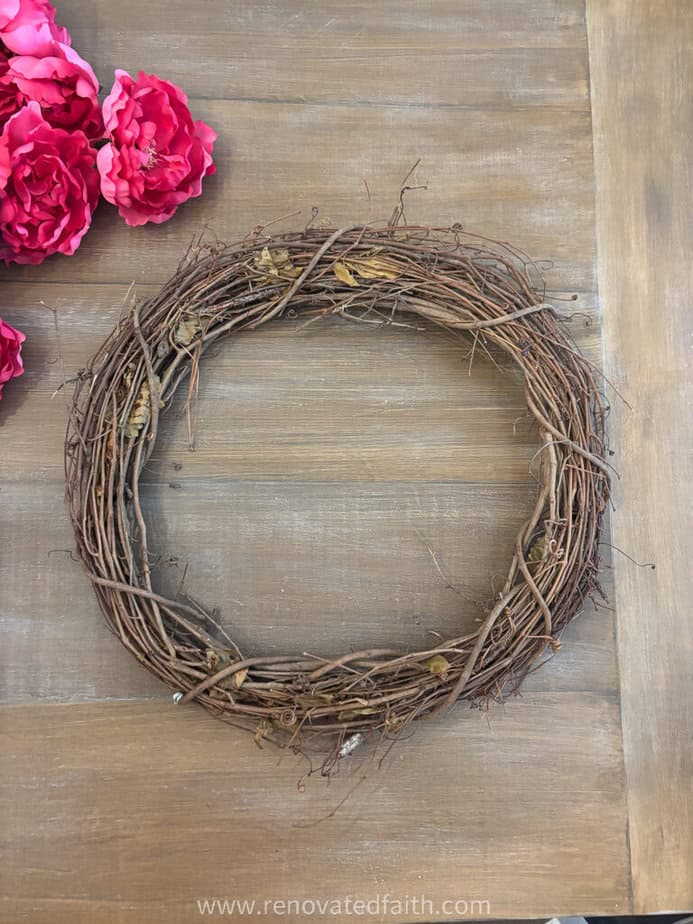
18″ Grapevine Wreath
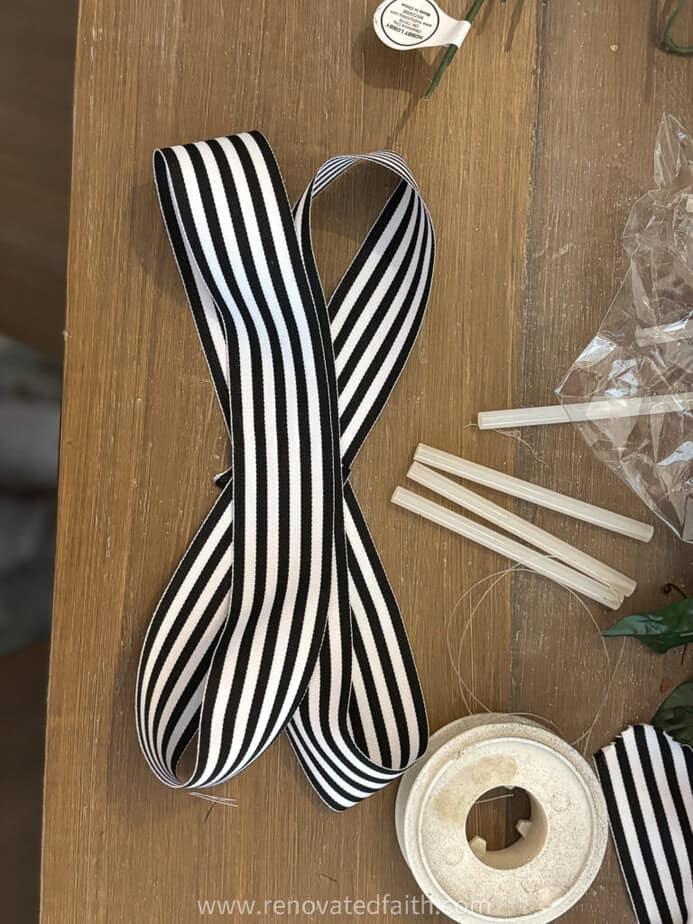
Ribbon – I got this Black and White Ribbon HERE.
Fishing Line or Floral Wire – Use whatever you have on hand.
How to Make A Peony Wreath (Step-BY-Step Tutorial)
Before you get started, find an image online of what you want your wreath to look like and refer back to it as you make your wreath. It helps to have a visual guide to create the look you want.
The wreath I found online is listed on Etsy here. I LOVE the look of the wreath but NOT the $255.00 price tag!
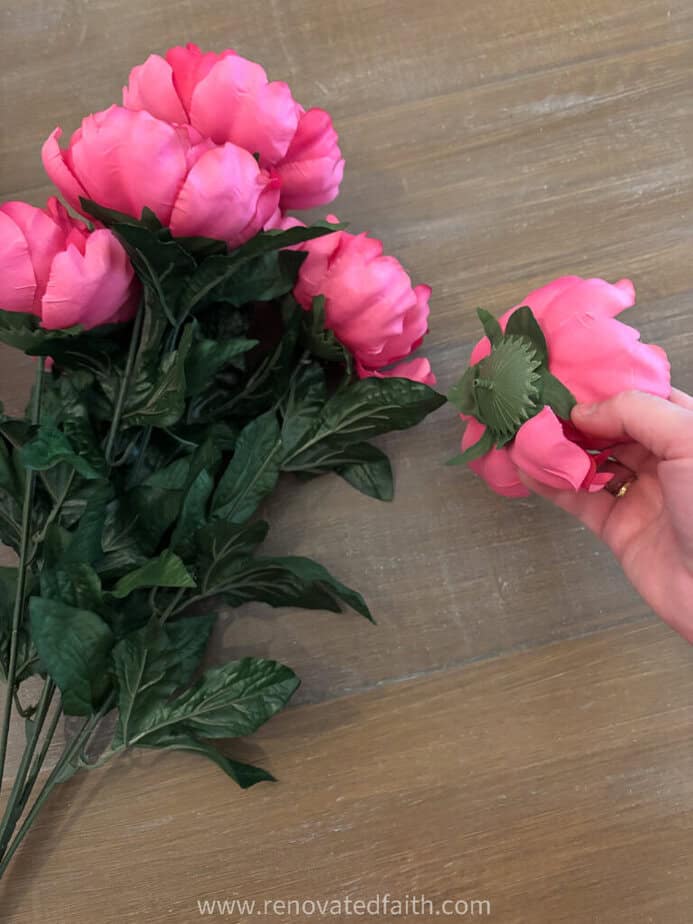
Step 1: Arrange the Flowers of Your Faux Peony Wreath
Here is one spray of the faux peony blooms. For my wreath, I used 3 sprays so my wreath would look jam-packed with peony blooms. You can use more or less to get the look you want.
Start by pulling the blooms off your peony wreaths
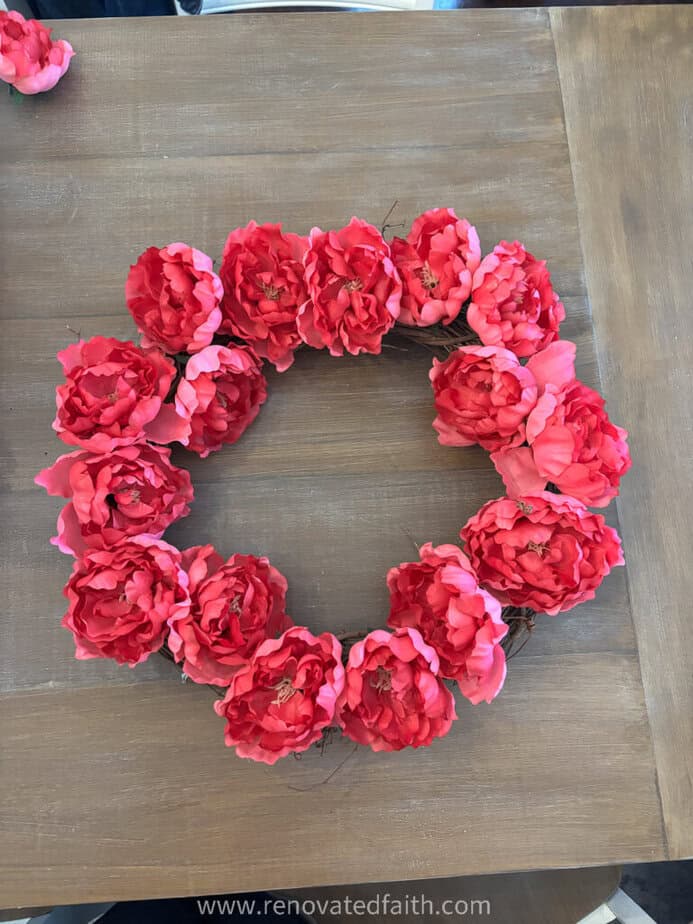
Take all your flower blooms and arrange them on the wreath to get the look you want. Just lay them on the wreath without gluing them just yet.
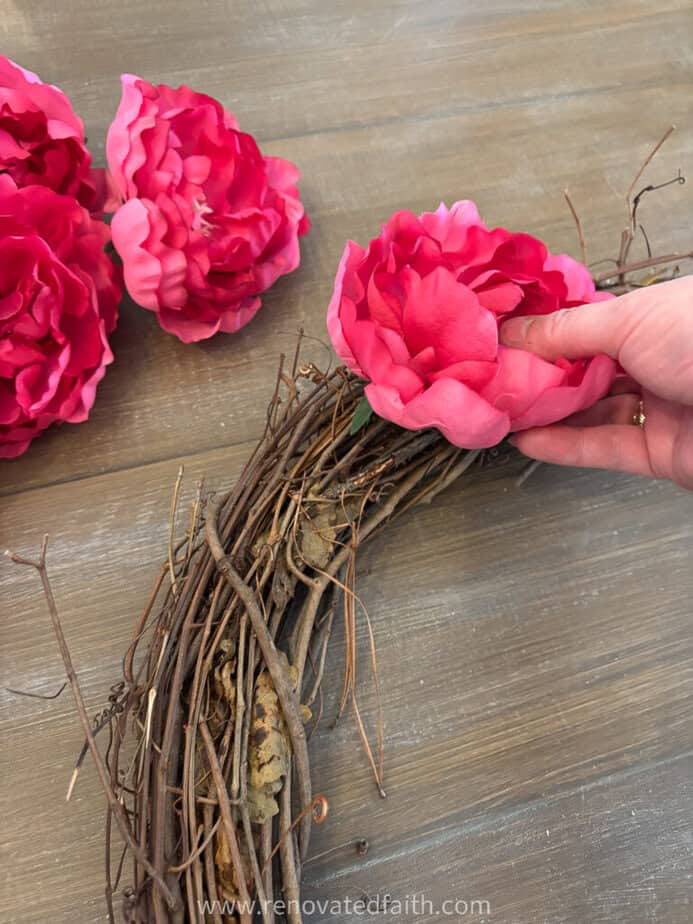
On this step, I had to tell my inner perfectionist to quiet down several times. Just get them on the wreath. If they look a little messy, that’s a good thing! Remember we will fill in with greenery on the next step.
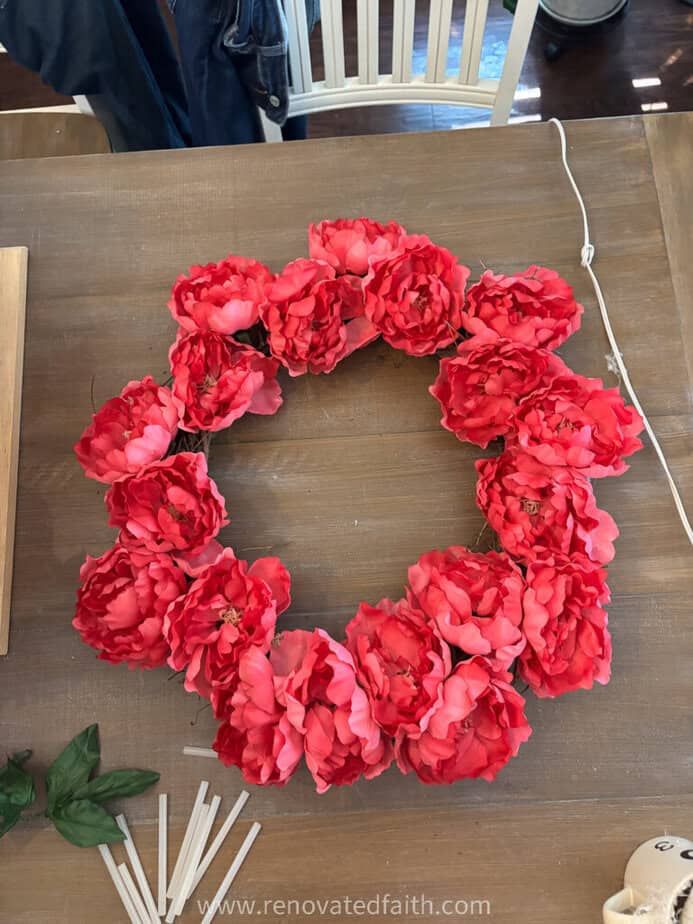
STEP 2: Glue The Flowers To The Wreath
Apply a decent amount of hot glue to your flower and stick it on the wreath. Do this for all the flowers.
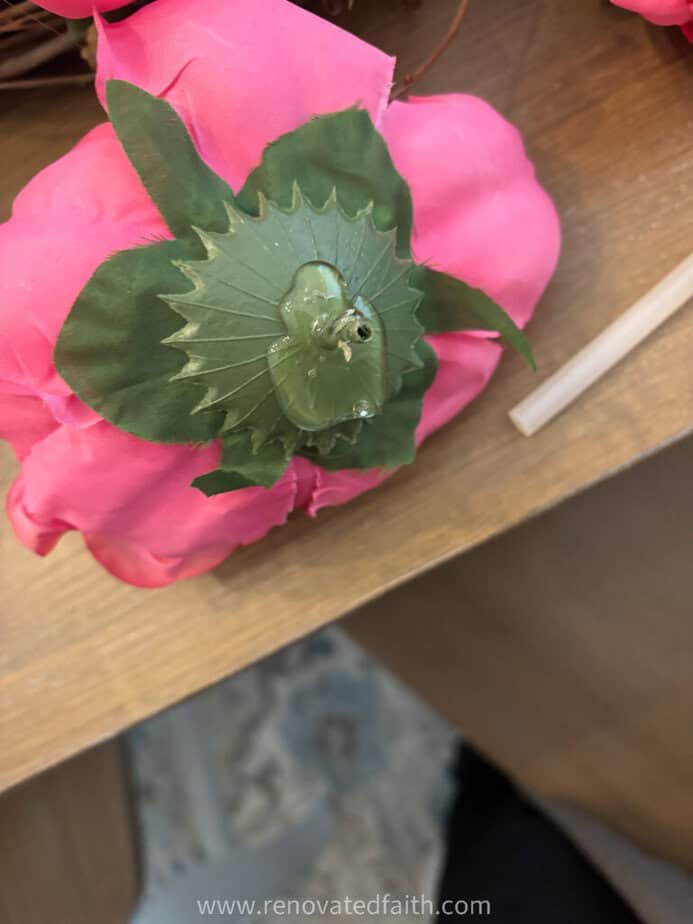
Step 3: Add Leaves To Your DIY Peony Wreath
Pull on the leaves off the stems. I used almost all of the leaves on the 4 different sprays of faux peony flowers.

Take the ends like so and tuck them in between the vines of your wreath.
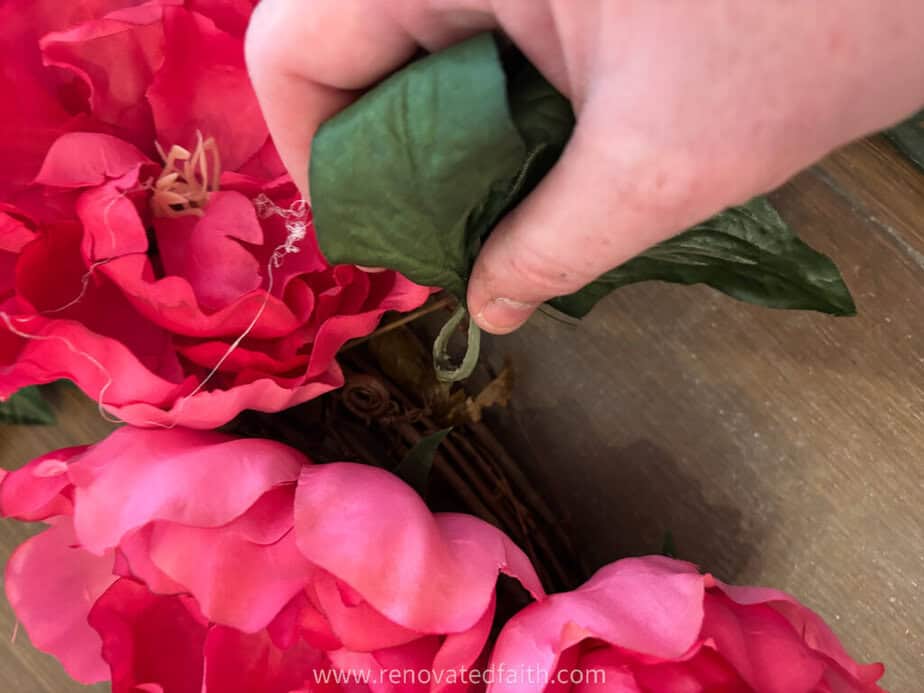
Keep tucking in the greenery until it looks full and lush. You don’t want any of the grapevine to show.
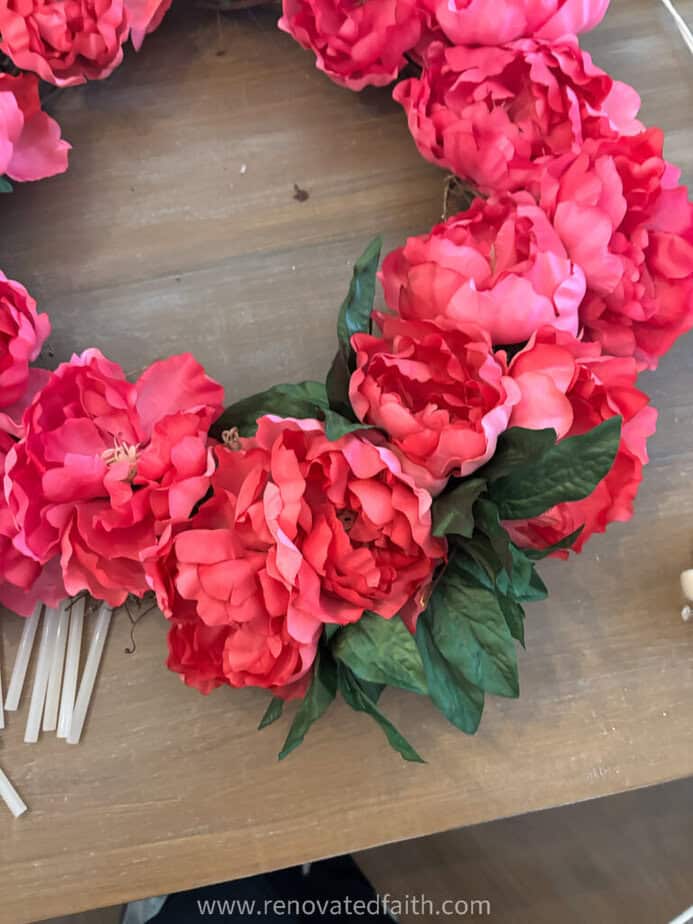
Flip your wreath over and add glue to the back to secure the greenery.


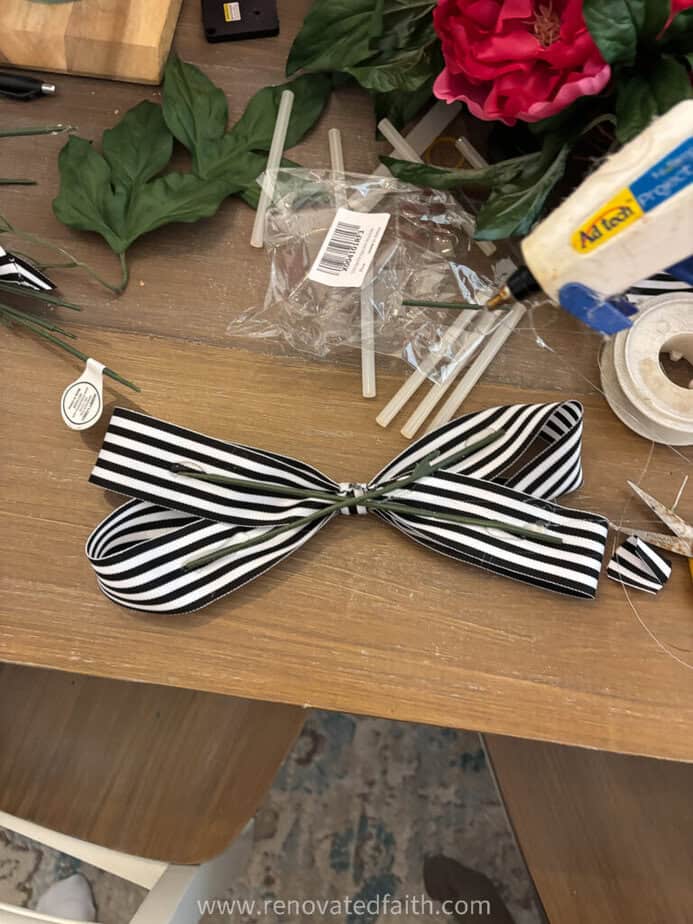
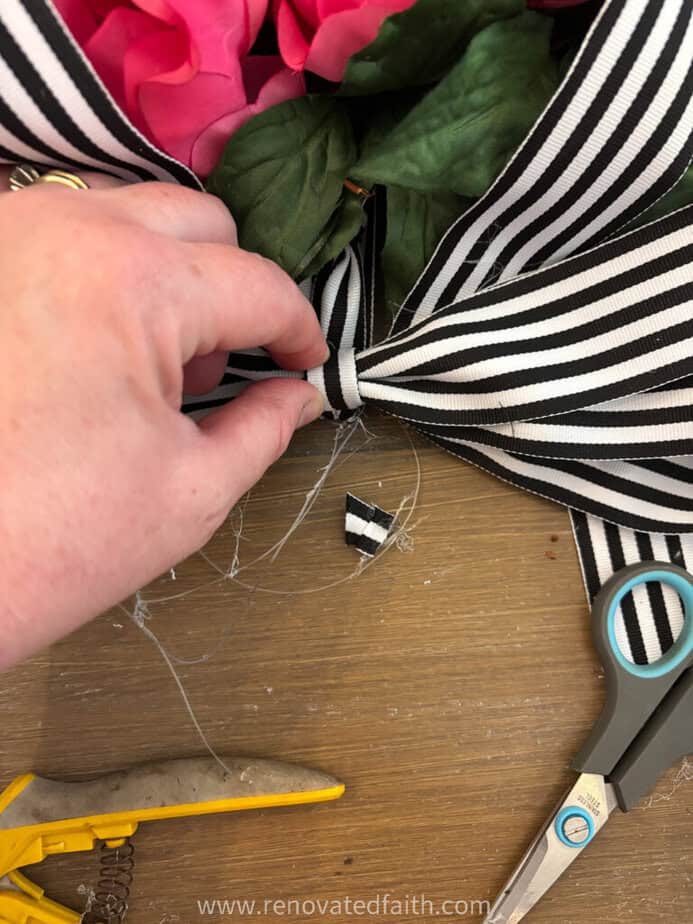
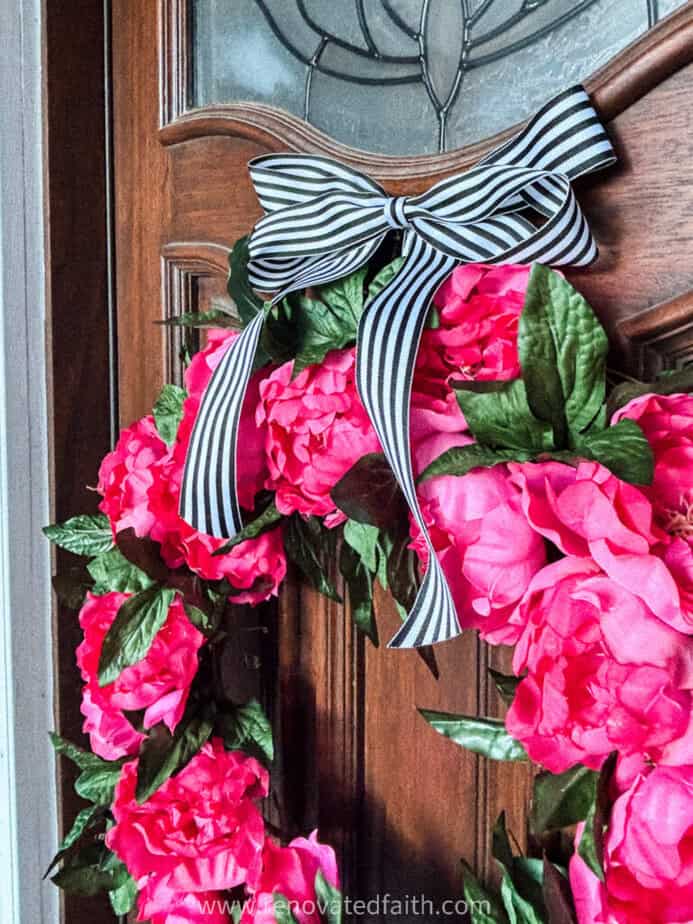
Step 4: Add A Bow To Your DIY Peony Wreath
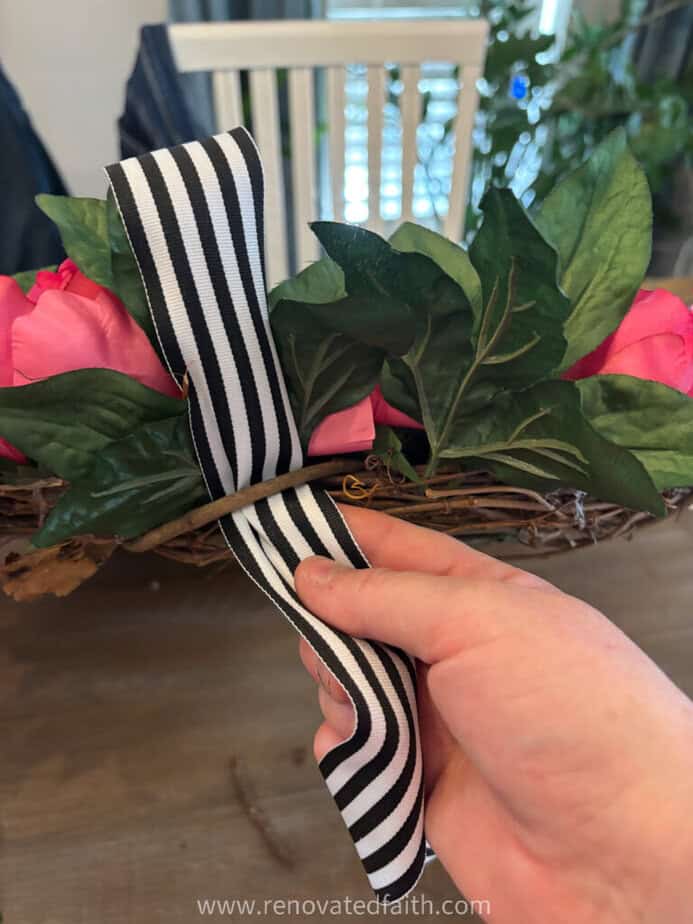
Before we make the actual bow, look some of the ribbon onto a sturdy vine on the back of your wreath. Make a loop of ribbon coming 3-4 inches away from the wreath. Tie a double knot to secure it. Cut off the two ends and rote the loop so the knot is close to the wreath.
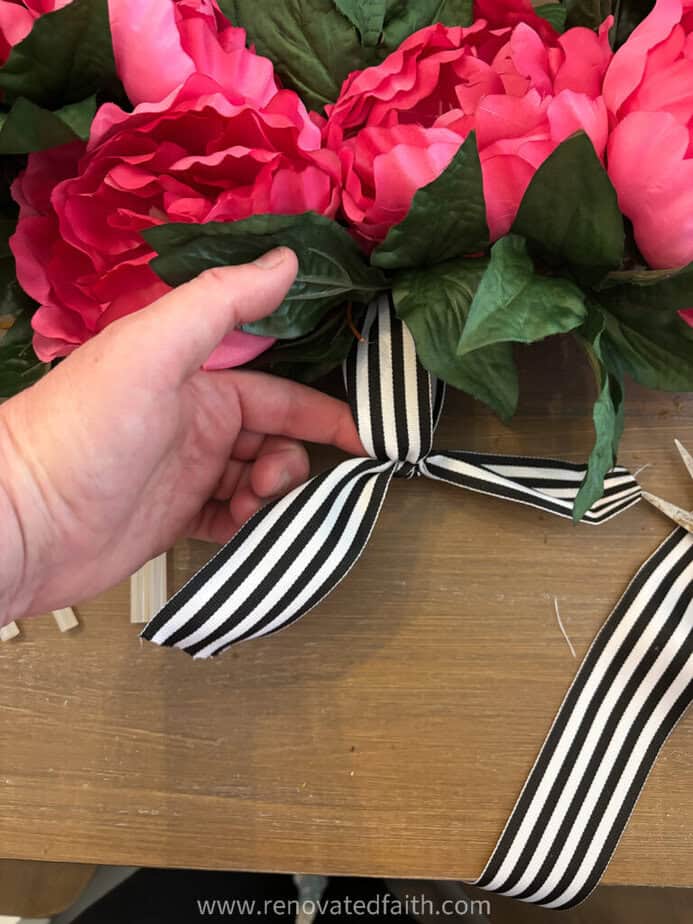
Now take some fishing line or floral wire and make a loop that is big enough for the nail or hook on your door. Make a double or triple knot if you are using fishing line.
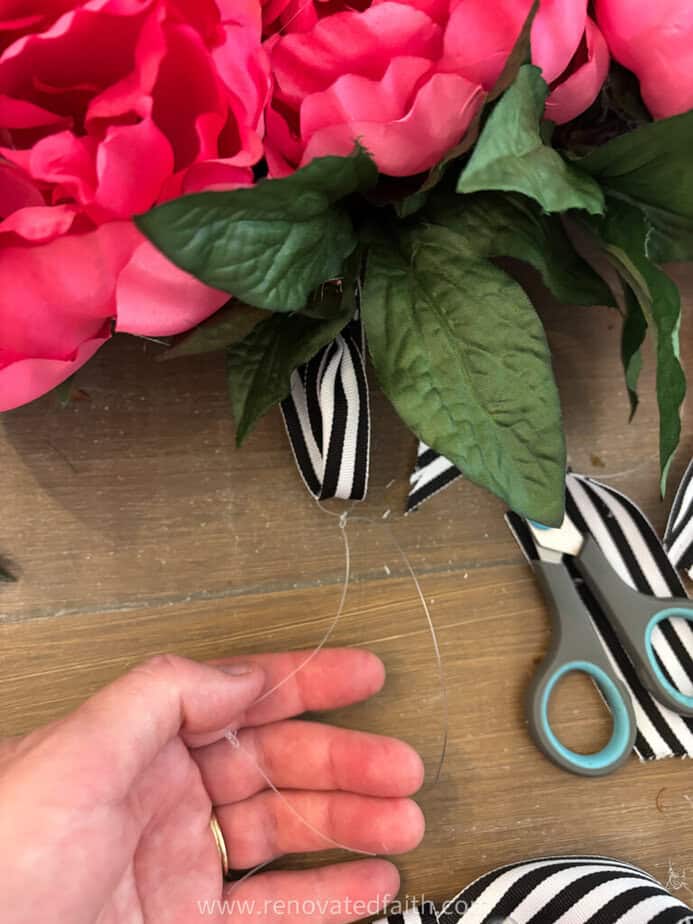
This fishing line is what you will actually hang your wreath with. We will make the bow separately and hot glue it to the top of the ribbon right under the fishing line.
You can make a simple bow for this wreath or you can use my bow tutorial here to make a double bow in different sizes.
Once I made my bow, I cut two pieces of the wire stems and blued them to the back in an X. These will give the bow more rigidity so it doesn’t go all floppy on us in high humidity. You can also use pipe cleaners for this purpose.
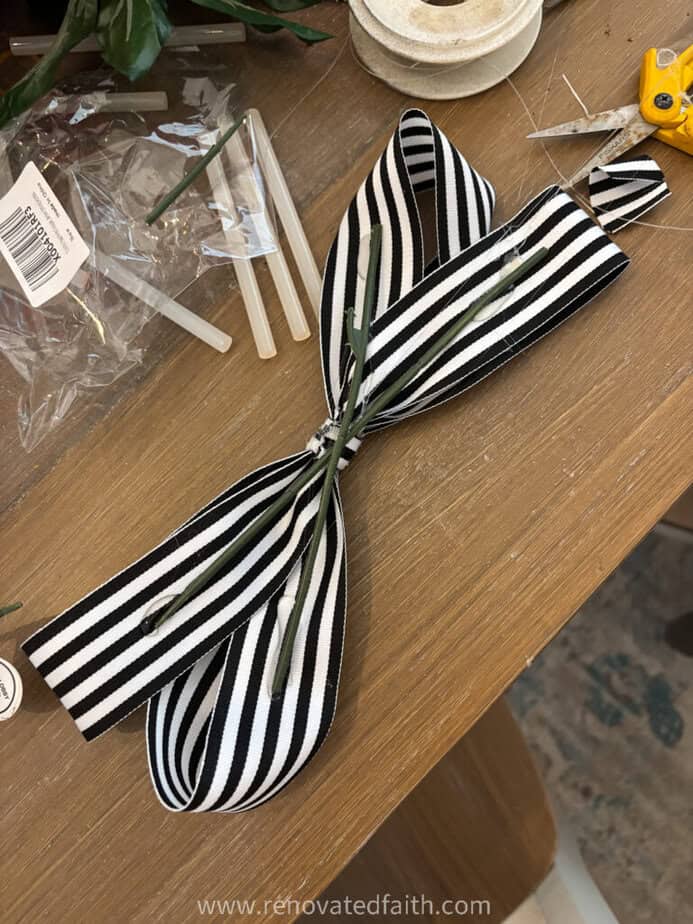
Now, fasten the middle of the bow to the top of that ribbon loop we made earlier with a big blog of hot glue.
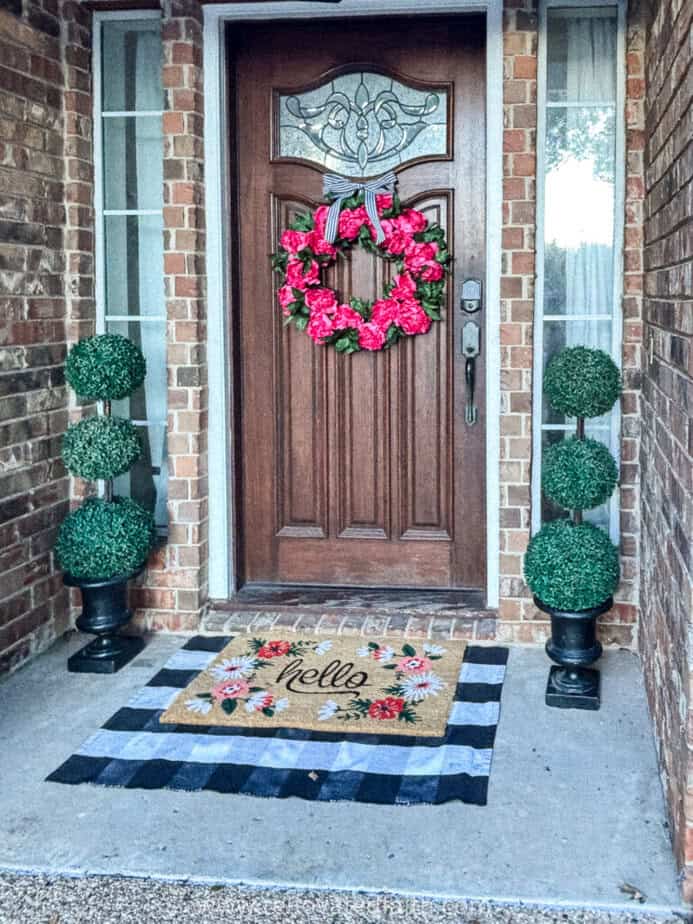
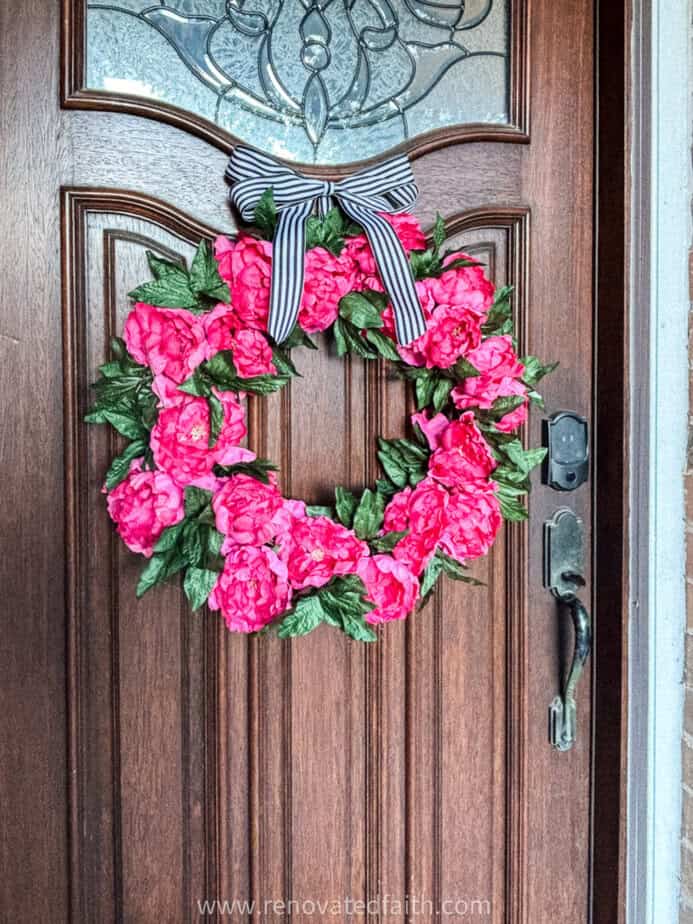
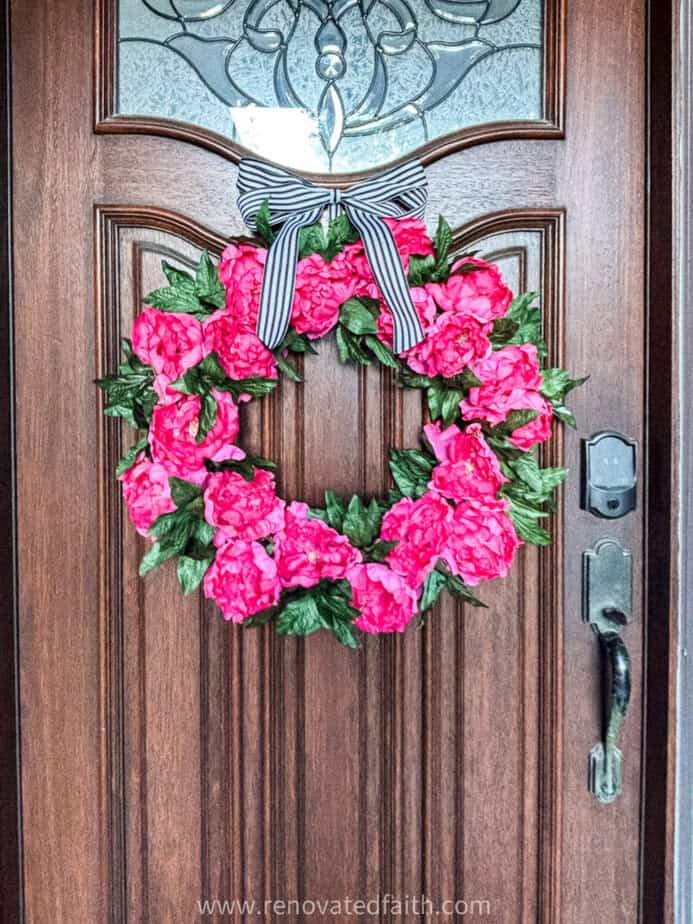
Now for the fun part! Hang it on your front door.

This peony wreath will be a warm reminder that we have finally made it to Spring!


RENOVATE YOUR FAITH: You Were Never Meant To Have It All Together
As I hung this wreath on my front door, I remember thinking, “Well, my front door looks great; too bad the inside is a mess!” Then, I had to remind myself that perfection is not my goal. It’s ok that I might never have my ducks in a row, because that’s not what life is all about.
Most of us are waiting for the day we finally get it all figured out — the day we’ll feel confident, polished, and truly “enough.” But what if that day was never the point? God is less concerned with your perfect performance and far more interested in your dependence on Him. If you’ve been striving to measure up and feel defeated, this post is for you.
Most of my projects include a corresponding devotional. For more spiritual encouragement, click here for the rest of my project posts that also include Renovate Your Faith devotionals.
Related Posts – Peony Wreath DIy Tutorial
31 No Demo Renovation Projects
Easy DIY Topiary Trees for Your Front Porch
How to Spray Paint Patio Furniture So It Looks New
Hummingbird Feeder From An Old Chandelier
How to Landscape Your Front Yard On A Budget
I love to hear your thoughts and questions! Scroll down to leave a comment and I WILL reply! ❤️
Blessings,

Be sure to follow the fun here!
Email Subscription | Instagram | Pinterest | Facebook | Twitter


Karin Peters is a DIY expert and the creator of Renovated Faith. She is a furniture painter, a home design consultant, and a tenacious problem solver determined to help you transform your house into a home. With 17 years of experience with DIY home improvement, she researches and analyses professional processes to adapt them to be easy and cost-effective for DIYers. She then tests every project and product before it appears on the site in a detailed, step-by-step format. After attending Texas A&M University, she received her Master of Divinity with Biblical Languages at Southwestern Baptist Theology Seminary. Her passions unite in Renovated Faith, which shows readers how to create a home that serves them so they can pursue their God-given purposes. About Renovated Faith | Editorial Policy | Facebook | Twitter | LinkedIn