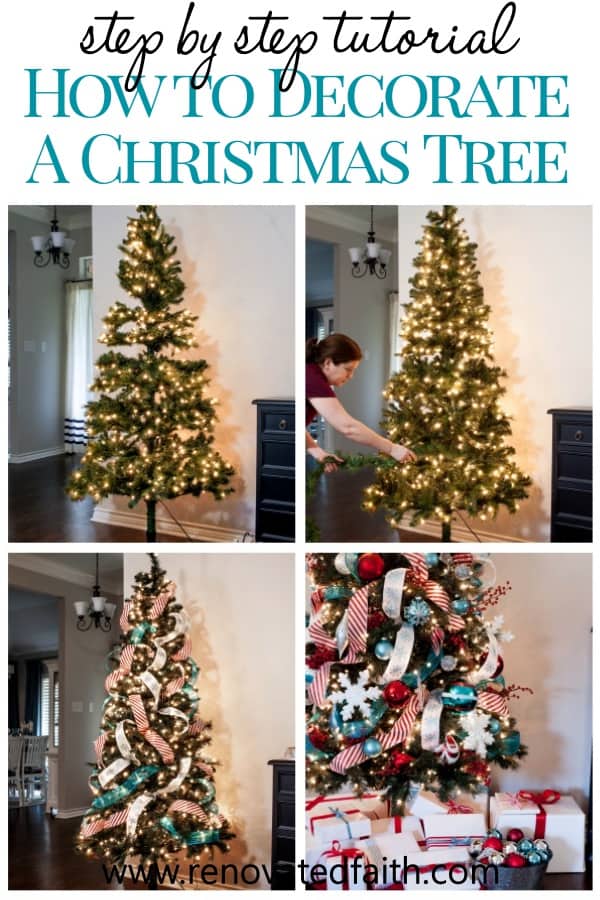
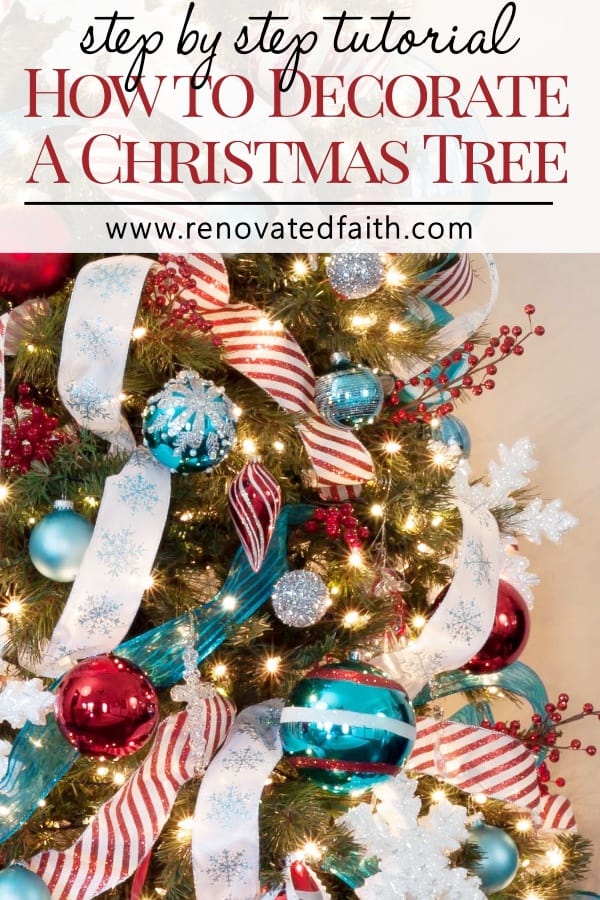
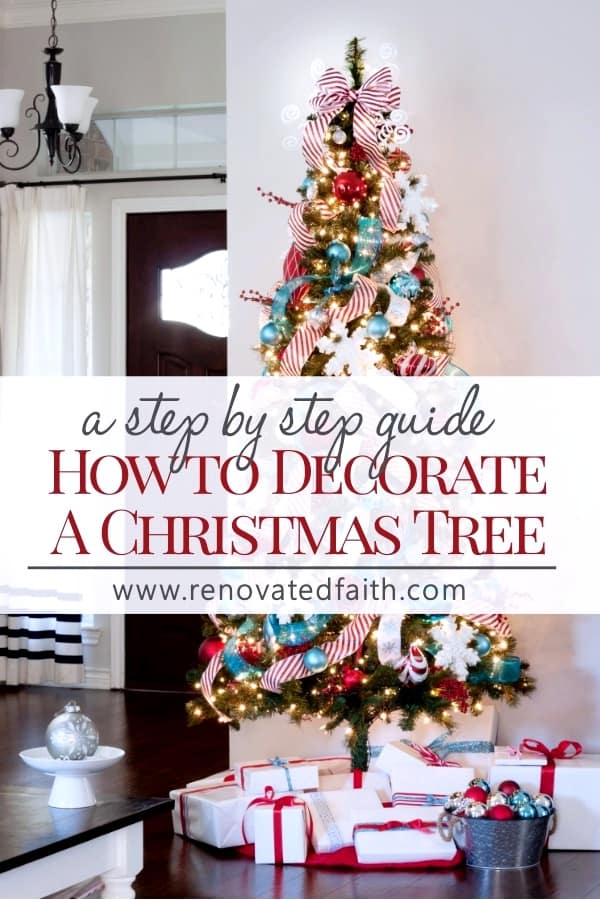
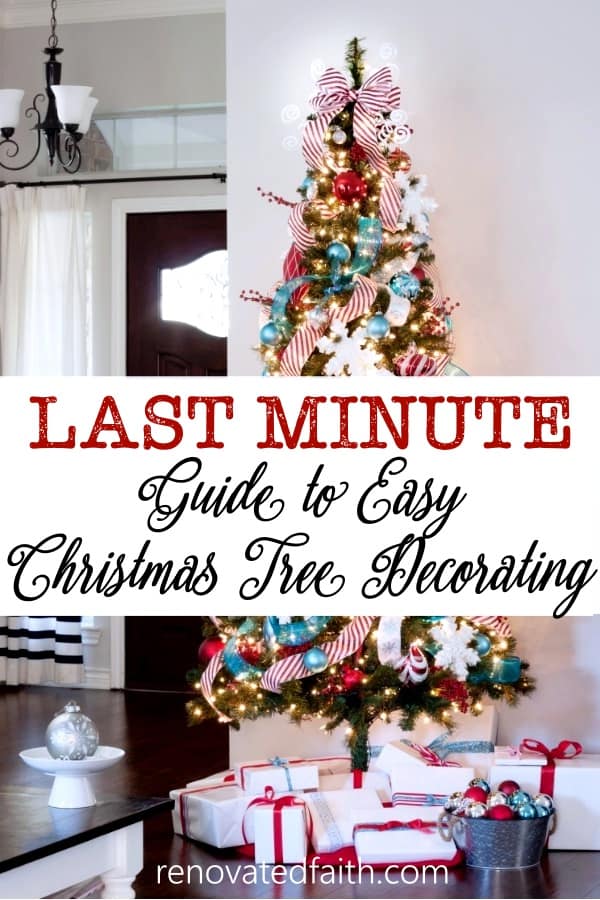
How to Decorate a Christmas Tree Step by Step (The Only Guide You’ll Ever Need!)
Decorating a Christmas tree can seem overwhelming, especially when you want to get the look of those designer trees you see on Pinterest. Here I’ll give instructions step by step on how to decorate a Christmas tree like a pro including some tricks and tips to help you out along the way.
Some people just seem to have a gift for decorating. My mother-in-law is one of those people. She can decorate anything beautifully on her first try. Fortunately, there are some foolproof steps you can follow to get a gorgeous Christmas tree that looks like it was decorated by a professional. Decorating your tree is not longer the most cringe-worthy part of your holiday decor with these easy hacks!
How to Decorate a Christmas Tree Step by Step (Best Ideas and Hacks)
The Best Hacks for Decorating a Christmas Tree (The Ultimate Guide)
Step 1: Getting Christmas Tree Theme Ideas
Before you go shopping, you need some Christmas tree inspiration so head to Pinterest to get a game plan.
Your goal is to find one or two trees you love on-line and add your own style and accents. I did the same here in this Pinterest Board where I found several red and turquoise trees I loved and combined elements of them all. You can also check out these Pinterest boards I made:
Farmhouse Christmas Tree Ideas
Traditional Christmas Tree Decor
Elegant Christmas Tree Decorating Ideas
Red and Turquoise Christmas Decor
Once you have created a Pinterest board, narrow it down to under 3 favorites and decide on two or three main colors. I picked red and turquoise with some white. Also, decide if you want to add in some silver or gold accents.
Step 2: Christmas Decorating Supplies
Some affiliate links may be used at no extra cost to you. View my full disclosure here.
You Will Need:
Wired Ribbon – I use 2″ to 4 inch wired ribbon on trees but this year I used all 2.5″. Be sure the ribbon is wired!
Lights
Large Ball Ornaments
Christmas Tree Ornaments – Regular Sized Ball Ornaments – If you buy ornament sets online, make sure they are the 3.15″ ornaments and not a smaller version.
Picks, Snowflakes or any other Accents
Christmas Tree Skirt or Christmas Tree Collar – I personally used a white sheet because the gifts cover it anyway, but I LOVE these Christmas tree collars. Maybe next year!
Don’t forget to get your free printable on how to update the look of your tree without getting all new decor: The EASIEST Way to Flock a Christmas Tree!

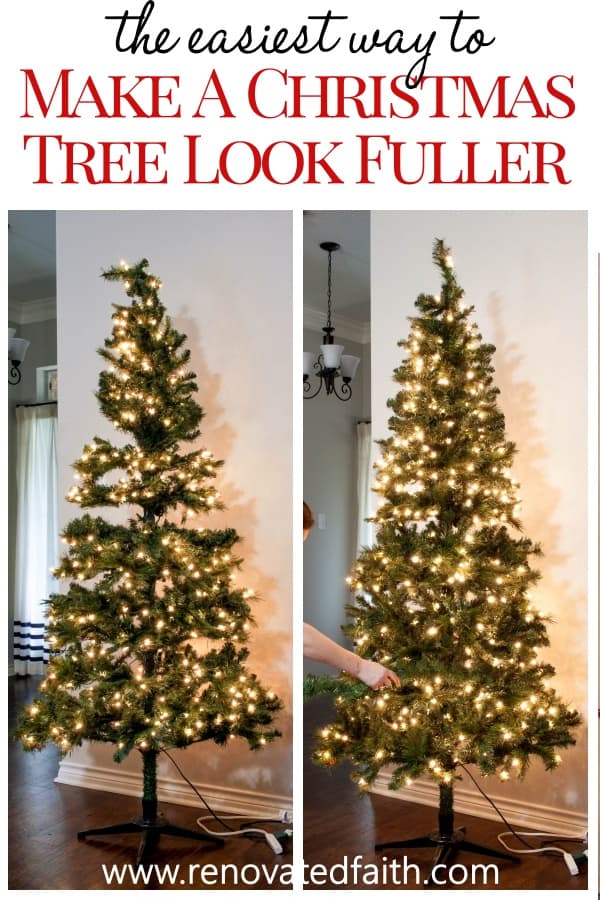
Step 3: The Easy Way to Make Your Christmas Tree look Fuller
A tree will never look like a designer tree if you can see straight through it. And no amount of ornaments and ribbon is going to fill in those big gaps. After you fluff each branch of the tree, I recommend using this to add a little more fullness to your tree.
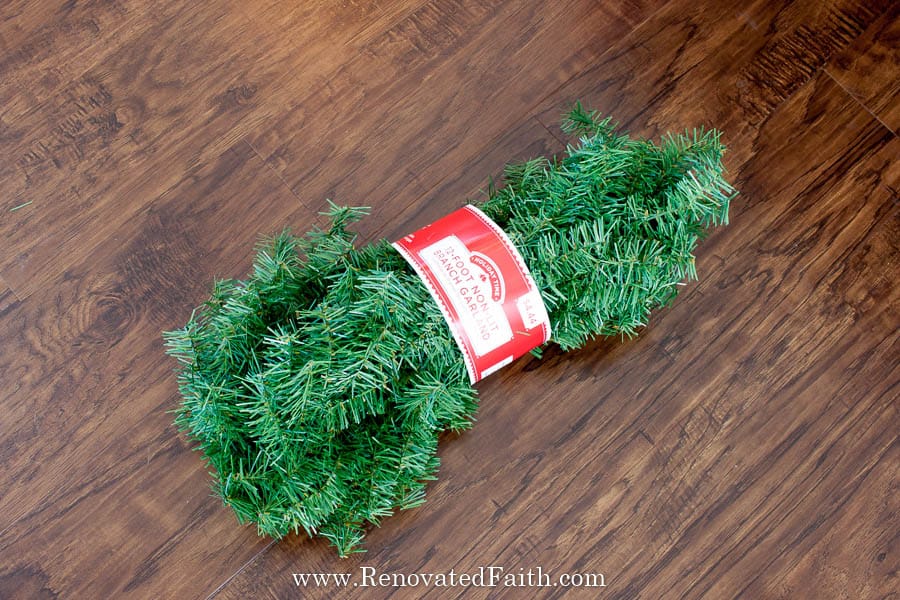
This garland was less than $7 at Walmart but it made the entire tree look like I paid a lot more for it than I did.
I simply weaved the garland between each row of branches paying special attention to the bare spots.
Doesn’t that make a huge difference?!?
Want to flock your Christmas tree for an updated look?
Here is the best point to do that and you can use this free printable:
Step 4: How to Arrange Christmas Tree Lights
Even if your tree is already pre-lit, consider adding more lights as professionally decorated trees have more than 100 lights per foot of height. For example, our 7.5 foot tree had 500 lights. That sounds like a lot but in past years I regretted not adding more. This year I finally did and it made all the difference with the extra strand of lights.
There are several different ways to add lights to a tree. If your tree isn’t already pre-lit, I recommend adding lights to one branch at a time by starting towards the base of one branch and running lights up to the tip and then back to the base and the same for the branch beside it. This way adds a lot of depth to the lights in your tree.

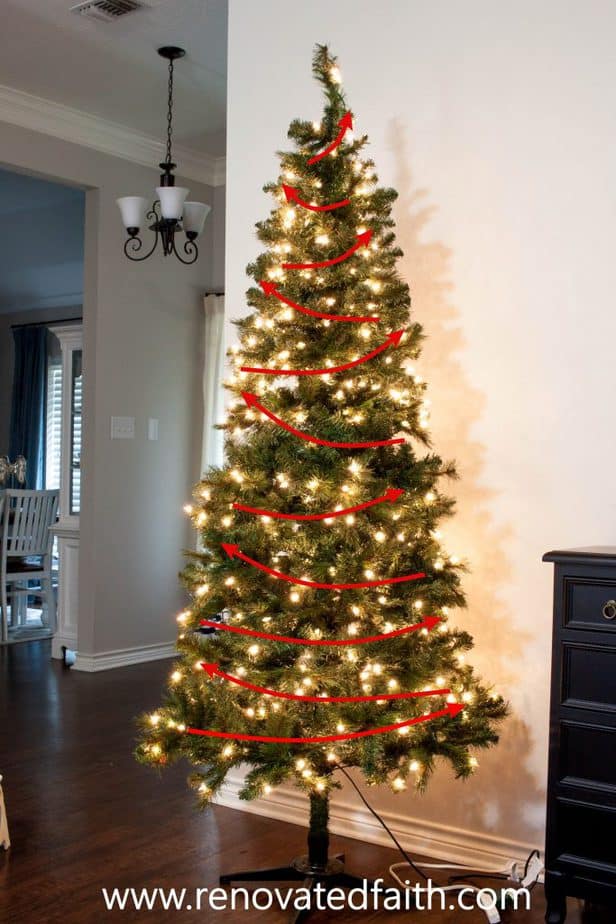
If your tree is pre-lit, add additional lights by going back and forth like the picture below. Since you already have lights in the innermost parts of the tree, this is the easiest, least time-consuming way to add lights.
If you have extra lights one you get to the top, right them back and form from top to bottom again, filling in any areas that look bare.
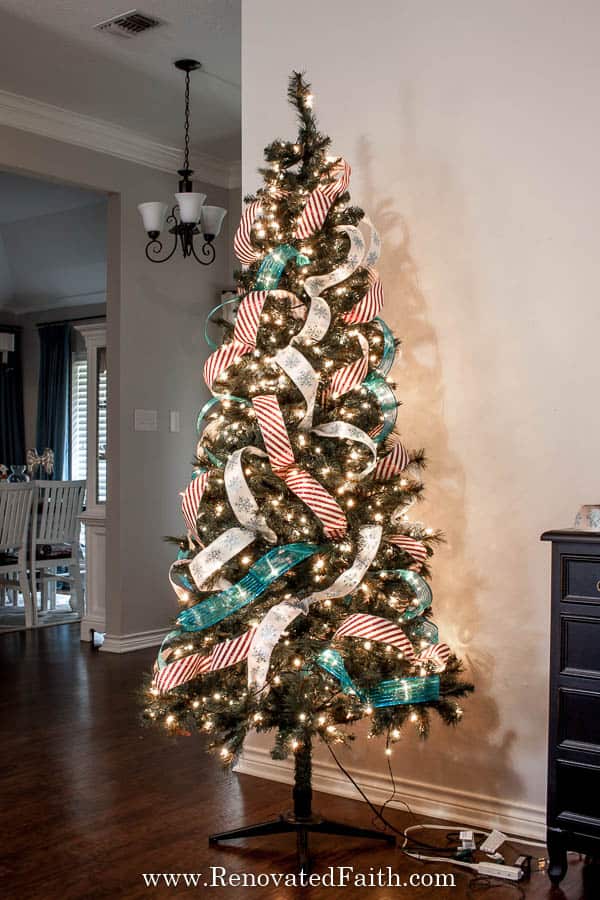
Step 5: Adding Ribbon on Tree-Ideas and Hacks
If you want to know how to decorate a designer Christmas tree, you need to add some ribbon BUT it’s a whole lot easier than you think with one simple trick!
The Best Ribbon for Christmas Tree Decorating
Make sure you use wire ribbon for your tree because it will be easier to bend in and out of the branches. I like to use ribbon that is 2.4” to 4” in width.
I go in-depth on the easiest way in my Adding Ribbon to Christmas Trees Tutorial. It’s even complete with a step by step video so you can decorate a Christmas tree like a pro. Then come back here for the rest of the tutorial.
Click Here for the Video Tutorial of How To Add Ribbon
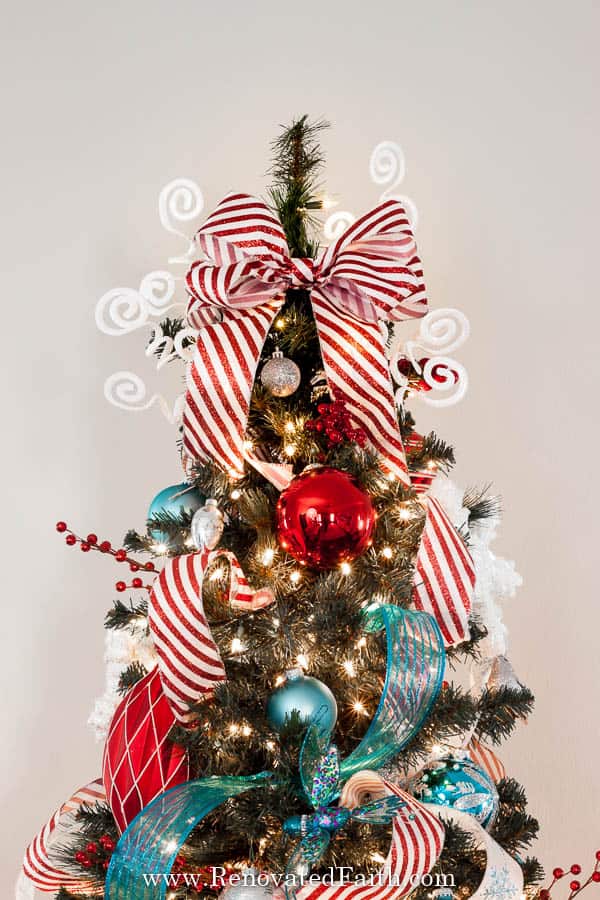
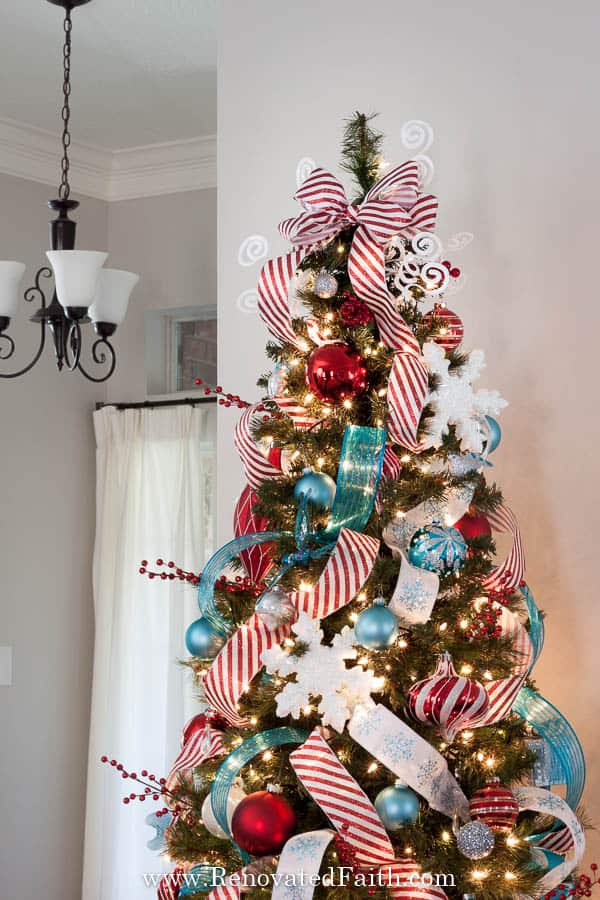
Step 4: How to Add a Topper to a Christmas Tree
Usually, I use a star at the top, but this year I opted for a big bow. I used the same short cut as I did in my post How to Make a Burlap Bow. No one will know (or care!) that you cheated and your bow will look stunning!

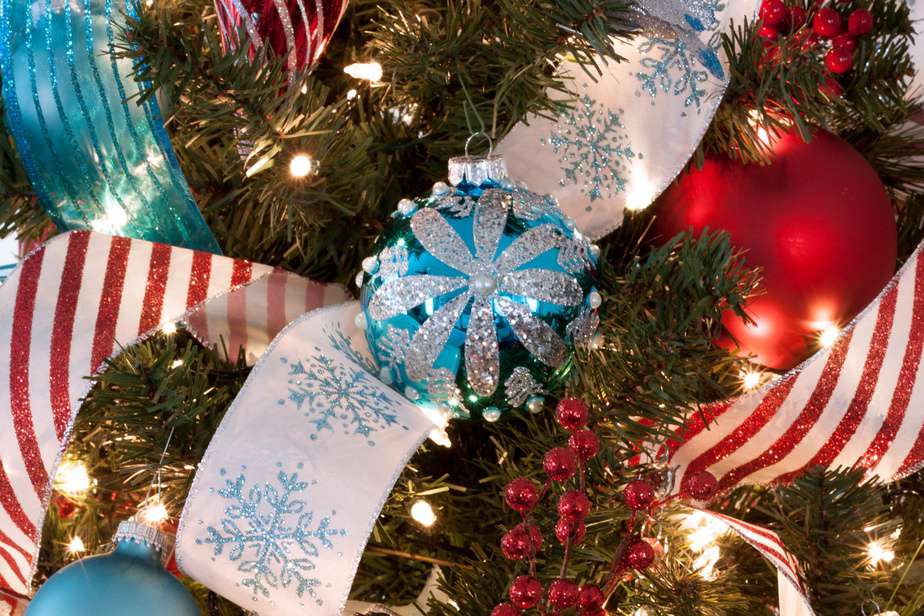
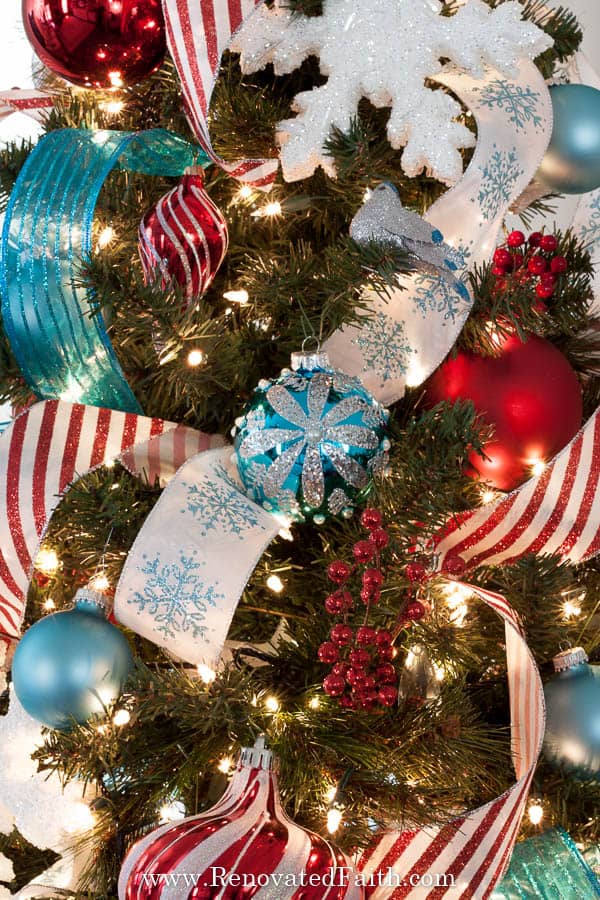
Step 5: How to Arrange Ornaments on A Christmas Tree
Designer trees are interesting trees and what makes a tree interesting is that it has varying sizes and shapes of ornaments although they fit into the same color scheme. I promise this is easier than it sounds!
Remember those 2 or three colors you picked for your tree? You are also going to use those colors and possibly a neutral metallic (silver, gold, copper, etc.) for your ornament colors.
But you don’t want all the same size of ornaments because that’s boring. I like to get about 5 or 6 really large ornaments and nestle them in the branches of my tree – mostly in the bottom two-thirds as they will be too big for the top. You can use green pipe cleaners, to adhere them to the branches if you’re concerned about them falling off.
Once you have added your large ornaments, you can fill in with the rest of your ornaments in “holes” and to cover the inner “bends” of your ribbon like below.
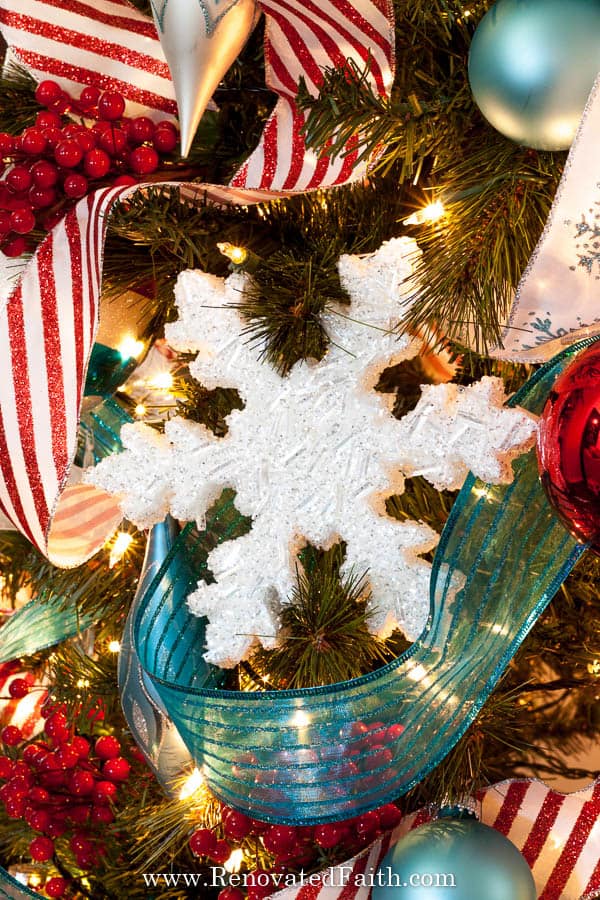
Step 6: Add Some Accents to Your Christmas Tree
The last phase of decorating a Christmas tree step by step is to add an “interest factor”. You can do this by adding various picks or even snowflakes. I’ve also seen someone add big bows instead of snowflakes. The possibilities are endless!

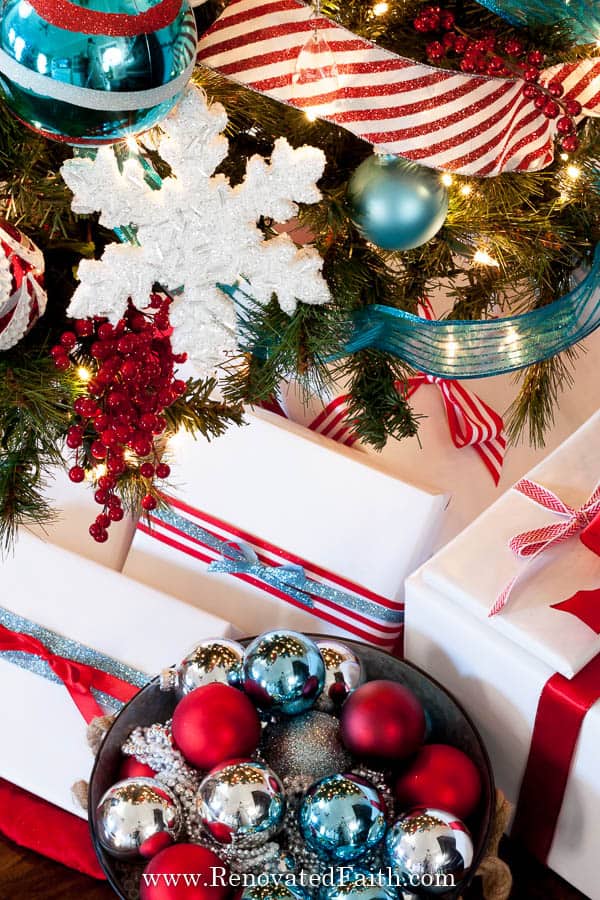
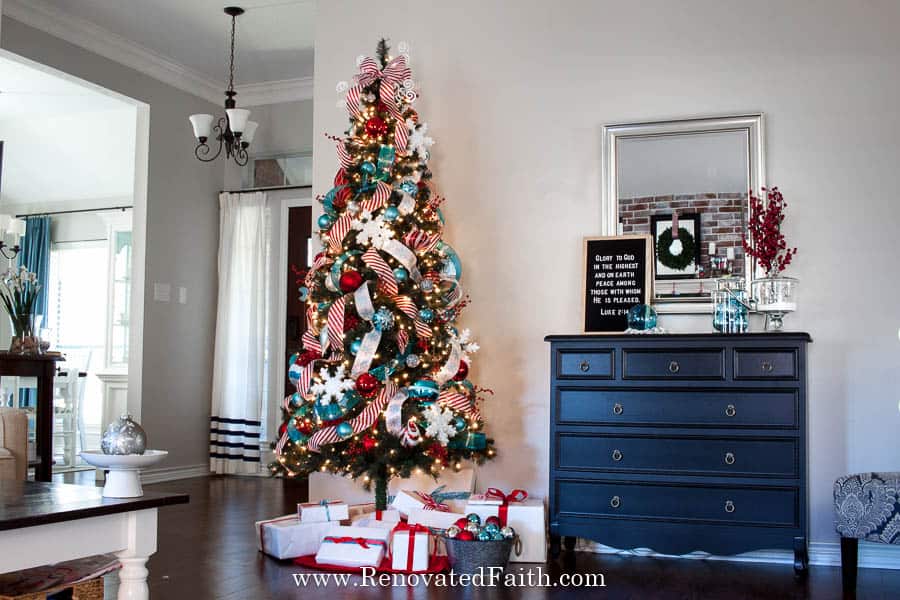
I love how it looks like the ends of the bow continues in and throughout the tree. This combinatiom of colors already coordinates well with all the blue in my home and they are still whimsicle and not-too-stuffy for my eight-year-old daughter!
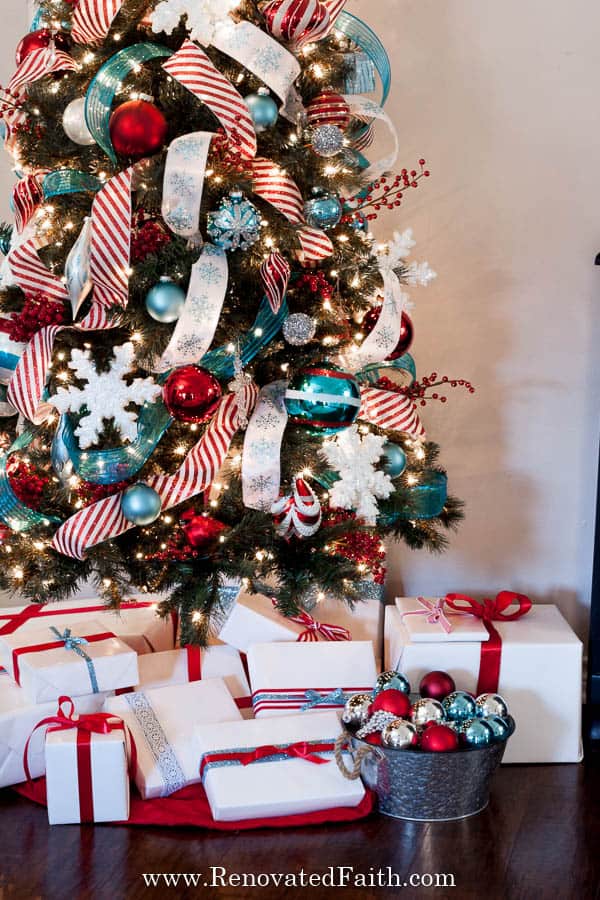
It was also fun to color coordinate the gift wrapping with the tree to make the look all come together. It was also a WHOLE lot easier to wrap all the gifts in white but they weren’t lacking for color with the sparkly ribbon!
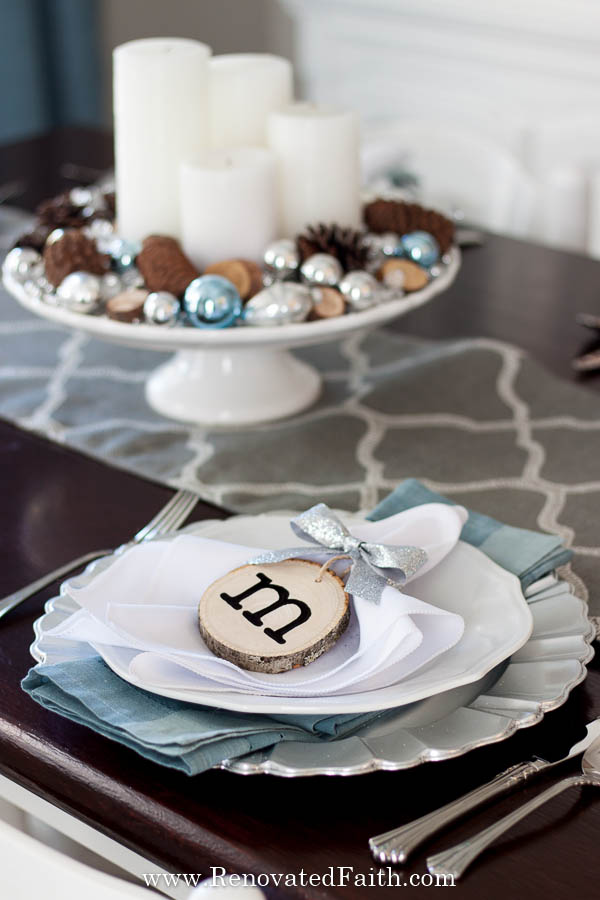
I’d also love for you to check out my post on how to do DIY Wood Slice Place Cards. They also double as personalized ornaments for your guests!
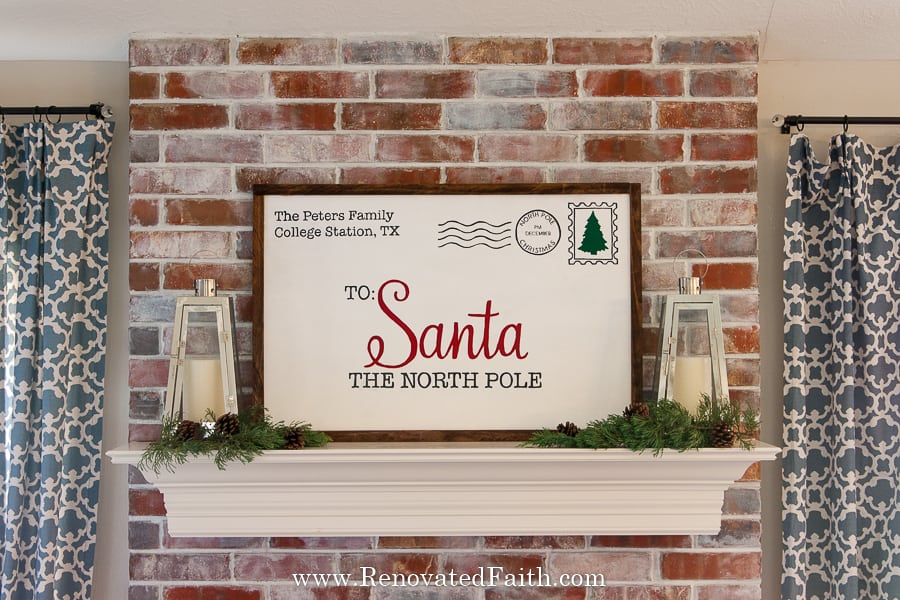
An for a super cute addition to your mantel or front porch, check out this DIY Letter to Santa Sign.
Quick Links to Information in this Post
If you want to save this post for later, pin it here:
Related Posts to Decorating a Christmas Tree, Step-by-Step:
DIY Letter to Santa Sign (No Cricut Required)
The Best Delivery Driver Appreciation Ideas
Gift Ideas for Christian Women (What They REALLY Want!)
Easy Front Porch Christmas Decor Ideas
How to Add Ribbon to a Christmas Tree, The EASY Way
Did you like this post? Be sure to share it with others. Have a wonderful week!
Blessings,

Be sure to follow
the fun here!
Email Subscription | Instagram | Pinterest | Facebook | Twitter

Karin Peters is a DIY expert and the creator of Renovated Faith. She is a furniture painter, a home design consultant, and a tenacious problem solver determined to help you transform your house into a home. With 17 years of experience with DIY home improvement, she researches and analyses professional processes to adapt them to be easy and cost-effective for DIYers. She then tests every project and product before it appears on the site in a detailed, step-by-step format. After attending Texas A&M University, she received her Master of Divinity with Biblical Languages at Southwestern Baptist Theology Seminary. Her passions unite in Renovated Faith, which shows readers how to create a home that serves them so they can pursue their God-given purposes. About Renovated Faith | Editorial Policy | Facebook | Twitter | LinkedIn
I love the idea of using a green garland to make the tree look fuller. A huge game changer on an old beloved tree that has seen better days. I used a 50′ garland found at Home Depot (the challenge was to find one that didn’t have pine cones or was pre-lit) and thought it would make our little 4 1/2′ foot tree look like a mummy! LOL I just tucked it in and it looks great! I’ve passed this idea onto friends and even a woman looking at decorations in Wal-Mart! Thank you, Karin! Merry Christmas!
Your tree is so beautiful! I’m one of those people that even if I follow your tips, it would never turn out that good, lol. My tree is already up, but I will certainly try these next year! Thanks for always sharing.
Amy, I’m sure your tree looks amazing just how it is! Hope you have a Merry Christmas and thank you for your kind words!
I love your tree! We do a traditional tree each year, but may add some of your ideas to it. I would like to know where you found the bucket that is on the floor by your tree (that ornaments in it).
Thanks!
Hey Sherry,
I actually found it at Walmart. It has “Flowers & Garden” on one side but I just turn that side to the back. Thank you so much for your sweet comment and have a great day! – Karin
Sherry, I actually got it at Walmart! It says Flowers & Garden on one side but I always turn that toward the tree. Let me know if you have any other questions! – Karin
Last years tree was probably the prettiest tree I’ve put up, at 63, I have put up alot of trees. Last year I went with burgundy and gold. I also hung big loose ringlets of burgundy and gold wire ribbon. I started the ribbon at the top of the tree and just let the curls flow down the length of the tree. With all the beautiful burgundy and rich gold ornaments and soft white lights, that tree was beautiful.
I bet it was absolutely stunning! I would love to see a picture if you get a chance. Did you use any of the tips in this tutorial? Have a great day Danita!
Thank you so much!! Husband and I’s first Christmas in our new home and we needed some guidance on a big tree! Excited to open our home to guests and family this season! <3 heather
Aww, thank you so much for taking the time to share that with me. I wish you a very Merry Christmas together Heather!
Thank you so much. I am going to use ribbons this year, I have a large bow topper but only used 3 or 4 small strands down over the tree. My tree looks pretty much the same every year, and nothing great. We have a pre lite tree but they no longer work so we have to put other lights on it. Love the tree so I’m dealing with it. Thanks again .
Hey Theresa, So glad you found the tutorial useful! Be sure to show me how it turns out. I know your tree will be gorgeous! -Karin