How to Make A Burlap Bow (The Easiest Bow Hack!)
A Beginner-Friendly Burlap Bow DIY Tutorial & Video
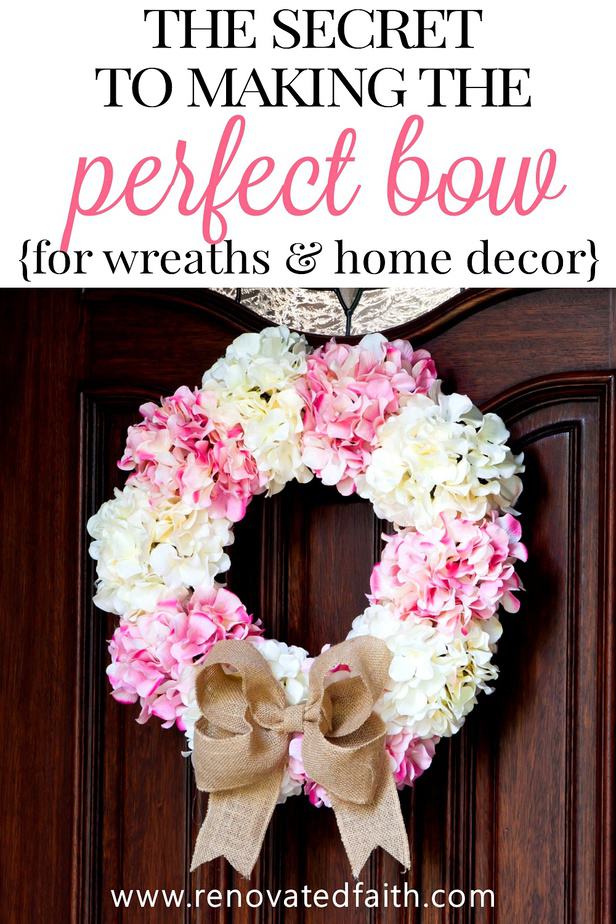
Want to know how to make a burlap bow for a wreath or any home decor? Here’s the easiest burlap bow DIY tutorial.
One fateful Christmas, my mom had an elaborate bow made for the top of her Christmas tree. It was huge, gorgeous, and oh-so-expensive!
As she fluffed the branches in preparation to put her elaborate topper on the tree, my dad came into the living room, plopped on the couch, and said, “What am I sitting on?”
That Christmas will forever be known as “the year Daddy sat on the Christmas tree bow.” No amount of fluffing and straightening could make that wired ribbon look the same as it once did.

Fortunately, you don’t have to waste your money on professionally-made bows and you won’t believe how easy it is. These easy step-by-step instructions will show you how to make the perfect bow in very little time. I also show you my favorite ribbon to use for bow-making!
Whether you are new to crafting, or you’re a professional wreath maker, this burlap bow tutorial includes an easy little trick to have in your craft arsenal for any bows you need to make – burlap or otherwise!
LET ME SHOW YOU:
- How to save money by making burlap bows instead of buying them
- A simple way to customize the shape and size of the bow to your project
- The easy way to make a bow for any home decor or project
- Some encouragement when you are feeling overwhelmed in this week’s Renovate Your Faith devotional at the bottom of this post
Quick Links to Information in this Post
- 1 A Beginner-Friendly Burlap Bow DIY Tutorial & Video
- 2 Supplies for Making a Burlap Bow:
- 3 How to Make a Burlap Bow for Home Decor: Step-by-Step Tutorial
- 4 RENOVATE YOUR FAITH:
- 5 Easy Burlap Bow DIY Tutorial: Related Posts
- 6 How to Make a Burlap Bow For Wreaths & Home Decor
- 7
- 8 [spacer height=”20px”]
- 9 How to Make a Burlap Bow for a Christmas Wreath
- 10 Easy Burlap Bow DIY Tutorial – FAQ’s:
- 11 How to Make Burlap BOws for Wreaths & Home Decor – Final Thoughts
- 12 HOw to Make Burlap Bows for Wreaths & Home Decor: Youtube Tutorial
- 13 Burlap Bow DIY Tutorial: How to Make a Bow for a Wreath & Home Decor

How Do You Make a Simple Burlap Bow?
When my daughter Morgan was about 6 months old, I decided that I needed a way to work from home. For some reason, my answer to that dilemma was a hair bow business.
This seemed like a really good idea at the time and it lasted about a year. But after too many hot glue burns and 2 a.m. Dr. Pepper breaks, I decided it would be best to take an early retirement from the bow-making business.
Fortunately, I got to work with a really great shop in town called And Sew On. Here are a few of the Aggie bows I got to make:

The nice thing about my hair bow venture was that my daughter has an unlimited, almost disposable, hair bow collection. But more importantly, I learned how to make a bow for any and every type of home decor including wreaths, mantels, mason jars, and even teacher gifts.
I’ve used this same technique to make a lot of burlap bows for various craft and home decor projects. As I show in the video tutorial, I love that it works well with any type of ribbon including burlap, wired burlap, satin, and grosgrain. So the next time you need a bow, this easy tutorial has got you covered!
Supplies for Making a Burlap Bow:
As an Amazon associate, I use affiliate links for products I use and love.

How to Make a Burlap Bow for Home Decor: Step-by-Step Tutorial
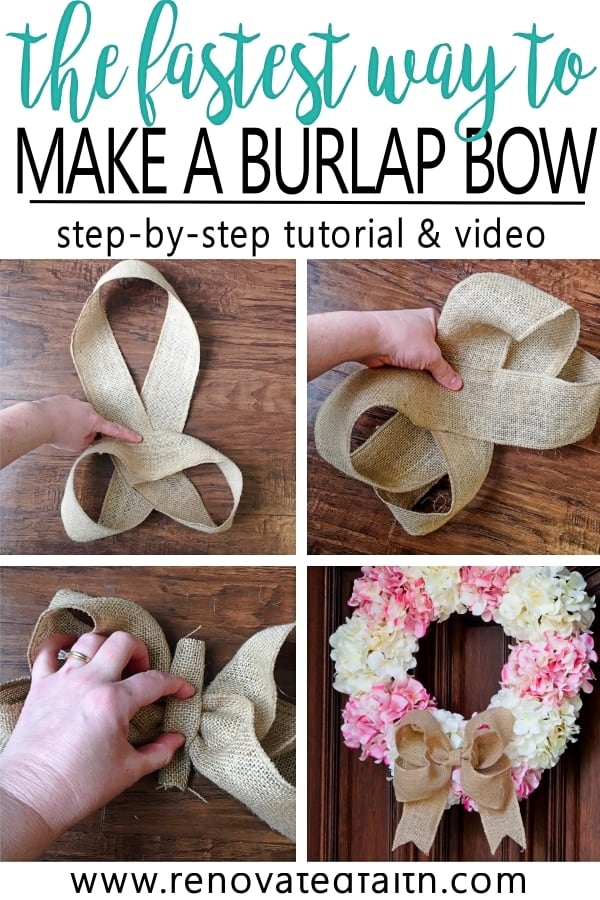
Here is a full step-by-step video showing from start to finish:
STEP 1: How to Make a Bow with Wired Burlap Ribbon
The bow I’m making below is for an 18-inch grapevine wreath. For this same size bow, cut your 3″ wired burlap ribbon (I like this kind) to a length of around 52″.
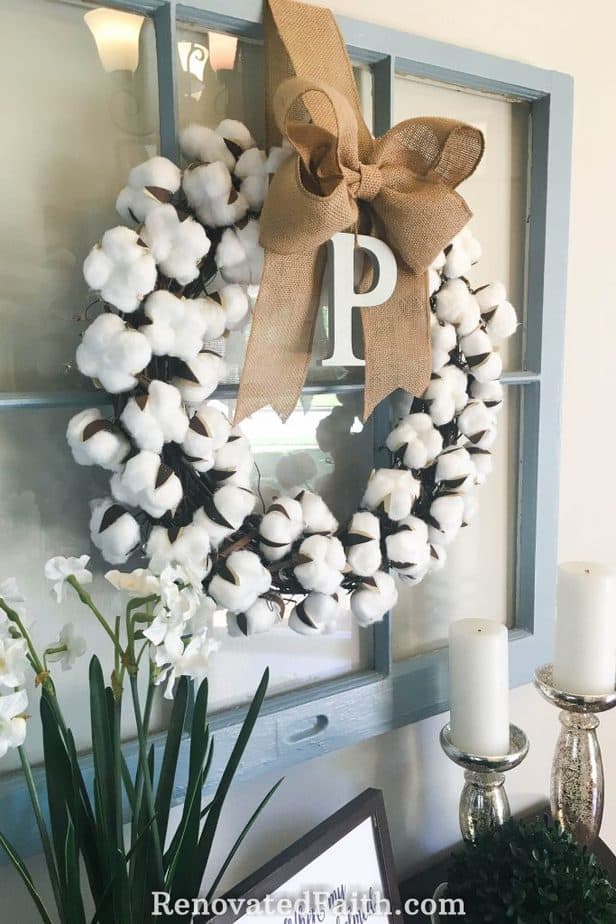
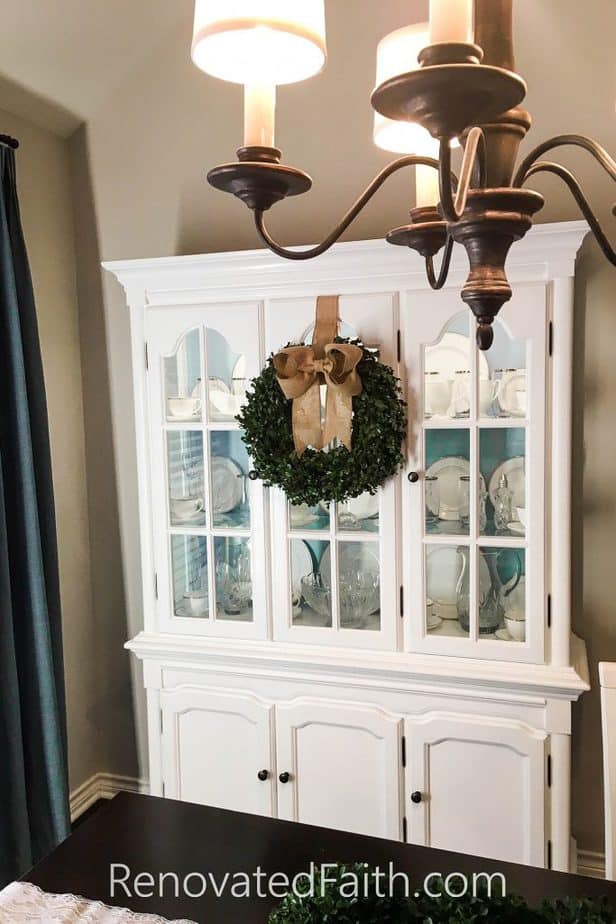
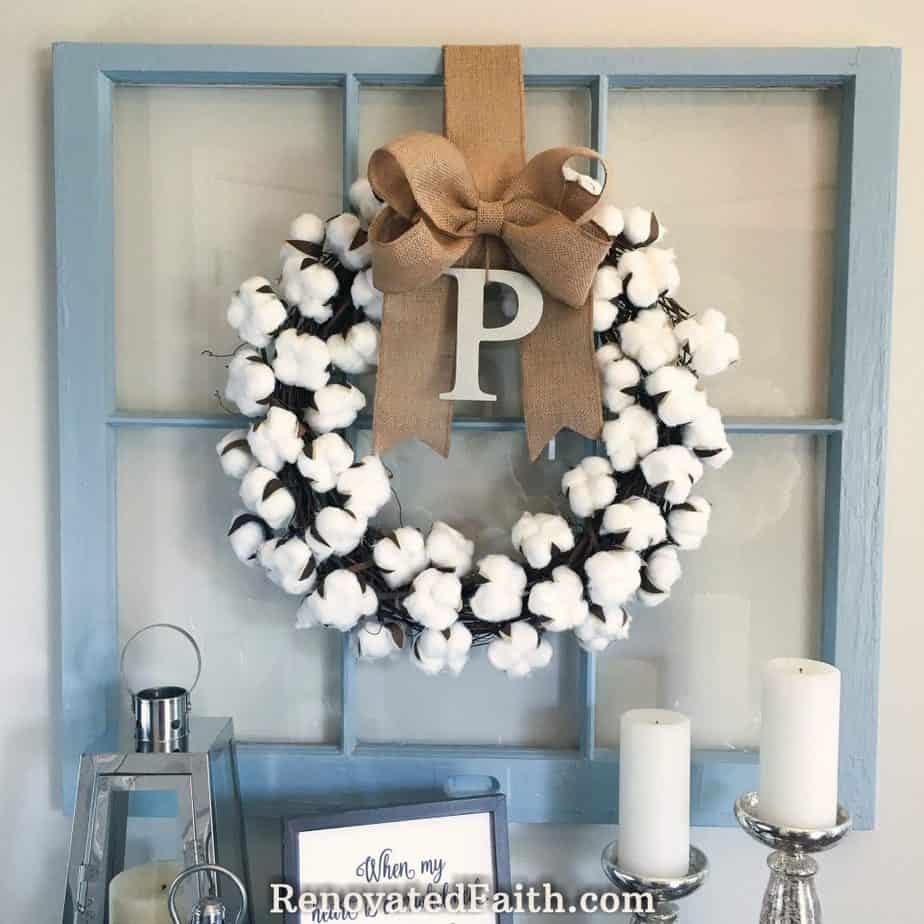
If you want a fluffier, loopier bow add a couple of inches, but if you want a flatter bow, subtract a couple of inches. I would consider the bow with the boxwood wreath above to be a fluffier bow and the bow with the cotton wreath below to be a little flatter.
Lay out your ribbon and figure out the center point by dividing the overall length by 2. Make a light pencil mark there to give you an idea of where the center is when making your burlap bow.
How to Make Burlap Bows for Wreaths (Large Burlap Bows)
If you want to make a large burlap bow for wreaths or home decor, follow the directions above using the 3″ wired burlap ribbon. If you want an even bigger bow, you can do one of two things: You can increase the length of your ribbon by 6-12″.
If that’s still not big enough, you can also get thicker ribbon you can find here or you can find multiple sizes at craft stores.
How to Make a Small Burlap Bow
This tutorial shows you how to customize a burlap bow to any project, whether it’s a wreath, a mantel, a mason jar or you need to make small bows for teacher gifts.
For smaller burlap bows, use a smaller thickness of ribbon, like 1 – 2″ wired ribbon. Also, decrease the length of your ribbon significantly. You want to look at the picture of the figure 8 below and make your figure 8 for the little burlap bows proportional to the big one – in other words just a smaller version. Every other aspect of the tutorial is exactly the same! 🙂
Renovated Faith: What’s in a Name?
God never leaves a project half-done…He continually works on each one of us, as a lavish expression of His amazing love and grace. So many of my DIY projects remind me of how God renovates our hearts. If you are a work-in-progress, just like I am, check out the Renovate Your Faith Devotional at the bottom of this post. Click here to get a weekly reminder of new posts by email.
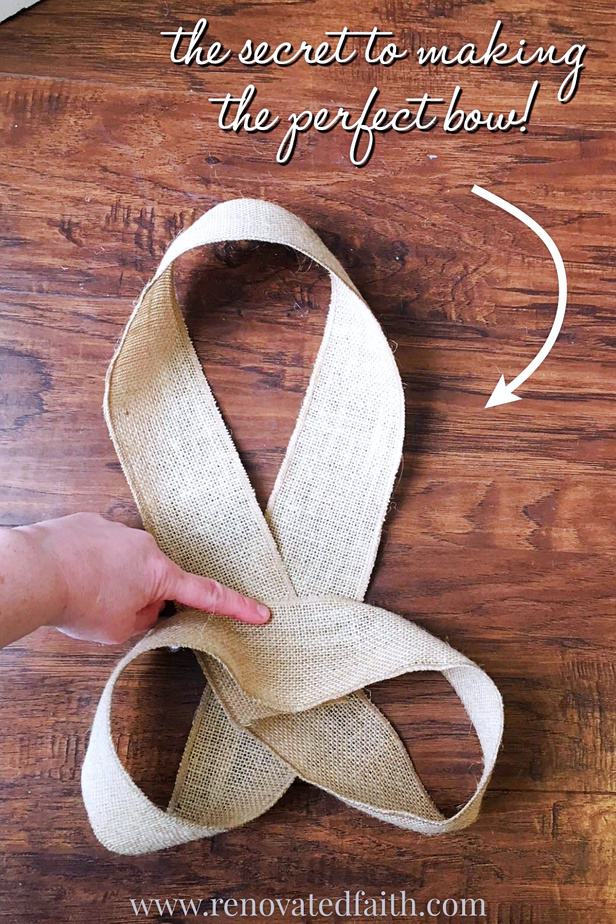
STEP 2: Make a Figure 8 to Start Your Burlap Ribbon Bow

STEP 3: How To Make a Bow Out of Wide Burlap Ribbon

STEP 4: Making the Loops for your DIY Burlap Bow

STEP 5: Fold the Center of your DIY Burlap Bow


STEP 6: How to Tie a Burlap Bow with Wire

STEP 7: Add the Center to Your Burlap Ribbon Bow

STEP 8: HOw to Make a Simple Burlap Bow With Tails

STEP 9: How to Make Burlap Bows That Attach Easily to Home Decor
RENOVATE YOUR FAITH:

For more spiritual encouragement, click here for the rest of my project posts that also include Renovate Your Faith devotionals.
☑️ My All-Time Best Furniture Painting Tips & Tricks (FREE PRINTABLE)
Don’t forget to download the FREE step-by-step printable checklist that shows you the entire process I’ve used on dozens of furniture pieces while saving you time and money!
DON’T FORGET TO TAKE A PICTURE!
Now that you are done, I’d love to see how it turned out! ❤️ Post the picture of your bow here!
Easy Burlap Bow DIY Tutorial: Related Posts
How To Make A DIY Cotton Wreath For Less Than $10!
Simple Hydrangea Wreath for Spring
How to Make a Rustic Glam Christmas Wreath
The Easy Way to Paint Mason Jars
How to Add Ribbon to a Christmas Tree
How to Make an Easy Peasy Lemon Wreath
Easy Gel Stain Technique for Staining Painted Furniture
How to Transform Acrylic Paint Into Fabric Paint
How to Make a Burlap Bow For Wreaths & Home Decor
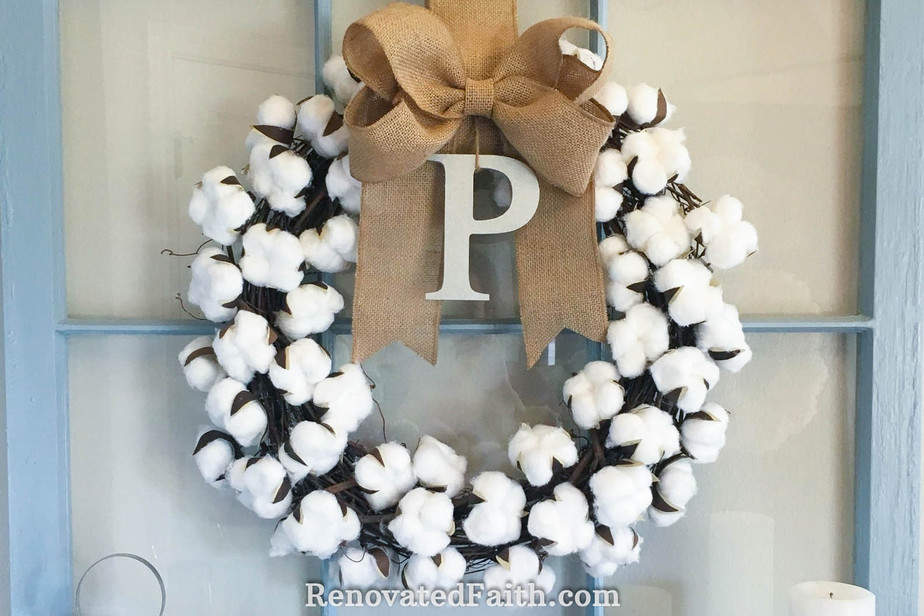
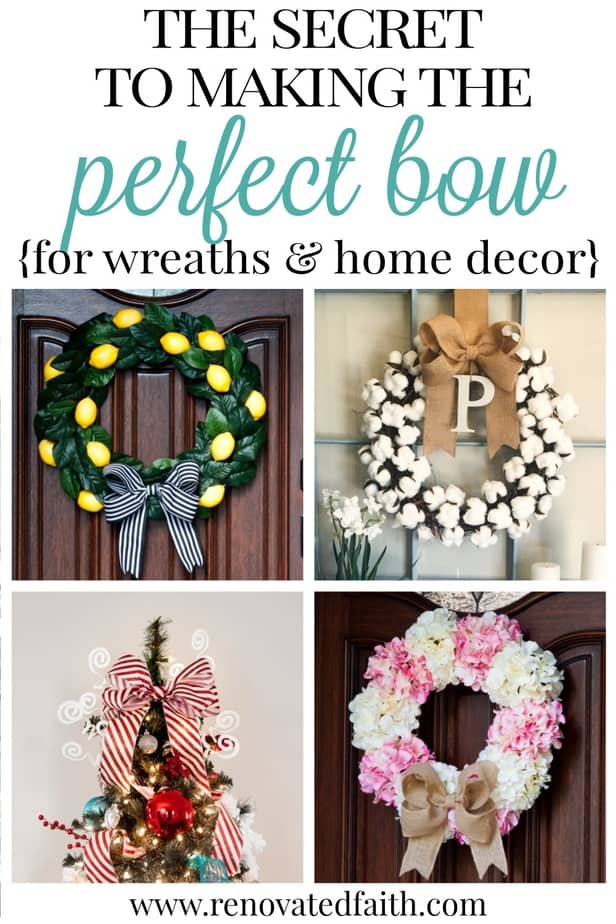
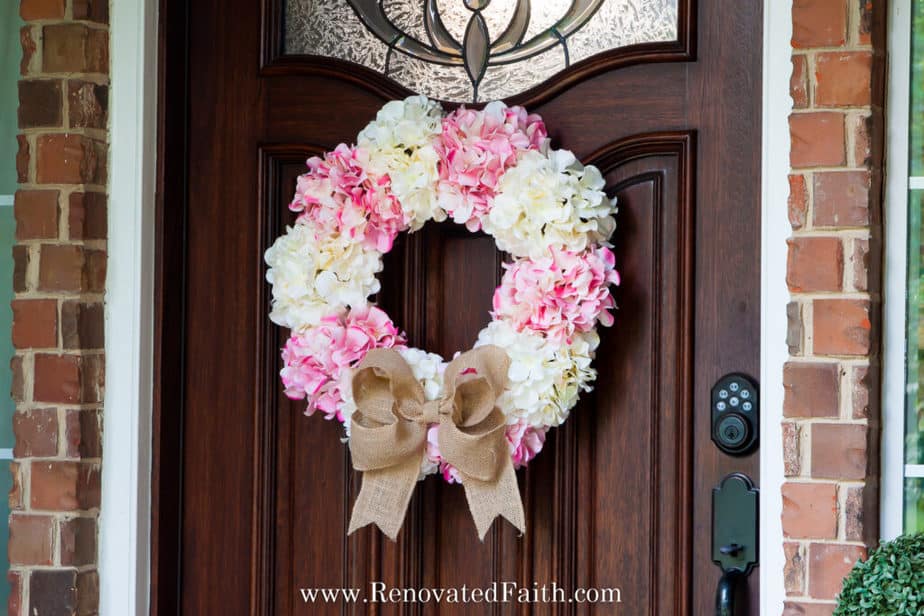
This tutorial is so versatile because you can use it for any kind of wreath or home decor. Below you can see how the same bow looks on my cotton wreath, hydrangea wreath and lemon wreath. I’ve also used this bow tutorial for lots of Christmas bows by hot-gluing it to a piece of red ribbon so it looks “tied-on”.

DIY Hydrangea Door Wreath {Why Spring Is The Season of Hope}
I made this hydrangea wreath for my front door and it has held up incredibly well! Click the link above to make your own.

[spacer height=”20px”]
You can use the wire attached to the bow to tie it on your wreath. This type of wire burlap bow looks great on the top or bottom of any wreath.
To get this same look, Amazon sells a wreath almost identical to this one: 20″ Boxwood Wreath Then, just attach your burlap bow and you are done! I actually made this wreath from real boxwood branches, but you can read why I DON’T recommend that here: How to Know When To DIY Home Decor or Buy It
[spacer height=”20px”]

![]()
[spacer height=”20px”]
How to Make a Burlap Bow for a Christmas Tree Topper

To make a bow for Christmas tree toppers and Christmas wreaths, use the same instructions above! Instead of wired burlap ribbon, here I use wired Christmas ribbon that is 2.25″ wide. Make the bow with the instructions in this post and attach it to the highest center branch of your tree. You can see in this post (How to Add Ribbon to a Christmas Tree) how I make it look like the same ribbon in the bow is intertwined throughout the whole tree!
[spacer height=”20px”]
How to Make a Burlap Bow for a Christmas Wreath

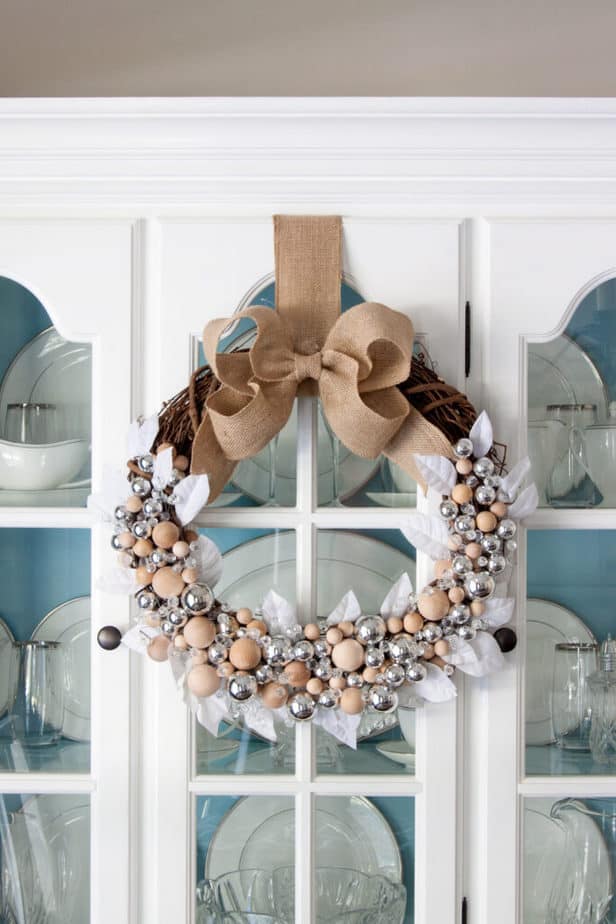
To see the full tutorial on how to make this rustic glam wreath click here: Rustic Glam Christmas Wreath with Ornaments and Wooden Balls
Easy Burlap Bow DIY Tutorial – FAQ’s:
How to Make a Burlap Bow Without Wire
You can make several different bow shapes without wire ribbon. Many bow-making tutorials don’t tell you that you can use any ribbon as long as you spray the bow with hair spray to hold it’s shape. Hair spray works well on burlap ribbon bows but also satin and grosgrain ribbon.
If you don’t have wire on hand for the middle of the bow, you can use the same tutorial above but you can use the burlap strip itself to hold the bow together. Cut your center strip slightly longer so that you can tie it in a knot behind the center of the bow. Once you have tied the knot, clip the excess ends so they don’t show from behind the bow.
How to Make a Burlap Bow Without Wire Ribbon
You don’t have to have wire ribbon to make beautiful bows! One tip for making a bow without wire ribbon is to spray your finished bow with hair spray. When I made hair bows, I would dowse them with hair spray and let them dry overnight. The next morning they were dry and just as stiff as they were if they were made with wire ribbon. Some people also swear by mod podge as a stiffening agent but I haven’t tried it personally.
The Best Place to Put a Burlap Ribbon on a Wreath
You can put a burlap ribbon wherever you prefer. The instructions from this tutorial still apply! You can put the bow at the top, at the bottom or at 4 o’clock if you want to add some hydrangeas or an initial. It’s totally up to you and there are several options!
How to Make a Layered Burlap Bow
If you want find out how to make a layered burlap bow, you can repeat steps 1-6 to make two separate bow “bodies”. Before adding the center strip of ribbon, stack the two bow bodies and then hot glue them together. Then continue with adding the center strip and continue the bow as usual. This is a great way to make a really fluffy layered burlap bow easily!
Easy Burlap Bows for Wedding Decor
If you are wondering how to make burlap bows for wedding decor you can easily use this tutorial! Use the instructions in step 1 to customize the bow to whatever size you need for the pew or for making burlap bows for wedding chairs.
You can hot glue the bow to a longer piece of ribbon that attaches to the pew or chair. Be sure to twist or gather the ribbon with wire before hot gluing it to the bow before attaching it. That will make it look like you made the bow from one long continuous piece of ribbon. No one will know the difference!!!
The Best Type of Ribbon for a Burlap Bow
If you can get wired ribbon, that usually helps the bow to stay in place and also be fuller. However, if you can’t find wired ribbon, you can see the tip below to use this tutorial with any other kind of ribbon material. You can find lots of burlap wired ribbon here: Wired Burlap Ribbon in All Colors
How to Make a Bow for a Wreath Stiff
If you can’t find wired ribbon, you can just as easily use ribbon without wire. To make it extra stiff and full, just spray the finished bow with a thick layer of hair spray. Let it dry and your bow will be stiffer than if you used burlap wired ribbon.
How to Make a Burlap Ribbon Bow for a Mason Jar
Use the instruction in step 1 to make a small burlap bow. When you are done, hot glue a piece of ribbon around the jar. Hot glue the end and cut off any excess. Then, just hot glue the bow to the ribbon on the jar to make it look like one continuous piece. To see how to spray paint and personalize mason jars, check out this post: The Easy Way to Paint Mason Jars.
How to Make a Burlap Bow without Glue
If you don’t want to use hot glue so your project is more kid-friendly, you can absolutely fasten the bow with a little floral wire or some chenille stems (pipe cleaners). For the center strip, make it long enough so you can tie it in the back without having to use glue for the ends of the ribbon.
How to Make A Burlap Bow With Two Colors
There are so many different colors of burlap fabric and ribbon that you can mix and match to make a bow with two different colors. You can make the body of the bow one color and make the center strip and tail of the bow another color. Or if like the look of double bows, make two body sections of the bows, making one slightly larger than the other. Stack the smaller bow on top of the larger bow and wrap the center with a piece of burlap ribbon. Simply add the long ribbon pieces for the tails and you are finished! You can even mix different types of ribbon in one bow.
How to Make a Burlap Bow For A Door Hanger
You aren’t just limited to making bows for wreaths with this tutorial but you can also use this same technique for door hangers, Christmas tree toppers and gift wrappings. Just use the tutorial above and attach it with wire or a zip tie. You can even add a bow to these vibrant sunflowers or other burlap flowers and floral bows.
How to Tie a Burlap Bow Around A Vase
There are several different ways to attach burlap bows and floral bows to vases and wreaths. To attach a burlap bow around a vase, I like to cut a seperate piece of burlap ribbon to the desired length depending on the vase size. Next, wrap the strip around the vase and hot glue the end so it overlaps slightly. Then hot glue the bow to the strip of ribbon on the vase. With very little additional cost, you can also use rubber bands or chenille stems (pipe cleaners ) from The Dollar Tree or Joann Fabrics. Did you know that Joann Fabric will honor Hobby Lobby’s 40% off coupons?
How Do You Make a Multi-Loop Burlap Bow?
To make a multi-loop burlap bow, follow the tutorial but before you put the center on, make another bow and stack it on top of the other. Now you have a double bow. Hot glue them together and then put the center bottom loom around them. This works with different types of ribbons so you can be creative with your bow-making.
How Do You Make a Puffy Bow Out of Burlap Ribbon?
This easy DIY burlap bow tutorial is great because it naturally makes a poofy bow that doesn’t lay flat. It works great for so many craft projects and fun uses whether it’s a fall wreath or a gift basket or even Christmas gift wrapping.
How Do You Make a Bow Out of Burlap?
If you are like me, you have tons of burlap fabric laying around from other DIY crafts. To use burlap fabric to make large bows, cut it in long 12-inch strips. Then fold over the fabric to make 3 or 4 inch wide ribbon strips. I like to iron them so they lay flat and keep their shape. Then, use those long strips as your burlap ribbon.
How to Tie a Burlap Bow for a Wreath
Whether you are making a spring wreath or door hanger for the holiday season, homemade burlap bows work well with any home decor. To tie a burlap bow to a wreath, cut wire into 4-6 inch strips. Hot glue the center of the wire to the back top of the bow. After the glue cools completley, the next step is to attach the burlap wreath bow with wire by simply tying it on.
How to Make a Burlap Bow for Christmas Tree Decor
YOu can use this same simple technique to make simple burlap bows to use as ornaments by cutting smaller strips of ribbon. Attach them to your tree with hair clips hot glued to the back. YOu can also mix in pine cones to add some rustic charm.

How to Make Burlap BOws for Wreaths & Home Decor – Final Thoughts
Don’t forget to sign up for my free printables including my Free Furniture Painting Cheat Sheet. Click the link to sign up for my weekly newsletter which also grants you free access to my resource library full of wall art printables, checklists, and project plans!
Whether you are making a wreath bow or adding a little something to a home decor project, burlap bows are such a fun way to add modern farmhouse style to your home. Knowing how to make them yourself will save you so much money and give you a lot more options. These easy tips and simple bow tutorial will help you make the perfect bow every single time!
I love to hear your thoughts and questions! Scroll down to leave a comment and I WILL reply! ❤️
Blessings,

Be sure to follow the fun here!
Email Subscription | Instagram | Pinterest | Facebook | Twitter

HOw to Make Burlap Bows for Wreaths & Home Decor: Youtube Tutorial
Burlap Bow DIY Tutorial: How to Make a Bow for a Wreath & Home Decor

Karin Peters is a DIY expert and the creator of Renovated Faith. She is a furniture painter, a home design consultant, and a tenacious problem solver determined to help you transform your house into a home. With 17 years of experience with DIY home improvement, she researches and analyses professional processes to adapt them to be easy and cost-effective for DIYers. She then tests every project and product before it appears on the site in a detailed, step-by-step format. After attending Texas A&M University, she received her Master of Divinity with Biblical Languages at Southwestern Baptist Theology Seminary. Her passions unite in Renovated Faith, which shows readers how to create a home that serves them so they can pursue their God-given purposes. About Renovated Faith | Editorial Policy | Facebook | Twitter | LinkedIn
You are Awesome! Thank you. I am kind of uncoordinated with my hands, but I do try my best and craft with hopes of getting good at somethings. These tutorials are HUGE HELP for me. I’m so very happy to have finally found you, ma’am. My passions are bows and flowers. You are an Angel. Thanks so much for your expertise and time. Sent with Love and Light, Jeannette
I am so thankful for your sweet message Jeannette. Please let me know if I can every answer ANY questions. Have a great weekend and God bless!
Wish I could see whatever you’re showing. All I get is a blank part of the screens with 3 flashing fots, and after about 45 seconds A bunch of ads and embedded videos start popping up. I’m on a tablet. I’ll send myself the URL and try again on my laptop. Love your uplifting email newsletters, but I have such a difficult time getting to any actual content!
That’s hurtful to hear. It’s opening up find on my end.
Oh! so this is how beautiful bows are made for wreaths… I have seen many beautiful wreaths in weddings and birthday parties and it draws my attention instantly. I will definitely gonna try to make bow myself this weekend.
I just want to tell you.. I LOVE everything on your site! I literally want to do everything! I found you because I’m renovating an old desk and I’ve searched high and low for the right “How To” I’m so glad I stumbled across yours! Every question I’ve ever had is answered! You rock!
Thank you so much Joanna! I really appreciate that. If you ever have a question the blog doesn’t answer, be sure to ask me! -Karin