DIY Fingerprint Wreath Wall Art (Personalized with Your Family’s Fingerprints & Name!)
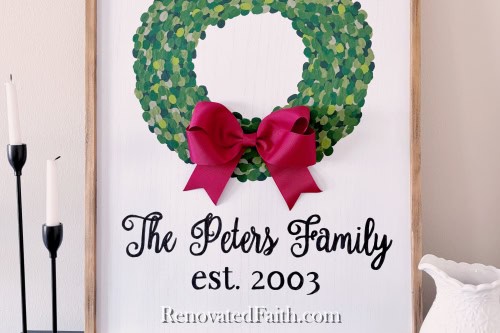
DIY Wall Art & Fun Family Activity
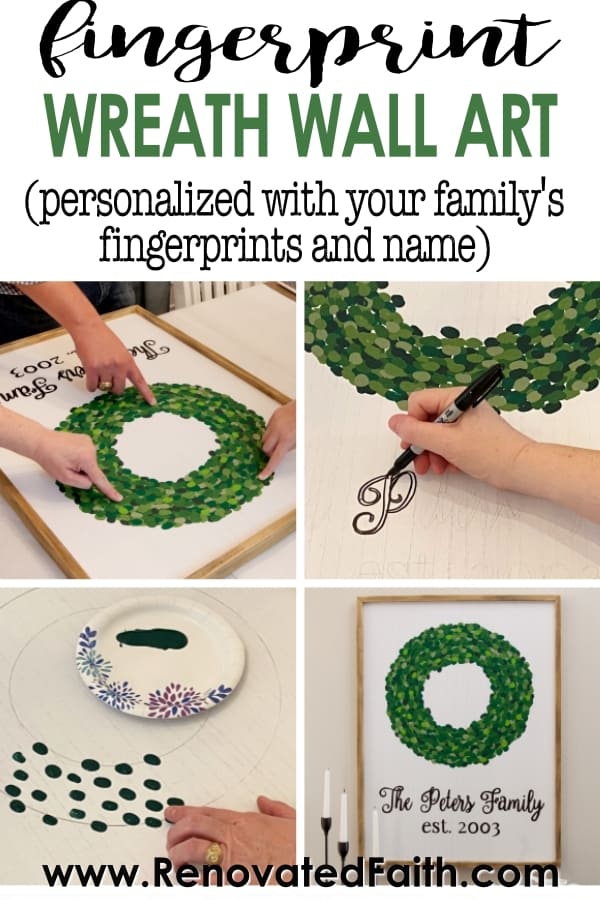
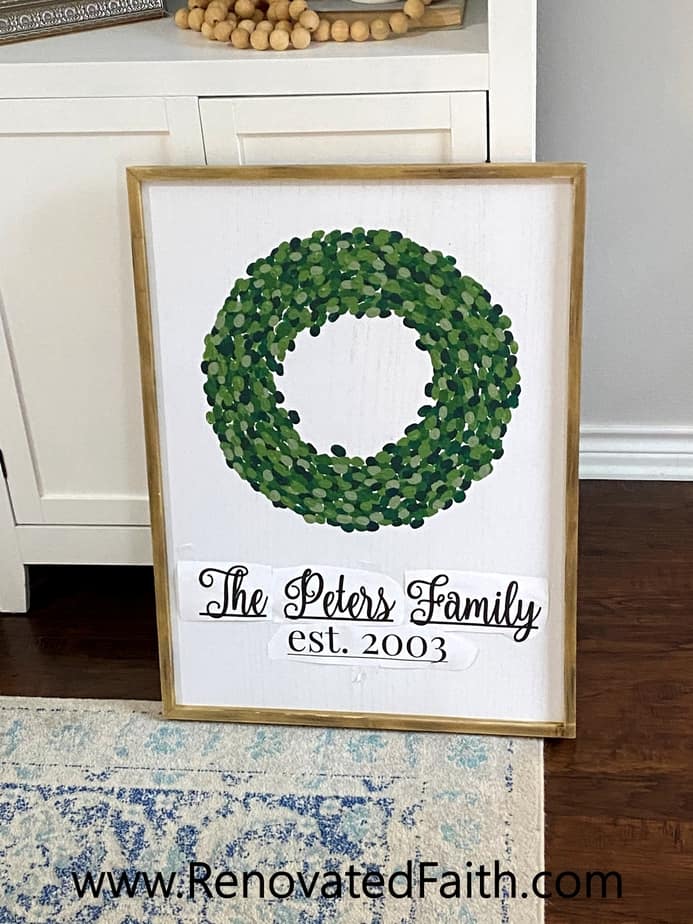
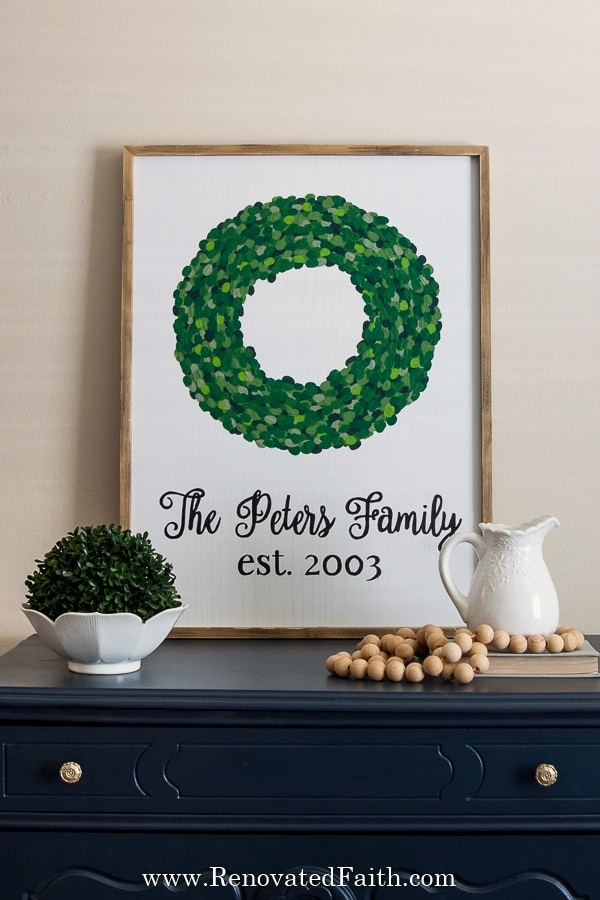
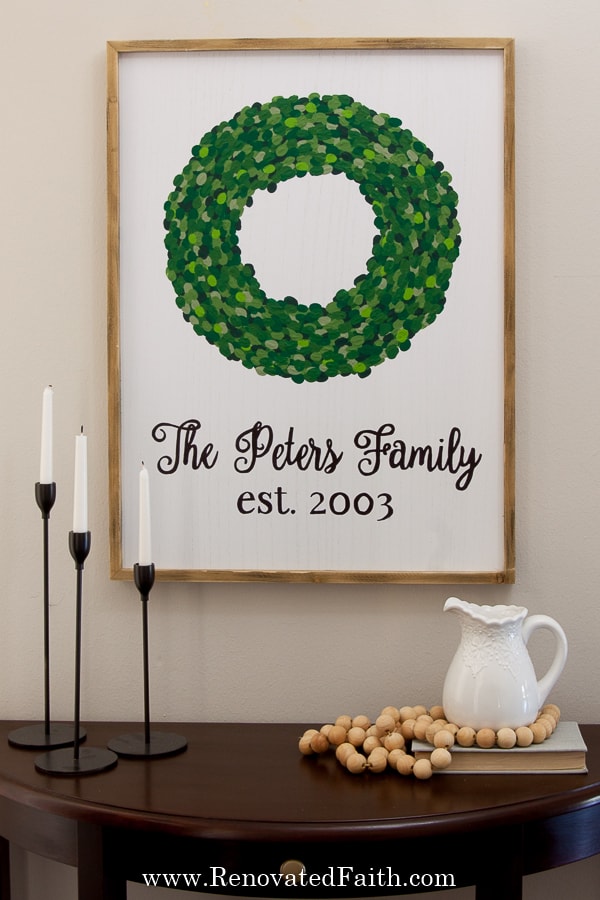
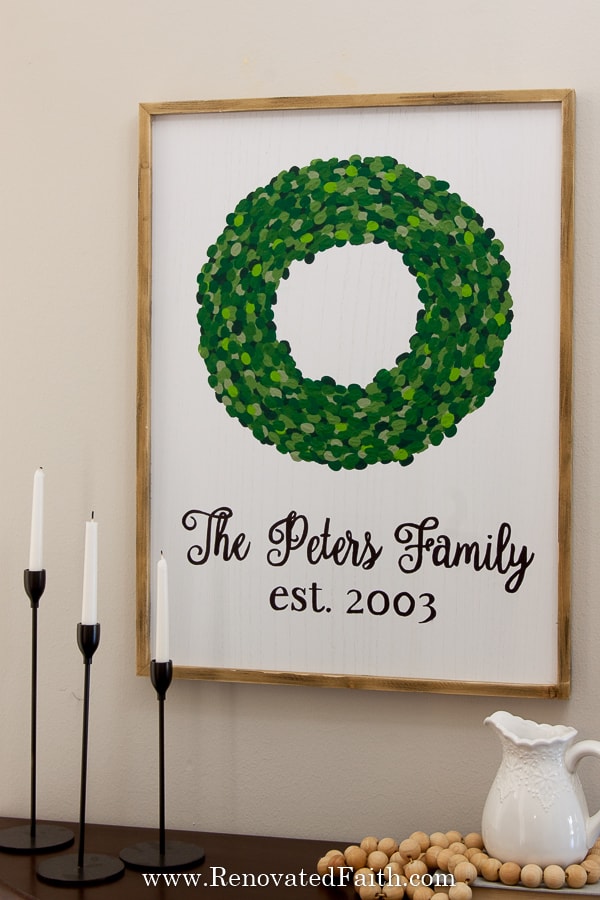
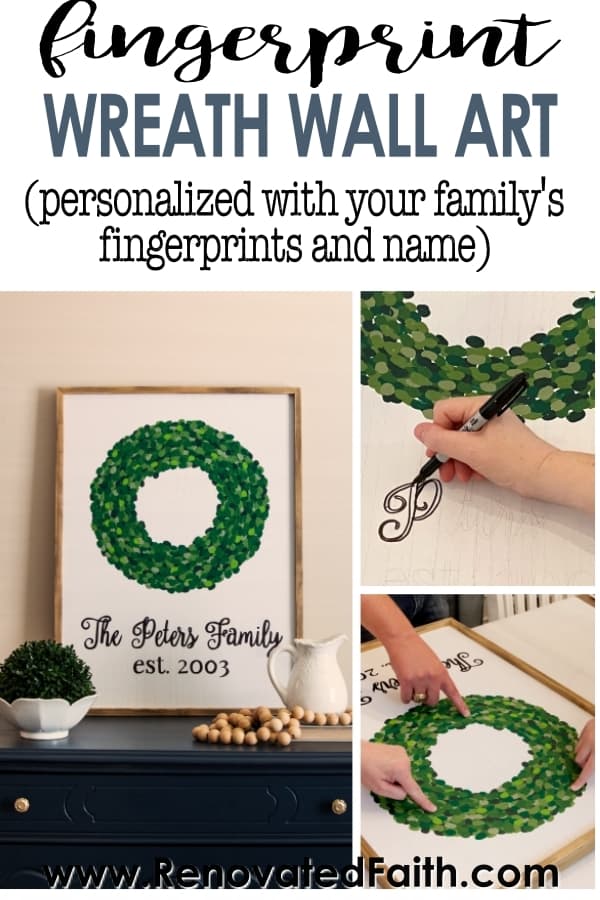
Make your own fingerprint wreath wall art with your whole family by following this easy, step-by-step tutorial and video!
When I think of the term ‘fingerprint wall art’, I usually envision a turkey on a paper plate or maybe a wreath hung on the refrigerator for a couple of months. But this tutorial will show you how to make fingerprint wreath wall art with your whole family that you will want to hang up all year round!
Who knew you could make super cute farmhouse wall decor out of your own family’s fingerprints?!?
This tutorial is SO easy and I also included instructions on how to personalize your sign with your family name – NO freehanding or Cricut required! This project also makes a great family activity for Thanksgiving or Christmas when everyone is in town!
LET ME SHOW YOU:
- How to make beautiful farmhouse style wall art with fingerprints from your family, friends or coworkers
- The easy way to personalize any sign with your own name – no freehanding or cricut required!
- A fun activity to do with your family during a holiday get-together
- Some encouragement on standing up to your inner perfectionist in this week’s Renovate Your Faith section at the end of this post.
(As an Amazon affiliate I earn from qualifying purchases. Please see my full disclosure HERE).
Quick Links to Information in this Post
- 1 DIY Wall Art & Fun Family Activity
- 2 Supplies Needed For Your Fingerprint Wreath Sign
- 3
- 4 Fingerprint Wreath Wall Art: Instructions
- 5 RENOVATE YOUR FAITH: The Difference Between Perfection & Excellence (And Why It Matters)
- 6 FREE Furniture Painting Cheat Sheet
- 7 More Posts Related to Boxwood Wreath Wall Art
- 8 Final Thoughts on Fingerprint Wreath Wall Art
- 9 How To Make a Boxwood Wreath Sign With Fingerprints
Supplies Needed For Your Fingerprint Wreath Sign
- White Farmhouse Sign – For this project, I used a ready-made blank sign from Hobby Lobby that you can see here: Whitewashed Sign (Some of their signs are more whitewashed than others, so you might want to add a coat of white paint, if too much of the wood is showing through.) For various size options, check out Etsy and Michaels.
- Various Shades of Green Acrylic Paints – Here are the ones I used, but any will work: CraftSmart Grass Green, FolkArt Fresh Cut Grass, FolkArt Classic Green, DecoArt Aloe, and Ceramcoat Hunter Green. You want at least 3 different shades and you can mix paint to make new shades!
- 2 Black sharpies (Fine-point)
- Pencil
- Paper and the Use of A Printer
Fingerprint Wreath Wall Art: Instructions
Here is a full step-by-step video showing you how to make your DIY wall art from start to finish. If it doesn’t pop up automatically at the bottom of your screen, click here: Easy Fingerprint Wreath Wall Art, YouTube Video

Step 1: Wreath Prep
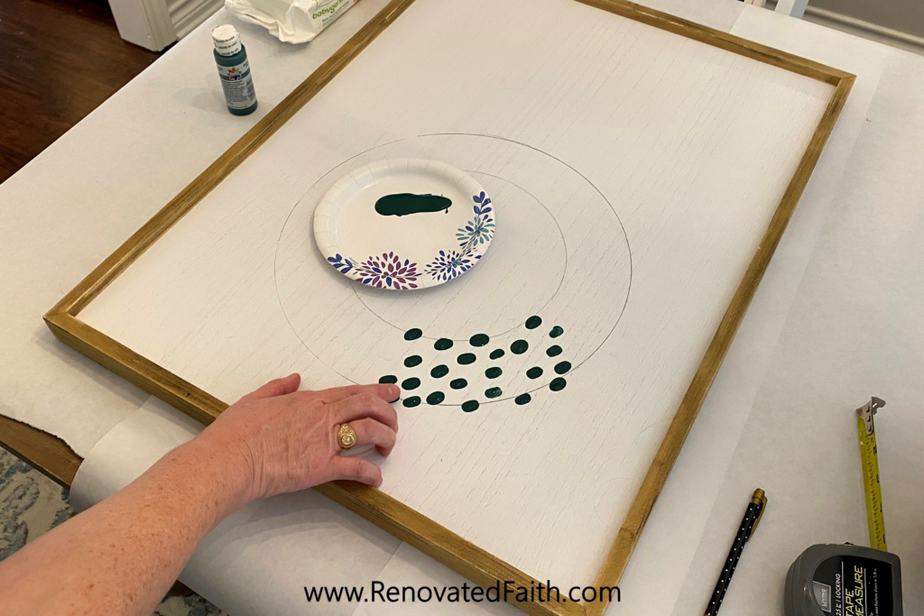
Because I’m a little high-strung, I wanted to have an idea of where my wreath would be located on the sign so that we wouldn’t get out of control with our fingerprints.
So, I used two bowls and traced circles to give me an idea of where the fingerprints needed to be. This is also a great idea if you have several kids working on the project to give them a guide!
Renovated Faith: What’s in a Name?
God never leaves a project half-done…He continually works on each one of us, as a lavish expression of His amazing love and grace. So many of my DIY projects remind me of how God renovates our hearts. If you are a work-in-progress, just like I am, check out the Renovate Your Faith Devotional at the bottom of this post. Click here to get a weekly reminder of new posts by email.
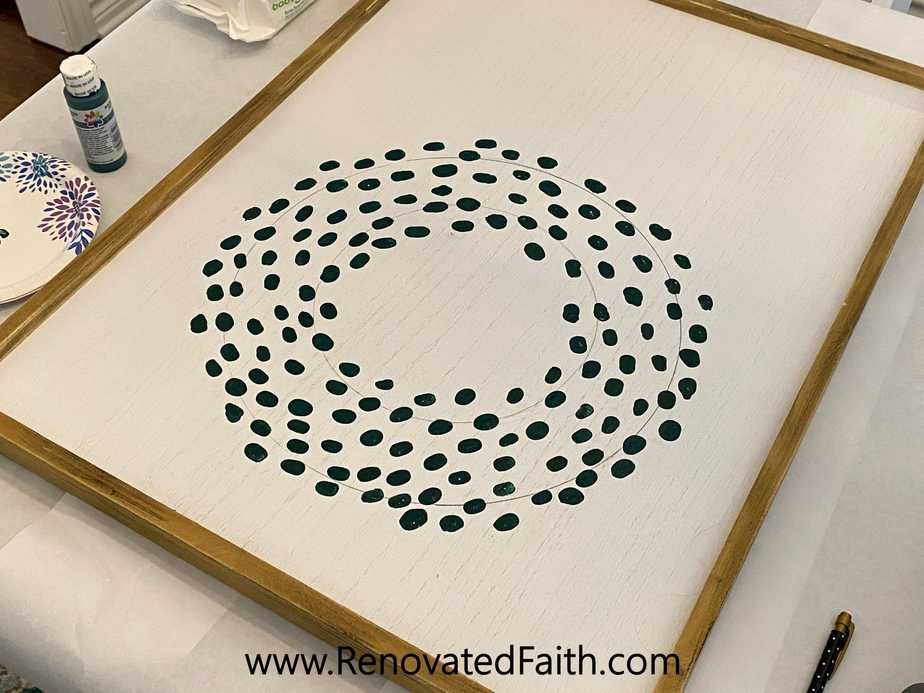
Step 2: Add Fingerprints To Your Wreath Wall Art Sign
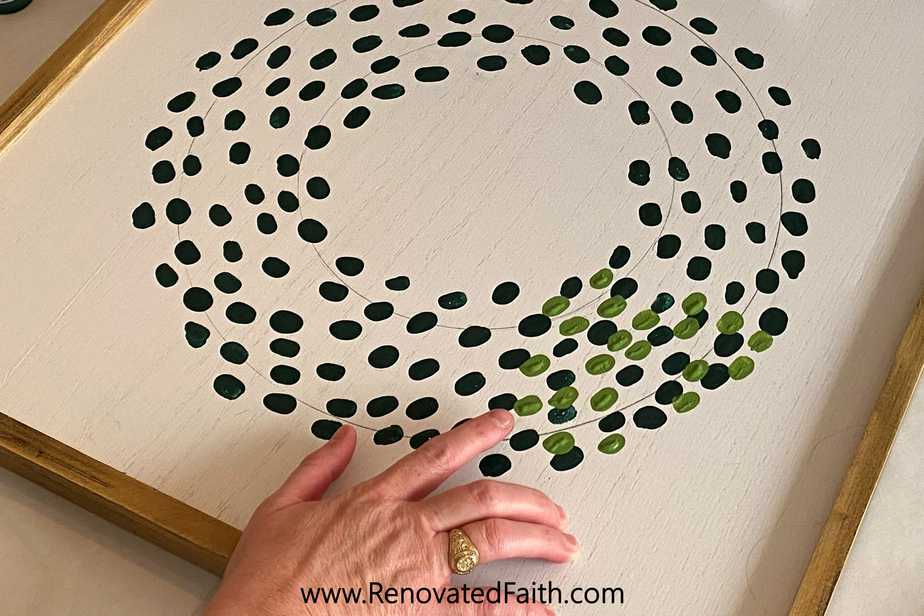
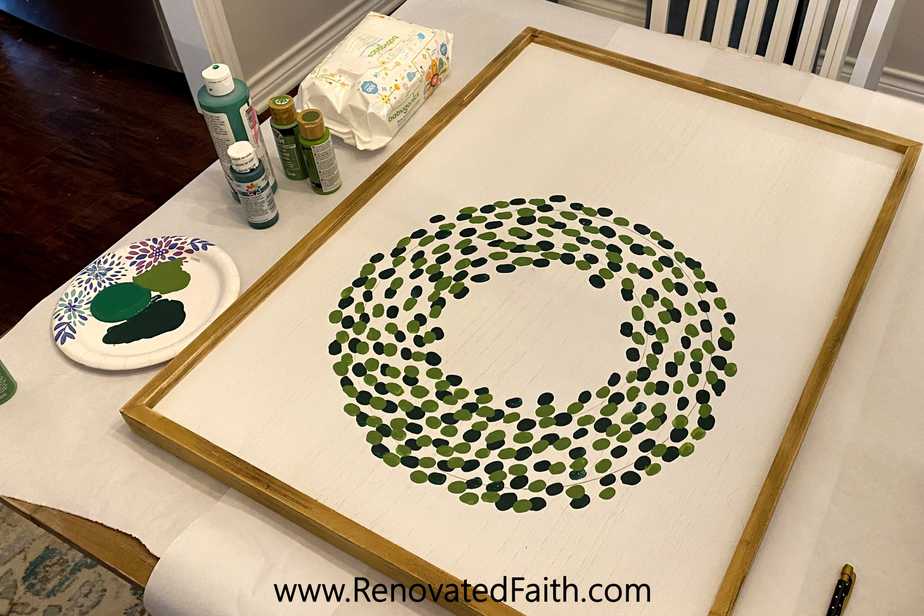
Start with a medium shade of green and make fingerprints all the way around about an inch or two apart. As you can see in the video, do the same all the way around with another shade. Once those dry, go in and add more fingerprints.
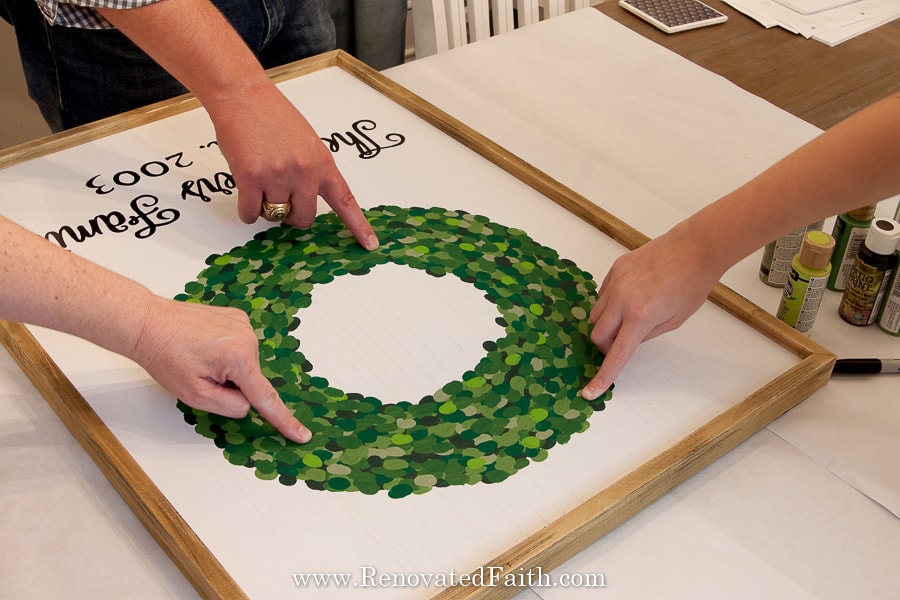
What seemed to work best was adding 2 or 3 greens at a time, letting them dry, and do the same again. Then keep repeating this with all the greens once each layer has dried. Your goal is to fill in all the white space.
IMPORTANT TIP: If your paint goes on kind of thick and not completely flat, that’s ok! It actually made the wreath a little more interesting with the added texture of the fingerprints. Also, this is much preferred over fingerprints that are thin and transparent.
Step 3: Prep the “Stencil” to Personalize Your Wall Art
To make the wording, you can follow the first few steps here: Easy Farmhouse Sign (No Cricut Required!)
Go to a Word Document and change the layout to Landscape. Now type out and print what you want at the bottom of the sign. This step might take a little trial and error to get the font the right size. To get the look of my sign, I used bolded Nouradilla (get it free here) at a font size of 200 and Playfair Display (get it free here) at a font size of 150.
(Also, be sure it is underlined. Even though your final text won’t be underlined, this will help us to keep it straight on the sign.)
Another option for the wording is to use those stick-on stencil letters you can find at craft stores. Just place them where you want the wording, trace them with a pencil and fill in the lines with a black sharpie.
Step 4: Cut Out the Stencil for Your Boxwood Fingerprint Wall Art
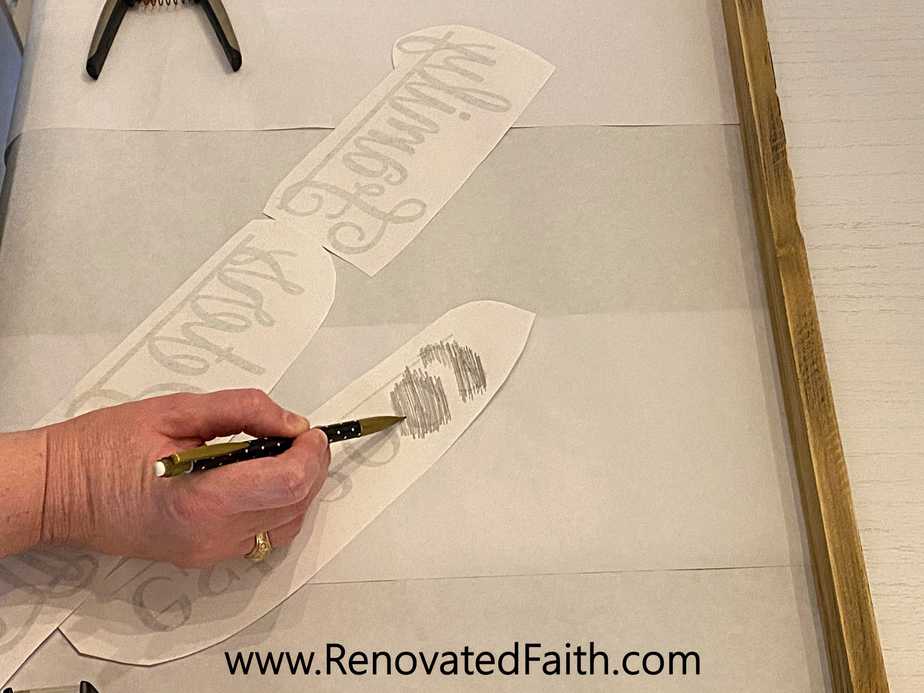
Once you have printed the wording to the desired size, cut it out with a little white space around each word. At this point, I used scotch tape to tape them together being sure to align the underlined part.
Then, scribble lightly all over the back with a pencil. When we trace the other side, the pencil will leave us an outline to follow.
Step 5: Trace the Wording On Your Boxwood Fingerprint Sign
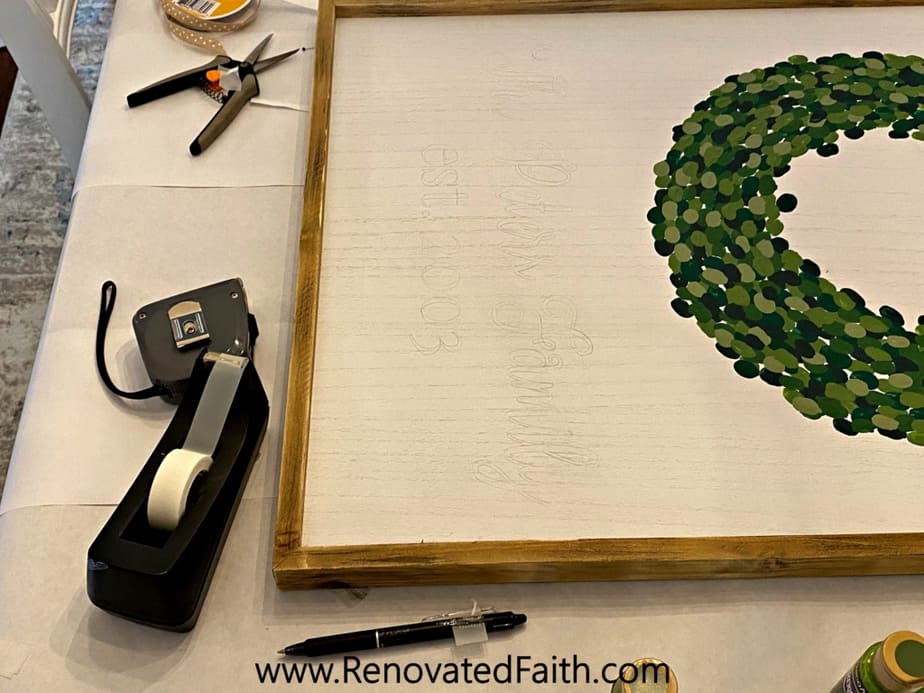
Use painter’s tape or scotch tape to tape the edges of each word to the sign. Now that your wording is laid out and centered how you like it, start tracing over each letter edge with a ball-point pen.
Lift up every once in a while to make sure you are tracing with enough force for the pencil lead to transfer.
Step 6: Outline And Fill In The Wording on Your Personalized Sign
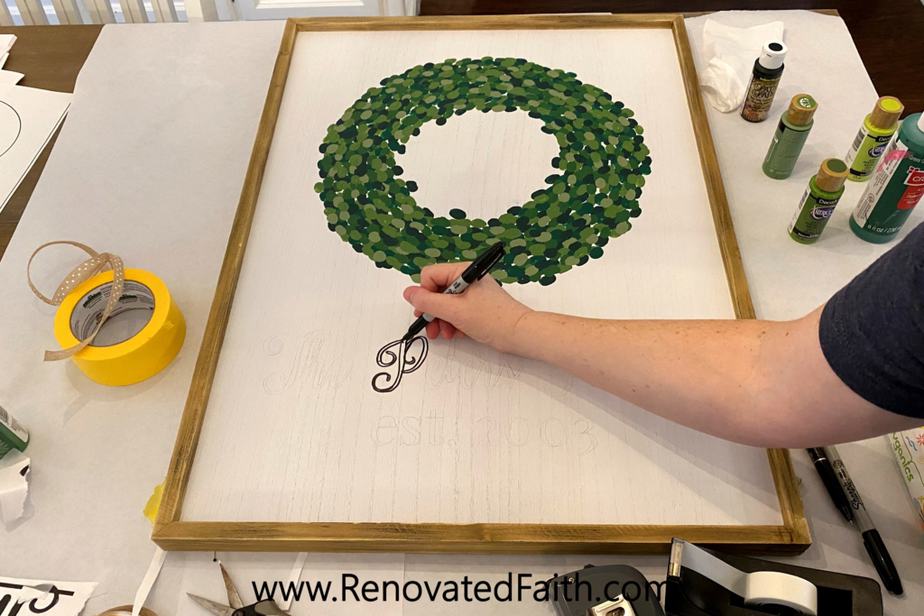
Now that you have an outline of your wording, you can trace over it with a fine-tip sharpie marker. Then, I just filled in the rest of the way with my sharpie. Be sure to have a couple of sharpies on hand because my first ran out of ink. I like to have some baby wipes on hand to wipe up any mistakes I make.
Let your paint dry overnight and you are done!!!
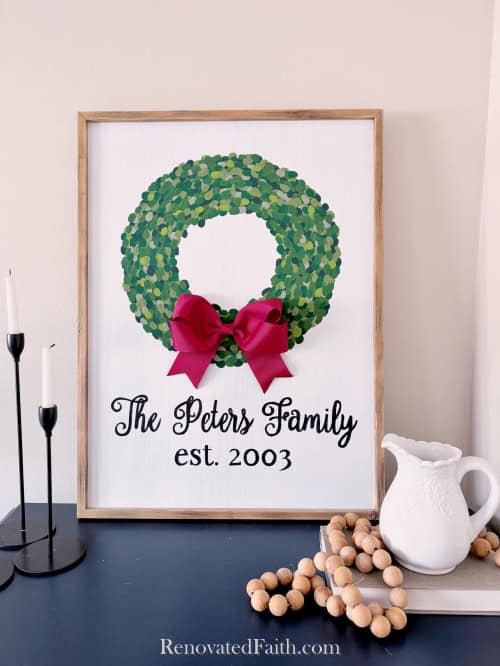
STEP 7: Add a Bow To Your Fingerprint Wreath (Optional)
After posting this initially, one of my email subscribers suggested adding a bow. What a great idea! Now you can do this sign one of three ways:
- Without a bow for a simpler look
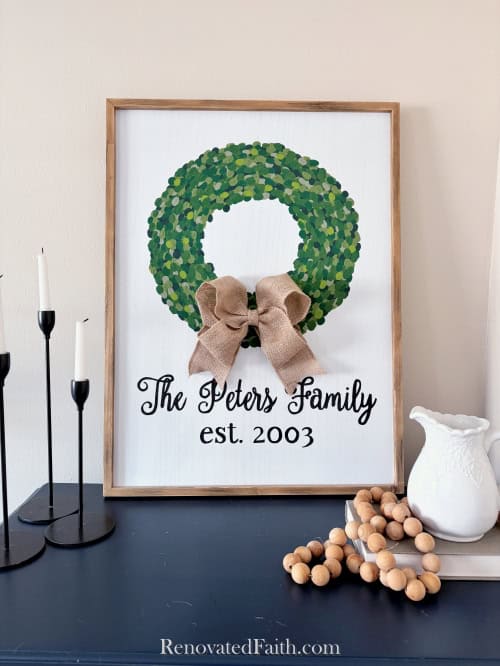
- A burlap bow for year-round or to go with farmhouse Christmas decor
- A red bow to go with Christmas decor

To make your bow, use this tutorial: The Easy Way to Make A Wreath Bow
To attach the bow permanently, use your hot glue gun. To attach the bow temporarily, try painter’s tape or these temporary stickies. That way, you can have a Christmas-look with the red bow and a year-round look with the burlap bow.
RENOVATE YOUR FAITH: The Difference Between Perfection & Excellence (And Why It Matters)
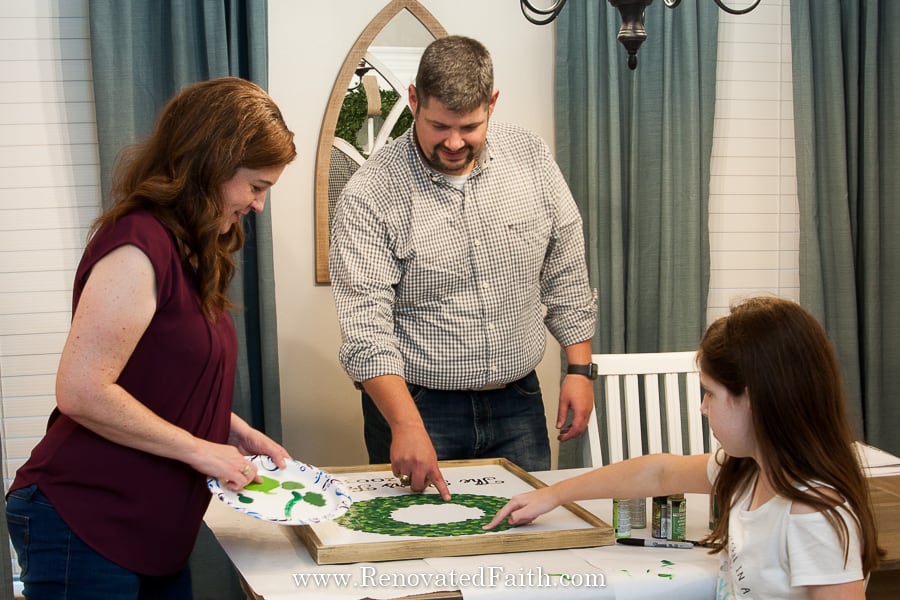
So, just to be fully transparent here, when I started this sign I was really hesitant to let my daughter and husband put their fingerprints on it for fear they would mess it up. ‘This IS going on Pinterest after all!’
But fortunately, I realized my inner-perfectionist was rearing her ugly head and I let them do their own fingerprints on the wreath – albeit, I kept the baby wipes close by at all times!
I have always struggled with perfectionism to a degree, and lately, I have realized how much I let it steal my joy and God’s blessings.
Often when I realize I’m teetering into perfectionist territory again, that little voice in my head says, “But I’m doing this with excellence. God IS a fan of excellence, right?!?”
Fortunately, a friend was really helpful on this matter showing me there is a stark difference between the two:
EXCELLENCE – Doing a job or task with quality to glorify God and help others.
PERFECTIONISM – Doing a job or task with quality to glorify yourself and your own need for approval.
The difference lies in the focus. For example, if I stutter some on a word in the instructional video, it’s certainly not the end of the world and doesn’t compromise how helpful the video is to readers.
However, if I do 7 retakes on a video because I slightly messed up on one word, I’m going to spend a lot of energy and time that God wants me to spend in other areas – not to mention the added stress. (This is a totally hypothetical situation of course).
Perfectionism is often over-looked because our American culture looks at is as an asset. But perfectionism is a sin and I’ve learned the hard way that all sin, no matter how seemingly insignificant, will hurt us and cause us to miss out on God’s blessings.
Fortunately, Our Loving Heavenly Father sent His perfect son on our behalf. And because Christ is perfect, we never have to be! Isn’t that incredibly freeing?!?
Know, dear friends, that God does not want you to put unnecessary restraints or expectations on yourself. He wants you to lean into Him and let Him take over. He will give you the right amount of strength, and skill for whatever your task is.
But he said to me, “My grace is sufficient for you, for my power is made perfect in weakness. Therefore I will boast all the more gladly about my weaknesses, so that Christ’s power may rest on me.” 2 Corinthians 12:9
If you need help with any bad habits, struggles or emotions , check out this book: The Renewing of the Mind Project by Barb Raveling. It’s been a huge blessing in helping me to take my thoughts captive in accordance with what He says and not lies I have believed. It gives detailed information on any struggle you can think of – including perfectionism!
For more spiritual encouragement, click here for the rest of my project posts that also include Renovate Your Faith devotionals.
FREE Furniture Painting Cheat Sheet
Here’s where you can get my must-have painting tips for furniture! Get the password for the library with all of my free printables including wall art, checklists and templates by filling out this form:
DON’T FORGET TO TAKE A PICTURE!
Now that you are done, I’d love to see how it turned out! ❤️ Post to Instagram and tag me @renovatedfaith or send them to karin@renovatedfaith.com!
More Posts Related to Boxwood Wreath Wall Art
Should You Buy Or DIY a Boxwood Wreath?
Easy Boxwood Topiaries On A Budget
Easy DIY Farmhouse Wall Art (No Cricut or Freehanding Needed!)
Why I Don’t Use Chalk Paint on Furniture
How to Whitewash Your Fireplace for Less Than $20
Easy Farmhouse Light Fixture Makeovers on A Budget
Final Thoughts on Fingerprint Wreath Wall Art
Don’t forget to download my Free Furniture Painting Cheat Sheet. To get your printable, sign up for my weekly newsletter which also grants you free access to my resource library full of wall art printables, checklists, and project plans!
Before this post, you may not have realized how easy it is to have farmhouse wall art made from your own family’s fingerprints. This easy project is a great activity for family get-togethers and can be personalized with your family name easily!
I love to hear your thoughts and questions! Scroll down to leave a comment and I WILL reply! ❤️
Blessings,

Be sure to follow the fun here!
Email Subscription | Instagram | Pinterest | Facebook | Twitter
How To Make a Boxwood Wreath Sign With Fingerprints

Karin Peters is a DIY expert and the creator of Renovated Faith. She is a furniture painter, a home design consultant, and a tenacious problem solver determined to help you transform your house into a home. With 17 years of experience with DIY home improvement, she researches and analyses professional processes to adapt them to be easy and cost-effective for DIYers. She then tests every project and product before it appears on the site in a detailed, step-by-step format. After attending Texas A&M University, she received her Master of Divinity with Biblical Languages at Southwestern Baptist Theology Seminary. Her passions unite in Renovated Faith, which shows readers how to create a home that serves them so they can pursue their God-given purposes. About Renovated Faith | Editorial Policy | Facebook | Twitter | LinkedIn


Help, how do I get the fonts to be in my font choices? I have done before I am thinking but cannot recall. Love love the wreath idea for our Thanksgiving family project. Thank you.
I love your family wreath idea 😊 do you have any suggestions for using puppy paw prints ? I would love to preserve something similar .
Oh my goodness! This is the best idea ever. I’ll be thinking. Thanks Denise!
“You always know how to put these things into words. I want to be able to do that. Could you teach me?
I loved the idea, I would do this with my family so we could stamp our fingerprint when doing this. Do you have any suggestions on what colors looks best together?
I just loved it!”
Oh my goodness! I LOVE this project. We are definitely going to try this. Thanks so much for sharing in a way that any family can feel confident tackling it!!
Thank you so much for your kind comment Andie!