How to Start Plants From Cuttings In Soil (Faster Than Water!)
Want to learn the fastest way to propagate plants? This easy tutorial will show you my best tips on how to start plants from cuttings in soil.
After owning an online plant business for several years, I learned some innovative hacks to propagate plants faster in soil than in water. This includes houseplants, annuals and perennials as they all respond well to this method.
This easy process has a 95% success rate, and I’m so excited to show you my best tips!
The Benefits of Propagating Plants from Cuttings
Last year, I propagated all of my annuals and several perennials from cuttings, and they performed just as well as if I’d bought them from a local nursery. These plants include blue daze, salvia, vincas, mistflower, and lantana – about 50 individual plants in all.
Propagating plants yourself is so satisfying as you get to see full plants and blooms come from what started as just a few cuttings. Watching their progress over time is a lot of fun.

Once you learn this method, you can get cuttings from friends, neighbors and you can even buy them on Etsy. I have found that I prefer planting younger plants more than buying older plants, because young plants adapt to my climate faster and are more hardy.
My favorite reason for propagating is to start new plants of my hard-to-find or rare perennials in case my in-ground plants die from a hard freeze. Then I have a replacement on hand.
(As an Amazon affiliate I earn from qualifying purchases. Please see my full disclosure HERE).
Quick Links to Information in this Post
- 1 Supplies Needed: How to Start Plants from Cuttings in Soil
- 2 How To Propagate Plants From Cuttings in Soil
- 3 RENOVATE YOUR FAITH: Leave the Results to God (Why Your DIY Approach to Life Is Wearing You Out)
- 4 More Posts Related to How to Start Plants From Cuttings Indoors
- 5 Final Thoughts on How to Start Plants from Cuttings in Soil
What is the best way to start plant cuttings?
Over the years, I’ve had the same success with this soil method as I have with rooting cuttings in water. Since water seems to take longer, I default to this soil method. For cuttings that are harder to root, you can start them in water first and then continue with this process.
List of Plants That Grow From Cuttings
Just about any plant with a stem can be grown from cuttings. With this method, I have personally propagated African violets, pothos, salvia, blue daze, tropical hibiscus, lantana, clerodendrums, lavendar, ficus, blue butterly bush, bleeding heart vine, and several other perennials.
Softwood vs Hardwood Cuttings
For this tutorial, we will be propagating softwood cuttings because they are easiest to root. Softwood refers to the new thin stems of green growth, while hardwood cuttings are older, woody stems that have hardened off over time.
When is the Best Time to Propagate Plants From Cuttings?
You can take softwood cuttings at any time, but it’s best to do so at milder times of the year when the plant isn’t stressed by extreme temperatures.
For my rare or hard-to-find plants, I’ll take cuttings in November and start rooting them indoors. This ensures that I have a backup if we have a really hard freeze.
For propagating annuals, I like to dig up and pot a few established annuals that I know I want cuttings from and put them in my portable greenhouse (you can see it here) in November (I’m in hardiness zone 9a).
Then, after Christmas, I still take cuttings from those potted greenhouse plants and start them then. You could also root them in the fall as long as you don’t mind watering baby plants for a longer time period.
Supplies Needed: How to Start Plants from Cuttings in Soil
Sharp Scissors (these are my favorite)
Plant Cuttings
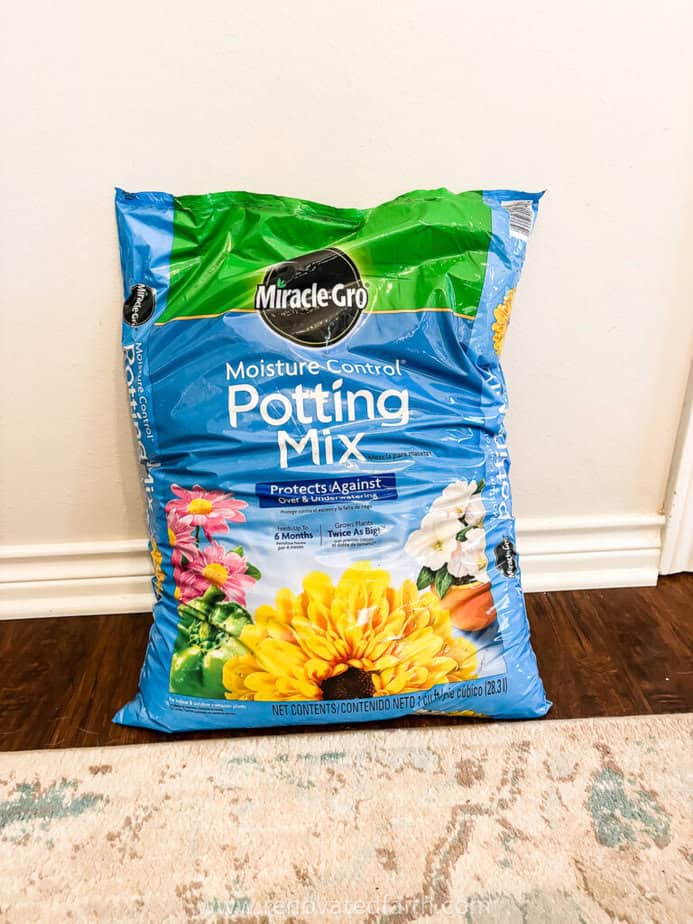
Miracle-Gro Moisture Control Potting Mix
Plastic Tub or Storage Container
Spring Water
Light Source – See the bottom of the post for easy options.
How To Propagate Plants From Cuttings in Soil
Step 1: Prep The Pots for Propagation in Soil
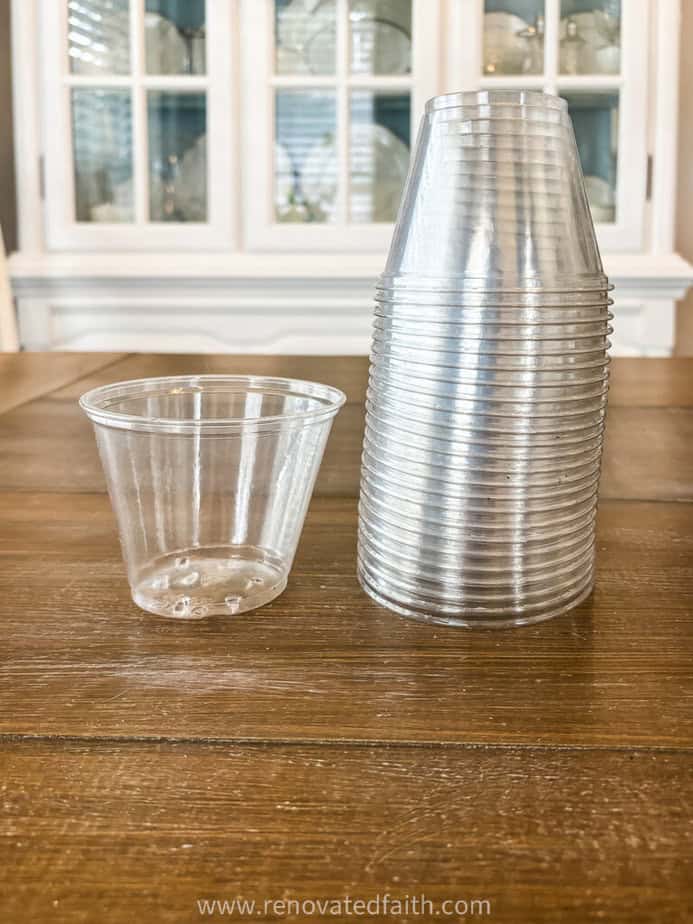
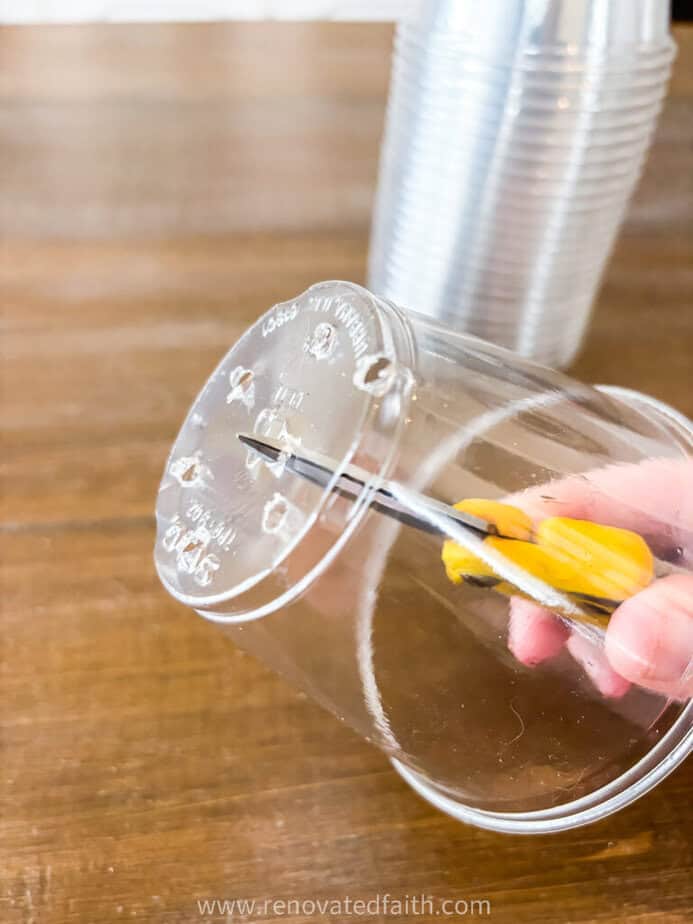
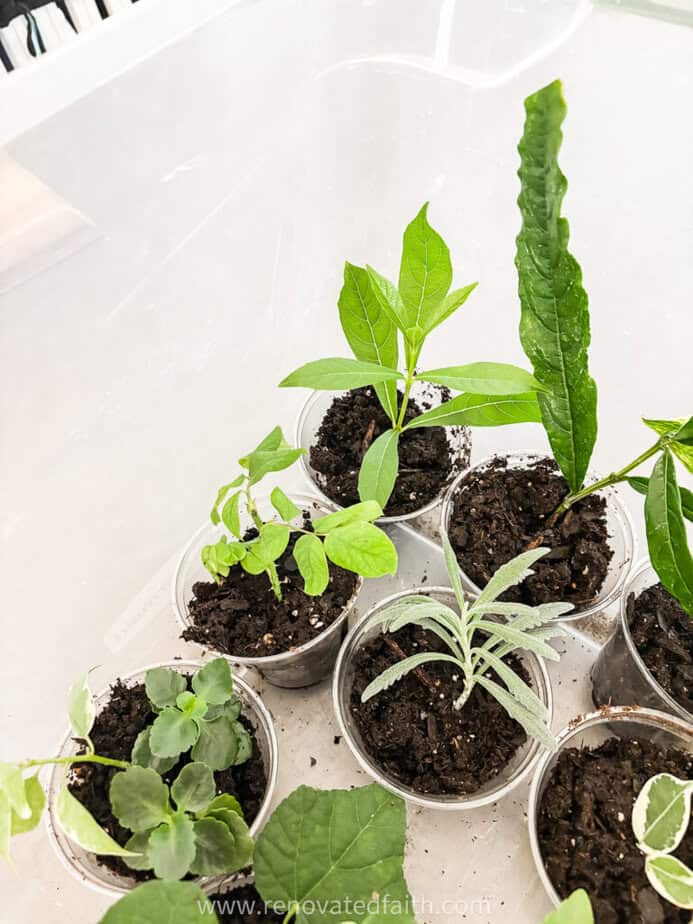
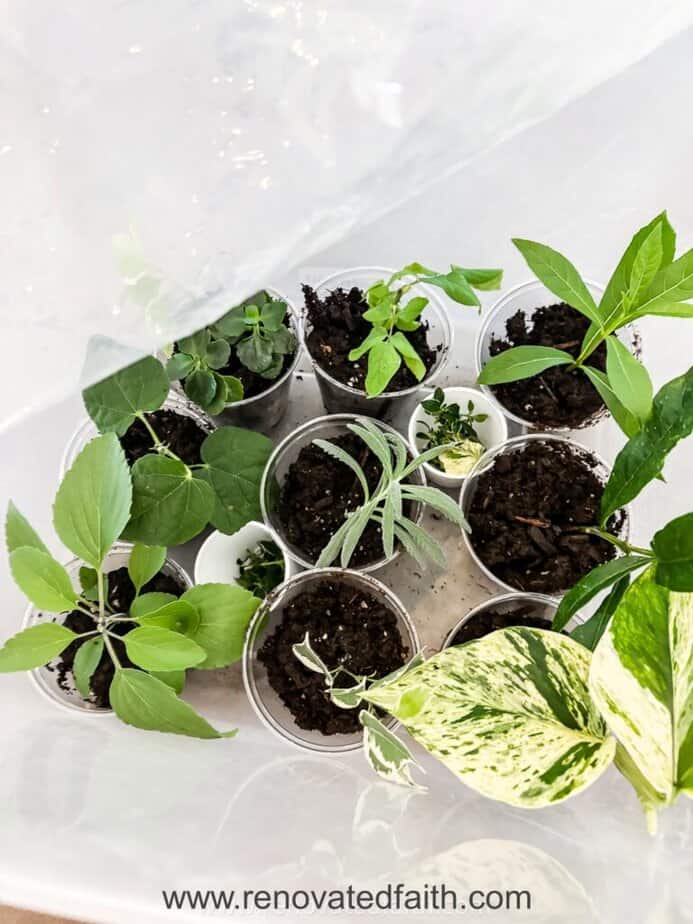
For this process, our pots are clear party cups. To add drainage holes, use your sharp scissors to make holes with a twisting motion.
Make holes from the inside out so that the plastic pieces that stick out at the bottom will hold the pot a little higher out of any standing water drops that might be in the storage container.
My go-to potting soil for propagation is Miracle-Gro Moisture Control as it keeps plants at the perfect moisture level.
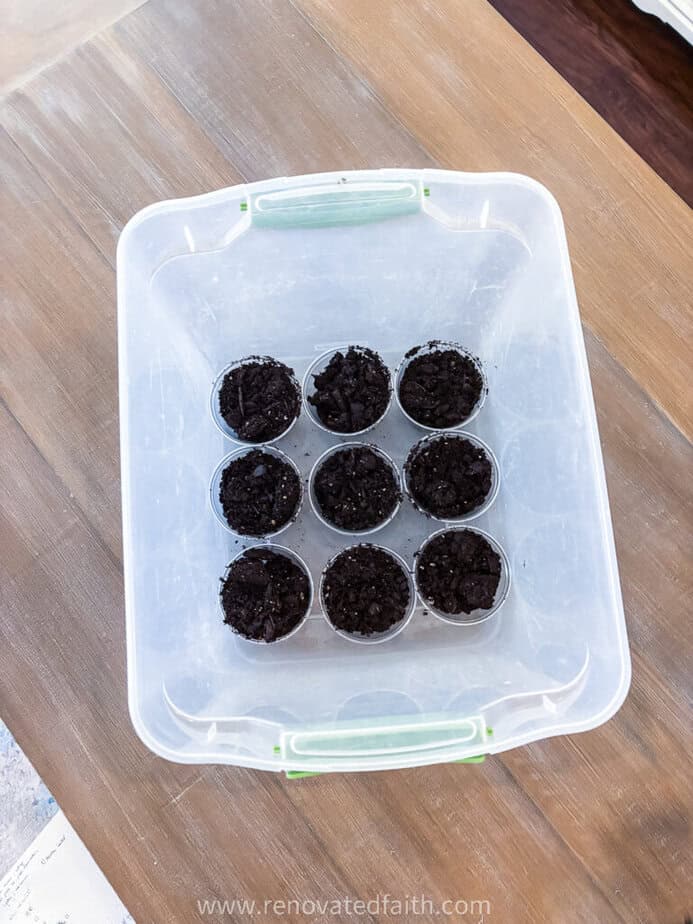
Scoop dirt into the cups, being careful not to pack down the soil. You want the dirt to be loose and airy.
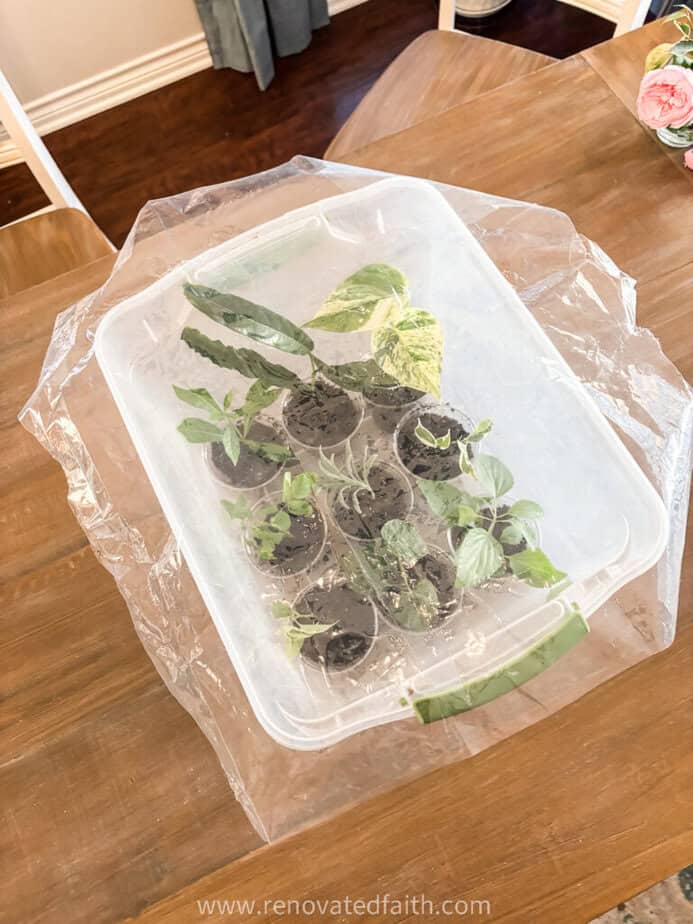
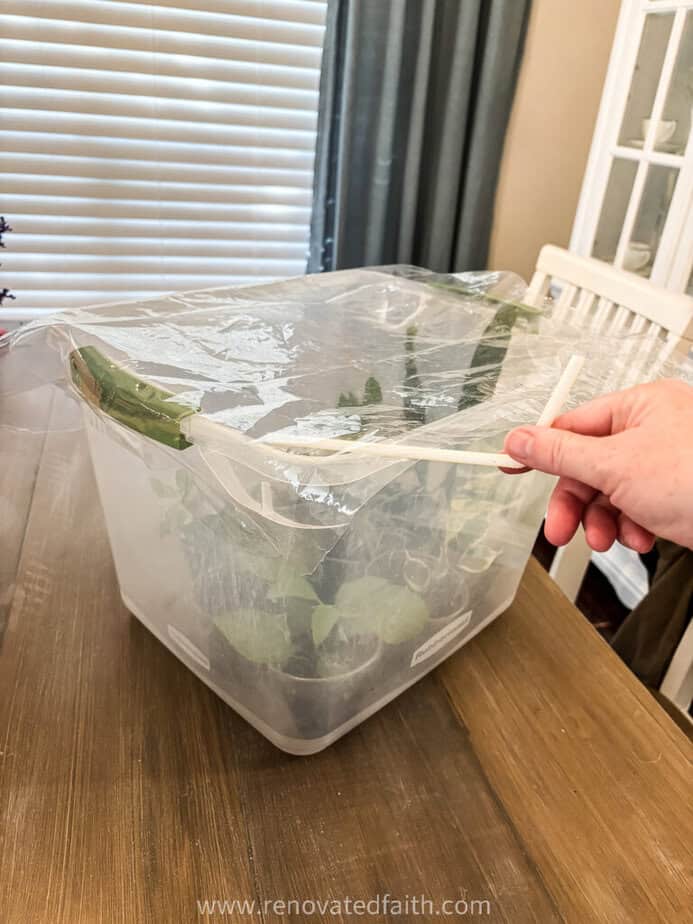
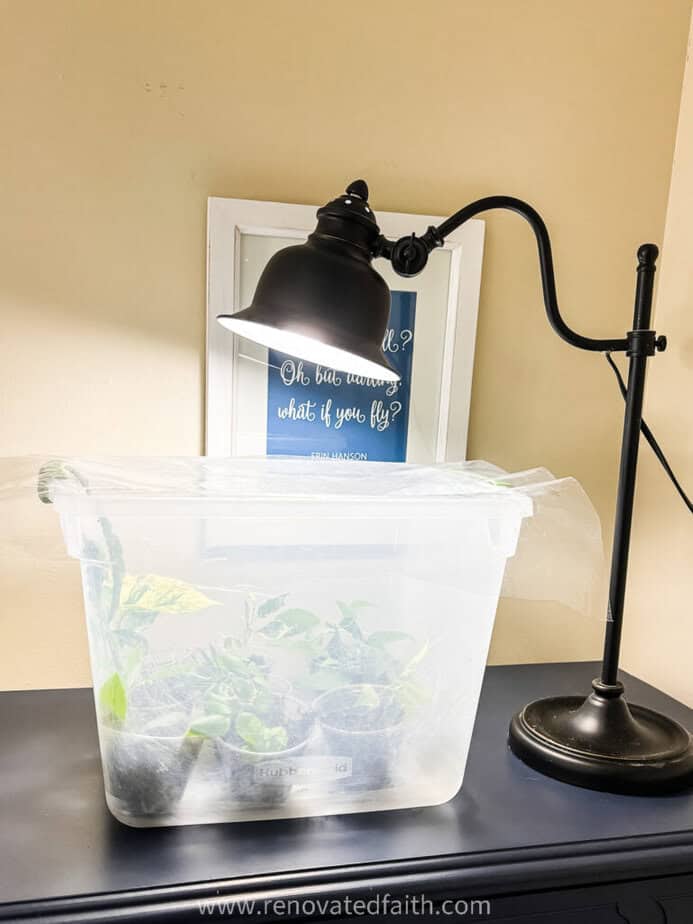
I like to use pieces of a clear shower curtain liner so I can easily control how much ventilation the plants get.
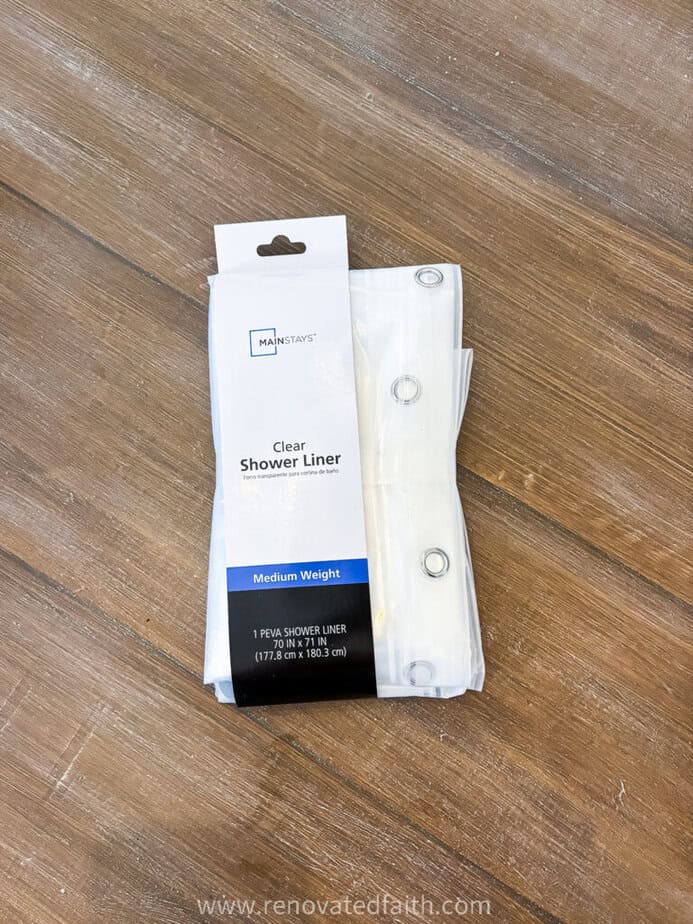
Cut the curtain rod so it’s 4 inches bigger than the plastic tub on all sides – a little larger than the one in this picture.
Now our cuttings will have a humid environment all ready for them so they don’t wilt after being cut!
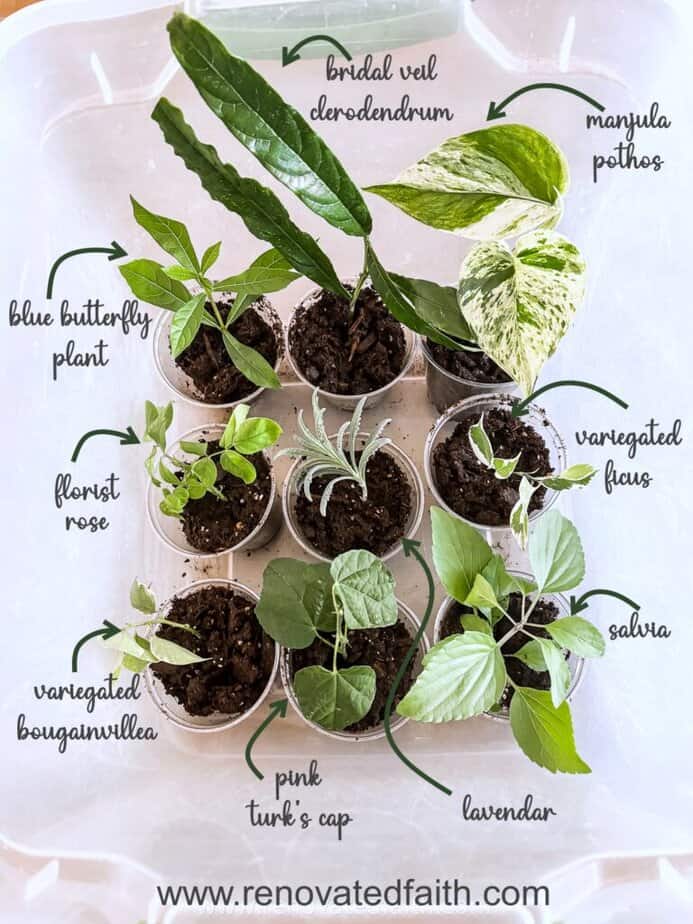
Step 2: Gather The Cuttings You Want to Propagate
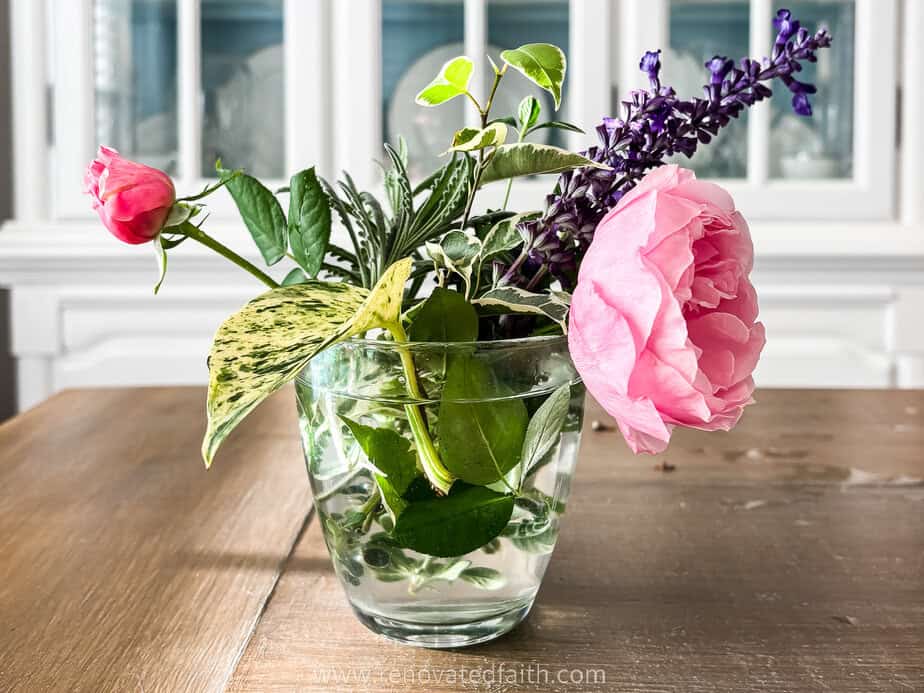
I like to collect my cuttings right before I pot them up so they are fresh. Cut about 6-8 inches from stems with some new growth. It’s ok if the cuttings have flowers.
Put them straight into water as you colllect them.
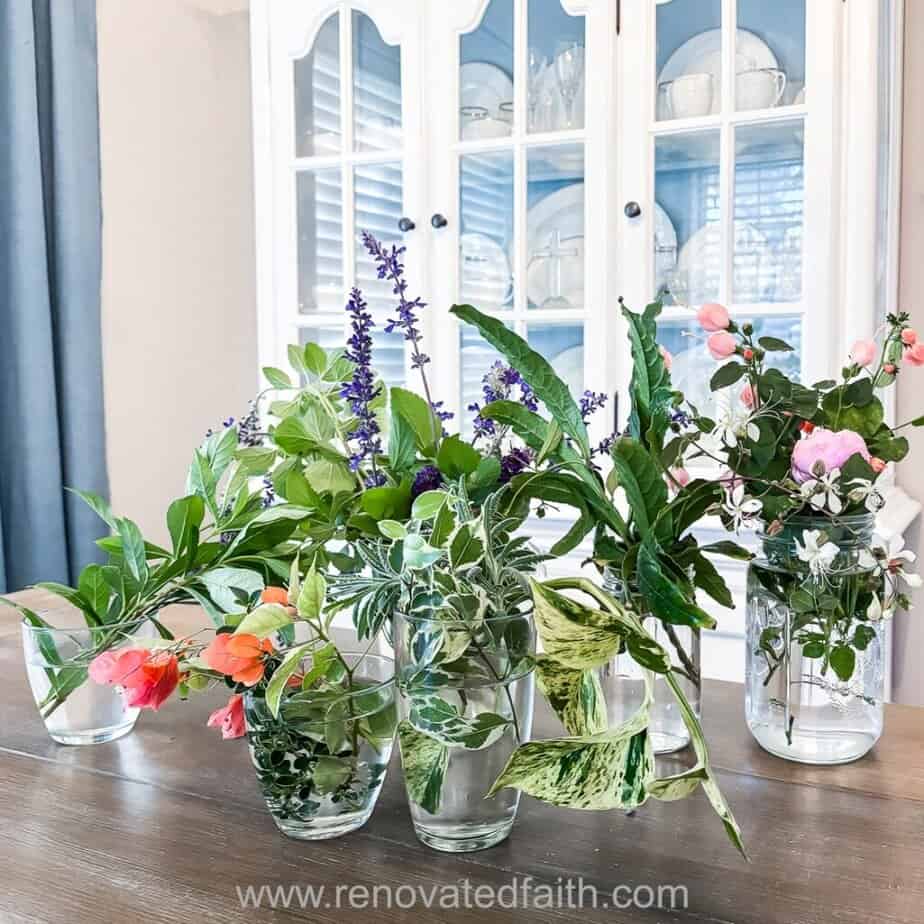
As you can see, in true Karin fashion, I went a little overboard in collecting cuttings.
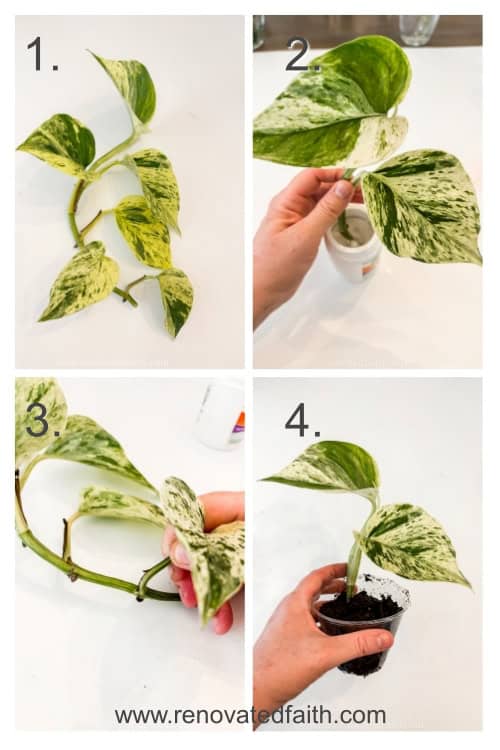
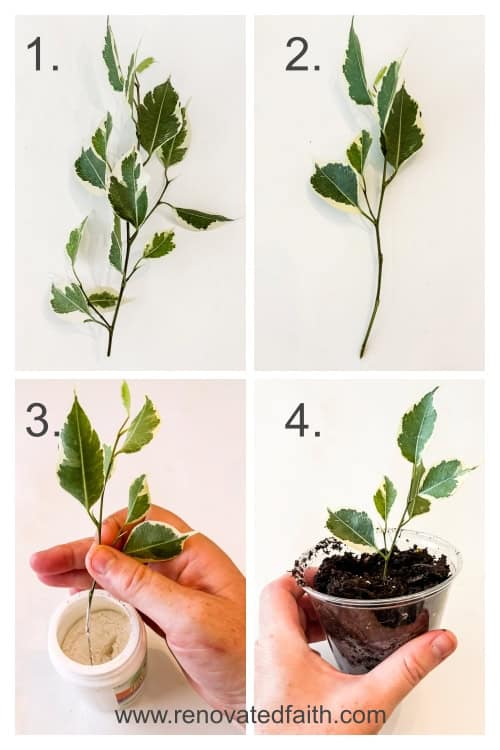
Step 3: Prep Your Cuttings for Propagation
Remove most of the leaves on the bottom half or 2/3 of the step using a downward motion to pull them off. Trim off any buds or flowers at the top
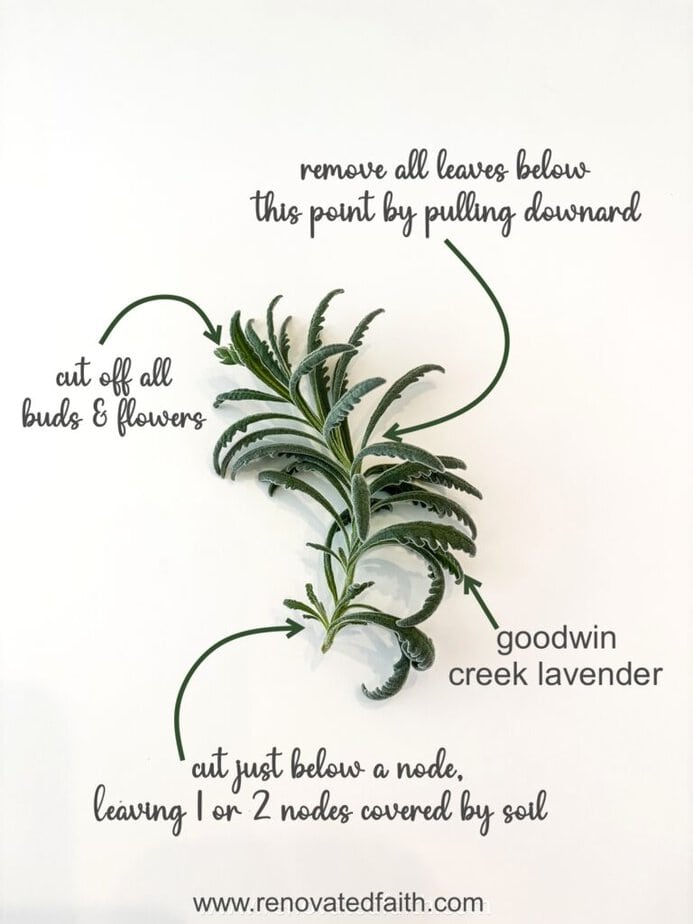
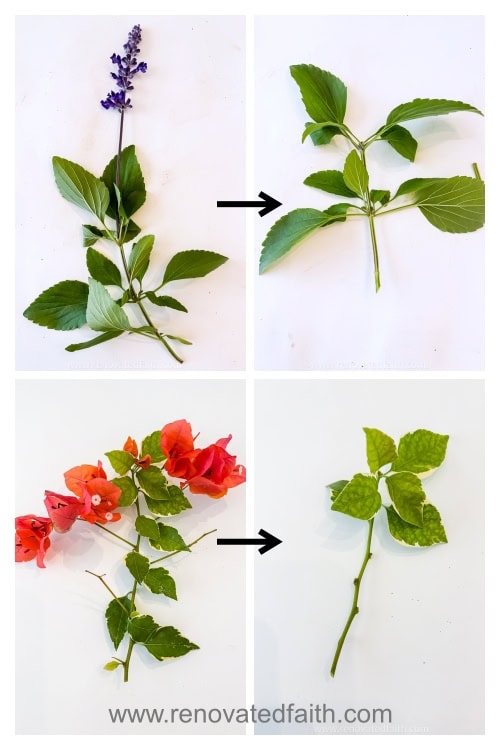
After you remove several leaves, you will see the nodes which are the joints where the leaves grew from. These are also a great place for roots to grow so we want to make sure there are as many nodes as possible in the soil.
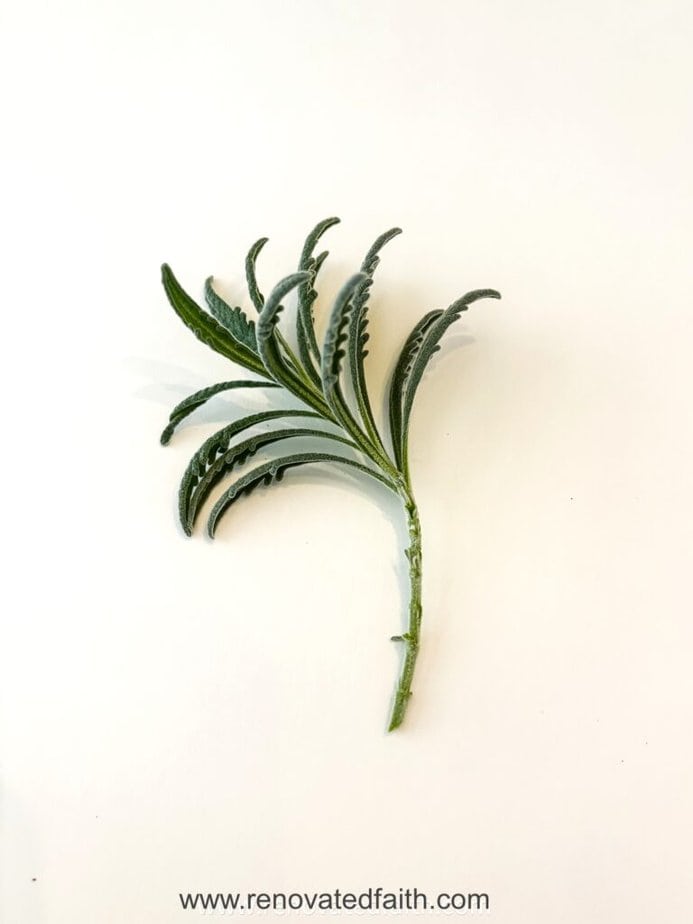
This lavender has 4 nodes, but most cuttings will just have one or two. Plan on having a least one or two nodes that will be covered by soil.
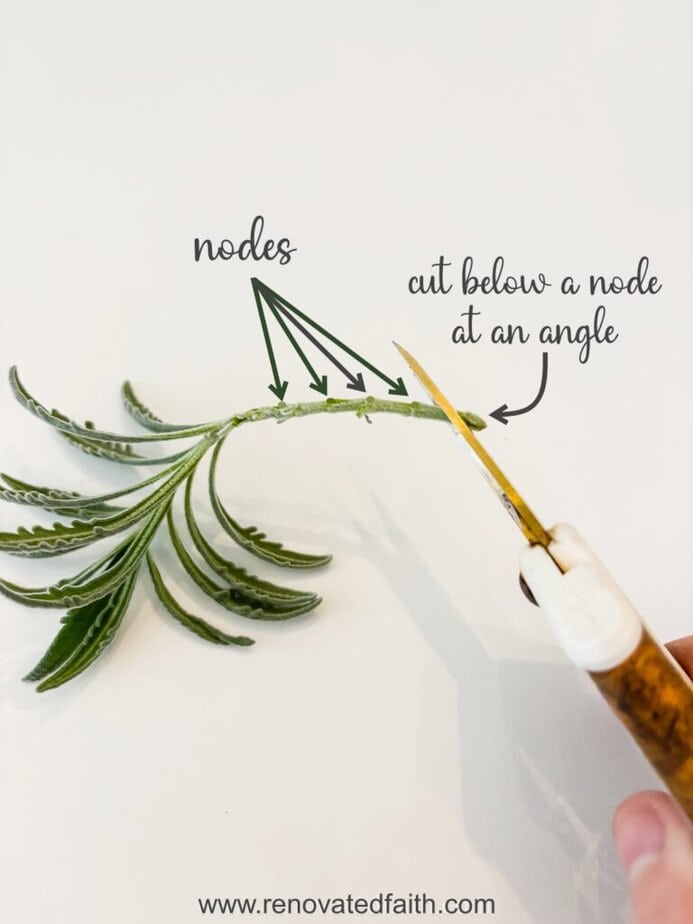
Use alcohol to sanitize your scissors and but an angled cut below a node.
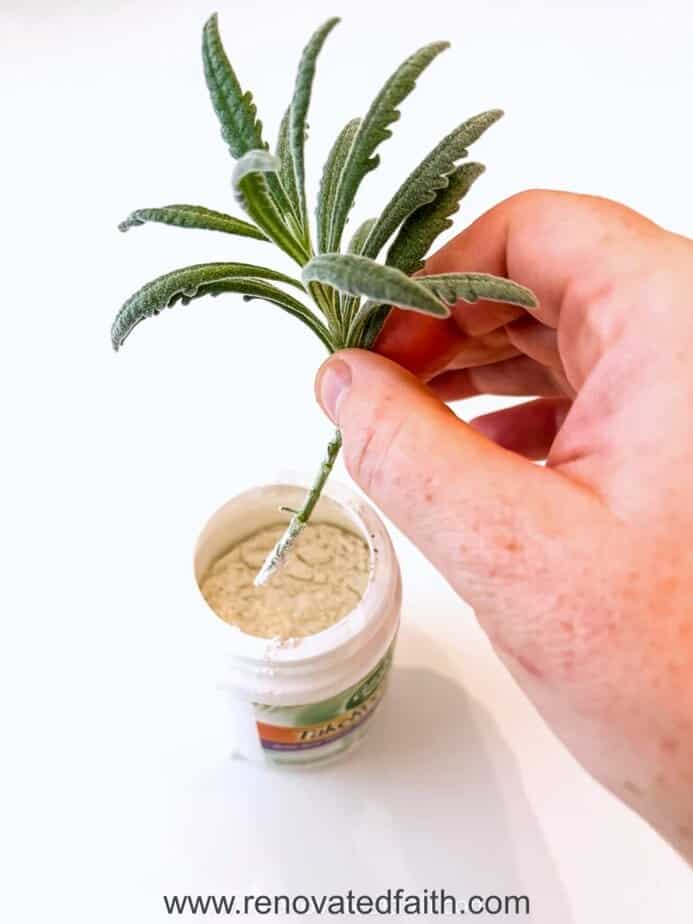
Step 4: Pot Up Your Plant Cuttings in Soil
Dip the cutting in rooting hormone, making sure that it covers the nodes.
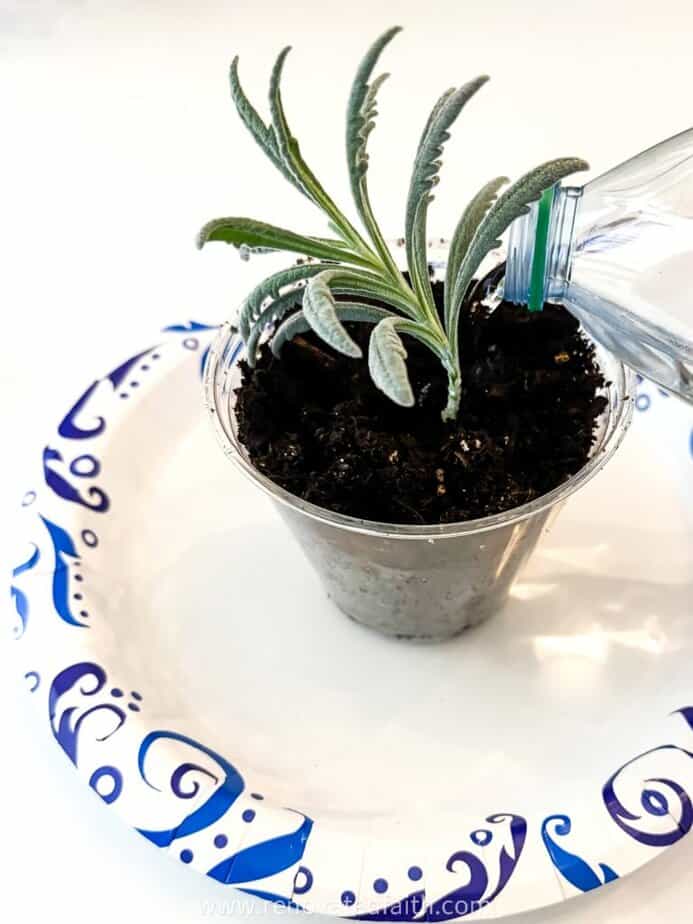
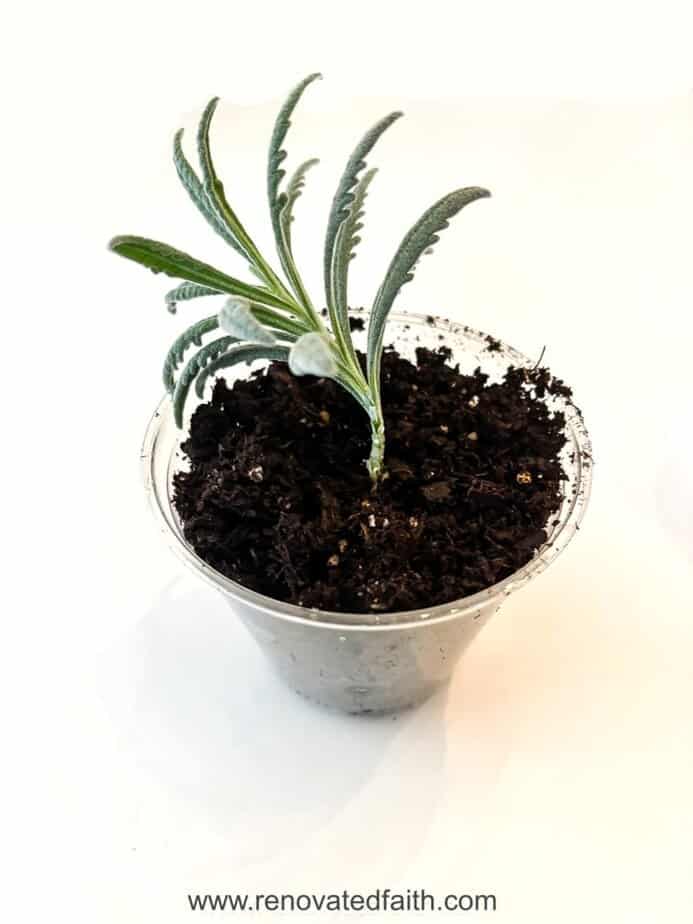
Stick your cutting in the middle of the soil.

Use spring water or RO water to give your cutting a drink.
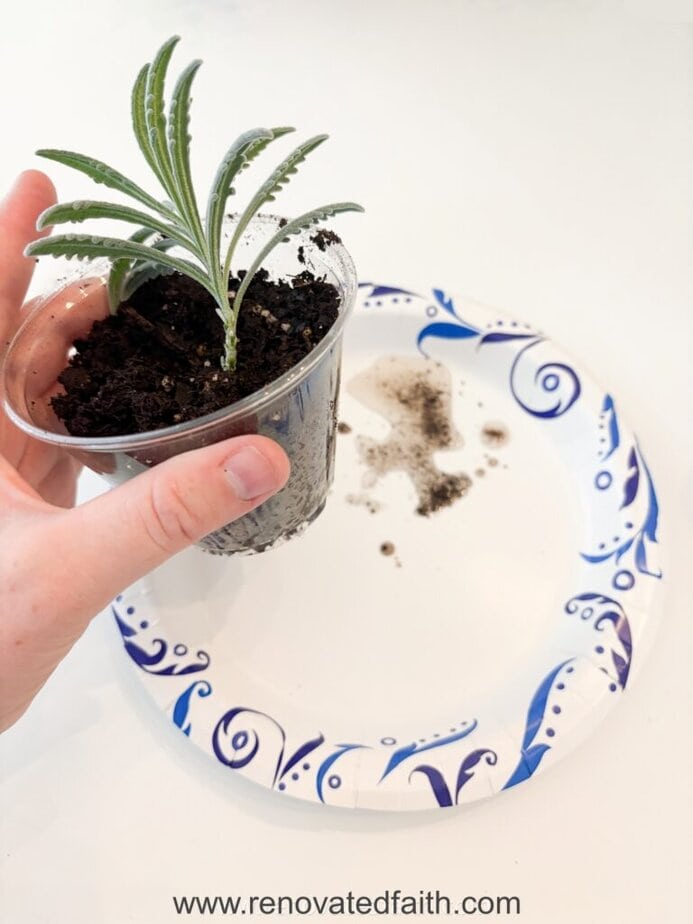
Tap the bottom on a paper plate so that all the excess water flows out.
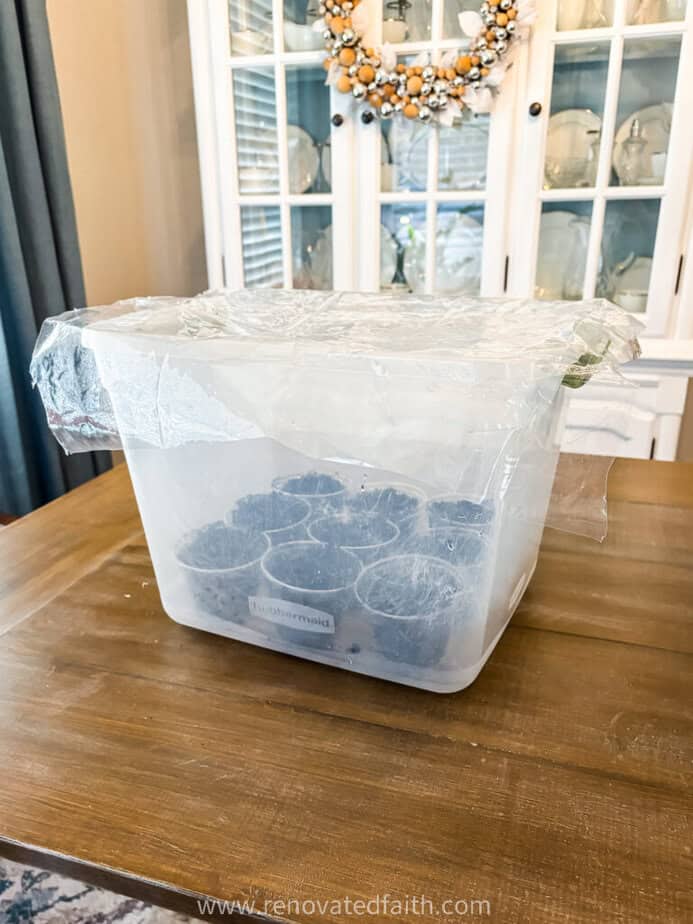
Put your potted cutting in the storage container and re-cover them to keep the humidity high.
Step 5: Easy Hacks for Making Your Plant Cuttings Propagate Faster
Before you secure the top, we are going to do a couple things to make your cuttings grow faster. These tips sound crazy but I PROMISE, they work!
Find a small cup or any small container that can fit between the pots. Take some of the cuttings you didn’t use, tear them into small pieces and put them in the pot.
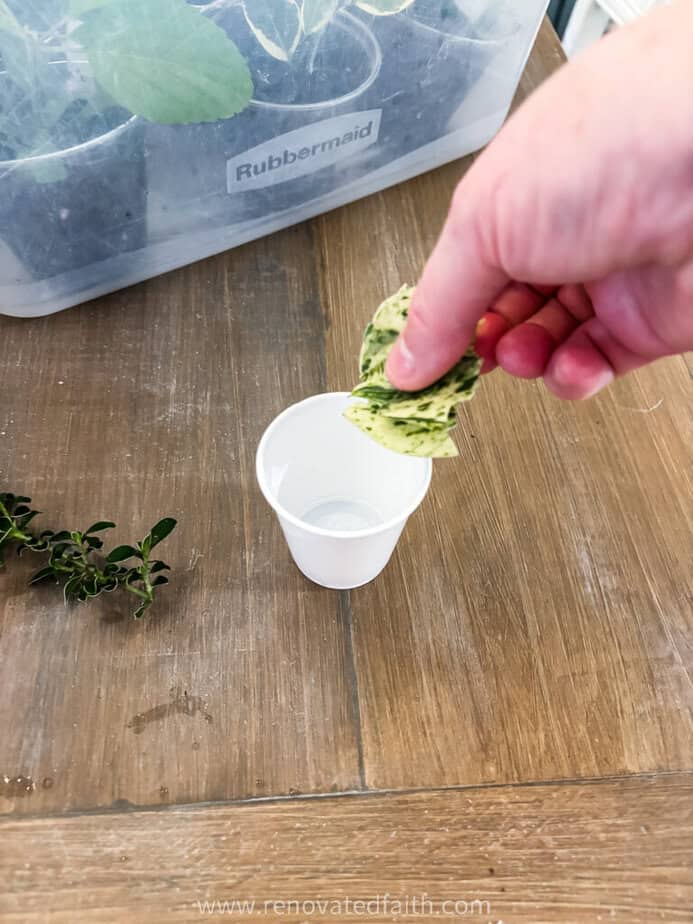
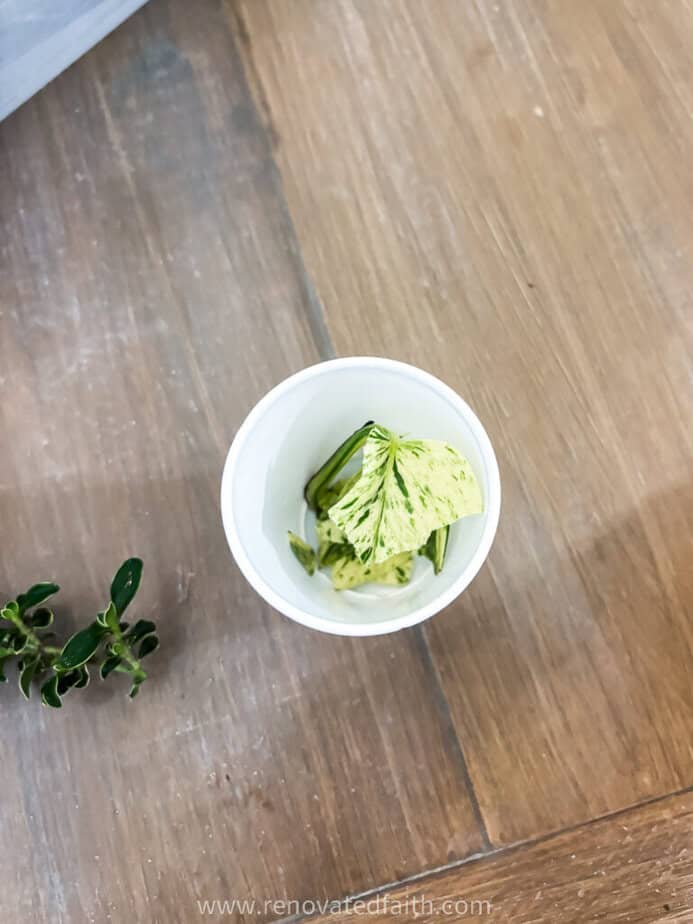
Now put a couple of these cups in with your cuttings, like below. These torn-up leaf pieces will continue to put off ethylene as they break down and dehydrate. When a plant detects the release of ethylene, it promotes root growth in this scenario.
Ethylene is commonly used for fruit ripening in the agricultural industry. For our purposes, we are using it to help our cuttings root faster.
When the cups of leaf cuttings get completely dried up, I take them out. Sometimes, they get kind of gross and at that point I take them out also.
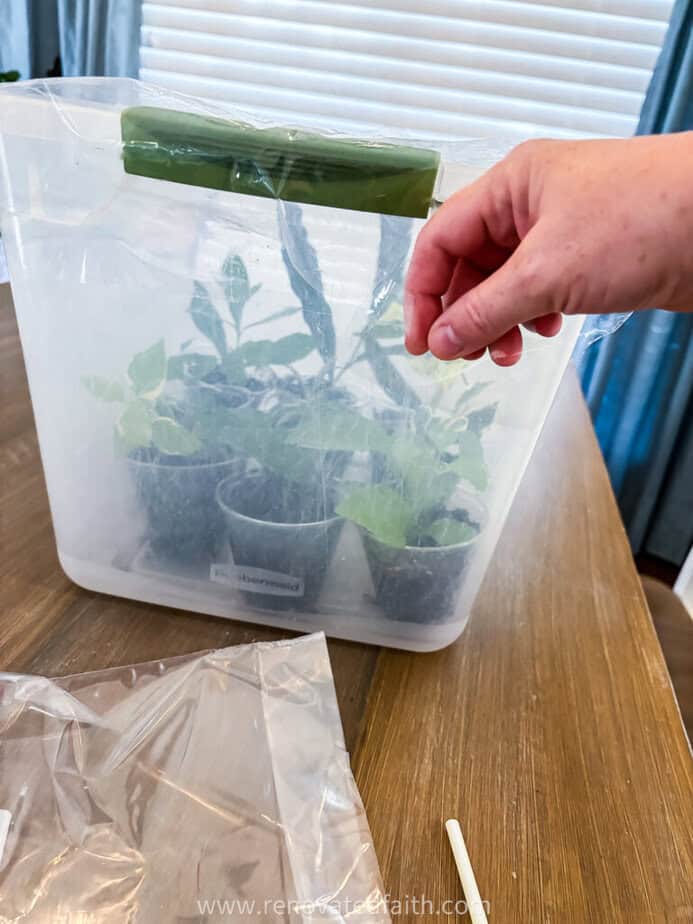
Another great hack is to get a straw and put it just under the edge of the cover. Now, air into the container. This adds warm humid air into the tub with lots of carbon dioxide, which the plants love!
I keep the straw close to the tub because every time I check them I replace the cover and blow more air in. Again, this is a totally optional step but I feel like it helps them to put down roots sooner.
My last tip involves humidity as it is your best friend when you are propagating plants. You want the inside of your container to have a thin mist of tiny water droplets on the edges. If you are getting big drops of water, you want to move the cover so a tiny air hole is exposed to lower the humidity.
If you don’t see any water vapor in your container, you need to tape the edges of the plastic cover to hold in more humidity.
I check my cuttings about once every 5 days to see if they need water. If they are dry, I’ll drip some water into each pot. A mustard-type squeeze bottle is great for this because you don’t want them sitting in too much moisture.
Step 6 – What’s the Best Lighting for Plant Cuttings?
For this tutorial, I am including a few different options, so use whatever works well for you!
Bottom line – plant cuttings like bright but indirect light to grow.
The easiest option is any lamp like this desk lamp I have below. You can use any daylight LED bulb or a dedicated grow light bulb. Plants will do great under this light setup!
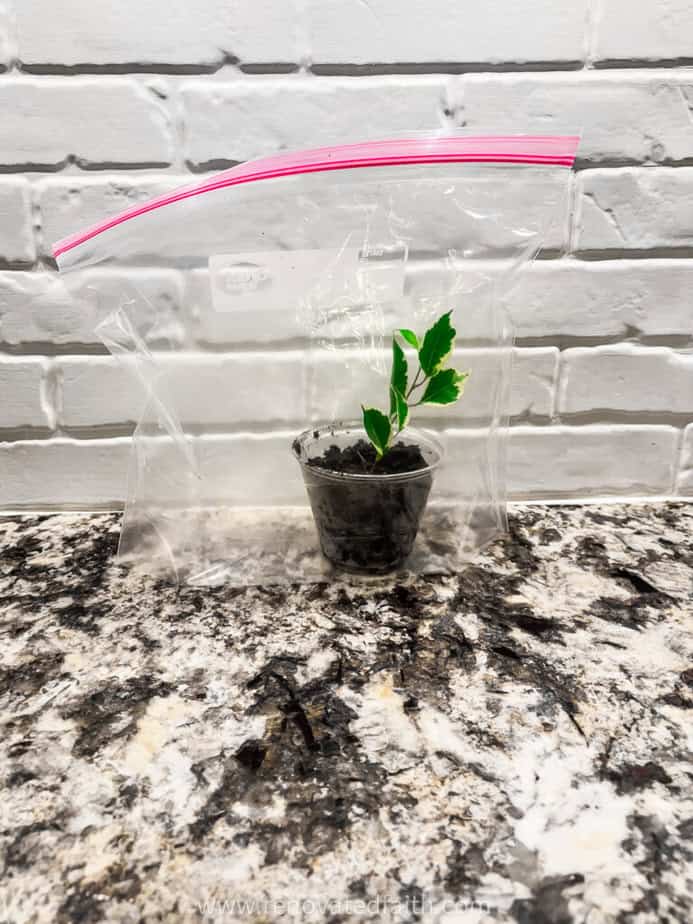
Kitchen under-cabinet lighting is great for plants. If you need to only propagate one plant, just use a gallon storage bag.
RELATED: Shameless Plug for My DIY Faux Brick Backsplash
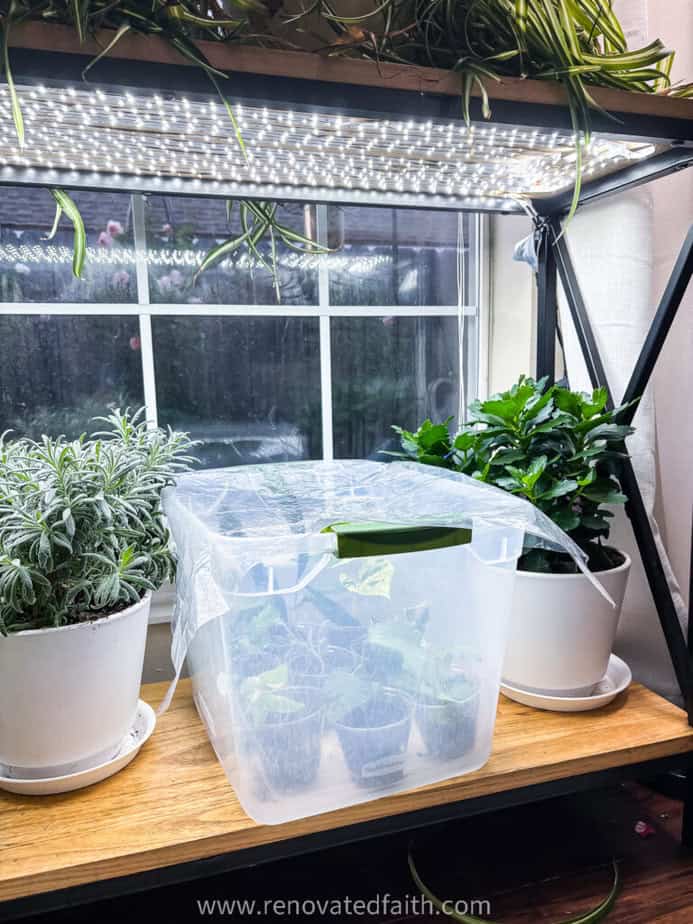
I have a console table with these LED strip lights underneath for house plants. You can see an easy tutorial here: DIY Lighted Shelves for House Plants
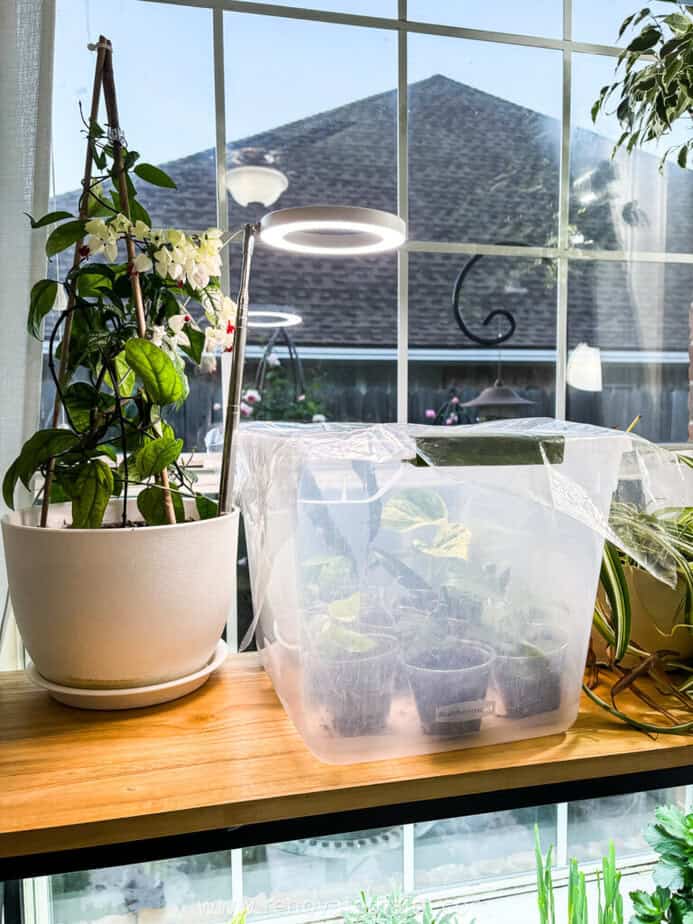
You can use a combination of window lighting and some supplemental lighting. This is a north window so the light will be indirect and here I supplement with one of these LED lights: LED Ring Light for Plants
These ring lights are fabulous, the brightness is adjustable AND they have built-in timers. I love them for my big houseplants in my living room.
Check your cuttings periodically to water them if they need it. When they are well-devloped and ready to take out, make sure to SLOWLY acclimate them to the humidity outside their little greenhouse. Every couple days, pull the cover back a tiny bit.
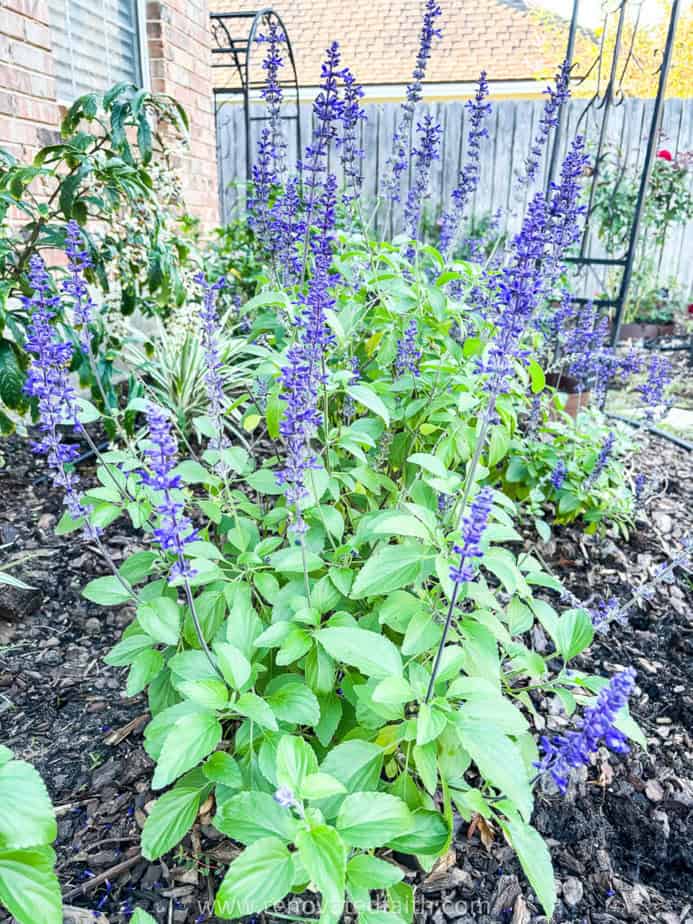
I’ve had SO much fun propagating plants and have saved a lot of money in the process. Above are salvia that I propagated.
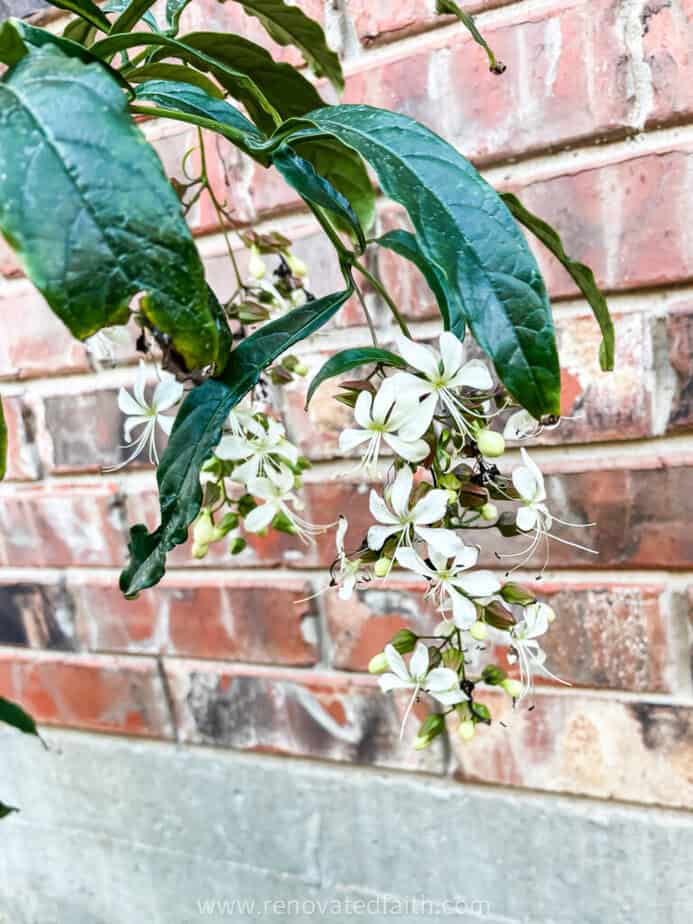
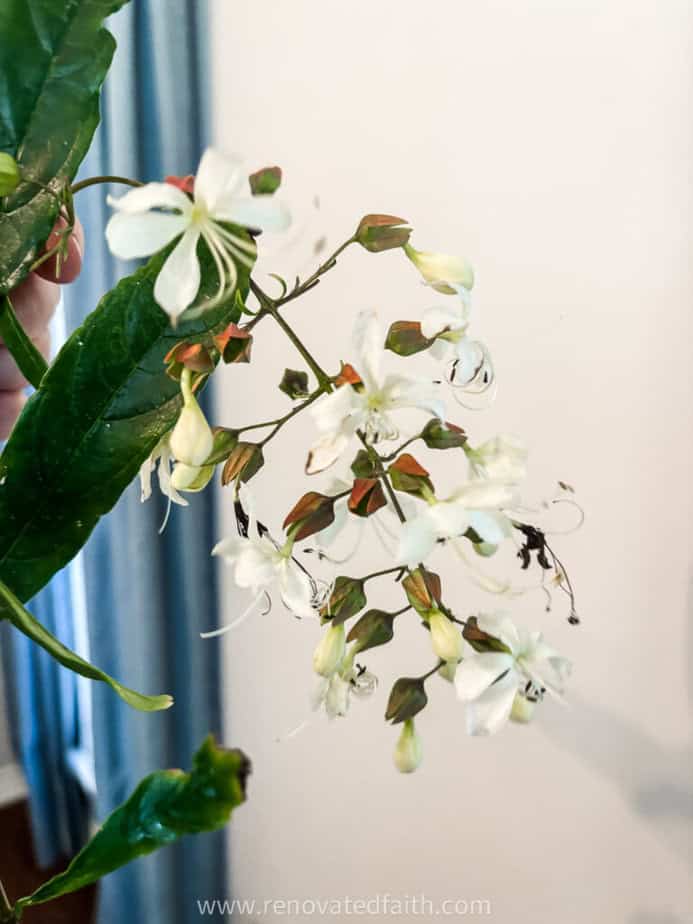
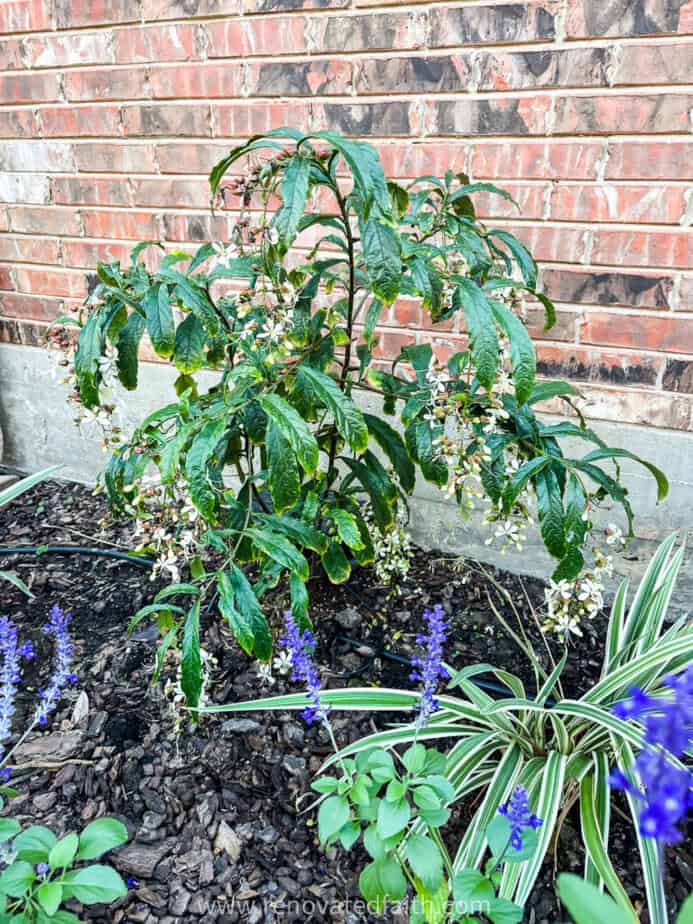
This amazing plant is a bridal veil clerodendrum. It blooms once a year with these chandelier like blooms that smell amazing! Then, they make red berries that look great for the holiday season. This plant thrives in DEEP shade which is crazy.
Mine is in morning sun and I also have one I’m trying out as a house plant with a ring light
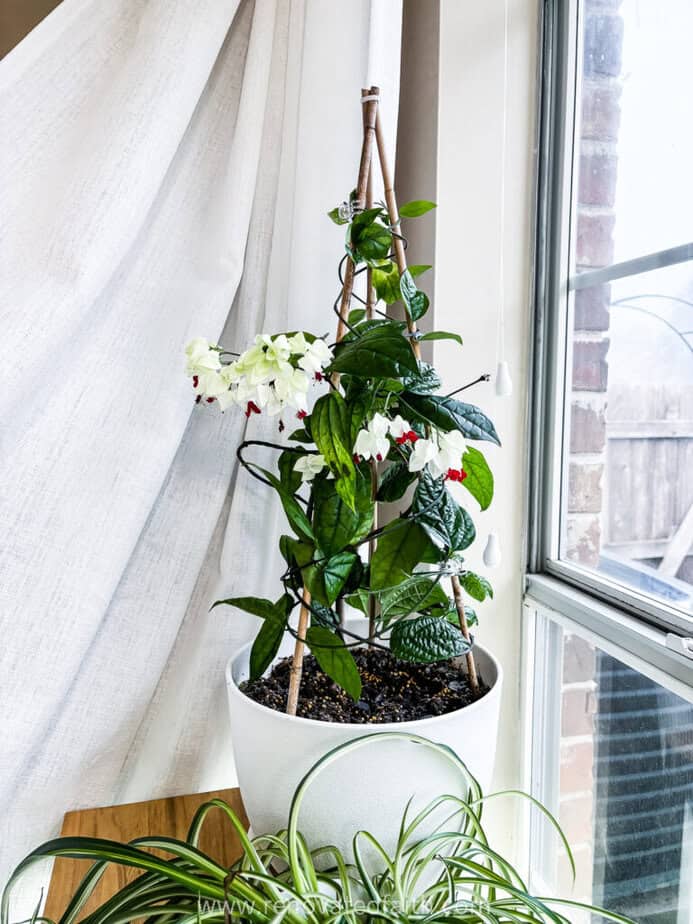
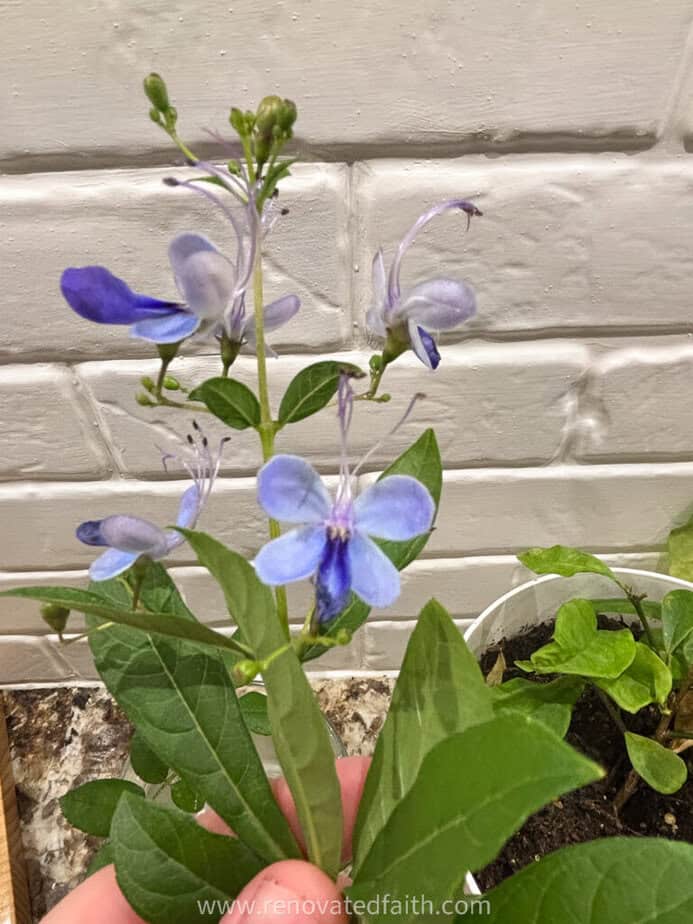
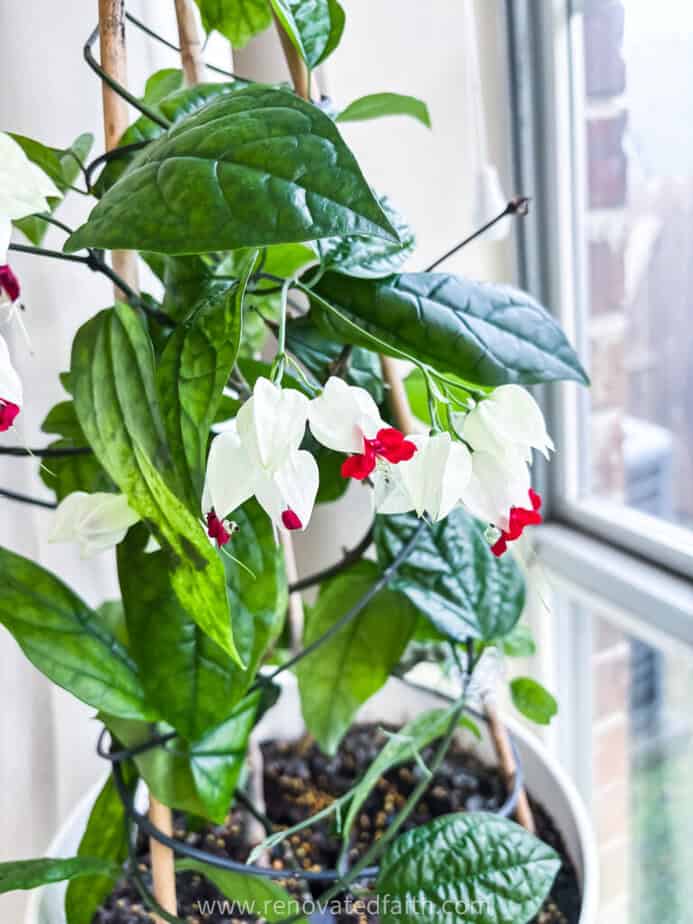
This is bleeding heart vine which surprisingly does really well as a houseplant under low light. She also can do well outdoors in morning sun but I’m in Central Texas. She could probably do full sun in a milder summer.
RENOVATE YOUR FAITH: Leave the Results to God (Why Your DIY Approach to Life Is Wearing You Out)
Just as an actor plays his or her role in a movie, we each have our individual part to play in God’s plan. But God is the director, producer and editor of our stories. He perfectly orchestrates our role and can see the ending even when we don’t
As actors in God’s plans, our role is to play our part He gives us but also to have faith to know that God will do the heavy lifting. He’s the one who has full control, and we can rest in knowing that we can trust Him with our lives. READ THE REST HERE
Most of my projects include a corresponding devotional. For more spiritual encouragement, click here for the rest of my project posts that also include Renovate Your Faith devotionals.
More Posts Related to How to Start Plants From Cuttings Indoors
How to Propagate African Violets in Water
Beautiful & Low-Cost Trellises for Climbing Roses and Vines
How to Build a Mounded Flower Bed
50 EASY Landscaping Ideas For The Front of Your House (Free Cheat Sheet)
Final Thoughts on How to Start Plants from Cuttings in Soil
With these simple techniques and a little patience, you’ll be amazed at how quickly your cuttings transform into thriving plants. The beauty of this method is that it works year-round and gives you endless opportunities to multiply your favorite varieties without spending a fortune at the nursery.
Whether you’re building a backup collection of rare perennials, filling your garden with colorful annuals, or simply enjoying the satisfaction of growing something from scratch, propagating in soil is a rewarding skill that pays dividends season after season. So grab those scissors, find a sunny spot, and start your propagation journey today—your future garden will thank you!
I love to hear your thoughts and questions! Scroll down to leave a comment and I WILL reply! ❤️
Blessings,

Be sure to follow the fun here!
Email Subscription | Instagram | Pinterest | Facebook | Twitter


Karin Peters is a DIY expert and the creator of Renovated Faith. She is a furniture painter, a home design consultant, and a tenacious problem solver determined to help you transform your house into a home. With 17 years of experience with DIY home improvement, she researches and analyses professional processes to adapt them to be easy and cost-effective for DIYers. She then tests every project and product before it appears on the site in a detailed, step-by-step format. After attending Texas A&M University, she received her Master of Divinity with Biblical Languages at Southwestern Baptist Theology Seminary. Her passions unite in Renovated Faith, which shows readers how to create a home that serves them so they can pursue their God-given purposes. About Renovated Faith | Editorial Policy | Facebook | Twitter | LinkedIn