Easy DIY Industrial Shelves on a Budget (Wire Shelving Hack)
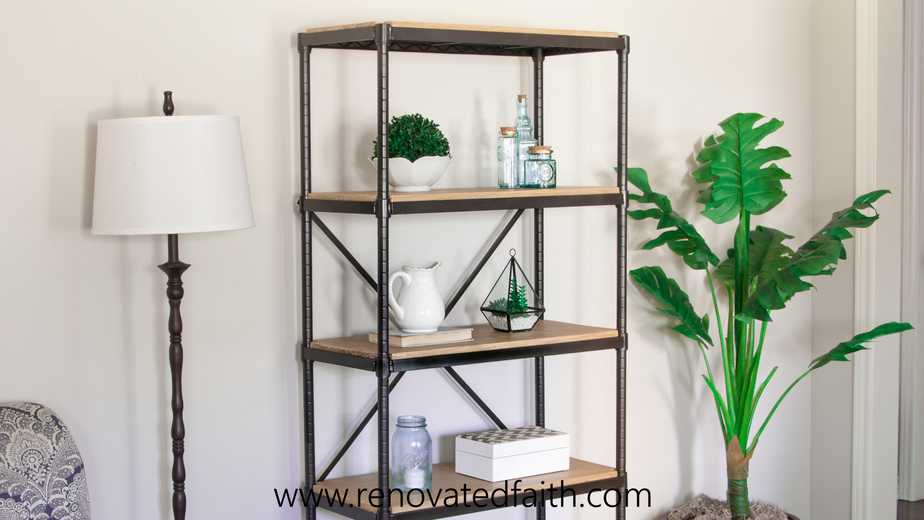
Get the Look of Iron Pipe Shelves with this Wire Shelving Hack
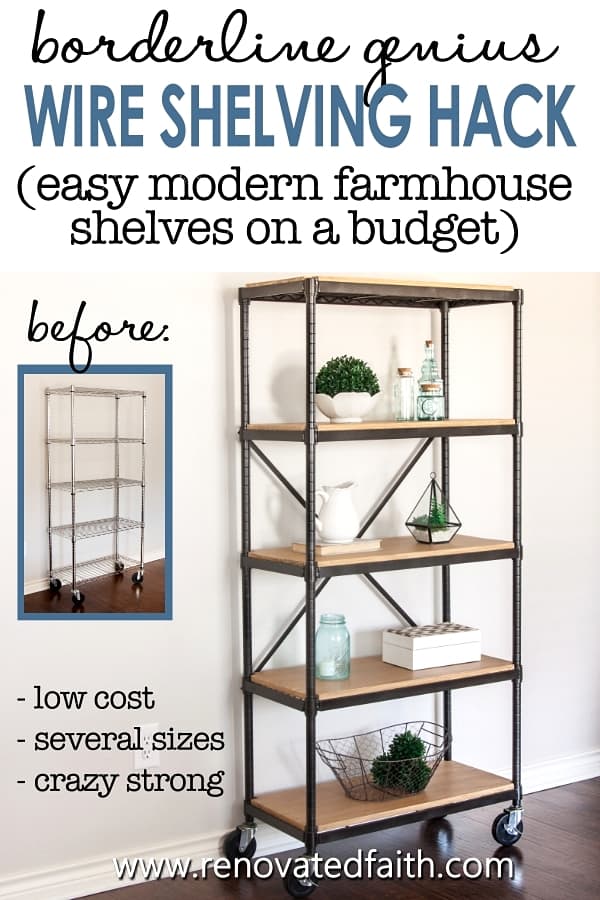
Why spend a fortune on high-end shelving when you can use this wire shelving hack to make your own DIY industrial shelves that are much stronger and cheaper than what you would buy online.
You love how industrial bookcases blend raw wood and dark metal for the perfect modern farmhouse look! Unfortunately, these freestanding bookshelves also have a pretty ‘industrial’ pricetag. But what if you could combine the durability, size versatility, and low cost of wire shelves with the look of industrial pipe shelves?
It’s no secret that the bright chrome of wire shelves could be a really ostentatious addition to any modern farmhouse decor. If wire shelves were on the cast of Friends, they would no doubt be the “Gunther” of living room furniture.
But although their appearance is a little tacky, wire shelves are reliable (especially if you’re Rachel) and have an important purpose. Afterall, Gunther was the one who made the coffee.
But wire shelf units are not part of the in-crowd when it comes to industrial-chic decor. Sorry, Gunther…
In this post, I will help you combine the low-cost versatility and strength of wire shelves with the rustic sophistication of industrial pipe shelves. You can even use this wire shelving hack on shelves already in your home!
LET ME SHOW YOU:
- How to make DIY pipe shelving that is super strong and also versatile
- The easy way to incorporate industrial shelving into your decor on a budget
- A simple way to make wooden shelf covers for any wire shelf storage
- Some encouragement when you feel left out or like you don’t fit in because of your differences (Check out the Renovate Your Faith Devotional at the bottom of this post.)
Quick Links to Information in this Post
- 1 Get the Look of Iron Pipe Shelves with this Wire Shelving Hack
- 2 Options for DIY Industrial Shelves
- 3 Supplies Needed: DIY Industrial Pipe Shelving Kit
- 4 Cut List: DIY Industrial Shelves
- 5 Easy DIY Industrial Bookshelf: Step-By-Step Tutorial
- 6 RENOVATE YOUR FAITH: How God Uniquely Equips Us
- 7 Wooden Shelf Covers for Wire Shelving
- 8 Turn Your Shelves Into A Lighted Plant Stand
- 9 FAQ’s: DIY Wire Shelving Hack
- 10 My Posts Related to Industrial Pipe Bookshelves (DIY Wire Shelving Hack)
- 11 Wire Shelving Hack – Related Posts:
- 12 Final Thoughts on My Industrial Pipe Shelf
- 13 Wire Shelving Hack and Industrial Pipe Shelving: DIY Tutorial
Options for DIY Industrial Shelves
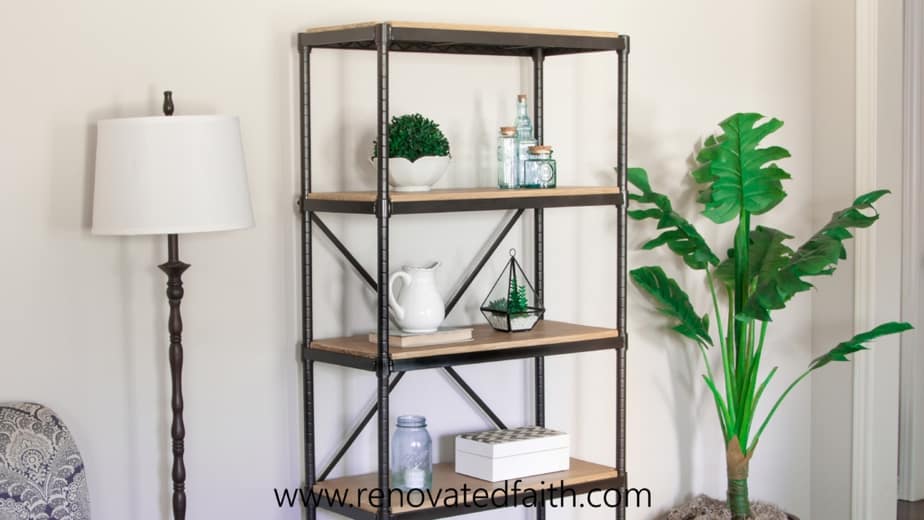
DIY industrial shelves beautifully contrast rustic wood against dark metal while providing a beautiful framework for your home decor items and books. Flexible with any home decor style, they mesh easily with traditional, modern farmhouse, rustic, and even coastal decor making even your storage items look amazing. Unfortunately, authentic pipe shelving from an online retailer also has a pretty high price tag leaving little wiggle room in your budget for other decor and furniture.
So why not make your own industrial pipe shelving?
Option 1: Galvanized Pipe Shelves?
You can build your own galvanized pipe shelf using metal pipes from your local home improvement store. What many DIYers run into with this method is a very heavy bookshelf that can’t support a lot of weight because the joints are already supporting the weight of the bookcase itself.
This works fine for home decor items but not books or other heavy storage. Also, it can be hard to get each verticle section of pipe to line up exactly with the one below it. If the galvanized pipes don’t align, your DIY industrial pipe shelves can look pretty sad.
Option 2: IKEA Shelving Unit?
What about an IKEA hack to get the look of a pipe bookshelf? You know I love a good IKEA hack as much as the next gal, but Ikea shelving units aren’t always the best option when it comes to sturdiness and durability in holding heavy items.
Option 3: Wire Industrial Pipe Shelves ☑️
As mentioned before, you won’t see standard chrome wire shelves on the latest cover of Magnolia Journal BUT they are crazy strong, light, cheap, and can even be rolled around!
Wire shelves are also easy to find in any size you can imagine! With a couple of simple changes, we can bump up the look of wire shelves while maintaining all their functional benefits! Be sure to check out the video too for more information on how to make your own high-end bookcase. Let’s get started!
Supplies Needed: DIY Industrial Pipe Shelving Kit
Wire Shelving Unit
5 Paint-Grade Edge Glued Panels – I was originally looking for basic shelf lumber but these were pretty cheap so I went for it.
Universal Wire Shelving Casters (Optional) – If your wire shelf unit doesn’t have wheels, you can easily add your own to make your industrial shelf more portable.
Black Spray Paint (Optional) – If your metal shelf is not already black or oil rubbed bronze, you can use this spray paint as it adheres well to metal: Rustoleum Universal Spray Paint
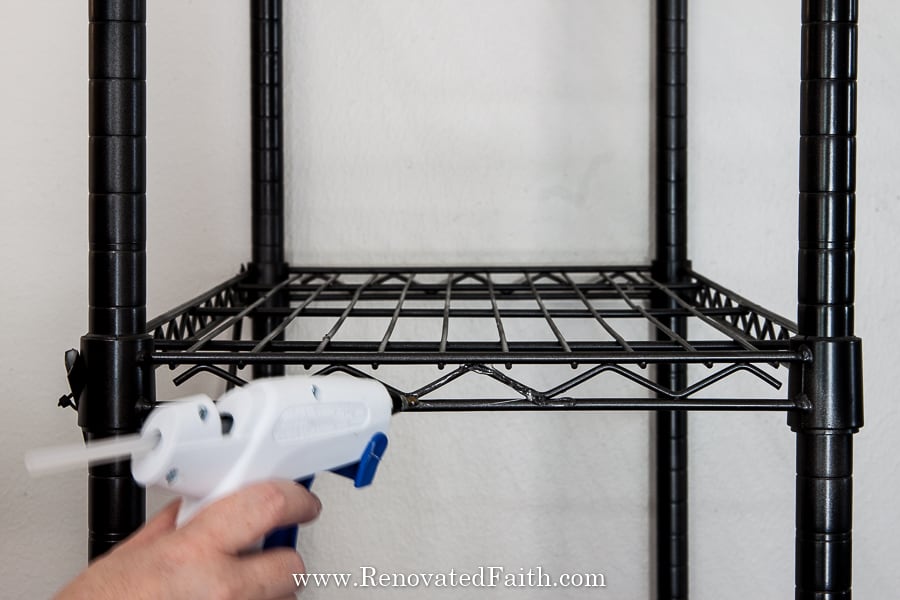
Hot Glue Gun – You will need a dab of hot glue to secure the crossbar bracing pieces.
Cross-bars – To make the crossbars, we are using white tile end caps (whatever that is!). They are long thin pieces of plastic that you can find on the endcap of the molding section at Lowe’s. You will need just one 8-foot piece. See the pic below so you can get an idea or where to find them or see the exact location at your local Lowe’s store here: White End Cap Molding
Sidebars – For the sidebars that cover the edges of each shelf, we will be using Polystyrene Traditional Lattice Molding. You will need three 8-foot pieces. These can be found in the molding aisle at Lowe’s and you can see what they look like here: Polystyrene Lattice Molding
Black Cable Ties – I like the 4” cable ties
Stain – I prefer to use a faux stain made with latex paint because I can get more consistent results than I can with a traditional stain. You can see the process and different shades to pick from here: Raw Wood Faux Stain Coming Soon – Join the email list here so you know as soon as it’s posted!
Clearcoat: My favorite Clear Coat is Varathane’s Waterbased Polyurethane If you want a more matte look, check out some options here: The Best Clear Coats for Furniture Clearcoat is not a necessity, but I wanted to make sure my shelves were completely waterproof.
Jigsaw – I did all of my cuts with a jigsaw which is super easy to use. See how to use my favorite here – How to Use a Jig Saw Easily
Sander or Sandpaper – My favorite power tool would have to be my sander: Best Sander For Furniture
Free Spray Painting Checklist – Don’t forget to download my Spray Painting Checklist HERE with all of my best spray painting tips, which will ensure you have a beautiful finish every time.
Cut List: DIY Industrial Shelves
2 – Tile End Cap Pieces @ 41” (crossbars on the back)
5 – Polystyrene Lattice Molding Pieces @ 27 5/8” (long sidebars on fronts)
10 – Polystyrene Lattice Molding Pieces @ 11 3/4″ (short sidebars on sides)
5 – Wooden Shelves @ 13 1/4″ x 29″
A Beginner’s Guide to Using a Jigsaw – I only used my jigsaw for the cuts on this project. If you have never used one before, they are SUPER easy to use and also inexpensive. I give you all the details here: How To Use a Jigsaw (Step-By-Step Guide)
My Best Spray Painting Tips and Tricks – Download them here to get a flawless finish on any surface.
Easy DIY Industrial Bookshelf: Step-By-Step Tutorial
Step 1: Prep Your DIY Industrial Bookcase & Make Cuts
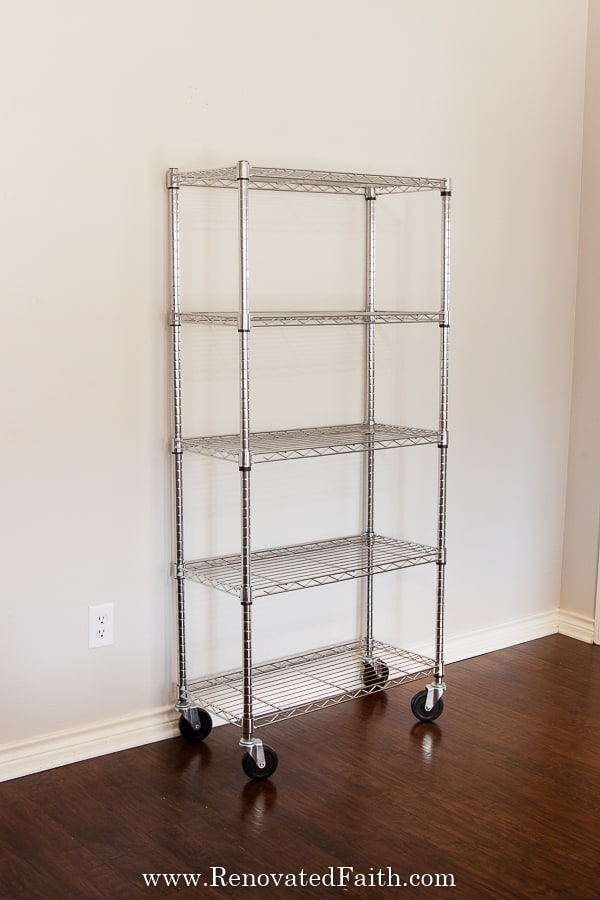
Stop! Before you do anything…take a before pic. When you are done, post the pics on Instagram and tag @renovatedfaith! I’d LOVE to see how your project turned out! ❤️ This is how my shelf started out!
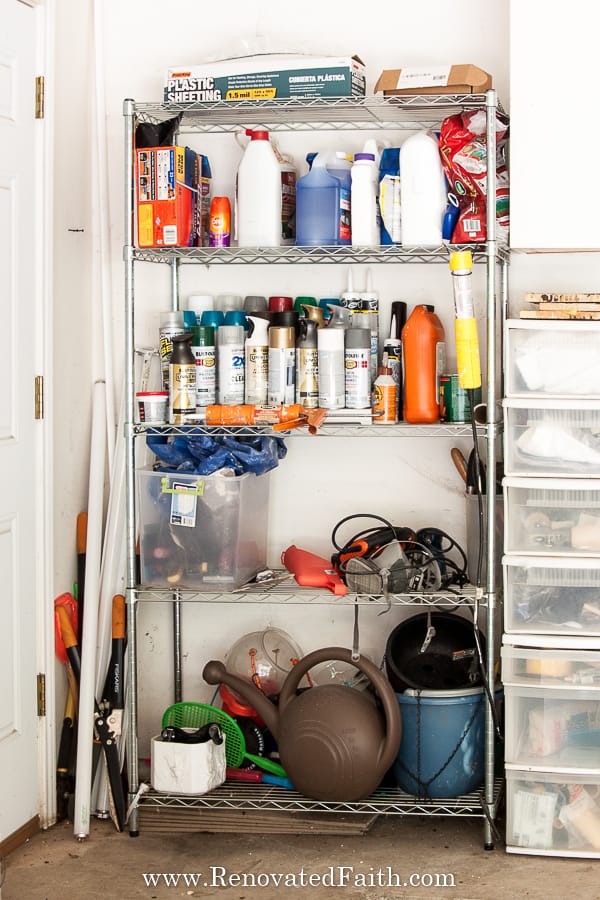
This tutorial can work on an existing wire shelf or the one listed above. If your wire shelf is chrome, then you can easily get the look of metal pipe shelves with black or oil-rubbed bronze spray paint. But first, we need to get a few things in place before we start painting.
If you want to add wheels to your shelf, now is the time to add them.
Also, you can cut and size the crossbar pieces that will finish off the look of our DIY industrial shelves. Although we won’t put them on just yet, we can get them ready to spray paint so we can do all of our spray painting at once. Figure out how you want your faux cross bracing to look. The plastic molding we are using can be easily cut to any length with sharp scissors.
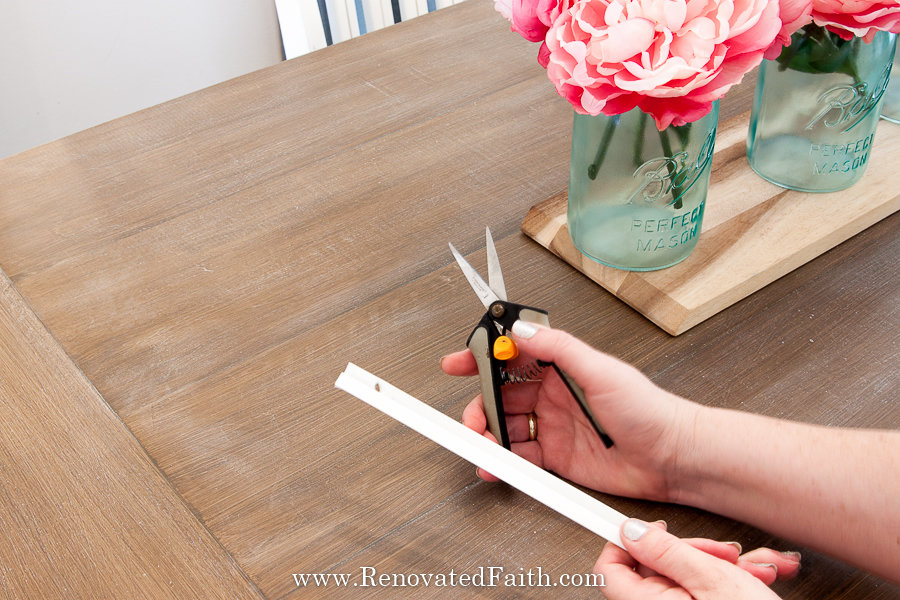
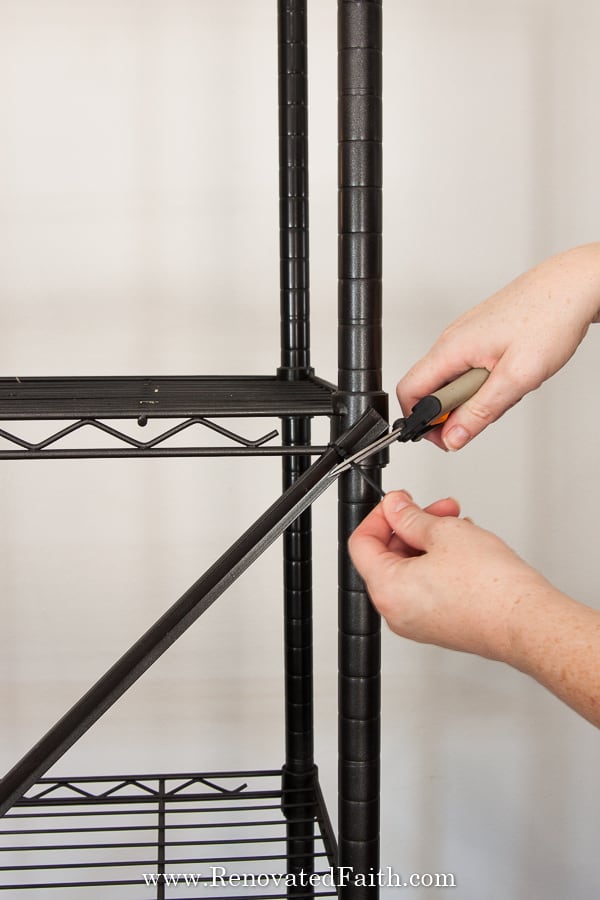
To get the look of my cross braces on the wire shelves for this tutorial, I cut each to the right size after holding them up to my shelves (41″). Then, I used a pair of sharp scissors to put a small hole about an inch from the end. You can see below where we will attach the “cross braces” with the zip ties connected to the wire of the shelf.
IMPORTANT TIP: You might be wondering why we are using plastic molding as faux cross braces for our black pipe shelves. Yes, the plastic is super flimsy, but these are purely aesthetic. They won’t be bearing any weight and once we spray paint them, they will look like metal!
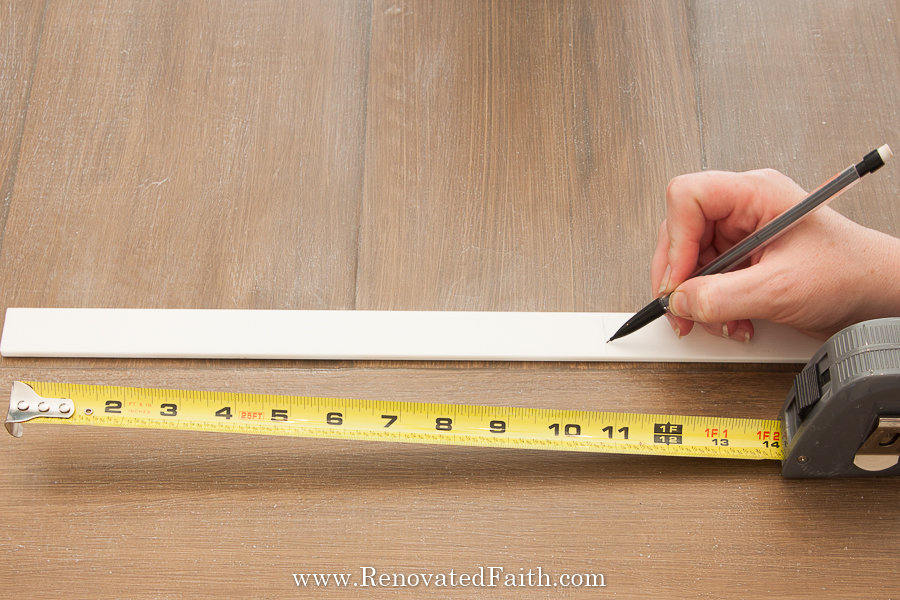
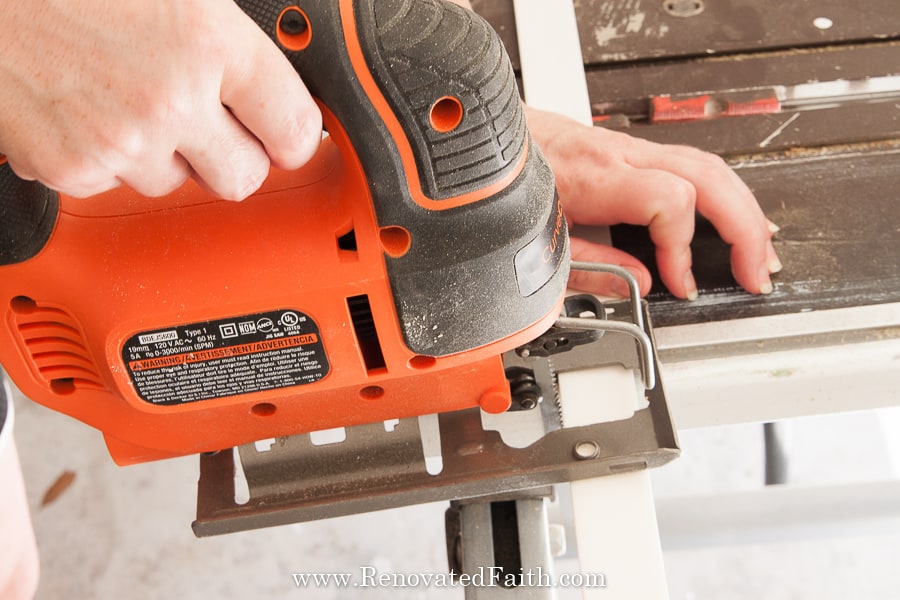
You also want to make all of your cuts for the vinyl lattice which will be the side covers for your shelf. I cut mine with a jigsaw and then sanded the ends a little with my mouse sander (click here for the current price) as you can see in the video.
Renovated Faith: What’s in a Name?
God never leaves a project half-done…He continually works on each one of us, as a lavish expression of His amazing love and grace. So many of my DIY projects remind me of how God renovates our hearts. If you are a work-in-progress, just like I am, check out the Renovate Your Faith Devotional at the bottom of this post. Click here to get a weekly reminder of new posts by email.
Step 2: Use Spray Paint to Get the Look of Pipe Shelves
Now that the cross braces and sidebars are ready, it’s time to spray paint to get the look of true industrial pipe shelves. I wrapped the wheels in painter’s tape because I wanted to leave them silver. If you want the metal part to be black, just tape off the rest of the wheel so it doesn’t get gunked up with paint.
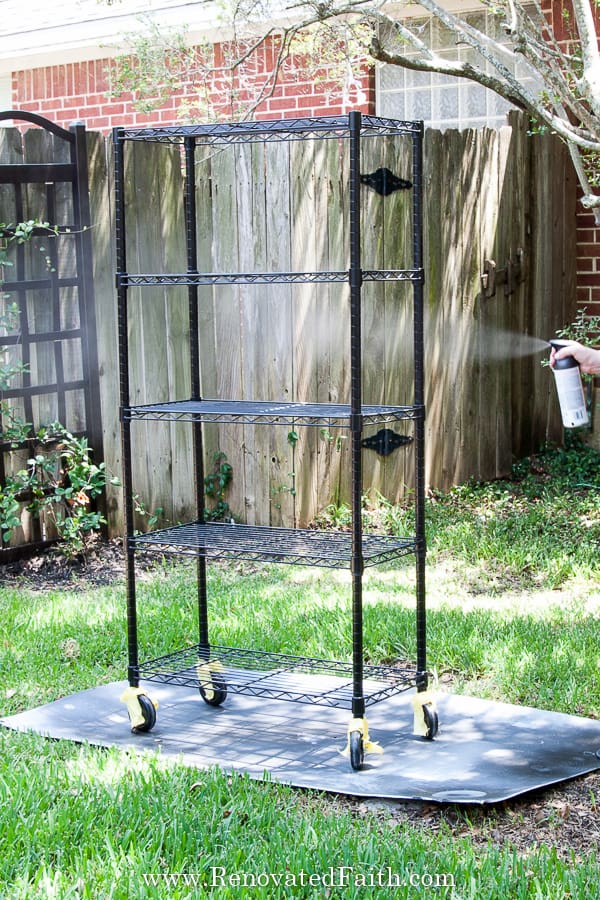
I spray painted my shelf unit after it was assembled (If I spray painted the pieces and then assembled the unit, I might accidentally scratch some of them during assembly.)
If there is a possibility that you will change the configuration of your shelf in the future, you might want to spray paint the pieces, let them dry 48 hours, assemble the shelf, and then touch up any scratches.
If your wire shelving unit is chrome, you will paint the entire shelf black or oil-rubbed bronze. But if your unit is already black, you will only be spray-painting the cross braces and sidebars black to match. Don’t forget to download my time-saving tips for spray painting home decor: Free Spray Painting Checklist
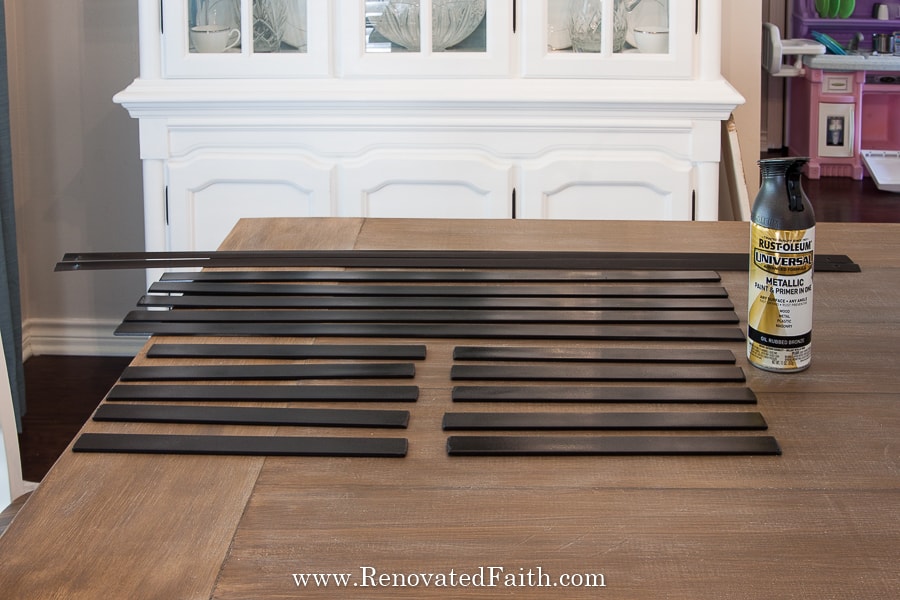
You can see in the video how I lay them all out to spray paint with the bottoms up. I sprayed on a couple light coats on the back at 15 minute intervals. Then, I waited 30 minutes, flipped them all over and spray painted two more light coats at a 15 minute interval.
Once you have spray-painted the shelf, cross braces and sidebars, let them dry for at least 24 hours. You aren’t going to believe how much our plastic cross braces and sidebars will look like metal when the whole shelf is together!
Step 3: How to Convert Wire Shelves to Wood
While the spray paint is drying, it’s time to cut the wood shelf covers for our DIY industrial shelves to change the look of our wire shelving to beautiful metal pipe shelves.
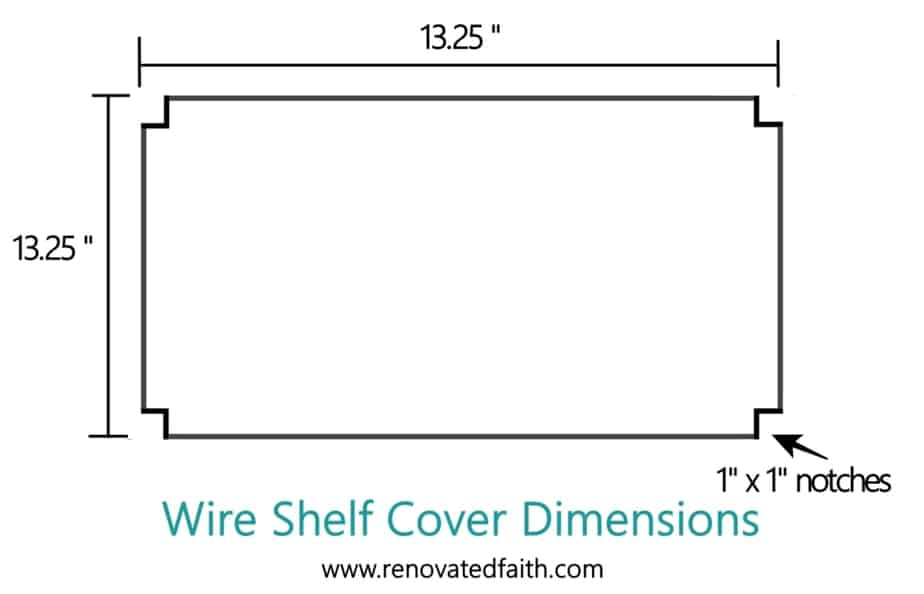
To make our DIY wire shelving covers, we need to cut the wood to the right dimensions. For the shelves I’m using, the final dimension of each wood cover should be 13.25″ x 29″ with a 1″ notch cut out of each corner.
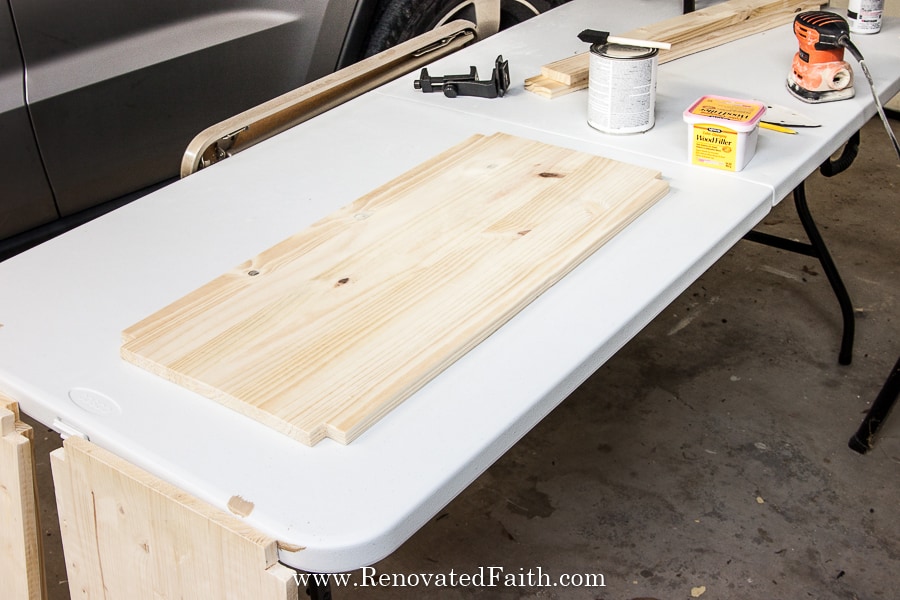
To do this, I used my jigsaw as you can see in the video. If you aren’t sure how to use a jigsaw, here’s my easy guide which includes how to cut straight lines with a jigsaw: How to Use a Jigsaw (Step-by-Step Instructions)
I recommend cutting out one shelf cover and then placing it on the shelf. From there, make any size adjustments for the rest of the shelf covers. Below you can see a top view of the dimensions.
First, cut your shelves to size with your jigsaw or circular saw. Now you will cut a square notch out of each corner so your cover fits the wire shelves. Use a speed square to help measure and mark the notches before cutting. Be sure to check out the video for this part!
Step 4: How To Finish Your DIY Wire Shelving Covers
You have a couple of different options as far as staining your shelf covers. Because I want to know for sure how my wood shelf liners will look in terms of stain color, I am using a faux stain. A traditional stain can yield unexpected or inconsistent results depending on the absorption (moisture and density) of the wood.
Also, I love that a faux stain with latex paint can completely cover the knot holes on these pieces of wood where that’s not an option with a traditional stain.
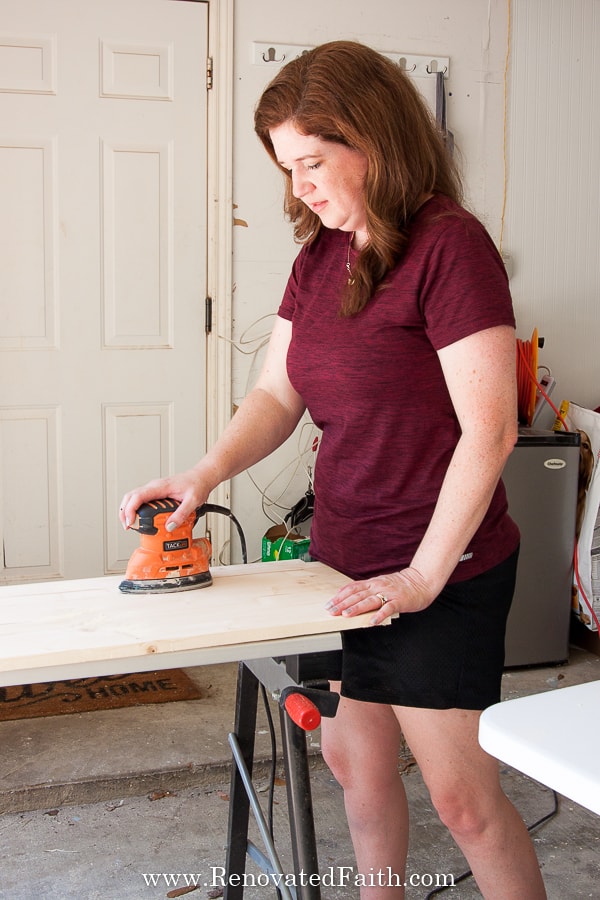
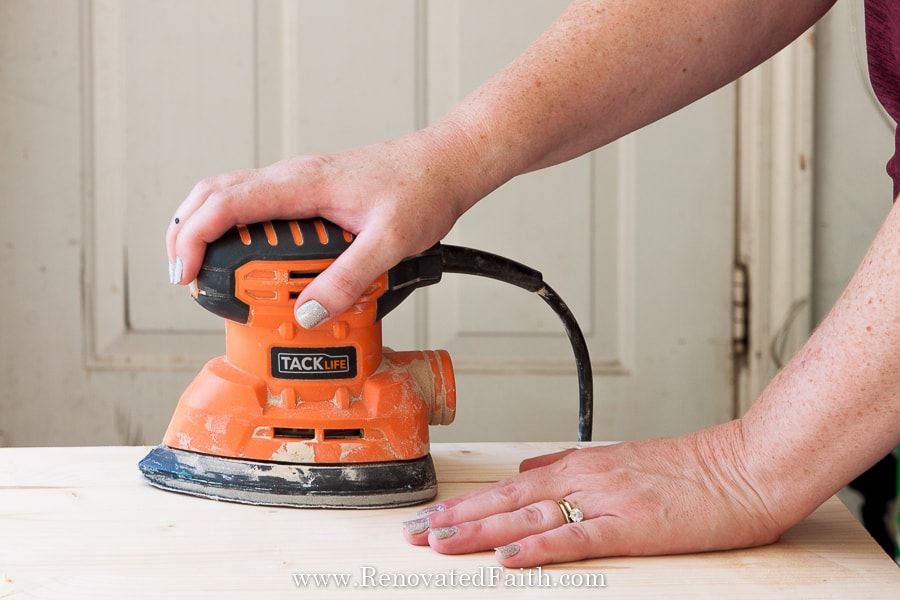
I filled the knotholes and sanded over the surface before adding the faux stain.
A topcoat is optional but I wanted to make sure my shelves were completely waterproof in case someone left a cold drink on one. So, I used Varathane’s Waterbased Polyurethane(click here for the current price) to ensure a beautiful and extremely durable finish.
On the video, you can see that they truly look like raw wood that is slightly aged but with no knotholes! I can’t for you to see how the wooden shelf covers look on the shelf unit when it is completely finished!
Step 5: Add the Cross Brace To Your DIY Metal Shelves
Now that your wire shelving covers are drying, you can add the cross braces and sidebars.
For the cross braces, simply attach the ends to the back of your wire shelving unit through the hole you made. String the 4″ zip ties through the hole, pull them closed and then cut off the excess. Secure the center with hot glue so the braces are secured together.
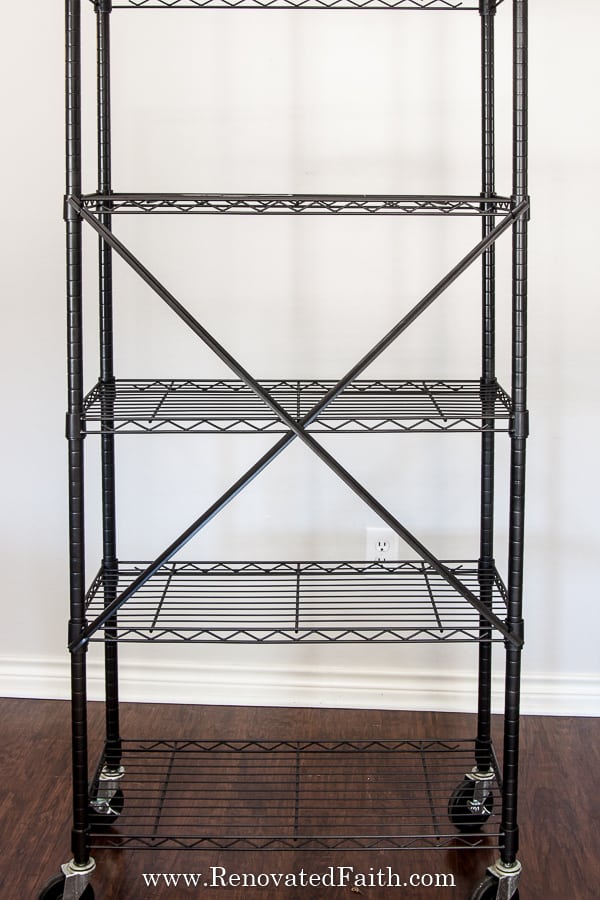
You can also hot glue your sidebars to the side of each of your shelves. Be sure to use plenty of hot glue to make sure the sidebars stick (I was a little too conservative in this pic). I also added some to the top and bottom of each end. You might be wondering why I’m using hot glue, but the Gorilla hot glue (Click here for the current price) we are using has a stronger hold! The video shows you how to do this entire step.
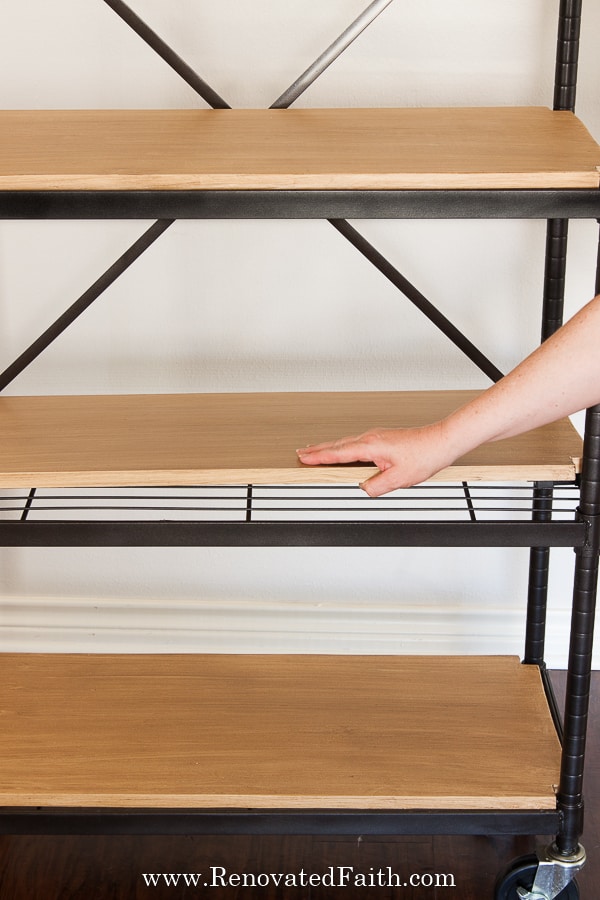
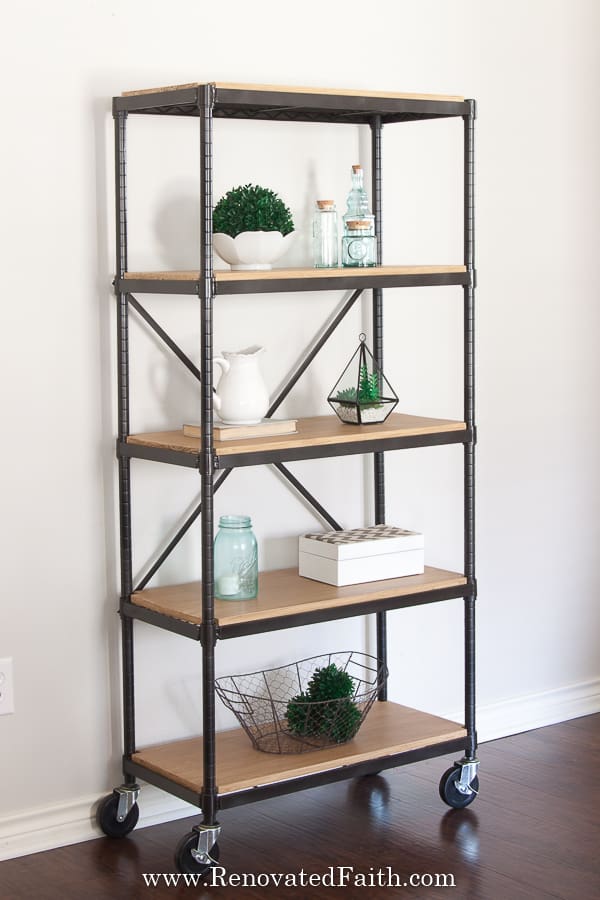
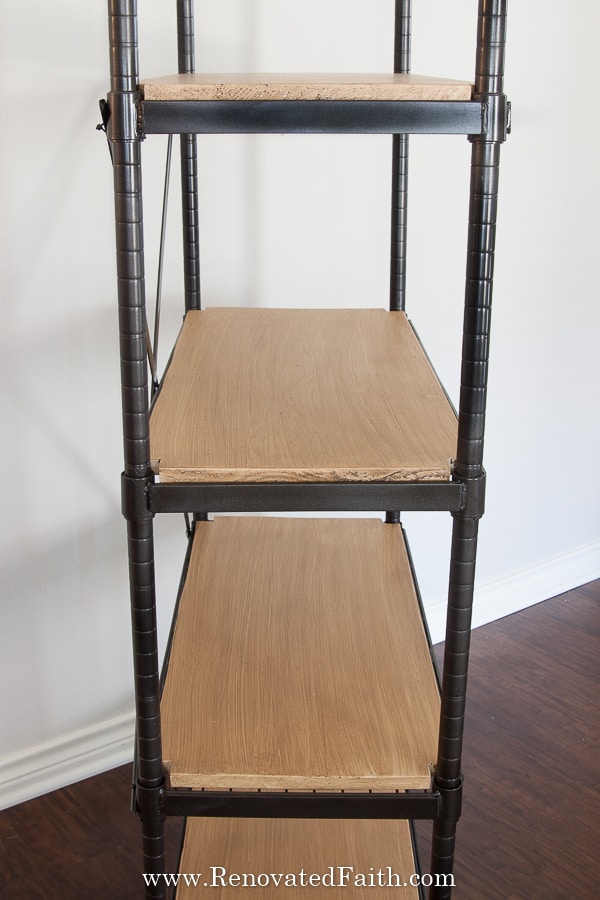
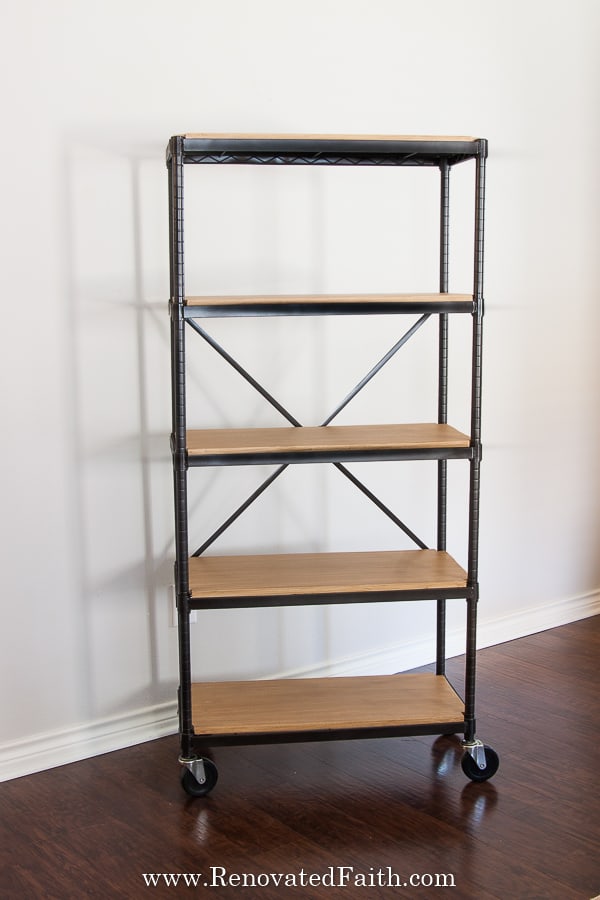
Now, you can simply add your wood shelf covers to the top of each shelf, and you are done!
RENOVATE YOUR FAITH: How God Uniquely Equips Us
Have you ever taken an Enneagram test? This is a personality test that assigns you into 1 of 9 different personality types and they are surprisingly accurate (Click HERE for my favorite book on the Enneagram Test).
I found out recently that I am an Enneagram 4. 4’s are known for being sensitive, creative, introspective, and sometimes a little dramatic (who me?). Another commonality of many 4’s is that they often feel “a little different” or like they are on the outskirts of a social group. Speaking of our Friends analogy from earlier, you can say 4’s are the Gunther’s of the Enneagram – or at least they feel that they are!
But I don’t think you have to be a 4 to wish you had some of the same characteristics, talents, or gifts as the person next to you. If you ever feel like the “odd man out” or that you’re a little different from others in your field, consider God’s intentional plan and purposes for those differences.
My work arena consists of other bloggers and it can be very tempting to put the same emphasis on certain types of social media to keep up with the Jones’, whether trying to mimic their gorgeous feeds, the style of their decor, or the frequency they post. But before I try to assimilate myself into what I see as success, I have to embrace the fact that God did in fact make me a little different and He did so for an express purpose. It was not by accident!
Do you ever feel this way in your field or social group?
Regardless of whether you are a stay-at-home mom, a teacher, a veterinarian, or an off-beat coffee barista, God has made you unique with individual characteristics that are geared especially for your God-given work.
The truth is that no matter where you are, what you do, or who you see on a daily basis, you can be a light for Christ in a dark world unlike anyone else. Here’s why:
- Consider your personality type.
- Now think about your talents, giftings, and unique resources.
- Also, consider your unique geographical location.
- Last, realize that you have a specific sphere of influence, whether real or virtual.
There is a unique set of people that ONLY you come in contact with daily. And you are the only one with your gifts and personality. It is no mistake that God has put you in their lives for a reason.
NOW, does anyone else on this entire globe have the same ministry capacity and opportunity for ministry as you do? Absolutely not, my friend.
No one else comes in contact with the same combination of people that you do.
Nowhere is there another human being with the same giftings and talents as you.
You are unique and He has made you that way for His glory. He created you to “do you”. It is a blessing if you are a little different – it’s so that you can reach out to people that your next-door neighbor can’t.
So the next time you feel out of step with others around you, remember that your Heavenly Father has woven your intricacies together for a purpose – to glorify Him!
You are uniquely you for a reason so embrace your differences on purpose for the glory of God.
For more spiritual encouragement, click here for the rest of my project posts that also include Renovate Your Faith devotionals.
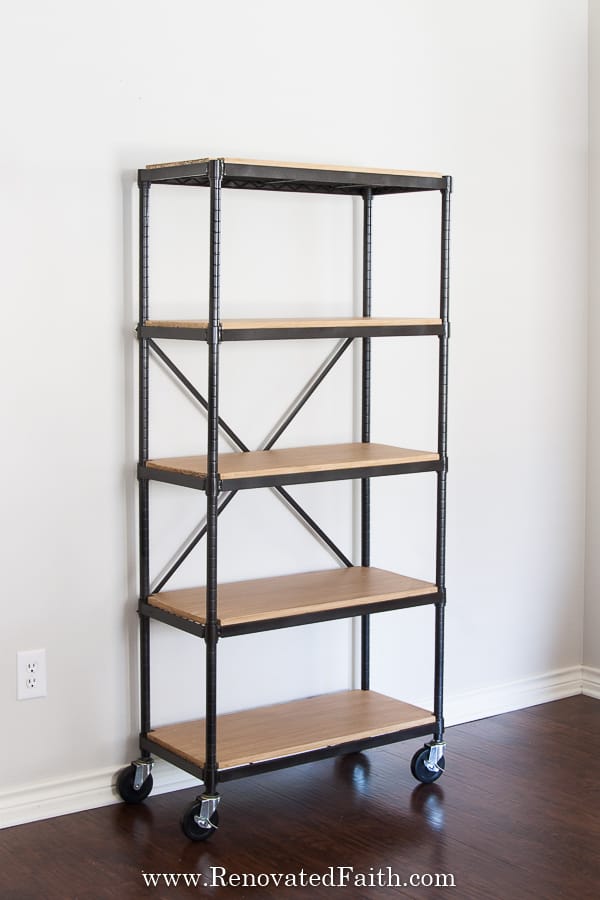
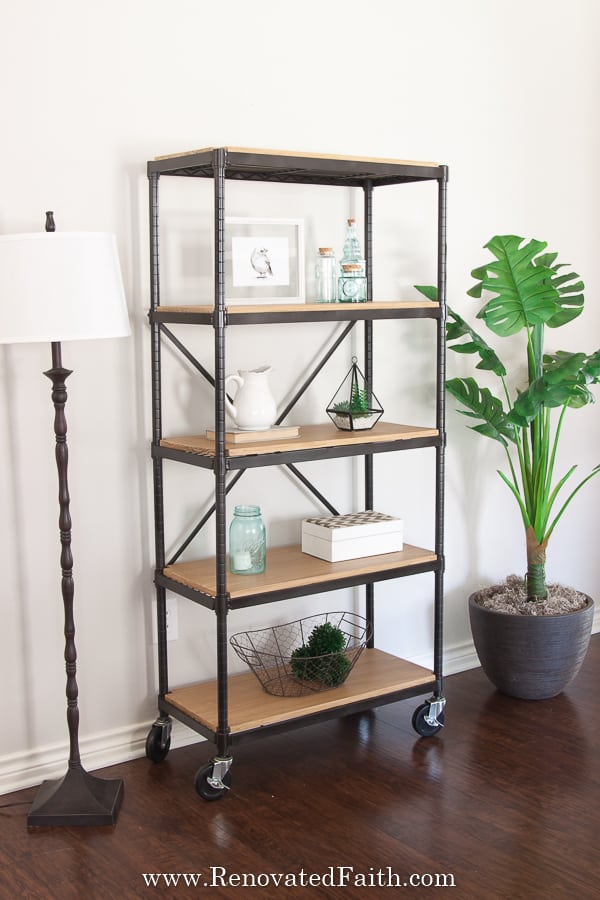
Wooden Shelf Covers for Wire Shelving
Ok, back to DIY…Other wire shelving hacks include the use of fabric or contact paper but this method gives you durable wood covers. These wooden shelf covers not only work on our DIY industrial bookshelves but they can work on any wire storage shelves – whether freestanding or wire closet shelving in a walk-in closet, pantry, crafts room, bathroom or garage. They can be used in any room of your house to keep you organized!
Simply measure the space just inside the outer wire that runs around the perimeter of the shelves. You want the wood covers to nestle on top. Then cut out your wood pieces with 1″ notches as we did above. Easy peasy!
If you aren’t used to spray painting, I have good news! Find out all my best tips and spray painting hacks by downloading this free checklist of Best Spray Painting Tips and Tricks. Get the password for the library with all of my free printables including wall art, checklists, and templates by filling out this form:
DON’T FORGET TO TAKE A PICTURE!
Now that you are done, I’d love to see how it turned out! ❤️ Post your before and after photos here!
Turn Your Shelves Into A Lighted Plant Stand
If you want to transform your shelves into a lighted plant shelf, it is so easy and budget-friendly with this tutorial: DIY Grow Light Shelf For Indoor Plants
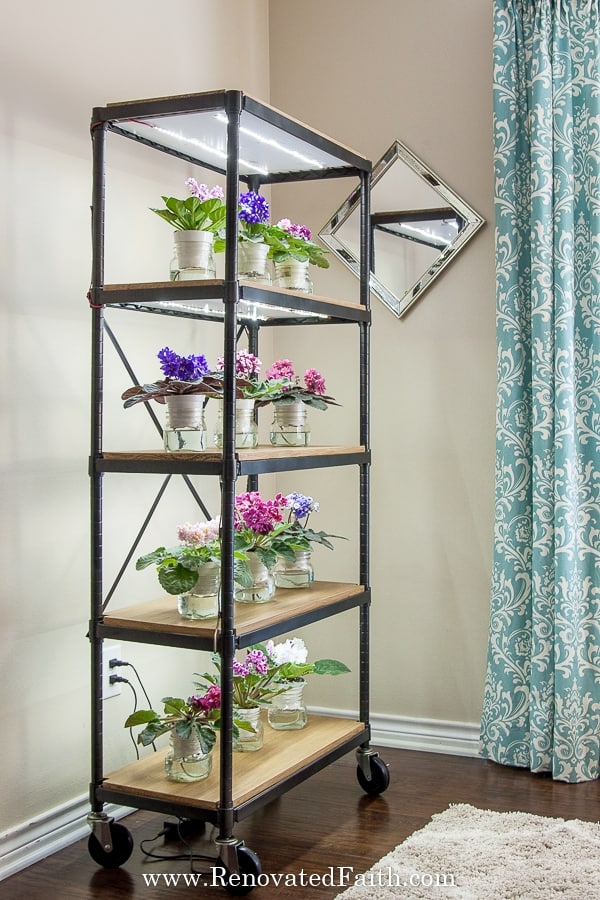
FAQ’s: DIY Wire Shelving Hack
How do I make wooden shelves without power tools?
There’s no easy way to make wooden shelves without the use of power tools BUT these DIY industrial shelves are the next best thing. The only power tool I had to use was a jigsaw to cut the wood and jigsaws are incredibly easy to use. (Click Here For A Beginner’s Guide to Using a Jig Saw) Also, you can find wire shelving racks anywhere.
Wire Shelf Problems
Sometimes the plastic coating on wire shelves can degrade over time making them very sticky. The tackiness cannot be wiped off as they are permanently sticky. We experienced this in our very first apartment that was already questionable in the first place, but the perpetually sticky shelves did not help. Fortunately, this wire shelving hack can provide covers for sticky wire shelves without having to replace them.
What About Renew Wire Shelf Covers?
Renew Wire Shelf Covers are pre-made laminate shelf colors that come in different shades. They are thinner than the ones we are making in this tutorial. Fortunately, you can stain your wood shelf covers in any shade either with a traditional stain or one of these faux stains. I love faux staining wood with latex paint because it covers knotholes and you know exactly what shade you will end up with, unlike a traditional stain. Also, this option is much cheaper than the Renew wire shelf covers.
How To Cut Wire Shelving
If you are wondering how to cut wire shelving to better customize your bookshelf design, they are easy to cut with a hacksaw or bolt cutters. It is best to cut them in one-inch increments until you cut off the desired lengths.
My Posts Related to Industrial Pipe Bookshelves (DIY Wire Shelving Hack)
How to Use a Jig Saw (Easy Beginner’s Guide)
Best Spray Painting Tips and Tricks
7 Feminine Home Office Essentials
How to Faux Stain Furniture With Latex Paint (6 Shades To Pick From)
Wire Shelving Hack – Related Posts:
Hanging Wire Shelves For Kitchen Storage
Pantry Wire Shelving Storage Ideas
Final Thoughts on My Industrial Pipe Shelf
Don’t forget to download my Free Furniture Painting Cheat Sheet. To get your printable, sign up for my weekly newsletter which also grants you free access to my resource library full of wall art printables, checklists, and project plans!
Before this post, you may not have realized how easy it is to transform wire shelves into a faux industrial pipe shelving unit with a few simple updates! This DIY industrial pipe shelf will provide you with storage that can handle a significant amount of weight and you have unlimited size options to fit your space. Use this wire shelving hack to make those chrome shelves fit in with the rest of your farmhouse and industrial decor!
I love to hear your thoughts and questions! Scroll down to leave a comment and I WILL reply! ❤️
Blessings,

Be sure to follow the fun here!
Email Subscription | Instagram | Pinterest | Facebook | Twitter
How To Cover Ugly Wire Shelves, YouTube Video
Wire Shelving Hack and Industrial Pipe Shelving: DIY Tutorial

Karin Peters is a DIY expert and the creator of Renovated Faith. She is a furniture painter, a home design consultant, and a tenacious problem solver determined to help you transform your house into a home. With 17 years of experience with DIY home improvement, she researches and analyses professional processes to adapt them to be easy and cost-effective for DIYers. She then tests every project and product before it appears on the site in a detailed, step-by-step format. After attending Texas A&M University, she received her Master of Divinity with Biblical Languages at Southwestern Baptist Theology Seminary. Her passions unite in Renovated Faith, which shows readers how to create a home that serves them so they can pursue their God-given purposes. About Renovated Faith | Editorial Policy | Facebook | Twitter | LinkedIn


Brilliant idea! I’m attempting to get the siding material, however it’s no longer available. I think I found an alternative for the sides, but not sure what to do for the brackets. Any suggestions from either Lowe’s or Home Depot (closer to me)?
Thanks for the through instructions and video!
Hey Cynthia, Both Lowe’s and Home Depot have been doing a good job of showing their in-store inventory online. You might check there for brackets! 🙂
nice post
These are awesome instructions and very inspiring photos too! Thanks for taking the time to document the whole process. I was wondering what size pots for your African Violets and what kind of jars did you use for the wick watering. Your wick watering setup is very pretty!
Hi Debbie,
I need to do a post on growing African violets! I use 3.5 or 4 inch pots for my African violets and the jars were some I got at Walmart. I would get your pots first and then take one of them with you to Walmart or Hobby Lobby to make sure you get the right sized glassware. Thank you so much for your encouraging words also Debbie! – Blessings, Karin
I cannot BELIEVE this coincidence. I have been gathering items in the past few weeks to put together my own seed-starting plant lighting assembly, after having been shocked at how much professional set-ups cost ($900 for 4 shelves with lights — seriously?) And today in my inbox I find your project instructions for the EXACT SAME THING. Thank you so much for this easy tutorial. I can’t wait to get started!
Karin, I love this project! I have a large wire rack in my craft room and this would make it classy! I guess I will have to conquer the jig saw!
I have several prayer requests. Due to becoming disabled, I can no longer afford my current home which is my dream home. So, I am putting my house on the market in a week. I am requesting prayer for my home to sale and that I can find an affordable home to buy. This will be a challenge to find where I live. If I have to leave the area in order to find a home I can afford, I will be alone. This is really tough as I do need help from my family.
Also request prayer for a family member who has lung damage and struggles to accomplish daily chores. A simple thing can bring his oxygen level down to 83%. He needs God’s healing .
I thank God for His love and His presence through the trials of life. May He be honored!
I’m so glad to hear that this can be of help to you! And I promise the jig saw is SO easy, you’ll be happy you gave it a try! I am printing out your prayer requests now so I can lift you up. I’m so very sorry to hear about your home. Praying that you find a home that is affordable that you love as much or even more as your current home. Also praying for your family member! Please keep me updated Karen and thank you for taking the time to comment! – Karin
You did an amazing job !
Thank you for sharing and sharing His light God bless from Ottawa Canada 🇨🇦
Aww, thank you so much for that Krista! I appreciate it! God bless to you too
I love what you did with the shelves, so clever! I have several of these shelves in different sizes that are already black, now I know how I can spruce them up! I have a college age daughter that is now in apartment living, and this would be great for inexpensive decorative shelving. Thanks so much! Also, did not know about Gorilla hot glue sticks! Also, I have an unspoken spiritual prayer need and would truly appreciate your prayers, thank you❤️.
Hey Vicki, I didn’t even think about this for college students. What a great idea!!! I printed out your comment so I can remember your prayer request. I’ll be lifting you up!
great idea, great tutorial. can’t wait to do this
So glad to hear that Jeanne! Send me a pic when you’re done