How To Make DIY Pinch Pleat Curtains (Quick and Easy!)

How To Pleat Curtains SO They Look Custom-Made
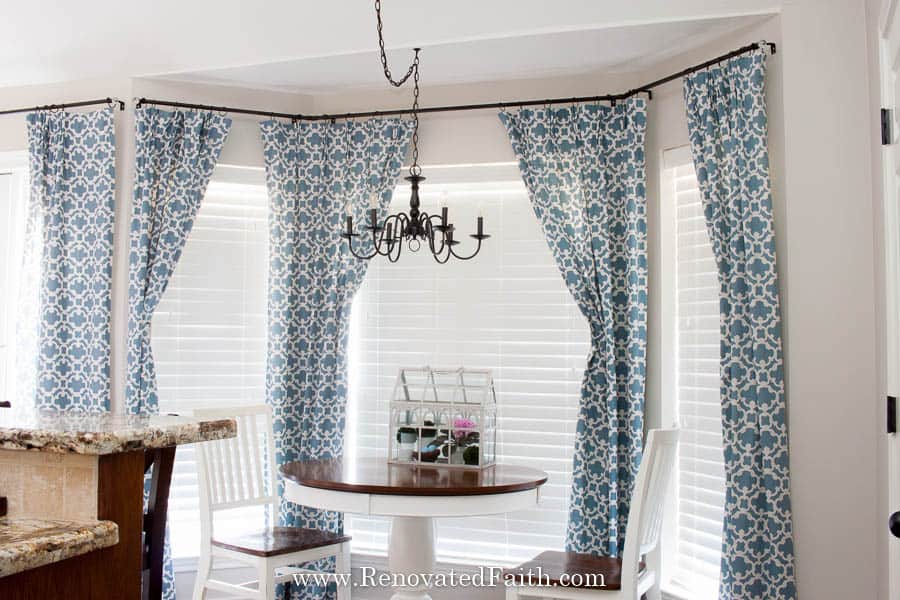
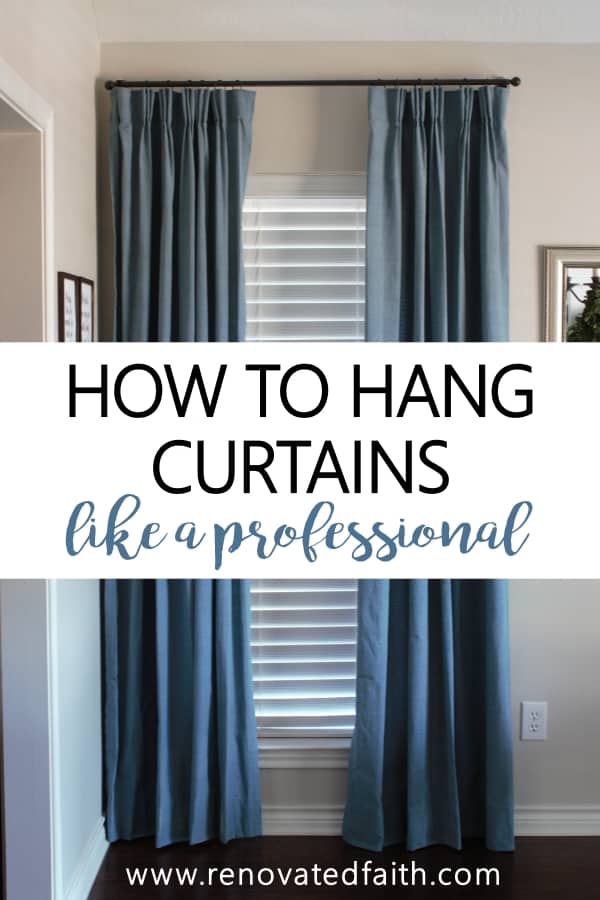
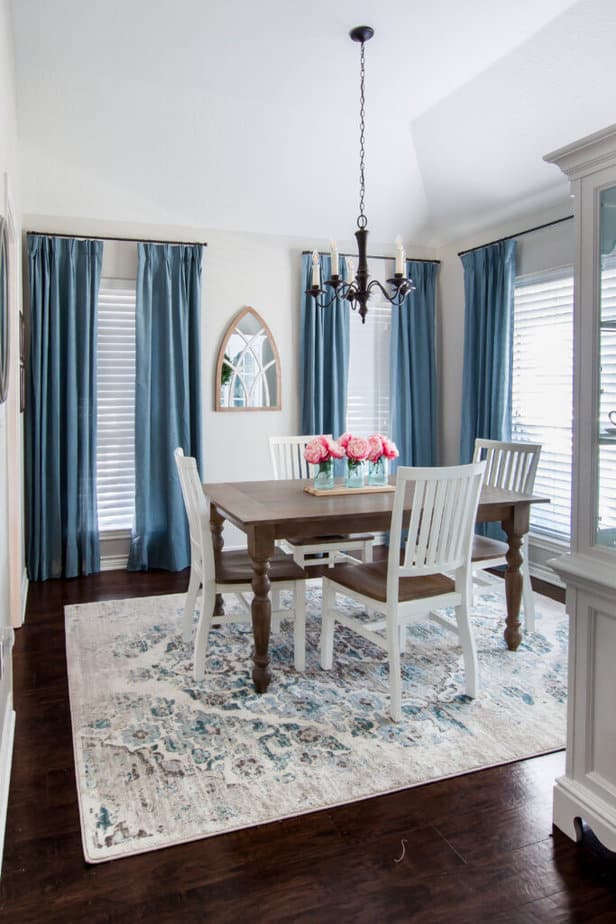
Say goodbye to sloppy, lifeless curtains! Here is how to make DIY pinch pleat curtains out of store-bought curtains so they add structure, depth, and style to any room!
Why is it that when you hang curtains, they never look like those in home decor magazines or Instagram feeds? That’s how I felt before I discovered this budget-friendly hack to pinch pleat store-bought curtains.
The good news is you don’t have to settle for sloppy, lifeless curtains! If you can sew a straight-ish line, you can have the look of custom curtains that will add depth and structure to any room without the cost! (I also include a no-sew option at the end of this post!)
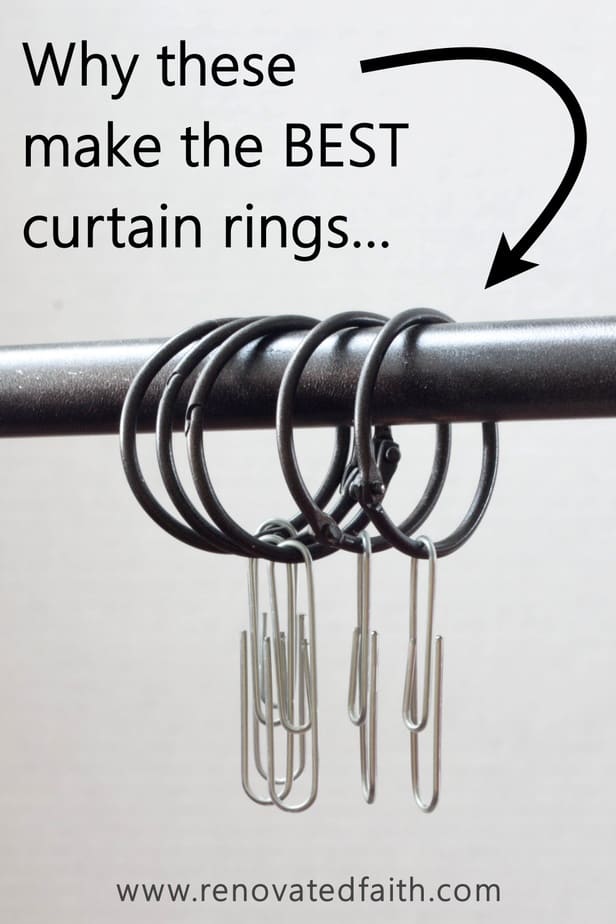
You can upgrade the look of your limp and lifeless curtains with this easy step-by-step tutorial. Also, I give tips on how to make your own curtain rings that work well for easy height adjustments. You won’t believe how much more functional these rings are, not to mention they are almost free!
This is the perfect project for you if you:
- Don’t like the look of sloppy curtains but don’t want to spend a lot on designer curtains.
- Have minimal sewing skills or want curtains that are easily adjustable.
- Want to be able to easily take down your DIY pinch pleat curtains to throw in the washer.
- Need a little encouragement from this week’s Renovate Your Faith devotional at the end of this post.
Quick Links to Information in this Post
- 1 How To Pleat Curtains SO They Look Custom-Made
- 2 How to Pinch Pleat Curtains That Are Store-Bought
- 3 How do Pinch Pleat Curtains Work?
- 4
- 5 DIY Pinch Pleat Curtains- Supplies Needed:
- 6 How To Make Pleated Curtains in 5 easy Steps
- 7
- 8 Why I Use Paper Clips and Binder Rings for Curtain Hardware:
- 9 How To Make Pinch Pleat Curtains Look Even Better with Drapery Weights
- 10
- 11 Renovate Your Faith: Hemmed In: Finding Peace When Life Feels Chaotic
- 12
- 13 FAQ: How TO Make Pinch Pleat Curtains
- 14 More Posts Related How to Pleat Curtains with Hooks and Pleater Tape:
- 15 Final Thoughts on How To Make Pleated Curtains
- 16 How to Pinch Pleat Curtains with Pleater Tape
How to Pinch Pleat Curtains That Are Store-Bought
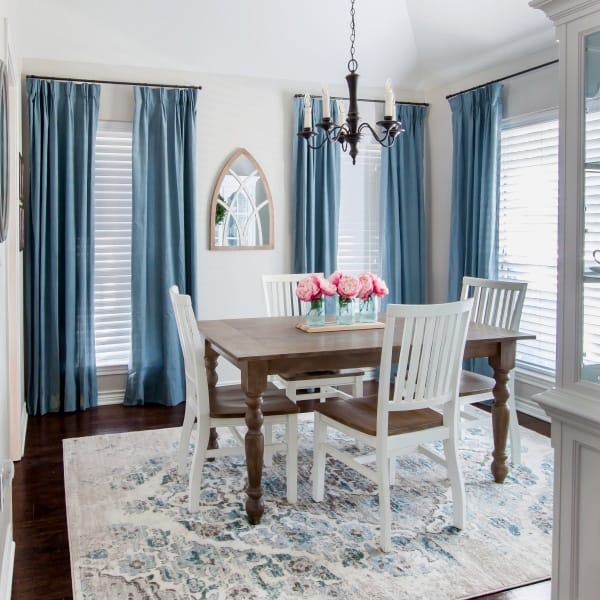
There’s something about pleated curtains that adds an extra touch of class to any room. They add timeless sophistication that never goes out of style. Think Reese Witherspoon meets Miss Mustard Seed.
For those of us that love the look but not the price, they aren’t the easiest curtains to sew and they aren’t always the cheapest option when it comes to window treatments.
Fortunately, I found a way to give you the best of both worlds by using pre-made curtains from Target and adding a pinch pleat with minimal sewing required. (I use the term sewing loosely. If you can sew a somewhat straight line, you can do this; I promise!)

How do Pinch Pleat Curtains Work?
Pleats are added to give curtains a more tailored look while helping them to flow in and out without the bottom of the curtain becoming too full and taking up too much space from the window. In other words, they keep your curtains from looking sloppy and naturally give them a more structured look.
Traditional pinch pleats are made by a process of hemming, marking, pressing, pinning, folding, pinning again, and hemming one last time. If it sounds complicated, that’s because it is.
Pinch pleats are great because with this easy method you can get a designer look with inexpensive curtains. I love that you can get a high-end look that can be formal or casual look.
Types of Curtain Pleats
There are a few different types of pleated curtains to choose from depending on your style. Also, it’s important to note that all curtains are technically pleated.
- Flat Drapery Pleat – These are plain-old, run-of-the-mill curtains with clip rings. You might see the term “Flat Panel Curtains” also used.
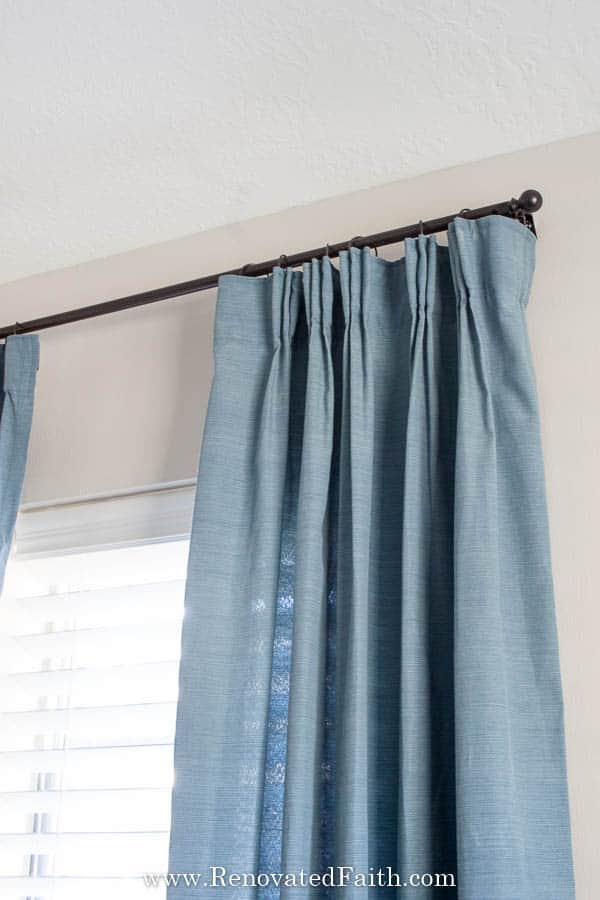
- French Pleat (or Pinch Pleat) – These are the same pleat we are using in this tutorial and are often referred to as French pleats. They give you a beautiful pinch pleat look and give lots of structure to your curtains with three fabric folds or pleats. Triple pinch pleat drapes have 3 folds or pleats, double pinch pleats have
- Rod Pocket – This is where a pocket is sewn at the top for the rod and the fabric gathers when the curtain is pushed to either side. The negative of these is that oftentimes they are not easy to open and close, they can only open as far as the gathering at the top will allow and also they don’t always stay in place.* Grommet pleat curtains are the ones with the metal grommets that the rod goes through.
- Euro Pleats – The difference between Euro pleats and standard pleats is where the fabric is gathered. For Euro pleats (also known as Parisian pleats), the fabric is gathered at the top outer edge of the curtain instead of being gathered an inch or two from the top. Here are some examples: Euro Pleats on Curtains
- Cartridge Pleats – These look like a row of continuous looped pleats without the flat surface of fabric in between. Cartridge pleating for drapes is a method of gathering larger pleats or loops of fabric on the whole header. Instead of gathered, “pinched” areas of fabric there are loops. You can see an example here: Cartridge Pleats on Drapes
- Goblet Pleats – Goblet pleats are similar to partridge pleats but they have a pinched area at the bottom of each loop of fabric making a goblet shape. The bottom of each pleat is gathered in the same way that triple pleat curtains are: Goblet Pleats on Drapes
*I explain how to convert rod pocket curtains into pinch pleat curtains at the end of this post. For more styles of curtains, you can check out this article on Drapery Pleat Styles.
How Do You Calculate Fabric for Pinch Pleat Curtains?
I wish I could tell you exactly how many yards of fabric you will need but the amount of fabric is going to depend on what you want your finished curtain width to be and the spacing of your hooks. IF you don’t feel like you have enough fabric on each side, you can always add an extra fabric panel. With the curtain pleat hooks spaced evenly, no one will be able to tell you added another curtain panel.
My best advice is to lay out any piece of fabric or an old curtain and pin your pleater tape to the back. Now, start to add the hooks while the tape is still pinned to the fabric and play with the spacing until you get the look you want. This is the best way to know the right curtain width and exactly how many yards of fabric you need.
DIY Pinch Pleat Curtains- Supplies Needed:
Pleater Tape – There are SEVERAL types of pleating tape to choose from but be sure to get this kind: Drapery Pleat Tape
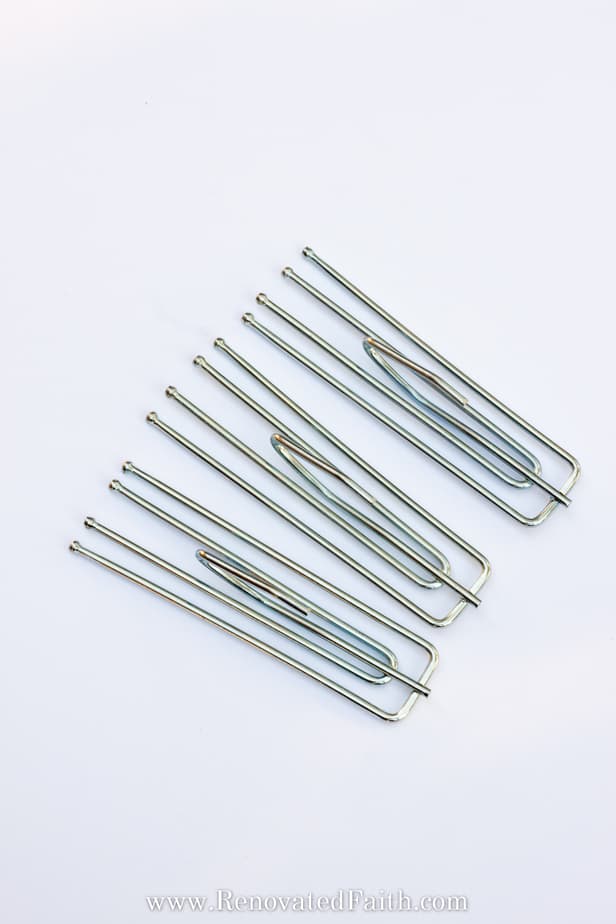
Pleater Hooks – Again, there are several types of drapery hooks and styles to choose from but these pinch pleat curtain hooks work best – Traverse Short Neck Pinch Pleat Hooks
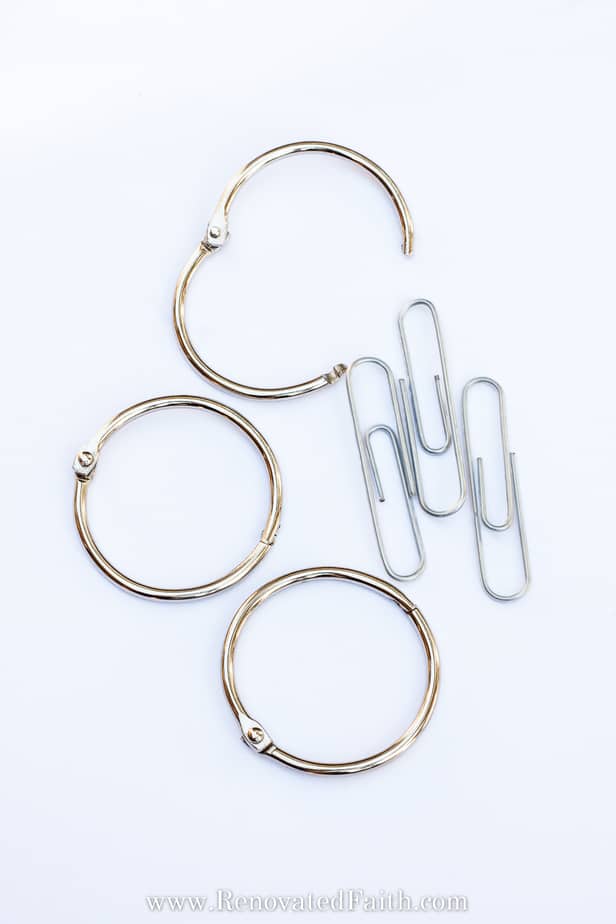
2″ Binder Rings
2″ Paper Clips
Spray Paint – My favorite is Rustoleum Metallics in Oil-Rubbed Bronze.
Thread to Match Your Curtains
Store-Bought Curtains
Tape Measure
Want to Spend Less Than $10 on Curtain Rods? Check out my post on Restoration Hardware-Inspired Curtain Rods. I also share my favorite inexpensive brackets and DIY Finials.
How To Make Pleated Curtains in 5 easy Steps
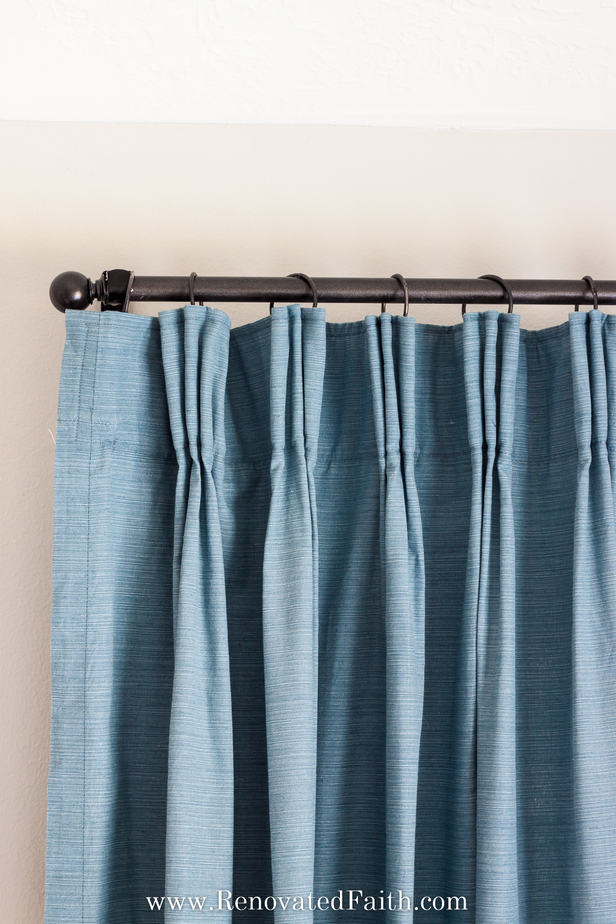
For this tutorial, we will be making triple pleats which are by far the most popular type of curtain pleat for a feminine but structured look.
Step 1: Prep Your Curtain Hardware
Stop! Before you do anything…take a before pic. When you’re done, post the before and after pics here, so I can see the amazing work you’ve done! ❤️
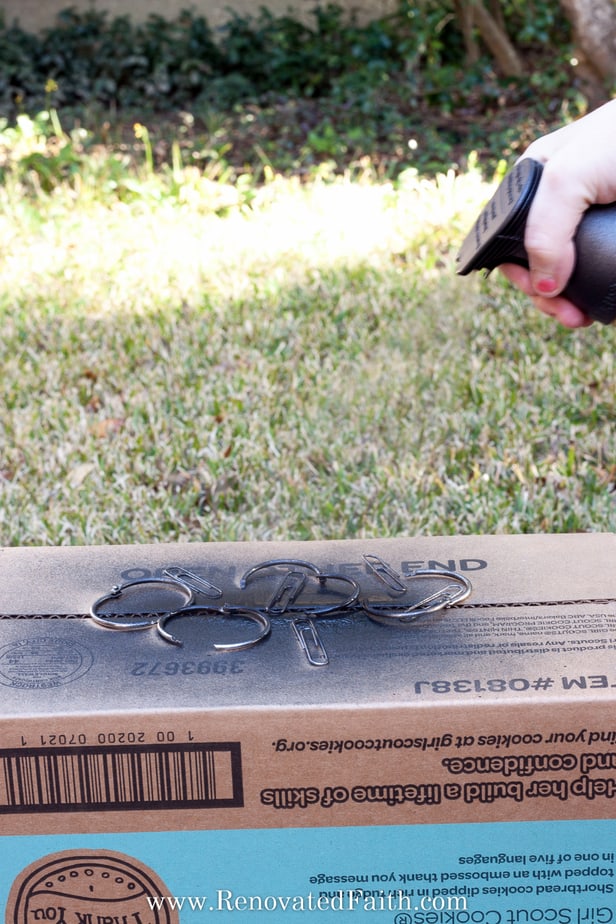
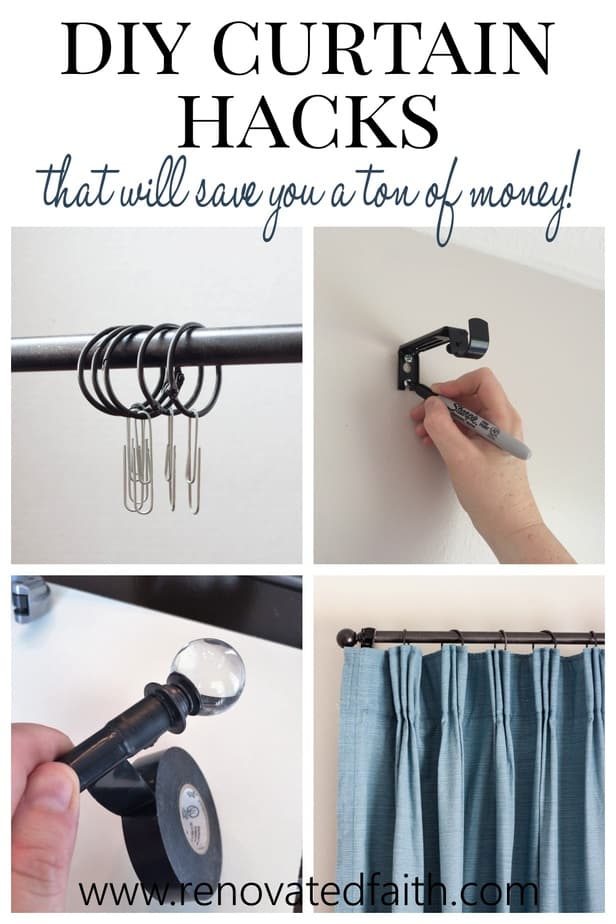
The first step is to spray paint your binder rings and paper clips so they can dry while we work on the curtains themselves. (You can also spray paint your old curtain rings for an easy, low-cost update.)
In a well-ventilated area, spray paint your rings and paper clips the same color to match your curtain rod. (To spend less than $10 on curtain rods, see my post here: Restoration Hardware Inspired DIY Curtain Rods.)
Let the spray paint dry for at least 24-48 hours.
While your spray paint is drying, wash and dry your curtains. Some fabric, especially cotton fabric, is going to shrink so you want that to happen before you start measuring your curtains.
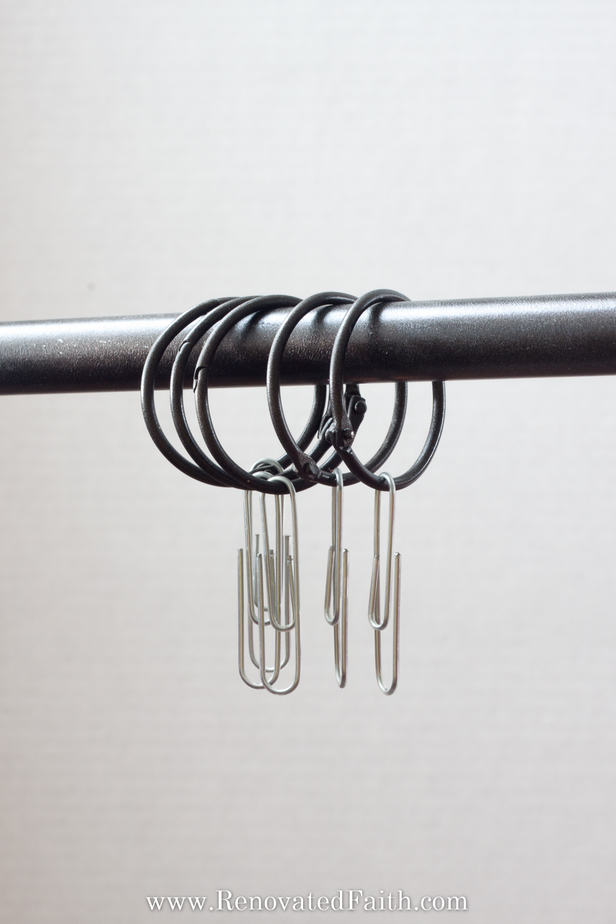
Why I Use Paper Clips and Binder Rings for Curtain Hardware:
- ALMOST FREE – These cost mere pennies while a set of curtain rings at your local hardware store will cost you around $14.00.
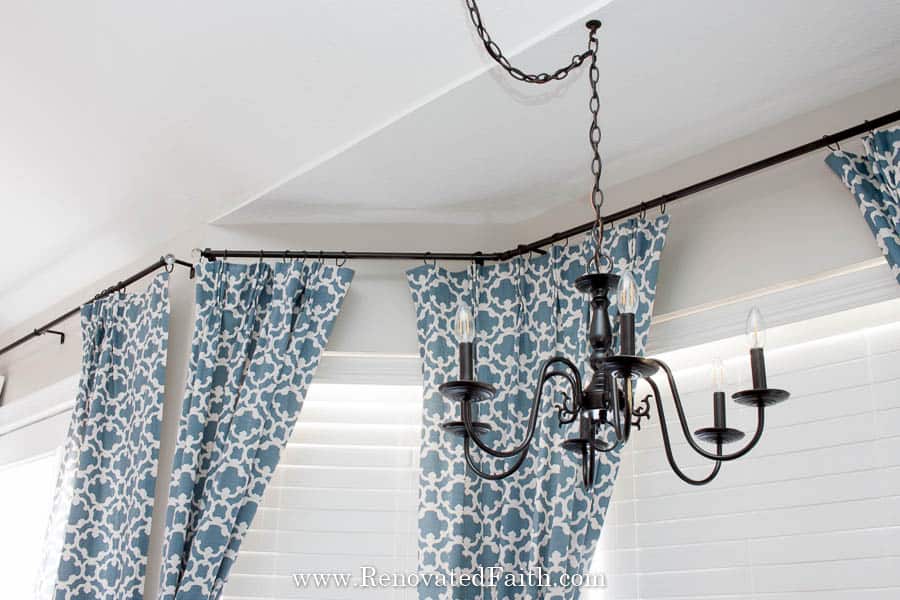
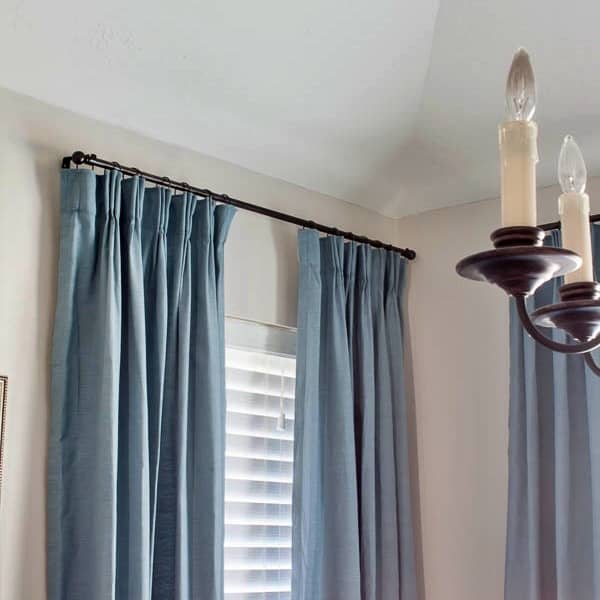
- EASY TO TAKE DOWN CURTAINS FOR WASHING – You can easily take down your curtains WITHOUT having to remove the entire rod from the brackets. You just undo each binder ring and they are down! This is especially helpful when dealing with bay window rods and you can see how to make your own here – DIY Bay Window Curtain Rods on a Budget.
- EASILY ADJUSTABLE – Perhaps my favorite reason for using binder rings and paper clips for curtain rod hardware is that you can have another height option to hook your curtains onto. The two loops of the paper clips give you two places where you can hook on the pleater hooks.
“So why does this even matter, Karin?” Have you ever hung curtains to realize that your store-bought curtains were longer on one side than the other? Well, on that long side you can hook to the higher loop using the paper clips. That means you don’t have to rehang your brackets or buy new curtains.
Have you ever washed curtains and they shrank up? In that case, you can just put your curtains on the lower loop instead of buying new curtains or rehanging your brackets.
Have you ever changed flooring to realize that all of the curtains in your house were now too short or too long? Now you can just change the loop you hook them on and it saves you from having to re-hem every curtain in your house!
A few years ago we had a flood, as I described in my post From Beauty to Chaos, and we had to get new flooring in the entire house. We went from carpet to vinyl plank throughout the whole house and as a result, all of our curtains were suddenly way too short. So, instead of having to re-hem all 28 fabric panels or move the brackets, I just hung them on the lower level when it was time to put them up again. It was amazing! Who would have thought paper clips and binder rings can save you so much time and money?!?
Step 2: Buy Curtains or Use Your Existing Curtains and Add a Pinch Pleat
How to Pinch Pleat Store-Bought Curtains
You can do this one of two ways. Before you buy your curtains, use your measuring tape to measure the height that you want your curtains, taking into account the height of the rings and paper clips. For tips on knowing the right height for new curtains, check out this post: Easy, DIY Curtain Rods
How to Pinch Pleat Your Existing Curtains
If you are using rod pocket curtains, you might need to move up your brackets because now we have to take into account the height of the paper clips and rings. If you did not wash your curtains before hanging them, now is a great time to do that because they might shrink a tad which would work in your favor!
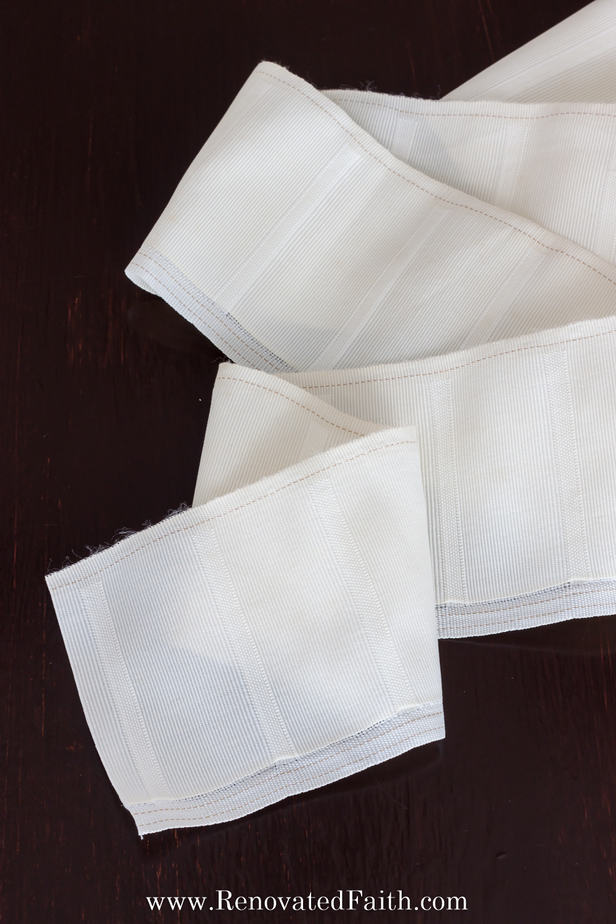
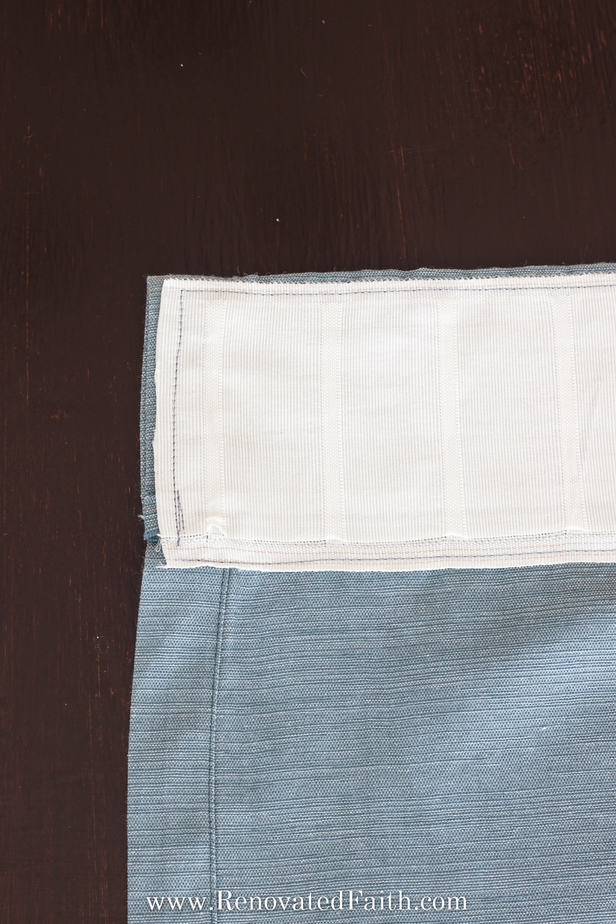
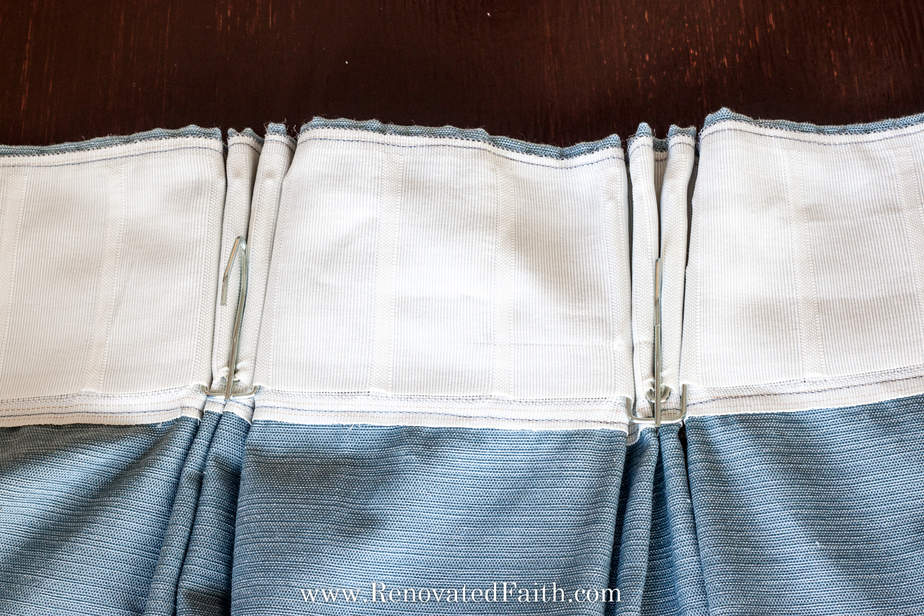
Now you want to make sure your pleater tape is lined up correctly against the back of your curtain.
Line up the top of the tape about 1/4 inch to a half inch from the top of the fabric and also so that the pockets closest to each end are about half an inch from the edge of the fabric. Cut off any extra tape.
Make sure the little holes that the pleater hooks will go into are on the bottom hem of the tape. This is important – ask me how I know!
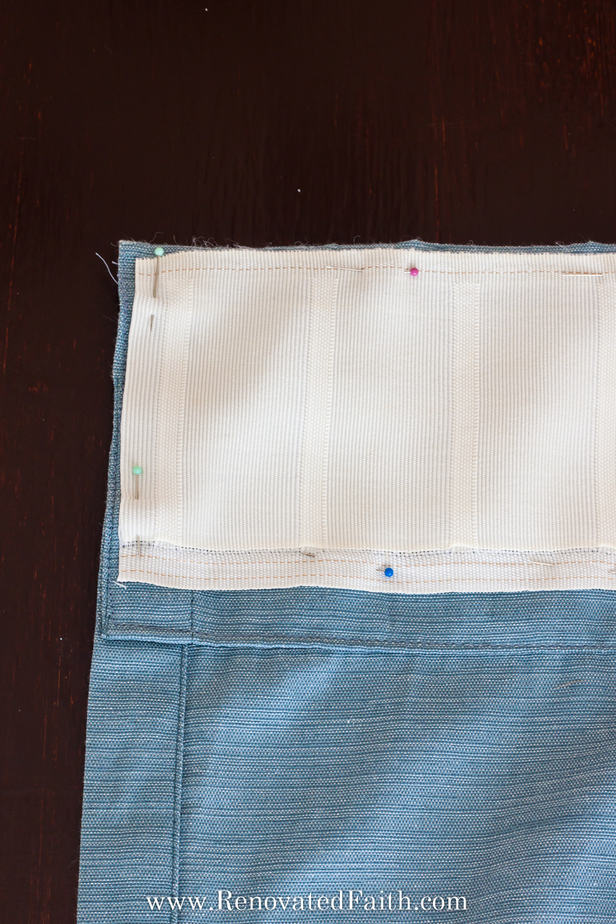
If you don’t like the exposed raw edge of the pleating tape, you can folder under and pin it so the side seams of the pleater tape will hem it in place. This also prevents frayed edges from showing outside the outer edge of your curtains.
Step 3: How DO You PUt Pleats In Curtains? Pleater Tape!
Pin your pleater tape and hem the edges of the tape right on the top gold seam and I like to hem right between the bottom two gold seams. Be sure you don’t hem over the openings to the little pockets at the bottom. Use a thread that matches your curtains.
Step 4: How to Pinch Pleat Curtains by Adding Hooks
Now that you have finished sewing the pleater tape to your DIY pinch pleat curtains, you can decide where you need to add the metal hooks.
How Far Apart Should Pinch Pleats Be?
This is all a matter of personal preference but I like the look of having an odd number of hooks so there is a middle hook. If it only works out that you can have an even number of pleats, that’s perfectly fine!
Fold your curtain in half length-wise to find the midway point. Add your middle hook there. From there space the hooks so they have the same spacing as one another. I like to start from the middle and let the rest of the hooks determine the spacing.
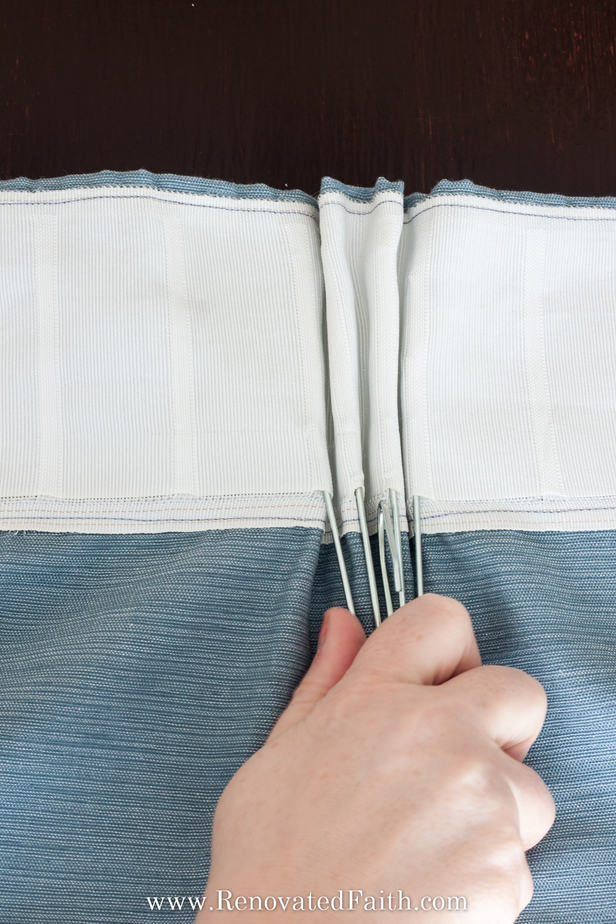
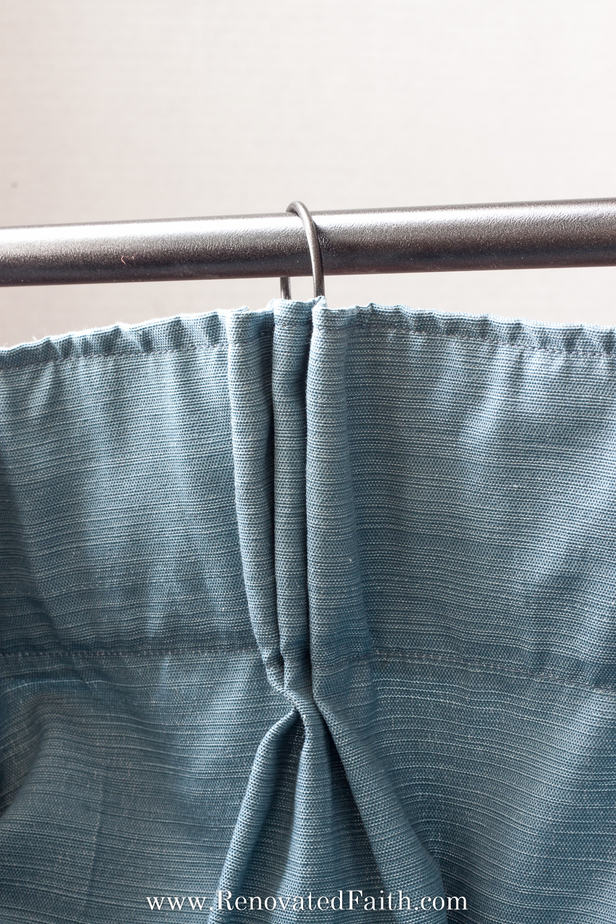
Pleater Hook Tip: It’s easier to insert the hooks by first putting all four of the ends of the hooks in the mouths of the little pockets and THEN push the hook up instead of trying to push one end all the way up at a time. I like to put hold the back of the fabric with my other hand at the base of the pinch to get leverage.
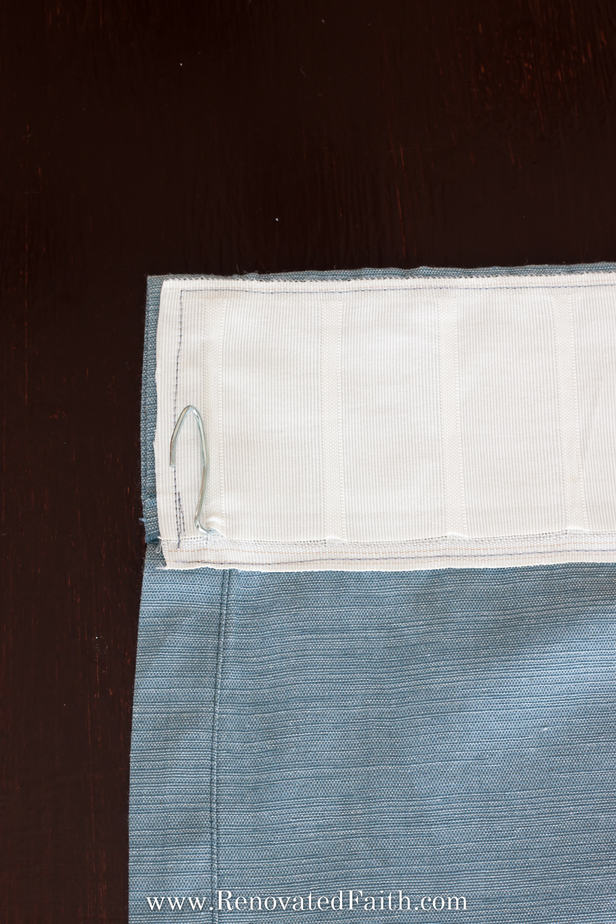
In your package of hooks, you will see four end hooks. You’ll need a little hook at each end of the curtain in the first pocket before your first pleat.
How to Space Pleater Hooks Evenly – This might take a little trial and error but each of my pleater hooks had 2 empty pockets in between. However, the math didn’t work out perfectly so there was one on the end with three pockets in between. THAT IS OK. No one will be able to tell because you will scrunch them at even widths when they are hung.
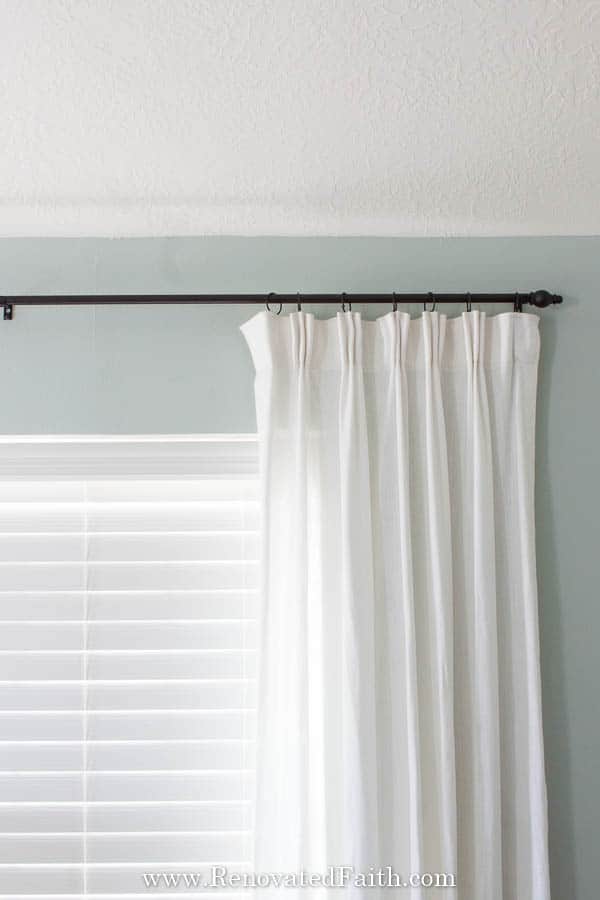
Step 5: How to Hang Pinch Pleat Curtains
Now that you have all of your pleater hooks spaced evenly, you can hang your curtains. If you don’t like how your hooks are spaced, just take them out and readjust their spacing. That’s one of the beauties of this method!
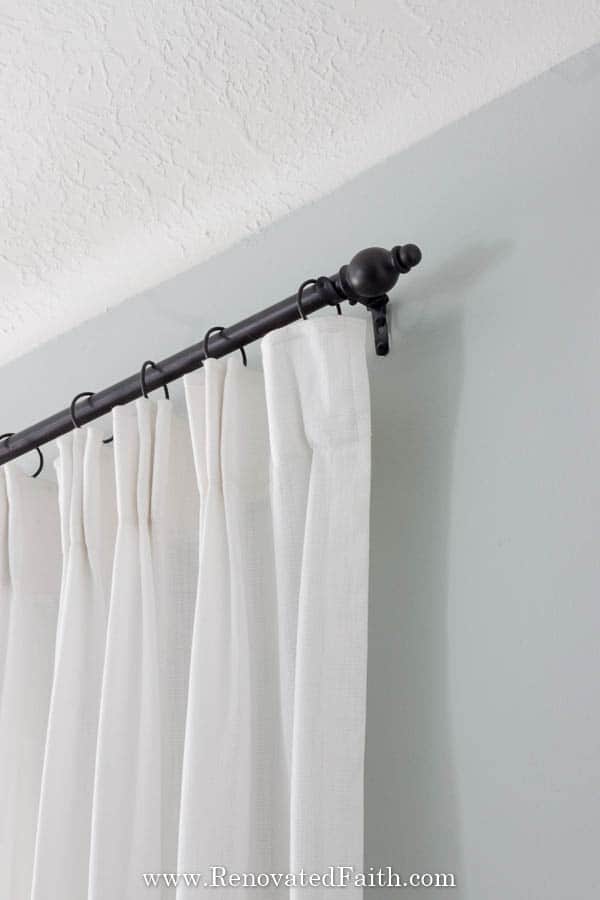
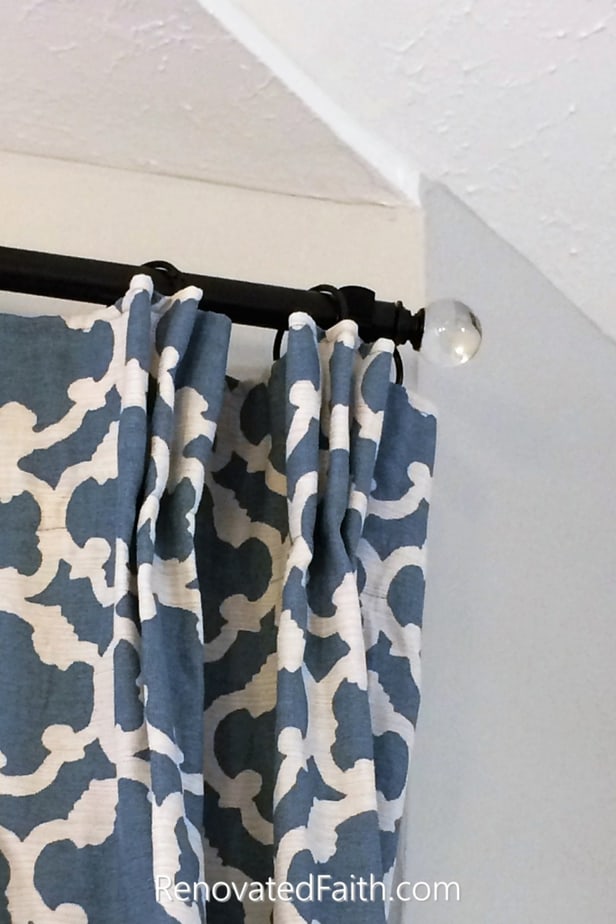
The next step is to clip your binder rings and paper clips to your rod like so.
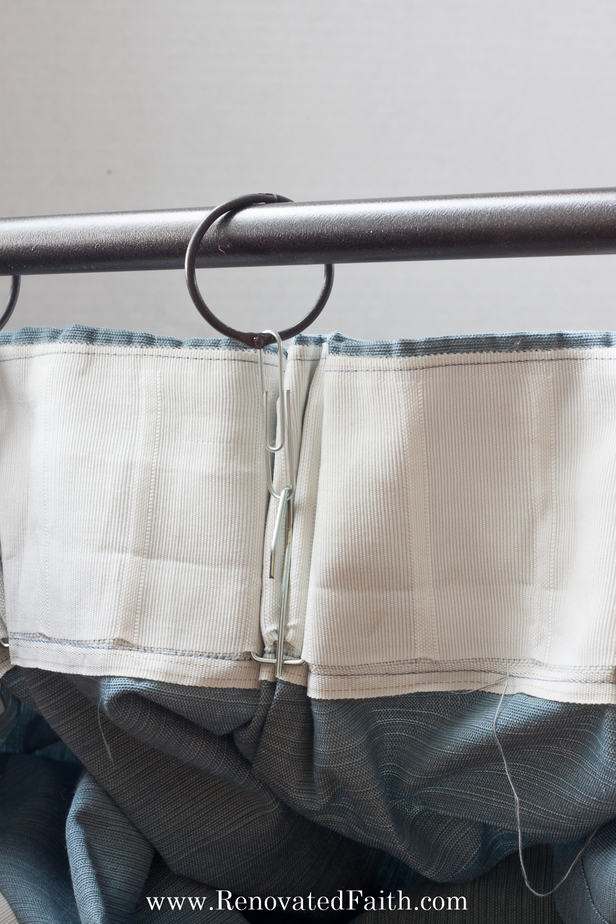
Now simply hook the curtains on and you are done!!!
When you look at the front, the only part that should show is the ring and none of the paperclip.
DON’T FORGET TO TAKE A PICTURE! ❤️
Now that you are done, I’d love to see how it turned out! Post your before and after photos here!

How To Make Pinch Pleat Curtains Look Even Better with Drapery Weights
Sometimes new curtains or recently washed curtains can be a little unruly so I added some curtain weights to the bottoms to give them a more streamlined, professional look.
I didn’t even bother sewing them. I just hot glued one on the inside corner of each curtain panel! How’s that for lazy easy?!?
Here are the curtain weights I used: Drapery Lead Weights
Renovate Your Faith: Hemmed In: Finding Peace When Life Feels Chaotic
As I sewed the tape onto the top edge of my curtains a couple verses popped into my head from one of my favorite psalms:[spacer height=”20px”]
O LORD, you have searched me and known me!
You know when I sit down and when I rise up;
you discern my thoughts from afar.
You search out my path and my lying down
and are acquainted with all my ways.
Even before a word is on my tongue,
behold, O LORD, you know it altogether.
You hem me in, behind and before,
and lay your hand upon me.
Such knowledge is too wonderful for me;
it is high; I cannot attain it. Psalm 139:1-6
Our heavenly Father “hems us in, behind and before.” I’d heard that phrase several times before but had never given it much thought until now.
As I hemmed the curtains, I realized that even in the midst of today’s chaos, God gives us protection, guidance and peace that can only come from His Hand.
For our actions and lives are not a culmination of random events but as His children He secures us, protects us and provides for our needs.
He defends our path from every possible angle. He protects us and intercedes in the hardships of our past. He leads and guides us into the uncertainties of the future and he secures and comforts us in the events of the present.
In a world where chaos is the norm, we can rest assured that our God has firm control of our lives, giving us peace to know He will never leave our side in the path before us.
He sees us, He protects us, He knows us and He loves us.
For DIY projects and devotionals in your mailbox, subscribe to the weekly email here: Sign Up For The Renovated Faith Newsletter
DIY Curtain Finials from Cabinet Knobs (CLICK HERE)
FAQ: How TO Make Pinch Pleat Curtains
CAN YOU WASH DIY PINCH PLEAT CURTAINS?
You absolutely can! In fact, the DIY version is easier to wash than traditionally pinch pleated curtains. Also, the binder rings make taking the curtains down for washing so much easier.
CAN YOU CONVERT ROD POCKET CURTAINS TO PINCH PLEATED CURTAINS?
That’s exactly what I did with my Target store-bought curtains that were rod pocket. I just ignored the pockets at the top and hemmed the pleater tape on the inside back of the curtains as normal. If you don’t like the extra hem at the top front of the curtain left from the rod pockets, you can remove it with a seam ripper after sewing on the pleater tape. I just left mine because they are barely visible.
HOW TO CONVERT PINCH PLEAT CURTAINS TO ROD POCKET Curtains?
If later you decide to go back to the rod pocket curtains, just easily remove the pleater tape with a seam ripper and add a hem about 2 inches from the top of the curtain to act as your rod pocket.
WHAT SIZE PINCH PLEAT CURTAINS DO I NEED?
That depends on the spacing of your pleater hooks but in most cases, you will assume that each curtain will cover half its actual width once it is pleated. So, keep that in mind, especially for functional curtains. In my home, we have wood blinds so the curtains are mostly decorative. But as I said, you will assume that each panel will cover half it’s actual width once it is pleated.

How To Make Pinch Pleat Curtains With Clip Rings
I like to use clip rings because they make it easy to open and close curtains. You can still get the look of pinch pleated curtains with the convenience of clip rings. All you do is hook the top of the drapery hook into the tiny ring that connects the ring to the hook. You can just leave the hooks there because no one will see them on the back side of the curtain anyway. Clip rings can be expensive so be sure to use this hack here: How To Make Your Own Drapery Rings On A Budget
How Do You Attach A Pinch Pleat To Curtains?
There are a few different ways to make a pinch pleat on existing curtains. You can sew them the traditional way, you can use buckram as a header tape or you can use pleater tape over the top hem like I do in this tutorial. The good thing about pleater tape is that it is adjustable and super easy to use for beginning sewers.
What is the Best Fabric For Pinch Pleat Curtains?
You can use any type of fabric for pinch pleated curtains whether it’s cotton, synthetic, faux linen (even drop cloths), or pure linen. The only thing I would be careful of is sheer curtains as you could see the header tape through the curtain. If you want to add shears, consider using a traverse curtain rod with sheer ikea curtains on the lower rod. This is what I did in my daughter’s room and it looks so cute with the pleated curtains but she has the sheer curtains also for privacy.
Can You Make Regular Curtains Pinch Pleat? (How Do You Pleat Curtains When Hanging?)
The good news is that you can pleat ready-made curtains that are already hanging with the simple steps above. You will have to experiment some with the spacing because the pinch pleat effects the width of your curtains but it makes a huge difference in the overall look of your curtains without the hard work of a traditional pinch pleat method. The tape and hooks make having beautiful pinch pleat curtains so easy and if you don’t like how they look at first you can easily readjust them.
How to Make Pinch Pleat Curtains Without Tape
If you make pleated curtains without tape, your options are the traditional way or to use buckram. You don’t have to be an expert seamstress or interior designer to use the traditional method but it is definitely more difficult than using tape and once you sew the pleats in place, you’ll have to completely remove the seams if you decide you want to readjust their placing.
Using buckram is easier than the traditional way but I’d say it is a little bit harder than the tape because there isn’t a visual guide but it allows you to put the pinch pleat hooks wherever you want.
How To Pinch Pleat Curtains Using Buckram
Buckram is a heavy-duty netted fabric that comes in a 4-6 inch width of fabric. It is used on the back of the top of the curtain header in place of the pleater tape. It’s a great way to make pinch pleat curtains when you don’t want to put the prongs where the pleater tape already dictates. You can also place pleats more often with buckram than you can with pleater tape. How you place the pleats is a matter of personal preference but you have a little more flexibility with the buckram.
How Far Apart Should Pleats Be on Drapes?
There is no conventional distance between drapery pleats – it’s just a matter of what looks best with the amount of fabric you are working with. To get ideas, be sure to look at pleated curtains online for inspiration on how far you want the pleats and how many hooks per panel you want to use: Pinch Pleat Drapes Online
How to Make Pinch Pleat Curtains Without Sewing
If you are wondering how to add a pinch pleat to curtains without sewing, there are a lot of time-saving hacks to this whole curtain game and new products on the market. To make no-sew curtains with pinch pleats, you can use heat bond (click here) or stitch witchery (click here) instead of a sewing machine. I’ve used both on several sewing projects and they work best on lightweight fabric. But I think the folding of the hooks will help keep the heat bond or stitch-witchery in place. Be sure to apply extra heat to the bottom of the tape since that will hold most of the weight of the curtains.
How To Make Single Pleat Curtains
Single pleat curtains are when there is one single gathering of fabric. For this, you can use the center two prongs of the same curtain hooks when gathering the pleats in the pleater tape. Also, this method doesn’t use as much fabric.
How to Make Double Pinch Pleat Curtains
Double pinch pleats only have two adjacent pleats as opposed to three. You will have a little more fabric to work with but you’ll still follow the same process in this step-by-step guide. Just use three prongs of the drapery hooks and bend them slightly so they are more centered. You can see an example of them here: Double Pinch Pleat Curtains
How to Make Triple pleat curtains
Triple Pleat Curtains are curtains with three folds at the top just like the ones I made in this simple tutorial. This is the perfect project for beginning sewers who want the stunning look of triple pleats but don’t have years of experience sewing.
How To Make Pinch Pleat Curtains With Lining
I used this same tutorial on the lined curtains in my office. You can add pleats to lined curtains in the same way you would to curtains unlined curtains. The fabric might be a little harder to bend between the pleats because of the thick hem but it is very doable. The only problem might be from the extra weight of the curtains. Be sure to use heavy-duty wall anchors to make sure that your curtain rods are secured to the wall. You can see how to install wall anchors to your curtain’s finished width in this post: How To Hang Wall Art Easily
How Do You Make Pinch Pleat No-Sew Grommet Curtains?
If you want to add a pleat to no-sew grommet curtains, make the grommet curtains as usual. Then, add the pleater tape and put each set of gathered pleats in the middle of each set of grommet holes. Your drapery hooks will not be used to hold up the curtains – that’s what the curtain rod going through the grommets will be used for. Instead the hooks are aesthetic to create the triple pinch pleat look in between each grommet. This gives you an idea of what they would look like: Grommet Curtains with Pinch Pleats
How Do Make Pinch Pleat Curtains With Tie Backs?
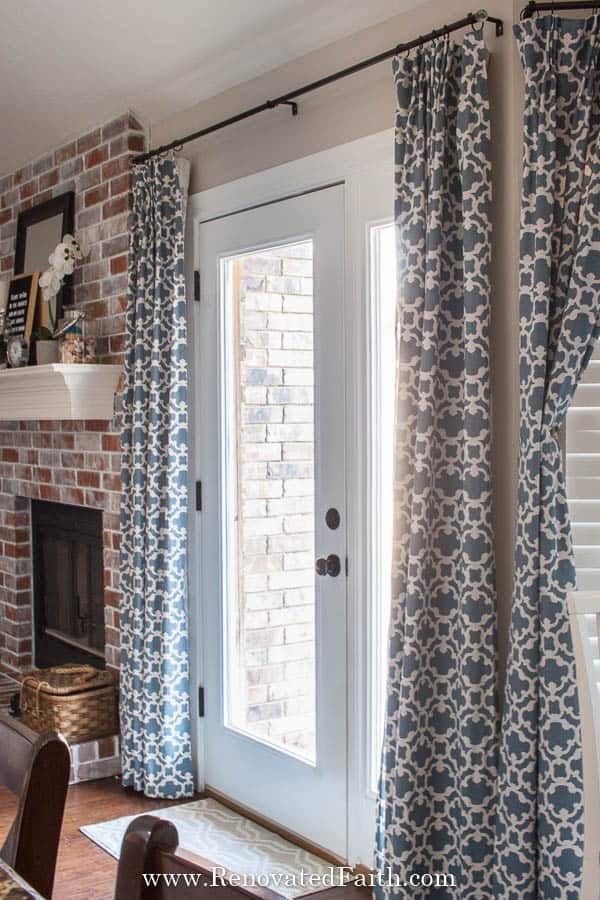
If you don’t want the look of so many vertical lines you can pull back the sides of the panels with loose cords or curtain pull-backs. If you use loose cords, you’ll want to somehow hold the outside edge to the wall so your curtains don’t pull inward. I have used a thumbtack behind my tie back to simply hold them toward the edge of the front window.
Are Pleated Curtains Out of Style?
Pleated curtains give what were once sloppy, lifeless curtains structure and dimension that can’t be achieved with plain curtains. Pinch-pleated curtains are a staple that never goes out of style. They can work in formal decor or more casual, relaxed settings and in any style whether, traditional, transitional, farmhouse, coastal or boho decor.
How to Pleat Curtains with Clips
You might have seen a pin or Facebook video where metal clips are used to keep curtains pleated. However, the problem with this is that the clips easily come off, and also you can see the metal clips when you look at the curtains from the side.
How to Make Rod Pocket Curtains into Pinch Pleat
To make rod pocket curtains into pinch pleat curtains, simply pin the pleater tape over the top back of the curtain covering the rod pocket tabs. Then, when you go to hem the pleater tape, it will completely hide the rod pockets.
More Posts Related How to Pleat Curtains with Hooks and Pleater Tape:
- DIY Custom Curtain Rods and Finials
- How to Make Bay Window Curtain Rods
- How to Make Traditional Pinch Pleated Curtains
- Master Bedroom Reveal in Sherwin Williams Silver Strand
- The Easiest Way to Gel Stain Furniture without Stripping
- The Best Greige Paint for a Living Room
- Easy Farmhouse Dining Room Table Plans
Final Thoughts on How To Make Pleated Curtains
I love my DIY pinch-pleated curtains so much that I went around my house pleating every curtain like a crazy person. Most of all, I like the fact that you cannot mess it up as it requires very minimal sewing for non-sewers like myself. Also, the easy DIY rings made from binder rings and paper clips were the icing on the cake to make this project not only super cheap but user-friendly. If you are tired of sloppy curtains and, this tutorial will give you a designer look that is low-cost and you don’t have to have years of experience sewing. Now, start measuring so you can make your own pinch pleat curtains!
If you want to save this post on How To Pleat Curtains with Clips and Pleater Tape, pin it here:


What are your thoughts, my friend? Do you think this project was worth it? I love to hear your feedback and questions! Scroll down to leave a comment and I WILL reply! ❤️
Blessings,

Be sure to follow the fun here!
Email Subscription | Instagram | Pinterest | Facebook | Twitter
How to Pinch Pleat Curtains with Pleater Tape

Karin Peters is a DIY expert and the creator of Renovated Faith. She is a furniture painter, a home design consultant, and a tenacious problem solver determined to help you transform your house into a home. With 17 years of experience with DIY home improvement, she researches and analyses professional processes to adapt them to be easy and cost-effective for DIYers. She then tests every project and product before it appears on the site in a detailed, step-by-step format. After attending Texas A&M University, she received her Master of Divinity with Biblical Languages at Southwestern Baptist Theology Seminary. Her passions unite in Renovated Faith, which shows readers how to create a home that serves them so they can pursue their God-given purposes. About Renovated Faith | Editorial Policy | Facebook | Twitter | LinkedIn
DIY pinch-pleat curtains are a fantastic way to add a touch of style and personality to any room. Your blog post broke down the process into manageable steps, making it seem achievable for beginners like myself. Your tips and suggestions for fabric selection were also greatly appreciated. Thank you for sharing your knowledge!
Thank you for this wonderful post. I purchased curtains with tabs that look sloppy on the rod. This method will give them the structured look that I like best. I also appreciate your inclusion of scripture with the post.
You are so welcome Vici! I so understand the frustration of getting new curtains up on a curtain rod and feeling like they didn’t meet your expectations. Let me know if you have ANY questions with this process!
Ooh, nice! I didn’t even realize that we could easily sew some hooks onto regular curtains to add some pleated effects on them. The curtain in my living room could use some adjustments to make it look more beautiful, based on my recent observation. I’ll ask someone reliable to figure out what should I do next after this.
Sounds like a great plan. Let me know if you have any questions Amy!
Do you think you could attach the pleater tape with hemming tape instead of sewing it on?
Hey Margaret, I am not sure. My only concern is if the pleater tape is strong enough.
Can I use a traverse rod? I want to have them left stack on a large window.
You sure can Rhonnie!
hi, maybe i missed it in your tutorial, but how much fabric do you “lose” through the pleating process? for example, if i have a panel that’s 30 inches wide, does it end up being like 20 inches wide after pleating? i’m trying to figure out how much “extra” fabric i need (e.g. how wide of panels i need) to ensure my drapes reach all the way across the window after being pleated. thank you!
With my drapes, they didn’t quite reach all the way across the window after I pleated them but I also have blinds so that was ok. I know that probably doesn’t help you much but I want to say mine were about half the width of the original fabric but it all depends on how many pleats you use. Thank you Heather!
Hi. I love this idea!! What are the smaller hooks you’ve used at the end of the panel?
Thanks!
Great question Beth! Those hooks will come in the pack of pinch pleat hooks I mention in the post. Let me know if you have any other questions – Karin
Amazing steps for PINCH PLEAT CURTAINS, Glad i found your post here, You are actually doing a great job. I was inspired by you. So keep it up!
Thank you so much Caroline! I so appreciate your encouragement and am glad the post was helpful!
Please share where you got the white curtains; I’ve fallen in love with the look of the DIY pinch pleats and I’ve been searching for white curtains for the longest time!
Hey Ashley! They are just Target curtains! I like them because they have a linen look but are cheap. Here is the link and thanks for stopping by: https://rstyle.me/+XhhEleiBEaM_-2DkehQHhQ