How To Hang Multiple Pictures On A Wall Evenly (Easy Hack!)
How to Hang Pictures Evenly Every Time
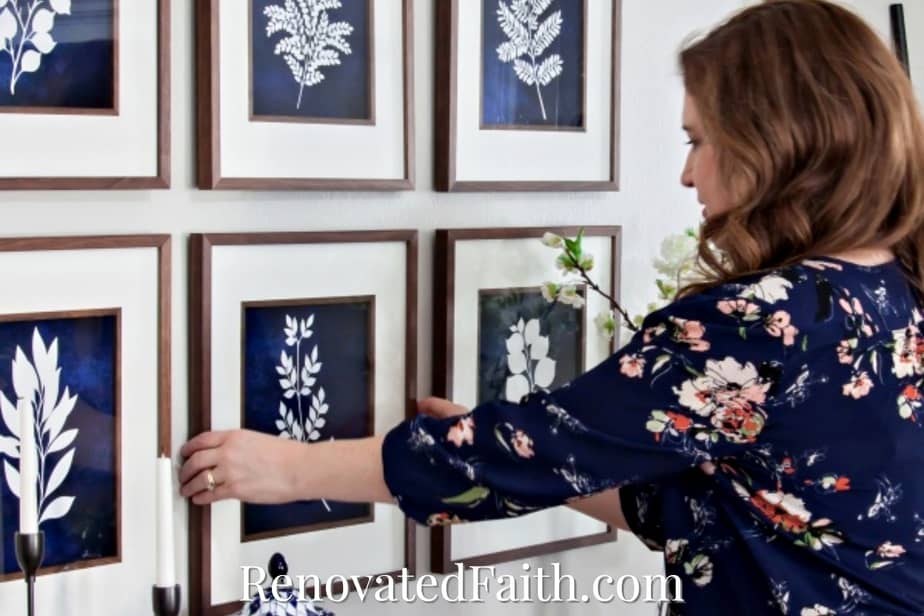
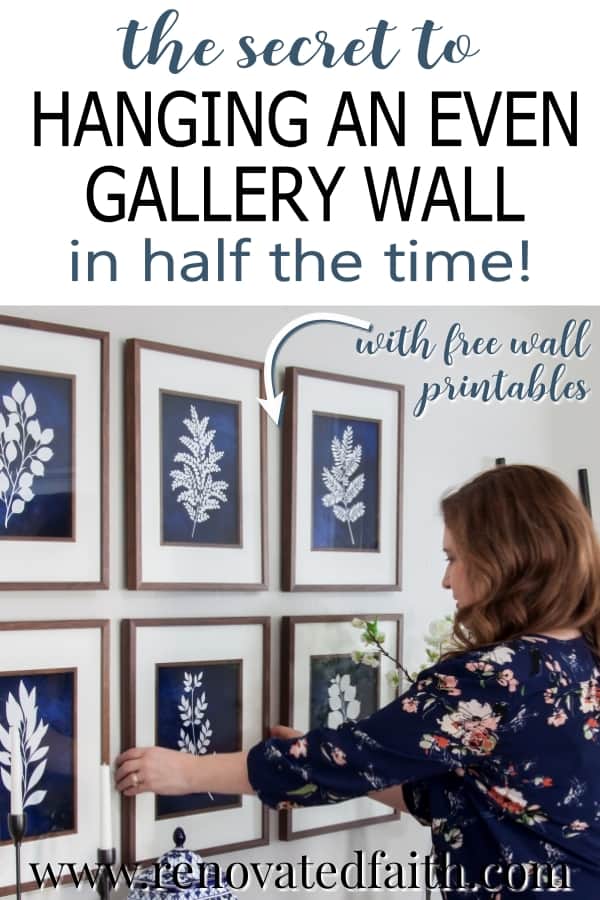
Hanging a gallery wall no longer has to be stressful! This easy tutorial will show you how to hang multiple pictures on a wall evenly without all the hassle and in half the time!
Does the idea of hanging wall art give you anxiety? Hanging multiple prints in a collage can be even more frustrating because if even one frame is uneven, it’s painfully obvious!
When I began hanging wall art in our first home, I started as a perfectionist, meticulously and scrupulously measuring so I didn’t dare make an extra hole in the wall. Of course, this made picture-hanging last ALL day, and it took all the fun right out of decorating our home!
Later, I shifted to the opposite spectrum, where I just made a half dozen extra holes in the wall before getting the right spot, knowing I could fill them later. But that left me with literally dozens of holes to fill!
But FINALLY, I have found a quick and easy method for hanging gallery-style wall art perfectly without the stress!
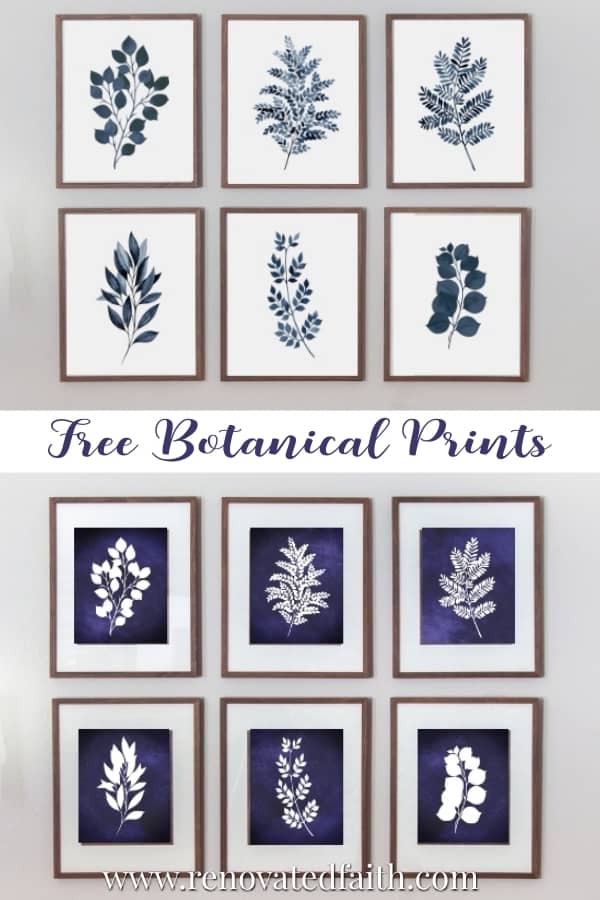
This step-by-step tutorial and video will give you a new method for hanging wall art, and you can even download the FREE botanical wall art prints to make your own collage!
Quick Links to Information in this Post
- 1 How to Hang Pictures Evenly Every Time
- 2 What Is The Formula For Hanging Pictures The Correct Height?
- 3 How To Hang A Gallery Wall Evenly
- 4 How to Hang Pictures Evenly (In Half The Time!) – Video Tutorial
- 5 Supplies Needed For How To Hang a Gallery Wall Evenly
- 6 RENOVATE YOUR FAITH: God’s Unchanging Character
- 7 How To Hang Heavy Wall Art Evenly
- 8 How to Fill a Nail Hole and Touch Up The Existing Paint
- 9
- 10 FAQ: How To Hang Multiple Pictures on a Wall Evenly
- 11
- 12 More Posts Related To How to Hang a Gallery Wall Evenly
- 13 Final Thoughts on How to Hang Multiple Pictures on a Wall Evenly
- 14 How To Hang Multiple Pictures On Wall Evenly
What Is The Formula For Hanging Pictures The Correct Height?
Did you know that the most common home decor mistake is hanging wall art at the wrong height? It’s the “lipstick on your teeth” of home decor because while it is blatantly obvious, it is also SO easy to fix as you’ll see in this tutorial!
Not only am I showing you tips for hanging multiple pictures level and straight, but you can also apply the same tricks the next time you have only one piece of art. These tips will never let you down no matter what type of picture you are trying to hang!
What Is The Right Height For One Piece of Art?
I’ve seen some designers use a special picture hanging height formula. But TRUST ME. You don’t need a fancy algebraic equation that takes into account the distance from the equator and relative humidity to hang your pictures correctly!
RELATED: 23 Low-Cost Tips for Decorating Your Living Room
What is the Right Height to Hang Pictures on A Gallery Wall?
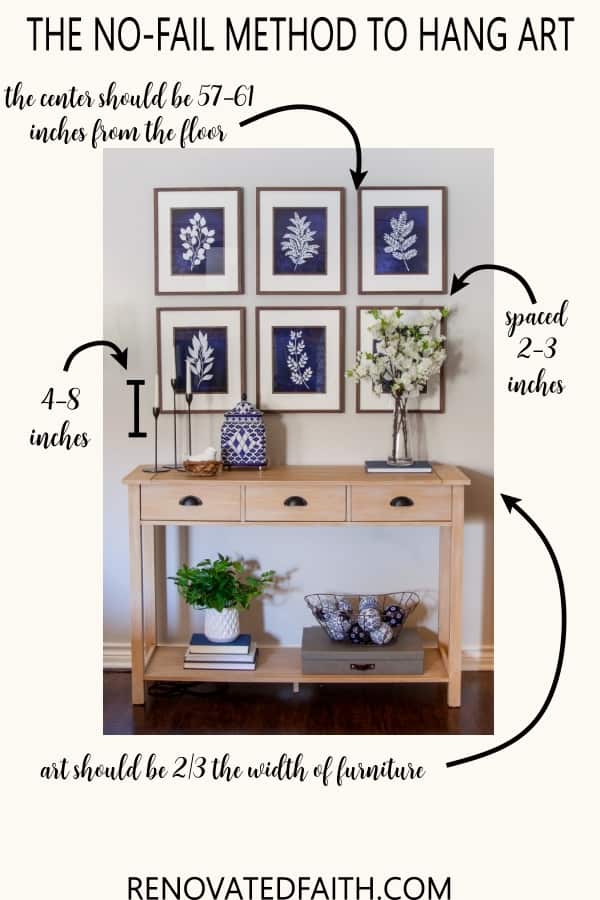
We are going to keep this simple, my friend! My go-to rule of thumb is that the center of the grouping (vertical midpoint) should be anywhere from 57- 60″ from the ground.
If your center point is within this range, you are in good shape. But if you have a particularly tall wall, you could add a few inches to better fill the space.
Another good method is to hang the artwork so the center is at eye level or slightly below. There are always exceptions to the rule but this will give you an overall guide. Remember, your home decor serves you and your tastes, not the other way around.
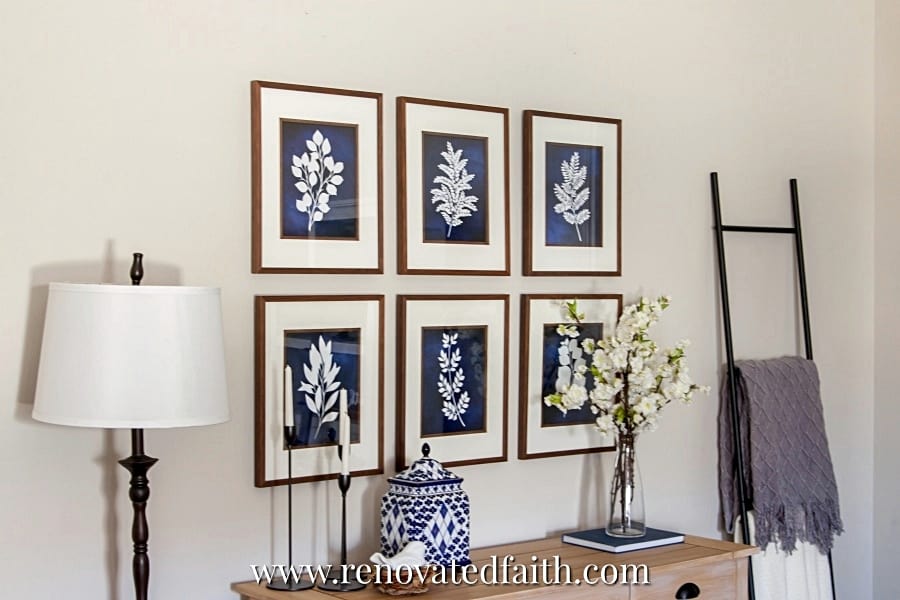
How to Hang a Gallery Wall Evenly
For the gallery effect, consider your grouping as one large piece of artwork, where the rules above still apply. This is why you only want to hang each picture in the gallery 2-3 inches apart. Keeping them close together will make them more cohesive – like one big piece of wall art.

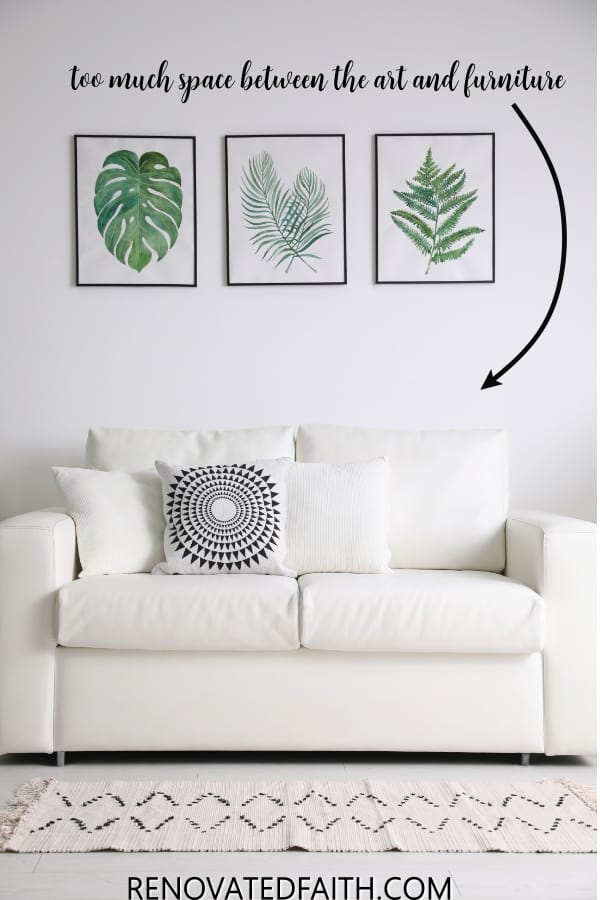
How High To Hang Pictures Over Furniture
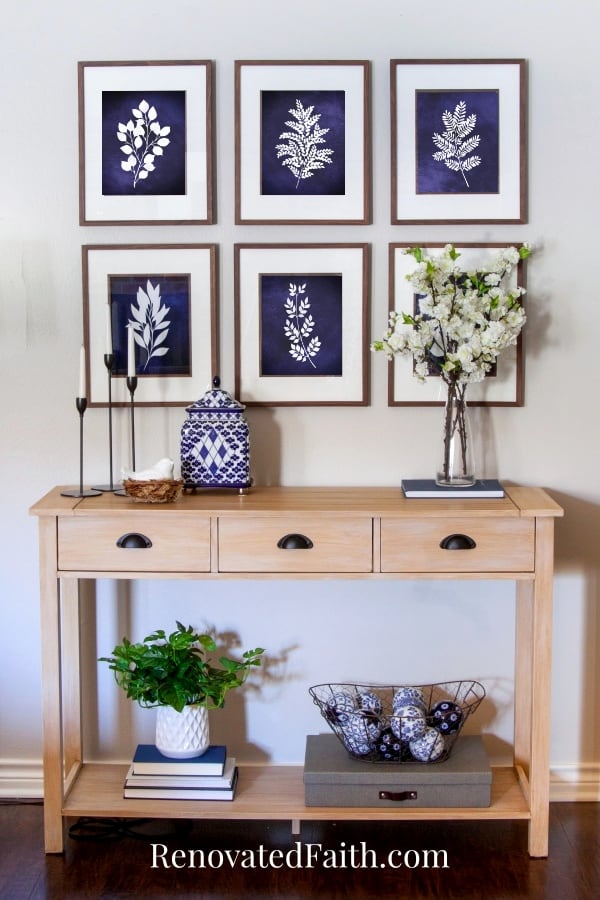
Whether you are hanging a group of pictures above a couch or console table, you want to make sure you leave about 4- 8″ between the height of the piece of furniture and the bottom edge of the artwork. This helps to ensure that the artwork still has a connection to the furniture piece under it.
You might have seen pins on Pinterest explaining how to arrange a vignette of decor on a console table? Well, in this case, our artwork is part of our vignette and we don’t want it to be so far away that’s it’s not still part of the “story”.
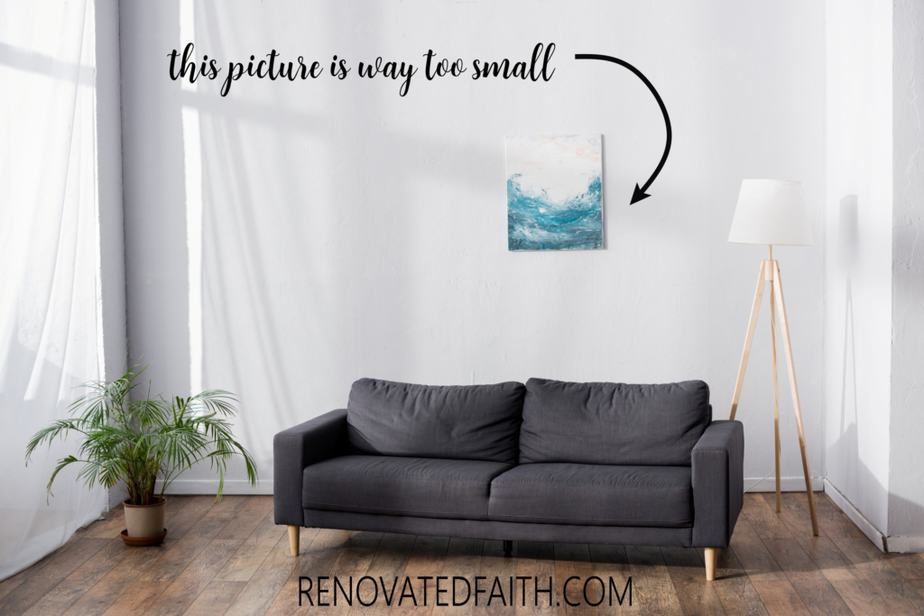
How Do I Size My Artwork Correctly?
“But Karin, what if I followed the first rule of hanging artwork so the center is 57-61” above the ground but now my picture is less than 4-6 inches away from the furniture piece underneath?” In that case, your picture size is too small.
Consider stacking a smaller piece of artwork on top or making a gallery display with other pieces of wall art that have something in common with it (like similar colors, textures, frames, the same theme, etc.).
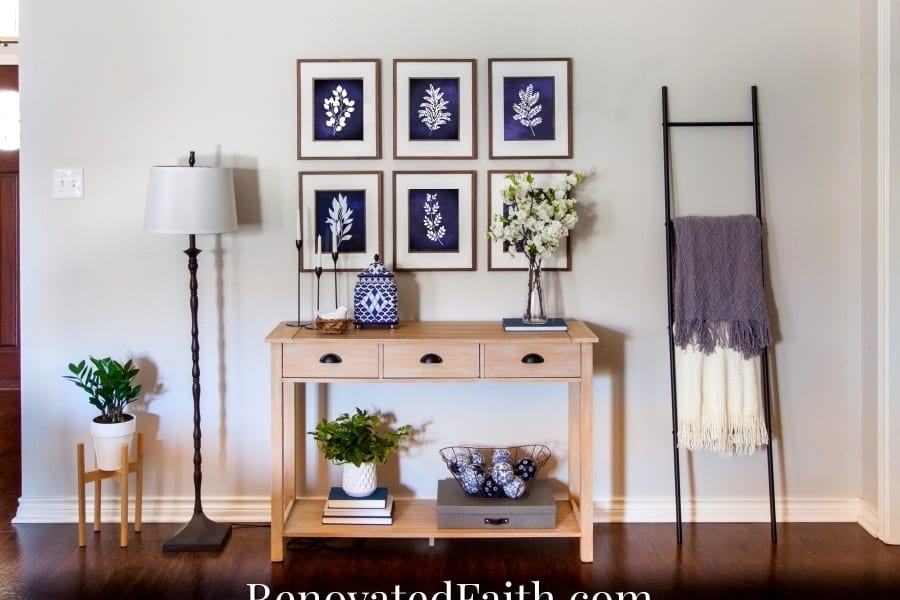
Also, your artwork should be at least 2/3 of the width of your furniture. If your artwork is wider than your furniture, add something on each side of the sofa or console to better anchor it. Ideas include a tall houseplant, lampstand, blanket ladder, etc. This will help to ensure that your wall art doesn’t look too top-heavy over the furniture
Should Art Be Centered On the Wall Or Over Furniture?
When in doubt, center wall art over your furniture, whether over a headboard, console table, entertainment center, or sofa. For smaller walls in bathrooms, where you won’t have any furniture, center artwork on the empty wall space.
Gallery Wall Definition
A gallery wall consists of any pictures that are hung in a cohesive grouping that have one element in common to bring them together such as colors, frames, texture, etc.
The wall art can be all the same size or different sizes, but it’s important for the sizes to be balanced with roughly the same amount of space between each frame. Often you will see the largest wall art toward the center of the collage.
How To Hang A Gallery Wall Evenly
In this tutorial and video, I’ll not only show you how to hang pictures evenly but how to hang groupings of pictures so they are perfectly straight and with some simple hacks so it doesn’t take you all day!
How to Hang Pictures Evenly (In Half The Time!) – Video Tutorial
Supplies Needed For How To Hang a Gallery Wall Evenly
Picture Hanging Kit – This is much cheaper than buying the proper hanging hardware separately! It includes nails, hangers for heavy art and hanging wire.
Painter’s Tape or Masking Tape – My favorite is the tape for delicate surfaces.
Kraft Paper – You can also use gift paper!
Yardstick or Straight Edge
Torpedo Level or Laser Level. You can use the FREE bubble Level App on Your iPhone, too!
Frames – These are the exact frames I used
Paint Stick Hanging Tool * – You can get paint sticks free at your local home improvement store. You’ll also need a ¾” or 1” screw.
Hammer
Measuring Tape
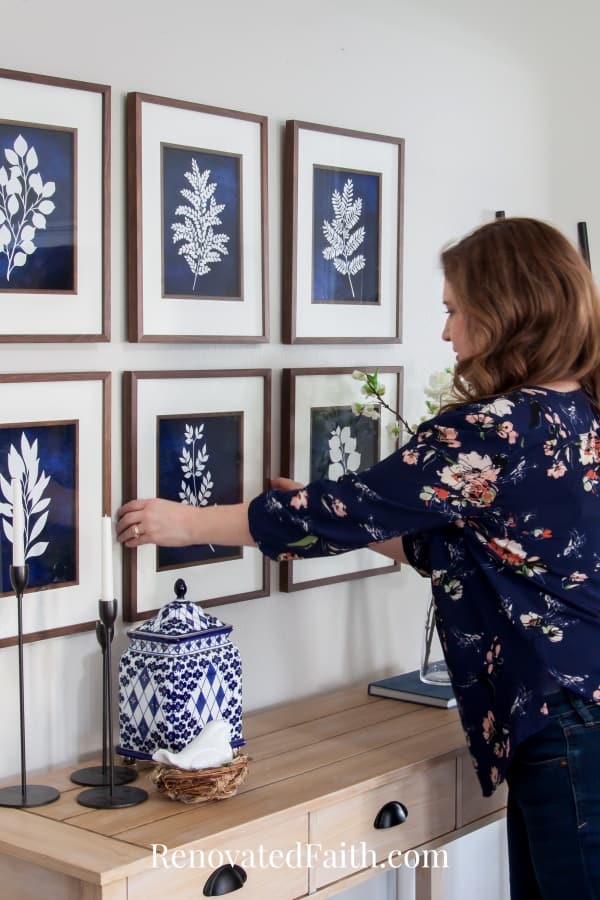
FREE Blue & White Botanical Wall Art – This set is one of the many printables in my FREE resource library. Get access to it and all my other free printables, templates, and wall art by filling out the form at the bottom of this post.
*For hanging pictures with wire or pics with two hangers.
Step 1: How to Hang Picture Frames Evenly
The first step is to lay all of your wall art on the floor placing them in the arrangement you want them on the wall.
Be sure to allow 2-3 inches between each piece of artwork. (For this project we are allowing 2 inches between each frame.) Now that you’ve arranged them on the floor in the order you want, be sure to number the back of the frames with a pencil so you don’t forget where they go in the collage.
As we said earlier, the midpoint of your wall art or collage should be between 56 and 61″. Pick the height that looks best for your gallery wall and make a mark of that height on the wall with a pencil.
Now, measure one inch below that mark and make another pencil mark. This will give us the location for the top of the frame edge of our second row if we are doing 2-inch spacing for our gallery wall layout.
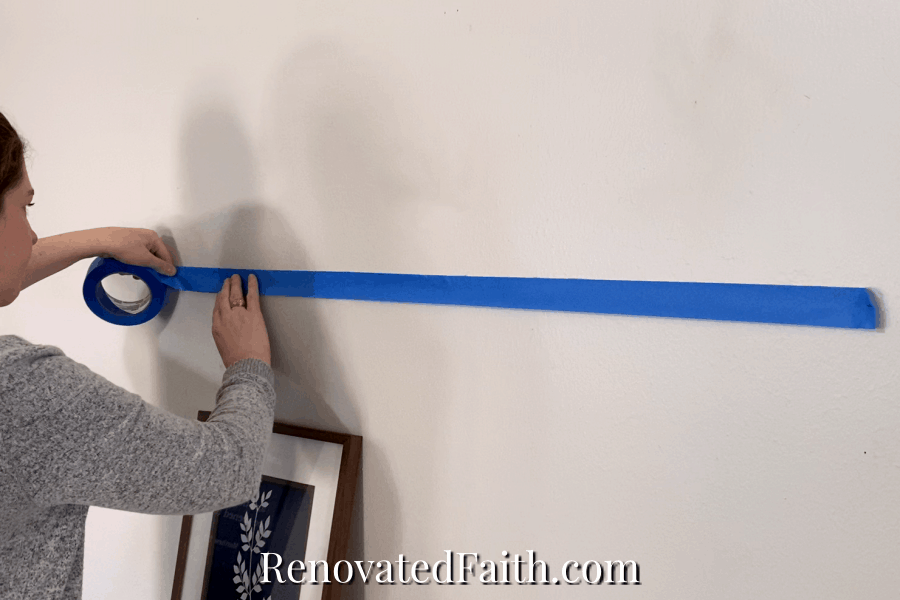
Since we know where the top of our bottom row is, we are going to add a long piece of painter’s tape to the wall as a level guide for all the art pieces in that row.
Renovated Faith: What’s in a Name?
God never leaves a project half-done…He continually works on each one of us, as a lavish expression of His amazing love and grace. So many of my DIY projects remind me of how God renovates our hearts. If you are a work-in-progress, just like I am, check out the Renovate Your Faith Devotional at the bottom of this post. Click here to get a weekly reminder of new posts by email.
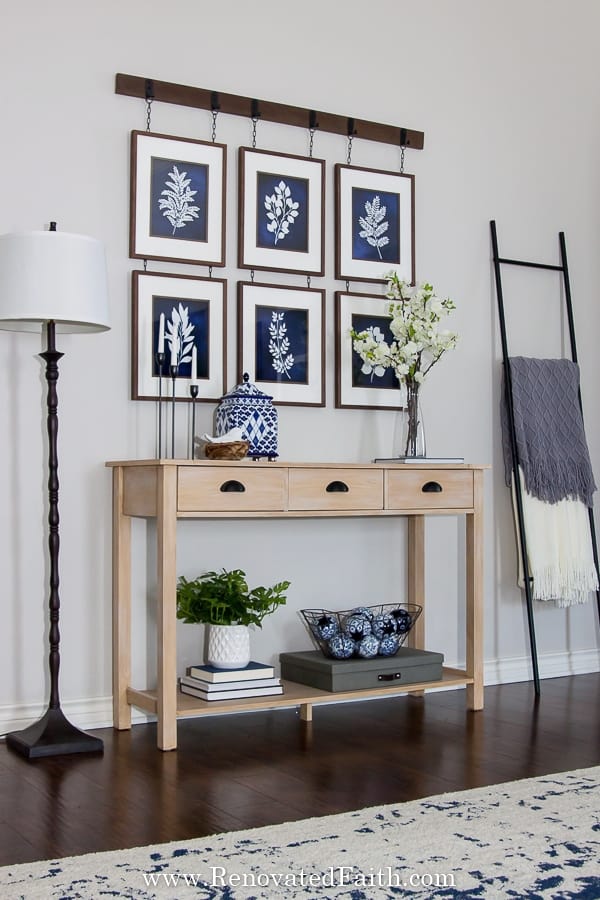
Gallery Wall Art Hanging From A Rail
You may have seen gallery hanging systems that give you the look of museum-style hanging artwork from a rail.
These picture-hanging systems don’t always go with the modern farmhouse look that is so popular now. Pottery Barn recently added this picture hanging system to give it a more cohesive look but it also has a rustic farmhouse feel.
The downsides to the Pottery Barn version are that not all pictures can be hung from it and it’s also pretty expensive. But here I’ve found a way to DIY the same look for a fraction of the price:
Step 2: How To Line Up Pictures on a Wall
There’s nothing worse than an uneven gallery wall, so a long piece of painter’s tape will give us a guide so that each picture is straight. Be sure to check out the video for this step and the following steps.
My favorite tools to hang pictures straight are a straight edge (or yardstick), painter’s tape, and my torpedo level.
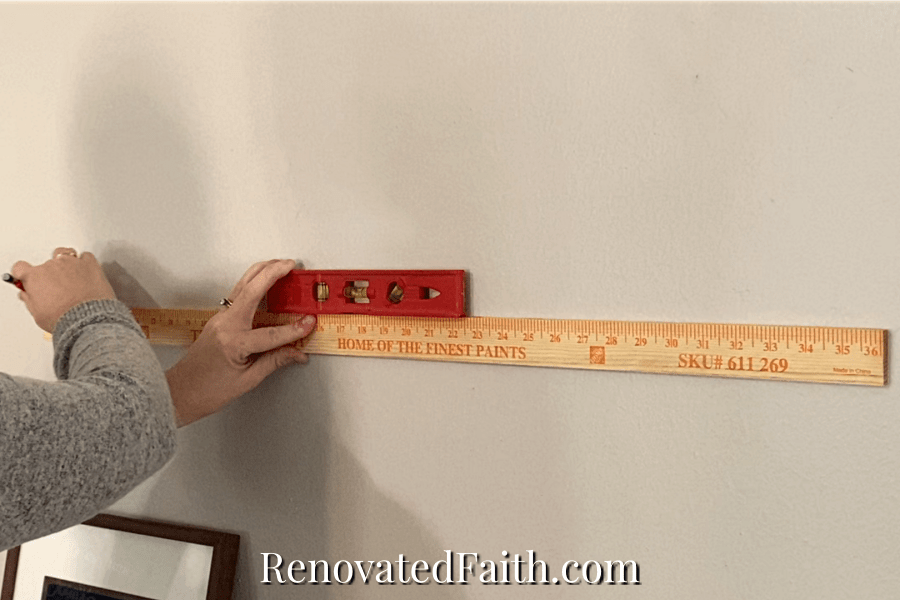
What Is The Easiest Way To Hang A Picture Level?
The simple way to keep your art level is to use a yardstick or straight edge with a torpedo level set on top.
Line up the straight edge on level with the mark you made at the top of the bottom row. Once you get it level, mark at least two dashes on either side of the top of the straight edge with your pencil.
Now, add a long piece of painter’s tape, with the top edge lined up with those two marks you just made.
Next, do the same thing with the next row of pictures so they will have a long piece of level painter’s tape on the wall also. (To do this, I measured the height of my framed art and added a couple of inches for spacing. Then, I marked that mark from the top of the first row of painter’s tape.)
How to Evenly Hang Pictures Without A Level
In my post on the best tools for beginning DIYer’s, I mention a great tool already at your disposal. You can use a level app on your phone for hanging pictures. Simply set your phone on top of the yardstick as you would with a small level and line up the bubble so it’s in the center. My favorite free level app is called Bubble Level, but there are several good ones out there.
How Much Space Should Be Between Pictures On A Wall?
I like to space pictures 2″ apart. Take one of your frames and mark each edge on the left and right. Now measure 2 inches out with your tape measure and mark it with verticle dash lines on the painter’s tape.
Repeat with the same frame on either side, until all of the edges and spacing are marked. I start with the middle and work out to the left and right.
Now your spacing between each framed picture will be even. (You know those cardboard corners that come on new picture frames. You can tape two of those together to make a picture spacing tool if that’s easier).
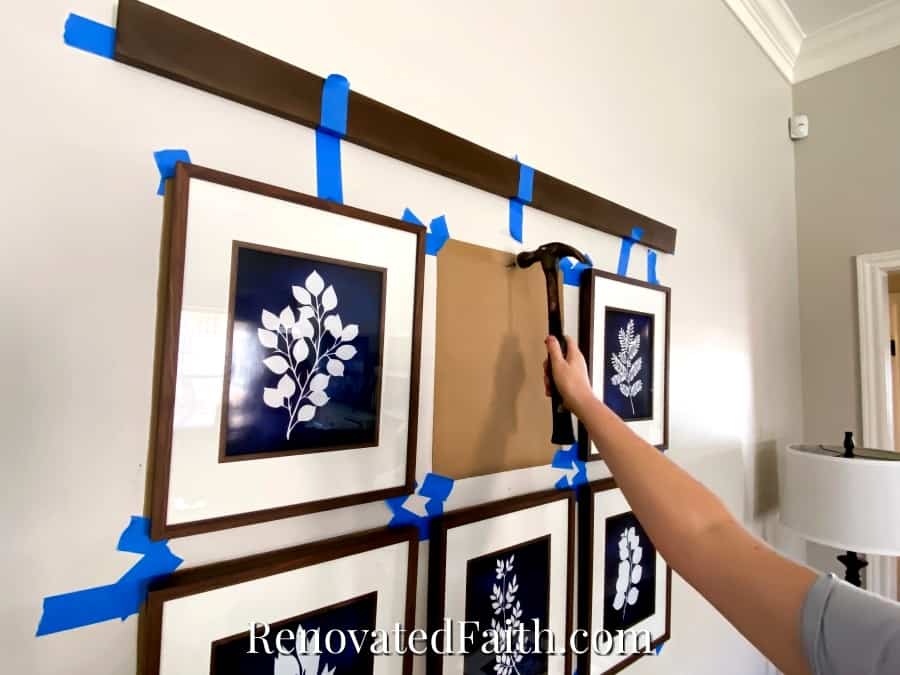
STEP 3: How To Hang Groups of Art Using Kraft Paper Cut-Outs (Optional)
As you can see in the video, one of the best picture hanging techniques for hanging wall art gallery style is using kraft paper cut-outs.
It’s a really easy task to move a piece of paper around on the wall as opposed to moving a picture that is already hung. (If you don’t have kraft paper, you can also use wrapping paper as long as it contrasts with the wall.)
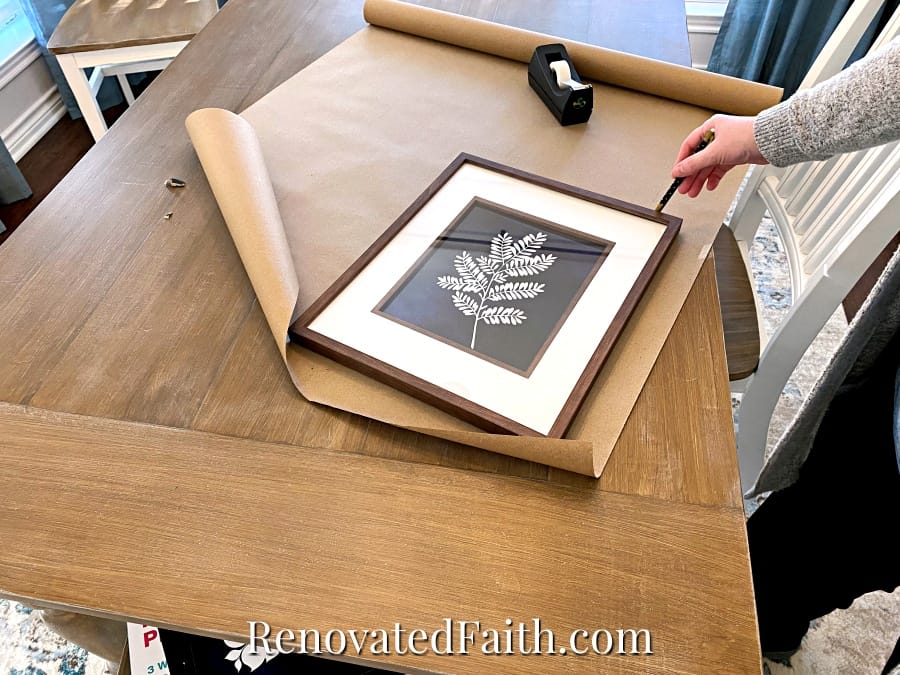
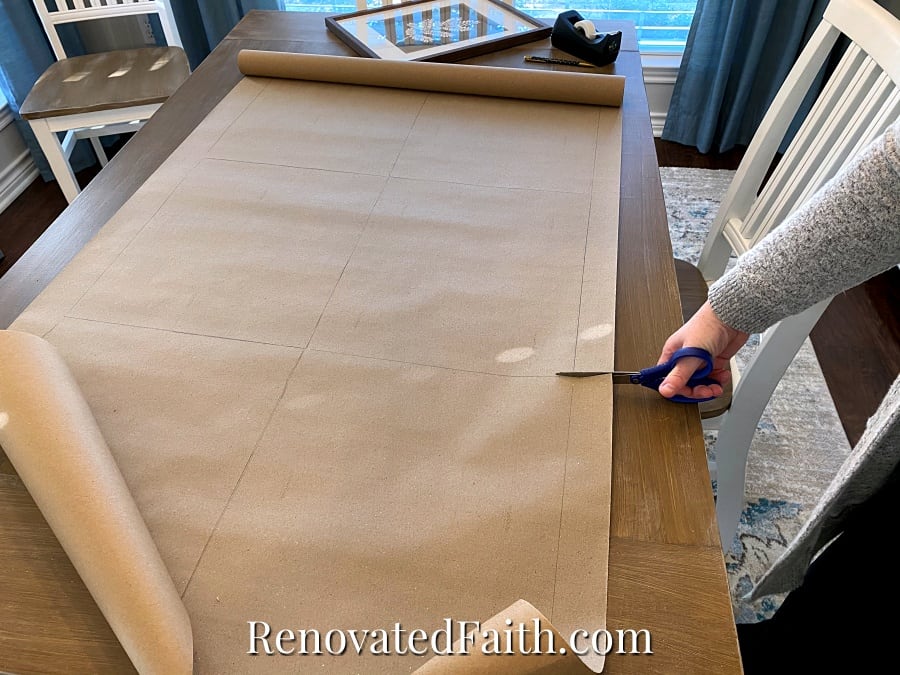
Trace one of your frames and cut it out. Do this for the number of frames you have so you have a cut-out for each.
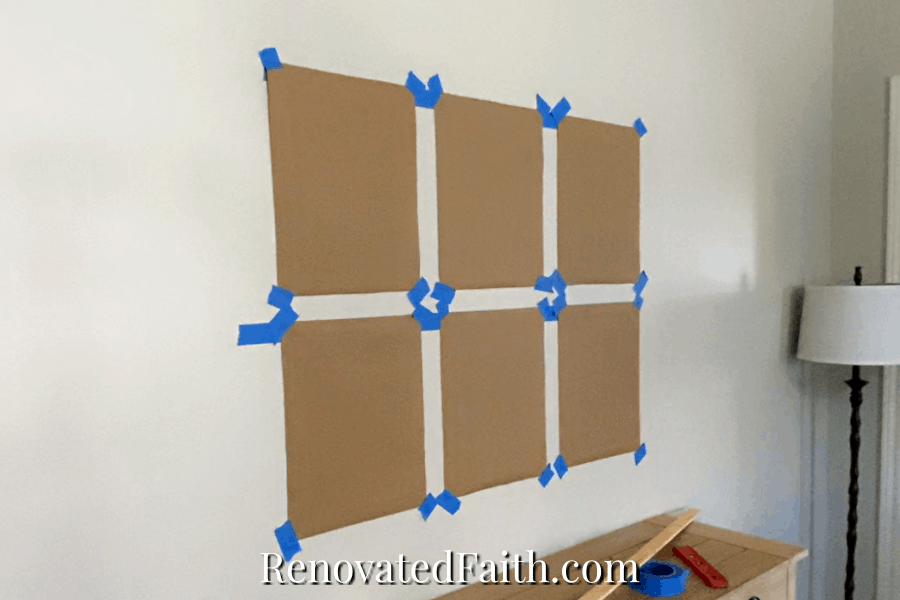
Now use painter’s tape to secure the corners of each cut-out to the wall along the edges you marked for the correct spacing. Make sure the top edges line up with the painter’s tape.
Now stand up back and see how you like the look of the spacing. Readjust any of the cut-outs as needed to get the spacing of your gallery wall art perfect.
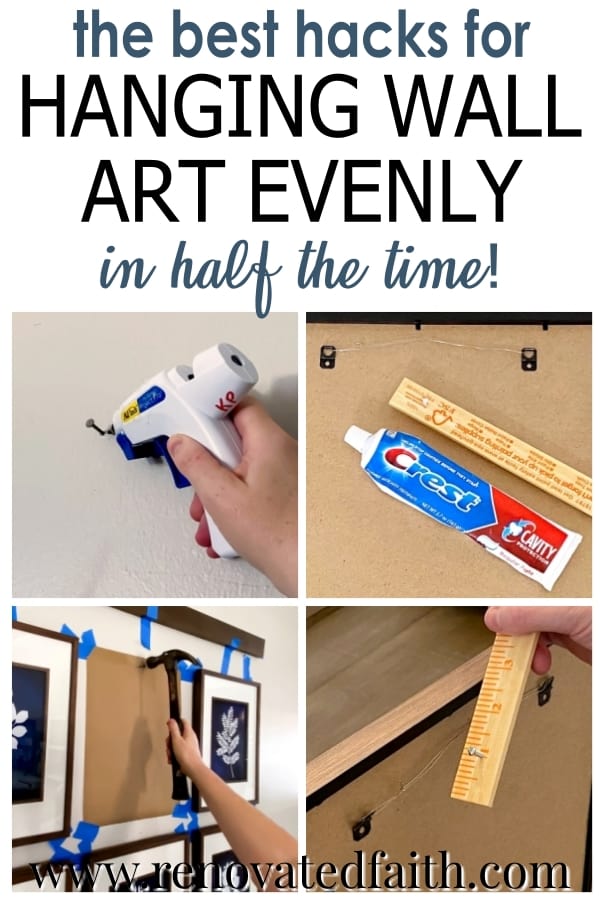
STEP 4: How To Hang Pictures Evenly Using Toothpaste
My favorite picture hanging hack includes using toothpaste to exactly determine where to put your first nail in the wall.
Why toothpaste? Well, it sticks to the back of your picture and wall without being too runny. Also, toothpaste is easy to clean up and is usually pretty bright to better see where to put the nail. I have tried dry erase markers and they work, but not as well as toothpaste.
Below and in the video, I’ll show you how to use this trick according to the type of picture hanging hardware on your frames:
Option 1: Hanging Pictures with One Center Hanger On The Back
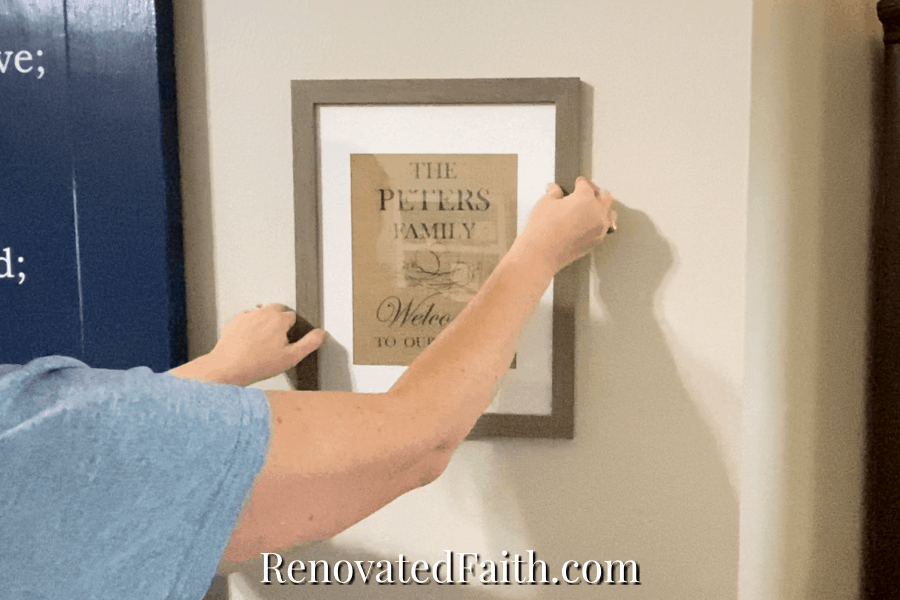
For frames with one center hanger, dab some toothpaste in the middle of the hanger. Now, turn your picture frame toward the wall and line it up with the kraft paper.
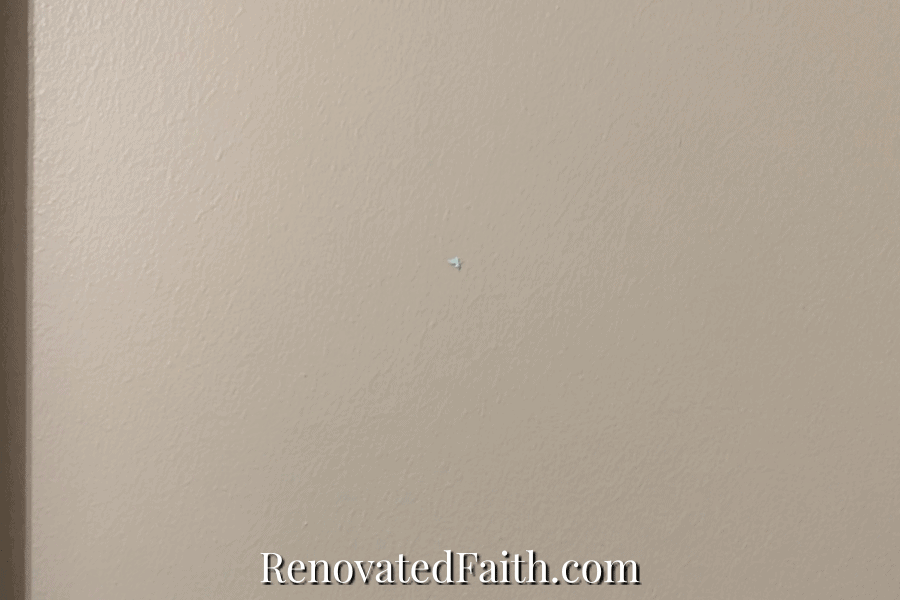
After pushing the frame to the wall, it will leave a tiny dab of toothpaste. As you see in the video, put your nail in just below that point. Do this for each picture.
Now, while the kraft paper is still on the wall hang up all your pictures on each nail. If they look good, you can pull off the tape and kraft paper, and you are done! (Because my framed art has a wire back, I’m showing you with a different picture frame.)
Option 2: How To Hang Pictures With Wire Evenly Using the Paint Stick Trick
If you have wire on the back of your picture frame, you can use the paint stick trick.* There are several picture hanging tools on the market, but this hack is virtually free and works just as well!
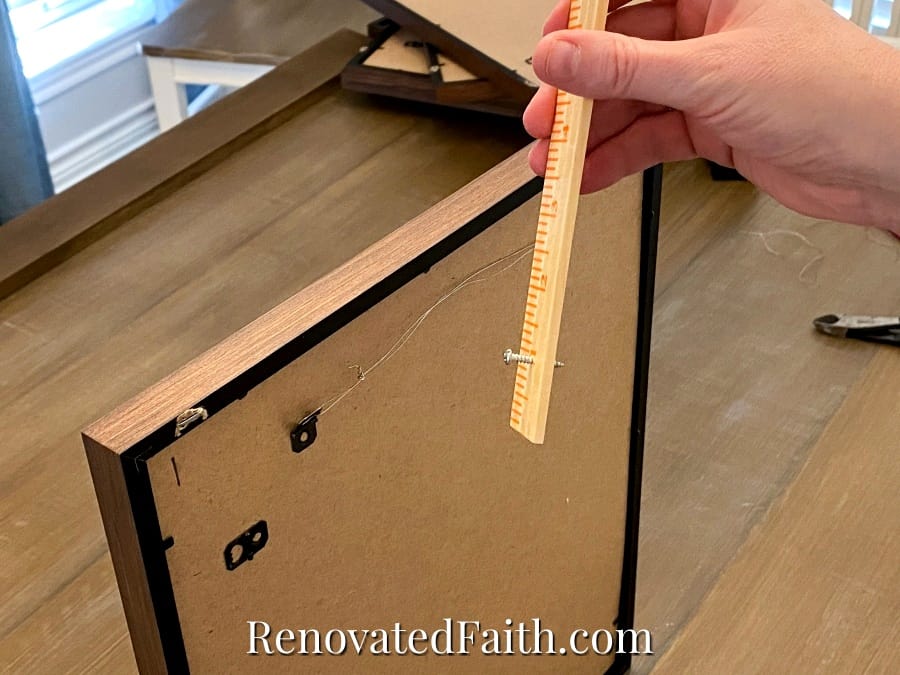
All you’ll need is a wooden paint stirrer or ruler and a screw. Drill a 3/4 to 1-inch screw halfway into the paint stirrer, an inch from the end.
Put a dab of toothpaste on the pointy end of the screw. Now, hang the wire on the other end of the screw. While the picture is hanging from the paint stirrer, line it up to the kraft paper and push it and the paint stirrer towards the wall.
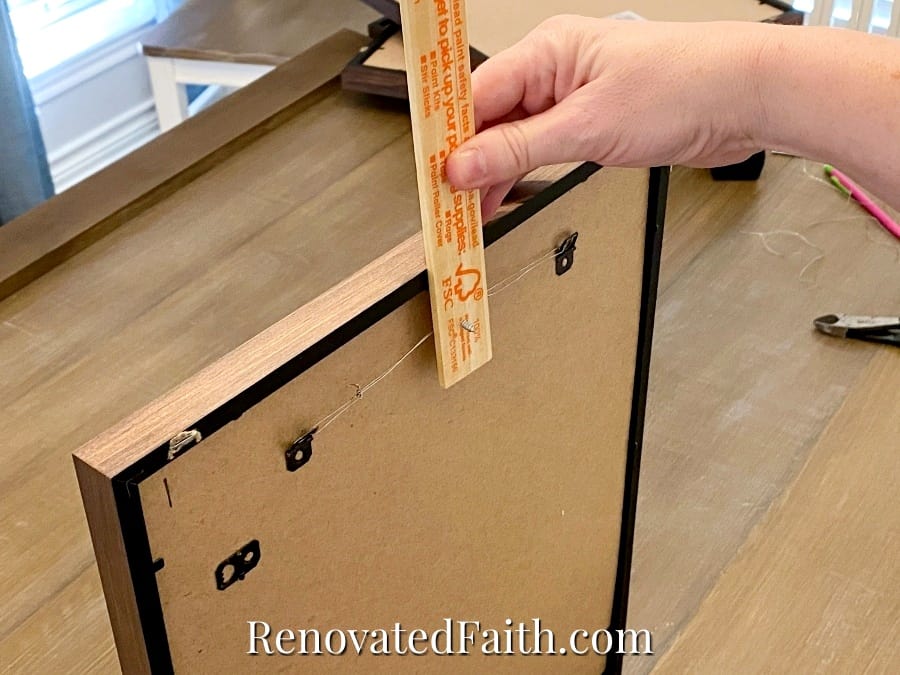
Now, you should have a small dab of toothpaste on the wall. Add your nail through the toothpaste and kraft paper. Do this for each frame, and hang them with the kraft paper still on the wall. If they look good, take down the kraft paper and tape. Now you can enjoy your perfectly straight gallery wall art collage!
Get paint sticks free at Home Depot, Lowe’s, and Walmart. They might be behind the counter but just ask and they are happy to give them away.
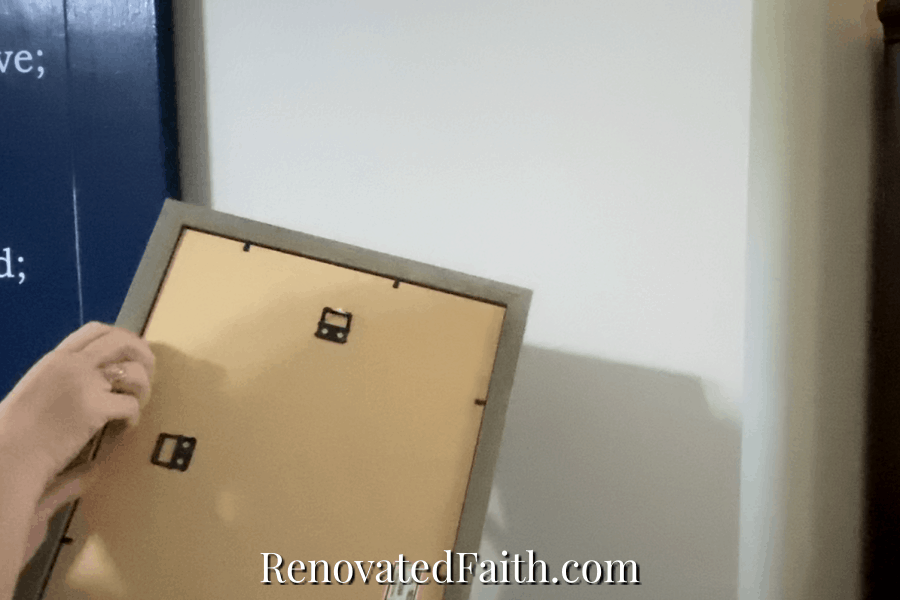
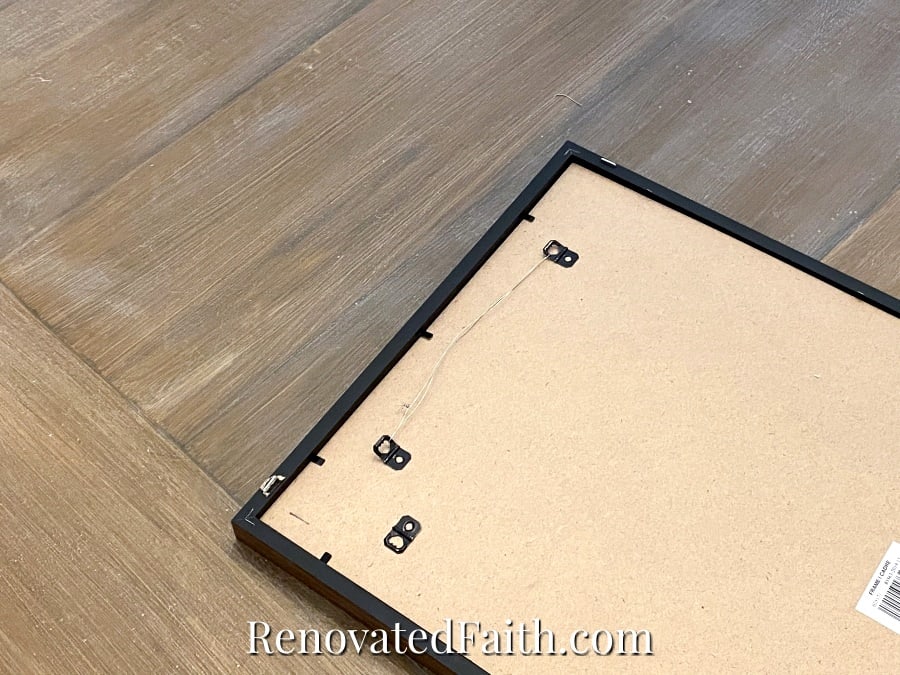
Option 3: How Do You Hang A Picture With Two Hooks Evenly?
At some point, someone thought it would be a good idea to make picture frames with two hangers on the back. These are SO hard to hang because if one of the nail holes is slightly off, the whole picture is crooked.
For that reason, I add wire to these every time. (If for some reason you can’t add wire, just use option 1 putting toothpaste on the back of the two hangers)
Take some wire and wrap it around both hangers tightly as you can see in the video. As you can see in the video, secure the ends of the wire twisting them together. Now, you will use the instructions above for hanging pictures with a wire on the back.
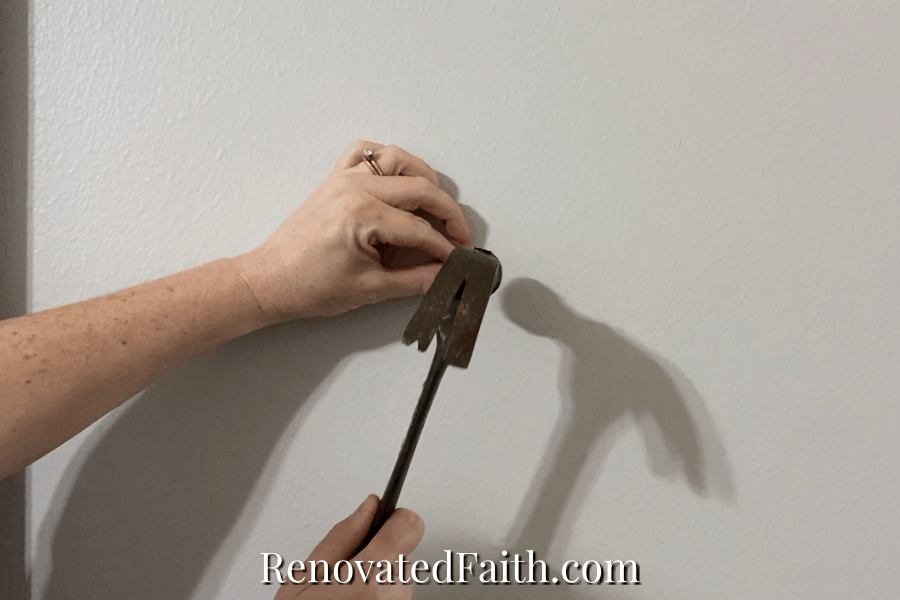
IMPORTANT TIP: If any of your pictures aren’t straight it might have to do with the angle of the nail. Because we are human, it’s hard to drive them in exactly straight. If this is the case, very lightly tap your nail with your hammer in the right direction to adjust it.

Hang the first frame as best you can to line it up so the top and bottom of the frame line up with the kraft paper.
Gallery System Lighting
Whether you have the FREE blue and white botanicals from my printable library or high-end artwork, you can really accent your gallery wall collage by adding lighting. And fortunately, it’s easier than you might think with these options:
CLICK HERE FOR LIGHTING FOR GALLERY WALL ART
RENOVATE YOUR FAITH: God’s Unchanging Character
The concept of “level” has always been a comforting idea to me. Whether you are hanging picture frames or building a home’s foundation, you can’t go wrong if you are measuring off 0 degrees.
Because no matter your background, your political affiliation or how you like your coffee, level is level. It’s a standard we can all depend on. Read the rest of the devotional here.
For more spiritual encouragement, click here for the rest of my project posts that also include Renovate Your Faith devotionals.
DON’T FORGET TO TAKE A PICTURE!
Now that you are done, I’d love to see how it turned out! ❤️ Post your before and after photos here!
How To Hang Heavy Wall Art Evenly
For any heavy frames, you want to use picture hangers. These are simply metal plates with holes for the nails that better spread the weight over a larger area of drywall. They are super easy to use and work great for smaller pieces as well as heavy pictures. The last thing you want is your artwork to fall and the glass to shatter.
For anything over one or two pounds, I like to use these hooks specifically for heavier pieces that can be found in the picture hanging kit I mentioned above: Picture Hanging Kit (CLICK HERE for the current price.)
For any larger pieces or heavy frames over 5 or 10 pounds I like to try to drill into wall studs if possible. If there aren’t any in the right location, there are hooks rated for this weight in the link above.
How to Fill a Nail Hole and Touch Up The Existing Paint
If you do need to make some extra holes in the wall, it’s no biggie! Just use the tutorials below to make your walls look like new.
How To Fill Nail Holes Like a Pro
How to Match Touch-Up Paint to the Existing Wall
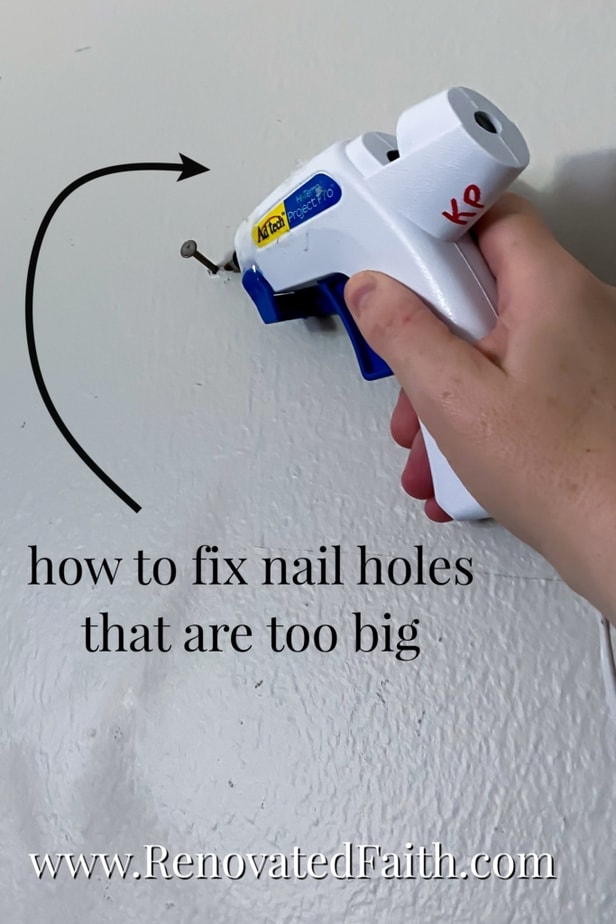
How To Fix a Nail Hole That is Too Big
Sometimes when I hang and rehang wall art – especially wall art that I change out often (see my Free Scripture Wall Art HERE), the extra movement can make the nail hole a little big. When this happens the nail slides out of the hole too easily.
What’s really annoying is when the nail won’t stay the right length from the wall and will sometimes go completely into the wall. Then you have to stop what you are doing, find something to pull it out and try to rehang your picture only to have it happen again!
When this occurs, I simply take my glue gun and add a small dab of hot glue at the base of the nail. This will keep the nail in place at the right length from the wall. If you ever decide to remove the nail, simply pull it out and peel off the hot glue. There will be no damage left on your wall and you can fill the hole as normal.
How Much Weight Can A Picture Hook Hold?
I wouldn’t put anything over one or two pounds on a standard nail or hook. Each of the picture hangers in the kit is rated for a certain amount of weight.
How To Hang A Large Canvas Painting
For large canvas paintings, I like to add a wire to the back as I mentioned above. Most often, they don’t need load-bearing wall hardware because they are so light. For canvas wall art, I usually just use a large nail.
How Do You Hang Large Pictures Evenly After Making a Hole In the Wall?
When I hung my Matthew 11 Wall Art (Click HERE to make farmhouse style wall signs easily) over my desk, I was in a hurry and didn’t get it centered over my desk very well. I only needed to move it over about an inch but when I rehung it on a different notch on the sawtooth hanger, the sign tilted.
So, instead of making another new hole in the wall, I simply used one of these Command Picture Hanging Strips (CLICK HERE for the Current Price) underneath one corner. It held the picture in place so it’s not tilted and I didn’t have to make a new hole in the wall!
FAQ: How To Hang Multiple Pictures on a Wall Evenly
How To Hang 3 Pictures Side By Side
This tutorial shows you specifically how to hang 6 pictures of the same size. To hang 3 pictures in a row, follow the instructions above but you’ll only need one line of painter’s tape on the wall. If you are wondering how to hang 4 pictures in a row evenly, this method works really well also. Just make sure the distance between each picture is the same.
How to Hang 4 Pictures On A Wall
For hangin a group of 4 pictures the same size, your center line will not be in the middle picture, but it will now be in the center of the two middle pictures. Follow the instructions above, make sure your piece of painter’s tape for the two middle pictures is equal distance from your center line. In other words, double check to make sure there is equal distance between each middle pic and the center line. (You can always mark the center line with pencil and erase it later).
How Do You Hang An Unframed Canvas Painting?
If your wall art is an unframed canvas, you can screw in hook and eye screws on the inside of each verticle frame like in this post: How To Add Hangers to Canvas Wall Art
The easier solution is to add a sawtooth hanger in the top like these: Sawtooth Picture Hangers (Click here for the Current Prices)
How Do You Hang Multiple Pictures On A Large Wall?
The only change you will make to the instructions above is having the center of your artwork hung a few inches higher. Also, make sure your artwork is large enough.
Large artwork can be expensive but that’s why wall art collages come in handy because 6 free printables in frames can take up the same space as a large piece of artwork. To fill horizontal space on the wall, consider adding a floor lamp, blanket ladder, or tall plant.
The Best Way to Hang Pictures with High Ceilings
To help compensate for high ceilings, go with larger art work to better fill the vertical space. However, don’t hang artwork so high that there is a large gap between the wall art and furniture underneath. A good rule of thumb is to hang your hard work in the middle third of the wall as long as your hard work is large enough to fill this space.
What Is The Best Picture Hanging Tool?
There are several picture hanging tools online that will help you hang artwork evenly and some have a level combined: Picture Hanging Tools But honestly, all you really need is the almost-free version above and a level app on your phone.
How Do You Hang Art Prints Without A Hanger?
A good rule of thumb is to add a sawtooth picture hanger (click here for the current price). All you do is nail it into the frame with the trim nails that come with the hanger. The important thing with these is to get the hanger in the center of the picture frame
How To Hang Two Pictures Evenly
Follow Step 1 above. Just make your level line with painter’s tape measure your spacing on either side of the center mark and line of the edge of each picture with those marks.
How To Hang Multiple Pictures on A Wall That Are Smaller In Size
For wall collages with small pictures, use the same process above but space them as little as 1 to 1.5 inches apart. We want them to be close enough so they look cohesive.
Do command Strips work for hanging pictures?
Command hooks have been a popular option for picture hanging. These plastic hooks with adhesive strips are touted to be one of the best picture hanging hacks but honestly, I’ve never had good luck with them. Even with the higher weight ratings, it doesn’t take much time for your wall art to come crashing to the ground because the sticky side won’t hold. It might take 5 minutes or 5 months but I have never had good luck with command strips for hanging pictures. This time varies with the type of wall but for the average person looking to hang wall art, wall nails are the way to go!
How to Hang Multiple Pictures of Different Sizes
When hanging pictures of different sizes, have one center picture as a focal point and structure rest of the different frames around them. Lay out the collection of pictures on the floor and arrange them around the center starting point. This allows you to find the perfect spot for each picture before hanging them on the wall. This is really a matter of personal preference but I wouldn’t hang them more than 2 inches apart so each picture in the gallery wall looks related to the others.
Where is the Best Place to Find Low-Clost Picture Frames?
Check your local Restore or flea markets for low-cost wood frames that are still high-quality. Whether you want larger or smaller frames, they often have custom frames that are well-built and will last a long time. A great way to make them all match is to spray paint them so look great together as gallery wall art: The Best Tips for Spray Painting Home Decor
FREE Blue and White Botanical Wall Art (2 Color Options To Choose From)
Here’s where you can get my free blue and white botanical wall art printables! Get the password for the library with all of my free printables including more wall art, checklists, and templates by filling out this form:
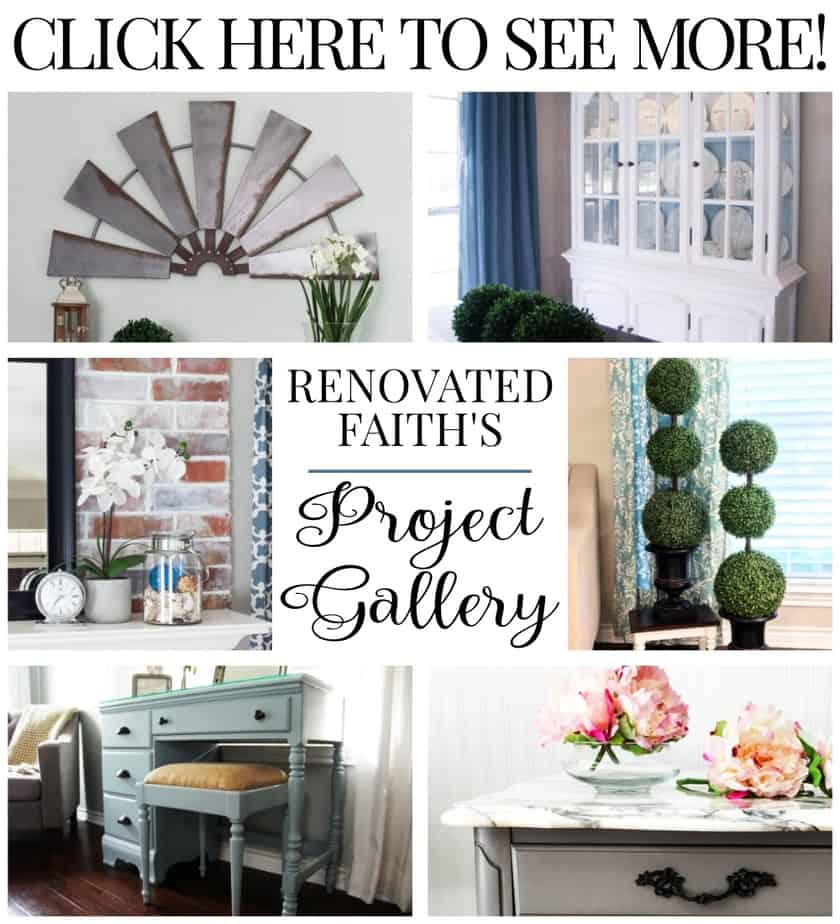
More Posts Related To How to Hang a Gallery Wall Evenly
How to Create a Home That Serves You Instead of You Serving It
Easy Rail For Hanging Wall Art (That Are Not Just for Art Galleries!)
Free Blue and White Botanical Art Printables
The Perfect Way to Create a Raw Wood Finish With Paint!
Free Farmhouse Scripture Wall Art (2 Dozen To Choose From!)
The Easy Way To Make Farmhouse Signs (NO Cricut or Hand Lettering Required!)
Christian Wall Art Ideas for Less Than $30
The Best Greige Paint for a Living Room
How To Easily Whitewash A Fireplace or Brick Walls
DIY Fingerprint Wreath Wall Art (Personalized with Your Family’s Fingerprints & Name!)
Final Thoughts on How to Hang Multiple Pictures on a Wall Evenly
Don’t forget to download my free wall art by using the form above. To get your printables, sign up for my weekly newsletter which also grants you free access to my resource library full of wall art printables, checklists, and project plans!
Whether this is your first time hanging wall art or you are an old pro, this post helpfully provided you with a picture hanging hack to save you time and frustration.
Before this post, you might have spent endless hours trying to figure out to hang art gallery style evenly! Or maybe your fallback technique was making as many unnecessary holes as you needed unto until the picture was straight. Fortunately, this tutorial not only shows you how to hang pictures evenly but in half the time as more conventional ways with no special tools required! Following these easy steps will ensure that your photo wall of family pictures or wall art collage will be a focal point you can be proud of. The best part is that you can enjoy hanging your gallery wall art just the way you envisioned!
I love to hear your thoughts and questions! Scroll down to leave a comment and I WILL reply! ❤️
Blessings,

Be sure to follow the fun here!
Email Subscription | Instagram | Pinterest | Facebook | Twitter
How To Hang A Gallery Wall Evenly, YouTube Video
How To Hang Multiple Pictures On Wall Evenly

Karin Peters is a DIY expert and the creator of Renovated Faith. She is a furniture painter, a home design consultant, and a tenacious problem solver determined to help you transform your house into a home. With 17 years of experience with DIY home improvement, she researches and analyses professional processes to adapt them to be easy and cost-effective for DIYers. She then tests every project and product before it appears on the site in a detailed, step-by-step format. After attending Texas A&M University, she received her Master of Divinity with Biblical Languages at Southwestern Baptist Theology Seminary. Her passions unite in Renovated Faith, which shows readers how to create a home that serves them so they can pursue their God-given purposes. About Renovated Faith | Editorial Policy | Facebook | Twitter | LinkedIn
Hi Karin!
We have a large wall in our office and three large art pieces of different widths and heights but have the same coloring. Do we hang each piece so that the tops of the frames are aligned or so that the centers of each piece are at the same level?
Thank you!
Joe
Hi Joe, I would aligns centers of the three pieces. Let me know if you have any other questions!
Thank you for this great tutorial. Where can I get the hardware that mounts to the 1×3 board you put the chains on?
Thank you!
Hey Pat, here is the link:https://www.amazon.com/gp/product/B088K6Y76T?ie=UTF8&psc=1&linkCode=ll1&tag=777770a-20&linkId=59ce1e07dde532e173e36d5167e9d182&language=en_US&ref_=as_li_ss_tl
Excellent post.
I love taking pictures, so I was thinking of setting up a gallery wall at home to display the photos I took of my family. I appreciate your tip when you told us to allow at least 2-3 inches between each piece if we want our gallery wall to look good. I’ll be sure to consider following what you said once I find a custom framing service to hire for my pictures soon.