How to Spray Paint Patio Furniture (Ultimate 2025 Guide & Video!)
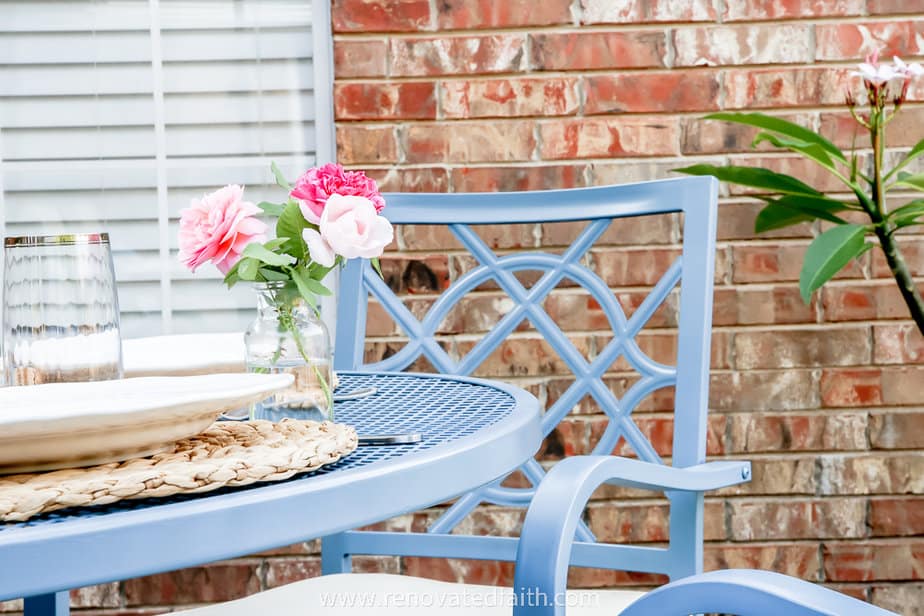
How to Restore Metal Outdoor Furniture The Easy Way!
Why buy expensive new outdoor furniture when you can get a whole new look with a couple of cans of spray paint & this DIY tutorial on how to spray paint patio furniture like a pro.
Did you know you can easily give your metal patio furniture a complete makeover for less than $25? Spray paint not only transforms the look of outdoor furniture but it gives it a new protective finish to make your furniture durable for years to come!
So before you buy brand new furniture or pay someone to restore it, try this easy step-by-step tutorial. This guide will show you the best way to spray paint metal furniture so it has a whole new life!
LET ME SHOW YOU:
- How to paint patio furniture so it lasts
- The best spray paint for patio furniture
- The failproof way to prevent spray paint drips
- Some encouragement that God will do all the heavy lifting in life in this week’s Renovate Your Faith devotional at the end of this post.
Giving My Grandma’s Patio Table a Brand New Look
The great thing about metal patio furniture is that it can last a really long time. Don’t be fooled by a few rust spots. Painting metal is easy and your outdoor patio furniture can have a whole new look in no time.
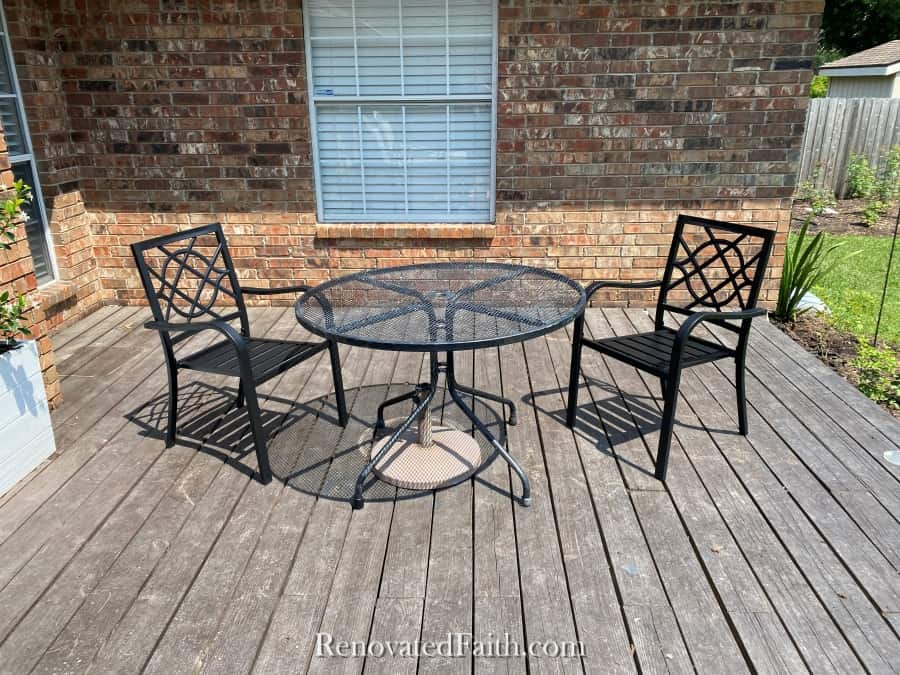
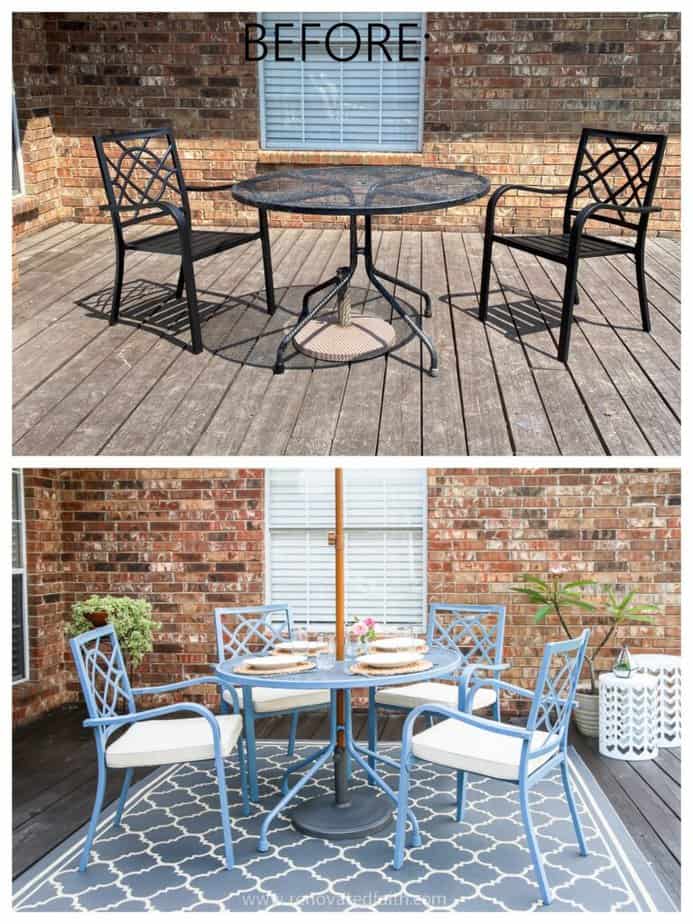
For this spray paint makeover that’s a part of my series on DIY patio furniture restoration, I’m painting the patio table that belonged to my grandmother. I remember her having it in her greenhouse when I was little.
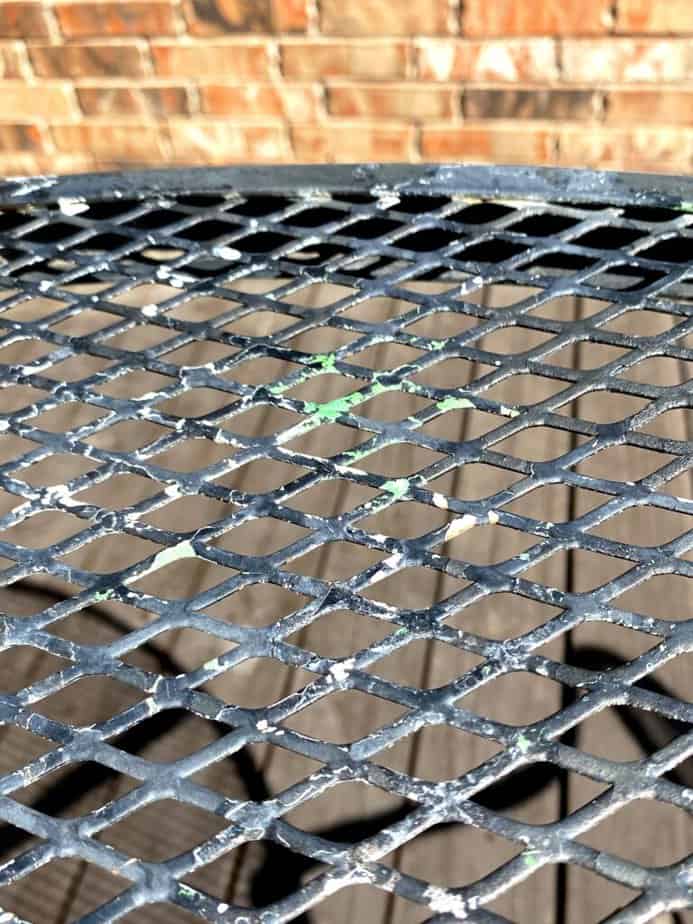
At the time, it was sage green and she would put various plants on it. Since then, it got a coat of black paint at some point. Needless to say, it’s been around a long time and I’m excited to give the entire piece a new coat of paint.
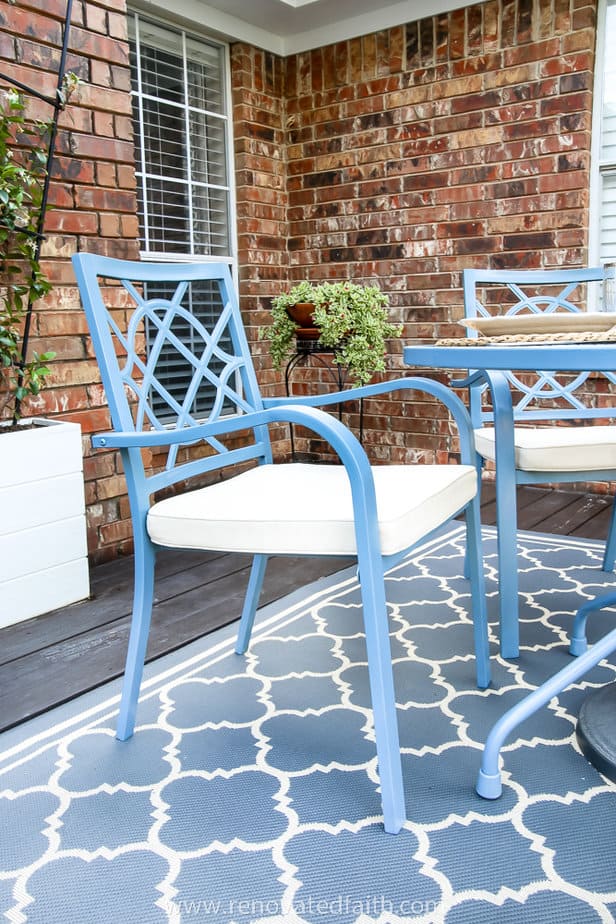
As for the chairs, I actually bought the four chairs for $140 for all 4 at Amazon and spray-painted them to match the table. So, if the chairs look like they are in good condition, that’s because they are brand new!
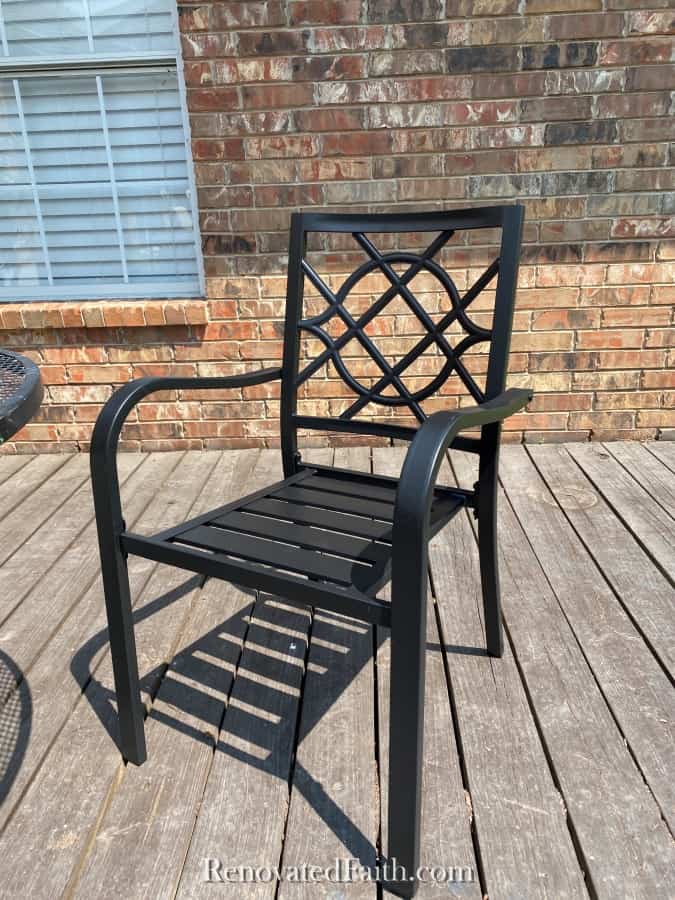
You can also find used chairs in good condition on Facebook Marketplace.
What Kind of Paint Do You Use On Patio Furniture?
One of the cheapest ways to paint outdoor projects is with spray paint. Not only is an oil-based paint durable enough to endure temperature changes, rain, and everyday wear and tear but it’s a great way to get a smooth factory finish on a budget.
For the price of a couple of bottles of spray paint, you can get a super durable finish that will adhere to metal, wood, and even plastic.
Can Patio Furniture Be Spray-Painted?
The best paint for outdoor metal furniture is spray paint because it’s fast, cheap, easy, and requires little paint. Spray paint is oil-based paint enamel that dries hard and smooth making it perfect for outdoor use. The other option is trying to paint with a paint brush and a can of oil-based paint which is messy and will show brush marks all over your paint job. You could also use a paint sprayer but that’s expensive and messy. The simplest method with the best results is using spray paint.
What is the Best Spray Paint for Aluminum Patio Furniture?
The type of spray paint you use will make or break your DIY project. When possible, I like to use Rustoleum Universal Metallics and I feel so confident in this paint that I don’t use a primer with it. However, I wanted a specific shade of blue so I used the next best thing: Rustoleum Ultra Cover Slate Blue in Satin and Rustoleum Universal Bonding Primer
🗹 You can see all their color options here: Rustoleum Universal (Metallic Colors) | Rustoleum Ultra Cover (Solid Colors)
What Spray Paint Finish Is Best?
Lately, the trend is to do matte or flat finishes and fortunately, Rustoleum has matte finishes for all of its solid colors of spray paint.
However, the shinier the sheen, the more durable your final finish. So, often times I compromise and use a satin finish. A satin finish is only slightly shinier than matte in order to get the most durable paint job possible without looking too glossy.
How I Picked My Spray Paint Color
For any spray paint makeover, make sure your color choice still works with your decor and doesn’t scream “hey, I spray painted this!” Apparently, I just can’t help myself when it comes to painting furniture pieces blue but for this patio furniture, I went with a Slate Blue because it has a lot of gray undertones.
With bright colors, seeing them in a small proportion might look great but when you get them on the entire surface of your outdoor dining table, they can get too bright for your space.
So, if you have a choice between two shades, go with the shade that isn’t as bright and maybe has some gray undertones. This tip has served me well in making sure my spray paint projects still look classy and fit with the rest of my patio decor.
Download Your Free Checklist of Spray Painting Tips & Tricks
☑️ Spray painting is easy as long as you know a few tips and tricks to get a perfect finish every time. To get my free checklist, click this link here: My Best Spray Painting Tips and Tricks
Quick Links to Information in this Post
- 1 How to Restore Metal Outdoor Furniture The Easy Way!
- 2 Giving My Grandma’s Patio Table a Brand New Look
- 3 Download Your Free Checklist of Spray Painting Tips & Tricks
- 4 Supplies Needed: How To Spray Paint Patio Furniture
- 5 How To Paint Metal Patio Furniture
- 6 Before and After: Spray Paint Furniture & Decor Makeovers
- 7 RENOVATE YOUR FAITH: The Best Way to Deal With Life’s Problems
- 8 FREE Spray Painting Tips and Tricks:
- 9 FAQs: How To Spray Paint Patio Furniture
- 10 More Posts Related to How to Paint Wrought Iron Patio Furniture
- 11 Final Thoughts ON How to Paint Metal Patio Furniture
- 12 How to Spray Paint Patio Furniture
Supplies Needed: How To Spray Paint Patio Furniture
I bought everything for this easy project online or you can also find it at your local hardware store.
MY FAVORITE PRODUCTS – FOR THE BEST BRANDS OF THE SUPPLIES BELOW, CLICK HERE:
Spray Paint
Spray Primer
Cleaner for Metal Furniture
Old Rag or Lint-Free Cloth
Stiff Wire Brush
Electric Sander
120 Grit Sandpaper Pads
Plastic Sheeting or Drop Cloth
New Leg Tips (Optional)
Dust Mask
Optional – Use Painter’s Tape or Masking Tape to mask off any areas that don’t need paint
PRO TIP: Use soup cans to elevate your piece of furniture off the ground. You can also use the tops of your spray paint cans.
MUST-HAVE Painting Tips & Tricks: The free printables are available in my resource library. Get access to it and all my other free printables, templates, and wall art by filling out the short form at the bottom of this post or click here: My Best Tips for Spray Painting Furniture
How Many Cans of Spray Paint for Patio Furniture Should I Buy?
For metal chairs or plastic chairs, I would allow at least one can of spray paint per chair. For an outdoor table, I would buy at least three cans of paint. You want to get more than you think you need, knowing you can always return any cans of paint you don’t use.
You only have around 30 – 60 minutes between each coat of paint and that is probably not enough time to make a quick trip to Home Depot. So have extra on hand and return the unused cans.
How To Paint Metal Patio Furniture
No matter if you are repainting a table and chairs, chaise lounges or metal garden art, the process is exactly the same. Check out this video to see every step of this DIY tutorial in detail. If you don’t see the video pop up, you can find it on my YouTube Channel here: How to Spray Paint Patio Furniture, YouTube Video.
Step 1: How to Clean Outdoor Patio Furniture
First, spray your patio furniture with Krud Krutter. Do this in an outdoor space so you have plenty of ventilation. Let it sit a few minutes between wiping it down with a rag and warm water.
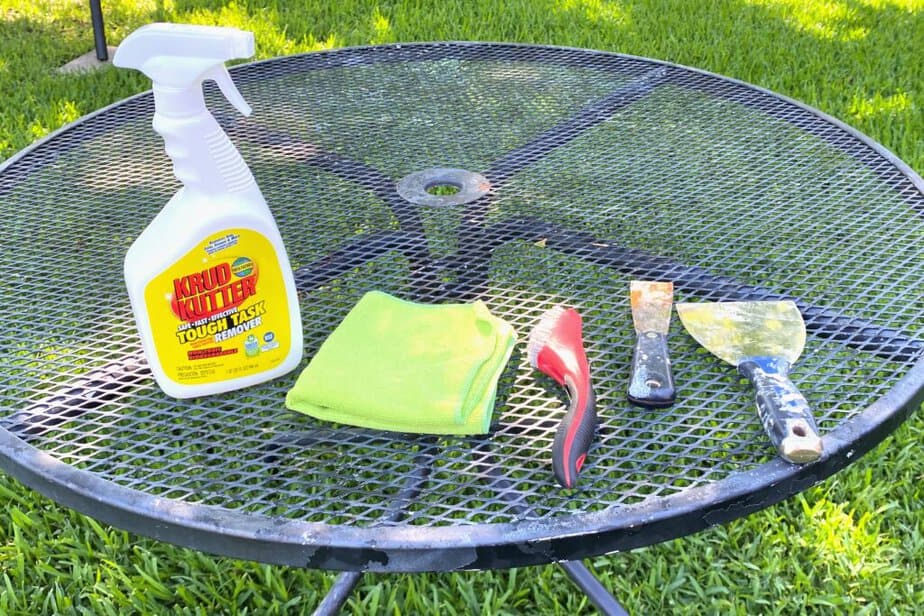
The Krud Kutter removes any grease or dirt that will prevent the paint from sticking. I was amazed to see how much dirt and possibly mold came off of my patio table.
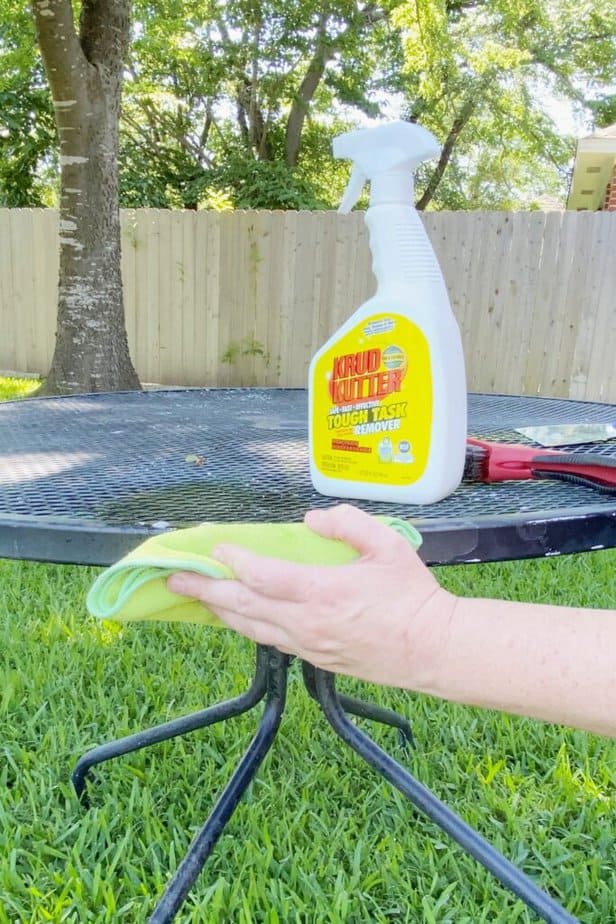
I’ve always been tempted to skip this step but you can see how much dirt and possibly mold came off my rag after wiping the table down.
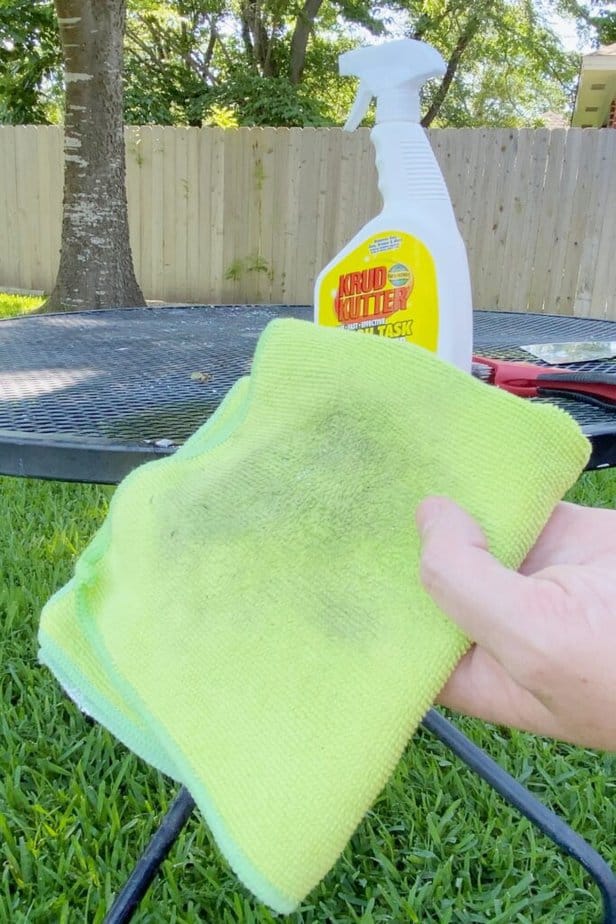
Removing all the dirt and crime will help to ensure that the spray paint adheres well to the metal table.
Renovated Faith: What’s In A Name?
Step 2: The Easiest Way to Sand Patio Furniture Before Painting
The next step is to remove any loose chipping paint as I show in the video. Any old paint that is actively peeling needs to be removed first or the addition of spray paint will just make it peel more.
The easiest way to do this is with an electric sander with a low-grit sanding pad to smooth out any rough areas. Use a lower grit sanding pad like 60 to 100.
Sanding your furniture piece will rough up the surface so the spray paint sticks and ensure that you get a super smooth finish so your furniture has a fresh look.
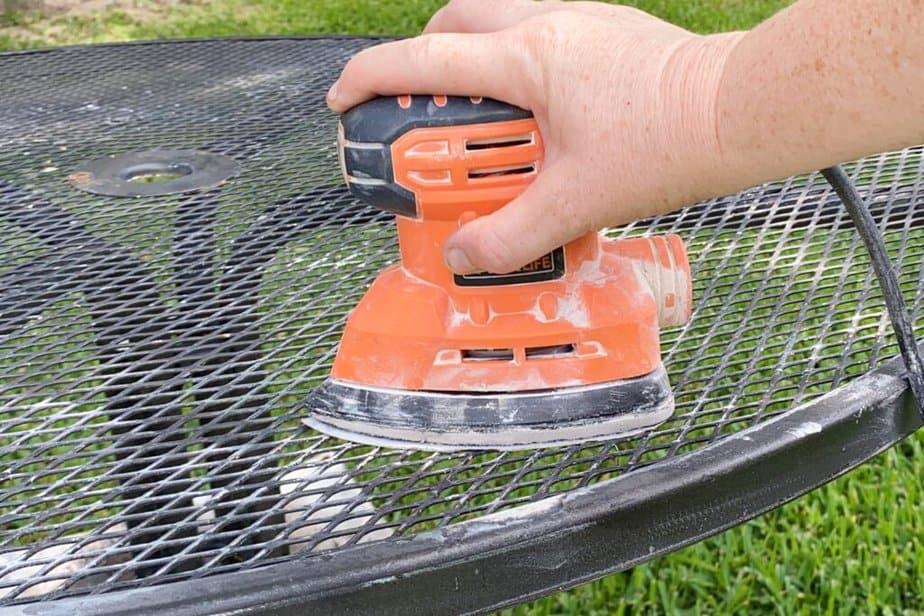
You can see how I sand in the video and pay special attention to the rough areas.
If you don’t have an electric sander, you can use a wire brush. Brush the surface of the metal patio furniture in circular motions. This will achieve the same as the electric sander but takes a little elbow grease.
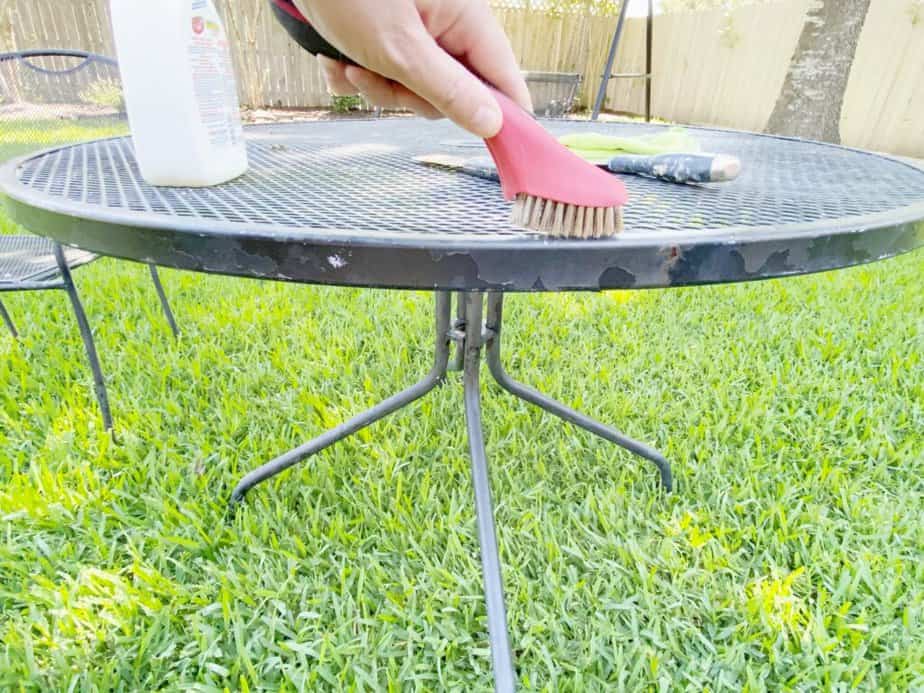
The wire brush is also great for reaching in crevices or curved areas the electric sander can’t reach. A putty knife also works well in scraping off large pieces of loose paint.
You know you are done with this step when there are not actively peeling areas of paint that could fall off easily.
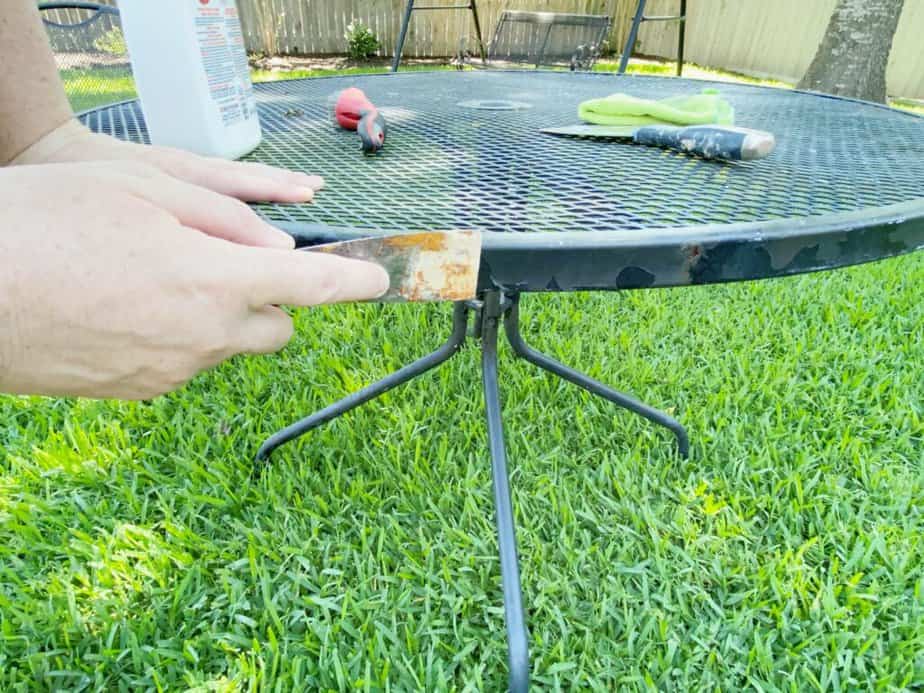
When you are finished sanding and scraping, wipe down your furniture with a wet rag to move any residual sanding dust. If you are painting bare metal or don’t have much rust, you can spray off the dust with a garden hose before letting it fully dry in the sun.
RELATED: How to Use An Electric Sander for Beginners | The Best Electric Sander for Refinishing Furniture
Step 3: Prep Your Paint Area Before Priming/Painting Patio Furniture
Set up in a well-ventilated area like a backyard. If you are spray painting in warm weather, be sure to set up under a large tree to get some shade so your paint doesn’t dry too fast.
Now, cover your work area with a drop cloth or old sheet unless you are painting in the grass and know you will be mowing soon. (Once, I got red spray paint on a section of our grass when I was painting a project in late fall that year. Unfortunately, it looked like we had a crime scene on our lawn until it was time to mow again in the spring!)
I like to prop up pieces I paint with something heavy under each leg. Cans of soup work great for this to get furniture up off the ground so you can get coverage on the legs.
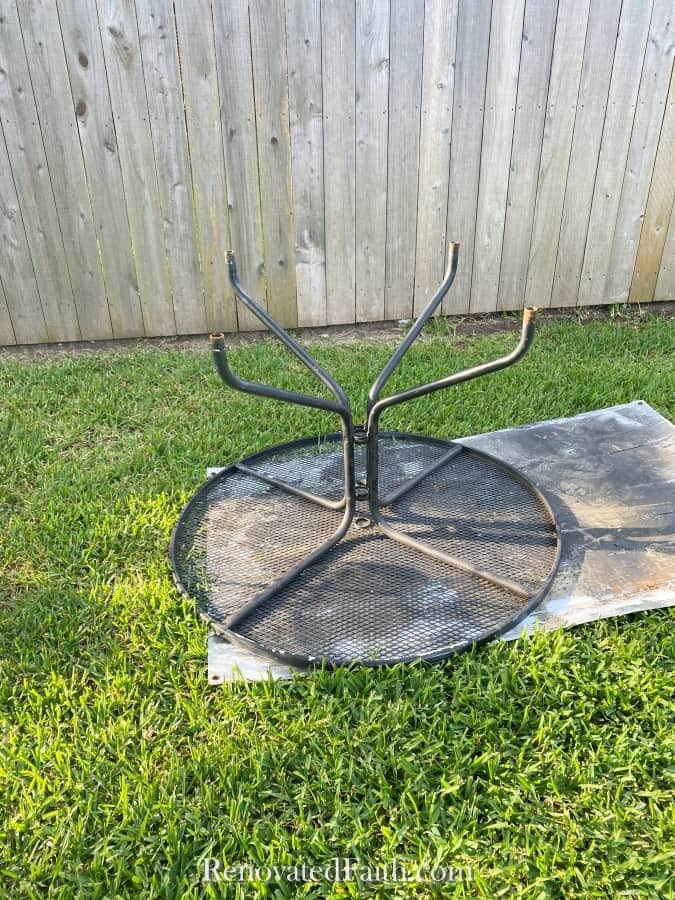
Always spray paint the bottom of your furniture piece first. So flip it so the bottom is facing up. By spraying the bottom first, you avoid messing up the top surface when you flip it over. If you get some fingerprints on paint that is still a little tacky, it will be on the bottom and no one will see this anyway.
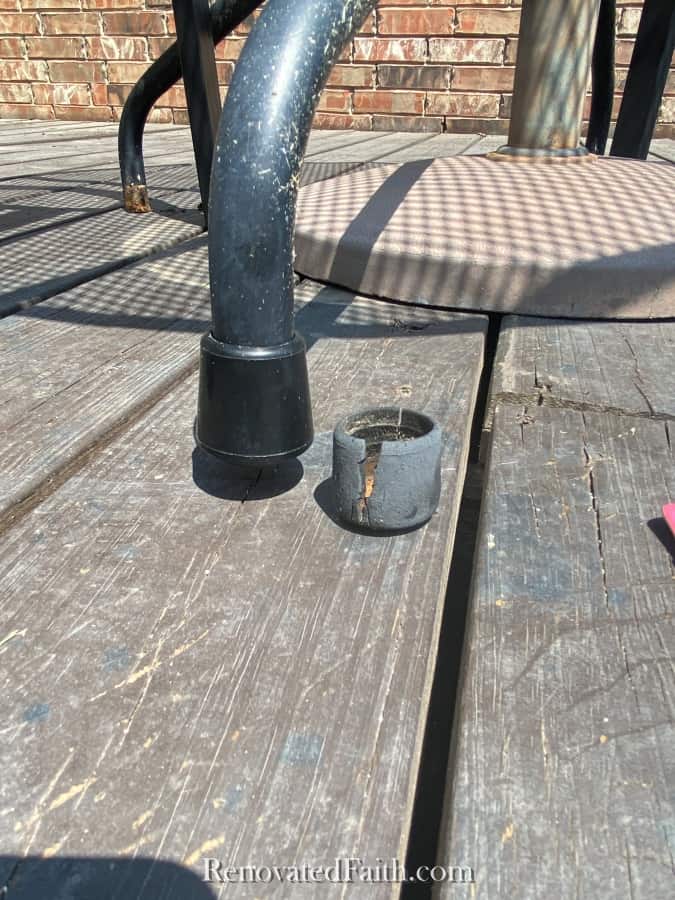
Now is a great time to replace any of the rubber end caps on your furniture. As you can see, the old leg tips on my old table were cracked and brittle so I replaced them with new ones.
Step 4: How to Prime Patio Furniture Before Painting (Optional)
Because this table is in really rough shape, I’m opting to use a good primer.
TIME-SAVING TIP: If you use Rustoleum Universal Metallics, you can get away with not using a primer. But that line of paint didn’t have the color I wanted – Slate Blue.
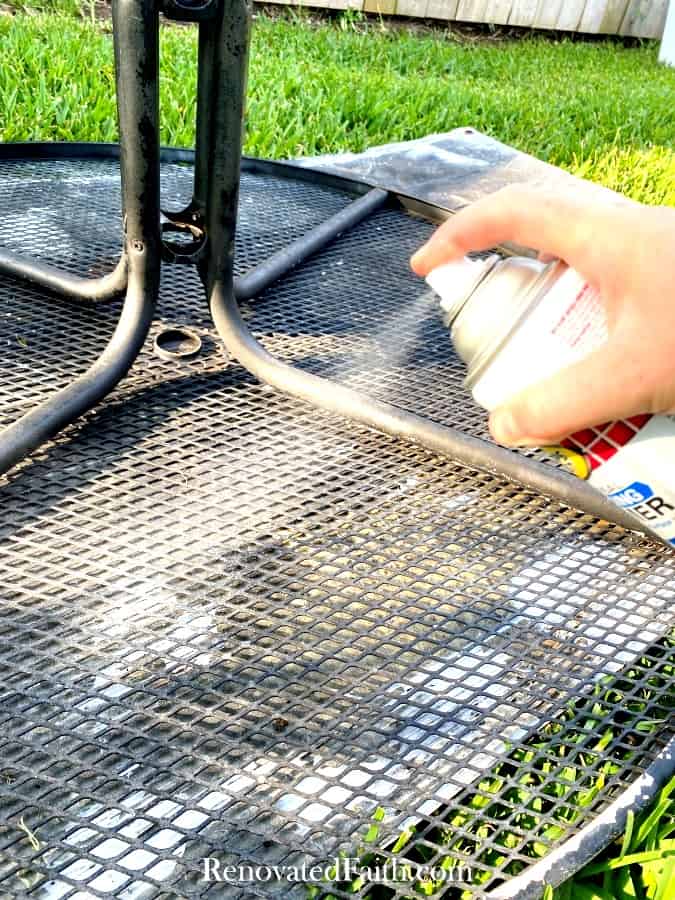
One can of primer is enough for a metal table. Just shake the can and spray a light coat over the whole table. It’s fine if you don’t get complete solid coverage with the primer. Shake the can well and spray a light coat all over the surface of your patio furniture.
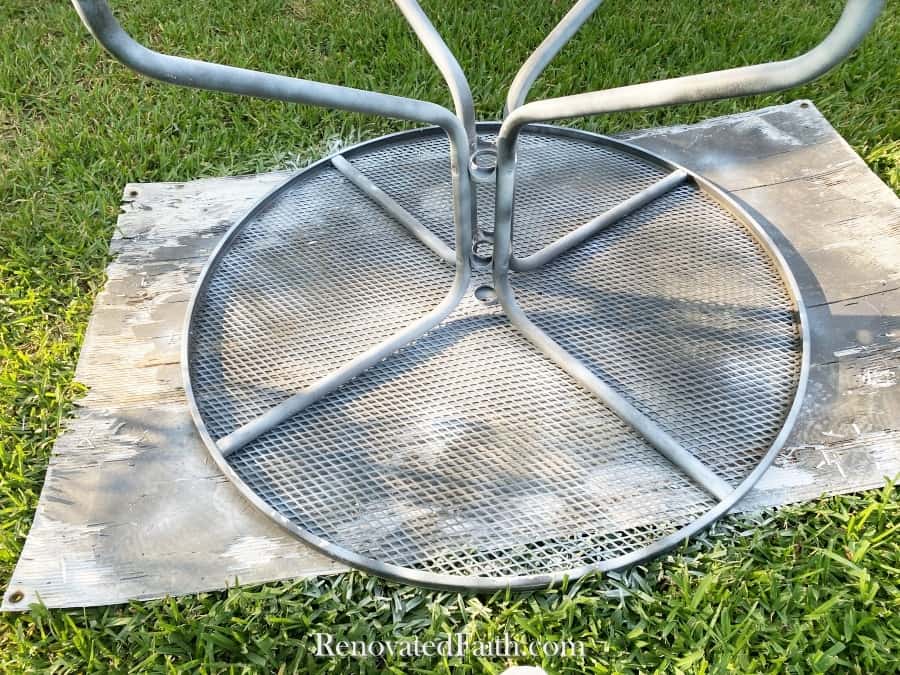
Prime the bottom, wait a few minutes and then flip your furniture upright to primer the top.
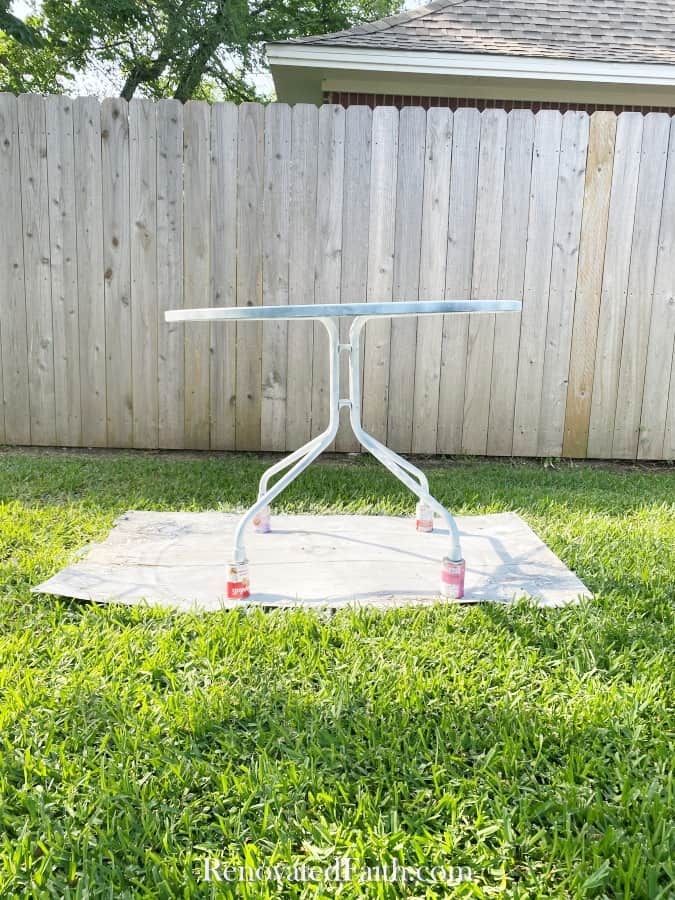
Let the primer dry for about 30 minutes before flipping over the first piece again to spray the bottom surface
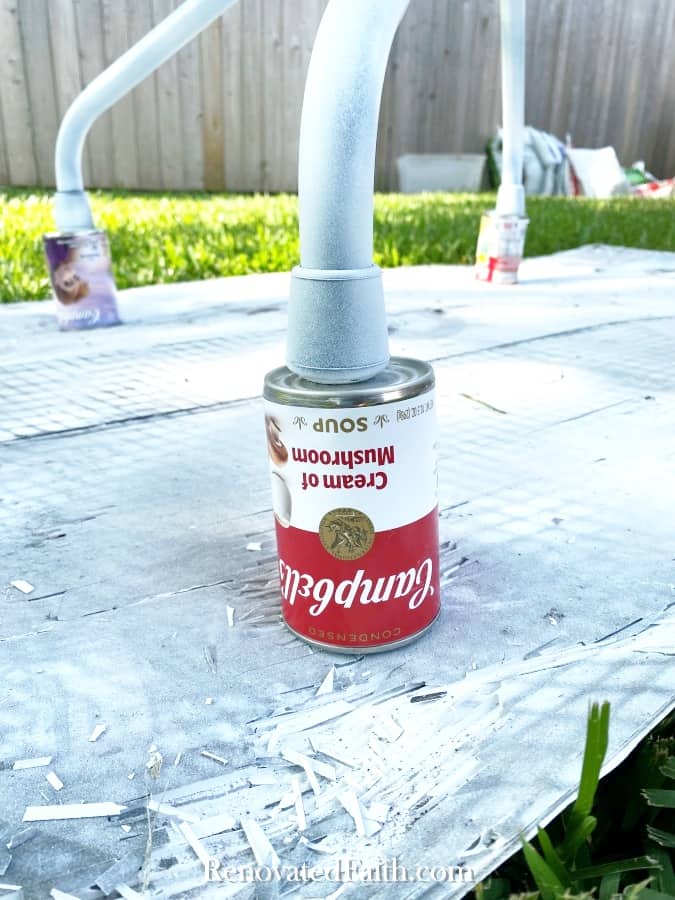
I like to prop up furniture painting projects on upside-down soup cans. This gets the table off the ground a little so I can get full coverage on the legs.
Step 4: How to Spray Paint Patio Furniture Without Drips
Shake the can for at least a minute before your first coat and wear disposable gloves. LIGHTLY spray on the first coat of the BOTTOM of the furniture piece. I like to wait about 15 – 30 minutes until I spray on the second coat.
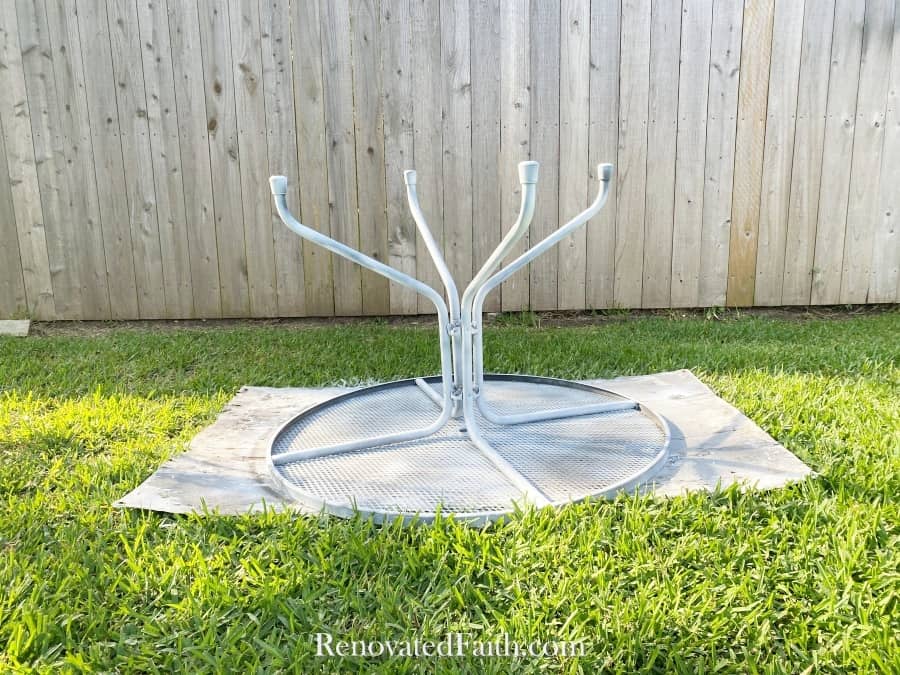
PRO TIP: The secret to a smooth, drip-free finish with spray painting is to apply several super-light coats of paint 15-30 minutes apart. You will be tempted to get full coverage on the first coat but don’t do it because that’s a sure-fire recipe for drips. Several light coats will make all the difference in making sure you have a professional finish. For my spray painting tips, click here: Must-Have Spray Painting Tips and Tricks
Keep spraying light coats until you get full coverage on the bottom parts of your furniture piece.
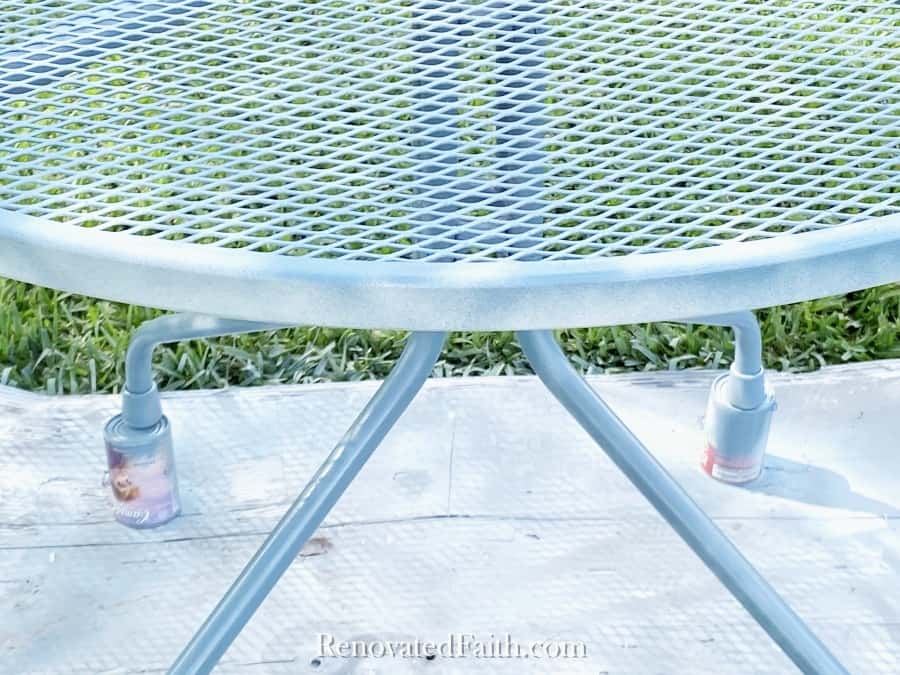
IMPORTANT NOTE: Each coat needs to be within a one-hour window of one another. I usually do 15-30 minutes. For example, if you wait to spray paint coat 2 more than an hour after coat 1, it will not adhere well until 48 hours. This has to do with the fact that you can still make a chemical bond to the spray paint with another coat within an hour.
After 48 hours, it’s a physical bond. That’s why all spray paint says you have to recoat within one hour or after 48 hours. I like to set a timer so I don’t forget to spray on the next coat within the one-hour window.
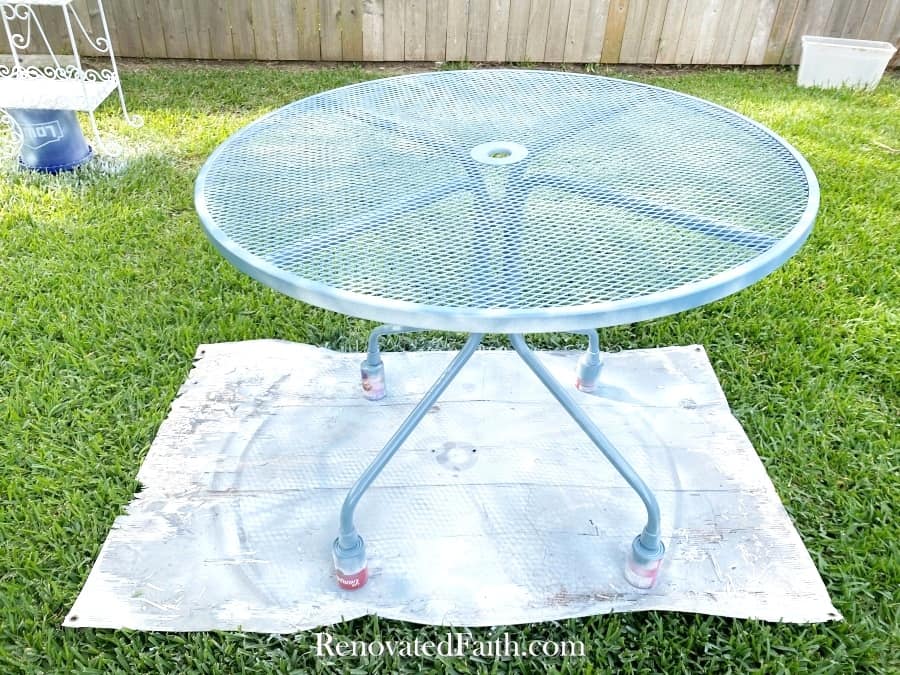
Do as many light coats as you need to at 15-30 minutes apart until you get full coverage with your new color and there are no blotchy areas where you see the primer color coming through.
If the above doesn’t make sense, here’s a run-down of the process:
- Light Coat 1 on bottom
- Wait 30 minutes
- Light Coat 2 on Bottom
- Wait 30 minutes
- Light Coat 3 on Bottom
- Wait 30 Minutes
- Flip it upright
- Light Coat 1 on Top
- Wait 30 Minutes
- Light Coat 2 on Top
- Wait 30 MInutes
- Light Coat 3
The number of coats will vary depending on what color you use, but that’s the general idea if you want to get a professional finish with anything you spray paint.
How To Fix Spray Paint Drips on Patio Furniture
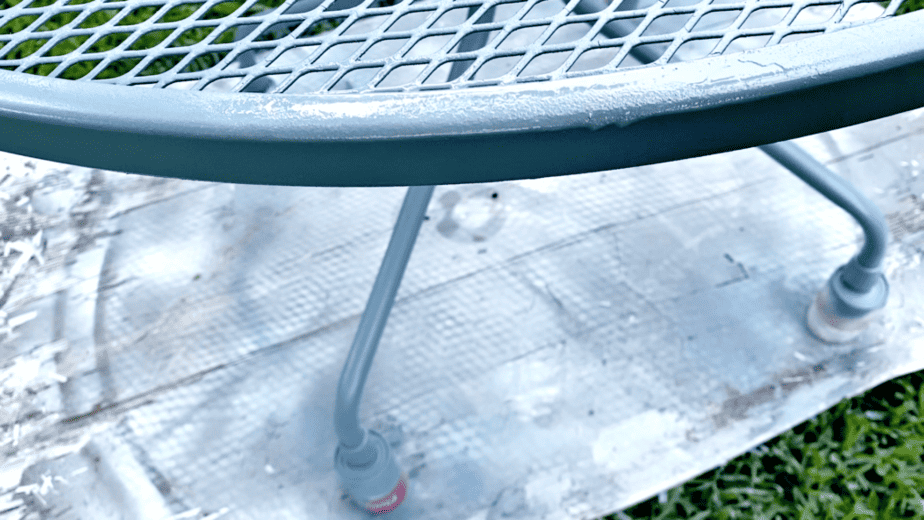
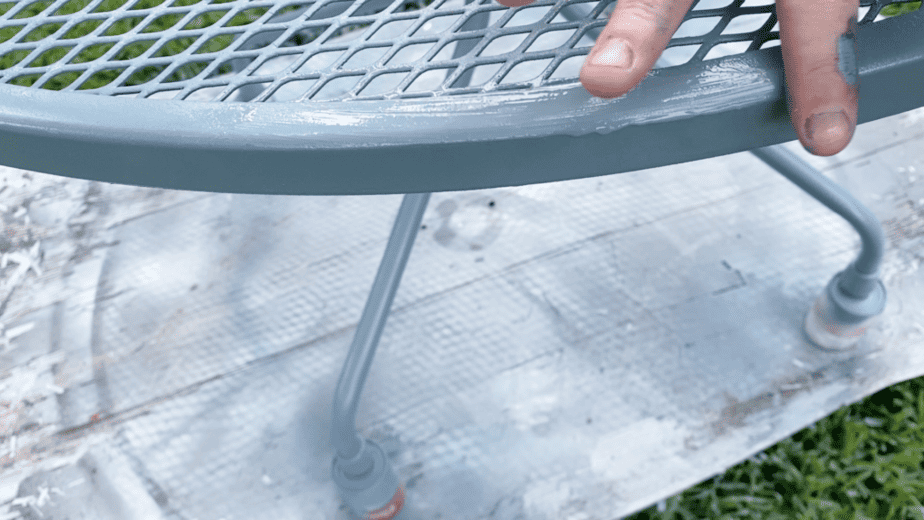
Pay particular attention if you see any small bubbles on the surface as you spray paint. If you spray on too much paint in an area, you might get what appear to be little bubbles which will soon turn into a drip. If you see the little bubbles like in the photo below, take your gloved hand (unlike I did) and immediately swipe off the extra paint with your finger. Then throw away the glove. Let it dry like that and you will spray it again on the next regular spray coat 15-30 minutes later.
When you have full coverage on the whole metal furniture piece, wait 30 minutes after the final coat to flip your furniture piece over so the top is facing up.
Now, repeat the above simple steps of spraying light coats and waiting about 15-30 minutes in between each. Do this until you get full coverage on the top of the furniture piece.
You can check for drips immediately after spray painting the piece but if you see a drip say 40 minutes after painting, do not touch it. Ask me how I know! At that point, touching it will only make it look so much worse. And it’s better to have a little drip than a blotchy mess.
Your furniture will be dry to the touch in a couple of hours but I like to wait 48 hours until it is completely cured before actually using it.
Step 6: Add New Cushions
Part of giving your patio set a good fresh is buying new cushions. I found some 18 x 18 cushions that worked perfectly here.
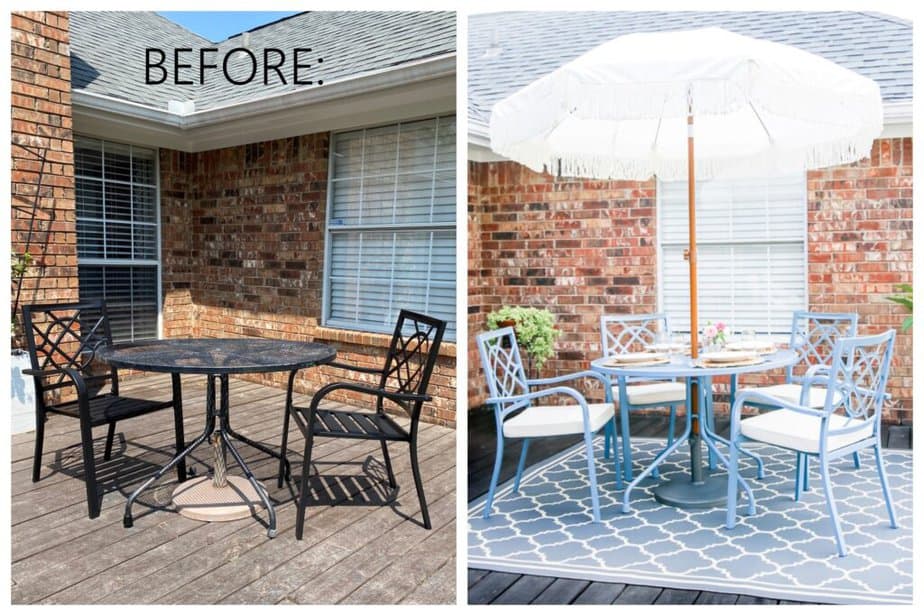
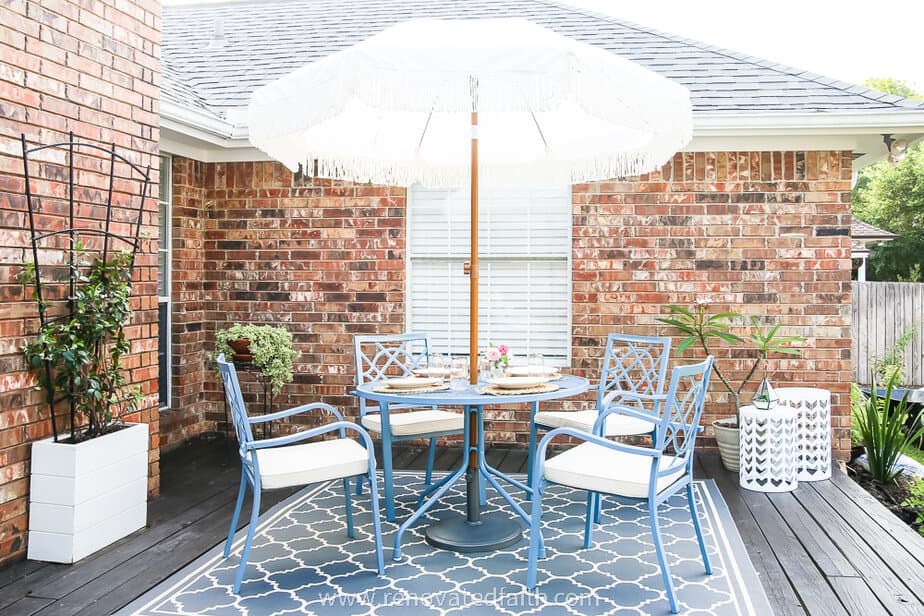
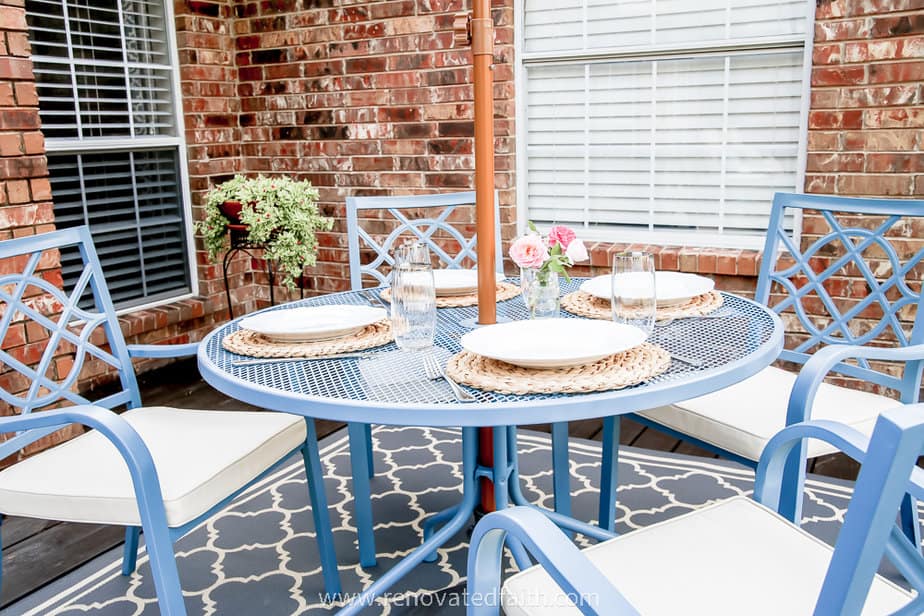
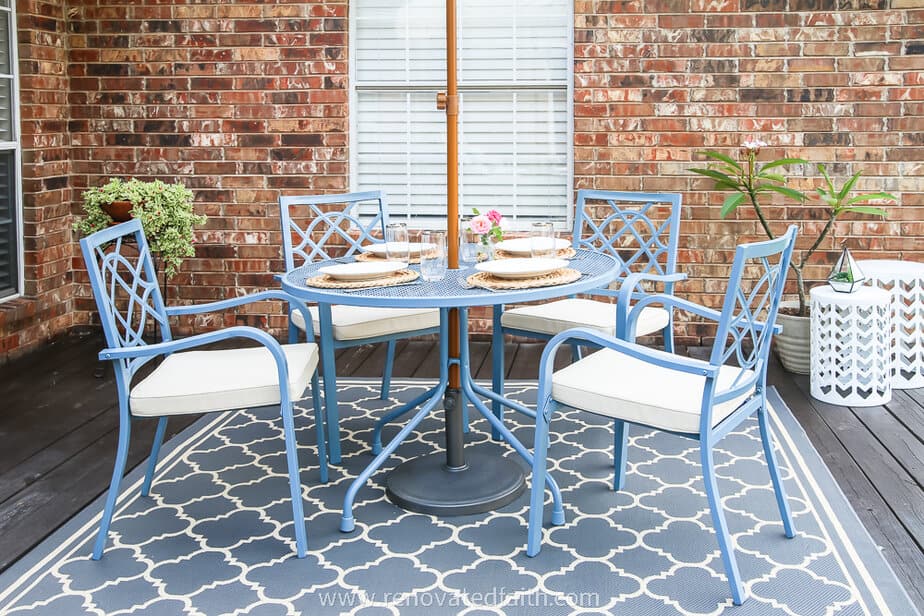
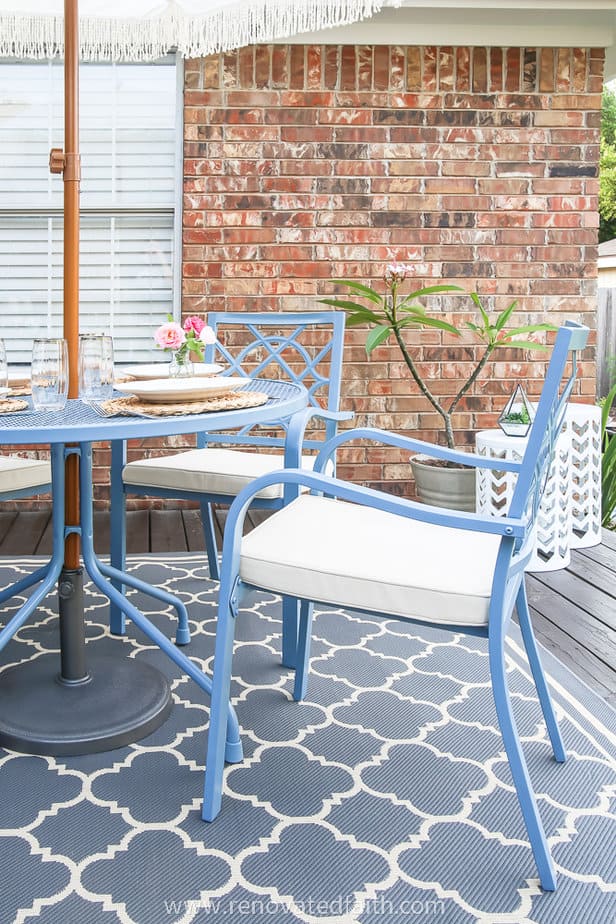
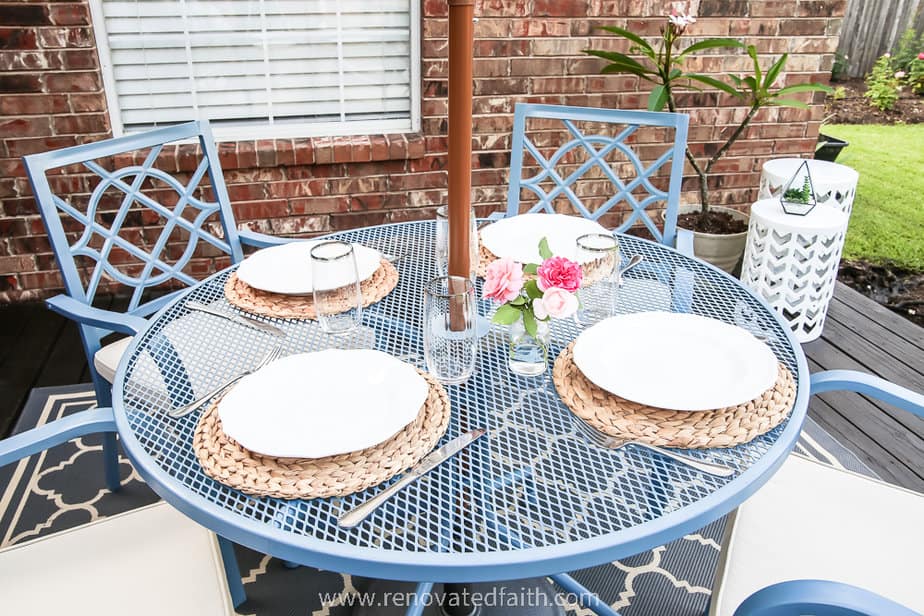
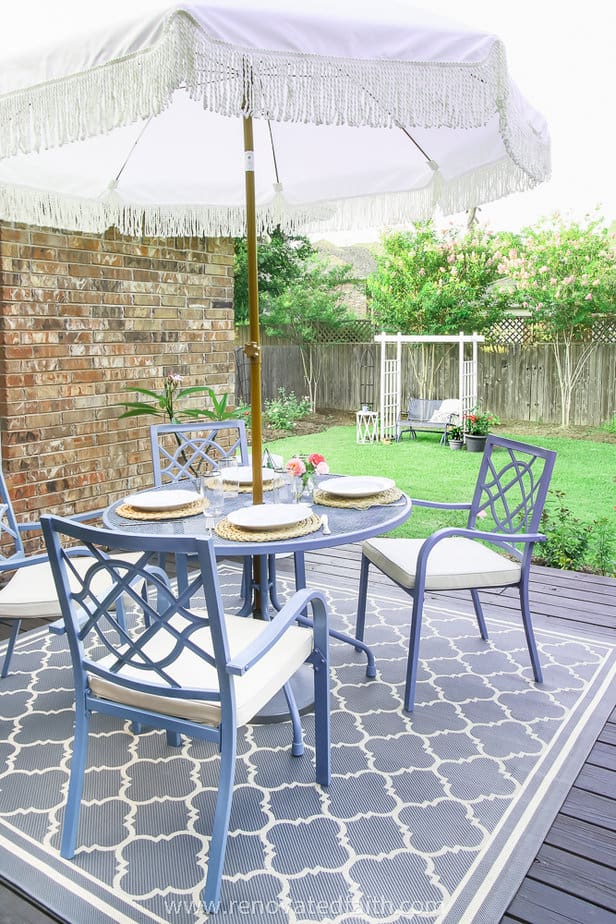
It amazes me how much the newly painted patio set brightens up my porch!
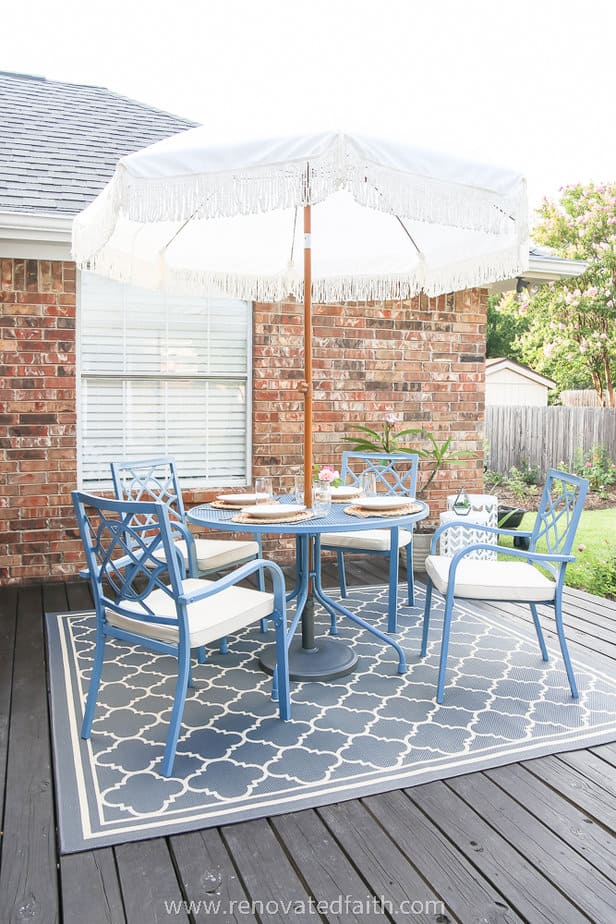
I’m so pleased with how this turned out! I just can’t help myself from painting things blue!
How to Spray Paint Patio Furniture: Source List
I added some accessories in white and gray to detract from my orange brick color.

Before and After: Spray Paint Furniture & Decor Makeovers
Here are more outdoor projects that I have restored with spray paint:
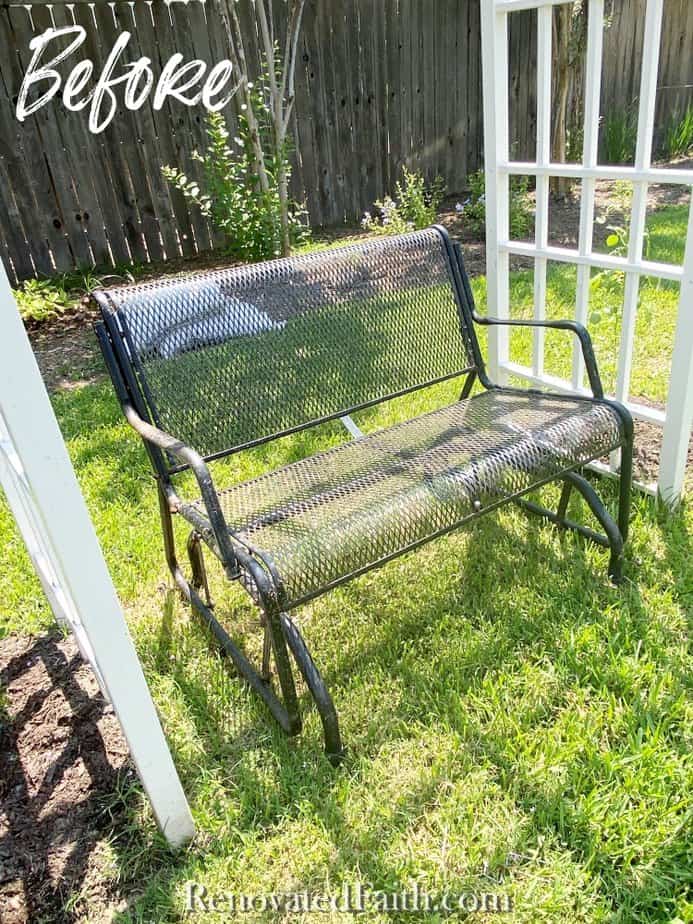
How to Paint Wrought Iron Furniture (Glider Reveal) – CLICK HERE
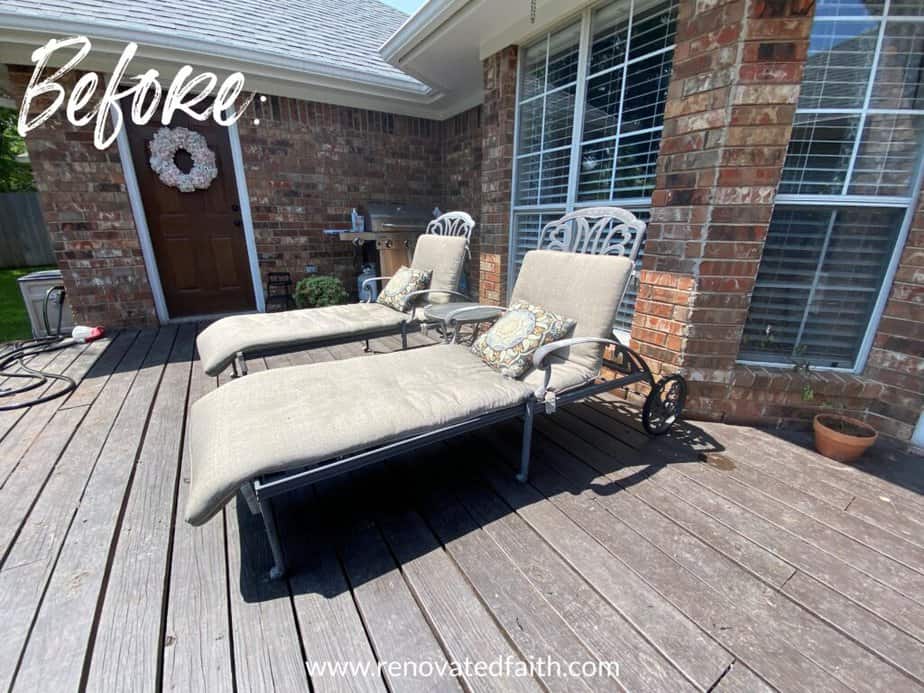
How to Restore Metal Outdoor Furniture (Chaise Lounge Reveal) – CLICK HERE
RENOVATE YOUR FAITH: The Best Way to Deal With Life’s Problems
Not only do I like DIY home projects, but I also have a tendency to try to DIY every other part of my life as well. As an American, we are taught to pull ourselves up by our bootstraps and make something of ourselves. We are encouraged to be independent so when I have a problem, I feel like it’s MY job and mine alone to solve it efficiently and effectively.
Fortunately, God knows better than to let us do the heavy lifting. He knows that if we had ANY control over our lives we would be sure to irrevocably screw them up.
God’s ways are so much different than ours and He calls us to be more like Him but not without His help. We are designed to rely on Him for our every need because He knows what we need more than we do AND He knows the best way to provide for His children.
So often, when I’m confronted with a problem, I self-analyze and figure out how to change myself for the better to best conform to God’s Will. I have found out the hard way that this is a frustrating and exasperating path.
When we find ourselves not measuring up, our most effective strategy for change is to surrender the problem over to God. Yes, we have to be submissive to God’s leading and obedient, but the ultimate work is His.
So often, I have found myself trying to fix things about myself and my life that only God can fix. When I try to take His matters into my own hands, I overanalyze and can’t enjoy the peace of surrendering the problems that rightfully belong to Him anyway.
For example, I’m a habitual overplanner. But when I plan so much that I feel the need to have total control, I forget to enjoy the process and let him be in charge of the results. And when my mind is fixated on problems that aren’t mine to solve, I can’t enjoy God’s peace. (Job 22:21)
But the first step in overcoming this problem is to ask for God’s help. If I try to do things on my own, I’m sure to fall on my face. But when I surrender my problem to God, not only will I be successful but in the best method and timing possible.
As His children, God wants us to lay our problems before Him, because they were never ours to solve in the first place.
No matter what you are facing, know that no problem is too big for the Lord and He wants you to hand it over to Him instead of going the DIY route.
“Come to me, all you who are weary and burdened, and I will give you rest. Take my yoke upon you and learn from me, for I am gentle and humble in heart, and you will find rest for your souls. For my yoke is easy and my burden is light.” Matthew 11:28-30
For understanding how to hand your problems over to Him, check out this post: Why You Struggle to Rest
For more spiritual encouragement, click here for the rest of my project posts that also include Renovate Your Faith devotionals.
FREE Spray Painting Tips and Tricks:
Here’s where you can get my tried-and-true tricks for getting the best finish possible when spray painting ANYTHING! Get the password for the free printable library that includes free wall art, helpful checklists, and templates by filling out this form:
FAQs: How To Spray Paint Patio Furniture
How To Spray Paint Outdoor Wood Furniture
If you are wondering how to spray paint outdoor wood furniture, use the exact same spray painting process above. You can use a putty knife to remove any actively peeling paint in addition to an electric sander or wire brush. You can also use this same process on wicker furniture and plastic outdoor furniture. Just make sure the spray paint is rated for plastic furniture.
What is the Best Spray Paint for Outdoor Furniture Cushions?
If you are wanting to spray paint your outdoor furniture cushions, stick with a paint like this one for the best results: Rustoleum Outdoor Fabric Paint
How Do You Spray Paint Outdoor Furniture with Glass?
When spray painting outdoor furniture with glass, you want to remove the glass top beforehand and store it in a safe place. Be sure to get someone to help you because glass tabletops can be heavy. Let the spray paint dry for at least 48 hours before replacing the glass.
If you can’t remove the glass, tape it off or cover it with cardboard or poster board. Spray paint will go through plastic bags. If you do want to paint the glass, be sure to check out this post: The Easiest Way to Spray Paint Glass
What Are The Best Outdoor Furniture Paint Colors?
There are several color options for outdoor furniture. For metal furniture, you can’t go wrong with oil-rubbed bronze, farmhouse black (matte black), or a gunmetal gray. These are all dark neutrals that wear well over time. Lighter colors show dirt easily. You can always do accent colors like navy or a brighter blue to freshen up the look of your yard.
More Posts Related to How to Paint Wrought Iron Patio Furniture
Best Spray Painting Tips and Tricks
How to Spray Paint Mason Jars Easily
The Best Spray Paint for Glass
Easy Light Fixture Makeovers on A Budget
Hummingbird Feeder From An Old Chandelier
Tips for Painting Furniture with White Paint
How to Refinish Door Knobs So They Last
Final Thoughts ON How to Paint Metal Patio Furniture
Whether you are painting aluminum garden furniture or a glider for your front porch, these simple steps will go a long way in ensuring your old furniture looks brand new. Spray paint not only gives patio furniture a smooth finish but ensures it is rust-free and durable for years to come. This easy tutorial will give your outdated furniture a new look with just the price of a couple of cans of spray paint.
I love to hear your thoughts and questions! Scroll down to leave a comment and I WILL reply! ❤️
Blessings,

Be sure to follow the fun here!
Email Subscription | Instagram | Pinterest | Facebook | Twitter
How to Spray Paint Patio Furniture, YouTube Video
How to Spray Paint Patio Furniture

Karin Peters is a DIY expert and the creator of Renovated Faith. She is a furniture painter, a home design consultant, and a tenacious problem solver determined to help you transform your house into a home. With 17 years of experience with DIY home improvement, she researches and analyses professional processes to adapt them to be easy and cost-effective for DIYers. She then tests every project and product before it appears on the site in a detailed, step-by-step format. After attending Texas A&M University, she received her Master of Divinity with Biblical Languages at Southwestern Baptist Theology Seminary. Her passions unite in Renovated Faith, which shows readers how to create a home that serves them so they can pursue their God-given purposes. About Renovated Faith | Editorial Policy | Facebook | Twitter | LinkedIn


You make it sound do-able.
Thank uou
It absolutely is! Spray paint is the closest thing we have to a DIY magic wand. Have fun!
Love your table and chairs!! I have my mom’s table set and it’s at least 50 years old now. I wish I had your instructions a month ago because that’s when I painted it. I used rustoleum metallic paint in a matt finish and also primed but used a regular quart can of primer my husband bought that was for metal that had a lot of rust issues. ( table wasn’t rusty). I never heard of the spray paint rule about recoating in 30 minutes. I waited a few hours and now I’m worried. Will it all peel off and when? One more thing, it was extremely hot and sunny when I painted. Will this hurt the finish too?
Thanks,
Mary
It SHOULD be ok. If it’s going to peel you will know within 48 hours. Thanks Mary!
Hi Karen
Thank you so much for this blog. I just recently purchased two lite metal chairs with thick cushions that rock for $30. They are black with a little rust on them. I want to paint them a different color and now I have detailed instructions. I was just gonna spray paint them. Loveangel94
Hi Karin,
I haven’t yet tried any of your projects but now I where to get all the info I need to get started.
Thank you for the devotionals as well. I feel more connected and encouraged when Iread them.
AJ, Thank you so much for taking the time to write your encouraging comment. Let me know if I can ever be of any help!
Just love your new outside furniture look! Thanks so much for sharing and especially all the tips about replacing items as well. Best of all, the reminder that God is in control!
Thank you so much for your kind words. I’m so glad you found it helpful!
I like to keep any unused spray cans for 2 reasons. 1) I have some on hand for touch ups. 2) If it’s time to repaint everything, which happens every 1-2 years, and I want to keep the same colors, I have a reference. Even though Sunshine yellow, Ginger yellow, and Lemon yellow are close, they aren’t the same…. I learned my lesson!
Tess, YES! I’m so glad you mentioned this. It’s so nice to have those cans on hand for reference and touch ups that inevitably are needed when life happens. I have a feeling we’d have a pretty impressive spray paint can collection between the two of us! 🙂 Thanks for your helpful comment Tess!
Thank you for the great tutorial. I am having computer issues so my screen kept jumping. I was wondering on the new shiny chairs, did you sand them, prime them or just use the spray paint on the am as they were? Did you use the enamel paint? I have the enamel before and even thought I cleaned the piece well it crackled in several places. I appreciate your thoughts. Blessings, Rhonda
I was in a hurry and just painted it but in retrospect I probably should have very lightly sanded and primed. I have no problems with peeling and they have been painted and in the hot sun for a few months. Hope this helps Rhonda!