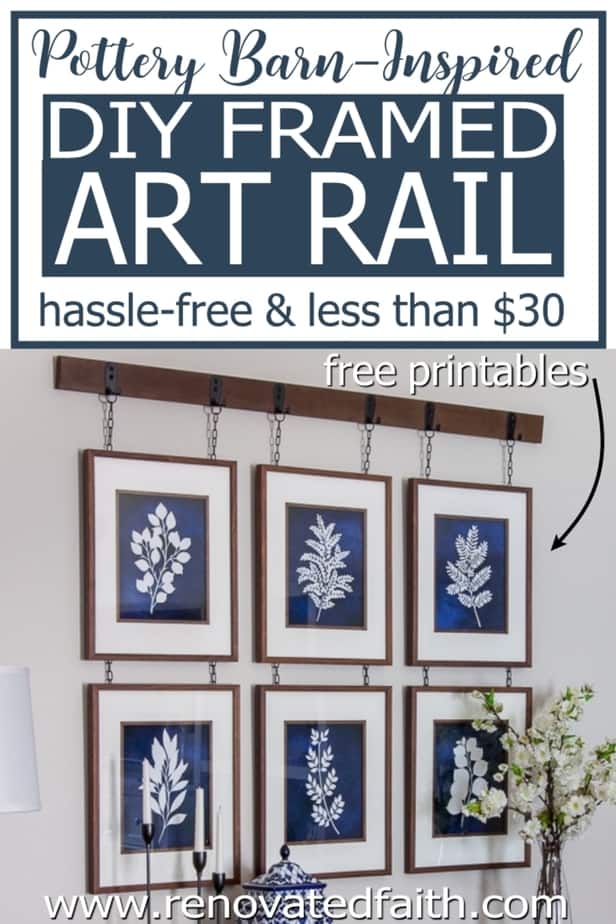
EASY Framed Art Rail Hack (The Hassle-Free Method)

The Best Picture Hanging System on a Budget
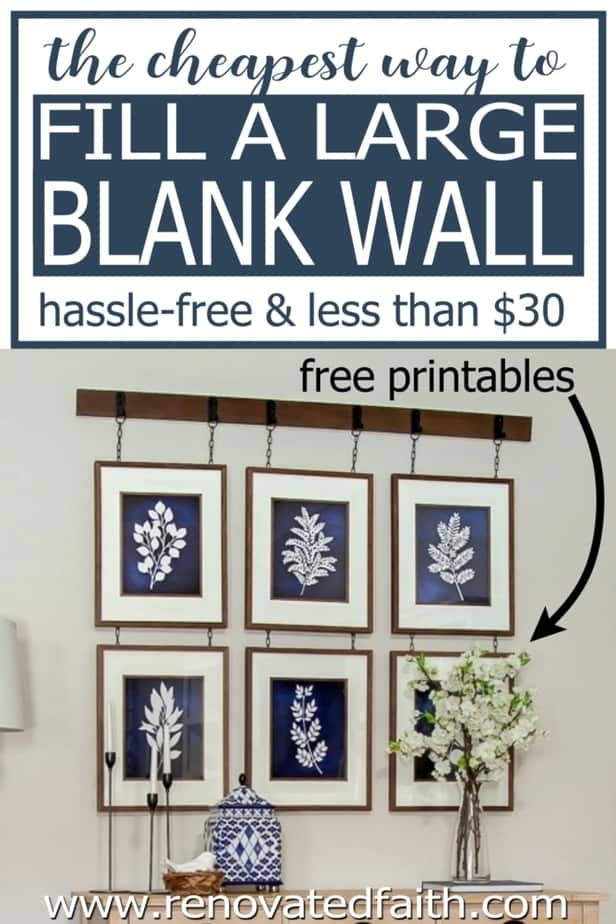
With this DIY picture hanging rail system, you can add a more cohesive look to any wall art in your home at a fraction of the price of picture rails online.
This DIY picture hanging rail is not only budget-friendly but is so much easier to hang! The Pottery Barn version costs $200-300 depending on how many rail segments you, buy but this DIY version is less than $30.
My DIY rail system can be used with any picture frame. Because the last thing you want is to spend a lot on the rail system online and then realize you have to spend even more on special picture frames.
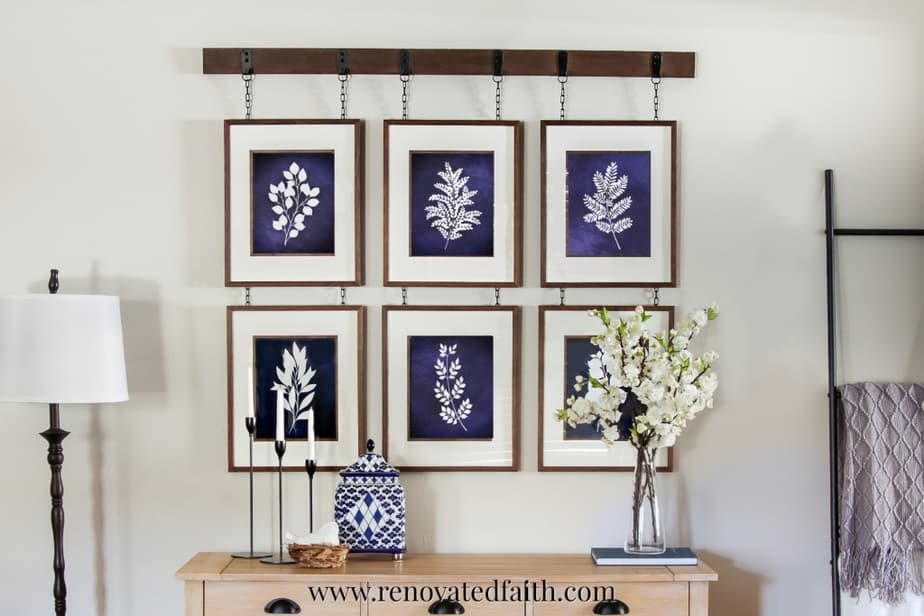
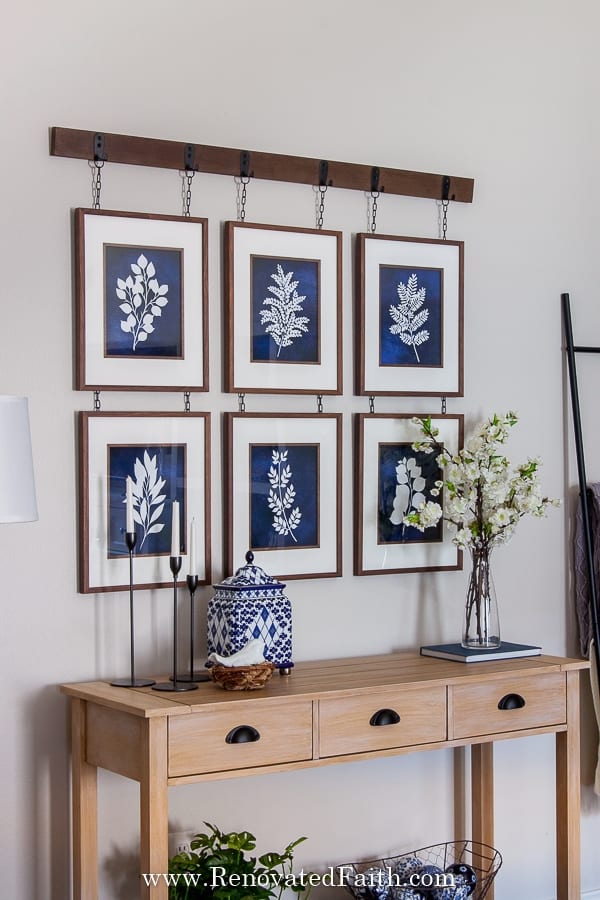
Also, I show you the fastest way to hang these so they are also perfectly straight and even. This system looks like the frames are hanging from chains but they are really hanging from the wall. (At the end of this post, I give additional instructions on how to actually hang them from the chains if you like that option better).
Once the rail system is in place, the next step is choosing artwork that complements the clean, gallery-style presentation. Printable art has become a practical option for anyone who wants the flexibility to refresh a space without replacing frames or hardware, especially when paired with a reliable printing service that preserves fine detail and color depth.
Many homeowners turn to https://artelo.io when looking for designs that translate beautifully from digital download to high-quality wall display, making it easy to create a polished arrangement that feels intentional and professionally styled. With the right print quality, the finished result brings warmth, personality, and balance to the room while making the most of the perfectly aligned hanging system.
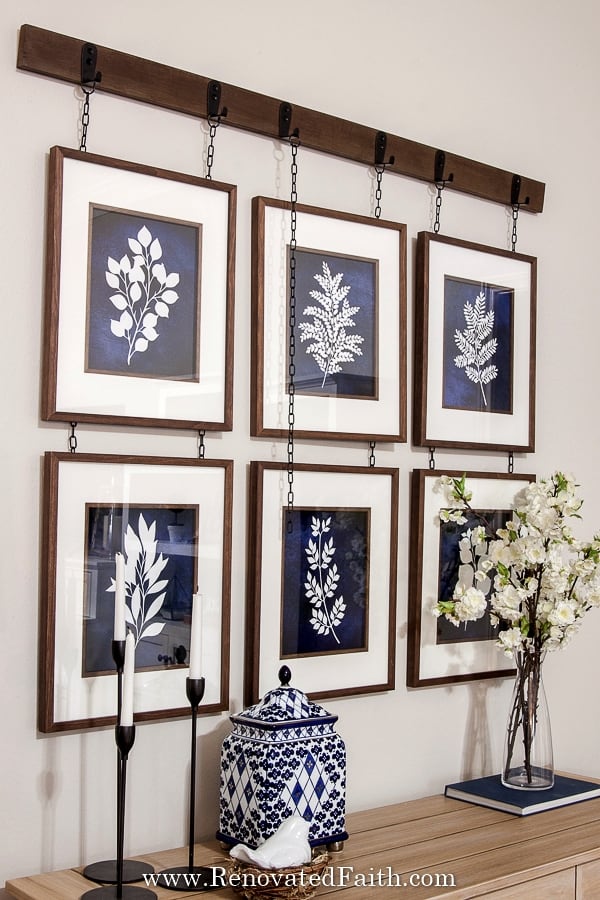
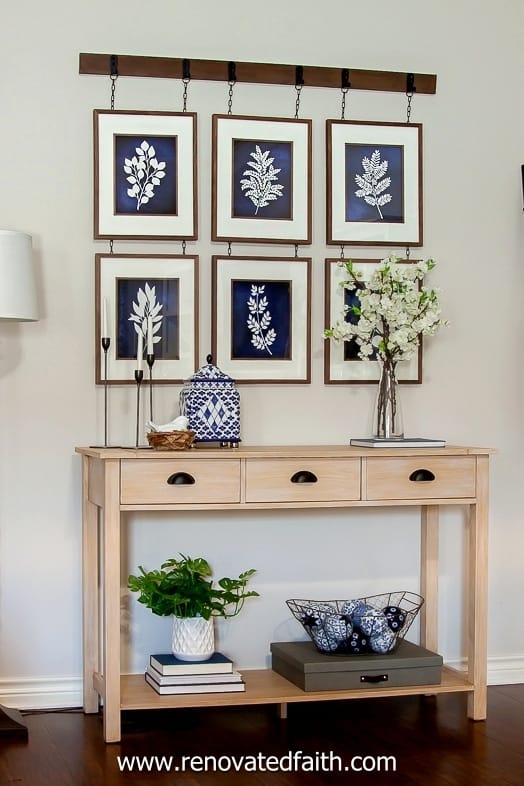
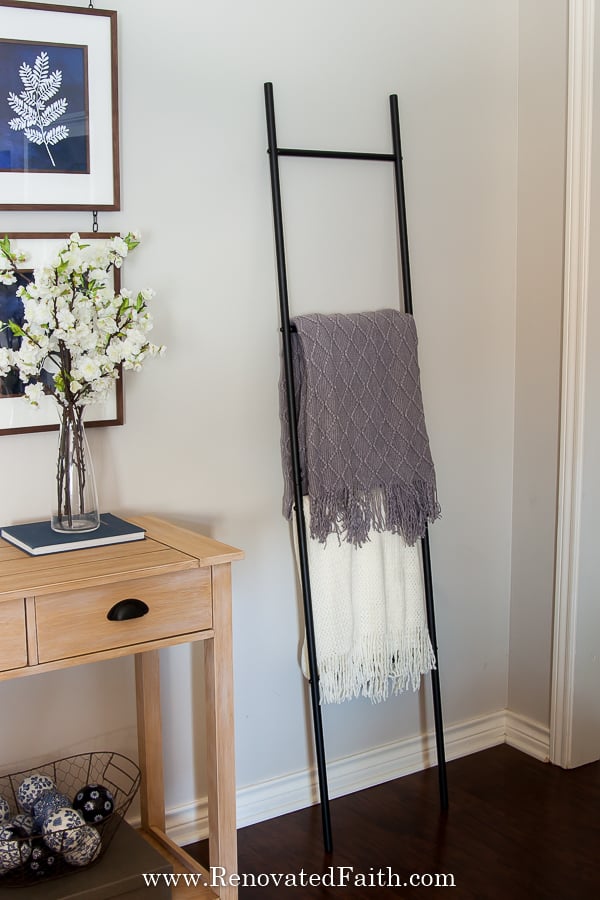
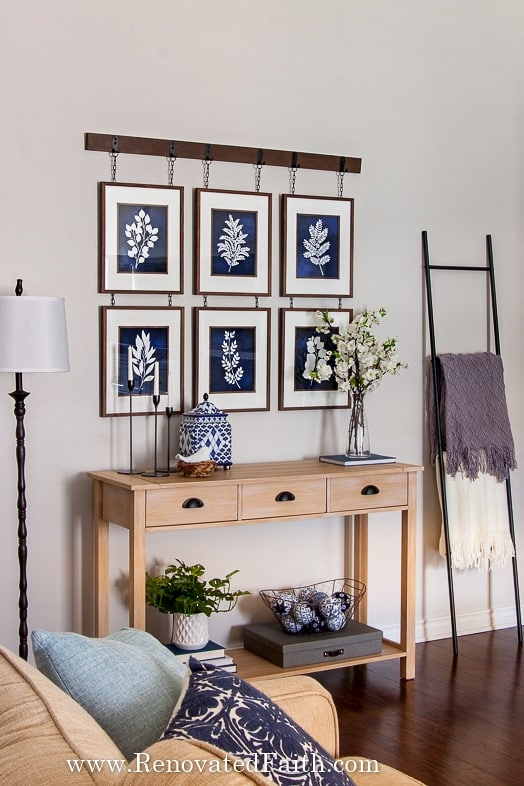
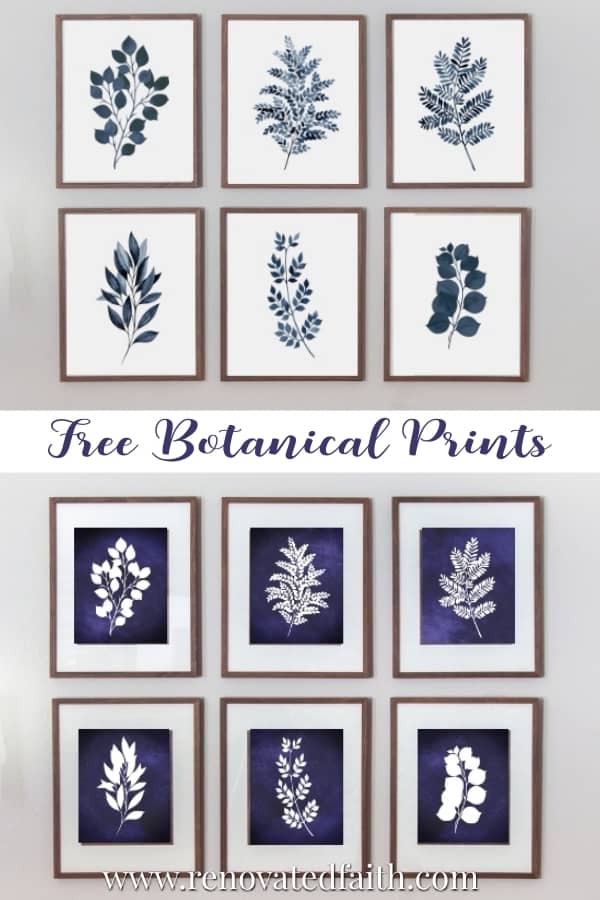
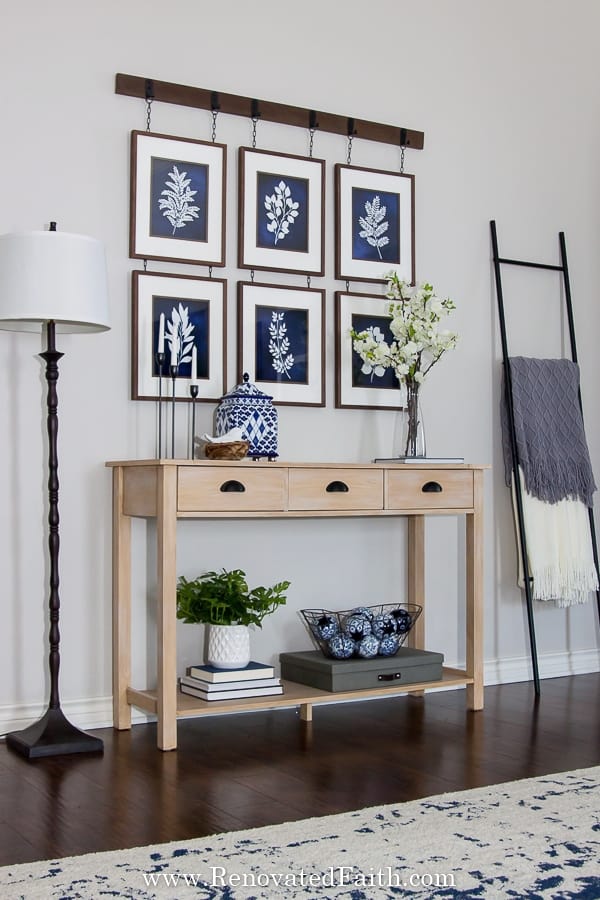
This easy framed picture rail tutorial and video show you how to give a more balanced look to any gallery wall art. I love the way you can fill a large wall space with the low-cost combination of this rail system and my free printable wall art in two design options. (Feel free to download my blue and white botanical art by filling out the form at the end of this post.)
LET ME SHOW YOU:
- A picture hanging rail system that is easier and much cheaper than what you will find online.
- The best gallery hanging system for an industrial or modern farmhouse style
- How to add this picture rail to any wall art in your home
- Some encouragement in how to find true satisfaction in this week’s Renovate Your Faith devotional at the end of this post
Quick Links to Information in this Post
- 1 The Best Picture Hanging System on a Budget
- 2 Pottery Barn Inspired Hanging Picture Frame Rail
- 3 Why My Picture Hanging Rail System Isn’t Load Bearing
- 4 Supplies Needed for the DIY Picture Hanging Rail
- 5 DIY Picture Hanging Rail Instructions and Video
- 6 Alternate Process for Loadbearing Rail Picture Hangers
- 7 RENOVATE YOUR FAITH: Satisfied In Him
- 8
- 9 FREE Blue and White Botanical Wall Art
- 10 FAQ’s: DIY Art Hanging Systems
- 11 How to Hang Pictures Straight (With or Without a Rail)
- 12
- 13 More Posts Related to the DIY Picture Hanging Rail
- 14 Final Thoughts on Picture Hanging Systems
- 15 Faux Picture Rail Hanging Gallery System
I learned this trick before my daughter was born when I was setting up her nursery and painted pink letters to go over her crib. I thought it would be a cute idea to hang the letters from cute white bows and ribbons hanging from a rod on the wall.
This was a really cute idea, but for this recovering perfectionist, getting the letters to hang perfectly even and straight from the rail was just painful.
I spent a couple of hours on this until I realized the letters didn’t have to actually hang from the rod. They just needed to LOOK like they were hanging from the rod, which made hanging them so much easier.
I’m a firm believer that home decor should serve you – not the other way around. So this tutorial for hanging pictures from a rail shows you a quick and easy hack to save you tons of time!
What Is A Picture Rail Used For?
Museums often use picture rails because they are versatile for adding and removing art easily. But picture rails because of the cohesion it can give several pictures on a wall.
Where Should A Picture Rail Go?
I love that picture rails with a collage of wall art are the PERFECT, low-cost solution to fill a large wall with art. You can easily get low-cost frames at Target or Walmart and free printable wall art. (Fill out the short form below to get access to my free botanical wall art).
Pottery Barn Inspired Hanging Picture Frame Rail
You may have seen Pottery Barn’s picture hanging rail kit below. But this DIY version gives you the same look for a fraction of the price.
Why My Picture Hanging Rail System Isn’t Load Bearing
My hanging picture frame rail doesn’t hold the framed art but simulates the look of art hanging from the chain. (If you want your artwork to hang from the chains I include those instructions at the end of this post)
The reason mine only looks like it is holding the frame is because when you actually hang pictures from a D-hook and chain, it is hard to make them straight and level. Positioning the links in the chain so each picture is even is really difficult.
When you simulate the look of them hanging, it’s actually so much easier to get them straight and you can see these tips for hanging gallery wall art here: How To Hang Gallery Wall Art Evenly Every Time
Also, with this process, you can use any type of picture frame. I called Pottery Barn and asked them about their picture hanging rail and they said that the frames have to have a D-ring on the back.
You can get Pottery Barn’s frames with the D-ring but it’s a lot cheaper to use your own. Also, you have a lot more size options when you can buy them from anywhere, not just Pottery Barn.
Last, if you were to hang all the pictures directly from the rail, you will need to use drywall anchors or a french cleat to support all the weight. That is more time-consuming to hang and will do some damage to your wall if you don’t get it right the first time. The DIY version just needs two small nails because it’s only supporting the rail itself and the chains.
If you need fewer nails in the wall, see the instructions below on how to hang the frames from the chains instead of simulating that look. Just make sure you use dry-wall anchors rated for the amount of weight for all your frames
Supplies Needed for the DIY Picture Hanging Rail
(As an Amazon associate, this post contains affiliate links. I only use affiliate links for products I use and love.)
Picture Rail Hangers (2 sawtooth hangers)
1 x 3 Board – You’ll need one 4-6 inches longer than the width of your gallery wall art (2-3 inches on each side.
Stain – To do the faux staining process to perfectly match your frames, check out this post: How to Faux Stain with Latex Paint. If you go with a traditional stain, I recommend Varathane’s Stains
Heavy Duty Picture Rail Hooks– These hooks are the perfect size for a 1×3.
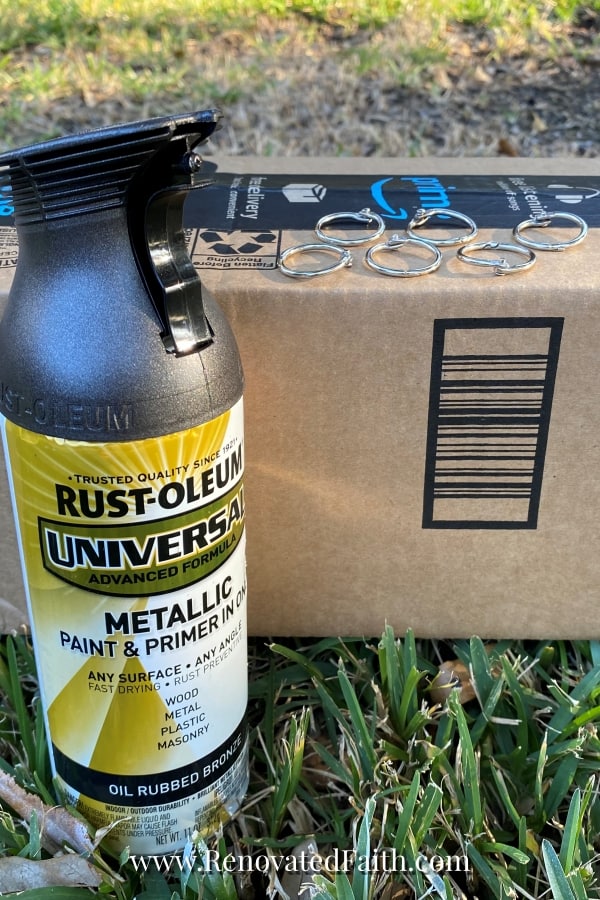
Spray Paint – Use black or oil-rubbed bronze spray paint to spray the binder rings.
Chain – I used this black chain so I wouldn’t have to spray paint it.
Long Nails for Your Frames
Also, I tell you my best picture hanging hacks here – The Easy Way to Hang Gallery Wall Art Evenly
Free Printable Wall Art – Be sure to check out my new blue and white botanical prints which you can print for free from my resource library along with several other free wall art printables. See the short form at the end of this post.
DIY Picture Hanging Rail Instructions and Video
Be sure to check out the video for the full process. It also includes my best tips for hanging gallery wall art.
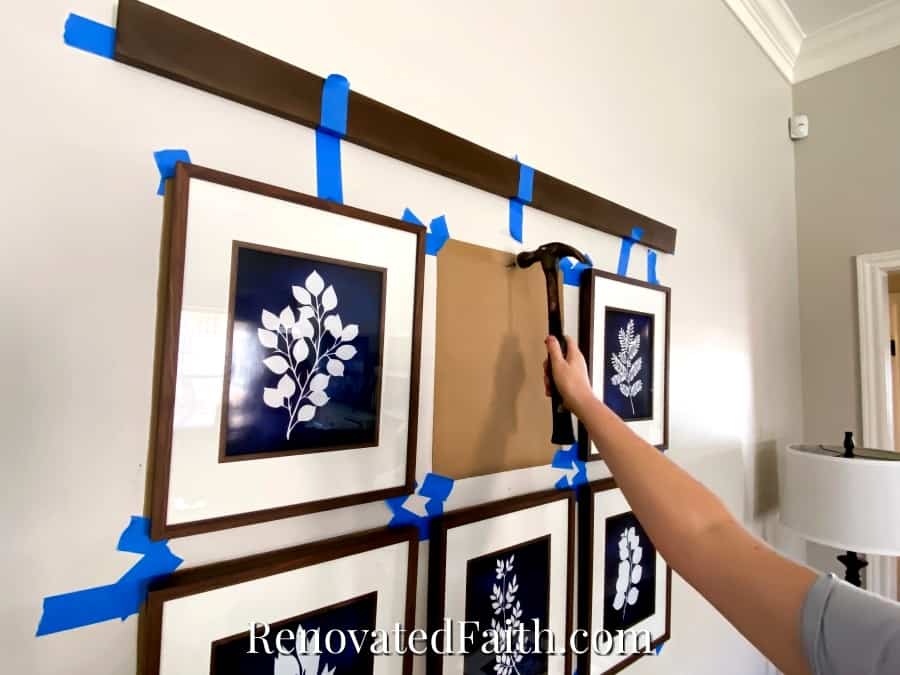
Step 1: Hang Wall Art Gallery as Normal
First of all, hang up your gallery wall art as normal. Like I mentioned above, these instructions show you how to add a gallery picture rail to any collection of wall art in your home. The chains are not holding up the wall art, they just hang behind each picture to look like a load-bearing picture rail system. (If you want your DIY picture hanging rail to actually hold the picture frames, see the load-bearing instructions below.)
To hang your wall art, check out my post for the EASY way to get your gallery wall art even, straight, and level every single time: Ultimate Guide to Hanging Gallery Wall Art
Stop! Before you do anything…take a before pic. When you are done, post the before and after pics on Instagram and tag me @renovatedfaith. I can’t wait to see the amazing work you’ve done! ❤️
Renovated Faith: What’s in a Name?
God never leaves a project half-done…He continually works on each one of us, as a lavish expression of His amazing love and grace. So many of my DIY projects remind me of how God renovates our hearts. If you are a work-in-progress, just like I am, check out the Renovate Your Faith Devotional at the bottom of this post. Click here to get a weekly reminder of new posts by email.
Step 2: Cut Your Picture Hanging Rail to the Right Length
For my gallery rail system, I’m using a 1×3 that I’m cutting 4-6 inches longer than my gallery art. Then, there are 2-3 inches of overhang on each side. I used my compound miter saw to make the cut. If you don’t have one, you can also use a jigsaw. (See my post here for the 7 Essential Tools for DIYers for reviews on great options.)
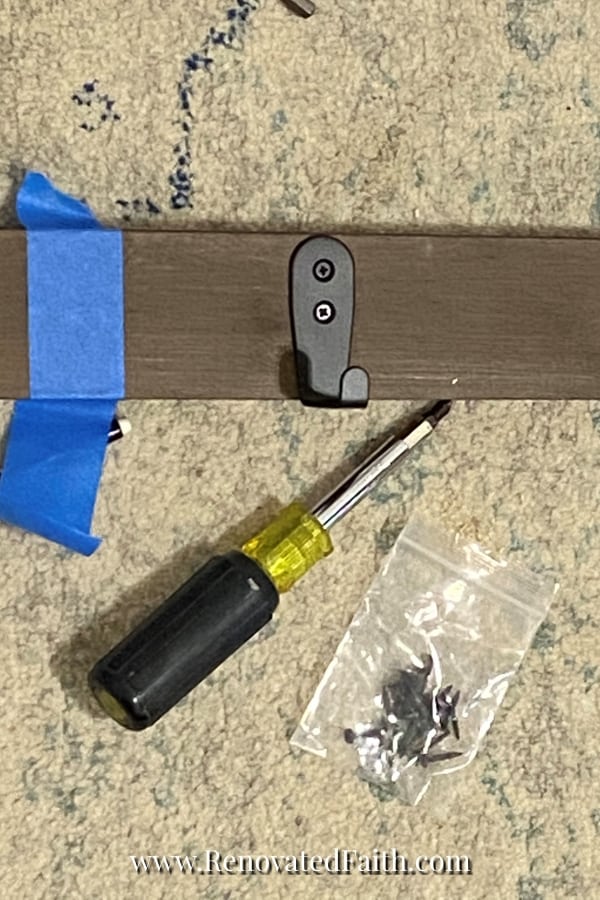
Step 3: Attach Hangers to Your Wooden Picture Hanging Rail System
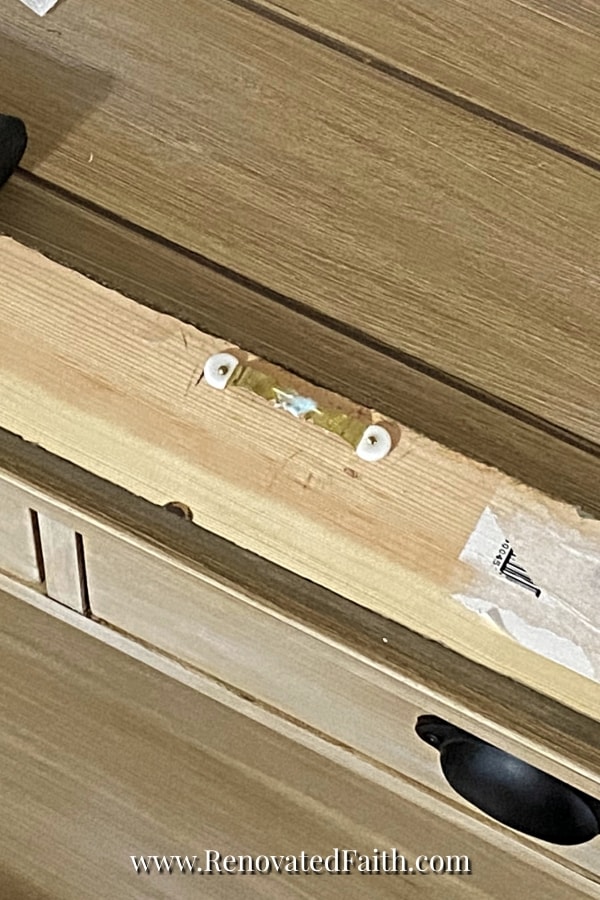
I attached two sawtooth hangers to the back of my 1×3 with the nails that were included with the hangers. Since our art rail hanging system isn’t holding any actual weight (other than the chains) we can attach the frame to the wall with nails instead of drywall anchors.
Step 4: Spray Paint the Picture Hanging Rail Hardware
Spray paint your binder rings with black or oil-rubbed bronze spray paint. Since the hooks and chain are already black, we don’t have to spray paint them.
I sprayed one side of the binder rings with a couple of coats about 15 minutes apart. After waiting for about 30 minutes, I flipped them over carefully and then sprayed the other side. (For my best spray painting tips to get a flawless finish, click here.)
Step 5: Stain Your Picture Frame Hanging Rail
Now it’s time to stain your framed art rail. You could use a traditional stain but I always opt for a faux stain so that I know exactly what shade I’ll end up with.
With the faux stain, I use two different shades of latex paint. For this project, I wanted the beam to match the frames I bought, so I did the American Walnut faux stain. You can see the process with 6 shades to choose from here: How to Faux Stain with Latex Paint
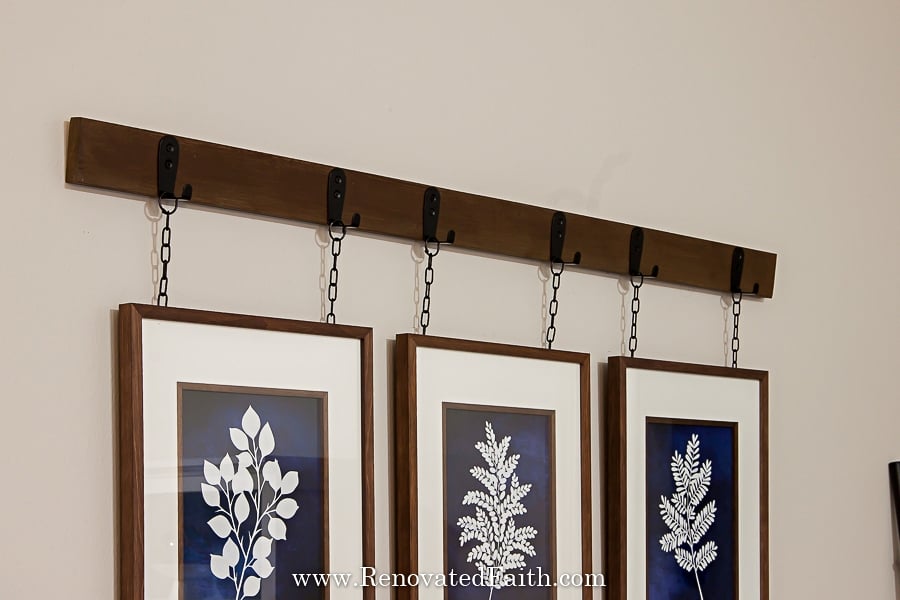
Step 6: Add Hooks to Your Picture Hanging Rail System
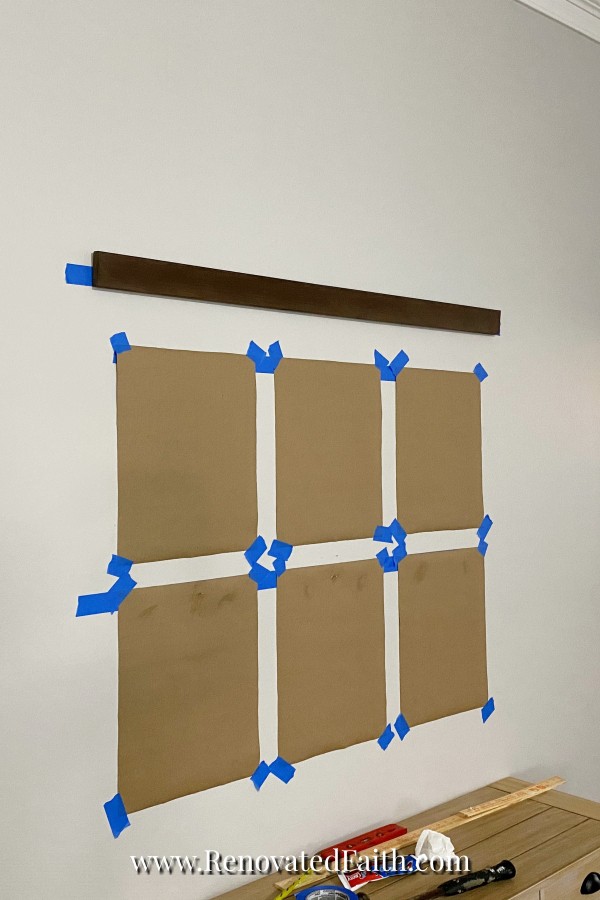
To add the hooks (click here to order them), I first hung up the picture hanging rail over the gallery wall art as if it was finished.
See my post on the easy way to hang gallery wall art here: How to Hang A Gallery Wall Evenly The First Time
Since I could see where the hooks needed to be to lined up with the wall art, I marked the location for each art display hook with a silver sharpie (I wasn’t concerned about the marks showing because I knew the hooks would cover them.)
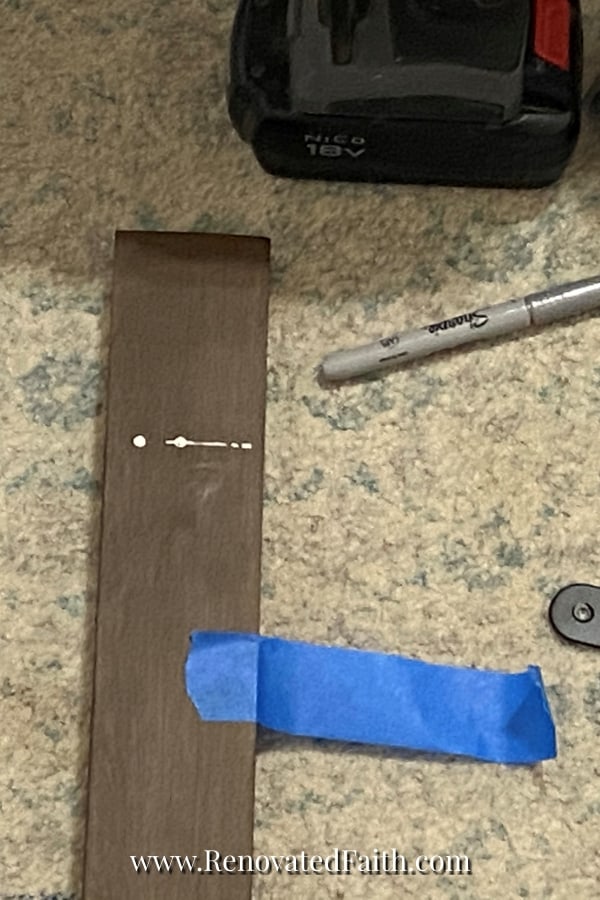
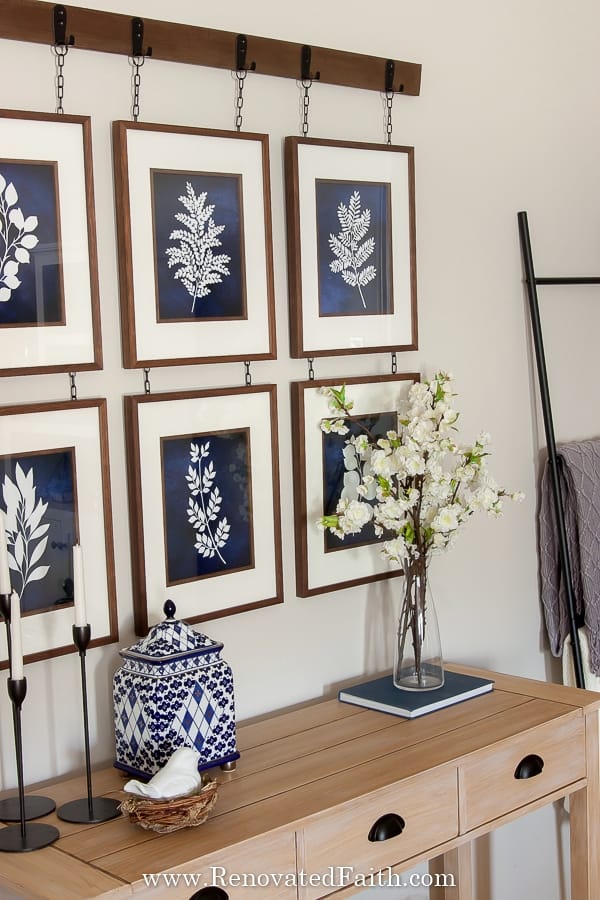
I took down the picture hanging rail and added my hooks. It is hard to find actual hooks for picture rails but these heavy-duty hooks are the perfect size for our gallery picture hanging rail to give the look of metal gallery hangers that wraps around the rails.
Step 7: Hang Your Picture Hanging Rail System
Now all you need to do is cut the chains to the right lengths. I actually stuck the end of some needle-nose pliers inside the chain I wanted to “cut”. By pulling the link open with the pliers, I was able to slip it right off.
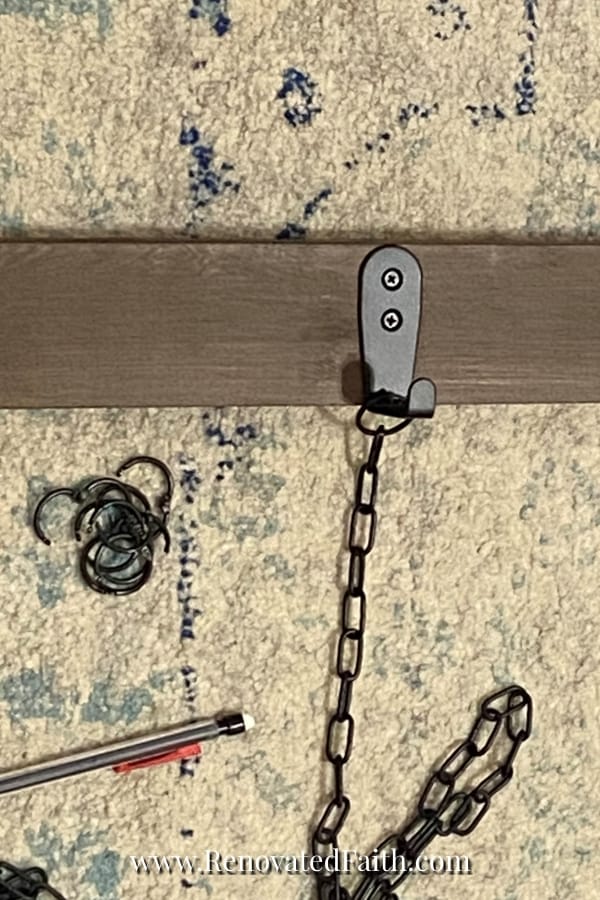
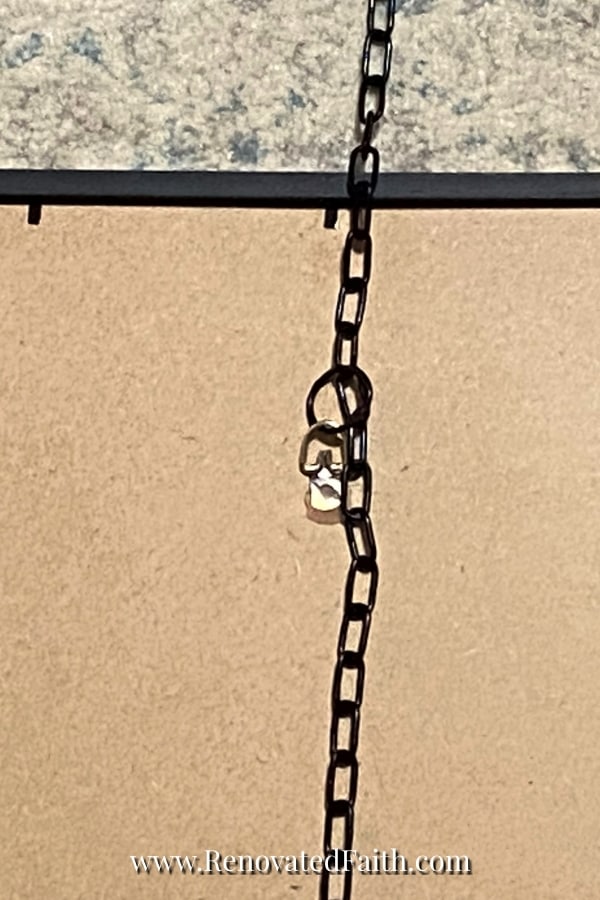
Simply attach a spray-painted binder ring to the end of each chain.
As you can see in the video, I hung the rail and then added each chain piece. Simply arrange them so they fall behind each picture frame and push the binder ring so it’s flush with the back of the hook.
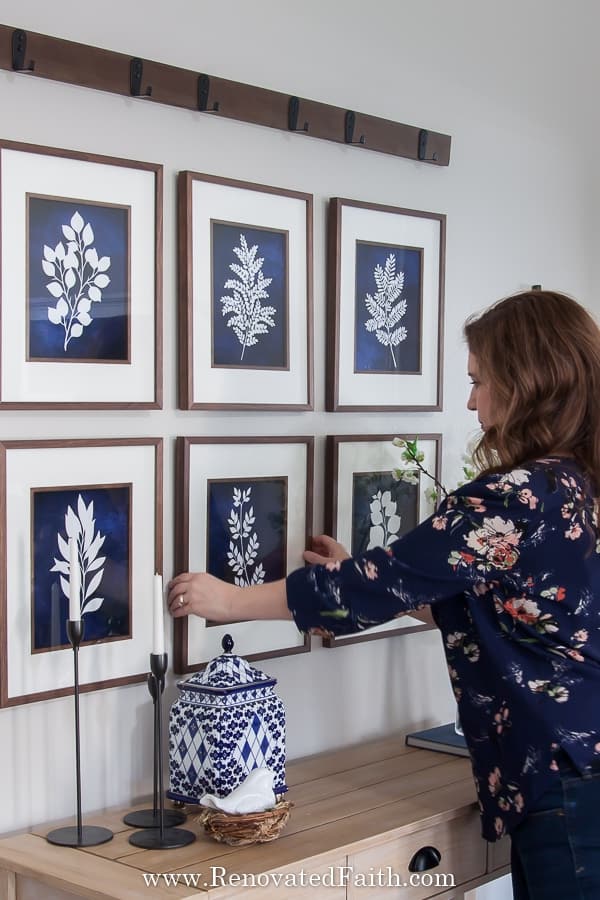
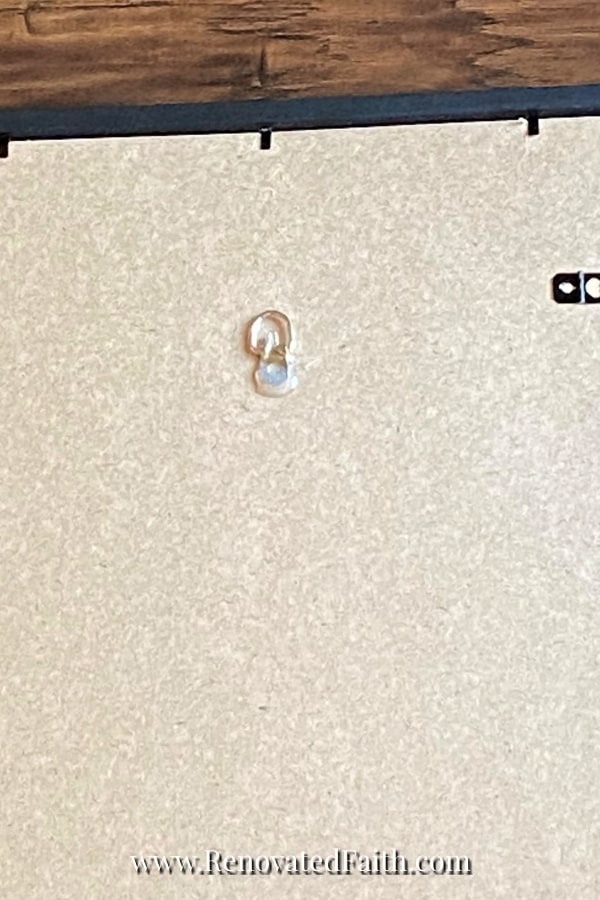
IMPORTANT TIP: I wanted to make sure that it looked like the frames were hanging from the rail and to do that, they need to sit away from the wall a little. You can create this look by pulling out the nails from the wall a little and hang the picture frames from the ends of the nails.
This will pull the top of the picture from the wall but you might also need a way to pull the bottom of the picture away from the wall. To do this, I stacked two or three of these furniture pads on top of one another. Then, I stuck them on the bottom center of the frame.
Some of the frames didn’t need help to look like they were suspended away from the wall but some did and this helped achieve that look easily!
Alternate Process for Loadbearing Rail Picture Hangers
Supplies Needed: S-hooks (you can use binder rings here), Drywall anchors
Follow steps 3-7 above but instead of nails, use drywall anchors and also metal rings from a home improvement store instead of binder rings.
Use S-hooks, to hang each frame from the chain. If your picture frames have two hangers on the back, follow these instructions to add a wire to the back: Best Picture Hanging Hacks
RENOVATE YOUR FAITH: Satisfied In Him
Last week, we took our daughter Morgan to the Houston Museum of Life Science. She is especially interested in Egyptians. As she looked at some ancient hieroglyphics on a stone tablet, she asked why they made up other gods to worship.
I told her that our hearts are created to worship something and there is a God-shaped hole in each of us. But when that something isn’t God, we often create our own false Gods to worship.
In telling her this, I remembered how quick I am to make false Gods of many of the gifts God gives me– food, scrolling through my phone, shopping, etc.
In reading Barb Raveling’s Freedom From Emotional Eating, I was reminded of how easy it is to go to food when I’m bored, unhappy, fearful, or even celebrating a small achievement. Obviously, food is something God created to nourish us and give us enjoyment. But a problem occurs when we go to God’s gifts for help repeatedly instead of going to Him.
Life isn’t easy. There are things we don’t want to do, emotions we would prefer to not feel and people we’d rather ignore. But part of being human is that we can’t always escape our situations. So then what do we do? Where do we go for help?
God tells us throughout Scripture, “I’m your refuge – come to me.” But it is so much easier to grab a bowl of ice cream, turn on the TV or call a friend. As Barb says, “The ice cream will numb the pain. The television will numb the mind. The friend will listen and feel sorry for us. But God will say, ‘No wonder you’re unhappy. You’re not living for me.’”
Initially, it is easier to go to false gods as an escape because they don’t ask anything of us. It can be harder to go to God at first because He does ask something from us – He wants us to live for Him and sometimes that’s uncomfortable in the beginning.
But ultimately, who is the better refuge? Which source will fill us up and which will leave us always wanting more?
What we continually go to, ultimately controls us. The problem with these false idols is that they begin to control us. They don’t require anything of us in the beginning, but later they become strongholds that are hard to break free from.
These strongholds never truly satisfy. They just keep requiring more and more control over us until we realized that our lives are dependant on them.
So how do we overcome strongholds? 2 Corinthians 10:3-5 tells us that strongholds are overcome not by self-control and discipline but by taking every thought captive to Jesus Christ.
But how do we do this? God’s Word is clear about how we should renew our minds and saturate them with Truth.
Here are some resources to get you started:
If you struggle with food fixation, I highly recommend this resource to help you overcome this stronghold in your life: Freedom From Emotional Eating
If you struggle with strongholds of any other kind, I love another of her resources here: The Renewing of the Mind Project
For more spiritual encouragement, click here for the rest of my project posts that also include Renovate Your Faith devotionals.
FREE Blue and White Botanical Wall Art
Here where you can get your blue and white botanical prints in your choice of design! Get the password for the library with all of my free printables including wall art, checklists, and templates by filling out this form:
DON’T FORGET TO TAKE A PICTURE!
Now that you are done, I’d love to see how it turned out! ❤️ Post your before and after photos here!
Want to Buy a Picture Rail?
If you don’t want to make your own picture hanging rail, there are some options online. Some also include ceiling track hanging systems and steel cable hangers for artwork:
- Wayfair’s clip rail picture hanging system
- Pottery Barn’s rail system for hanging pictures
- Metal Picture Hanging Rail with Clips and Molding
FAQ’s: DIY Art Hanging Systems
What if you want to DIY an aluminum picture hanging rail or a brass system?
If you want to simulate the look of a metal hanging rail system, you can still do that with your 1×3 piece of wood. With metallic spray paint like Rustoleum Universal Metallics (click HERE for the current price), you can get the look of metal, like a stainless steel or brass picture rail system
How can I hang a picture frame with sawtooth hangers?
You can hang any picture frame with sawtooth hangers easily. Just nail them on the top trim of the frame. If your frame is not wood, dab a SMALL amount of Gorilla Glue (Click HERE for the current price) on each side and attach it to the frame or backing.
How do I hang pictures without nails?
Some people try to use command strips to hang pictures but eventually, they will fall off the wall, bringing your artwork with it! My best solution for picture hangers that do minimal damage to the wall while still holding quite a bit of weight are the ones in this kit: Picture Hanging Kit (Click HERE for the current price.)
How much weight can a picture rail hold?
The first set of instructions is for a non-loading bearing rail so you don’t have to worry about how much weight the rail can handle. A load-bearing picture rail can hold whatever the drywall anchors are rated for.
How to Hang Pictures Straight (With or Without a Rail)
For the best free picture hanging tool and the easiest way to hang a picture, check out my post here: The Ultimate Guide to Hanging Wall Art
More Posts Related to the DIY Picture Hanging Rail
Raw Wood Finish With Latex Paint (No Furniture Stripper or Bleach Required!)
The Ultimate Guide to Hang Gallery Wall Art Evenly
12 Free Blue Botanical Prints (FREE PRINTABLES)
8 Good Ways to Decorate With God’s Word (For Less Than $30)
How To Make Any Printables Look Like Painted Farmhouse Signs (Free Scripture Printables)
How To Make Easy Windmill Wall Art From Ceiling Fan Blades
My Favorite Paint Color – Agreeable Greige
Final Thoughts on Picture Hanging Systems
Don’t forget to download my free blue and white botanical wall art above. To get your printable, sign up for my weekly newsletter which also grants you free access to my resource library full of wall art printables, checklists, and project plans!
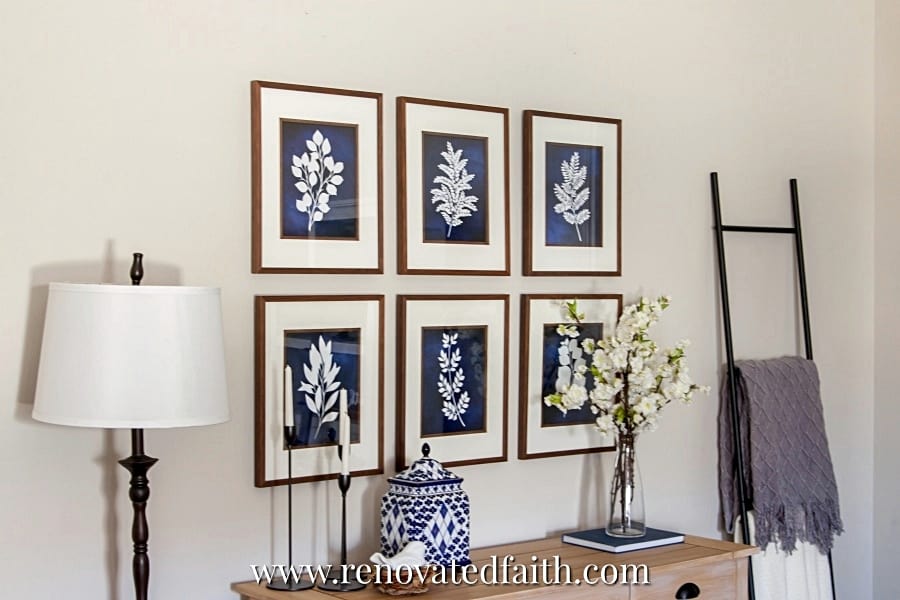
This DIY picture hanging rail is not only a fraction of what you will find online, but it is so much easier to hang and can be used with any picture frames. Also, this method makes hanging the pictures look like they are hanging from the rail chains instead of the hassle of trying to make them straight even when hanging from the picture hanging rail. This will save you so much time and frustration!
I love to hear your thoughts and questions! Scroll down to leave a comment and I WILL reply! ❤️
Blessings,

Be sure to follow the fun here!
Email Subscription | Instagram | Pinterest | Facebook | Twitter

Easy DIY Picture Hanging Rail, YouTube Video
Faux Picture Rail Hanging Gallery System

Karin Peters is a DIY expert and the creator of Renovated Faith. She is a furniture painter, a home design consultant, and a tenacious problem solver determined to help you transform your house into a home. With 17 years of experience with DIY home improvement, she researches and analyses professional processes to adapt them to be easy and cost-effective for DIYers. She then tests every project and product before it appears on the site in a detailed, step-by-step format. After attending Texas A&M University, she received her Master of Divinity with Biblical Languages at Southwestern Baptist Theology Seminary. Her passions unite in Renovated Faith, which shows readers how to create a home that serves them so they can pursue their God-given purposes. About Renovated Faith | Editorial Policy | Facebook | Twitter | LinkedIn
Hello! Thanks so much for this step by step project. Would you mind pls resharing the links for all of the supplies? The links don’t appear to be working.
Thanks!
Hey Stephanie, I just updated it. Thank you so much for letting me know!
What frames did you use? Where you purchase them?
Do a search for “supply list” and the information should be there. I got them at Michael’s. They always seem to have the best selection and deals. Thanks Rachel!
If you used 8×10 frames, how long was the rail? How much space was in between each frame?
Hey Mandee,
I have about 1.5-2 inches between each of my frames. Before you even cut your board, I’d lay out your frames on the floor to get an idea on how far apart you want them and how long the board should be. I hope this helps! Blessings, Karin
What size are the frames used in these pictures?
They are 8 x 10. Thank you Jessie!
Love this project. Going on my Pinterest to-do board! Thank you for the in-depth information.
You are so welcome Dorothy. Thank you for your sweet comment and let me know if I can help you in any way!
Blessings,
Karin
The link above doesn’t take you to the right place.—it takes you to the stain.
Heavy Duty Picture Rail Hooks– These hooks are the perfect size for a 1×3. (Click HERE for the current price.)
Can you fix the link?
It is fixed now. Thank you Michelle!
I love this idea. I can’t find the hooks though, and the link you posted is not bringing them up. Can you send me the link for them on Amazon? Thanks!