How To Install Cabinet Handles Straight (Without Losing Your Mind!)
With this easy, step-by-step tutorial and video, you’ll learn how to install cabinet handles straight in the fastest way possible.
You’ve diligently primed, painted, and rehung all the doors and there is one final step between you and the finish line – installing the hardware.

I don’t know about you but the thought of drilling holes into that gorgeous, clean finish is daunting enough but what if you make a mistake? Can you fill the hole and cover it? How much longer will it take to repaint those spots? And what if the hardware isn’t straight when you do finally get it installed?
This tutorial and video is your pain-free guide to drilling perfectly placed kitchen hardware holes the first time, every time. And with this method, you’ll never risk drilling through that pristine new paint job. I’ll show you my best secrets to filling old cabinet hardware holes so they are completely undetectable.
When I started painting furniture and cabinets, I remember searching through video tutorials of one of my favorite furniture painters. I just knew she would have an easy way to ensure precision holes in cabinet doors and furniture.
To my surprise, there were no videos on how to install cabinet handles and it didn’t take long to find out why. She said in one tutorial that she hired out hardware installation to professionals.
Because I didn’t want to go to the trouble and extra expense of hiring that out, I started experimenting with furniture projects and found the easiest way to drill cabinet hardware PERFECTLY. (And as a recovering perfectionist, I don’t throw around the “p” word lightly!)
With this tutorial, I’ll show you how to install cabinet handles straight without all the stress and in a fraction of the time.
Is It Hard to Install Cabinet Hardware?
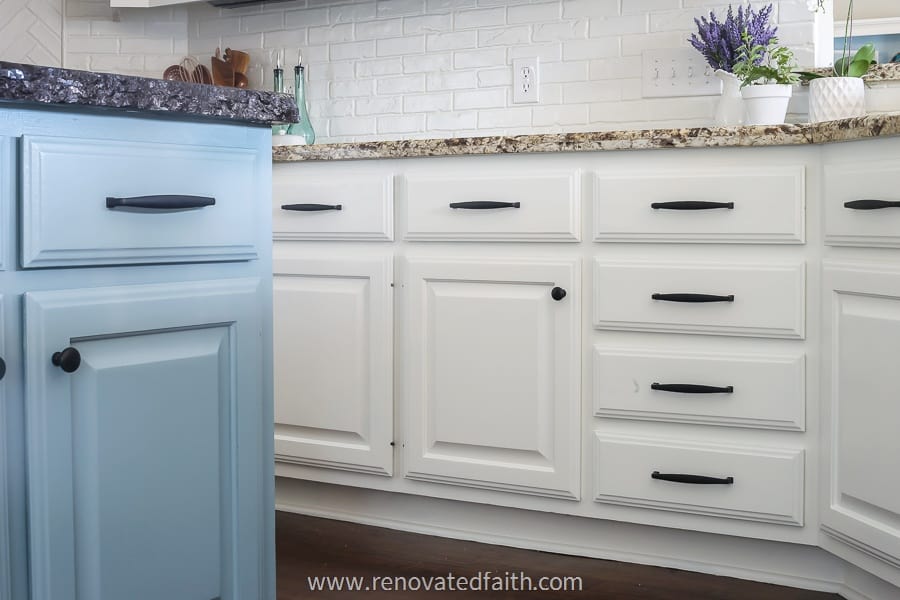
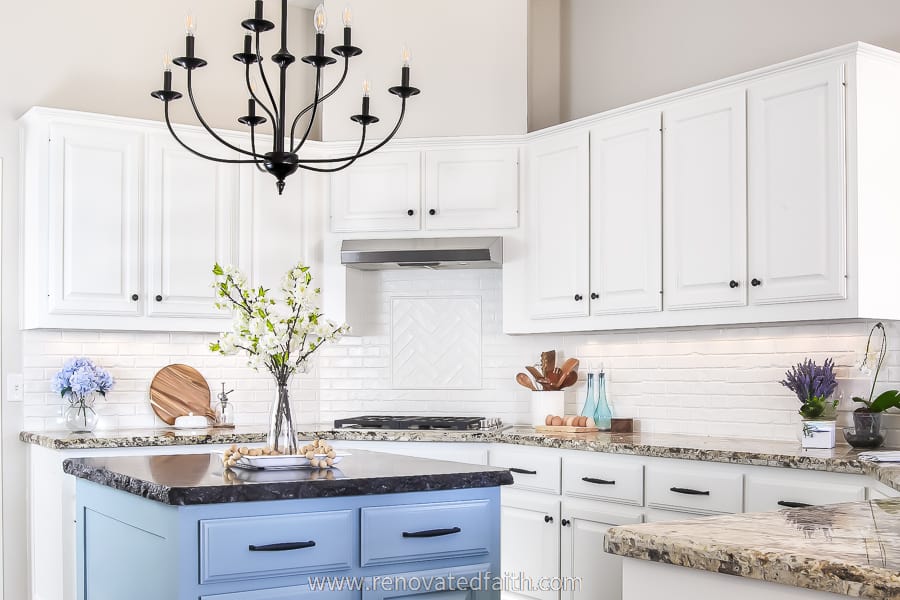
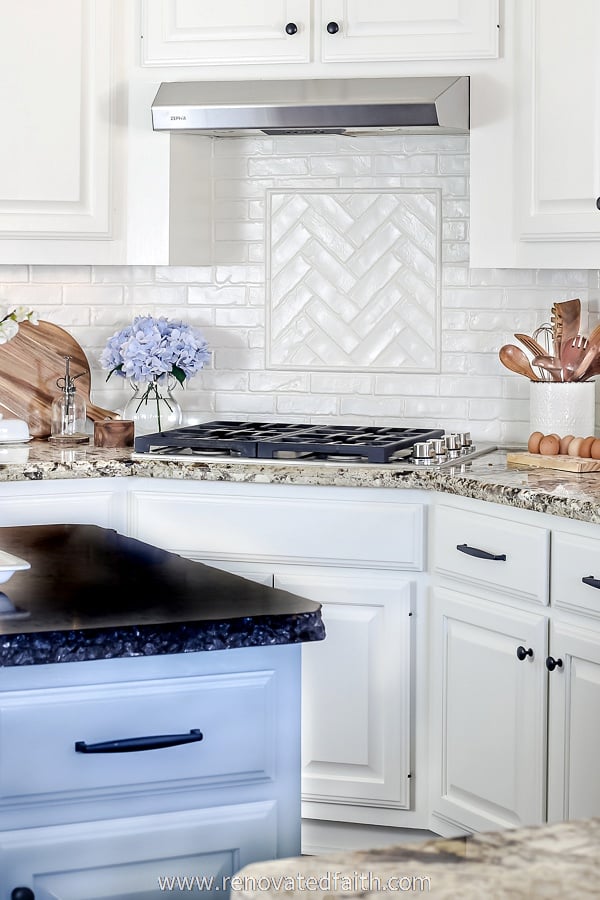
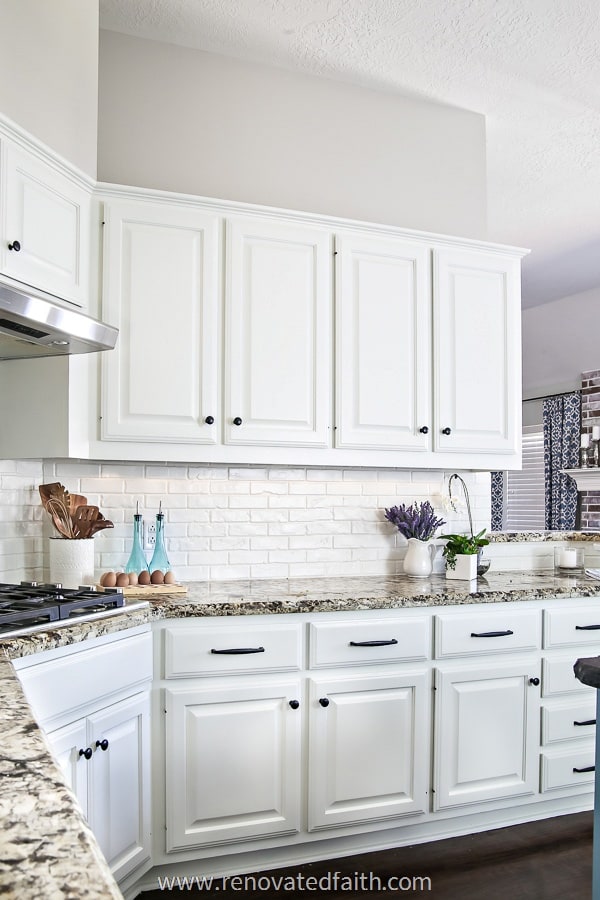
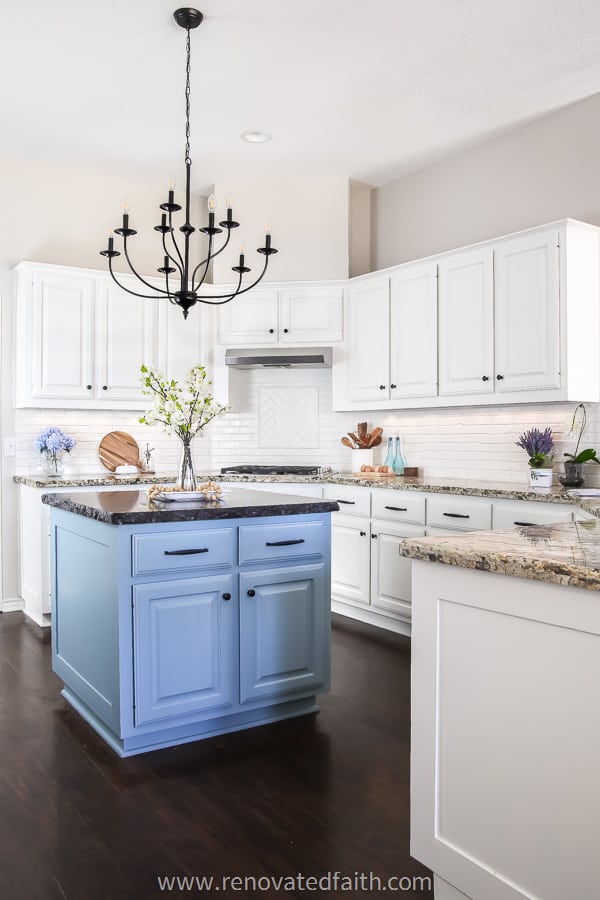
Painting your own kitchen cabinets is a huge undertaking but the work is so worthwhile once you experience the satisfaction of seeing the new look of your kitchen! No project can change the look of an entire room the way painting cabinets can transform a kitchen.
But whether you are painting old cabinets or installing new ones yourself, cabinet hardware installations can be difficult because if it’s not done precisely, you WILL be able to tell. Since all of your handles are lined up in a row, it will be obvious if one isn’t straight.
Say you drill a hole in the wrong location. You can drill a new one of course but filling and repainting the old hole is not only an additional step, but there’s a good chance you will be able to see where the old hole was patched.
But no worries! I have experience installing hardware on three sets of cabinets and dozens of furniture pieces after researching the best professional method. I am with you every step of the way to show you how to install cabinet knobs and pull handles perfectly the first time.
Quick Links to Information in this Post
- 1 How Do You Install Handles on Cabinet Doors? With a Cabinet Hardware Jig!
- 2 Supplies Needed: How to Install Hardware on Cabinets
- 3 Correct Hardware Placement: Where to Put Knobs and Handles on Kitchen Cabinets
- 4 Cabinet Hardware Placement Standards: Where do you put handles on cabinets?
- 5 How to Install Cabinet Hardware Like a Pro
- 6 What is the Best Way to Paint Cabinets: Brush, Roller or Paint Sprayer?
- 7 RENOVATE YOUR FAITH: Take The Next Baby Step in Trusting God
- 8 FAQ’s: How to Install Cabinet Knobs and Hardware
- 9 How To Install Cabinet Handles And Knobs, YouTube Video
- 10 More Posts Related to How to Install Cabinet Hardware
- 11 Final Thoughts on How to Install Kitchen Cabinets and Knobs
- 12 HOW TO INSTALL CABINET HARDWARE
As an Amazon associate, I make a commission on affiliate links. I only use links on products I use and love.
How Do You Install Handles on Cabinet Doors? With a Cabinet Hardware Jig!
FIND THE HARDWARE JIG I USED HERE
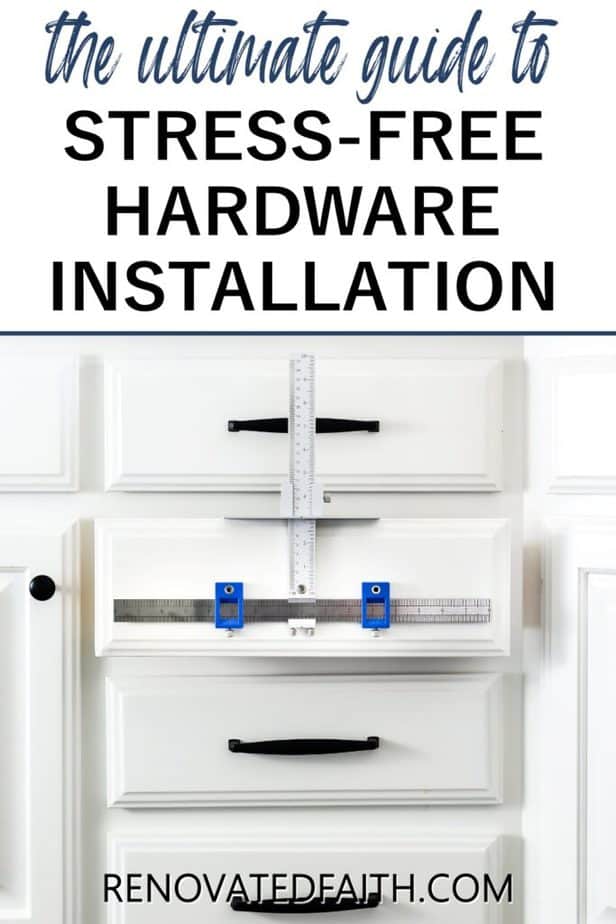
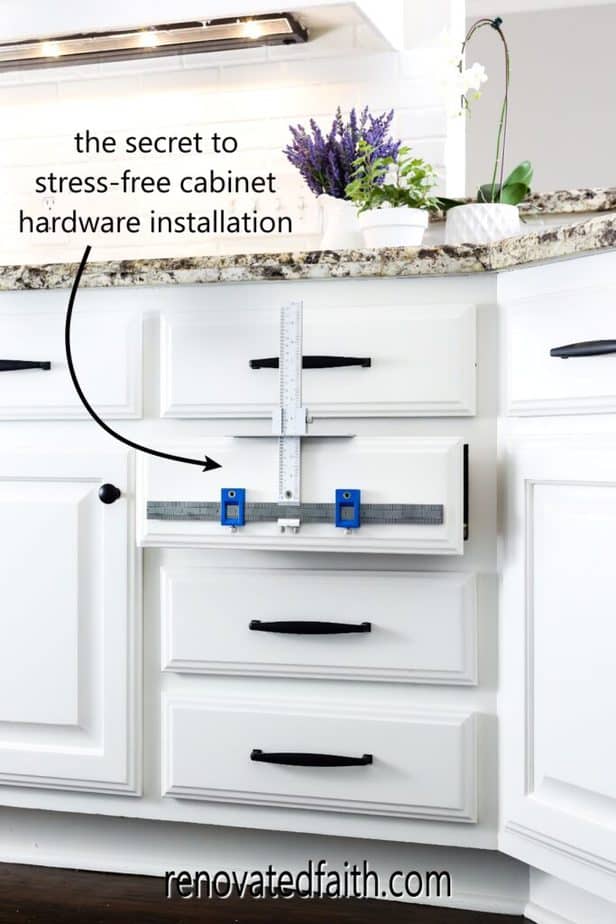
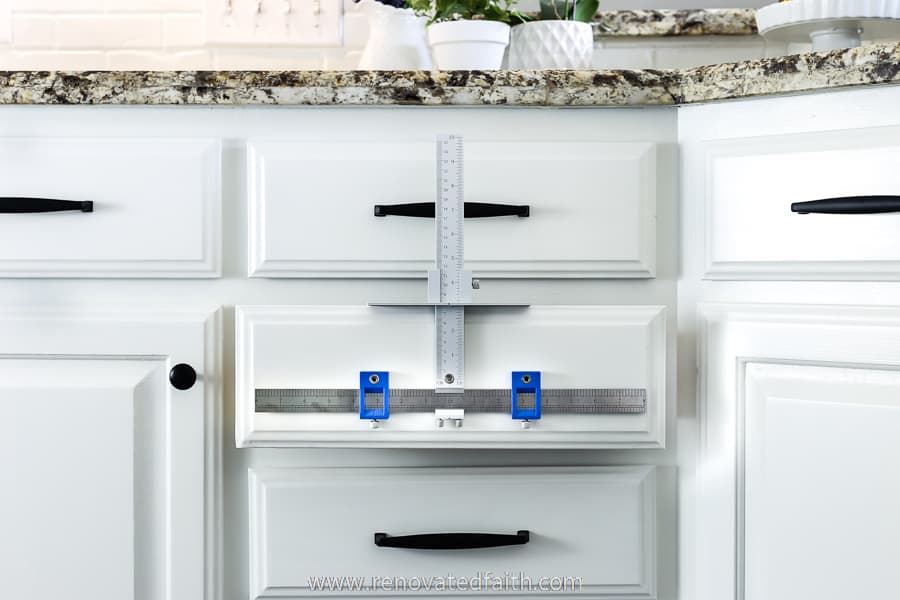
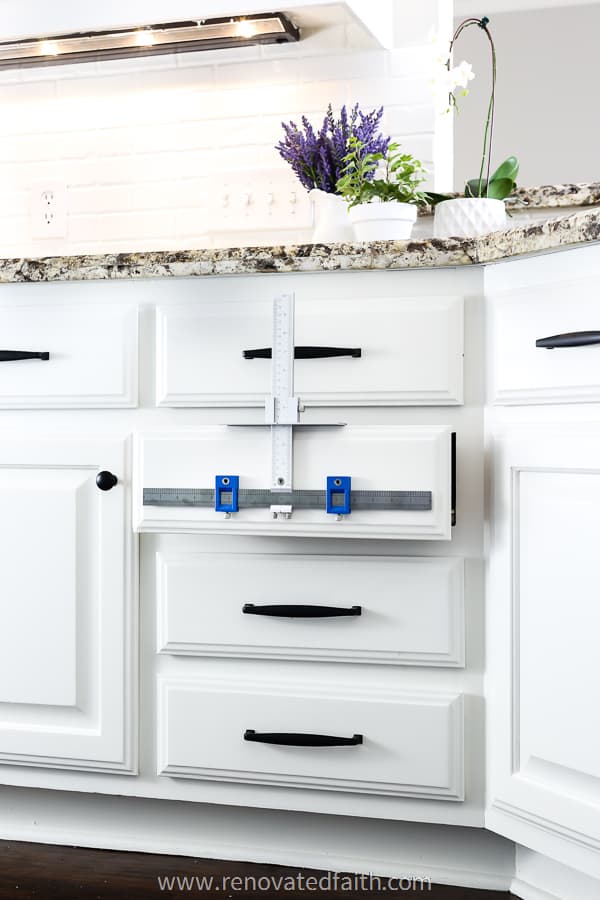
The most important tool when learning how to install cabinet handles is a cabinet hardware jig, which helps you drill perfect holes quickly and painlessly. I love the fact that it actually attaches to each door or drawer so it frees up my hands to drill the holes.
You won’t believe how much faster the process goes with this cabinet jig as it takes ALL the frustration out of installing cabinet hardware.
This hardware jig template is mostly aluminum which prevents bending when I’m trying to align the jig to mark holes on my cabinet doors. Also, its mounting holes are incredibly accurate in ensuring that each of your door holes is in the exact same location on all the other doors.
Unlike a plastic template or piece of cardboard, this hardware jig can adapt to any knob or handle. It can be adjusted to any hardware no matter if I’m drilling holes for cup pulls, extra-long drawer pulls, appliance pulls, or European hardware with little room for error. I can also use my jig on any furniture drawers or doors
Supplies Needed: How to Install Hardware on Cabinets
Cabinet Hardware Jig – I picked this particular jig because it was mostly aluminum and had the best reviews on Amazon. I loved how easy it was to adjust but it also stayed tightly in place as I went quickly from drawer to drawer making holes.
Awl – This is a handy tool that I also use a lot for hanging pictures but you can also use an ice pick.
Power Drill and Correct Drill Bit
New Hardware and Any Necessary Screws
Painter’s Tape or Masking Tape
Don’t forget to check out my Full Tutorial on How to Paint Cabinets Like a Pro with a FREE Cabinet Painting Roadmap!
Where to Buy New Knobs and Handles FOR KITCHEN CABINETS
New hardware is like the icing on the cake of any kitchen cabinet makeover. When you’ve spent so much time painting your cabinets, the last thing you want to do is put the old hardware on your newly painted cabinet doors.
RELATED: How Much It Costs to Paint Kitchen Cabinets (DIY or Hire a Pro?)
DRill THE HardwarE Holes Before Painting
As you can see in the video, I highly recommend that you drill your hardware holes before you prime and paint your cabinets! Mistakes happen! But if you make a mistake drilling a hole in the wrong place, it’s SO much easier to fill it BEFORE you paint.
The alternative is to fill, sand and repaint an extra hole on your newly painted cabinets and there’s a good chance you won’t be able to completely disguise your patch job.
Another big advantage to drilling holes before you paint is to get the drawer fronts to line up perfectly with the holes in the front of the cabinet drawer. Since the hardware hole has to go through both pieces of wood, leaving the draw fronts on while drilling ensures a perfect hole all the way through.
Personally, I felt it was easier drilling holes for the doors as well while they were hanging. That way you can get an idea if the holes are lining up to the doors next to it.
For those reasons, recommend drilling your holes before you actually paint your cabinets.
But if you are coming to this post AFTER painting your cabinets, NO WORRIES! You are in the right place and the cabinet hardware jig is just what you need to install all your hardware! The good news is that everything in this post still applies.
But Won’t the Holes Get Filled With Paint?
Yes, when pre-drilling holes before painting, the paint will partly cover the new hardware holes. Fortunately, the paint comes out easily when you put the screw through the hole for installation.
KITCHEN CABINET HARDWARE IDEAS
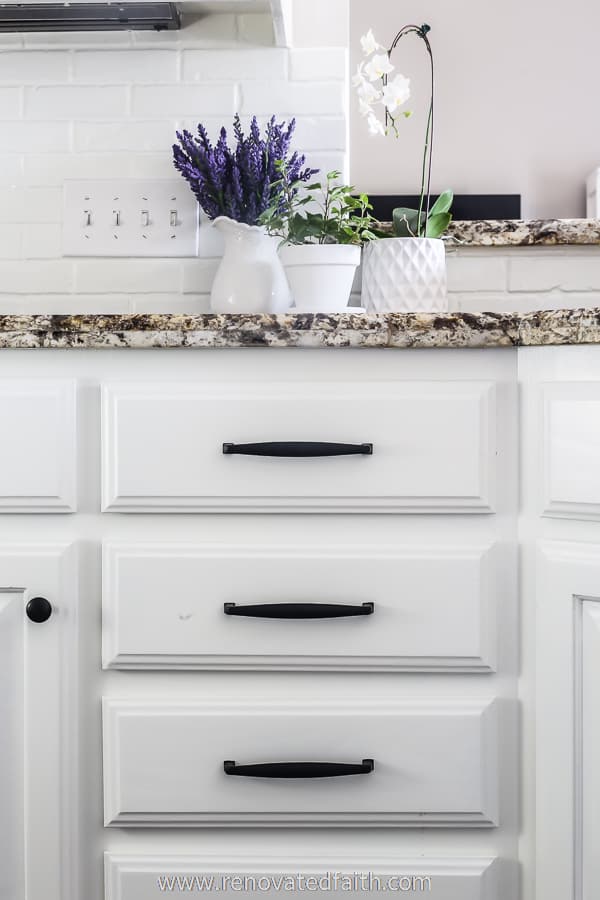
Cabinet hardware comes in a variety of different styles and finishes. Take some time to look through Pinterest or Google to see and compare different sizes of hardware as well. Once you get your hardware in, hold up the handles to the cabinet doors to see what you prefer in terms of placement.
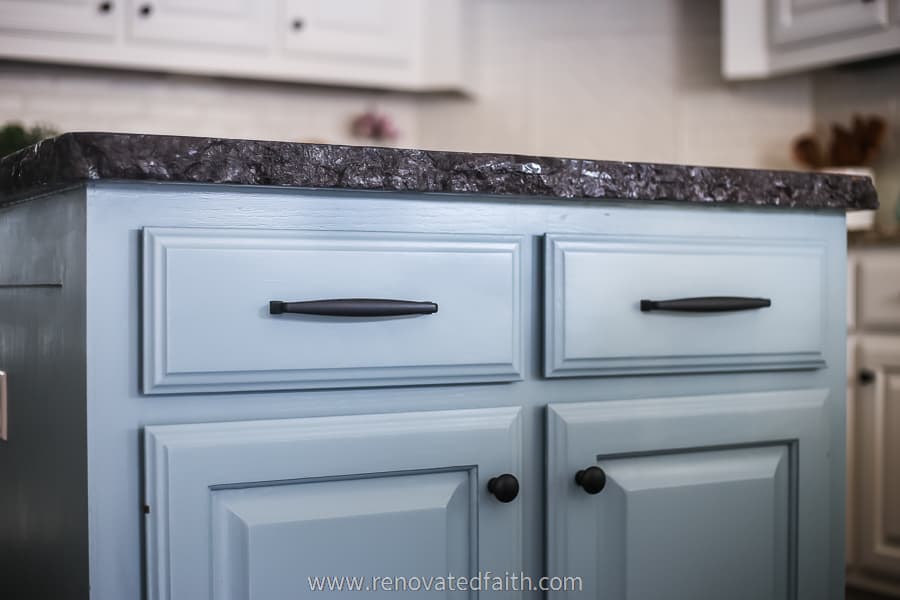
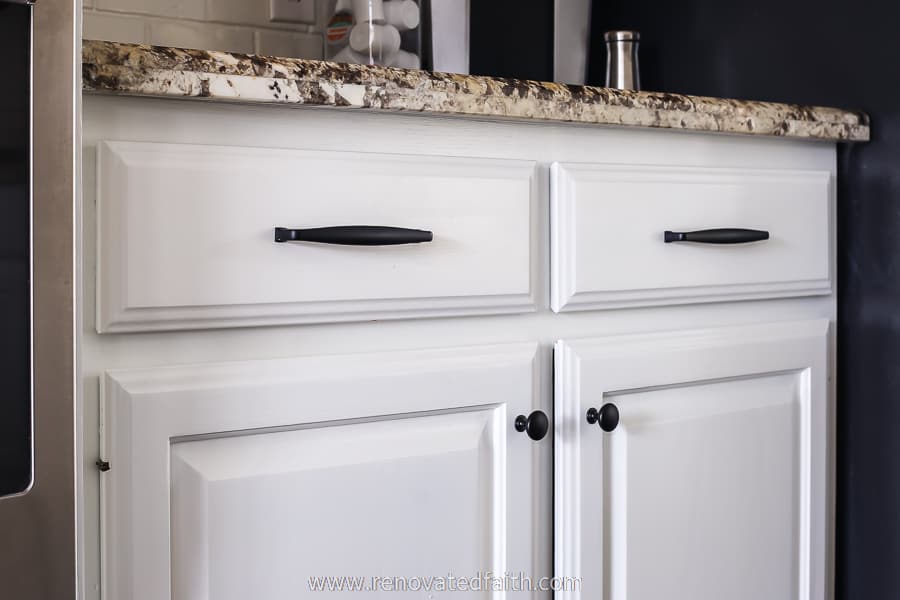
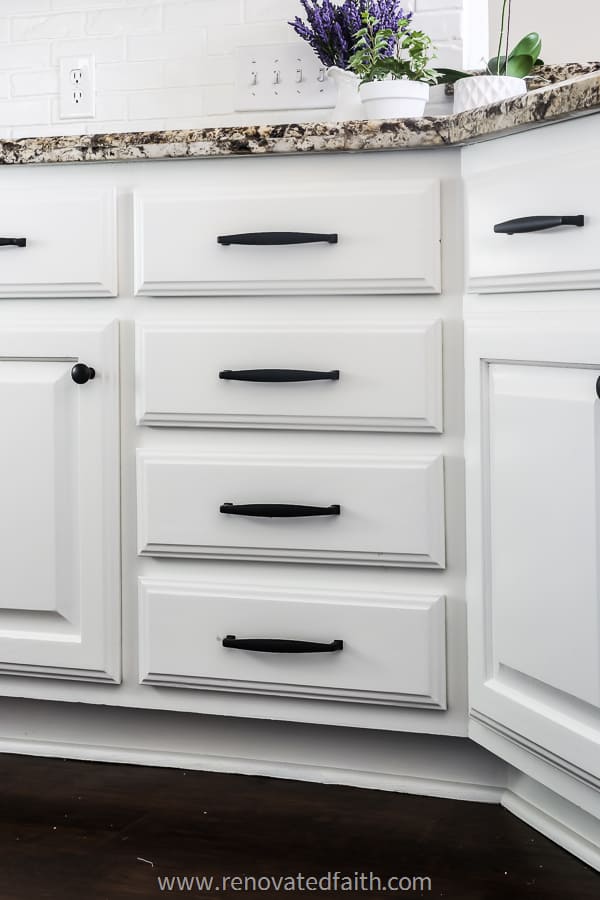
A big trend with cabinet hardware is to use longer handles on drawers (especially) and doors. With long handles, you will definitely be able to tell if they aren’t straight, so using this jig is so important to make this project go smoothly.
Correct Hardware Placement: Where to Put Knobs and Handles on Kitchen Cabinets
Depending on your hardware, there are some basic standards that can serve as a straight line for hardware placement. After sifting through a sea of articles on this topic, here is what you need to know based on the most common positioning used by professionals today.
Cabinet Hardware Placement Standards: Where do you put handles on cabinets?
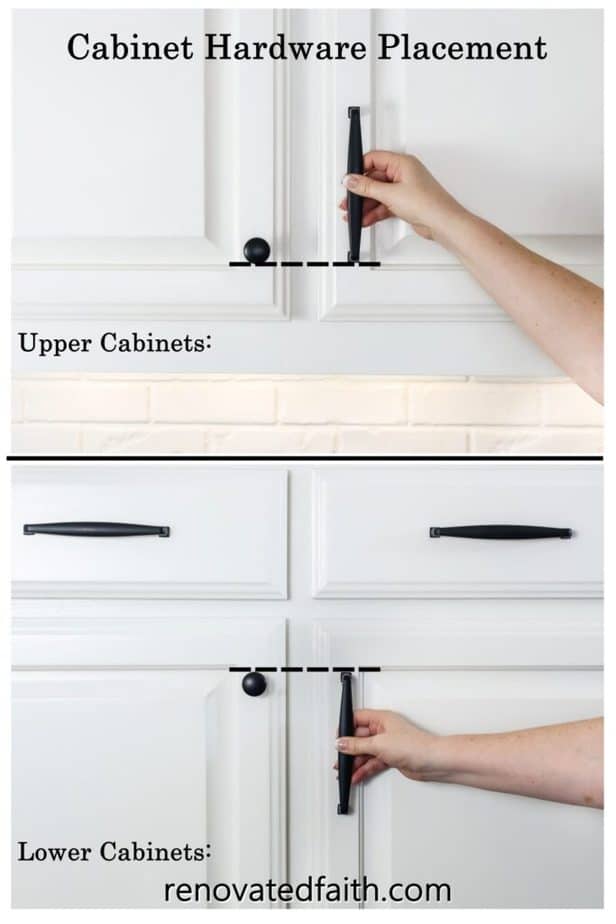
For Upper Cabinets – Knobs
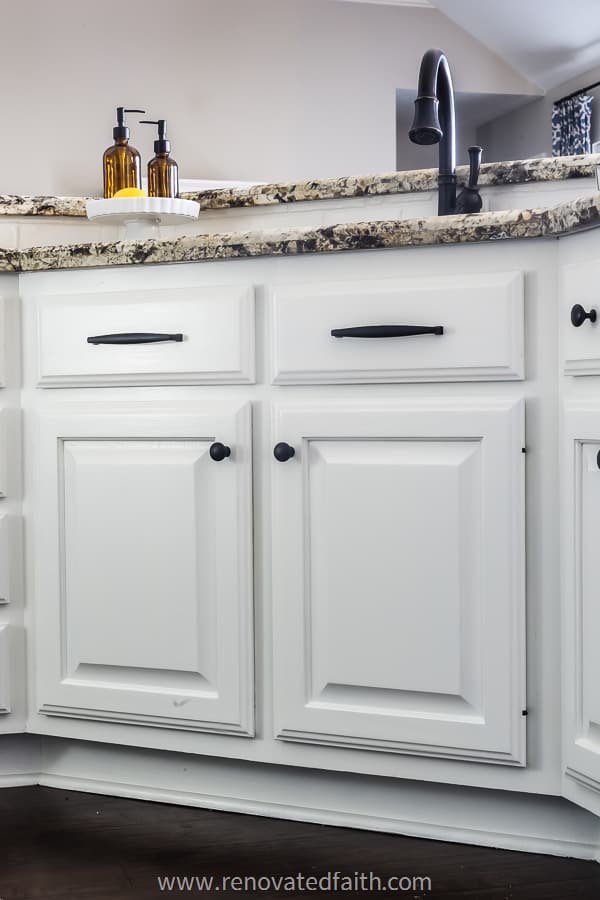
The general rule for proper cabinet knob placement is that the bottom edge of the knob should line up horizontally with the top edge of the bottom molding.
For Upper Cabinets – Handles
The is the same as above for knobs. The bottom edge of the handle should line up horizontally with the top edge of the cabinet door bottom molding.
For Lower Cabinets – Knobs
The top edge of the knob should line up horizontally with the bottom edge of the top molding
For Lower Cabinets – Handles
The top edge of the handle should line up with the bottom edge of the drawer top.
Important Tip: Notice mine don’t line up exactly but it was only ¼” off. This is not an exact science and it is absolutely not worth drilling new holes if the old ones are close enough. I promise no one will come to your house and think bad of you if your handles are slightly too high. So, if my own knob holes are ½” inch too high or low, and you like the overall look, it is not worth it to drill new screw holes.
How To Add Handles to Kitchen Cabinets
If you are going from knobs to handles, let’s say on the uppers that the old knob hole is ½” too low by the guidelines above; don’t worry about drilling a new hole.
Just use that hole for the bottom handle hole for your new hardware. Measure off that first hole for your second hole for the handle.
How to Install Drawer Pulls
Where Do Pulls Go On Drawers?
Use measuring tape to measure the width of the drawer. For drawer knobs and handles, go dead center from the edge of the drawer. It’s a good idea to draw a center mark midline on the unpainted drawer and set your jig to that line.
Where Do You Put Cup Pulls on Drawers?
For those rounded cup pulls, I like to center those on the center or middle of the drawer faces. So, since the holes are towards the bottom of the pull, when you center up the pull on the drawer, those two holes will be a little below the midline that runs horizontally.
For really small drawers, just use a knob instead of a handle.
Phew…. now that we have that figured out we can go onto installation!
How to Install Cabinet Hardware Like a Pro
Be sure to follow along with the video as you go through the step-by-step instructions below. If you have trouble seeing the video, you can also see it here: How to Install Cabinet Handles Straight, YouTube Video
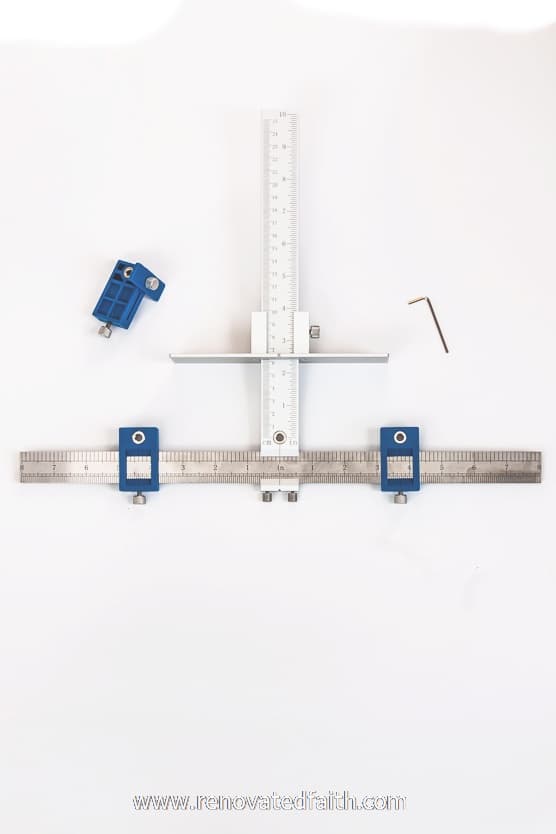
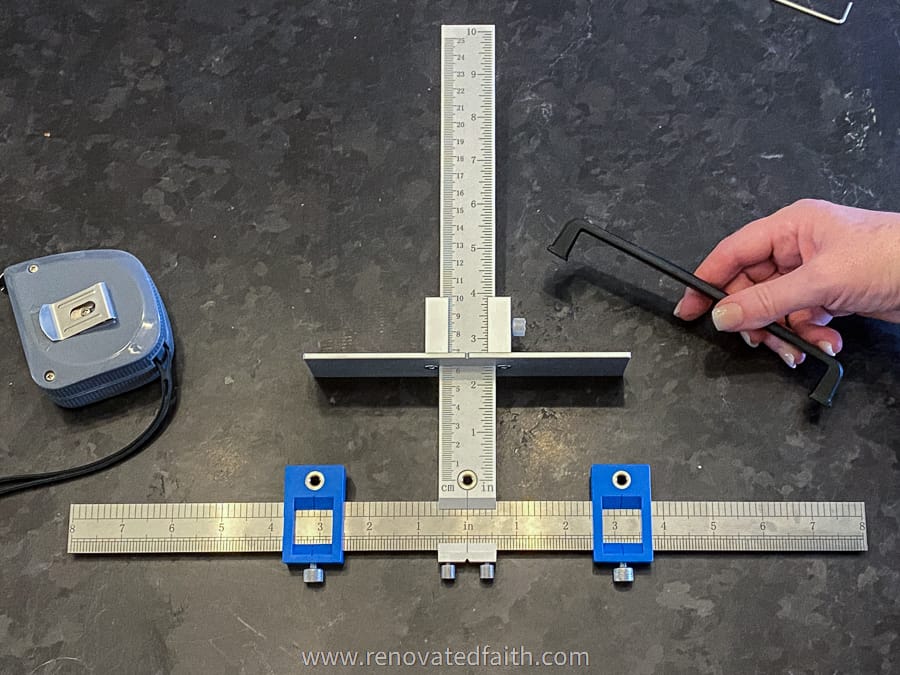
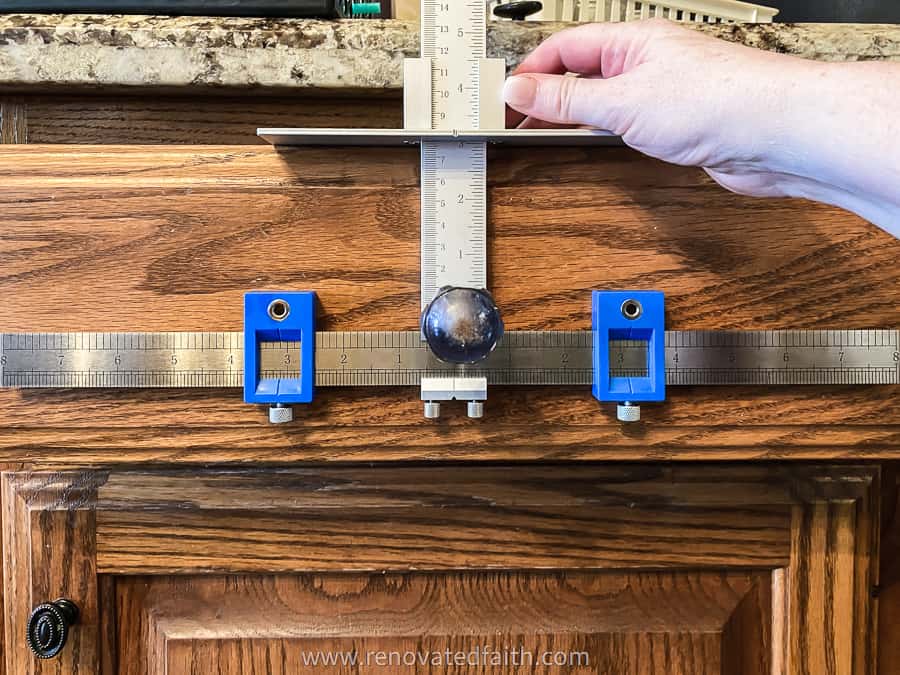
Step 1: Assemble the Cabinet Hardware Jig
Simply put together the upside-down T and tighten those two knobs at the bottom making sure that it’s calibrated to zero. (I learned this the hard way and wasn’t careful to set it to 0 and the first drawer I drilled was actually off-center by ¼”.) After you’re sure it’s set to 0, tighten the two knobs.
Now, you can put the top section on loosely. This holds the hardware jig in place vertically. Then you put the two blue ends on each side as shown.
RELATED: For the before and after reveal of my entire kitchen, click here: Before and After Kitchen Reveal Photos
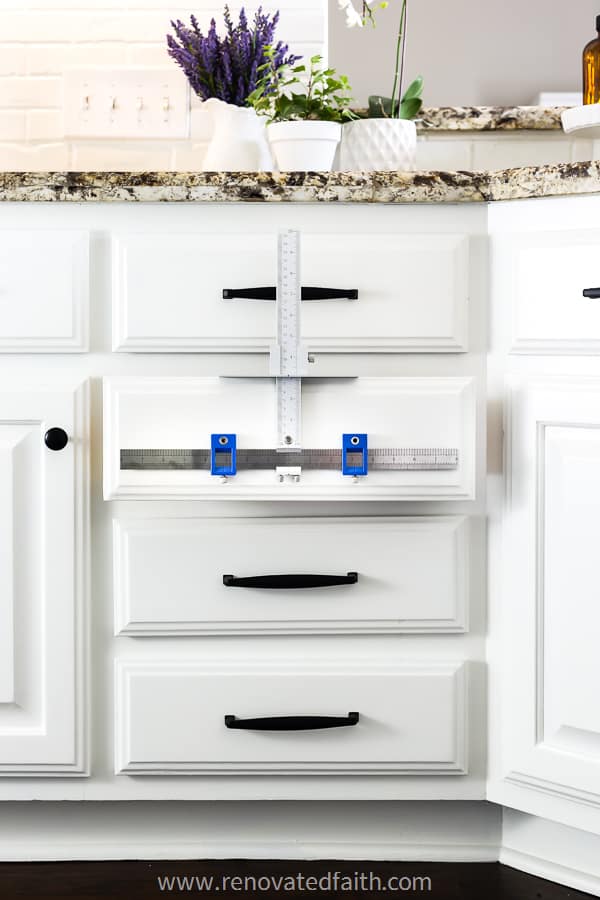
How to Use A Cabinet Hardware Jig For Perfect Hole Placement
Before we get started drilling holes we want to make sure the hardware jig is set to the exact specifications. It’s the most important step when learning how to install cabinet handles. Let’s set it up for drawers first.
Lay the jig on a flat surface, and measure the length of a handle and divide that length by two. This will be the center point of where the handle is going to be. Say if my handle is 6 inches then I’ll measure 3 inches from zero on both sides so those blue slides are exactly 3 inches from the center.
Tighten the two blue ends. Now hold your handle up to the blue ends to verify that they line up exactly.
If your drawer did not have a center knob, draw a midline horizontally while the drawer face is still on the drawer. Make sure the line at the center of the drawer fronts is level.
I had a center knob to work from so I put my awl through the existing screw hole and jig to keep the jig in place while I set the vertical slide to the top of the drawer. Once you set it to the right height, tighten it with the small Allen wrench that comes with the jig.
Take time during this part to make sure your jig is exactly where you want it and the bottom of the T is calibrated to 0 still.
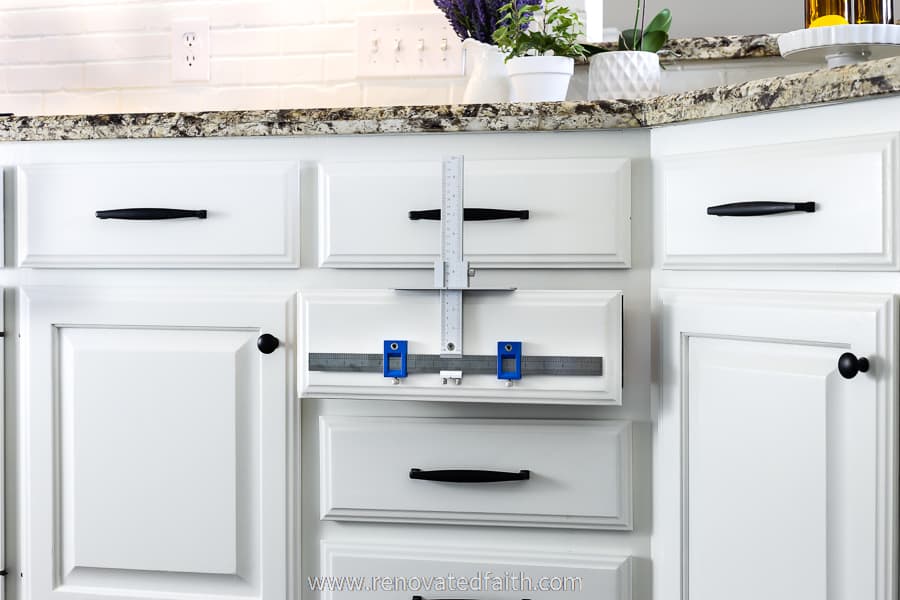
Step 2: How to Mark Holes With A Cabinet Hardware Jig
Like I said, it’s really nice if you’re going from a center knob to drawer pulls because you have that center hole to put your all in as a guide keep the jig in place on center
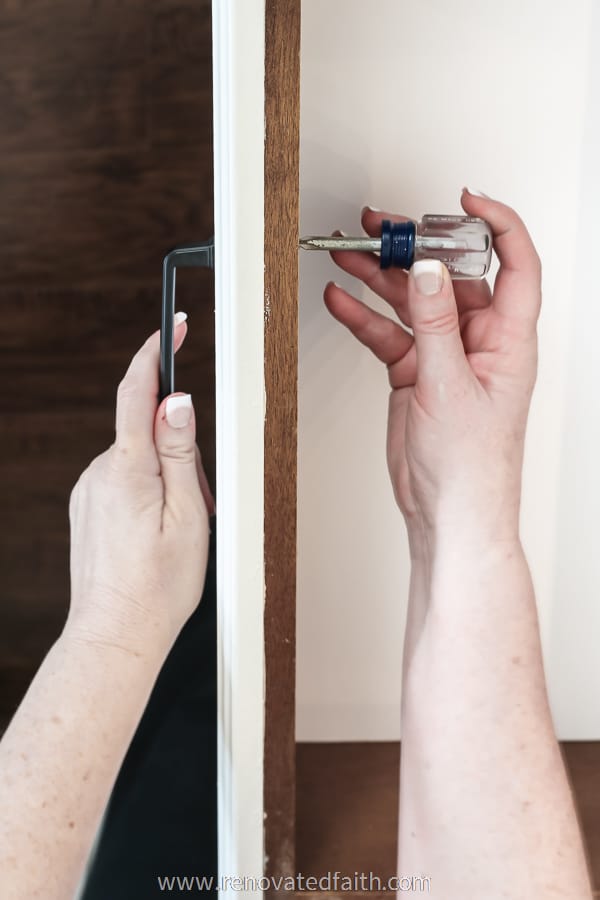
Some people prefer to drill through the hardware jig to make their holes, but I like to mark them first and drill holes after I take the jig off the drawer. You can mark the holes with a pencil or even make pilot holes with your smallest drill bit at this exact point but I like to make a little indention with my awl as you can see in the video.
As you see in the video, hold the jig in place flush with the drawer or door while you mark the first hole and then the second.
Step 3: How to Drill Holes for Cabinet Pulls and Knobs
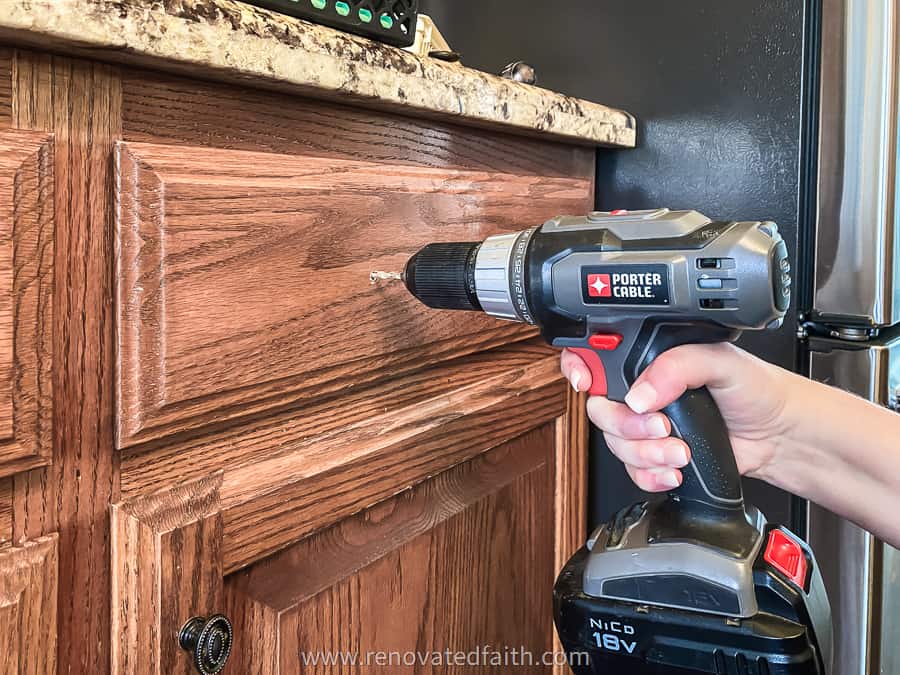
Once I’ve made these two little indentions I’ll take the jig off the drawer and drill two holes with a 3/16th or slightly larger drill bit.
Be sure that the hole you drill is a slightly larger hole than the width of a single screw. You want the hole size to be a little larger so that you have some wiggle room to adjust the handles so they are perfectly level.
After you drill the two holes, put the handle on temporarily to make sure the placement is correct.
Then, place the torpedo level on top of the handle to make sure it’s level. We want to verify that the holes on the first drawer are perfect because this is how the jig is adjusted for all the holes going forward.
Time-Saving Tip! When drilling your actual holes notice that I am leaving the front of the drawers attached, because I want holes in the drawer fronts and actual drawers to line up perfectly. Drilling the hole for both simultaneously is the best way to do that.
Don’t Forget: A general rule of thumb is to drill from the front to the back of your doors. This is not a hard and fast rule but sometimes as the drill bit comes out of the other side of the wood some splintering occurs. If this does occur, you want it to happen on the backs that are hardly seen instead of the front of the cabinet door.
Mark and drill holes on the rest of your drawers.
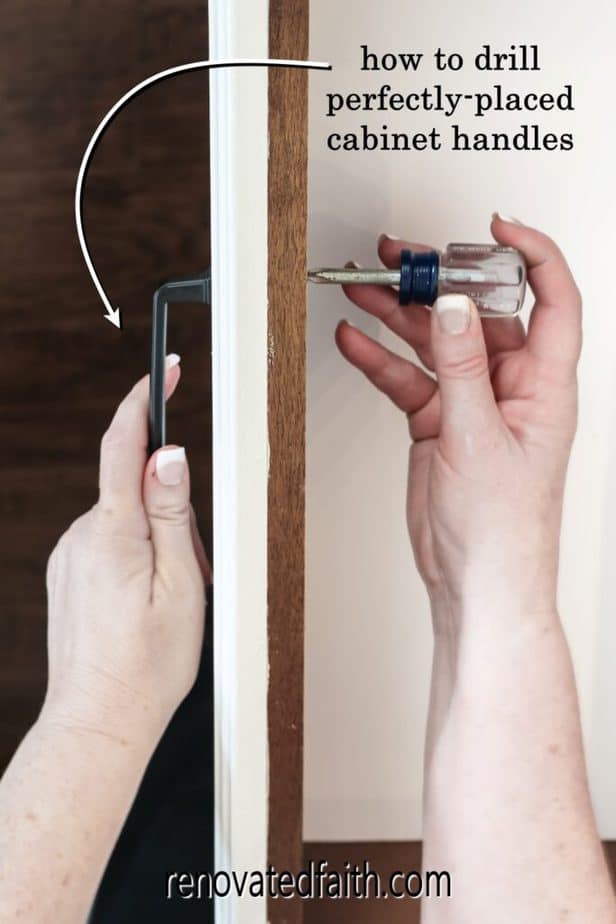
Step 4: HOw to InstaLL CABINET HANDLES Straight ON DOORS
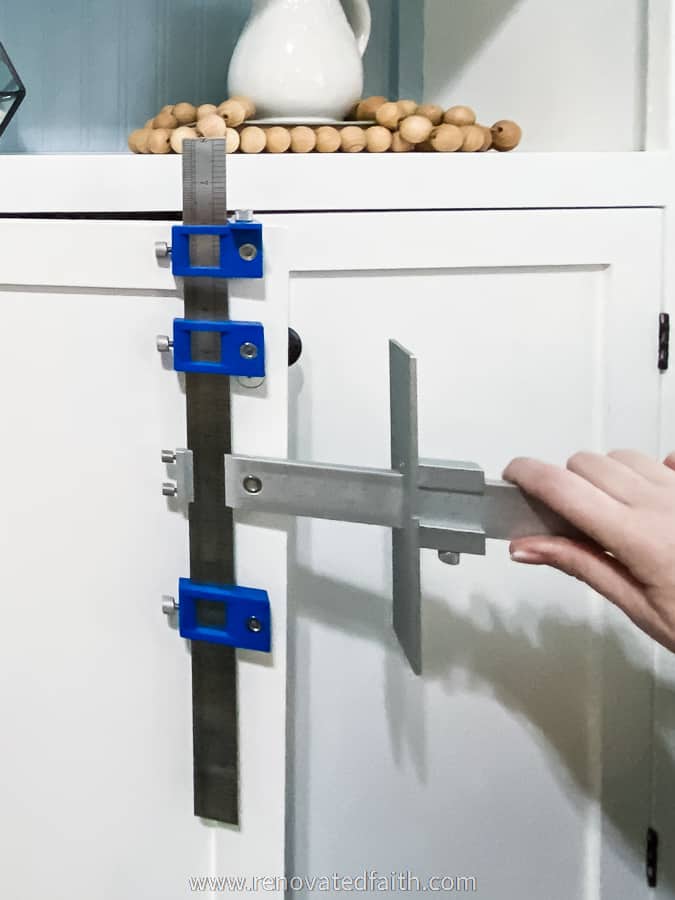
To show you how to use your jig to drill holes in doors, I’m showing you on the cabinet door of my DIY entertainment system. You will use the jig the same way on drawers but this time use the other blue slide because it has a stop on it to hold the jig in place vertically.
If you’re going from a knob to a vertical handle, try to use the knob hole as the 1st hole for my handle. As long as the placement is good you can do this and it saves you from drilling and filling an extra hole for each door. Also, by doing this I can put the awl in the jig to hold it in place while making the second mark for the hole.
IMPORTANT: I recommend setting the jig for one door side and then doing all of the rest of the drawers on the same side. For example, set the jig for the drawers, then drill the drawer holes. Then set the jig for all the upper left doors, drill those. Set the jig for all upper right doors. Drill those and so forth. Any time you have to change the orientation of the jig, re-check it because it might not line up the same when you flip it over from the left doors to the right doors.
Congratulations! You have done the hardest part by drilling all the holes for the new hardware. Trust me when I say you will be SO happy you have already done this instead of waiting until the last step when you are so tired of painting your cabinets!
Step 5: Remove The CABINET DOORS AND drawer FRONTS
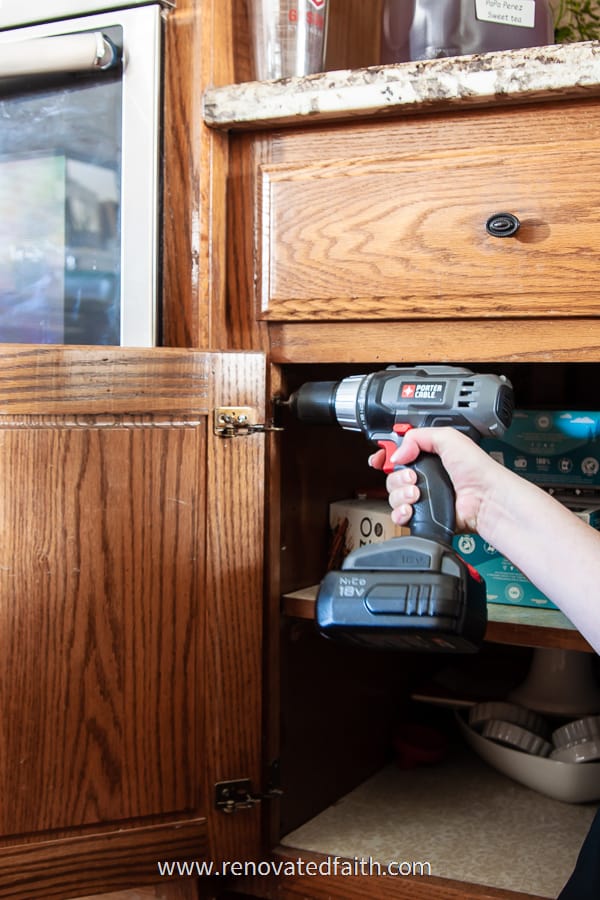
The next step is to remove all your cabinet doors and drawer fronts but first make a diagram of your cabinets. It doesn’t need to be perfect but just have some sort of record of the location of the drawers and doors on your base cabinets so you know where they go for reinstallation.
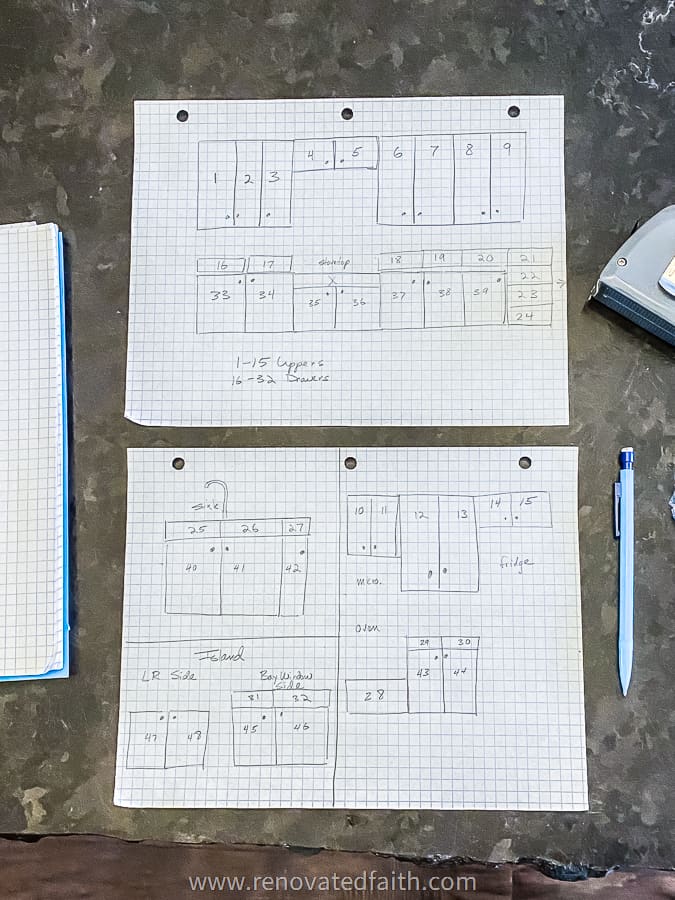
On your diagram assign all the cabinet doors and drawers a number. You can see how mine started from one on the upper cabinets and then I continued all the way around until I got to the last doors on the lower parts. Don’t forget your island!
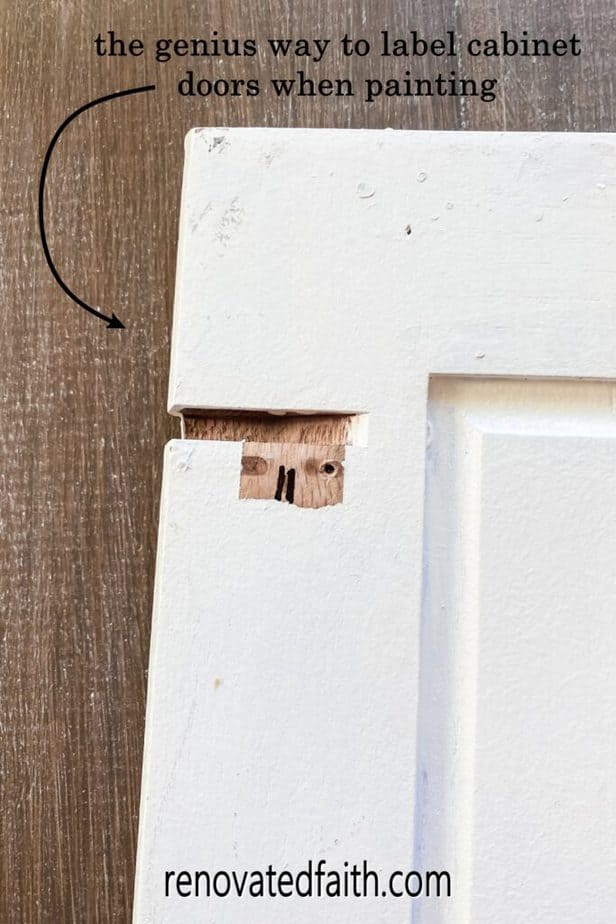
The Easy Way to Label Cabinet Doors and Drawers
Now you’re going to label all your cabinet doors and drawer faces with that corresponding number. The problem is that we’re of course going to paint the cabinets, so how do we label something we are painting?
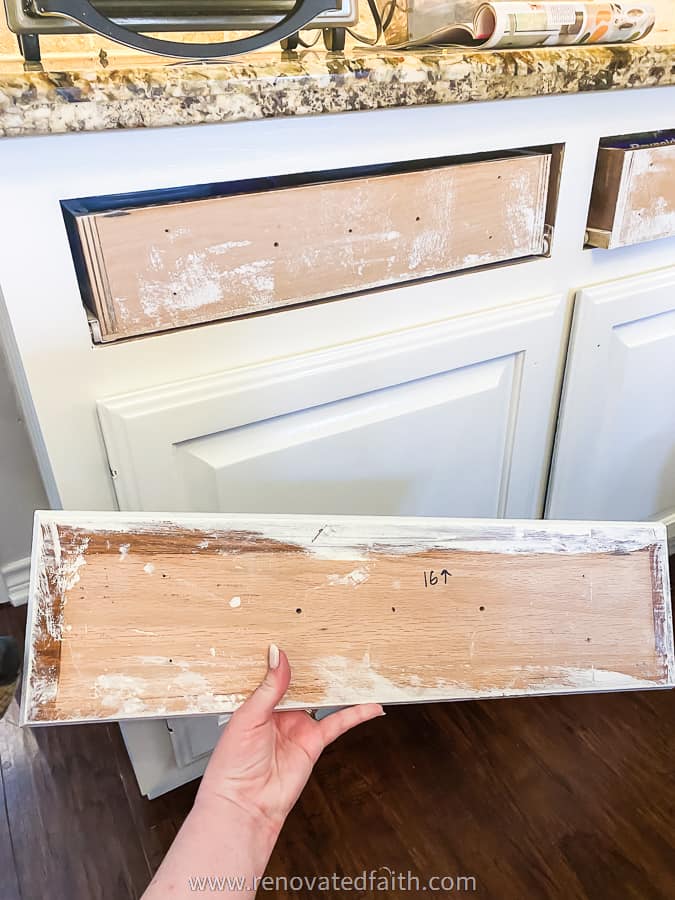
After talking to several professionals, the easiest way is to write the number on the part of the cabinet where the hinge is attached on the back bottom corner of your cabinet door (not over the holes but that space of bare wood under the hinge). I also add an arrow on the backs of drawer fronts to show which way is up.
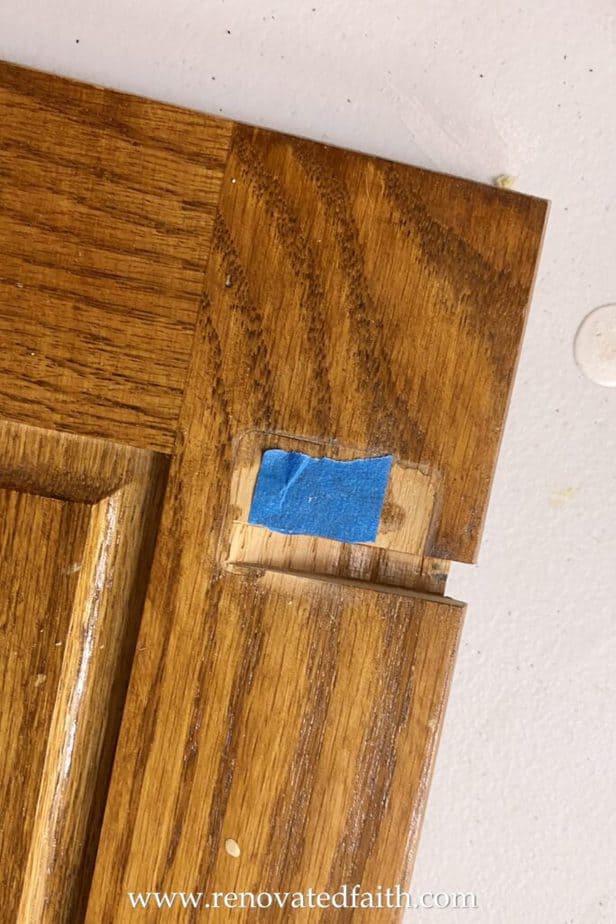
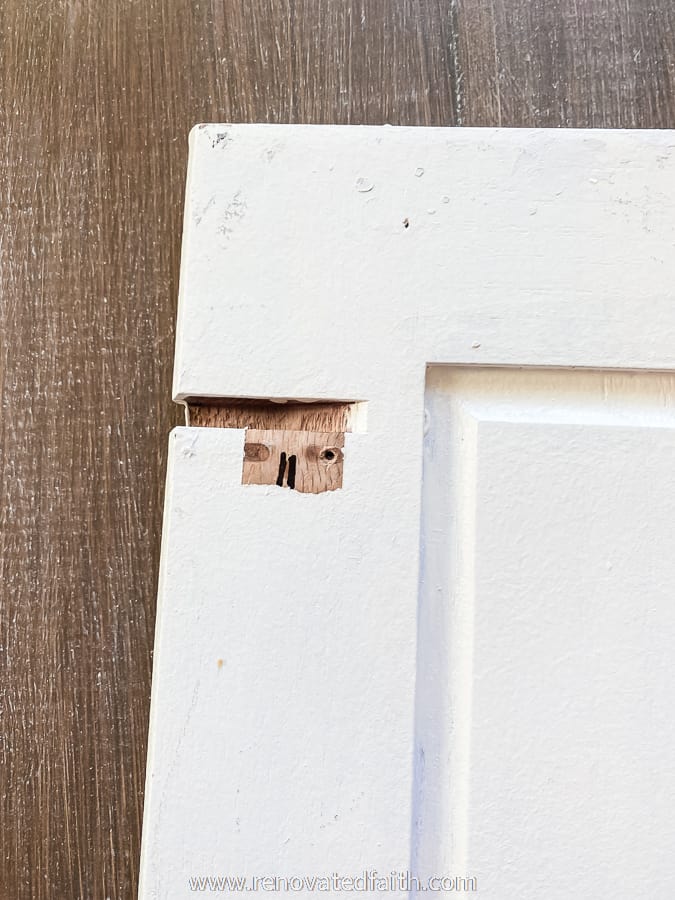
On the doors, cover up that number with a little piece of painter’s tape. That way, the number stays intact even as the doors are being sanded and painted. When it is time to rehang the doors, simply peel off the piece of painter’s tape to expose the number.
When I finished my cabinets, I was so happy I did this! The painter’s tape was so easy to pull up to see the numbers underneath. Then the numbers were hidden by the door hinges after they were hung. Win-win!
Labeling Cabinet Hinges
I also added a piece of painter’s tape to each hinge and labeled it with the door number and then a “T” or “B” for top or bottom. This step is not an absolute necessity but it helped me sleep a little better at night at least. The most important part is labeling the actual doors!
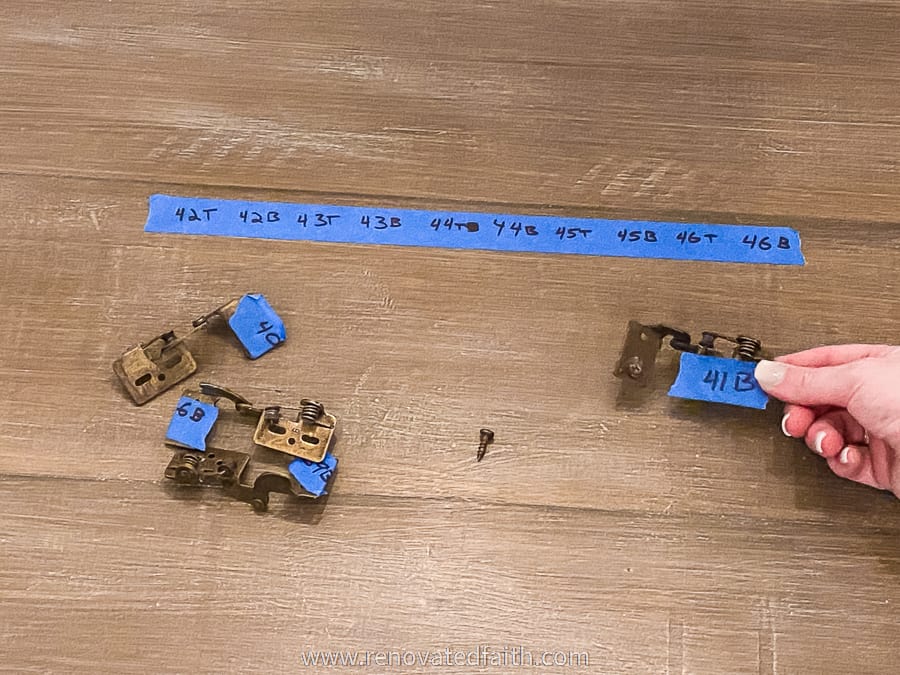
DON’T FORGET: After you’ve removed all your cabinet drawers and doors and labeled them be sure to put all the hinges and hardware screws in a baggie and put your diagrams in that baggie for safekeeping until your cabinet painting process is over.
Step 6: How to fill holes FROM OLD HARDWARE
Next, you will use wood filler to fill the drill holes from the old hardware. As you see in the video, apply a liberal amount of wood filler over the old holes. With a scraping motion, push the filler in the hole and flatten it over the surface making it mostly smooth.
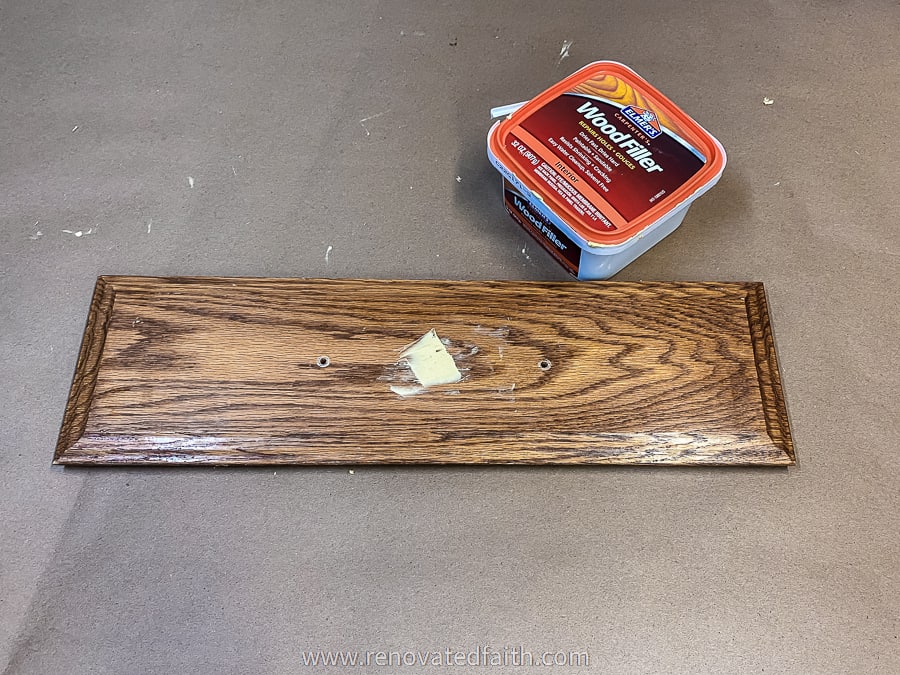
IMPORTANT TIP: Be sure to leave a thick enough layer of wood filler on the surface of the wood. If you are looking at the hole from the side you’d see that a coat of wood filler is covering the surface of the wood not just over the hole but around it. This is important because if you scrape off too much of the excess, the wood filler will shrink too much when it dries, leaving a little divet where the hole used to be. So, apply a think amount of wood filler on and around the hole.
Let the wood filler dry for at least a few hours or even better, overnight.
Use your sander with a 120 or 180 sanding pad and very lightly go over the surface of the dried wood filler. As you sand, check with my other hand to see how smooth the surface is. You are doing this to make sure you haven’t sanded too much. (Related Posts: The Best Sander for DIY Projects | How to Sand Quickly and Easily )
Sanding too much leaves a little divot in the hole and it will show through the paint after it’s painted. So be careful to sand just to the point that you can feel it’s smooth and no further.
Step 7: Prime and Paint Your Kitchen Cabinets
Be sure to check out these posts in my Cabinet Painting Series of Tutorials:
The Absolute Best Paint for Cabinets, Blind-Tested and Reviewed
A Step-by-Step Guide to Fill The Grain in Cabinets with Aquacoat Grain Filler
A Complete Guide to Getting a Smooth Finish When Painting Cabinets
How to Choose the Best White Paint Color for Kitchen Cabinets
The 33 Top Paint Colors for Kitchen Cabinets (The Best Dark Grays, Neutrals and Bright Colors!)
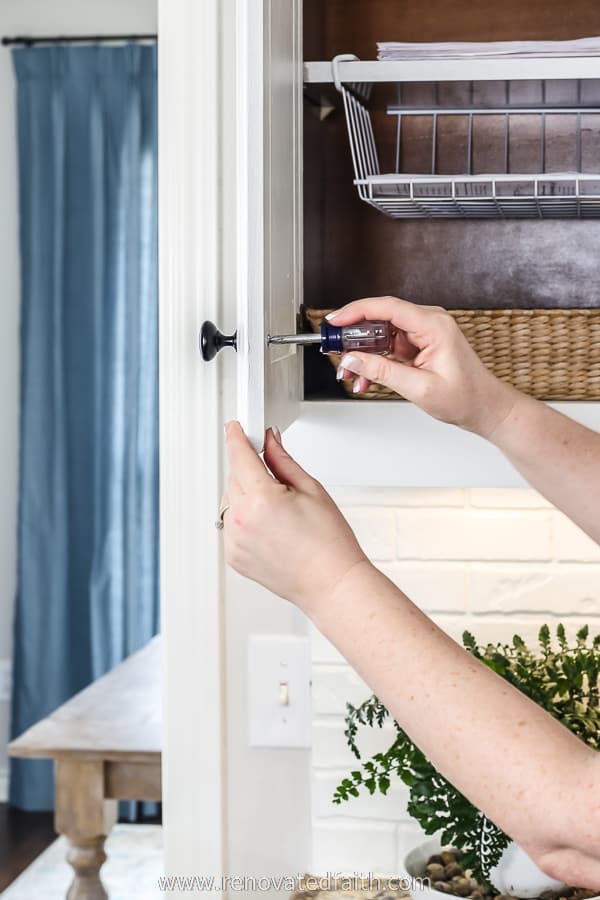
Step 8: How to Install Cabinet Handles Straight
Once you have primed, painted and reinstalled your cabinet doors and drawer fronts, the last step is to reinstall the hardware. This will go SO much faster since you already drilled your holes in the beginning.
If the paint has partially filled the holes, simply push it back through the hole with the screw.
What is the Best Way to Paint Cabinets: Brush, Roller or Paint Sprayer?
Many professionals will spray cabinets with a pneumatic paint sprayer but there’s definitely a learning curve. The paint has to be adjusted to the proper thickness and the nozzles have to be adjusted correctly as well to the flow of the spray right.
However, you can get an incredibly smooth finish with a brush or a roller. I like to use a combination of the two which you can see by checking out my full tutorial on how to get a smooth finish painting kitchen cabinets that comes out in a couple of weeks.
What is the Best Brush for Cabinets?
I prefer using a high-grade angular brush on cabinets. After a lot of experimenting with cabinets and furniture projects, I found time and time again that Zibra brushes (pronounced like the animal) give me a superior finish on wood surfaces.
Zibra brushes allow the paint to go on with good coverage but also very smoothly giving me a sprayed-on finish without brush marks.
Painting with these brushes is fun because the brush glides the paint onto the surface. It sounds cheesy but it’s something you have to experience for yourself. You can see the full line of Zibra brushes here: Zibra Brush on Amazon
You can also see my full results after doing a side-by-side comparison of all the top cabinet painting brushes in this blind comparison. To see other top picks including a lower budget option, be sure to check out my post: The Best Paint Brushes For Kitchen Cabinets (COMING SOON)
What is the Best Roller for Cabinets?
The are several good rollers on the market, and also several that perform poorly. You definitely don’t want a roller that leaves roller marks or particles of the cover on the painted surface. Also, you want to look for consistency in paint rollers. Some rollers will give you a completely smooth finish with one paint but lots of roller marks with another paint with a different thickness.
After doing a blind comparison with several rollers and 3 different paints, my personal favorite is the Whizz Black Foam Roller (See the Current Price Here.)
To see how other rollers compared, the best nap roller and a low budget option you can see the full results here: The Best Paint Rollers for Painting Cabinets (COMING SOON)
What is the Best Paint for Cabinets?
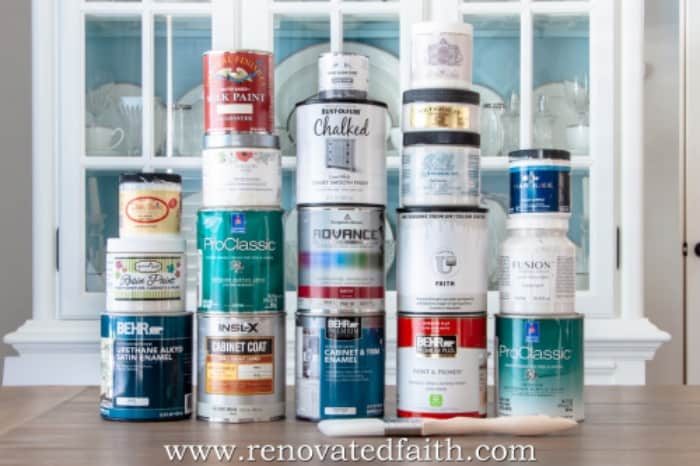
The other most important factor in addition to using the right tool is selecting the best paint for cabinets. There are so many different categories of paint including water-based, oil-based, hybrids, and chalk paints.
Fortunately, I’ve tested several from each paint category (over 20 brands) to see which yielded the best results based on smoothness, coverage, price, durability and scrubbability. You can read more about my favorite paint for cabinets here: The Best Paints for Cabinets, Blind-Tested and Reviewed
RENOVATE YOUR FAITH: Take The Next Baby Step in Trusting God
If you are at the beginning of your cabinet painting project, you might be feeling a little overwhelmed at the moment. I procrastinated for 6 years before painting the cabinets in our own house because I knew it would be a huge process.
When taking off the cabinet doors, I thought “I’m just at the beginning and I’m already sore. How am I going to do this all on my own?”
I think the same can be said of the Christian life. We see where we are struggling and we see where God wants to take us and all we can focus on is how far we have to go. READ THE REST HERE
For more spiritual encouragement, click here for the rest of my Renovate Your Faith devotionals.

FAQ’s: How to Install Cabinet Knobs and Hardware
How do you install cabinet pulls without a template?
Learning how to install cabinet handles straight without a jig or a cabinet hardware template is doable but it’s not easy. Installing cabinet handles, pulls or knobs without some sort of a hardware drawer template is nearly impossible in terms of accuracy. The side edge molding on most cabinets will make it difficult to precisely measure where the new hardware should be installed. Also, it will take you considerably longer not to mention the extra step of refilling and painting any accidental handle holes you drilled.
What size drill bit for cabinet hardware?
Use a 3/16” drill bit or something slightly larger to get the right size hole. I like to drill my hole with a slightly bigger bit so I have some wiggle room to play with later to make them perfectly straight and level. Don’t go too large if you are using Euro pulls because not much of the metal covers the edges of the hole.
How to Drill Holes for Cabinet Pulls and Knobs: How Do You Install Different Types of Hardware?
There are several different types of hardware including bin pulls, edge pulls, finger pulls, and using large handles is a popular trend. When installing your new handles, make sure to give some allowance for how far your hardware’s screw holes will be off from the center line of the drawer fronts. For example, if you are using a bin pull where the holes are off center a half-inch, you’ll want to make sure to add that half of an inch to the distance from the top of the drawer front. Mark your screw holes with a pencil mark and double-check before you drill holes for the new cabinet hardware.
How do I replace kitchen cabinet handles?
If you want to replace old cabinet handles with a different style, try to find the style of handles in the same length as the old hardware so you don’t have to drill any new holes.
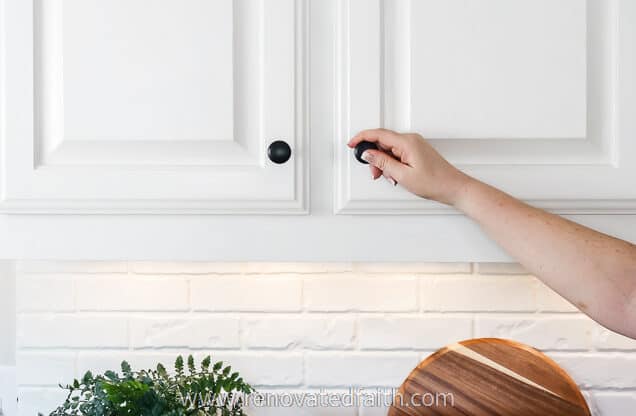
Should kitchen handles be vertical or horizontal?
Straight handles should be horizontal on drawers and all door handles should be vertical. Knobs are more commonly used on doors but the latest trend is to use them on doors as well.
Should drawers have knobs or pulls?
This is completely a matter of personal preference depending on your kitchen’s style and what you feel more comfortable with on a day-to-day basis. See the above section on how to install drawer pulls.
How do you install cabinet hardware without splitting wood?
Always drill front the front to the back of the cabinet door so any minor splintering of wood will be on the back instead of the cabinet fronts.
How do I make a cabinet pull template?
If you don’t want to purchase a cabinet door jig, you can measure and drill your first set of holes without a jig. Make sure they are perfectly placed and then make a jig out of a piece of scrap wood, cardboard or foam board with holes that correspond exactly to the hole placement of your cabinets.
The tricky part about using cardboard is that you want to make sure you line it up precisely with the edges of the cabinet doors every single time. Even a hairline off will the whole handle to be crooked. Also, consider taping the template in place with painter’s tape so your hands are free when you mark or drill the hole.
How do you install cup handles on drawers?
Cup handle installation is the same as with traditional handles. The holes are just hidden underneath on either side. Follow the same procedure above for cup pulls on drawers.
Cabinet Hardware Placement Standards: Where should handles be placed on kitchen cabinets?
Handles can be placed on drawers or doors as long as they are vertical. To see the guideline for cabinet hardware placement, check the section towards the beginning of the tutorial.
Can You Reuse Old Handles and Knobs?
Reusing your own cabinet hardware is a great way to save money on your cabinet painting project while getting the look of completely new kitchen cabinets. An inexpensive way to update the look of your old handles is by spray painting them. The important thing to remember when spray painting cabinet hardware is to use the right spray primer. You can use the same process I use in this post: How to Spray Paint Door Hardware So It Lasts
What is the best paint for wood furniture?
There are SO many furniture paints on the market and the most expensive is usually not the best. Check out my results here to find out what I’ll be using on every furniture project from now on: The Best Paint for Furniture, 2024
How To Install Cabinet Handles And Knobs, YouTube Video
More Posts Related to How to Install Cabinet Hardware
The Best Paint for Cabinets (24 Brands Blind-Tested & Reviewed)
The Best Faux Brick for A Backsplash (PVC Panels for Walls!)
A Fool-Proof Guide to Fixing Damage on Furniture
How To Spray Paint Door Knobs That Last
The Best White Paint Shades for Kitchen Cabinets (Sherwin Williams Colors)
From Antique Family Heirloom to New Vanity
A Sneak Peek At My Kitchen Cabinet Reveal
Final Thoughts on How to Install Kitchen Cabinets and Knobs
With this easy step-by-step tutorial, what seems like a daunting task can actually be a simple process that makes a huge difference in the finished product. You can have all your cabinet hardware holes pre-drilled perfectly before you even paint them. Also, using the cabinet hardware jig makes what could be a very frustrating process, quick and painless. When you finish the hard work of refinishing your cabinets you can be confident that the final step of your kitchen cabinet makeover will be simple! With this tutorial on how to install hardware on cabinets, you can save a ton of money while getting the same results you would get from a professional. Don’t forget to check out my full tutorial on The Right Way To Paint Oak Cabinets and download your free checklist!

I love to hear your thoughts and questions! Scroll down to leave a comment and I WILL reply! ❤️
Blessings,

Be sure to follow the fun here!
Email Subscription | Instagram | Pinterest | Facebook | Twitter
HOW TO INSTALL CABINET HARDWARE

Karin Peters is a DIY expert and the creator of Renovated Faith. She is a furniture painter, a home design consultant, and a tenacious problem solver determined to help you transform your house into a home. With 17 years of experience with DIY home improvement, she researches and analyses professional processes to adapt them to be easy and cost-effective for DIYers. She then tests every project and product before it appears on the site in a detailed, step-by-step format. After attending Texas A&M University, she received her Master of Divinity with Biblical Languages at Southwestern Baptist Theology Seminary. Her passions unite in Renovated Faith, which shows readers how to create a home that serves them so they can pursue their God-given purposes. About Renovated Faith | Editorial Policy | Facebook | Twitter | LinkedIn
Great post! My husband and I recently got our and decided we want different hardware on them. Unfortunately, my husband is out of town and I am going to install them myself so I have been scouring the internet for help and came across this post! Thank you!
Any tips on removing faint scratch marks on varnished wood?
So glad the post is helpful with your hardware! For scratches in wood, check out this post for my favorite furniture markers: https://renovatedfaith.com/how-to-fix-damaged-wood-furniture/
keep trying to find the link for best site to buy inexpensive knobs/pulls but I’ve been back through a hundred times and can’t find it again. Won’t come up in the search bar for the site either.
On the other hand, just need to say it must have been divine intervention that I found your blog on cabinets. All of my questions, curiosities and concerns have basically been addressed in this post! Definitely following you!
Hey Lesley! Here is the post: https://renovatedfaith.com/spray-paint-door-knobs/ Thank you so much for your kind words. Glad the hardware post was helpful and let me know if you need anything!