Painting Oak Cabinets White? (BEST DIY Tutorial!)

Everything You Need to Know to Paint Oak Cabinets White Like a Pro
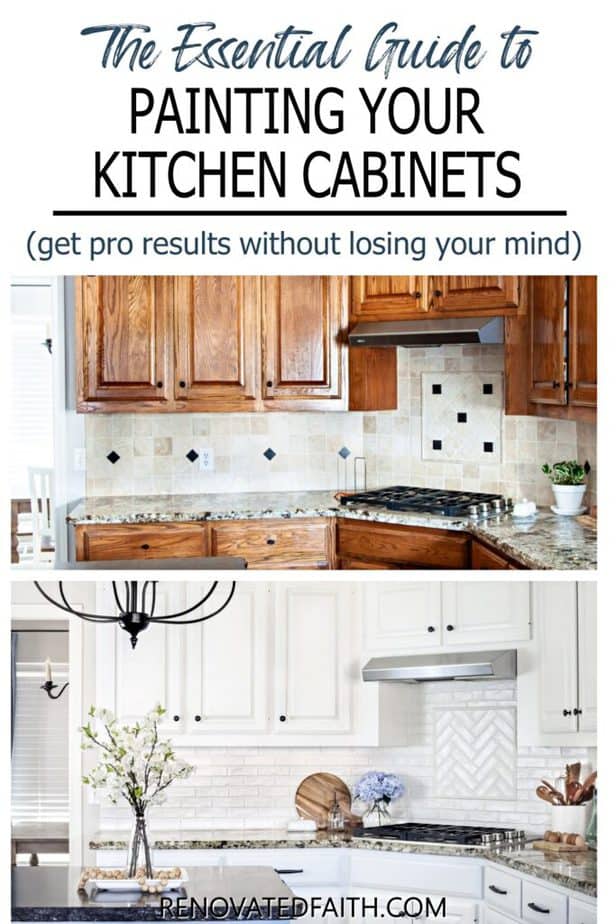
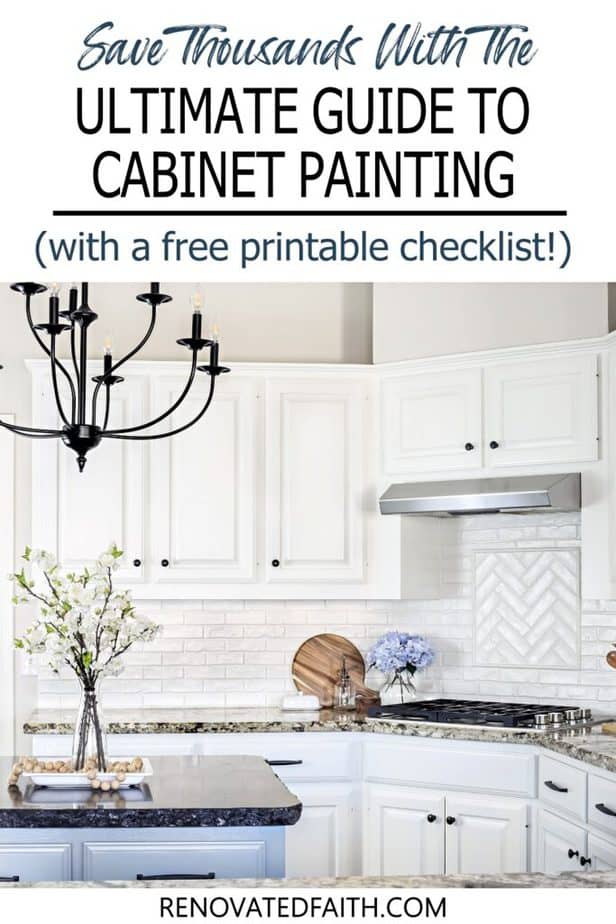
Want your cabinets to look professionally refinished while spending a fraction of the cost? Check out this tutorial & video on painting oak cabinets white without grain showing.
Are you overwhelmed with the thought of painting kitchen cabinets yourself? I’ll show you the best way to get a professional finish painting oak cabinets white with this step-by-step tutorial, video, and FREE Cabinet Painting Roadmap Checklist.
There’s more to it than slapping on a fresh coat of paint. Stained cabinets can be hard to cover especially when you are painting in white. Also, oak cabinets are notorious for having a deep wood grain that paint alone won’t fill. But no worries!
After talking to several cabinet refinishers and doing lots of research on the best cabinet paint, brushes, and rollers, I am here to help you get the perfect paint job in the easiest way possible! You’ll get the same results as hiring a professional but will save thousands of dollars with this DIY process.
Painting your kitchen cabinets can completely transform the look of your kitchen. And since the kitchen is the most important room of a house, no other DIY project can make such a visual impact or have a greater ROI than refinishing your kitchen cabinets.
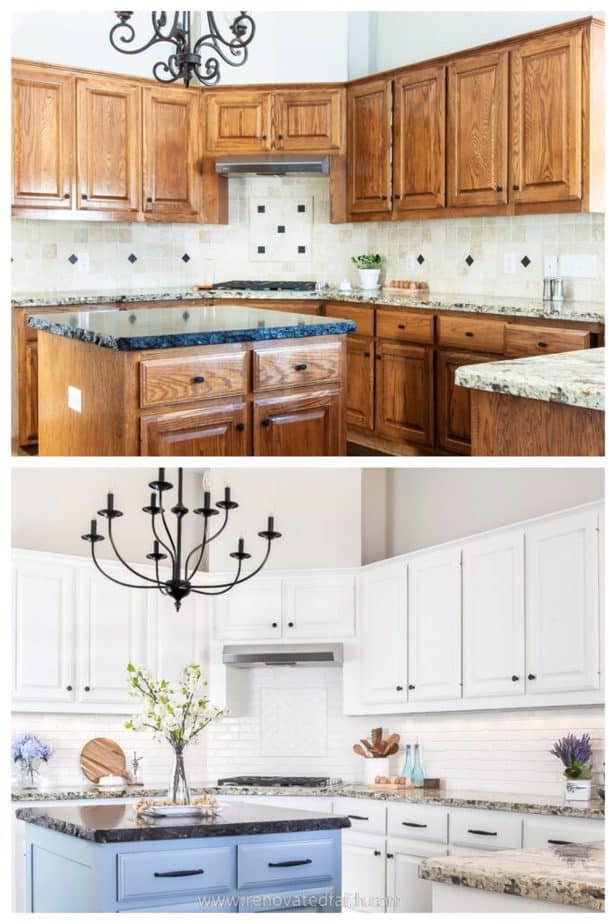
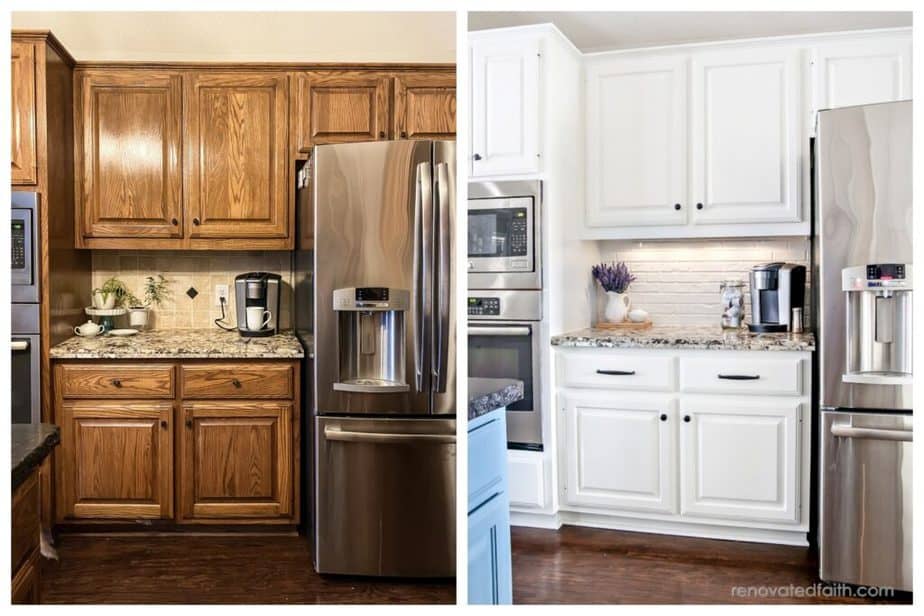
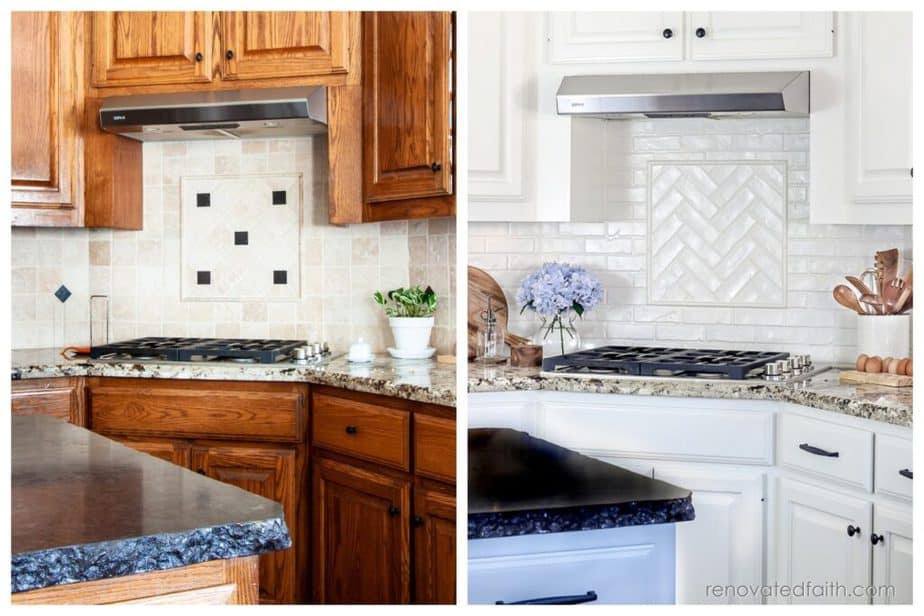
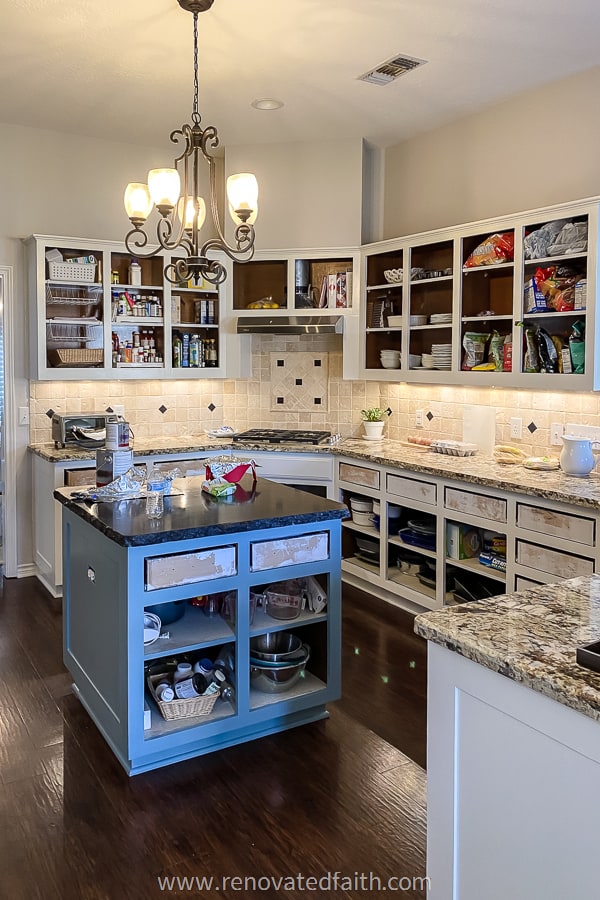
In this blog post, I’ll show you the whole process of my own orange oak nightmare that made my kitchen dark, dated, and depressing.
Not only can you save $1000’s but your cabinets will have a gorgeous, smooth finish that will stand up to the chaos of daily life for years to come.
Can You Paint Oak Cabinets White?
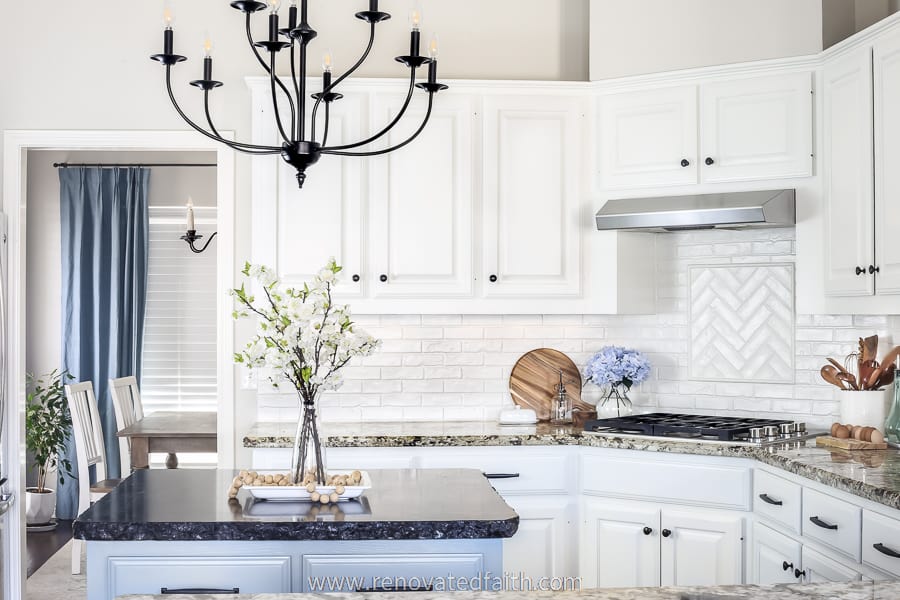
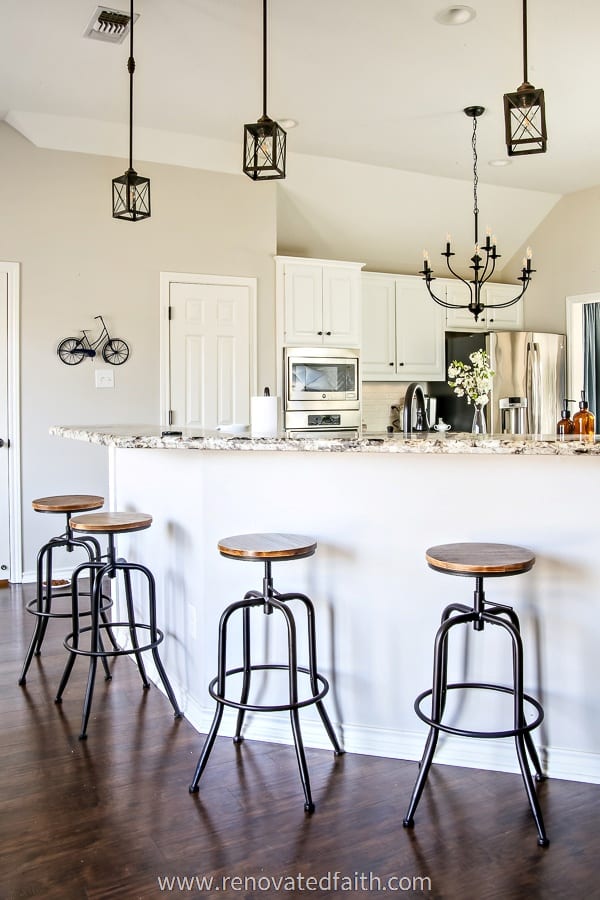
By painting away that blazing orange, the value of your home automatically goes up. Painted cabinets are classic and can work well for any home decor style. Also, they give you a brand new palette so your kitchen has a crisp new look. Imagine how the fresh look of painted cabinets will update your home and change the feel of your kitchen.
Are Oak Kitchen Cabinets Outdated?
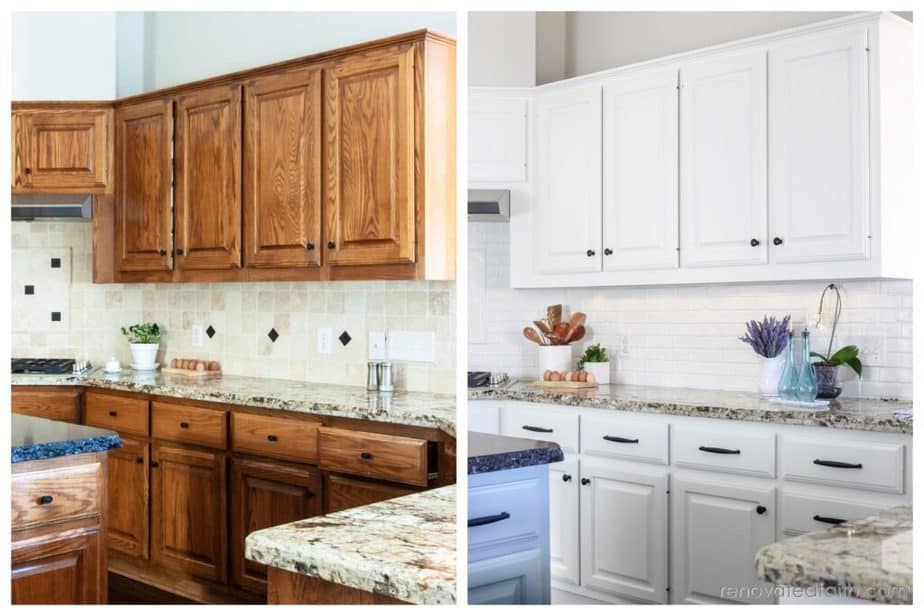
While some cooler-toned oak cabinets are trending, the traditional honey oak cabinets with the orange hue and heavy wood grain won’t be going back into style anytime soon, not in this century at least. Also, white kitchen cabinets are classic, and you have the flexibility to bring in any color palette you want with accessories and rugs.
Can You Just Paint Over Kitchen Cabinets?
Well, yes, but there is some prep work you want to do to ensure the paint adheres, the final finish is durable, and the surface is super smooth. The last thing you want is to forgo some of the prep work and then have to re-paint your cabinets in 3 months because they are peeling. Unfortunately, it happens way too often because a step was skipped in prepping the wood’s surface.
How Do You Paint Oak Cabinets Like A Pro?
If you are going to go through the trouble of painting your cabinets, this step-by-step tutorial will show you everything you need to know so they are done correctly and you don’t end up repainting them again.
Did you know many Professional Painters Aren’t Necessarily Cabinet REfinishers?
A little-known fact is that most painters are not cabinet refinishers and most cabinet refinishers aren’t painters. It’s two different skill sets that involve different products, materials, and procedures used.
Painters will likely paint your cabinets for a lot less money than cabinet refinishers. Even though that could be $3,000, an actual cabinet refinisher will usually charge much more, and you get what you pay for. This is not a jab at painters because you only know what you know.
But it goes to show that even if you pay someone to paint your cabinets, it doesn’t mean it will be done correctly. This tutorial will show you lots of techniques used by professional cabinet refinishers so you get a durable, smooth finish but also the savings of doing it yourself.
What’s The Average Cost To Paint Kitchen Cabinets?
I paid less than $500 by painting my own cabinets but a professional would have charged over $5000. See the full cost breakdown here: How Much It Costs to Paint Kitchen Cabinets (DIY or Hire a Pro?)
“How Hard Is this Project? Is Painting Kitchen Cabinets worth it?”
This is not a weekend painting project, and I recommend you get a couple of family members or friends to help you because it’s hard work. I did my cabinets myself, and it took me 2-3 weeks. That also included redoing my backsplash (see the reveal here). I think it took me that long because of the added grain filler step. A big issue with oak cabinets is the deep grain and paint alone won’t fill it very well.
Even though this was a big project, I would definitely do it all over again. Whether you do the project yourself or someone else does it, your kitchen will be out of commission for some time. Also, I saved over $4500 by doing them myself. And even though the grain filler was a whole extra step, I think it’s what made my cabinets turn out as good as they did and I also used significantly less paint since the paint wasn’t filling all those grain holes.
RELATED POST: For the entire reveal, click here: Before & After Kitchen Cabinet Photos
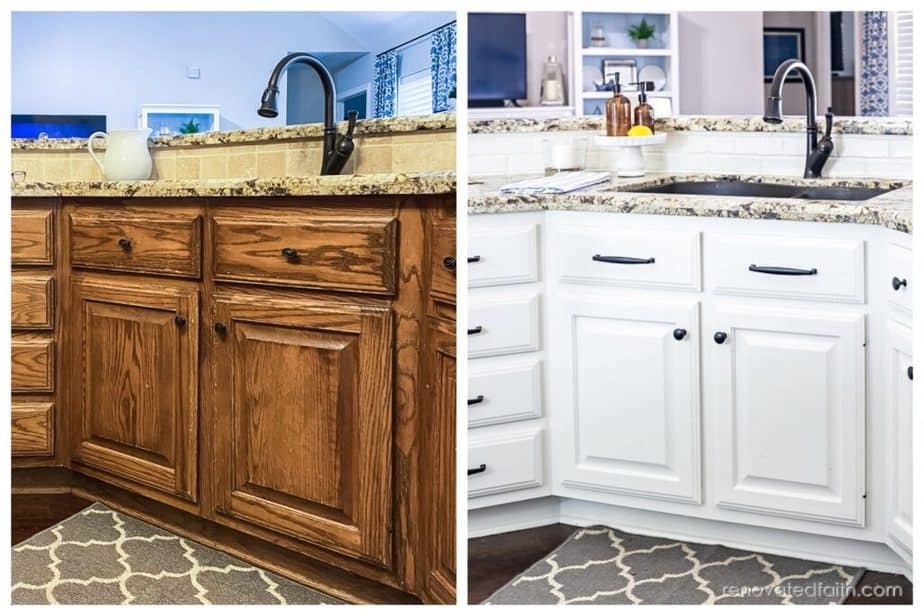
The new color changed the entire kitchen. Getting rid of the honey oak kitchen cabinets even changed the look of my countertops for the better.
Can You Paint Brown Cabinets White Quickly?
Whether your cabinets are stained brown or painted brown, painting over dark colors with a light color will take several coats to get full coverage. However, using a primer and paint with good coverage can minimize the total number of coats when painting brown cabinets white.
Also, the grain filler helped my kitchen cabinet painting process to have better coverage which meant fewer coats and less money spent on paint. This process will help you to minimize the number of coats and get full coverage in less time!
Quick Links to Information in this Post
- 1 Everything You Need to Know to Paint Oak Cabinets White Like a Pro
- 2 Can You Paint Oak Cabinets White?
- 3 Can You Paint Brown Cabinets White Quickly?
- 4 Supply List: How To Paint Cabinets White
- 5 How to Paint Oak Cabinets White Without Grain Showing
- 6 RENOVATE YOUR FAITH: How God Really Sees You
- 7 FAQ’s: How To Paint Cabinets White
- 8
- 9 More Blog Posts Related to How To Paint Oak Kitchen Cabinets White Without Grain Showing
- 10 How To Paint Cabinets White, YouTube Video
- 11 Final Thoughts on Oak Cabinets Painted White
- 12 How To Paint Oak Kitchen Cabinets White without Grain Showing
Supply List: How To Paint Cabinets White
Krud Kutter
Primer Brush
Mini-Rollers
A Good Paint Brush
Electric Sander- I love my mouse sander and it makes sanding a breeze. Click the link above for best brand after I tested several sanders.
Sanding Pad Set – Click the link above.
Primer – The best primer for oak grain is Zinnser Cover Stain which you can find at most home improvement or paint stores. If you have cherry cabinets that are likely to have stain bleed, use a shellac-based primer like Zinnser BIN.
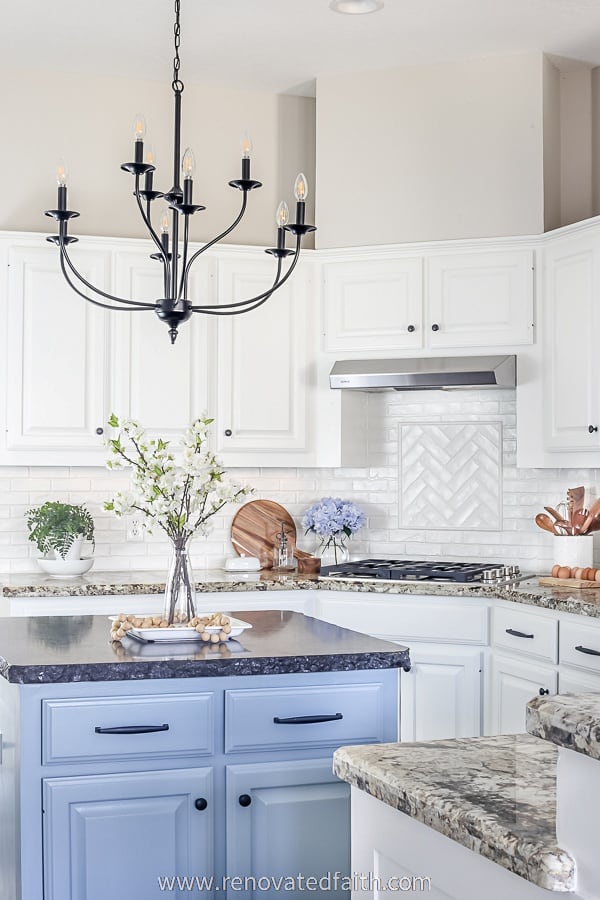
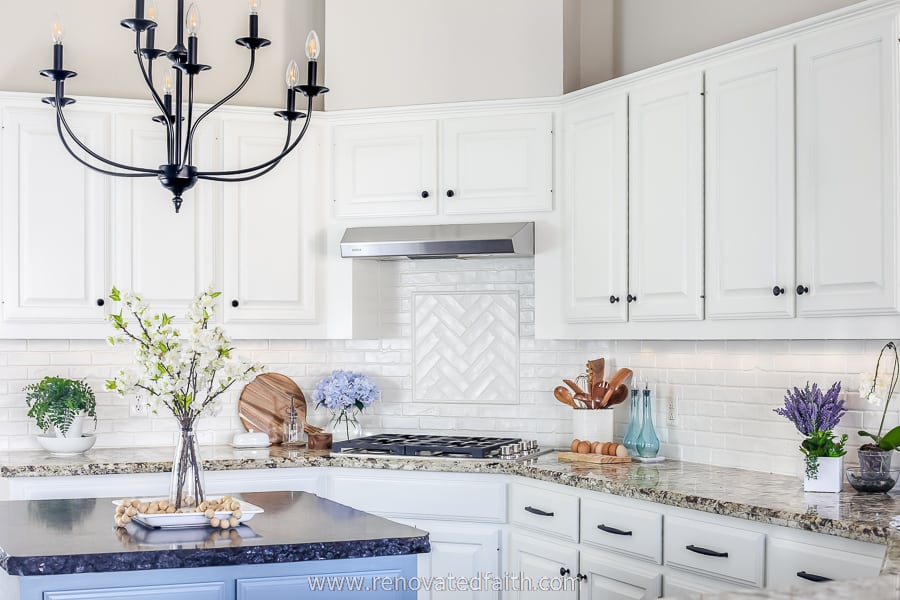
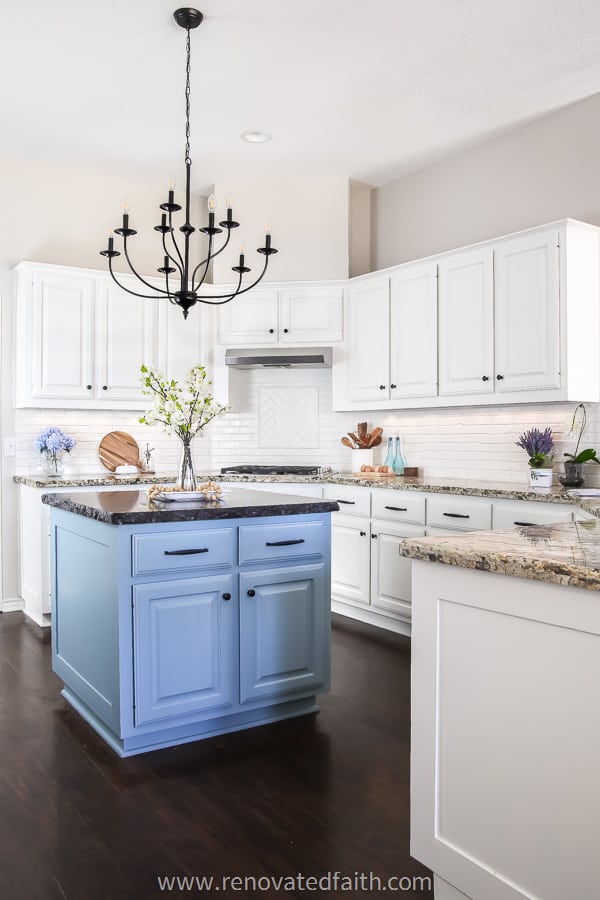
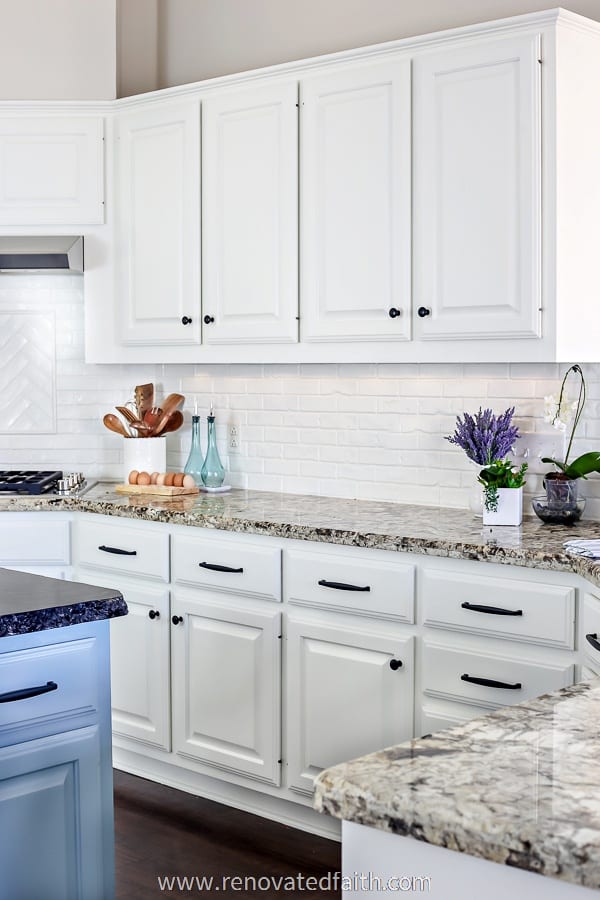
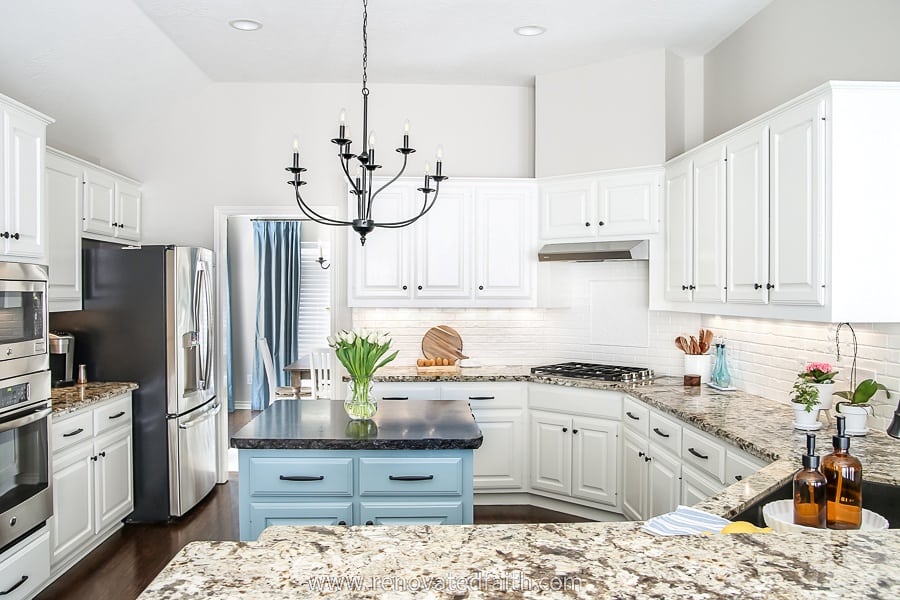
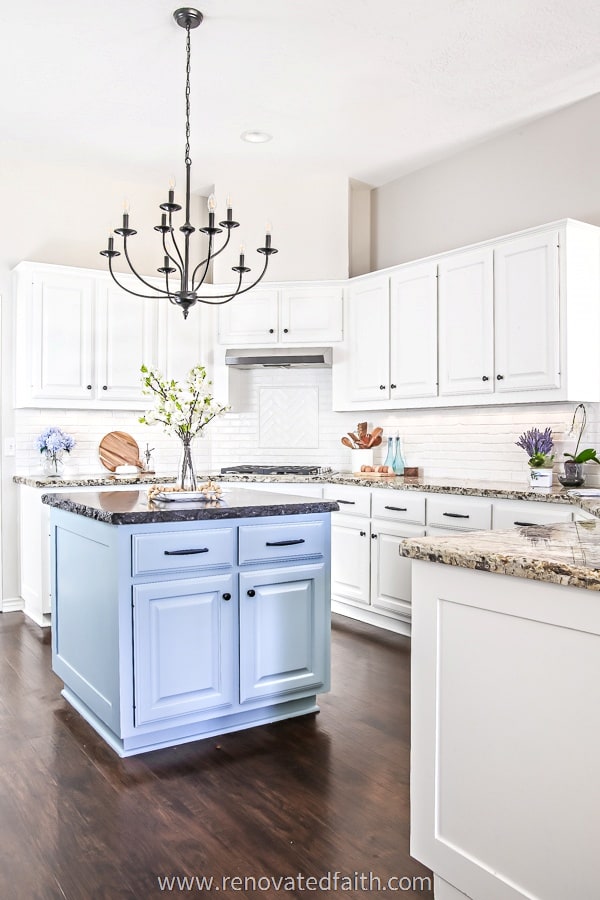
Paint – I recommend Benjamin Moore Advance in a satin sheen. The color I used was Sherwin Williams Alabaster and Benjamin Moore Van Courtland Blue for the kitchen island. Here are my results when testing high-quality paints: The Best Paints for Cabinets Blind-Tested
Tack Cloths or Damp Rags
Drop Cloths – Cover your kitchen floor with drop cloths or builder’s paper.
Sharpie Marker
Folded Boxes or Cardboard and Push Pins
Painter’s Tape – Get the yellow painter’s tape for delicate surfaces.
New Hardware (Optional)
Cabinet Painting Roadmap Printable – Don’t forget to print out this resource that will show you the exact order to go in when painting your cabinet bases and doors! See the form below.
Don’t forget to check the supply lists for these posts as well: The Easiest Way to Install Cabinet Hardware | How To Apply Aquacoat Grain Filler
How to Paint Oak Cabinets White Without Grain Showing
I recommend that you read through the information below as you watch the video that goes along with this tutorial. If you don’t see the video pop up, you can also find it here: The Ultimate Guide to Painting Oak Cabinets White, YouTube Video
Once you have read the instructions and watched the video, you can print out the FREE Cabinet Painting Roadmap printable showing you the exact order painting your upper cabinets, lower cabinets and doors. You can get it here or below: FREE Cabinet Painting Roadmap Printable Checklist
Stop! Don’t forget to take a pic. When you are done, post the pic on Instagram and tag me @renovatedfaith! ❤️
Step 1: Drill HOles for New Hardware (OPtional)
The very first step in this process is to make some decisions about your hardware. Here are your options:
- Replace the old hardware with new hardware
- Spray Paint the old hardware for a new look. See my post on How To Spray Paint Door Knobs. All the same information applies.
- Use the old hardware as is.
Please don’t be scared off by option 1! If you are going to change your hardware, now is absolutely the time to do it.
New hardware can add SO much character and will update the look as much as paint does. In this post, I walk you through the whole project here: The Easy Way to Install New Cabinet Hardware (Cabinet Jig Tutorial)
As I mention in the post above, if you are changing out your hardware, now is the time to drill new hardware holes. If you make a mistake, it’s so easy to fix it now on the unpainted woodwork versus waiting until your cabinets are fully painted. I also included a guide on hardware placement in the hardware installation post.
So after you remove your old hardware, go to that post and come back here when you have gone through the tutorial:
HOW TO INSTALL CABINET HARDWARE (THE EASY WAY!)
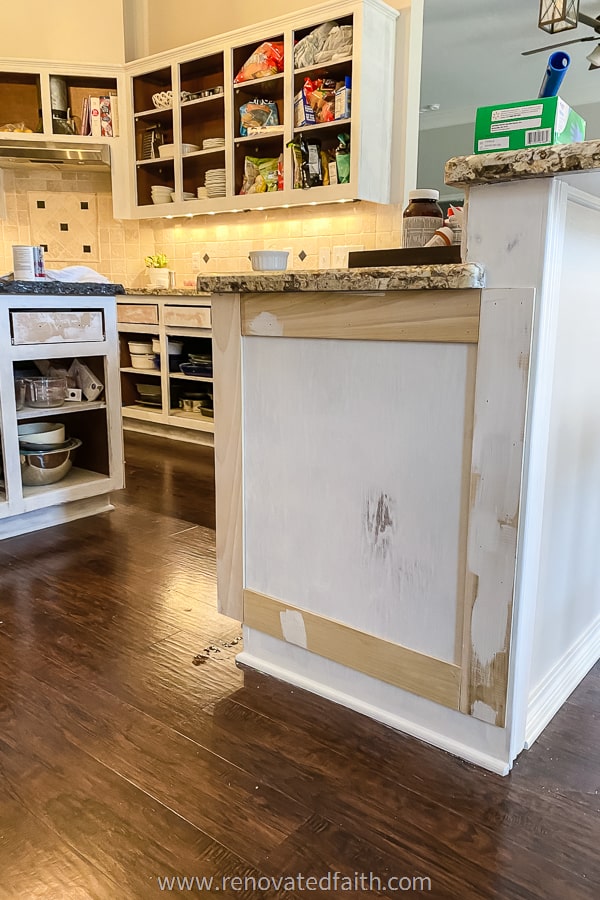
STEP 2: Make A Diagram And Label The Oak Cabinet Doors
After you drill any new hardware holes, make a diagram of your cabinets like this one here. It doesn’t have to be pretty, but you want to label your oak cabinet doors so you know exactly where they go after they are painted. Trust me. You will thank yourself later!
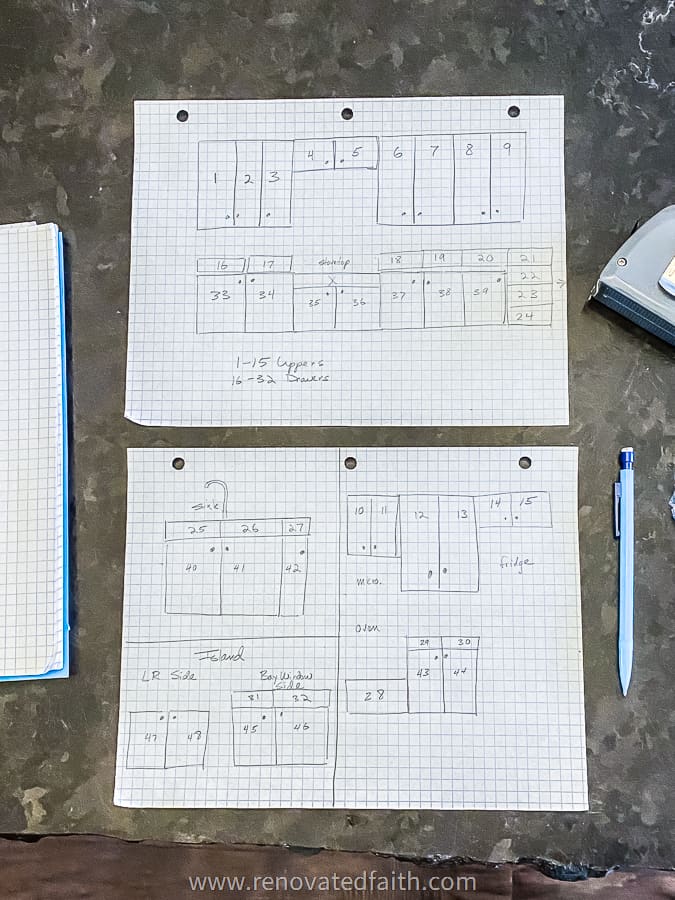
Assign each cabinet door and drawer a number. For mine, I started from one end of the upper cabinets, and then I continued all the way around. Also, don’t forget your island!
The Best Labeling Hack for Painting Oak Cabinets White
Now you are going to label all your cabinet doors and drawers to match your diagram. However, since we are painting the cabinets, it’s not easy to label something we are painting. Fortunately, I have one of the easiest ways to label your doors so you know where they go after painting.
After talking to several cabinet refinishers, the easiest way to label your cabinet doors is to write the number in the bare spot where the hinge is removed. (You can write it on the section covered by the plate, not on the holes.)
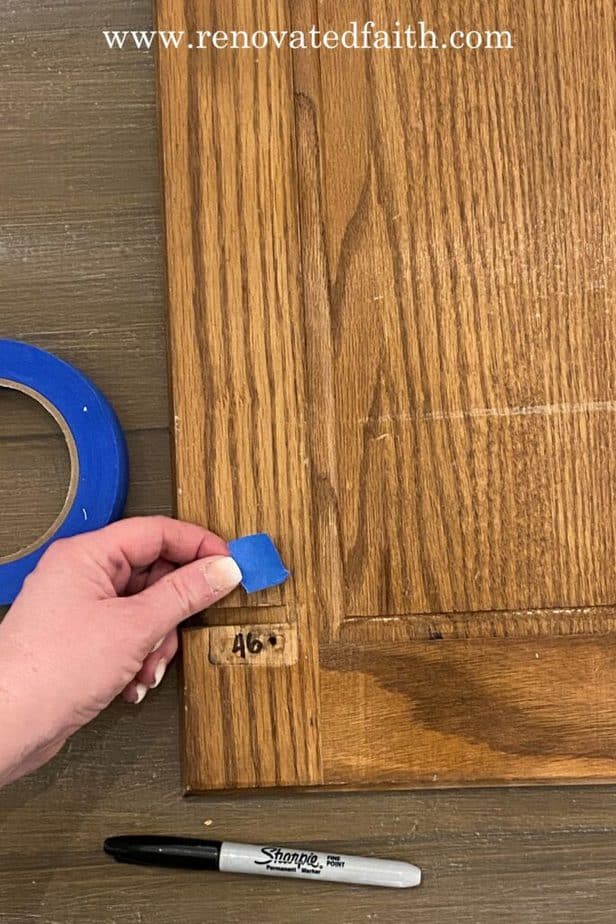
So as you take off all of your oak doors, remove the hinges and write the number where the hinge was with a sharpie. Then, cover each number up with a little piece of painter’s tape. I added the number twice on each door where the hinges go.
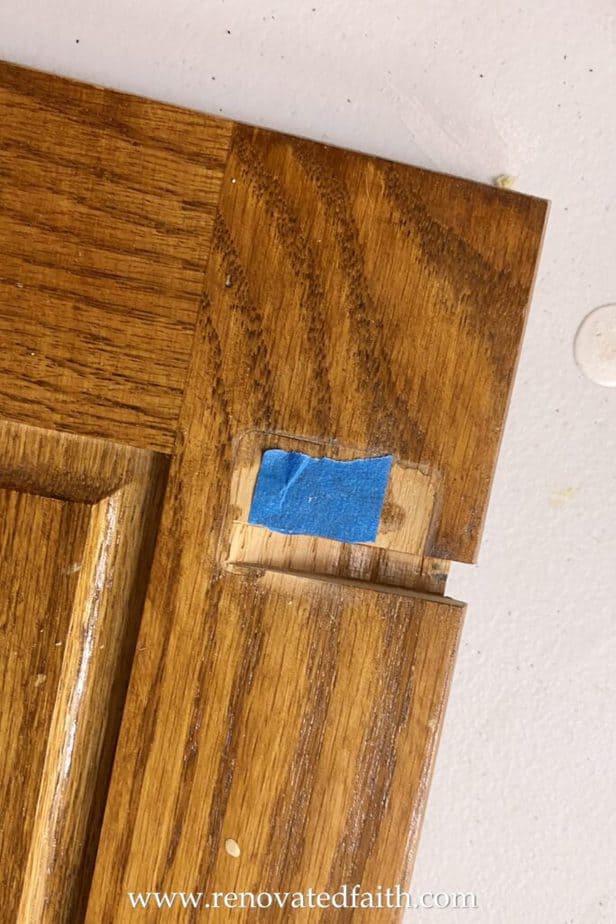
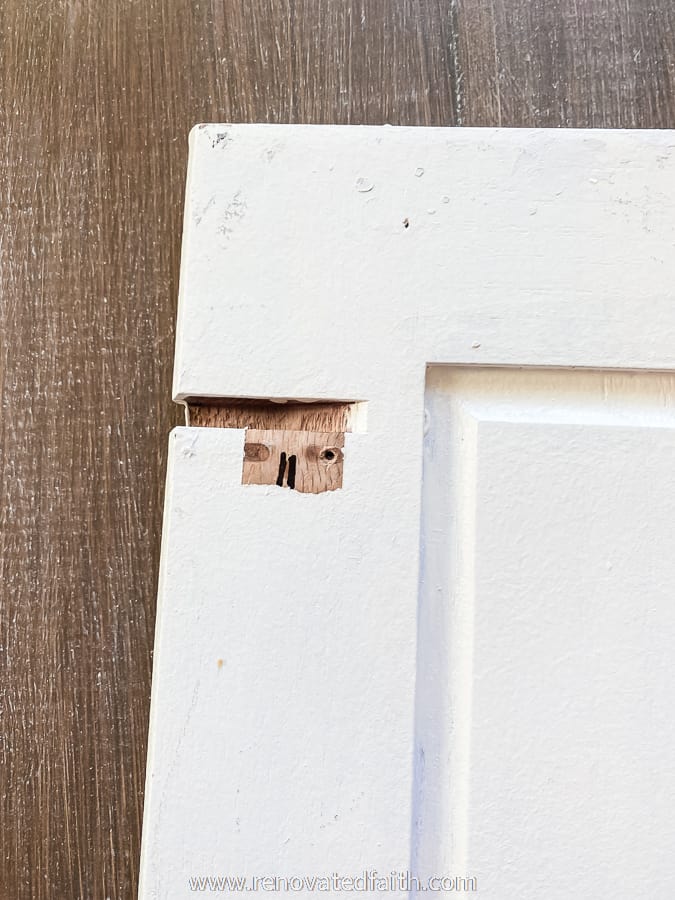
When I finished my cabinets, I was SO happy I did this! I could paint over the painter’s tape freely and the tape was so easy to pull up when the paint had dried. Also, the numbers were covered up by the hinges again when I was done. Win-win!
I also recommend you label your hinges by wrapping a piece of painter’s tape around each and writing the number on the tape. If your hinges are in rough shape, you can get new hinges but just make sure they are exactly the same as the old ones.
Don’t forget to put your old hardware, screws, and hinges in a baggie for safekeeping WITH your diagram for when your cabinet painting process is complete. You can also label your hinges but I found it wasn’t as helpful as labeling my doors.
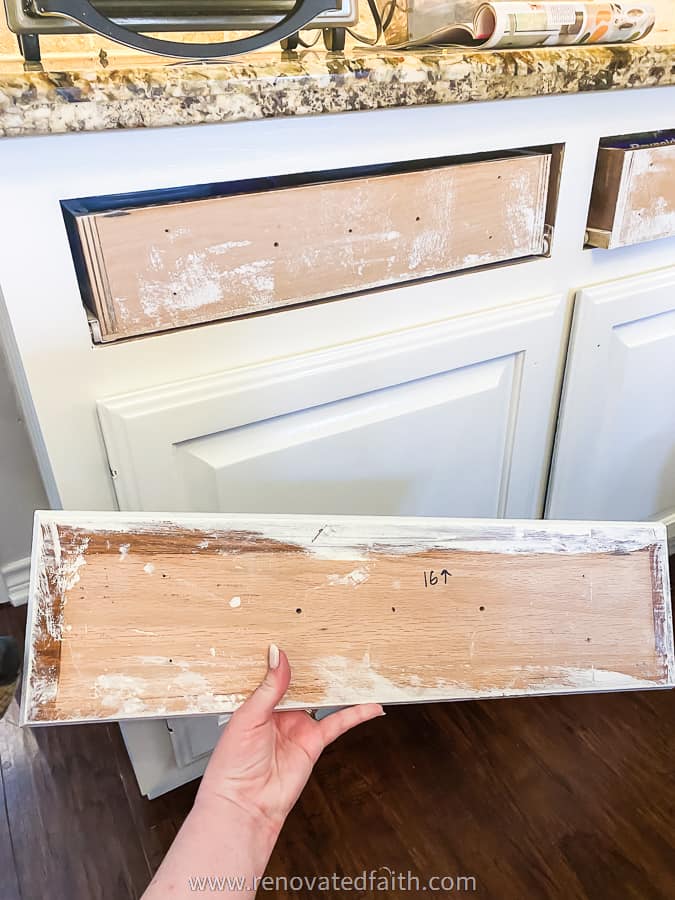
When labeling the drawer faces, you don’t have to use tape. I write directly on the back of the face but I labeled which direction was up with an arrow by the number on the back.
If you are adding brand-new hardware, this is the point where you will want to fill and sand the old hardware holes and I show you exactly how to do that here: How To Install Cabinet Hardware Easily
God never leaves a project half-done…He continually works on each one of us, as a lavish expression of His amazing love and grace. So many of my DIY projects remind me of how God renovates our hearts. If you are a work-in-progress, just like I am, check out the Renovate Your Faith Devotional at the bottom of this post. Click here to get a weekly reminder of new posts by email.
STEP 3: Always Sand Before Painting Oak Kitchen Cabinets
The first step in prepping our cabinets is sanding. NOW, before you click over to another post that promises you that can paint cabinets without sanding, please hear me out…
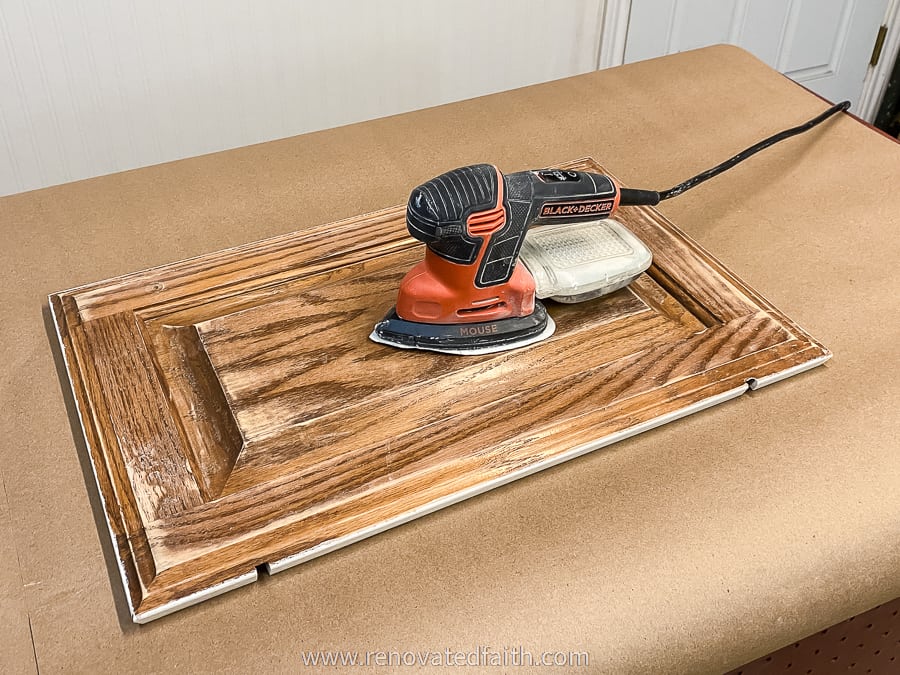
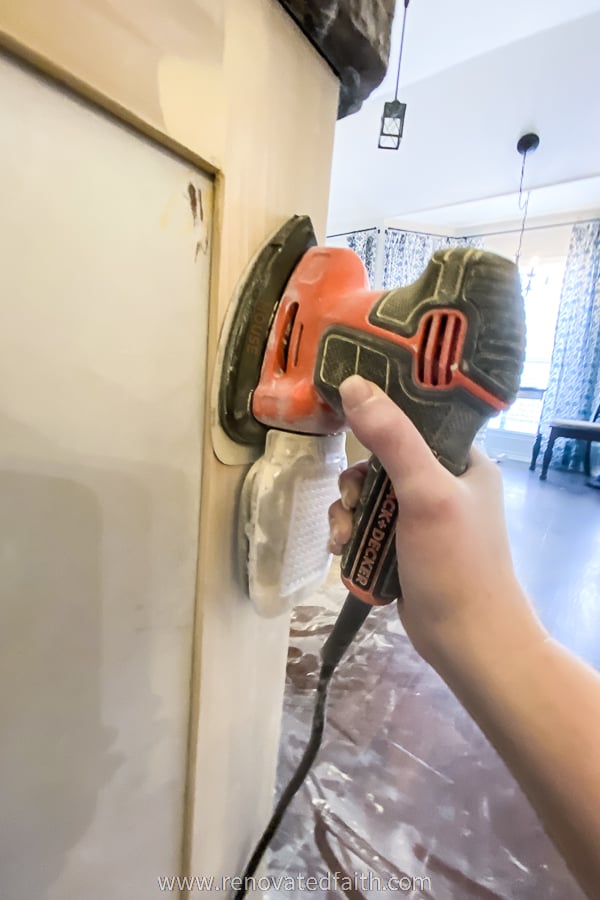
First of all, I like to use an electric sander to scuff sand the surface. We are NOT sanding off the old stain to bare wood; we are just sanding enough to remove the smoothness of the wood’s surface so that our primer sticks well and doesn’t “slide” off.
Related Posts: How To Sand Wood Quickly & Easily | The Best Sanders for Wood | Quick Link to My FAVORITE Electric Sander for Cabinets
Do I Have to Sand Cabinets Before Painting?
Sanding is an essential step in painting your cabinets. Your cabinet finish will only turn out as good as your prep work. But fortunately, sanding can be done quickly and easily since we are just scuffing up the surface, and not sanding it off.
As you can see in the video, sanding one door only took a minute or two.
Start by putting a 120-grit sandpaper pad on your electric sander and lightly sand in a circular motion to remove any glossiness. I like to use slightly oversized sanding pads with my Black and Decker Mouse Sander so that I can get in the edges of the trim easily without having to get out my sanding block.
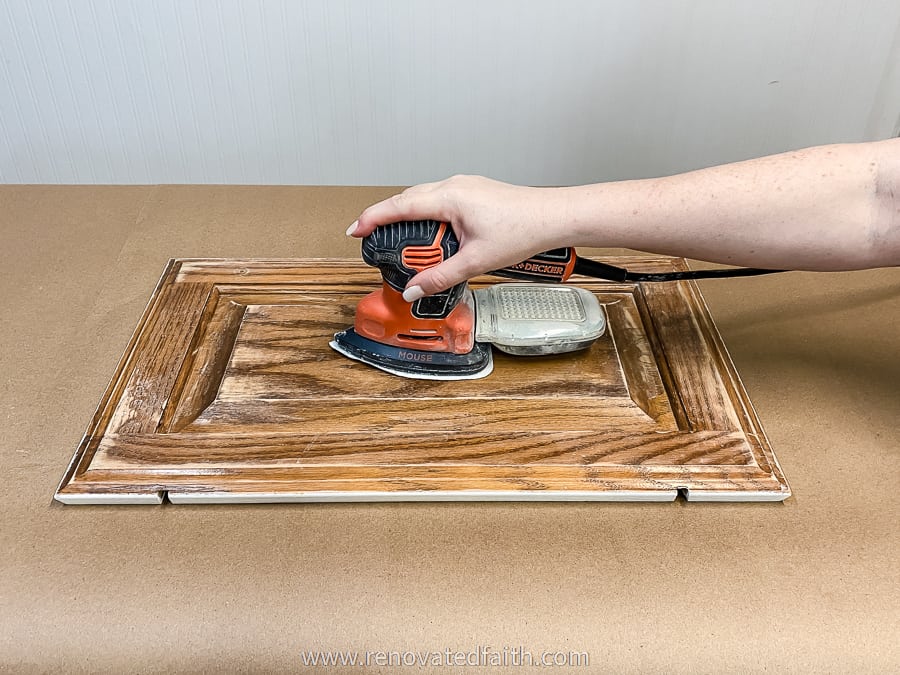
If you’d prefer, you can use a sanding block for the trim. Normally, you would remove any dust at this point with a damp rag but I like to go onto degreasing to save a step.
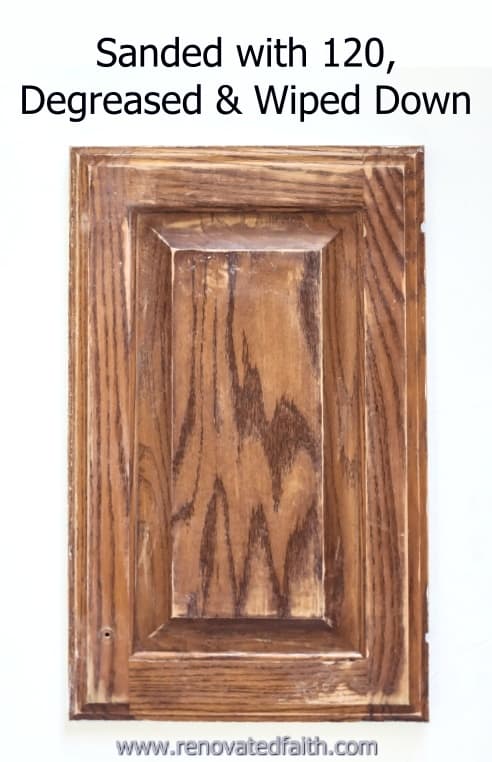
STEP 4: The Easy Way To DEGREASE Your Kitchen Cabinets
I like to use a degreaser at this point. This is another important aspect of prep because it removes any excess oils that could have seeped into the pores of the wood. These oils and dirt can prevent the primer from adhering which then affects the durability of the final cabinet finish.
To degrease your cabinets, simply spray on Krud Kutter and use the green side of the Scotch Bright scrubber to remove any dirt or oil from the surface. It’s also a good idea to wear gloves so the Krud Kutter doesn’t irritate your hands (do as I say, not as I do).
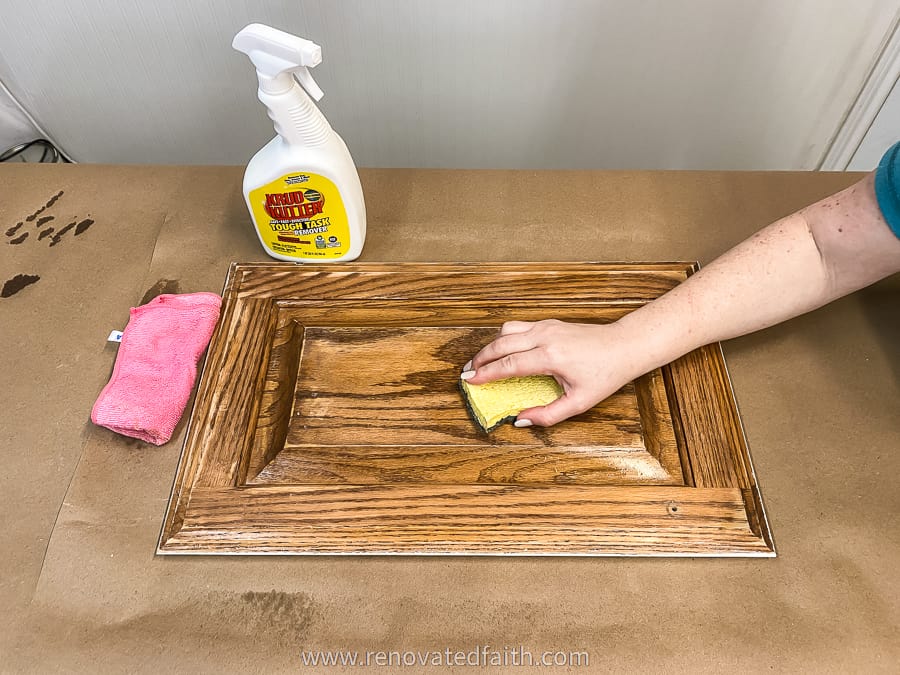
Once you have scrubbed the surface, wipe it down with a cloth and warm water. Make sure you wipe off all of the Krud Kutter. You will also be wiping off any residual sanding dust during this step as well.
Here’s how your door will look after being sanded and degreased:
As I mention in the past on installing hardware, if you have any old hardware holes to fill or any damage to repair with wood filler, or Bondo wood putty, now is the time to do it. Fill any nail holes with this wood filler. We will use caulk later in the process. If your old cabinets are in good condition, you can skip this step.
This post was written for furniture but it will show you how to remove any damage on cabinets as well:
HOW TO FIX DAMAGED WOOD SURFACES
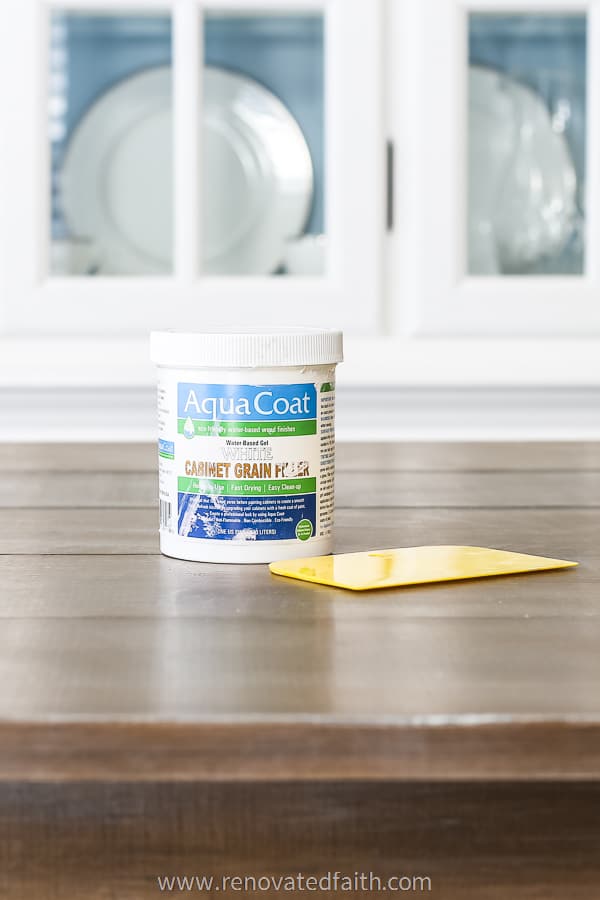
Step 5: How To Paint Oak Cabinets Without The Grain Showing – Add Grain FIller (OPTIONAL)
Often times honey oak cabinets will have a deeper grain than other wood species. The biggest issue with a deep grain is seeing the indentions of the oak wood grain in the surface of the wood. If the indentions are deep enough, it can be hard to cover these tiny indentions and little pockmarks can be left on the surface of your finished cabinets.
But if your cabinets aren’t showing much grain, skip this step.
But if you are wondering how to paint oak cabinets white without grain showing, you’ll want to consider using a grain filler. Adding this step is more work but it also made a huge difference in my cabinets. Contractors use grain filler but often upcharge the whole paint job by 50%.
Using a grain filler was the key that made my cabinets look professionally painted versus DIY’d.
If you want to consider adding a grain filler, visit this post and come back here when it’s time to prime:
THE ULTIMATE GUIDE TO USING AQUACOAT GRAIN FILLER
Whether you are dealing with oak cabinets, maple cabinets or any other type of wood, here are the results you can expect with one heavy coat of Aquacoat white cabinet grain filler. It’s so much easier to use than a joint compound.
Oak Cabinets Painted White With Grain Showing
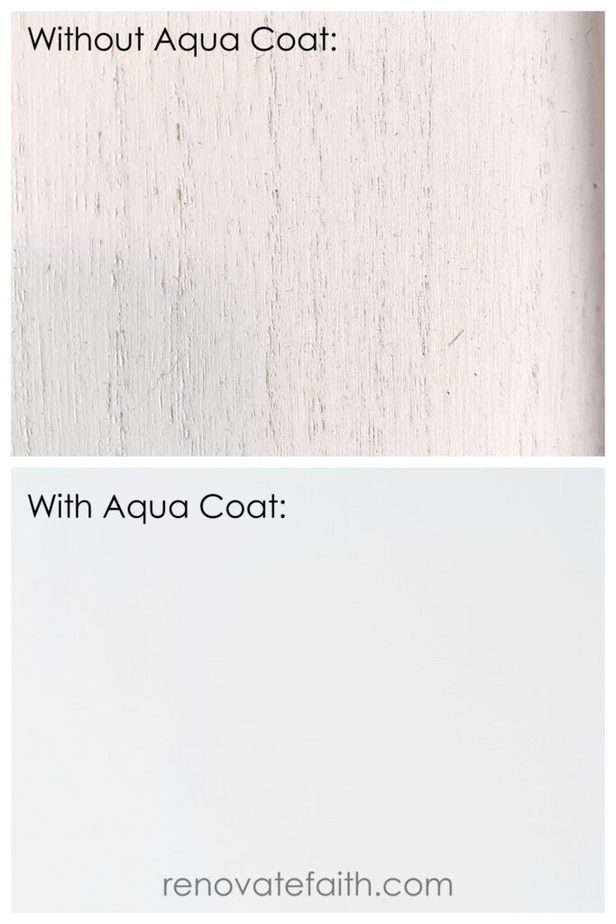
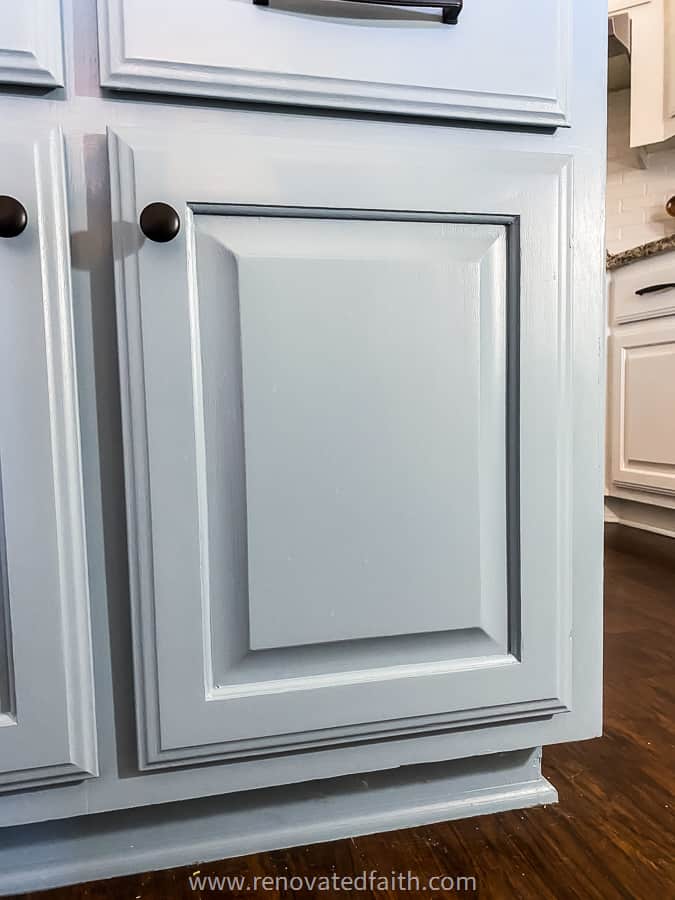
Also, by using the grain filler, I used substantially less paint which saved on costs. Here are how the doors on my island turned out. This picture is Benjamin Moore Advance with no grain filler or a primer coat.
And this is the finished door with the application of grain filler, primer, and paint:
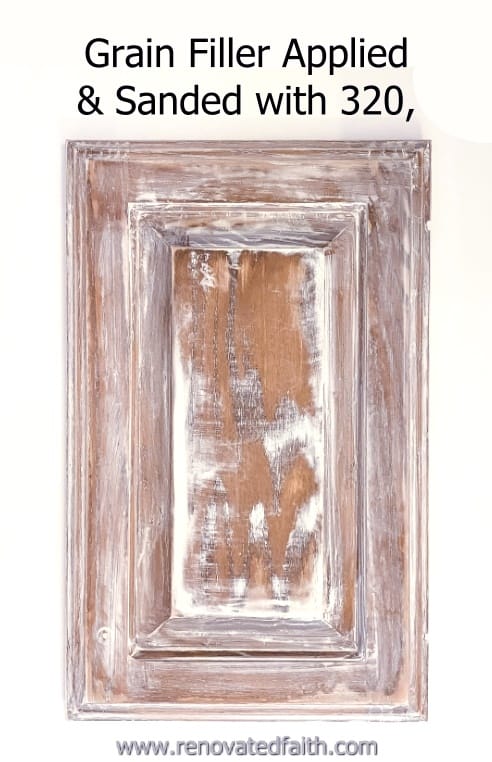
Here’s how the cabinet doors looked after the grain filler was applied and sanded.
STEP 6: How To Prime Before Painting Oak Kitchen Cabinets
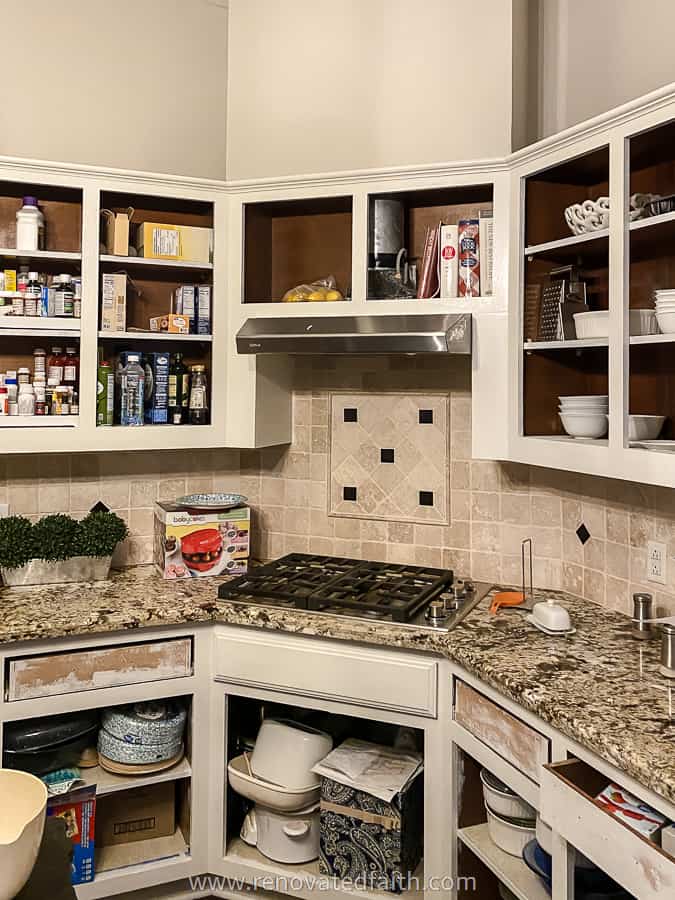
Before we discuss priming, here is how I had my garage configured for the cabinet doors and drawer covers. (I recommend doing this full process for your boxes first and then do the full process for the doors and drawer covers. Use the Cabinet Painting Roadmap Freebie for the exact order I follow and check off each step as you go.
Excuse our messy garage but you can see how I have most of the garage is allotted as a drying area and my workbench was on the other side.
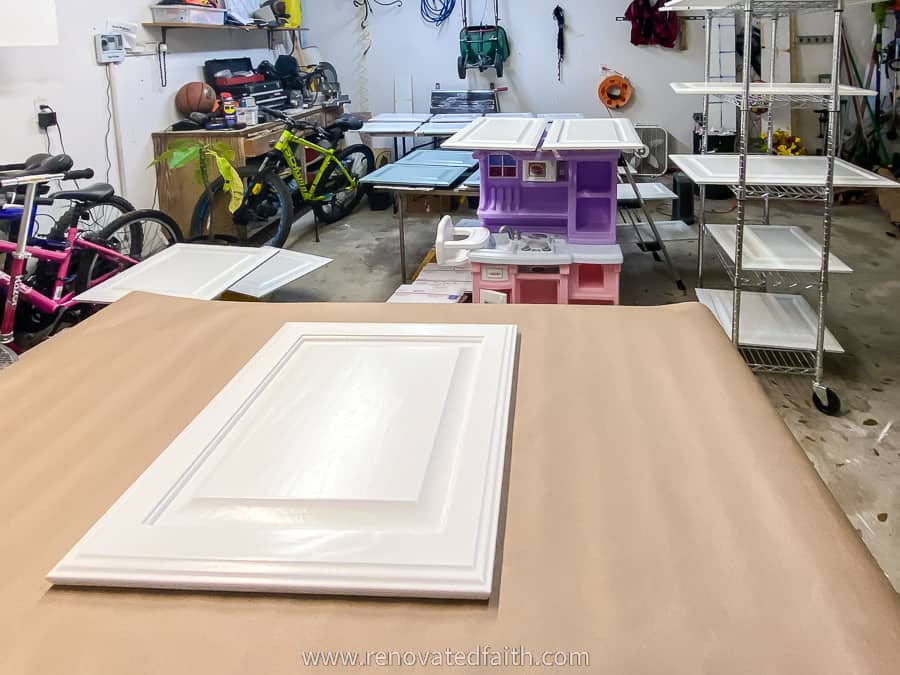
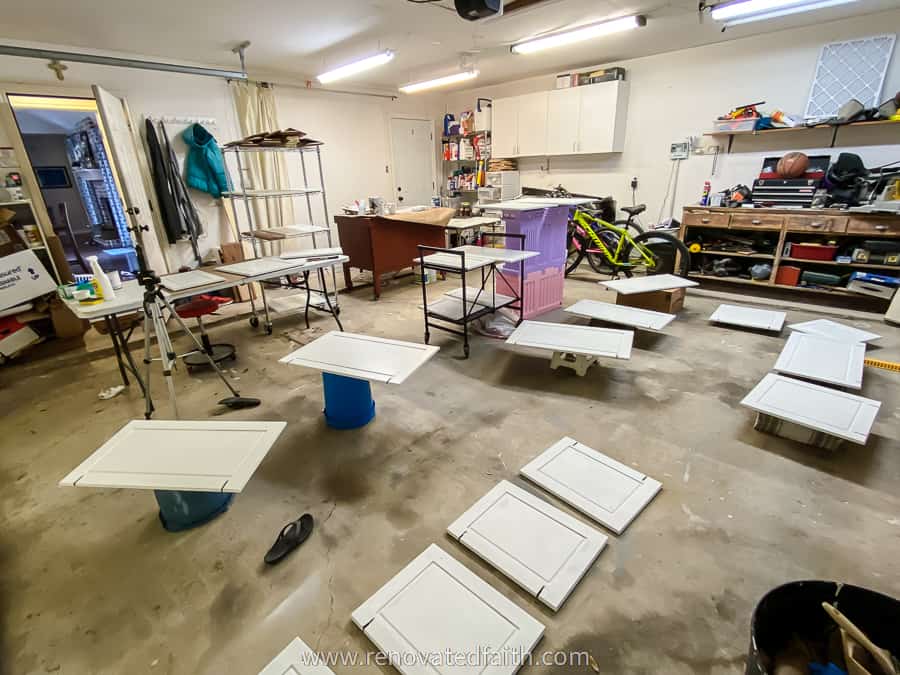
It was a little cold out so I left my garage door down and opened up the door to our kitchen to get some warm air in the garage. You can see that I had to get a little creative when finding items to dry doors on.
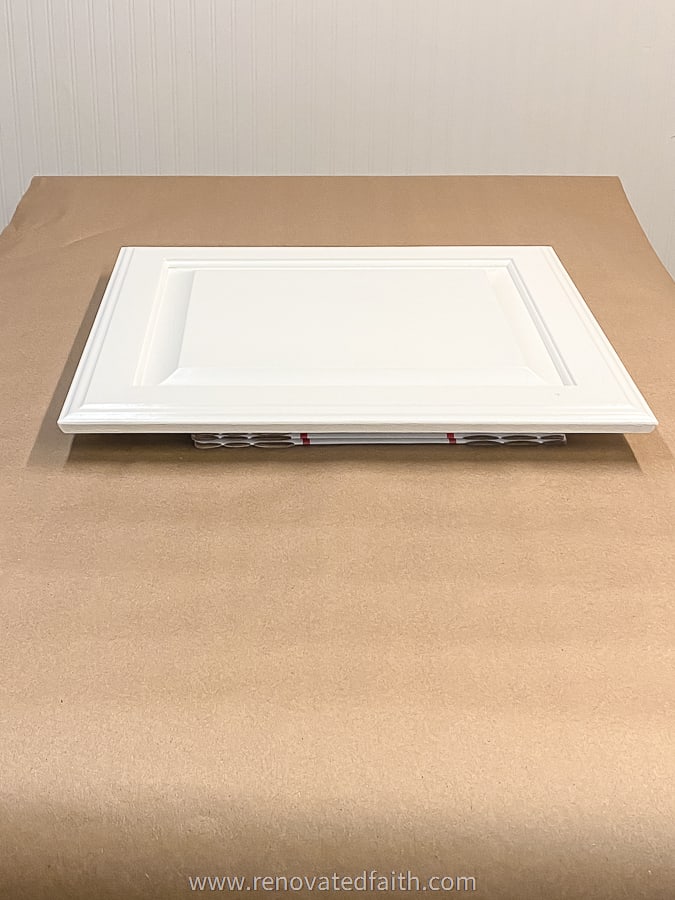
You can’t tell this in the picture above but most of my doors are on a couple of flattened boxes. I stuck four push pins in the boxes to support the shelves without damaging the paint in case it was still tacky.
Full Disclosure: I had leftover USPS boxes from an eBay business I once had and I dropped them off at the post office when I was done. So, this is me telling you not to get free boxes from the Post office that are available online for free and drop them off at the post office when you are done.

Do You Paint Both Sides of Kitchen Cabinets?
Yes, paint both sides of your kitchen cabinets, however, I only used the grain filler on the fronts. Also, I opted not to paint the inside of my cabinet frames.
I recommend priming the backs first, painting them, and then you can prime and paint the fronts last. The trick we use above with the cardboard and push pins keeps the painted backs from sticking to a flat surface and also provides a little airflow so they can continue to cure.
We will apply one coat of primer, let it dry, sand, apply the second coat of primer, and then sand again.
My favorite primer for making cabinets as smooth as possible is Zinnser Cover Stain. It is an oil-based primer which is necessary for kitchen cabinets but fortunately, it’s not as smelly as some other oil-based primers. (If you are concerned more about bleed-through and less about smoothing out a deep wood grain, use Zinnser BIN primer.)
I like how Zinnser Cover Stain adheres to the wood and it sands well to help fill in the wood grain even more.
PAINTING TIP – Always stir your primer and paint right before you use them. Don’t shake the can because this can cause tiny air bubbles on the surface of the paint finish.
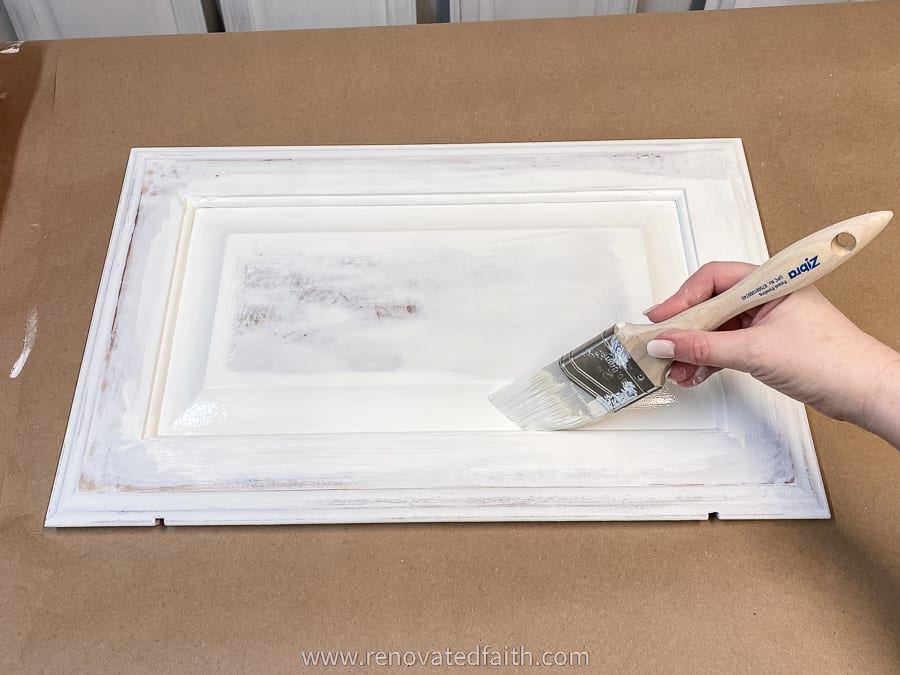
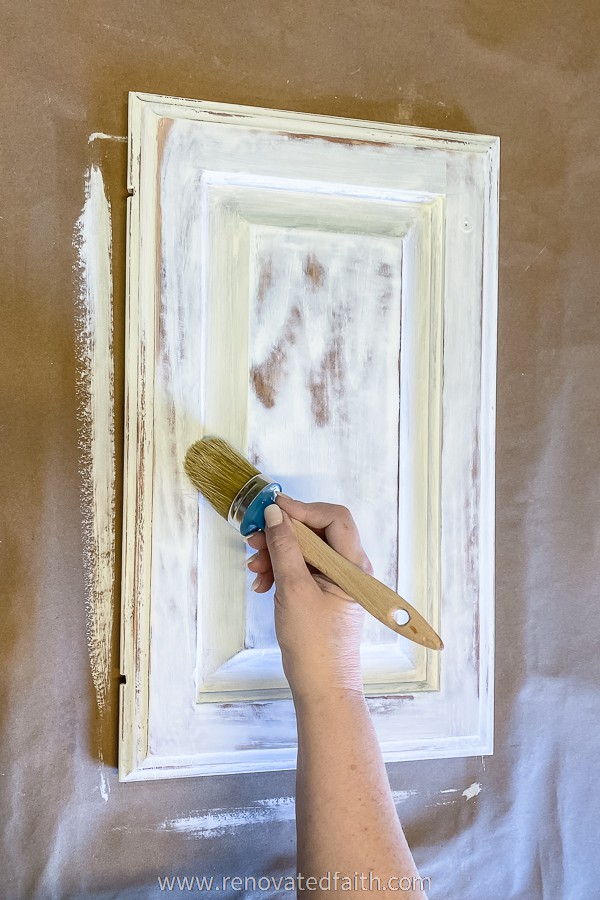
You can use a brush or mini roller for the primer but your best bet is to use a brush. We will use a roller when painting but when using primer, I found I could get a much smoother finish with the brush and a brush fills in the wood grain better.
Even the best roller I tested left some subtle roller makes in the primer’s dried finish. They were also a pain to sand out in the sanding step so for that reason, I’m recommending using this brush for both primer coats: Budget-Friendly Brushes For Cabinet Painting At Amazon
We will use a nicer Zinnser brush for the paint but I like these low-cost brushes for primer as they are cheap enough to throw away after you are done priming but still give you a smooth enough finish. With this oil-based primer, you have to use mineral spirits to clean the brushes but throwing them away is much easier.
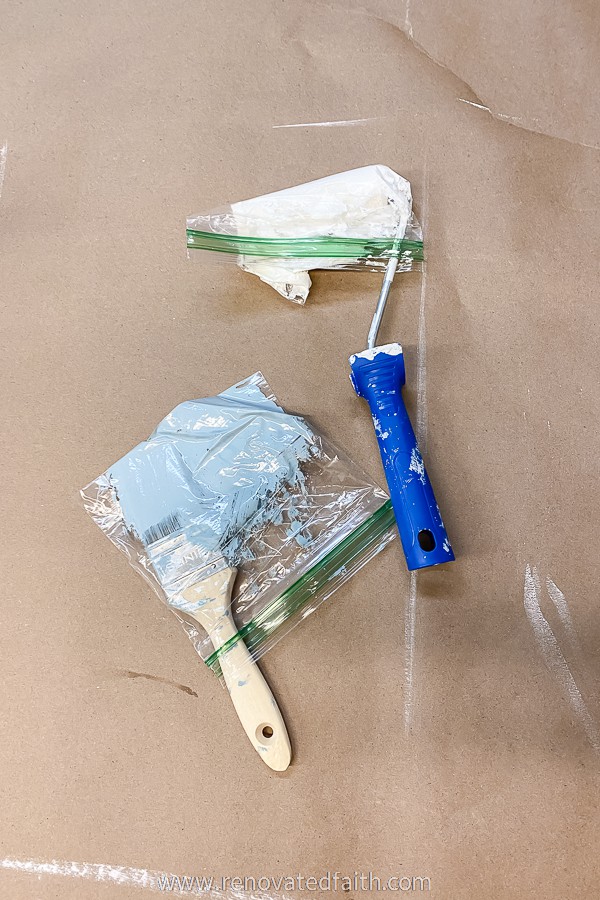
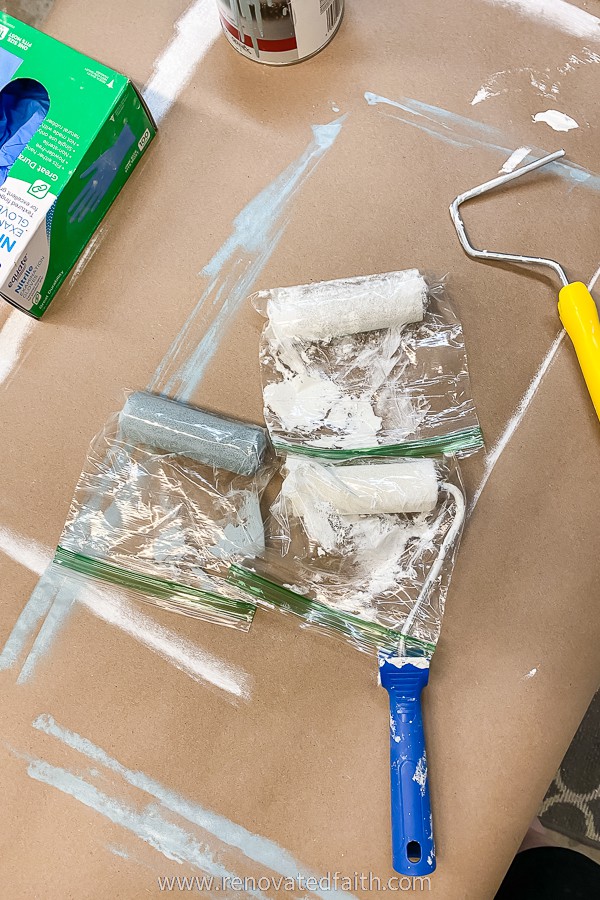
Don’t throw them away until you are COMPLETELY done with the primer step. Between primer coats, put your brush and/or roller in the refrigerator in a baggie to keep it moist with primer. It will be all ready for you to use again on that second coat.
For coat 1, I like to start in the middle and then do the trim work last, as shown in the video. Brush the primer on against the grain first and then quickly brush it with the grain. This helps it to fill in what is left of the grain from all directions.
Apply the primer for coat 1 and check for any drips before you go onto the next door or section.
Let the primer dry for 4 hours. Don’t forget to stick your brush in a baggie and put it in the refrigerator.
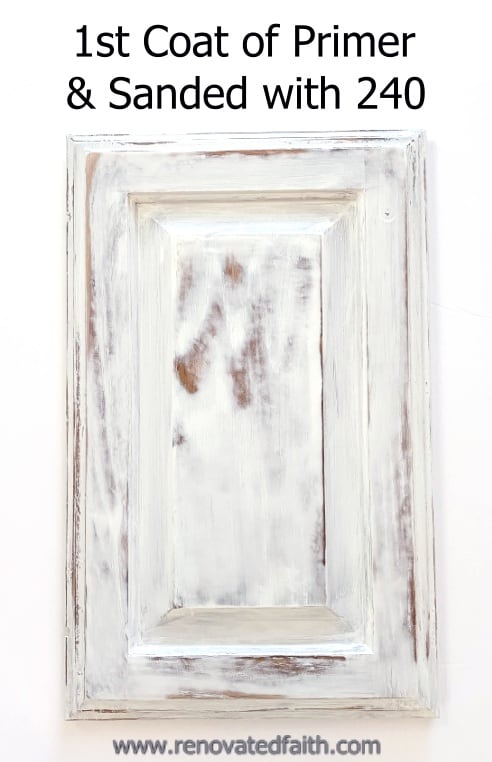
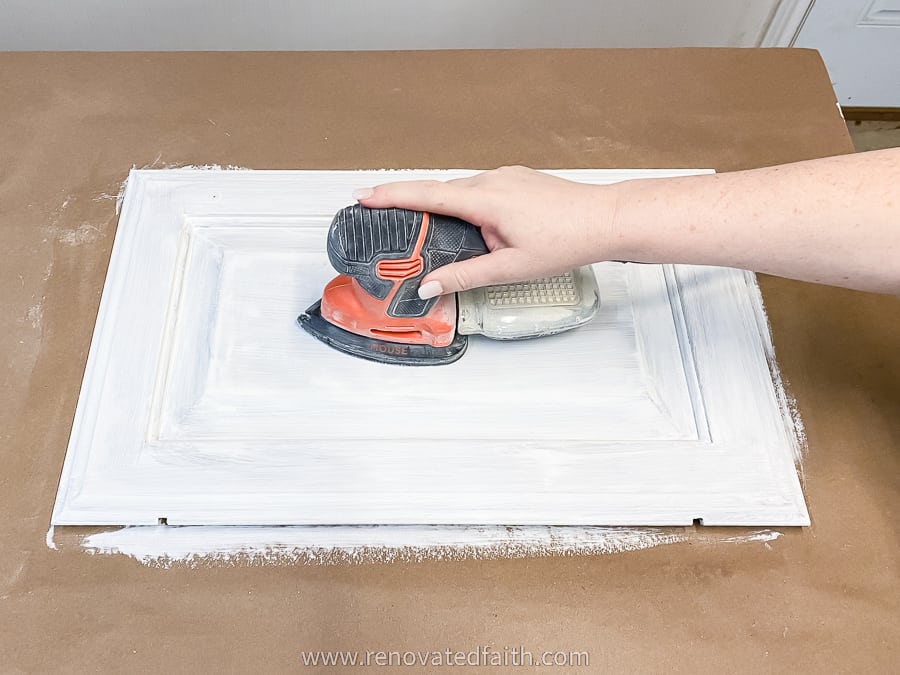
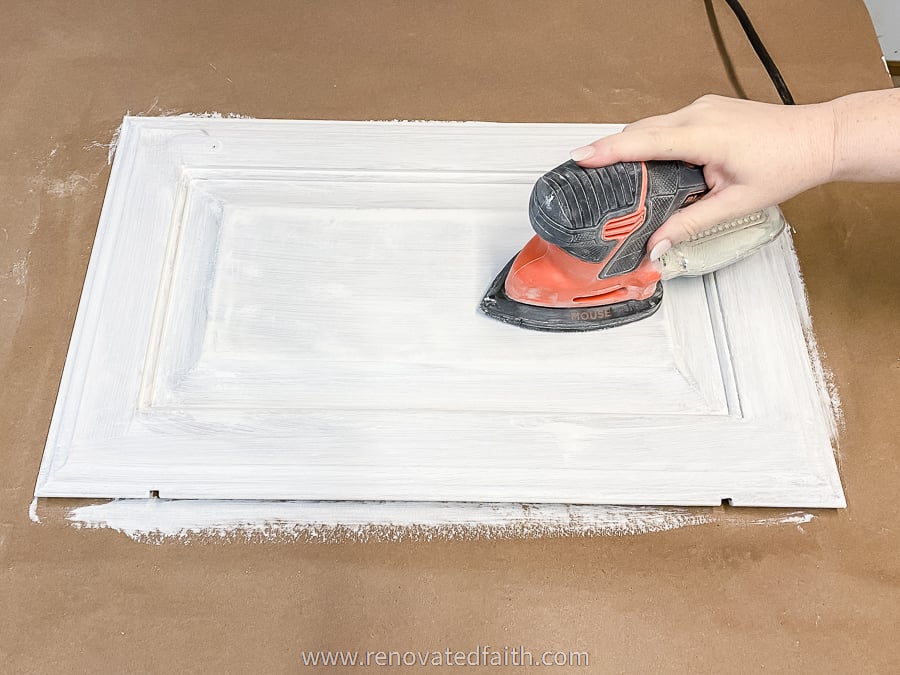
Once the first coat of primer has dried, sand your surface with your electric sander and a 240 sanding pad. You can use a little more muscle when sanding both coats of the primer because this is your last opportunity to level your wood grain so it’s as smooth as possible. For this reason, I recommend sanding your doors outside when sanding the primer, if it is feasible. (There will be less dust when we sand the paint)
Here is how the doors looked after one coat of primer and sanded with a 240 sanding pad on my sander.
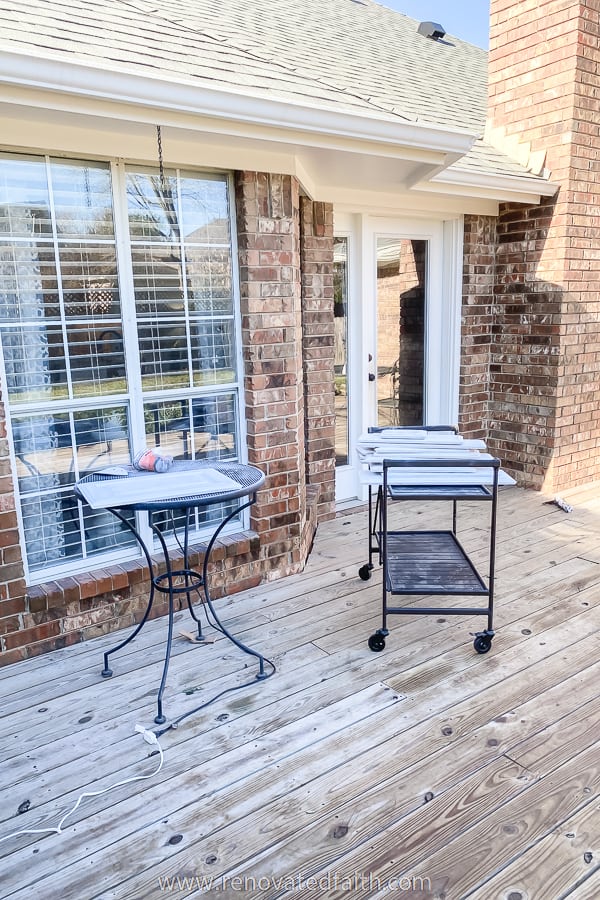
Here is where I sanded the doors outside. Yes, it was a pain taking them on our back deck and I used this cart to help. But it cut down on the mess in my garage. I did not take the doors outside to sand the paint in the next step because there wasn’t nearly as much dust.
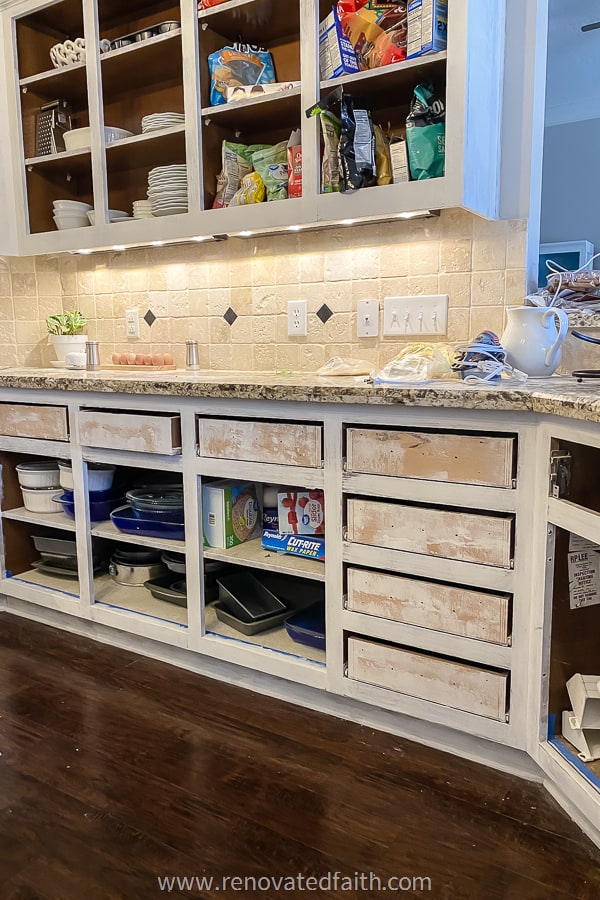
Below is how a couple of the drawer fronts looked after sanding the first coat of primer. I love that this picture shows how important the grain filler is for the process.

The grain of the wood isn’t just uneven on a micro level but it also creates waves in the wood. You can see how the grain filler and primer are filling in that unevenness beautifully!
Wipe off all the sanding dust with a damp rag. I like to use a chalk paintbrush to get in the corners before I paint coat 2 of primer. Any dry brush will work though! (By the way, this is the only time you’ll see me use a chalk paint brush: Why I Don’t Use Chalk Paint on Furniture.)
Now re-prime the surface one last time with your brush and sand again with a 220 sanding pad. This time you will do a lighter job of sanding.
And here is how they look after the second coat of primer and sanded with a 240 sanding pad on my sander:
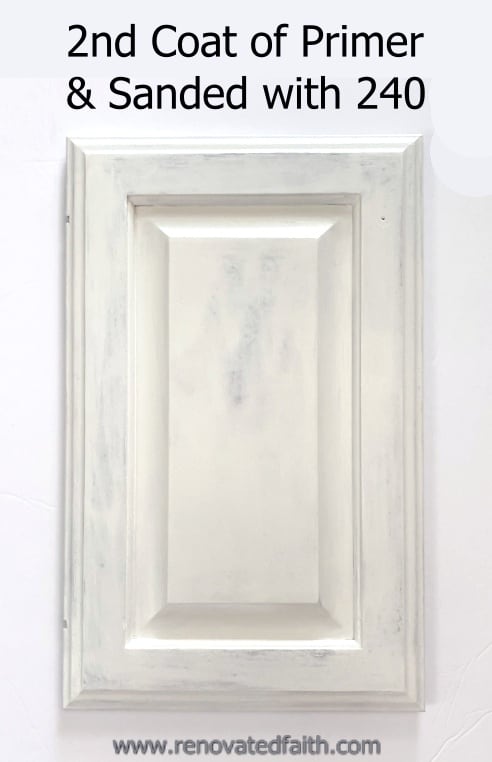
I went a little overboard with sanding. You don’t have to sand quite this much!
IMPORTANT TIP: If you are going to add any trim to your cabinet boxes, it worked out well to add it after the first coat of primer. I primed and sanded the boxes, added the trim, filled holes in the trim with wood filler, sanded those, and then continued with my second coat of primer. This makes more sense in the Cabinet Painting Roadmap.
Here is how my boxes looked after two coats of primer.
STEP 7: How TO Paint Cabinets White Like A Pro
Now, we can finally get to painting! I promise it is all downhill from here!
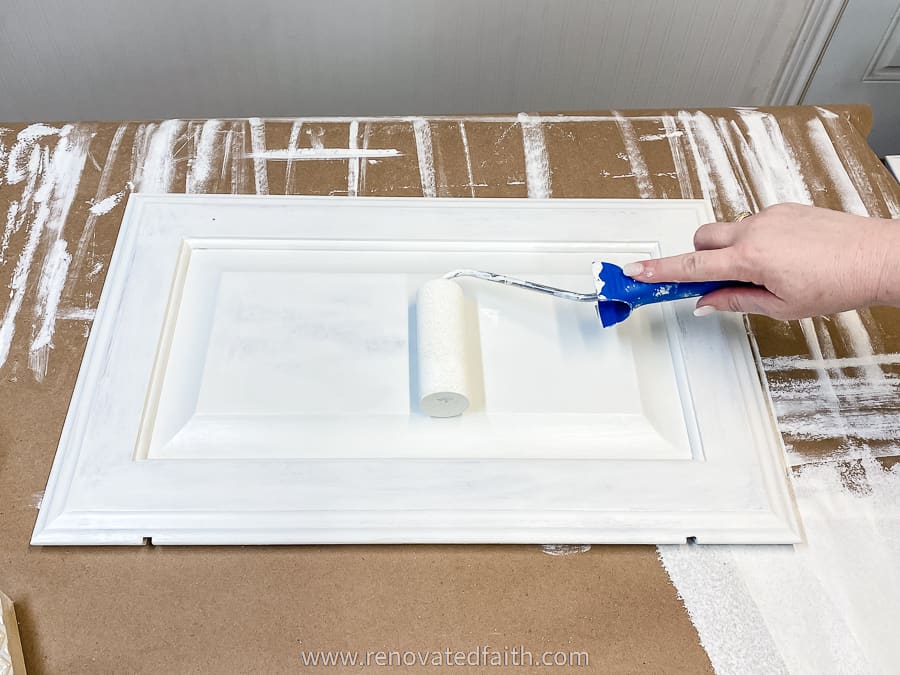
This is where we get to use the roller, finally. After testing several rollers my favorite roller is this one: Best Mini Foam Roller
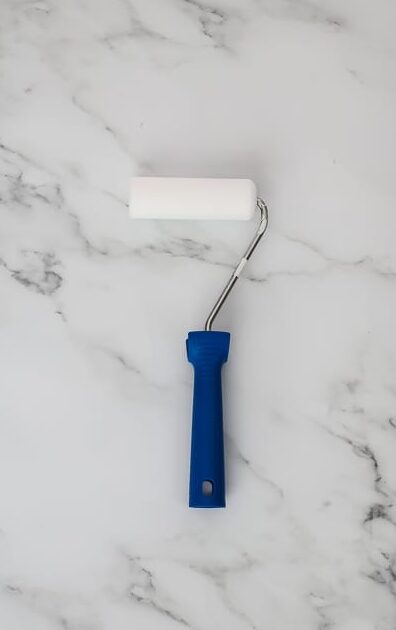
IMPORTANT TIP: Dampen your roller with water and wring it out before painting so your paint will absorb better into the roller cover. (This just applies to water-based products.)
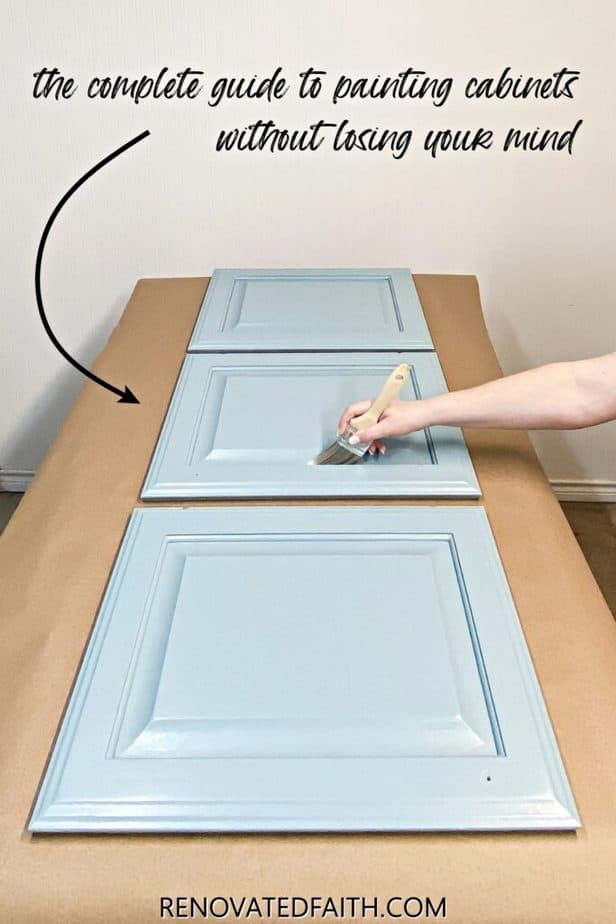
This is where we get out our Zinnser brush which will leave a super smooth finish on our cabinets. As you see in the video, you’ll use it to apply paint to the trim indention.
Then, roll the paint onto the large flat surfaces. Remember not to get too much paint on your roller cover. You can always add more paint later, but the secret to a smooth finish is rolling on THIN layers of paint.
IMPORTANT TIP: For a really good finish, do one final pass over the surface with your roller holding it as lightly as possible. Don’t add more paint to your roller on this final pass. You can see how I do this in the video and this is an important step to getting a smooth finish without roller marks that sometimes look like the surface of a football.
Check the dry times on your paint can. For Benjamin Moore Advance, let the first coat dry for 16 hours. This is the one downside of this paint, but honestly, after I had rolled on one coat on all of the doors, I needed a break before going to the second coat of paint anyway.
Don’t forget to stick your rollers and roller covers in the frig in ziplock bags so you can start where you left off without having to clean any rollers.
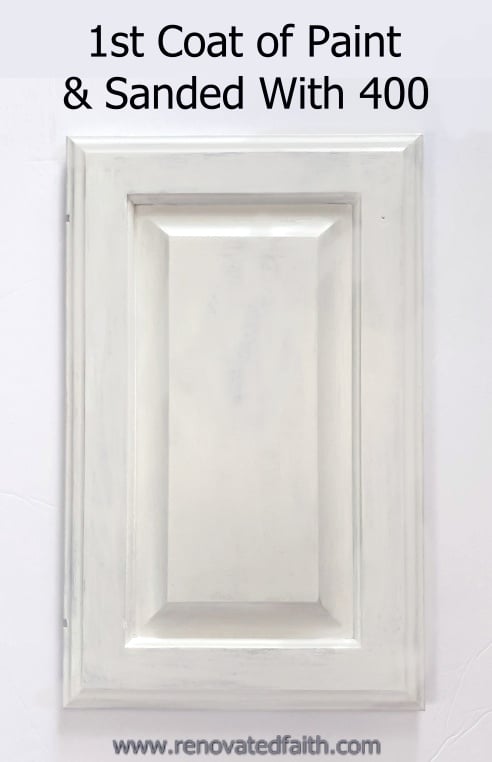
Sand your first coat of paint very lightly with a 400 sanding pad and wipe off the dust with a damp rag.
At this point, look at your finish and decide if it only needs one more coat or two more coats. If you have dark wood still showing, roll on the second to last coat with the roller again.
In most cases you will need two coats of paint. If you are already getting good coverage on your previous coat, go onto the last coat! But before you do that, you want to caulk any gaps that need to be filled.
Should You Caulk Cabinet Door Panels?
Any caulking should be done right before the final coat is brushed on. Caulk doesn’t sand well so you want to caulk after the last sanding pass. Also, caulk will attract dirt like a magnet if left unpainted so the final coat will prevent that.
Conventional cabinet refinishing wisdom says not to caulk the crack between the frame of the cabinet doors and the center panels. This is because they are designed to move with the natural expansion and contraction of solid wood.
However, a lot of the Aquacoat will fill in portions of the cracks, which is fine. To get a consistent look, I went ahead and caulked in the cracks where the Aquacoat didn’t fill in completely. I just used a very thin bead of caulk, came back with my brush, and touched up with paint over the gaps I caulked.
If over time you experience something called “bridging,” where the door expands or contracts and pulls a little of the paint away in the gap, just take a small artist brush to touch up the exposed wood.
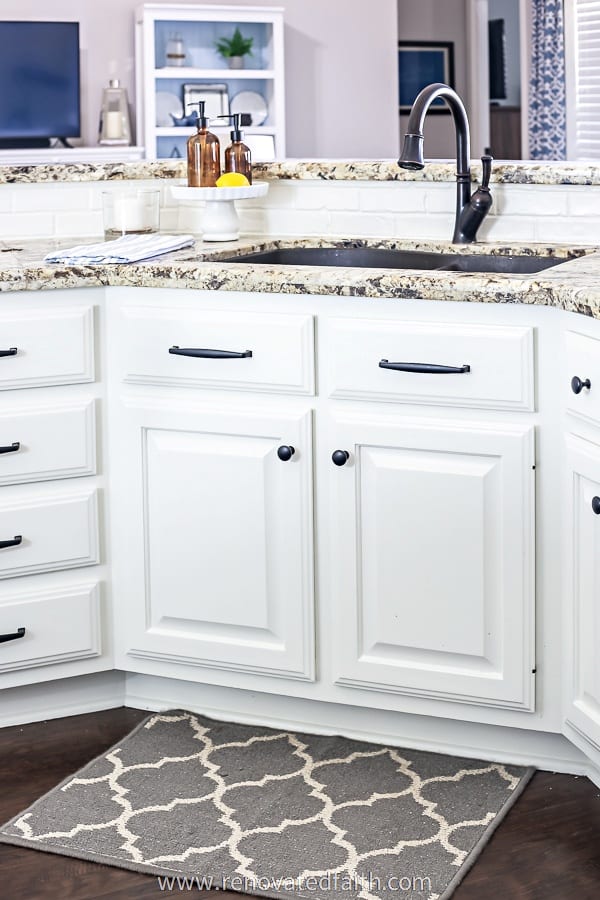
For a nice finished look in your kitchen, caulk any gaps between the cabinets and the drywall or trim work. Any gap that you see that tapes away from the finished look can be caulked. You’ll be amazed at what a difference it makes. Here is the caulk I used: Caulk
Are you new to caulking? Here is a post on how to fix damaged furniture that applies to cabinets: How to Caulk Gaps in Wood
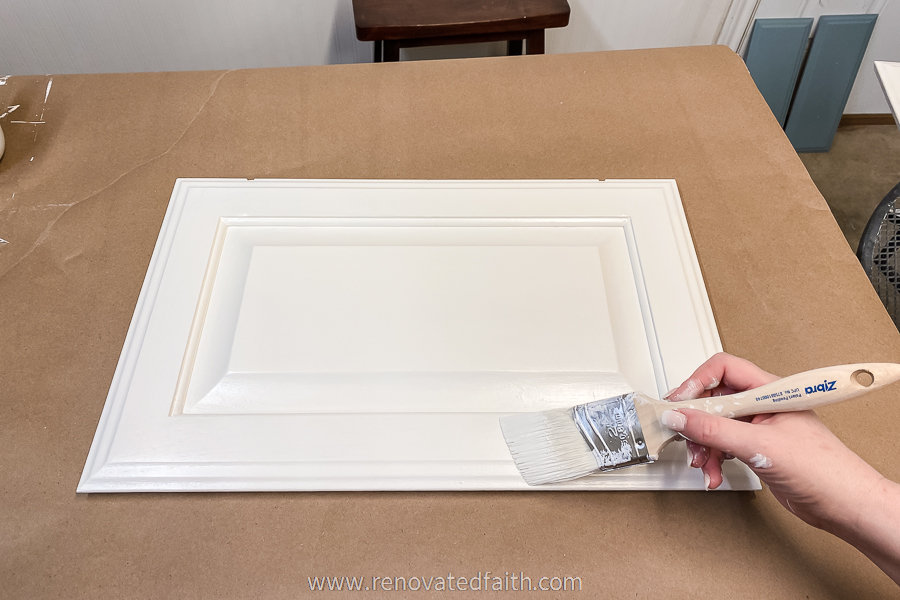
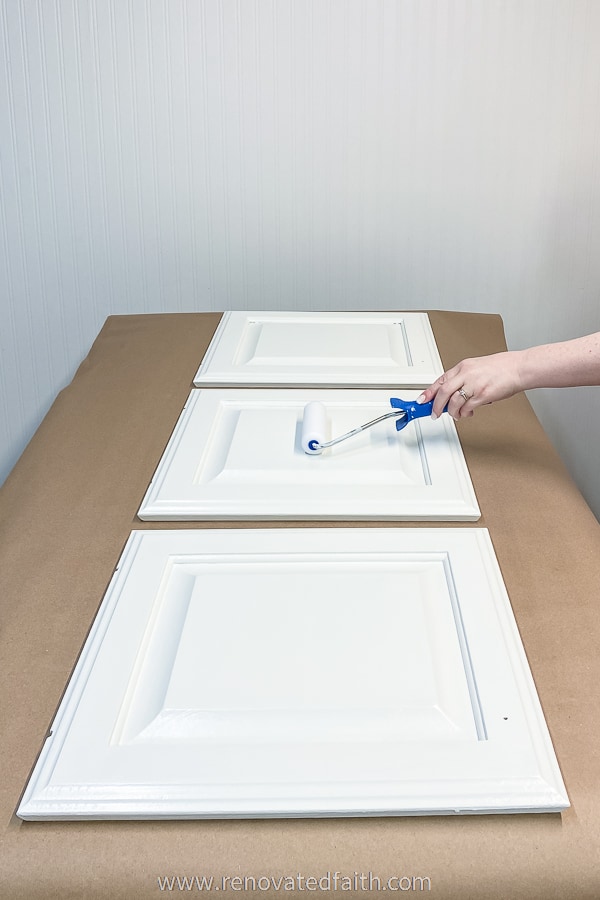
Brush the Final Coat on Your Painted Oak Cabinets
We are using the Zibra brush only to paint on the final coat because you can get a smoother finish with it than even the best roller. This final brushed-on coat will not only give the best finish possible but also cover any scuff marks from the sander.
Brush on your final coat in the direction of the wood grain. Brush with the grain of the wood and make sure that extra paint is not pooling in the corners. Just lightly remove it with the tip of your brush.
After it has dried for 16 hours, if you see any small areas that need more coverage, don’t be afraid to just touch up those areas with your brush. You don’t need an entire extra coat.
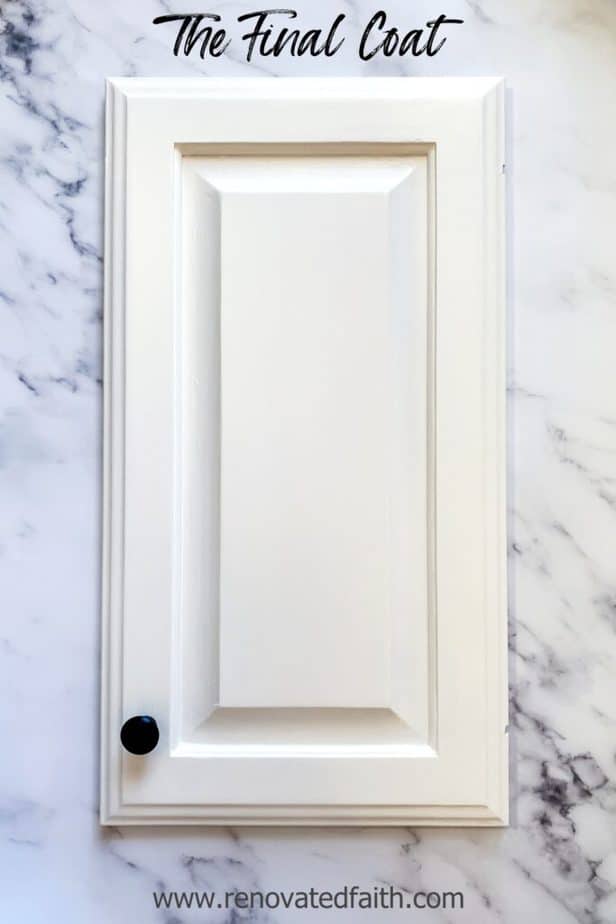
Here is a finished door in Benjamin Moore Advance Satin, color-matched to Sherwin Williams Alabaster.
RELATED: The 33 Best Cabinet Paint Colors | The Best White Paint Colors | Gorgeous Blue-Gray Painted Oak Cabinets | 25 Popular Paint Colors With White Cabinets
What IS the Best Order for Painting Oak Kitchen Cabinets?
Here are my cabinet boxes completely finished. Not sure what order to paint your cabinet boxes, door fronts, door backs, and drawer fronts? Download my free Cabinet Painting Roadmap.
STEP 7: reHANG and Add The New Cabinet Hardware
Let the cabinets dry at least 24 hours before adding the hardware and rehanging your doors. Fortunately, this will go SO much faster since you have already drilled new holes for your hardware and have a diagram to show you exactly where the doors go!
When you push the hardware screws through the holes, you might find that some paint dried in the holes. Just put the screws through and you can use a hammer to very lightly tap the screw through the hole to remove the paint.
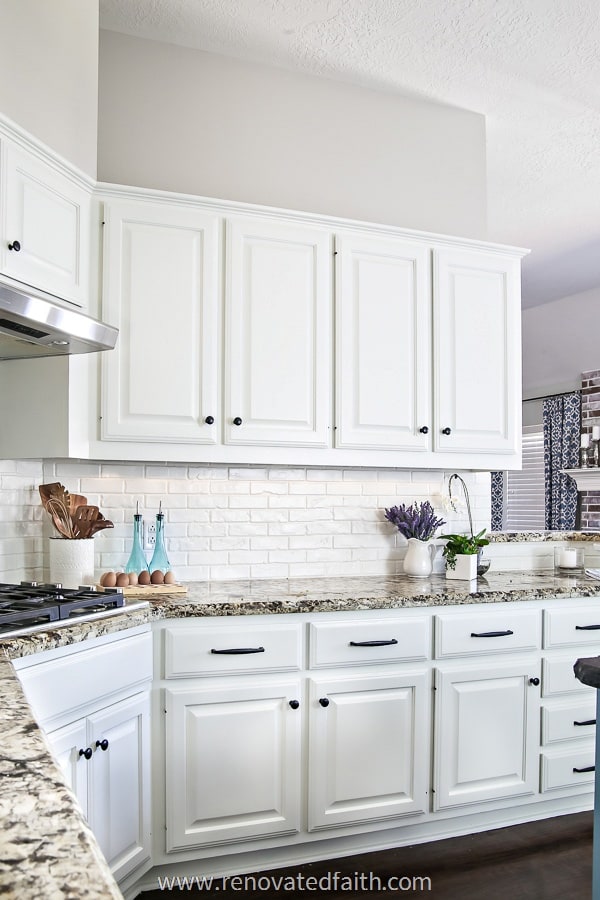
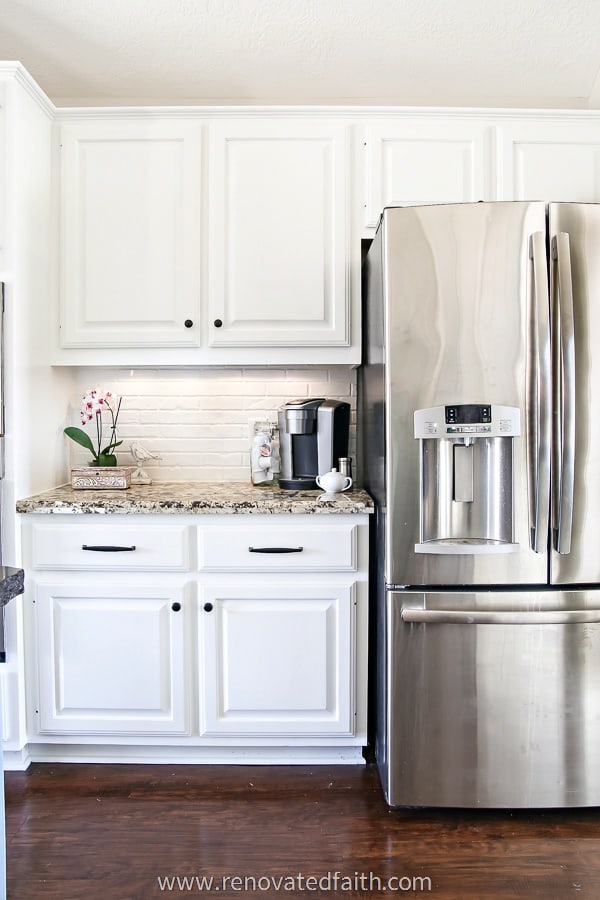
IMPORTANT: Need an EASY backsplash option? You won’t believe what I used to look like white brick for my new backsplash. It doesn’t cost a lot of money and also went over my existing tile: The Best Faux Brick for Backsplashes
LAST STEP – regain your Weekends and your sanity
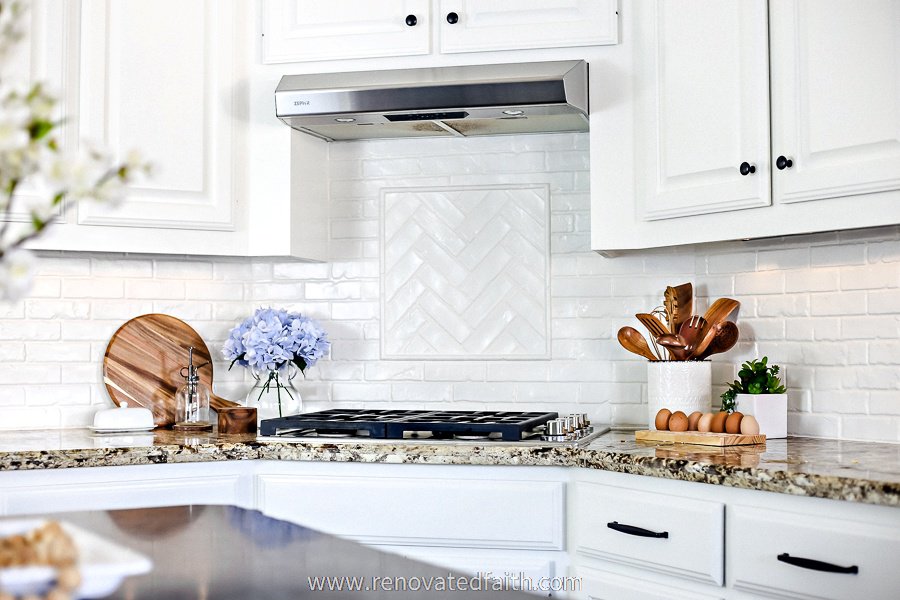
Now, take a few minutes to enjoy your “new kitchen”! You did it and you have officially completed the DIY project that transforms a home more than any other!
Painting Kitchen Cabinets White: Before and After Reveal
RENOVATE YOUR FAITH: How God Really Sees You
If you have been around a four-year-old for any length of time, you soon come to realize their expertise in question asking…endless, relentless questions. As an introvert, I am amazed at my extrovert daughter’s capacity to ask a barrage of questions over such a long period of time, only stopping for minutes at a time to “reload”.
Here are a few of the questions that stick out in my mind when she was younger:
- Why did my pet ants decide to go to heaven instead of making their tunnels?
- How did I watch Ipad when I was in your tummy?
- When is the cheeseball I planted outside going to grow into a cheeseball tree?
I can’t say I’m always attentive to these questions, with my answers often ranging from “I don’t know” to “why don’t you ask Daddy.”
However, there’s one question that would stop me in my tracks…
Can you imagine your child asking you “Mommy, am I enough…Am I smart enough? Am I good enough? Am I pretty enough?” What would your answer be?
No doubt, you would stop what you are doing to reassure her she is more than enough – that you love her just the way she is and more than she can possibly imagine.
Now imagine how God would feel if we asked him the same question – “Am I enough?”
If you are a parent, think about how much you love your child and try to grasp the fact that God loves you exponentially more than that.
“See what great love the Father has lavished on us, that we should be called children of God! And that is what we are! (1 John 3:1).”
When you look in the mirror in the morning what do you see? Do you see a woman who isn’t ___(fill in the blank)___enough or do you see a woman with tremendous value because she is loved and cherished by her Creator?
God loves us more than we can possibly fathom, no matter how many times we yell at our kids or make snarky political comments on Facebook. God is not waiting to love some future version of ourselves. He is absolutely thrilled with you at this very minute. He loves you just as you are – fearfully and wonderfully made (Ps. 139) and cheers you on daily.
Often social media is a barricade we can hide behind so the true world can’t see how unhinged we really are. The window we peer through into each other’s personas is rose-tinted. No one shares their insecurity and fears about not being enough and the God-given peculiarities that make them uniquely them. So we offer a cleaned-up, alabaster white version of ourselves….at the very cost of being ourselves.
God designed us in His image (Gen. 1) and God promises to abide in us. To abide means “to remain, he to or follow.” We are also called to abide in Him which means keeping his commandments which encompasses loving the Lord with our hearts, soul, and minds and to love others as ourselves (Matthew 22).
“For anyone who hears the word but does not carry it out is like a man who looks at his face in a mirror, and after observing himself goes away and immediately forgets what he looks like (John 1:24,25). We are never more ourselves than we are abiding in Him by obeying His commandments and loving others. When we withhold our true self from others, we limit what God wants to show others about who we really are – and how He works through us.
To “be yourself” means you submit control to be who God created you to be by abiding in Him. By abiding in Him we allow His light to shine in us to empower us to be who He created us to be. Just like a prism, the colors of the rainbow cannot be defused without a source of light directed into it. We glean hope from the one who infused hope into us.
When you look in a mirror, who do you see? I pray you see a woman dearly loved by her God.
For more spiritual encouragement, click here for the rest of my paint projects that also include Renovate Your Faith devotionals.
FAQ’s: How To Paint Cabinets White
Are there any alternatives to painting oak cabinets White?
If you like the look of dark colors for cabinets you can use my gel stain method here which goes right over the stained surface: Easy Gel Stain Technique for Wood
Are white cabinets going out of style? White cabinets are classic and can work well with any décor style. There are times when all-white kitchens go out of style and eventually always trend again. With white cabinets, you have the flexibility of adding a pop of color with the backsplash, rugs, and accessories as styles change.
Can kitchen cabinets be painted white with a paint sprayer?
I like to leave paint sprayers to professionals. There are DIY models on the market but none of these are very robust and a good sprayer is very expensive. Also, there is a learning curve with spraying to know when the paint is too thin, how to change its settings with changing weather, and how to remedy any clogs. Also, you have a work area set up for spraying. You can get a nice finish but you get a finish that is just as smooth with the Zibra brush for a lot less hassle.
Can you paint oak cabinets without sanding?
Painting oak cabinets without sanding is generally a bad idea. For one thing, if your primer doesn’t adhere well to your surface because you didn’t sand, your paint will peel. Not only will you have to do the entire process all over again but also but you will have to scrape off the first coat of paint.
Sanding your old paint or stain is a crucial step that goes a long way to make your cabinets durable. But the good news is that a lot of people don’t realize that getting a good surface for paint only requires a light sanding. Also, with an electric sander it takes just a little bit of time but you can also use a sanding sponge or orbital sander.
Do I need to prime cabinets before painting?
Priming is crucial to give your paint a strong bond to the surface of your wood cabinets. It doesn’t require any extra work because if you didn’t prime with two coats of primer, you would have to paint on two extra coats to get the same amount of coverage. Also, primer is a lot cheaper than paint so you actually save money by using a primer. For cabinets that have light water-based stains, you can get away with a water-based primer but for oak kitchens with a dark stain, use a shellac-based primer.
Do you need special paint for kitchen cabinets?
Benjamin Moore Advance is a hybrid paint. Hybrids are high-quality paints that have the positives of oil-based paints and water-based paints without the negatives. You get the durability of enamel paint but the flexibility and easy cleanup of water-based paints. I highly recommend it and you can see how it did during testing here along with other great paints: Best Paint Paint for Cabinets
Does painting oak cabinets decrease value?
Painting honey oak cabinets can only increase your home’s value and give the new buyer the look of a new house. The kitchen is the most important room in the house and the cabinets are the most visual part of a kitchen so painting your cabinets could have the biggest impact on your home’s value than any other DIY project.
How can I paint my kitchen cabinets without brush marks?
The closest tool to give me a factory finish on cabinets is actually a brush. Zibra brushes give an incredibly smooth finish without brush marks. Also, the type of paint you use is very important as some will show roller marks and brush strokes more than others. Benjamin Moore Advance shows the fewest brush marks.
How long do painted kitchen cabinets last?
If painted the right way, painted kitchen cabinets will last you for a decade or more. That’s dependent on the wear and tear they go through on a daily basis but overall the finish is extremely hard and durable.
How To Paint Kitchen Cabinets Without Sanding
Painting oak cabinets without sanding is NEVER a good idea! If someone tells you that you can paint kitchen cabinets without painting, ask them if they would try it on their own cabinets first. Sanding your cabinets only takes a few minutes but not doing could make you have to redo the entire process all over again and also scrape off the peeling paint.
Is cabinet paint different from wall paint?
Cabinet paint is usually a higher grade paint meant to be more durable to endure everyday wear and tear and contact with water. You can use a semi-gloss or satin wall paint on cabinets but there are much better paints on the market. There are lots of boutique or special paints on the market but none perform as well as Benjamin Moore Advance: The Best Paint for Cabinets
Can You Paint Oak Cabinets White?
“Can you paint brown cabinets white?” is a question I get a lot. Oak cabinets can be painted white but it’s a lot of work if you don’t have the right paint that covers well. In our first house, I used a cheap paint that didn’t cover well and because of that, I had to put 13 coats on our cabinets. It was like painting with skim milk. That’s is what prompted me to test cabinets paints because I didn’t want to have to go through that again. You can see my first painted cabinets here: How to Sell A House in 24 Hours
What is the Best White for Kitchen Cabinets?
There are an unlimited number of white shades of paint but here’s an easy guide to pick the right one: The Best White Paint for Your Kitchen
White is the best color and it makes the size of your kitchen look so much bigger. I used Sherwin Williams Alabaster but Chantilly Lace and Pure White are also great options.
Is it better to paint or stain oak cabinets?
Painting oak cabinets is the way to go because you can pick from any color option and experiment with different paint samples. If you stain, you are limited to stain colors darker than your original color and the orange oak tones of the original stain might still come through the new stain. To apply a faux stain with paint, check out this post: How to Apply Paint To Look Like Stain (9 Shades to Choose From!)
How To Paint Kitchen Cabinets Professionally Without A Paint Sprayer
Most professionals will use a paint sprayer. I don’t recommend a paint sprayer for DIYers because a decent sprayer is really expensive and there is a learning curve. However, you can get an equally smooth finish with the paint and brush I recommend in this post.
How To Make Your Oak Cabinets Look Modern Without Painting
Painting is a lot of work. If you want the look of stained wood that is not so orange, you can try my gel stain method. If you don’t mind the tone of your wood, try going over it with a matte top coat and changing the hardware. Clear coats also bring out a little of the contrast in the wood surface.
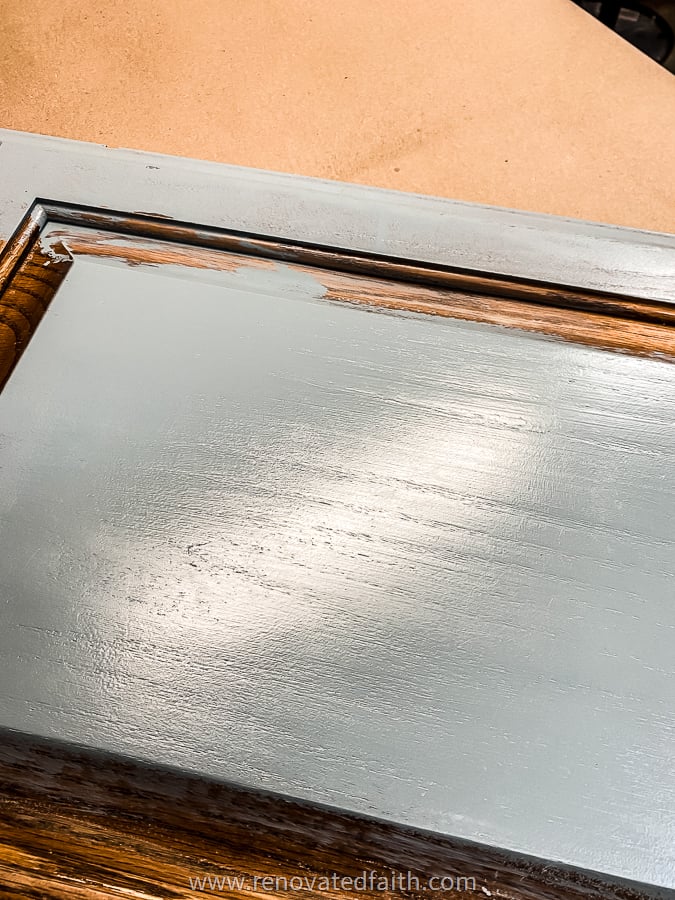
A Tip for Painting Oak Cabinets Gray
If you are going with a darker cabinet color like gray, follow the tutorial above. But one time-saving tip is to get your primer tinted at the home improvement store you buy it from. Have it tinted a shade lighter than your paint color. You will get better coverage because you are not having to cover a white primer with gray paint. You can see how I do this year: A Better Alternative to Chalk Paint
What about spray painting kitchen cabinets?
You can get a really smooth and durable finish with spray paint but it would be cost-prohibitive because it would require SO many cans of spray paint. Also, the fumes would be unbearable and the overspray dries in the air but it is still tacky enough to adhere to anything it lands on – even 12 feet away.
What do professionals use to paint kitchen cabinets?
Many professionals use Sherwin Williams products. I’m not sure why exactly because my tests and also Consumer Reports show that there are better paints on the market.
What happens if you don’t sand cabinets before painting?
Whether this is your first time painting cabinets or you are a seasoned professional, the biggest issues with cabinet paint jobs arise from a lack of sanding. One of my most frequently asked questions is whether you need to sand your old cabinets but, doing a little sanding will cause you to have a beautiful end result because the new paint can adhere properly. There is a high likelihood that they will peel. Scuff sanding your cabinets to remove the sheen only takes a few minutes and it is a small price to pay to ensure that your paint adheres.
What kind of paint is best for kitchen cabinets?
Why you shouldn’t paint your cabinets with chalk paint – Chalk paint performs poorly on furniture so on cabinets it would be a disaster! Not only does it attract dirt but it’s not durable and leaves more brush strokes than any other paint.
More Blog Posts Related to How To Paint Oak Kitchen Cabinets White Without Grain Showing
The Easy Way to Install Hardware on Kitchen Cabinets
How to Remove the Grain on Oak Cabinets
The Best Faux Brick for A Backsplash (PVC Panels for Walls!)
How to Get a Bare Wood Finish with Latex Paint
The Best Paint for Cabinets (24 Paints Tested & Reviewed)
The Best Sanders for Sanding Cabinets & Furniture
How To Sand Wood in Less Than 5 Minutes
The Ultimate Guide to Adding Front Yard Curb Appeal on A Budget
How to Turn Any Acrylic Paint Into Fabric Paint
The Best Primer for Kitchen Cabinets (COMING SOON)
How To Paint Cabinets White, YouTube Video
Final Thoughts on Oak Cabinets Painted White
Painting your cabinets is not a simple job, but with this tutorial, you will be able to streamline the process and have a gorgeous finished product. There are several ways to paint cabinets, but it is so important to do the proper prep work so you can enjoy the beautiful finish for a long time. Otherwise, you could find yourself having to completely redo your cabinets in a few months if they begin to peel and it does happen.
I love to hear your thoughts and questions! Scroll down to leave a comment and I WILL reply! ❤️
Blessings,

Be sure to follow the fun here!
Email Subscription | Instagram | Pinterest | Facebook | Twitter
How To Paint Oak Kitchen Cabinets White without Grain Showing

Karin Peters is a DIY expert and the creator of Renovated Faith. She is a furniture painter, a home design consultant, and a tenacious problem solver determined to help you transform your house into a home. With 17 years of experience with DIY home improvement, she researches and analyses professional processes to adapt them to be easy and cost-effective for DIYers. She then tests every project and product before it appears on the site in a detailed, step-by-step format. After attending Texas A&M University, she received her Master of Divinity with Biblical Languages at Southwestern Baptist Theology Seminary. Her passions unite in Renovated Faith, which shows readers how to create a home that serves them so they can pursue their God-given purposes. About Renovated Faith | Editorial Policy | Facebook | Twitter | LinkedIn
Your cabinets look great. I’m going to be selling my house and I have dark cherry cabinets. Would this technique and color work on my cabinets? I also have a paint sprayer and would like to know if I can use this instead of paint brushes? Thanks for all the great ideas you give us.
This process works on any surface! I personally like to use brushes because paint sprayers can be unpredictable and there’s a lot of prep work.
Oh dear, so I bought Sherwin Williams Emerald Urethane Trim Enamel to repaint my cabinets. All my cabinets are a solid flat front. Do I still use the same technique with a four inch roller and zibra paint brush?
Yes, the same technique still works great!