DIY Guide to Painting Soffits and Fascias (2025 Tips & Video)
How to Paint Soffits and Fascias Like A Pro
In this tutorial, I’ll show you how painting soffits and fascias yourself will not only save you a ton of money but can change the look of your whole house for the better!
Does the paint job on your home’s trim and gutters look tired and worn out? Maybe you have a brick house and your trim has never accentuated your brick. Or maybe you are just ready for something new?
Having your home’s trim, fascia, and soffits professionally painted can be crazy expensive. But with a little bit of prep work and the cost of a few cans of paint, you can completely change the look of your home’s exterior by doing it yourself!
This is one of those home improvement projects seems like a daunting task but is easier than you think. It makes a huge impact on your house’s curb appeal without much money or effort on your part.
When you are in the market to buy a house, you realize that there will be some aspects of your new home you might need to settle on in order to get the right house in the right location for the right price. Fortunately, some of those wish-list compromises can easily be changed later on as a DIY project!
For me, I loved our house but I was not crazy about the brick color choice. Even after buying our house, and before we moved in, I wanted to get a better look at the brick to convince myself that I liked the color…you know, on this house we already bought.
So I would drive by slowly staring at the brick as I tried to talk myself into liking it and wondering if just maybe there was an easy way to make it more appealing. (The former homeowners even said they saw me a few times on my slow drive-by’s! whoops… )
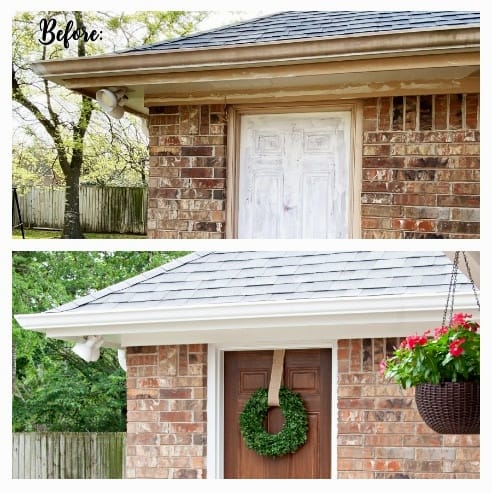
I later realized that the brick color wasn’t so horrible, but it was the dark beige trim that had to go. I got a quote from a few local painters and they wanted to charge over $2000. That stung a bit, because they wouldn’t even be painting most of our brick house, just the woodwork, and gutters!
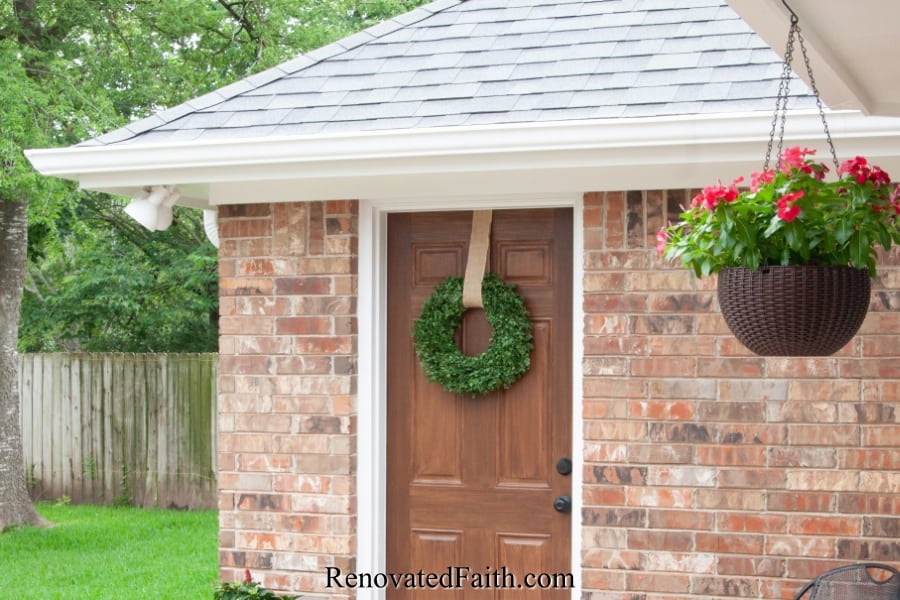
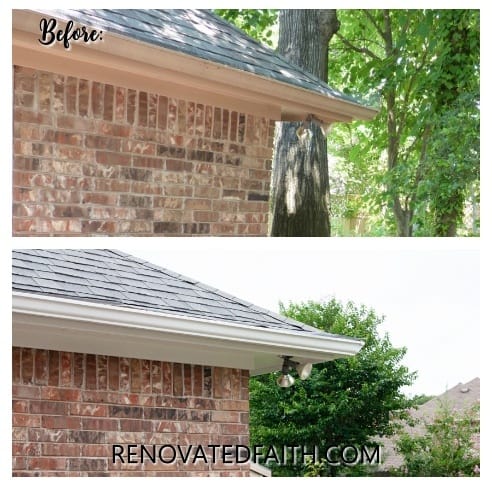
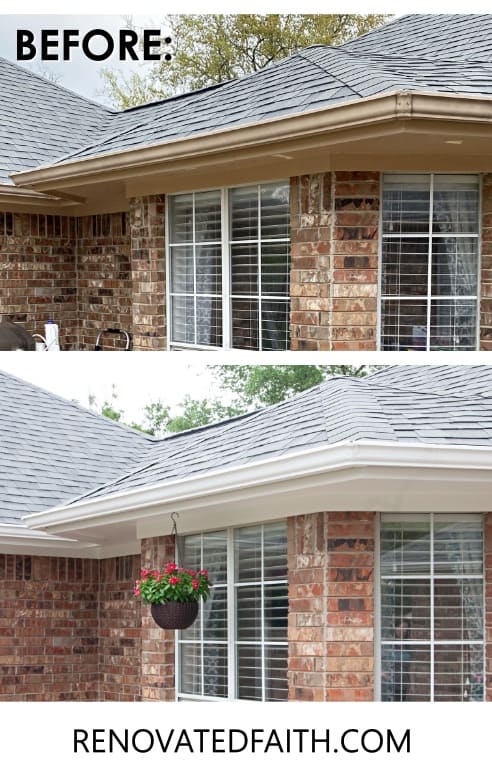
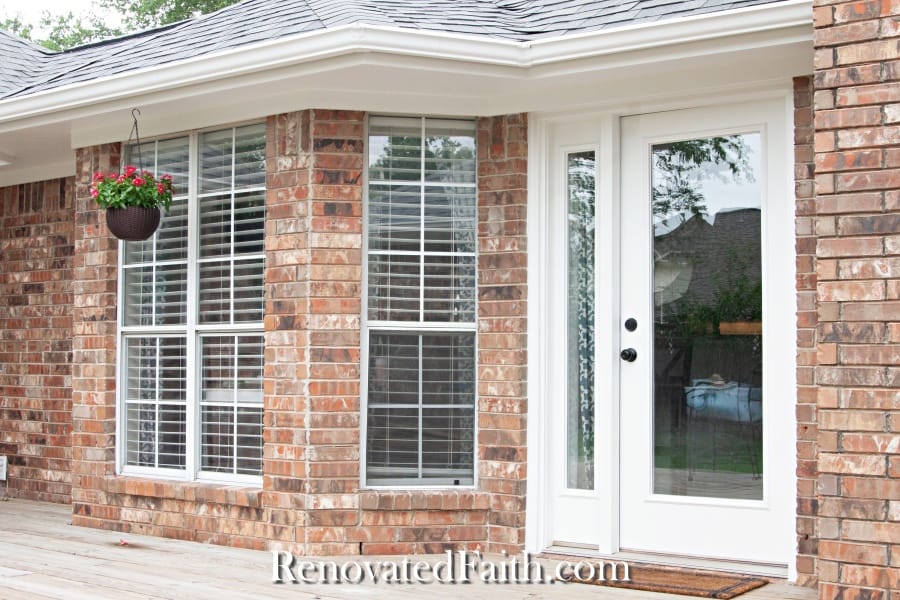
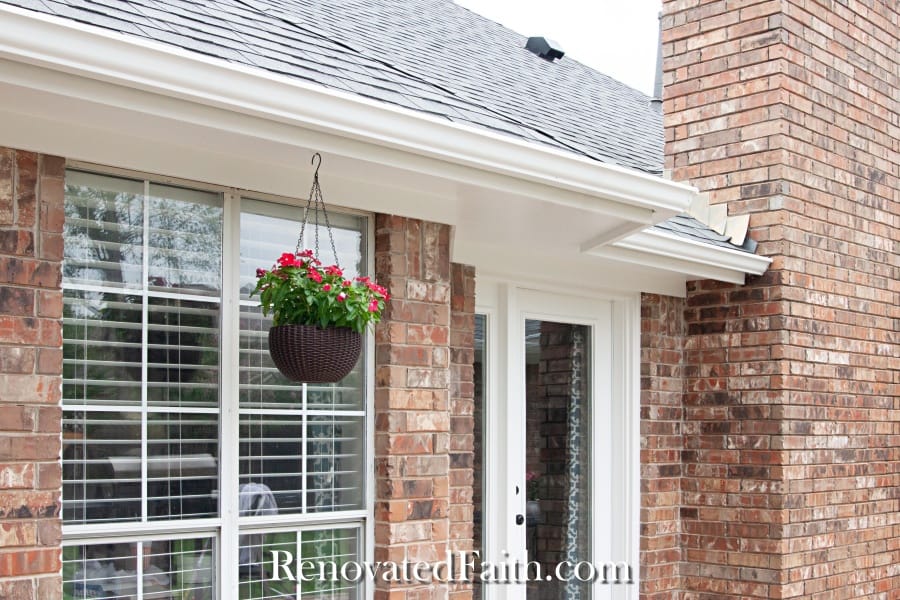
So I decided to tackle the house painting myself and I’m SO glad I did. Fortunately, the new cream paint color not only freshened up the look of our home but emphasized the grays in the bricks and mortar while playing down the orange-toned beiges.
Who knew painting our home’s trim would give our entire house a whole new look! IT’s truly amazing what a fresh coat of paint can do to update the look of your home.
In this post, I’ll show you my best tips and tricks for painting exterior trim boards and gutters along with an instructional video so you can get the best results!
LET ME SHOW YOU:
- How to add to your home’s curb appeal while saving a ton of money by painting your home’s trim yourself
- Tips for picking the right exterior paint color and brand of paint for your own home
- Time-saving tips to make this exterior paint project go as smoothly and quickly as possible!
- Some encouragement that God is perfect so we never have to be.
Quick Links to Information in this Post
- 1 How to Paint Soffits and Fascias Like A Pro
- 2 What Are Soffits and Fascias?
- 3 Cost To Paint Exterior Trim and Soffits (Professional Exteropr Painters)
- 4 How to Paint Exterior Trim the RIGHT Color
- 5 How Long Does it Take to Paint Trim?
- 6 Supplies Needed for Painting Trim, Soffits, and Fascias
- 7
- 8 RENOVATE YOUR FAITH: The Source of Perfection
- 9 The Fastest Way to Paint Exterior Trim, Soffits and Fascias, YouTube Video
- 10 FAQ’s: Painting Soffits and Fascias
- 11 More Posts Related to How to Repaint Trim, Soffits and Fascias
- 12 Final Thoughts on Tips for Painting The Exterior Trim of Your Home
- 13 Best Tips on Painting Soffit and Fascia
So, for the purpose of FULL DISCLOSURE, we moved into our house 5 years ago and soon after we started removing the small jungle that was in our backyard that you can see here: Easy DIY Landscaping Tips on A Budget (When I say ‘jungle’, I don’t mean it in a relaxing tropical rainforest sort of way…more of a “the underbrush in our backyard is too thick to walk through and a rat just ran up that tree” situation.)
Once I had the old “landscaping” cleared and put new plants in, I knew I’d be able to see the front of the house so much better. What I didn’t expect is how much I didn’t love our trim color.
So, to complete the look of the front of the house, I painted all the trim….but just on the front of the house. I suppose that’s because we had so many projects going on that I got sidetracks and never finished!
So yea, for the last five years our brick house has had white trim on the front and side and pukey beige/brown trim on the back and sides. I guess I figured that since no one really sees it, except our dog, it could wait.
BUT NOW, I can personally attest that the process I used will ensure a very durable paint job because it still looks as good as it did when I painted it….five years ago. So, as I’m finishing the back half, I’m doing the step-by-step tutorial of the process and showing you exactly what has worked for me.
The Purpose of Painting Soffits and Fascia
Not only does painting your house completely update its look, but a high-quality paint is like an insurance policy that protects the investment of your home from sun, wind, and rain. If your home’s last exterior paint job is cracked, peeling, or dingy, it’s time to better protect it with a new coat of paint.
The last thing you want is water penetrating your exterior wood, which causes paint to lift even more and the wood to eventually rot.
What Are Soffits and Fascias?
First, decide what portions of your home actually need to be painted. Maybe your home is brick and you want to paint just the woodwork and gutters. Or maybe you have siding on your home that’s in good condition, but you want to change the look of your house exterior by repainting the trim. So before we get started, let’s define terms:
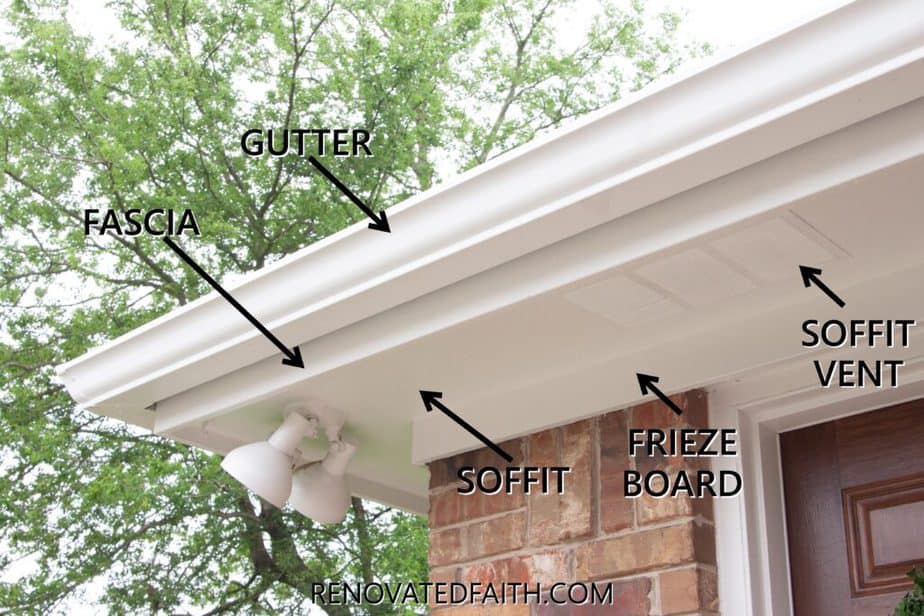
Gutters – These are often made of aluminum and are anchored with brackets to the woodwork to redirect rainwater.
Downspouts – These are the long vertical sections of your gutters that move water from the gutters to the ground.
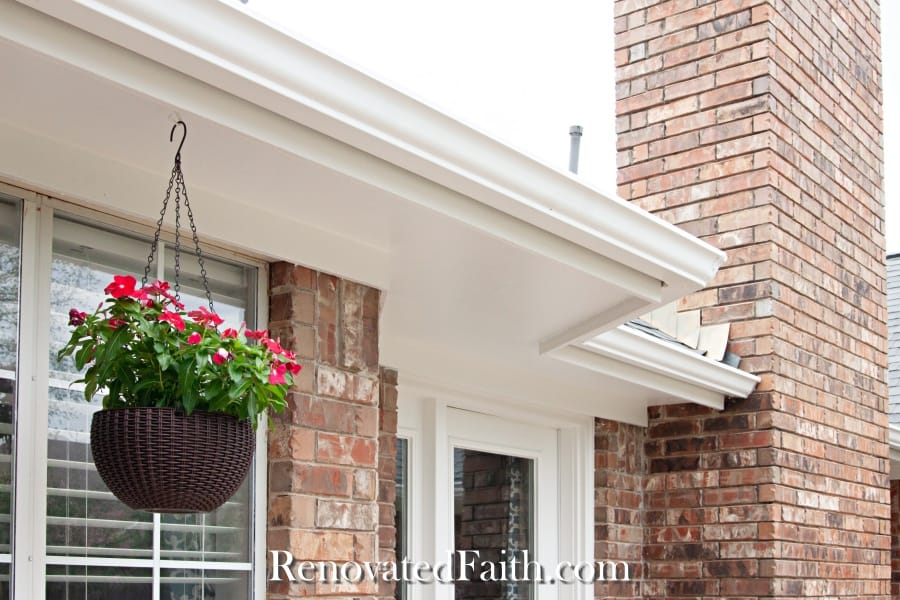
Fascia Board(or ‘fascias’ plural) – These are the boards along the side of the roofline that meets the shingles. Your gutter sits on top of the fascia board. “Transition trim” or “corner board” are two other names for exterior fascia. To help you remember, the fascia is “facing” you.
Soffits – Your home’s soffit boards are the section of woodwork underneath the edge of the roof. It is the horizontal band that runs along the underside of your roof around the house. Sometimes homes have aluminum soffit panels but they are usually wood.
Frieze Board – Depending on the architectural style of your home, you might have a freize board running under the soffits that is facing you. They help to give your eaves a more finished appearance and keep out moisture.
Eaves – To confuse things further, eaves just refers to the soffits and fascia material together. The outer edge of the eave area might also have box ends where it meets the gable ends to give your home a more finished look as decorative elements.
What Do Soffits and Fascias Do?
Soffits and fascias are more than just architectural elements but they play an important role in air circulation that affects rest of your home.
The soffits on a house have soffit vents that gives cold air an opportunity to come in from below while the exhaust vents on the roof allow warm air to rise. This are essential parts in allowing your house’s roofing system to do its job by allowing the attic to have proper airflow and adjust to changing temperatures.
The fascia boards are critical to protect the the edge of the roof where water damage can easily occur.
Another importance of soffits is how they keep the edge of the roof away from the external walls of the house. In windy weather, moisture could easily get into the house and attic without the overhang but the soffits keep the edge away from the house’s exterior.
Cost To Paint Exterior Trim and Soffits (Professional Exteropr Painters)
You might be considering whether it’s worth the trouble to paint your soffits and fascias or just have a professional painter do it. Here is a breakdown of the labor costs of painting exterior trim in linear feet including materials:
Average Cost to Paint Exterior Trim and Soffits Per Linear Foot
Gutters and Downspouts $6-7
Wood Soffits and Fascias $6-7
Window Frames and Door Trim $1-6
Shutters and Dormers $3-6
Of course, don’t be afraid to call a painting service and get estimates on the actual cost to paint exterior trim in your area. For our home that’s just over 2,000 square feet, I didn’t get a bid under $2000 for the exterior painting.
(The cost of painting soffits and fascia will be higher if they have not already been painted because they will need to be primed first A primer will also be needed when painting PVC exterior trim.)
Should You Paint Soffits and Fascia Yourself?
For the homeowner, you are looking at basically the materials cost. For a 2000 square foot house, I spent less than $200 on Sherwin Williams paint and other supplies, which was enough to paint the front, back, and door trim for two doors.
When Should You Replace Soffits and Fascias?
Before you start painting, it’s important to assess your soffits and fascias for any damage. They are more susceptible to damage from high winds and rain. Any cracks or holes could allow insects or even small animals in so be sure to fill them. Water infiltration is also a concern so look for signs of rot and water damage.
Who replaces soffits and fascia boards?
Any boards with wood rot will need to be replaced with a straight board before you start painting. IF more than a few boards need replacing, consider calling a professional paint contractor as many of them do soffit and fascia installation.
You can always get a free estimate before you decide to do it yourself. To get an idea of the cost of soffit and fascia replacement, check out this resource: Soffit and Fascia Cost Calculator
When Should You Replace Gutters?
If your aluminum gutters have one or two leaks, these seams can easily be filled with caulk. If you have sections of gutter that are rusted through, you want to have a professional come in and install new gutters.
Painting rusted-through gutters would be a waste of your time. But if your gutters are just dirty and the paint is deteriorating, then you can easily repaint them without the cost of new ones and it won’t take much time.
How to Paint Exterior Trim the RIGHT Color
Picking the right exterior trim color for the design of your home is so important to the overall look of your home’s exterior. Whether you want a blue house with white trim or a gray house with black trim, get samples of different colors to make sure they coordinate with your brick or exterior siding.
Some good advice when picking a paint color is to always go a little lighter than you think you will need. When you look at a paint swatches, those little squares of color can seem like the perfect shade, but in larger portions, they can easily become too deep.
So aire on the lighter side! You can also use my posterboard trick to help you pick the right color: The Posterboard Trick (Agreeable Gray Review) final decision
Can Soffits and Fascias Be a Different Color Then the Body Color of The House?
Whether you go with a bright white soffit and fascia trim or color that coordinates with your siding, it’s a great idea to go with a different color. Going with the same soffit and fascia color is fine and will save time when painting but different colors will add more interest and contrast. You can look here for ideas: What Color Should Soffits and Fascias Be?
What Are the Most Popular Exterior House Colors for 2025?
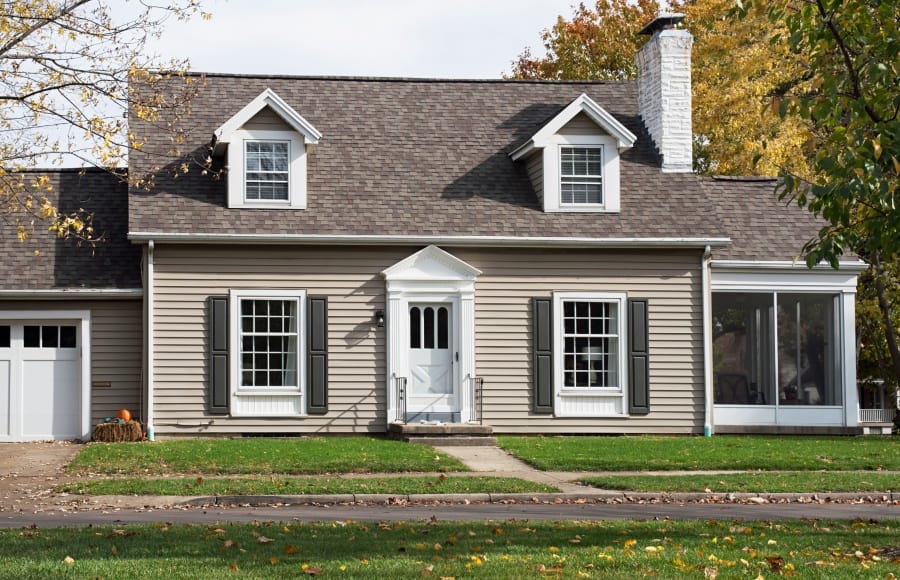
Grays are still popular for home exteriors but you will probably see more beiges as homeowners are going for cozier, more traditional look inside and out. You can’t go wrong with a greige like this one: My Favorite Warm Neutral Paint Color
For lots of ideas on painting soffits and fascia, check out colors here: Most Popular Paint Colours for Exterior Renovations

What Is The Best Paint Finish for Soffits and Fascia?
Any sheen but flat paint will work as soffit and fascia paint. The shinier the finish, the more durable so that’s why many people will opt for a semi-gloss on doors. Gloss is a little too flashy for most people but you can’t go wrong with satin or semi-gloss. I went with a satin sheen on my exterior trim. Any acrylic flat paint could work for interior painting but would attract too much dirt outdoors.
What is the Best Paint for Painting Soffits and Fascias?
On my house, I used Superpaint’s Exterior formula by Sherwin Williams. Their exterior paint is formulated to be mildew-resistant and holds up well in weather extremes which isn’t a consideration for interior trim painting. For an even better quality paint, you can try Sherwin Williams Duration that is even better for exterior use. Be sure to get plenty of paint for your job size and remember that any good paint for soffits and fascias will have mildew-resistance and UV protection. As I found in experimenting with the best paint for cabinets, the best paint isn’t the most inexpensive paint.
Renovated Faith: What’s In A Name?
The Best Temperature for Painting Soffits and Fascias
It’s amazing how different seasons can affect your paint finish. Make sure to look at the upcoming forecast to best plan your project. Your results depend on it! The best weather is lower humidity and 75-85 degrees F. Follow the shade so that you aren’t painting in direct sunlight and the paint doesn’t dry up on you too quickly. Also, hotter weather can make paint dry too quickly which affects the finish.
Painting on a windy day will lead to unnecessary splatter on your home’s brick or wood siding. Painting exterior trim during the winter season is a bad idea because it will affect your drying time so don’t paint at temperatures less than 50 degrees (see the back of your can as this can vary.)
How Long Does it Take to Paint Trim?
Depending on the size of you house, two people could knock it out in a weekend. Since I have trouble with my shoulder, I spaced it out over two weeks and did a little each day.
Should You Spray Or Roll On the Paint?
Repainting gutters and soffits with a paint sprayer can seem really appealing because it’s faster but you also have to consider the amount of time you’ll use to cover and tape your home’s siding or brick to avoid overspray.
Most professionals paint exterior trim with an airless paint sprayer but they are professionals. By that I mean they know when the paint is too thin, too thick, and have fully mastered a spray gun. I prefer a roller and brush because I know I am less likely to accidentally paint the side of my house with those.

Supplies Needed for Painting Trim, Soffits, and Fascias
As with any painting project, investing in the right tools will give you a much nicer finish but will also make the project easier and faster. If you have fun seeing the video pop-up, you can also see it here: Painting Soffits and Fascias, YouTube Video.
Wet and Forget – This is a concentrated cleaner that been a much easier alternative to a gpm power washing unit for painted finishes. I got a gallon and mixed it in a tank sprayer but I wish I would have gotten the bottle that connects to your hose.
Sprayer Tank or Spray Bottle – This is for the mixture of water and Wet and Forget.
Wood Filler – I’ve used this wood filler on lots of furniture projects and it works great for filling nail holes in trim.
Putty Knife – Use a 1 or 2” putty knife to be used as a scraper
Sandpaper or sander – You can use higher grade sandpaper but I prefer my trusty electric sander: The Best Mouse Sander You can see how easy it is to use one of these here: How To Sand Furniture in Five Minutes
Respirator or Mask – This is to keep sanding dust out of your lungs.
Caulk – It’s a good idea to fill cracks, gaps or large seams with exterior caulk.
Babywipes – Trust me, they will come in hand when caulking!
Handy Pail and Liners– I don’t often try to promote “extras” but this is one product you need if you are going to be going up and down a ladder. You can see in the picture below that mine is well used and you can get your own here:
Cheap brush – Use a super cheap brush for your oil-based primer. You’ll only use primer on areas where paint was peeling and there is now bare wood. Since you are using a cheap brush you can just toss it when you’re done instead of cleaning with paint thinner. Otherwise, you can clean your brush with mineral spirits.
Large Roller, Smaller Roller and Paint Pan
Roller Extension
Zibra Paint Brush – Don’t skimp on brushes. The last thing you want to worry about while you are on a tall ladder is getting loose brush fibers in your paint or dealing with brush marks.
Primer – Use an oil-based primer like Zinnser Cover Stain for priming areas you scrape or sand to bare wood.
Paint – I used Sherwin Williams Exterior SuperPaint in Pure White. You can also use Sherwin Williams Duration. The best choices of exterior paint have mold resistance and UV protection.
Paint Pan Liners (Optional) – If you are using a metal paint pan, I love these liners to make clean-up quick and easy: Paint Pan Liners
Clear Acrylic Bonding Primer (Optional) – If your aluminum gutters are not painted, a clear acrylic bonding primer is your best option to ensure the paint sticks.
Exterior Painting Preparation Tips for Painting Fascia and Soffits
Most DIYer’s like myself like to get straight to the main event – painting! BUT the prep work for painting exterior trim is so important! It makes all the difference in the look and durability of the final results. By prepping the surface, we are helping the old paint to better accept the new paint. Below are my best tips on how to prep exterior trim for painting.
A Guide to Painting Soffitsand Fascia- Video Tutorial
You see the step-by-step video as a pop-up in this post but if you have a hard time finding it, you can also find it here: The Best Tips for Painting Soffits and Fascia , YouTube Video
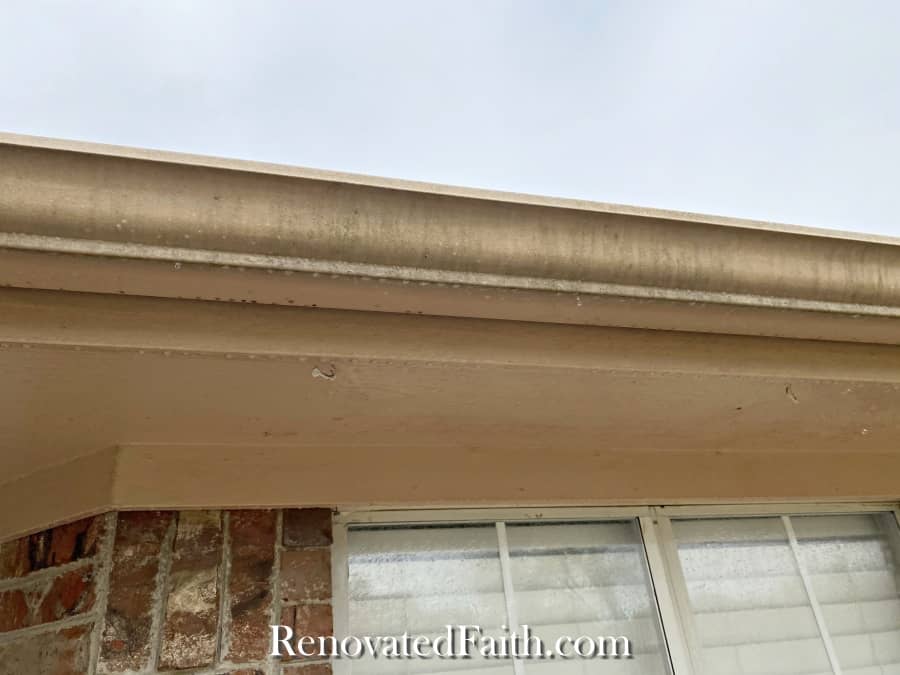
Step 1: How to Prepare Trim for Painting With A Good Cleaning
Stop! Don’t forget to take a pic. When you are done, post the pic on Instagram and tag me @renovatedfaith! ❤️
The first step is to clean off the trim and gutters so our paint adheres to the surface and not the dirt. Usually before scraping and painting exterior trim, a pressure washer is recommended to clean off dirt, mold or mildew. But in the hands of a novice a pressure washer can actually damage the woodwork if you aren’t careful. If you aren’t used to pressure washing and don’t want to scrub the trim with a scrub brush (who does!?), you can use a product called Wet and Forget.
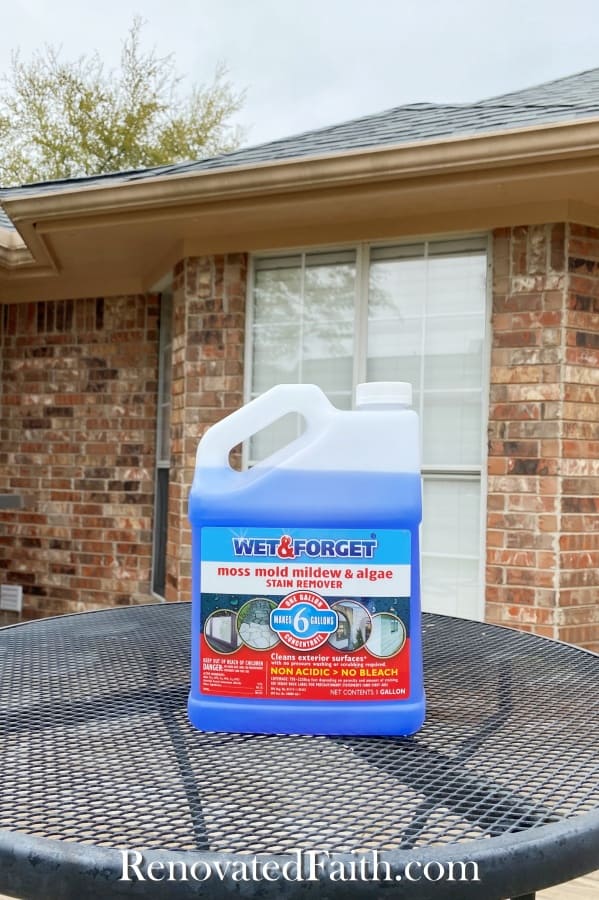
Wet & Forget is a Clorox-free cleaner that removes dirt and mildew from exterior surfaces. It’s an amazing product and will save you from the expense and time of using a pressure washer. The only downside is that it needs to be used at least 3 days before you want to paint as it takes some time to fully take effect.
At least four days before you are plan on painting, mix 1 part Wet and Forget with 5 parts water in a gallon sprayer. You can also you a spray bottle but the sprayer is much easier. (After buying the wet and forget concentration, I wish I would have gotten the bottle that just attaches to your hose: Wet and Forget with Hose Attachment)
As I show you in the video, dowse your wooden soffits, fascia, gutters, and trim with the solution. Then, let it sit. Don’t rinse it off right away, because it needs time to do it’s thing. Rinse it off the day before you are ready to paint.
After a few days, you will see the mildew and dirt fade away. Using this product is so much easier than a pressure washer and a fraction of the cost! (This is also a great product for proper maintenance of your newly painted trim.)
So many of my DIY projects remind me of God’s capacity to transform our brokenness and renew our hearts. If you are a work-in-progress, just like I am, check out the Renovate Your Faith Devotional at the bottom of each DIY and home décor post. Click here to get a weekly reminder of new posts by adding your email address.
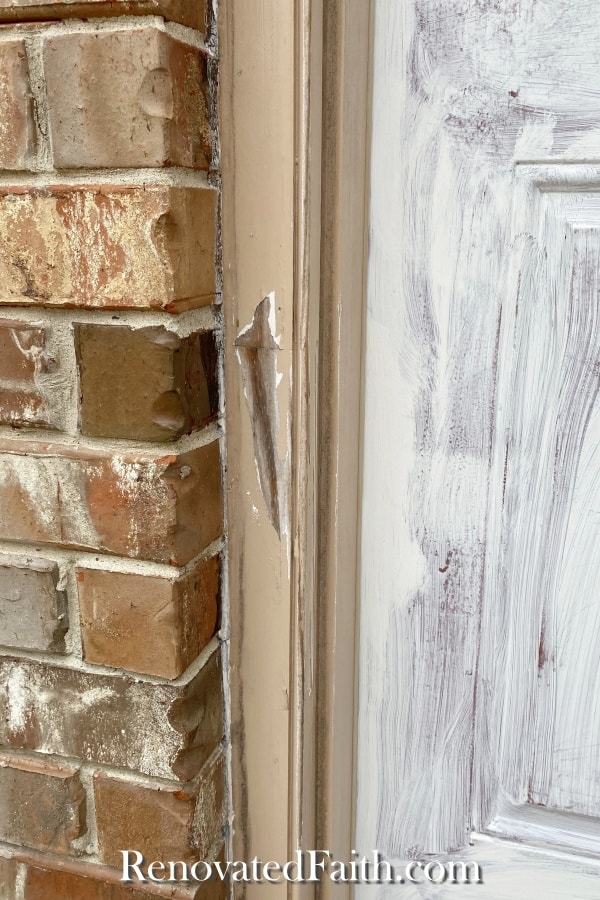
STEP 2: Scrape Before Painting Soffits and Fascia
IMPORTANT: If your house was built before 1978, be sure to have it tested for lead paint. You can find out more about testing here: Lead Paint Testing Info
When painting soffits and fascias that are peeling, it’s important to scape off all of the loose paint. For the most part, you will be painting over the old paint as long as it has still adhered well to the eaves or gutters. But if the paint is loose, a new coat of paint will only make it peel more.
Regardless of the type of trim, scrape off loose flaking paint chips with the putty knife. Any paint that is attached pretty well to the wood can stay. When removing paint from gutters, be careful not to scratch or dent the aluminum with your putty knife.
When painting soffits and fascia with peeling paint, it is also important to remove any paint that has bubbled or blistered along with old caulk that is loose.
STEP 3: How to Paint Soffits and Fascia with Holes or Damage
When painting old exterior trim, you are bound to have small holes to fill. In our soffits were several hooks from the previous owner that I no longer wanted. So I unscrewed them and filled those holes with the wood filler as you see in the video.
How to Prepare Soffits for Painting
As I mention in this post (How to Fix Damaged Furniture), I like to add enough wood filler so there is a decent amount still on the top surface over the hole if you were to look at it from the side. If you level it flush with the hole, sometimes the wood filler can shrink slightly and you will see a recess where the hole was. So add extra wood filler and you can sand off the excess later.
When the wood filler has dried, take your electric sander or sandpaper and sand over the filled hole to make it a smooth surface.
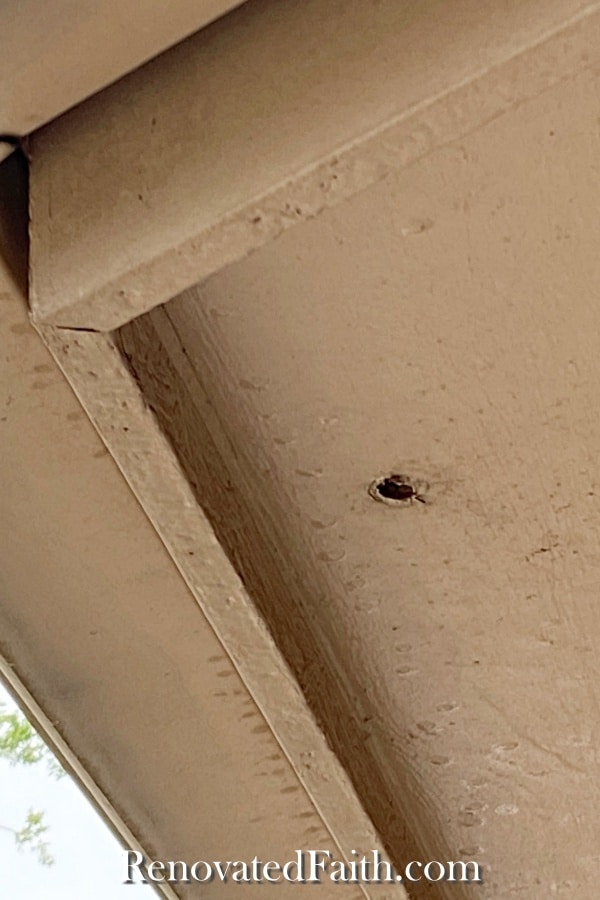
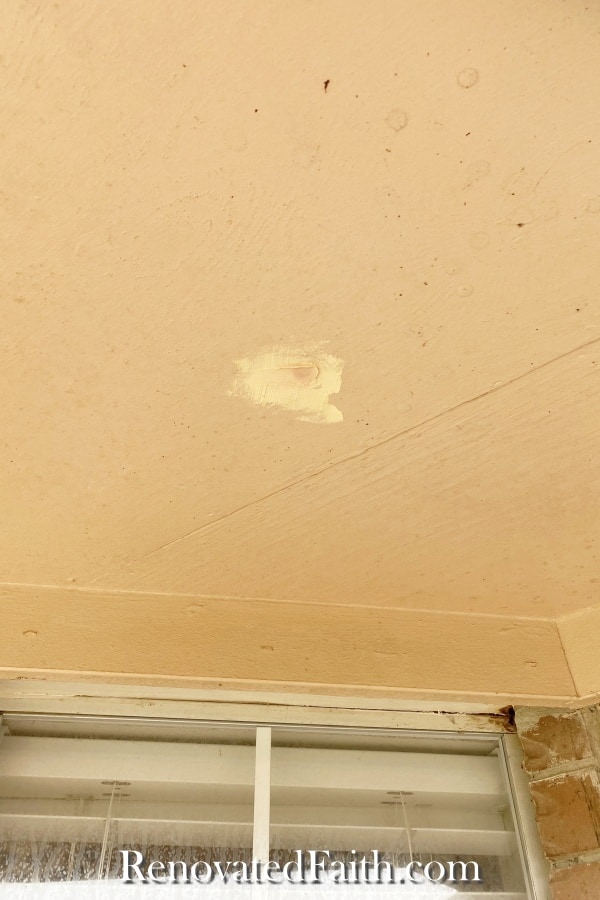
Step 4: Prime Just the Repaired Areas Of Your Exterior Trim
You also want to take a cheap brush and prime any areas that were scraped down to the bare wood and holes that were filled. The good news is that you don’t have to prime any surfaces with the old paint – just places where the paint was scraped off earlier. Use Zinsser Cover Stain for this and when you’re done, you can just throw away the brush or clean your brush with mineral spirits.
Step 5: Caulking (Optional) Exterior Trim and Gutters
The next step is caulking. Ok, yes, I know… “When are going to get to the actual painting part, Karin?” But I promise this prep work is the most important part of exterior trim painting so your paint job lasts for years!
If you have any cracks or space between trim pieces or old windows, you’ll want to caulk them. I like to use wood filler on anything that resembles a hole and caulk anything that looks more like a seam, crack or long gap. You can see in the video how I’m filling a large crack where the fascia corner boards don’t meet up.
To caulk, simply squirt in some caulk on top of the crack in a straight line(It’s ok to be messy)! This is where you will want to have baby wipes on hand. After applying the caulk, wet your index finger with the baby wipe and smooth out the caulk. After you smooth the caulk, wipe the excess caulk off of your finger and onto the baby wipe. Keep repeating until you cant a nice flush caulk line.
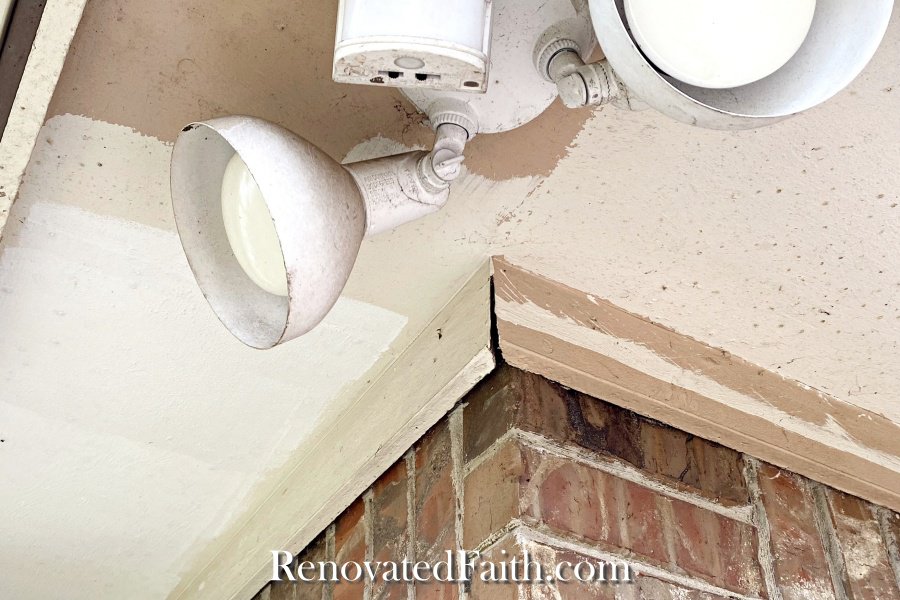
Also, be sure to have a trash container ready for the baby wipes. Do not…I repeat, do not, throw your caulk-filled baby wipes on your deck or porch. After 20 minutes it WILL dry and it is not picnic to scrape off. Ask me how I know! 😉
Let the caulk try 20 minutes or whatever it says on the tube.
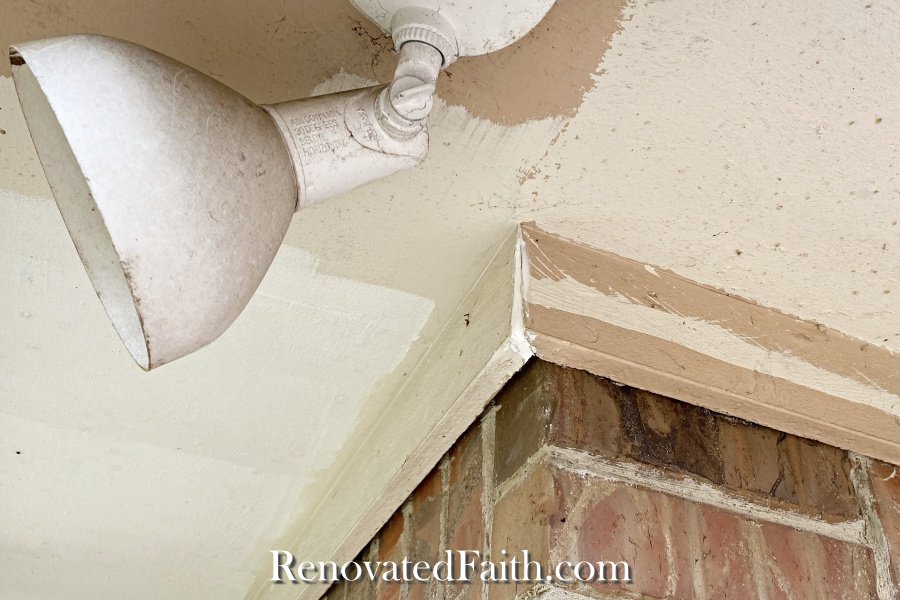
Step 6: Cover Plants And Your Deck
Before you start painting, trim any bushes that are too close to the house and cover any that you don’t want to get paint on.
If you are painting during the summer, now is a good time to water any plants before covering them with plastic. This will prevent them from getting too hot under the tarps.
Painting Tip: My first time painting a soffit with a roller, I probably got more paint on myself than the ceiling. So whenever I paint I turn my clothes inside out. Even if you are painting in a t-shirt or pajamas there is no sense in ruining them. Just turn them inside out while you paint!
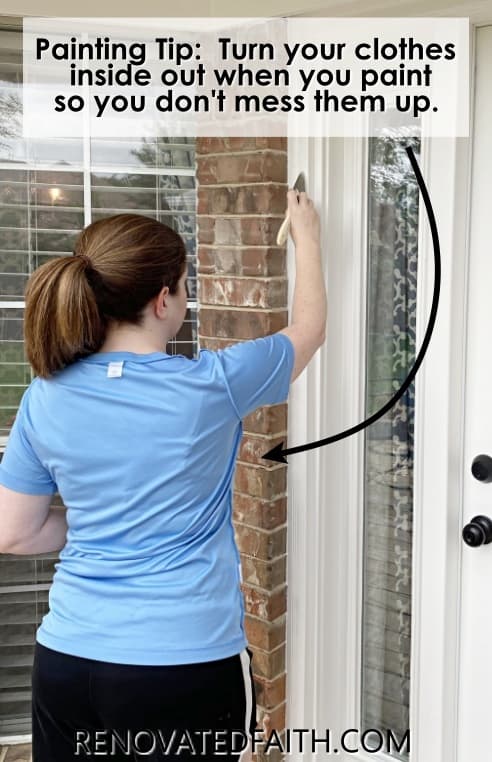
Be sure to also cover your deck or porch floor. I like to use Brown Masking Paper (like this on Amazon) or old sheets as floor coverings.
Step 7: Time-Saving Tips for Painting Soffits and Fascias
And now that you have a clean slate… It’s finally time to start painting! You will need to apply two coats of paint, but I promise, it will go faster than you think with this method. Below is the best way I found to go about painting the trim.
And just a reminder to plan around your forecast. There’s nothing more depressing than watching latex paint getting washed off by the rain.
Do You Paint Fascia or Soffits First?
I like to start with the exterior soffits first with the larger roller since they are the biggest area. Then, I move on to the fascia and gutters.
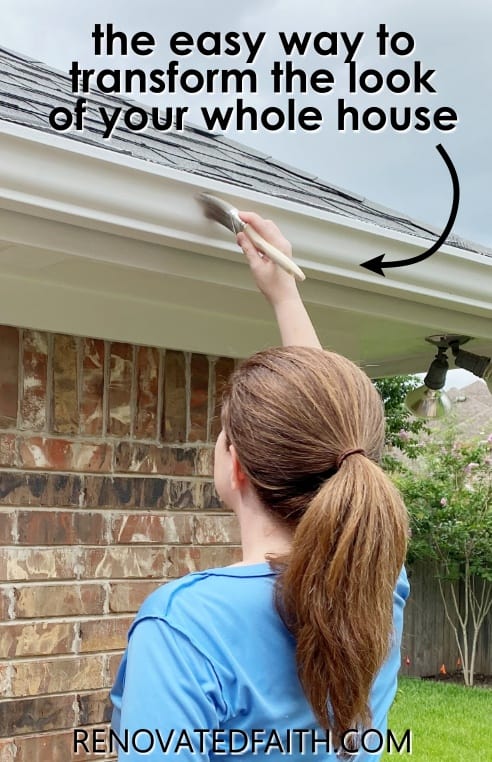
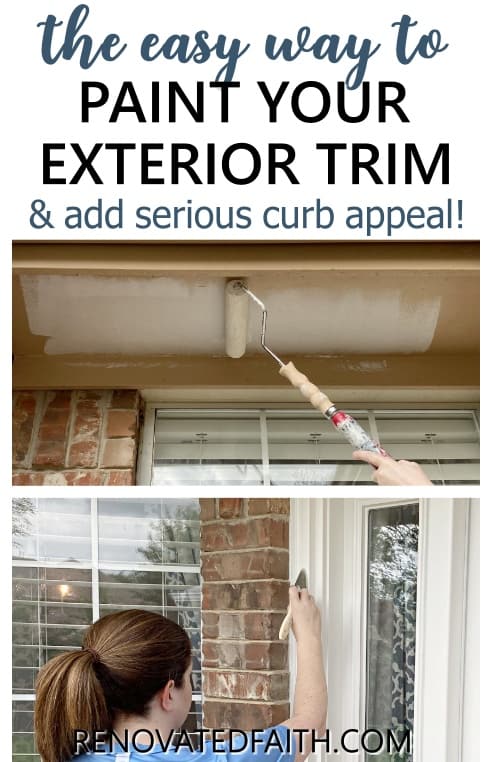
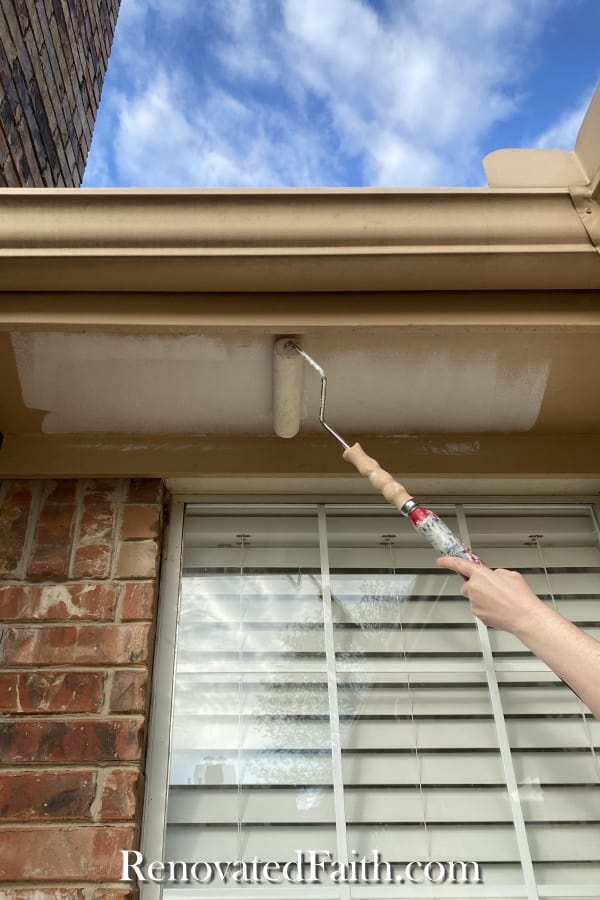
How to Paint Soffits With a Roller– As with most of my paint projects, I like to use a roller for flat areas and then come back with my brush for the trim and edges. As you can see in the video, use your large roller and extension pole on the soffits first. If you are wondering how to paint a soffit without a sprayer, a roller is a faster option since there’s not the extra time involved in taping off. Also, not only is it faster but it helps you maintain a wet edge.
Get plenty of paint on your roller and run it lengthwise down the soffits, getting as close as you can to each edge. I like to cover as much of the large areas as I can with the big roller. You can also use the big roller to paint the bottom edge of your fascia board while you have it out. Do one coat, give it enough time to dry and do another coat. (A large roller can sometimes cause some lap marks but since this is on the edges of the soffits, no one will be able to tell, I promise!)
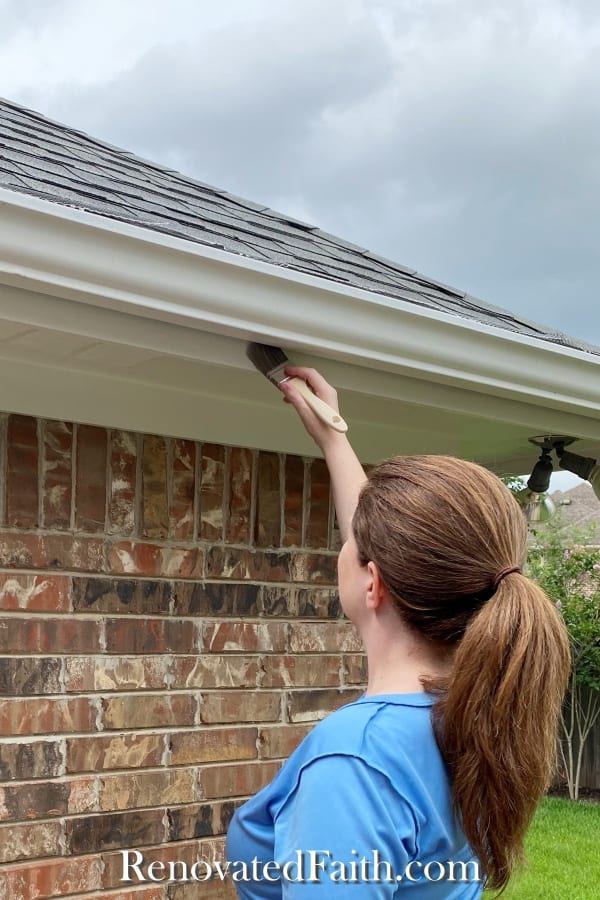
How to Paint Fascias and Gutters– Now attach your small roller to the end of your extension pole. At this point, you will use it to paint the gutters, fascia, and frieze board. Pay close attention as you paint the frieze board that you don’t slip and paint the brick. I like to get one good coat on these with the roller and do the rest with my brush. (I tried doing this part completely with the brush but first coats always take longer because the brush drags more on the old surface and it was a lot easier to do the first coat with the small roller.)
Do the second coat on the above with your brush and any narrow areas you couldn’t reach well with the rollers.
Can You Paint Soffit Vents?
If you are painting perforated soffits or soffit vents, you will probably need to touch them up with your brush after rolling them.
How to Paint Fascia and Soffit Boards Without Gutters
To prevent getting paint on the roof line, you can hold a piece of posterboard or cardboard between the lower edge of your roof and the fascia. Paint to the edge of the posterboard with your brush. If you are on a tall ladder, you can also just tape off the roof edge with masking tape or painter’s tape.
How to Prevent Getting Paint on the Brick or Windows
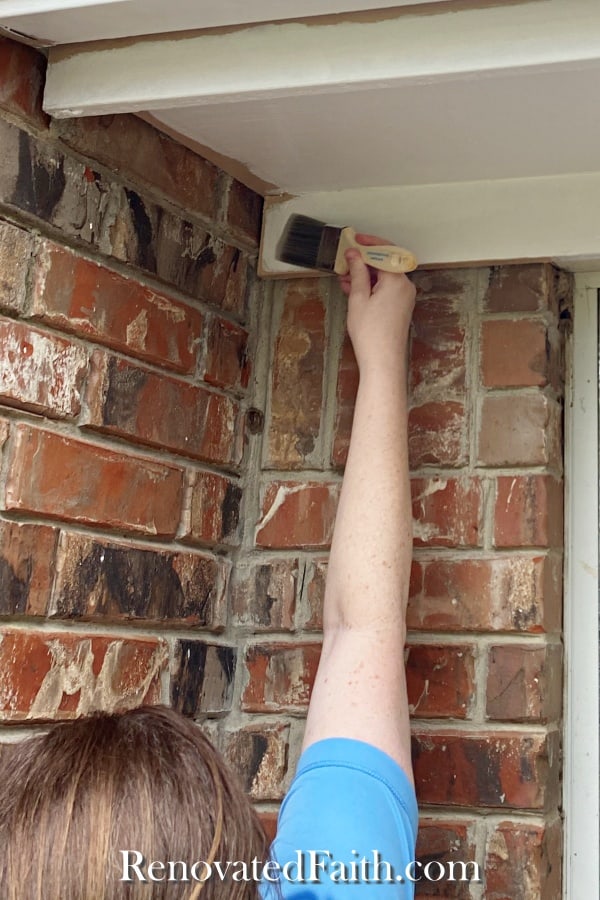
Use a piece of posterboard as a border to prevent your brush from getting paint on the brick where it meets the trim as you can see in the video.
Painting Exterior Door, Porch Railings and Window Trim
Use your 2” Zibra brush for painting exterior door trim. If you get paint on any window casings, you can wipe if off with a damp rag or peppermint essential oil if it has dried.
Painting Shutters
If you have shutters, it is easiest to take them off the house to paint. Be careful with using dark colors on vinyl because the heat can cause them to warp over time. Use an angled brush to get in each of the grooves.
What If I Get Paint on My House?
You have two good options for removing paint from surfaces like your brick, siding or deck. The first is a product called Vandal (check the price here on Amazon) and it is strong enough to remove grafitti off concrete. But first, try using an essential oil like peppermint oil (this kind is cheaper here). It removes paint (even oil-based paint) like no-body’s business. I use it every time I paint when it’s time to get the paint off my hands. I have used this brand for years as it is inexpensive and great for this purpose. (In other words, you don’t want to waste money on a super-refined peppermint essential oil just to remove paint.)
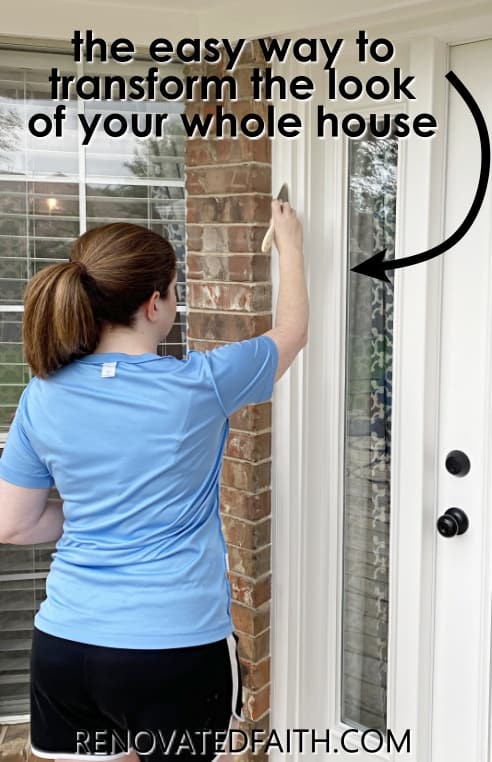
I’m so excited about how my trim turned out and it is so satisfying to be done with this home improvement project. It was a lot of work but it was well worth it considering it saved us over $2000.
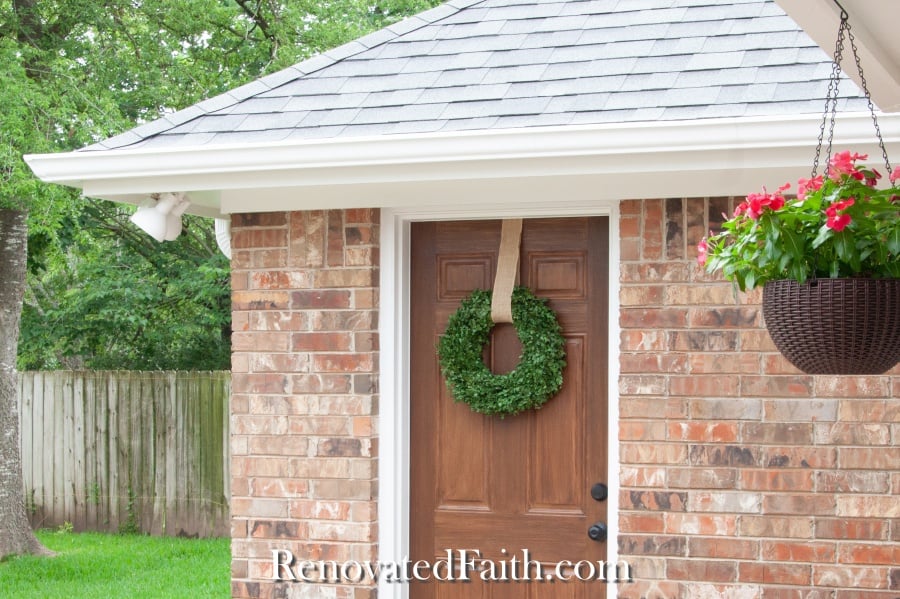
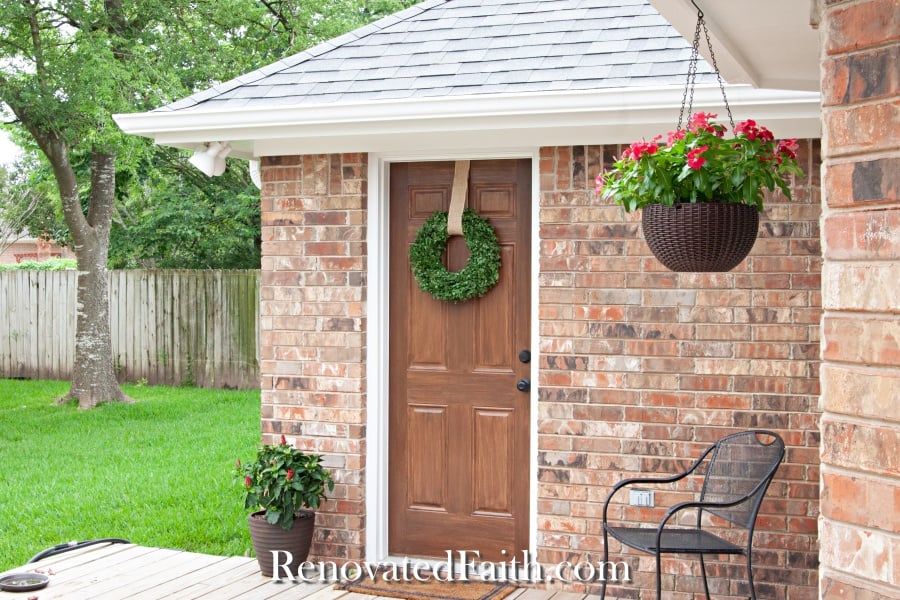
Isn’t amazing how the new trim really brightens up the house and makes gives old brick a more modern look?
RENOVATE YOUR FAITH: The Source of Perfection
Yesterday we got 5 inches of snow in Texas which is a real rarity – especially since the snow actually stuck. It reminded me of how I decorated around the spray-painted nativity scene at Christmas by adding a little fake snow.
To make my pictures of the nativity scene Pinterest-worthy, this recovering perfectionist tried to push the snow around with her fingers to try to make it look smooth and natural.
But I could never get it to look quite right.
I kept seeing holes in the light feathery “snow” where my fingers touched it.
Finally, I realized that the snow looked best when I sprinkled the snow around the nativity figurines from above. When the snow was untouched by my fingers after falling, it looked just the way it should – like freshly fallen snow.
It reminded me that when God sees us, He doesn’t see our faults, failures, and shortcomings. No, He sees us through the lens of His Son’s perfect righteousness. He sees us like we are – as white freshly fallen snow.
And then it hit me! So many times I feel like I’m not measuring up…like my Pinterest photos aren’t pretty enough, like I’m not exactly killing it in the mom department, or that I’m overall just not ‘good enough’.
But God doesn’t see that when He looks at you. If you have a relationship with Him, God sees you as good and pure – perfectly white, like newly fallen snow.
“Come now, and let us reason together, saith the Lord: though your sins be as scarlet, they shall be as white as snow; though they be red like crimson, they shall be as wool.” Isaiah 1:18
God knew you could never be perfect. Only Jesus was, which is why God sent Him to save you in ways you could never save yourself. If you have a relationship with Christ, His spotless Son has redeemed you, washing away 100 percent of your sin.
When God looks at you, He doesn’t see your flaws and shortcomings, He only sees His Son’s righteousness.
He looks at you as freshly fallen snow – untouched, unblemished and untainted by anything in this chaotic world.
We can’t do anything to make God love us more or love us less since our relationship status has been taken care of solely through Christ’s finished work on our behalf.
He doesn’t see the dirty dishes, the untouched to-do list, or even the fact that your home looks like a frat house. He sees YOU, your struggles, and what is heavy on your heart.
He looks at you as a proud Father who wants you to bring your concerns to Him.
With what’s going on in our world today, there’s a good chance you are running on empty. Let Him fill you up and show you that as a child of God, you are now and forever made perfect in Him! YOU ARE ENOUGH!
(If you are unsure if you have a relationship with Christ, or want to know what that means, please don’t hesitate to email me at karin@renovatedfaith.com so I can answer any questions.)
For more spiritual encouragement, click here for the rest of my project posts that also include Renovate Your Faith devotionals
The Fastest Way to Paint Exterior Trim, Soffits and Fascias, YouTube Video
FAQ’s: Painting Soffits and Fascias
Do you need to clean exterior trim before painting? How Do You Clean Exterior Trim Before Painting?
You need to clean your exterior trim before painting so the new paint adheres well to the old primer and paint. Most professsionals will use a pressure washer to thoroughly clean your trim before painting. If you aren’t careful though, you could actually do damage to your woodwork with a pressure washer if you don’t have it on the right setting. I did not pressure wash my trim and gutters but instead used a product called Wet & Forget. I mixed the solution with water in a 1-gallon sprayer and sprayed it all over my gutters and trim about 4 days before I wanted to paint. Then, the day before I washed it off with water. I did this with the gutters and trim I painted 5 years ago and they still look great!
What Kind of Paint Do You Use on Exterior Trim, Soffits and Fascias? What kind of paint do you use on outdoor trim?
There are different types of paints on the market for different exterior finishes like wood, mdf, vinyl soffits, etc. But for aluminum gutters, wood trim and other exterior applications, I like using an a high quality latex paint suited for exterior walls and trim like old windows. Most of the acrylic paints (latex paints) on the market can give you the same or close to the same finish as oil-based paints without the VOC’s. Also, they won’t harden over time like oil-based enamels do. In addition, water-based latex makes cleaning paint brushes easier and you don’t risk getting oil-based paint on the rest of the house. Using the best type of paint that can handle the elements is the most important part of exterior house painting.
IMPORTANT NOTE: For painting aluminum soffits and fascias, it is important to not use a paint or primer with ammonia in it because it will cause the paint to wrinkle. For painting any exterior trim or gutters, Sherwin Williams Superpaint and Duration do not contain ammonia making them a great choice for painting the outside of your home.
How Long Does Sherwin Williams Exterior Paint Last?
If you are prepping the trim correctly and use a high-quality paint, the paint job will last for at least 15 years.
How Much Does It Cost To Paint Stained Trim?
Painting stained trim, soffits and fascias require the additional step of priming the entire surface. Since most stains are oil-based, it’s best to use a primer between the old stain and your new painting job. While this does add an additional step to painting fascia and soffits, the primer can take the place of one of your paint coats because you probably won’t need as much paint since your primer will provide some coverage. For this reason, get a primer that’s close to the same light or dark color as your final paint color. Most primers can be tinted as I have had Lowe’s tint the Zinnser Cover Stain and Zinsser Bullseye at no additional charge.
You want to have your primer tinted so it’s slightly lighter than your latex paint and that will provide you better coverage and save on paint. The additional cost to stain painted trim will just be for whatever your primer costs minus what you don’t use in paint because your primer is acting as a coat for coverage. If you have someone do it for you, you will add $1-6 per linear foot for trim and $6-7 per linear foot for roof soffits, fascia and gutters on first and second floors..
Aluminum Soffits and Fascias
There seems to be some confusion on this issue. Aluminum gutters can absolutely be painted. If they have not been previously painted, you will want to prime them with a clear bonding primer. The same applies for soffits and fascia painting. If they have been previously painted, Sherwin Williams Duration and Sherwin Williams Exterior Superpaint are great options.
(Since soffits and fascias come in a variety of materials, make sure to find the right primer for your job. Here are a few of the different materials: Fiber cement soffits, Vinyl Soffits, Aluminum Soffits. Older homes built in the 1960’s to 1980’s might have asbestos soffit boards so a liscensed professional should oversee their removal. )
How Much Does it Cost to Have Gutters Painted?
Gutters caused about $6-7 per linear foot if they have already painted. This will be a couple dollars more if they were not previously painted and need to be primed. Be sure to prime aluminum gutters with a clear bonding primer to ensure better adhesion.
What is the Most Efficient Way To Remove Paint From the Exterior of a House?
If you are referring to paint that is peeling on a surface that you want to re-paint, take a putty knife and scrape off any loose paint that is peeling or bubbling up. Once all the loose paint is removed, prime those areas where the raw wood is exposed again. When that is dry, you can start painting over those areas and the rest of the trim work.
As far as removing paint from say brick that you accidentally got on your house while painting trim, I like to first wipe it immediately with a damp rag. If that doesn’t get it all, you can use this product called Vandal (get it here on Amazon). I have had good luck with peppermint essential oil (like this cheaper oil) getting paint off surfaces and I use it everytime I get spray paint on my hands. Another options is to get one of those sample containers of paint at your local improvement store. Get it so it matches your brick and dab a little paint over the area. Trust me, no one will know!
How do you prepare exterior trim for painting?
The first thing you need to do when painting exterior surfaces is to prepare the surface for primer and paint. Unlike painting new wood, having a clean slate is critical so the new surface adheres well and doesn’t peel in the future. Take a close look at the condition of the paint. For any problem areas with actively peeling, loose paint, scrape those areas well. Once all peeling paint is removed, you can lightly sand with an electric sander to smooth any rough edges of the soffits and fascia.
Do I have to sand before painting Soffits and Fascia?
Ideally, you should sand your aluminum soffits and trim but not to the point that you need to sand off the old surface. Just use an electric sander or sanding block to scuff sand your aluminum soffits and fascia just enough to help the paint adhere. Wipe down the trim with a damp cloth do remove any sanding dust before painting.
Does exterior trim need two coats of paint?
In most cases, you will need two coats of paint. Even with paint with great coverage, you’ll absolutely need two thick coats when painting with lighter colours. For a darker exterior colour scheme, you might be able to get away with one thick first coat of paint.
HOW MANY GALLONS OF PAINT DO I NEED FOR EXTERIOR TRIM?
It can be difficult to determine how much paint you need for long areas of trim where it’s a lot easier to determine the amount of wall color you need for interior purposes. I like to start with a couple gallons and you can get more as you go. Professional painters will say that you need to “box your paint” which means combining all the gallons together in one large container so that they are the exact same shade. However, with long areas like exterior trim, you will not be able to tell if one section is slightly darker as you would on a large wall. When painting commercial properties or a home with a second floor, I’d try to save money and go ahead and get a 5-gallon bucket.
Should exterior trim paint be flat or satin? Should exterior trim be flat or semi-gloss?
A satin finish will give you more durability than a flat finish because dirt will not adhere as well. You could also go with a semi-gloss finish but today the trend is to go with a more matte sheen. With satin sheen, you get the best of both worlds.
Do I need primer for outdoor paint?
If you have rust-stains, you will need a good primer like Zinnser Allcoat Exterior paint. Then follow with a high-quality exterior paint. If you don’t have lots of rust stains and or peeling paint, you can get away with a high-quality paint that adheres well.
More Posts Related to How to Repaint Trim, Soffits and Fascias
How to Paint Any Furniture Piece to Look Like Wood
How to Restore Metal Outdoor Furniture
How to Use Gel Stain on Furniture for A Whole New Look
Easy Restoration Hardware Finish on Furniture
Faux Raw Wood Finish on Furniture (No Bleach or Stripping Required!)
The Best Projects to Increase the Value of Your Home Before You Sell
The Easiest Way to Create a Driftwood Finish for Furniture
How to Spray Paint Door Knobs So They Last
Why I Don’t Use Chalk Paint on Furniture
The Most Popular Colours for Kitchen Cabinets
Final Thoughts on Tips for Painting The Exterior Trim of Your Home
Any updates to the exterior part of your home will add so much value! Painting the trim, soffits and fascias on your home is a great way to update the look of your house on a budget. A new coat of paint that coordinates well with your home does wonders for curb appeal and doesn’t take a lot of time to finish.
With this tutorial, you can save so much money by doing it yourself and feel confident that your paint job will protect the investment of your home for a long time. Not only does a cost of fresh paint protect the exterior of your home but it gives it whole new look that you can be proud of.
I love to hear your thoughts and questions! Scroll down to leave a comment and I WILL reply! ❤️
Blessings,

Be sure to follow the fun here!
Email Subscription | Instagram | Pinterest | Facebook | Twitter
Best Tips on Painting Soffit and Fascia

Karin Peters is a DIY expert and the creator of Renovated Faith. She is a furniture painter, a home design consultant, and a tenacious problem solver determined to help you transform your house into a home. With 17 years of experience with DIY home improvement, she researches and analyses professional processes to adapt them to be easy and cost-effective for DIYers. She then tests every project and product before it appears on the site in a detailed, step-by-step format. After attending Texas A&M University, she received her Master of Divinity with Biblical Languages at Southwestern Baptist Theology Seminary. Her passions unite in Renovated Faith, which shows readers how to create a home that serves them so they can pursue their God-given purposes. About Renovated Faith | Editorial Policy | Facebook | Twitter | LinkedIn


What a great tutorial, and wow, does your house look better now! Thank you for the detailed instructions, and I am definitely trying the Wet and Forget cleaner!
Thank you so much Jeanine! I’m trying to decide whether to tackle painting the deck now. Thanks for your kind words and have a great rest of the week!
Hi Karin.
Thanks very much for this lengthy post. It contains great details. I’m planning on doing all my trim & porch this fall. I did click on a link to see the peppermint oil you spoke of, but it came up with the other spray product that takes paint off your house. I did it twice, but both times it did not show any peppermint oil. I’d never heard this tip,& it will help a lot! Thank you also for the devotionals you include with your posts. I’ve found them so encouraging.
Hey Christina, Thank you SO much for your kind words and for letting me know that link didn’t work. I fixed the link and please let me know if you have any questions about the project. I hope you have a great day! Blessings, Karin
Hi, Karin! Thank you for all the details. I never thought of using a roller for the trim like that. It’ll save me so much time this fall.
I’m wondering if you cleaned the brick and the roof before you started painting. Both are much lighter in color in the after photo. Thanks!
Hey Claire, I can tell you are a details person like I am! Yes, I bet there are some professional painters that might not suggest using a roller on the trim but I didn’t care about roller marks, I just wanted to get the paint up there. But roller marks or brush strokes in furniture are a whole different story for me! 🙂 I’m glad you asked that about the brick color. I did not clean it but I used my phone on one and my DSLR on the final pics. I was trying to save time by using my iphone for the before shots and all the process shots. THen I like to use my DSLR for “beauty shots”. Unfortunately, I couldn’t edit the contrast levels to be quite the same so that’s why the brick looks a little different. When you look in the video, you can see a truer representation. THanks Claire and let me know if you have any other questions! – Blessings, Karin