How To Paint a Door to Look Like Wood Stain {12 Shade Options}
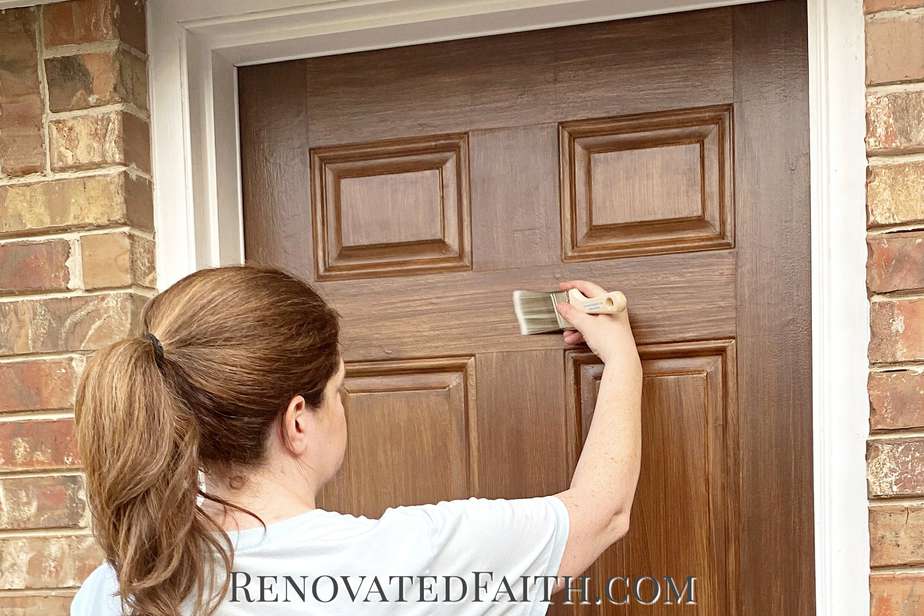
How To Make A Metal Door Look Like Stained Wood
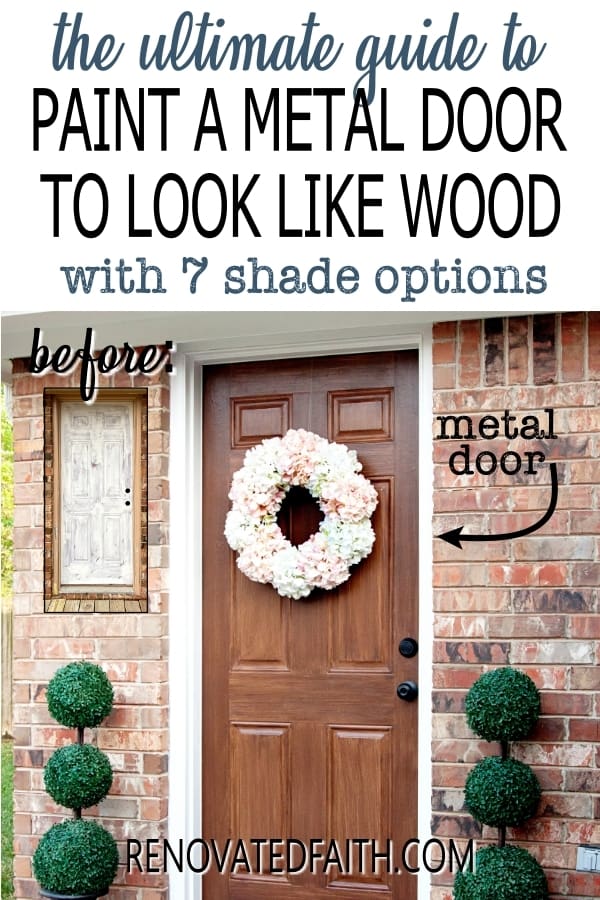
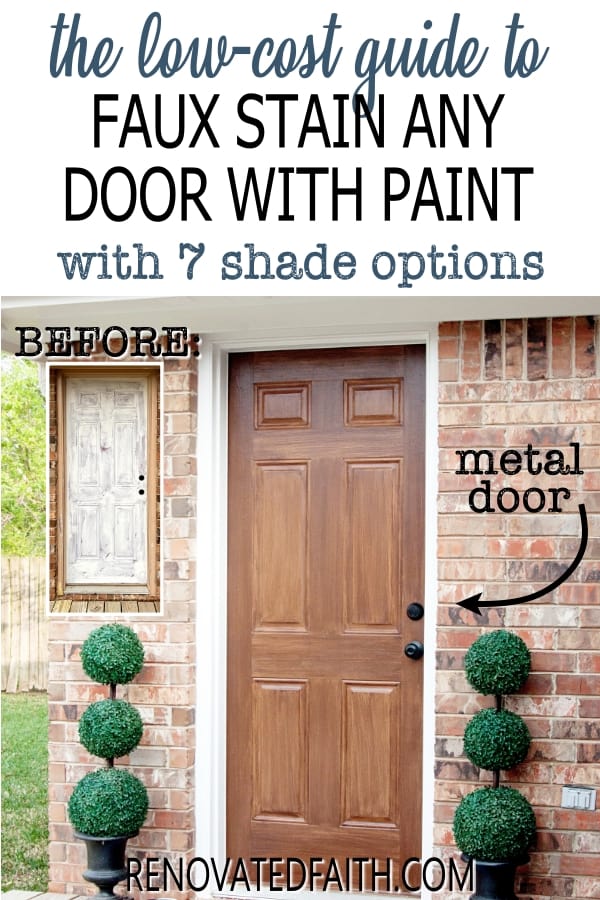
Want to upgrade an ugly metal or fiberglass door? I’ll show you how to paint a door to look like wood on a budget with seven shade options.
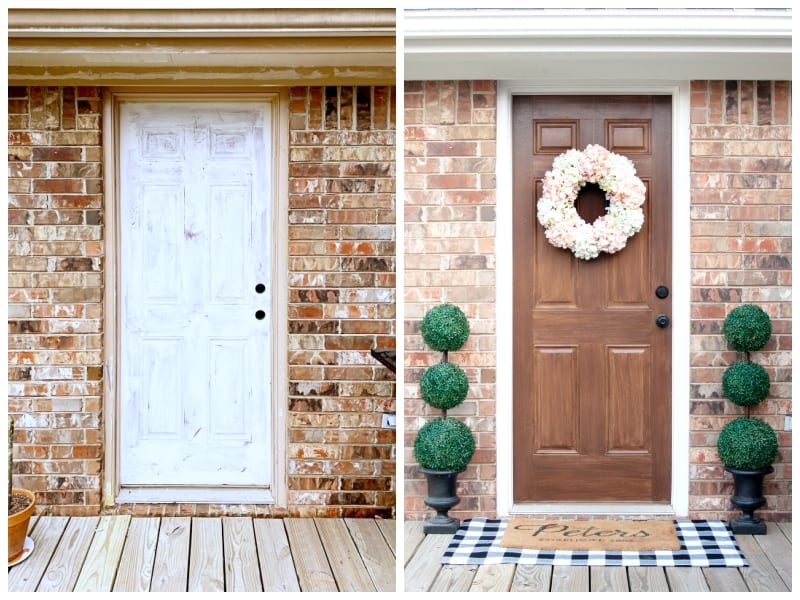
Did you know you can give any metal or fiberglass door the look of wood with a few paint supplies from your local home improvement store? Don’t settle for a tired, bleached-out door color when you can paint your door in any of 7 beautiful shades of faux wood grain.
I have used this technique with excellent results on furniture pieces, but I’m so excited to show you how amazing it looks on interior and exterior doors made of any material. I’ll show the simple steps so your old door looks like wood for less than $40. That could save you hundreds of dollars if you buy a new one.
How Do You Make a Door Look Like Wood With Paint?
Whether you are refinishing your metal front door or a fiberglass back door, the process is the same and uses latex paint and glaze to give any material the look of wood grain. If you have a stained faded door, this is a great process, as you can completely refinish your door without stripping. With this easy step-by-step tutorial and video, I’ll show you exactly how to do your door makeover on a budget!
Quick Links to Information in this Post
- 1 How To Make A Metal Door Look Like Stained Wood
- 2 Is There Such a Thing as Paint That Looks Like Wood?
- 3 How to Make A Metal Door Look Like Wood (Process Overview)
- 4 Supplies Needed: How to Paint a Door to Look Like Wood
- 5 Shade Options When Painting A Metal Door To Look Like Wood
- 6 How to Paint a Door To Look Like Old Wood – Rustic Options
- 7 How to Paint a Door to Look Like Wood – Video Tutorial
- 8 RENOVATE YOUR FAITH: Why Doesn’t God Always Answer Our Prayers?
- 9 FAQ’s: How to Make A Metal Door Look Like Wood
- 10 Related Posts – How Do You Make a Regular door look like wood?
- 11 How to Paint A Metal Door to Look Like Wood, YouTube Video
- 12 Final Thoughts on How to Paint a Door To Look Like Wood
- 13 How to Make A Metal Door Look Like Wood
Is There Such a Thing as Paint That Looks Like Wood?
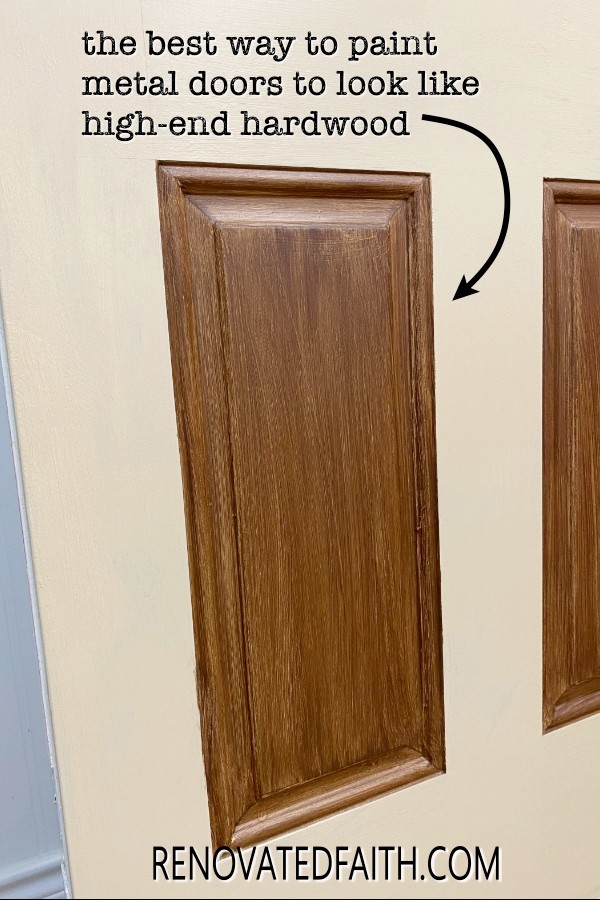
There is no one shade of interior or exterior paint that looks like wood stain because when you look at a stained piece of hardwood there are actually several different colors in one piece. After lots of experimenting, I’ve found a faux finish that synthesizes the look of wood grain on any material surface.
You will be using three different sample containers of paint per door and we will paint them on with a method that is easy and looks so much like real wood. I also give you over 7 different shade options so you can get the exact look that matches your style and home decor.
How to Make A Metal Door Look Like Wood (Process Overview)
With this process, first, pick your shade from several options below. Each shade has a designated wood tone base coat color and two different glaze colors. (I promise this is easier than it sounds so stick with me!) We will paint on the base coat and let it try before taping off your paneled door in smaller areas to make sure the faux wood grain is going in the right direction.
Then, we will brush on one glaze later into the sections we are working on at the moment. The glaze layers are semi-translucent and the brush strokes will create a graining effect just like wood. When that first layer of paint dries, we will brush on the second glaze layer which acts as a wood grain finish coat.
After that layer of paint dries, we remove the tape and retape the rest of the sections. Then, we will do glaze layer 1 and then glaze layer 2 again on those sections. When it is dry, we apply a clear coat and admire the amazing door you just created to look like a high-end hardwood door you first paint on a basecoat for less than $40!
How Does This Process Compare to Wood Look Paint Kits?
There are many wood look paint kits on the market. This process is cheaper, has a more realistic end product and I use a more reliable clear coat. Also, you can customize all the shade options to get the style you want.
Supplies Needed: How to Paint a Door to Look Like Wood
Before you get started, know that there are several different stain color options. Follow this tutorial step by step but you can go to one of these options for the basecoat and glaze steps: How to Paint Furniture To Look Like Wood – Shade Guide
Zinnser Cover Stain Oil-Based Primer – Be sure to use Zinsser Bullseye 123 Primer (Water-based) if you are working on a garage door. Using an oil-based product on a new garage door can void your warranty.
Sander or Sandpaper for Light Sanding – Here is my favorite sander. For tips on sanding, read my post here: How to Sand in Less Than 5 Minutes
Base Coat – See the information below for the right base coat for your shade of faux stain. Usually, I just get the sample containers of paint at Lowe’s that are less than $5.
Clear Mixing Glaze – I’ve tried other wet glazes and this one can’t be beaten: My Favorite Clear Mixing Glaze is Valspar’s. You can usually find it at Lowe’s.
Latex Paint Sample for Glaze Layer 1 – You will mix Layer 1 by combining the glaze above, water, and latex paint based on the stain color you pick below. Don’t worry; it’s super easy to mix and you will only need a sample container in Satin or Flat paint! I like to get these sample containers of paint at Lowe’s in their Sherwin William paint and that’s also where you can get the clear mixing glaze.
Latex Paint Sample for Layer 2 – Again, you will mix this by combining the glaze, a little water, and latex paint (sample size again). See the mixing instructions below in step 4.
Roll of Painter’s Tape – Get the yellow tape for delicate surfaces.
Paint Brushes – CLICK HERE FOR MY FAVORITE PAINT BRUSHES AND ROLLERS.
4″ Paint Roller and Paint Tray (Optional)– See the link above.
Chip Brush (Required for Driftwood Finish and nice to have on-hand for any other finishes)
Foam Brushes (Optional) – I like to add my topcoat with a foam brush to get a smoother finish without brush strokes.
Top Coat (Recommended) – My favorite for Interior Doors is Varathane’s Water-Based Top Coat in Satin. You can also find it at Home Depot. For exterior doors and garage doors, I recommend this one: Varathane’s Waterbased Spar Urethane
Stir Sticks for Your Cleat Coat
Drop Cloths
Paper Towels
Shade Options When Painting A Metal Door To Look Like Wood
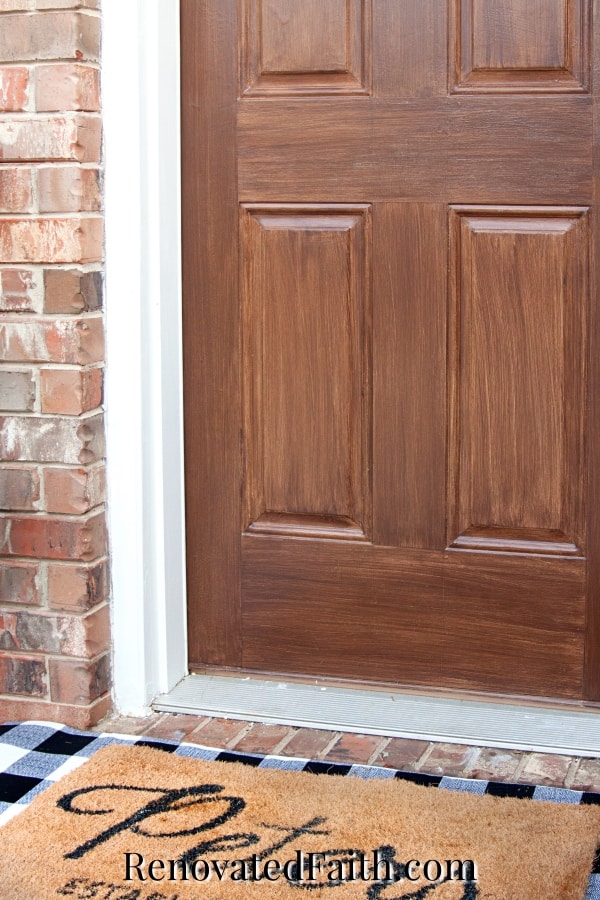
For my metal door I used the Rustic Mahagony faux stain that you can find here: Traditional Faux Stain Options
For the rest of my faux stain options, go to this guide: How to Paint Furniture To Look Like Wood – Stain Shade Options
Follow this tutorial step by step but when you get to the base coat and glaze steps, make sure to use the colors I suggest in the link above.
How to Paint a Door To Look Like Old Wood – Rustic Options
Raw Wood Faux Finish
If you want to how to paint a door to look like wood that is raw or bleached, you can apply this Natural Wood faux finish to your interior or exterior door. Follow this tutorial for taping off the different sections of your door but do the process listed here: Easy Raw Wood Finish With Paint. You’ll find it is a very similar process to this one with most of the same supplies. For examples of furniture in this finish, check out this post: Easy Raw Wood Finish With Paint
Restoration Hardware Faux Finish
For a Restoration Hardware finish, you can use this tutorial for taping off your door panel and the restoration hardware faux finish tutorial for the actual process. Again, it is very similar to the process here and you can see how I used this process on the different wood panels of our dining table here: Easy Restoration Hardware Finish with Paint
How to Paint a Door to Look Like Wood – Video Tutorial
You can also watch the video with this post to see exactly how to faux finish your door with paint. If your video isn’t showing up, you can find it here on You’Tube: How to Paint A Door To Look Like Wood, Video Tutorial
Step 1: Sand First Before Painting A Door to Look Like Wood
Stop! The first thing you want to do is take a before pic. When you are done, post the before and after pics on Instagram and tag me @renovatedfaith! ❤️
The first step is taking the door off the hinges and removing hardware. Be sure to put your screws and hardware in a plastic baggie so none get lost. I refinished my door in a vertical position so I could get better video shots but it is easier to refinish horizontally on a table.
BUDGET-FRIENDLY TIP – If your hardware needs an upgrade but you don’t want to spend a lot, now is a great time to spray paint it. You can see my easy process here: How to Spray Paint Door Knobs So They Outlast The House
I like to sand with my Tacklife Mouse Sander and I go in circular motions all over the piece as you see in the video. You can also use fine grit sandpaper and sand by hand. To learn more about sanding, check out this post here: How to Sand in Less Than 5 Minutes
How to Make a Metal Door Look Like Wood – Prep Work
Whether your door is metal, wood or fiberglass, you are just sanding to scuff up the surface. In other words, you are not trying to sand off the old finish. Chances are there is at least one layer of paint on your door and we want to make sure the new paint adheres to the old surface.
So many of my DIY projects remind me of God’s capacity to transform our brokenness and renew our hearts. If you are a work-in-progress, just like I am, check out the Renovate Your Faith Devotional at the bottom of each DIY and home décor post. Click here to get a weekly reminder of new posts by adding your email address.
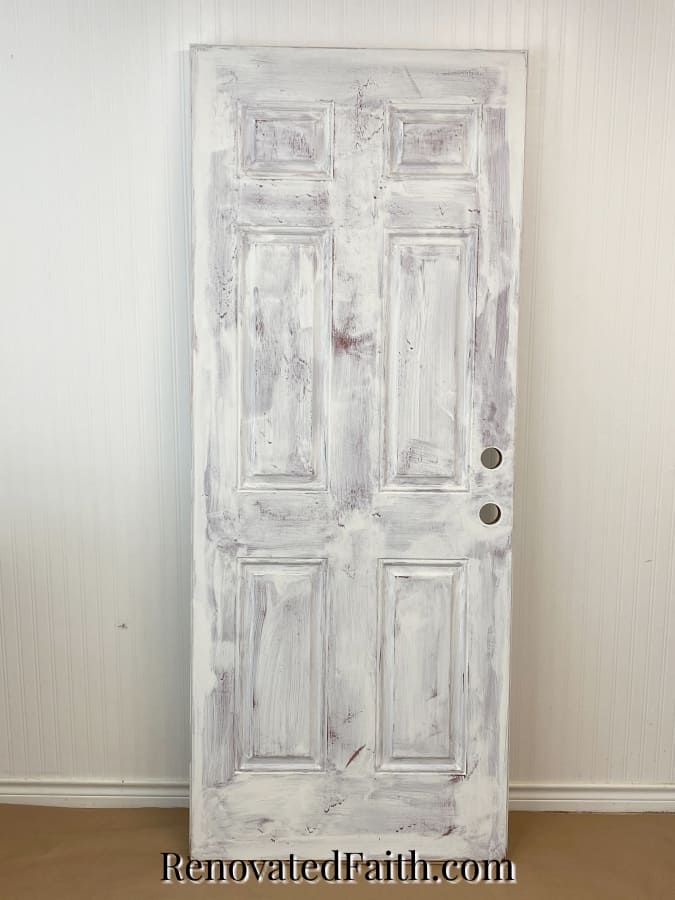
STEP 2: Prime Your Interior or Exterior Door First
The second step is to brush on a primer. For my exterior door, I used an oil-based primer called Zinsser Cover Stain. It has great adhesion qualities which is important for exterior doors. However, if you are doing this process on an exterior garage door, be sure to use Zinnser Bullseye 123 because some garage door warranties will be voided if you use an oil-based product on the garage door. It also adheres well and you will get excellent results.
I brushed the Cover Stain primer on the entire door with a cheap brush that I can just throw away afterward. I prefer this to going to the trouble of cleaning a nice brush with mineral spirits as this is an oil-based product.
Be sure to brush the primer on in the direction of the grain. Once I have covered the door in primer, I go back and catch any drips that might have accumulated in the corner of the panels.
If your primer doesn’t provide full coverage of your door and you can see some streaks, don’t worry about adding a second coat. Unless your original door color was bright purple, the streaks will add to the final character of your door.
What happens if I apply paint without applying a primer?
The primer is an insurance policy that our paint will always stick to the door without cracking or peeling. The last thing we want to do is go to the trouble of painting our door only to have the paint peel off. I like to say that “primer sticks to things and paint sticks to primer”. As I mention in my post on Why I Don’t Use Chalk Paint, you need both because the two serve very different functions.
Once my primer is dry, I like to sand again to get an extra smooth finish but this step is not required. The sanding will only take a couple of minutes. Be sure to wipe down the door with a damp cloth when you’re done to remove sanding dust.
WANT MORE STAIN OPTIONS?
Don’t forget you can find more stain shade options here: How to Paint Furniture to Look Like Wood
STEP 3: Apply A Base Coat on Your Front or Back Door
Before applying a good base coat, put down any plastic tarps or drop cloths around your work area.
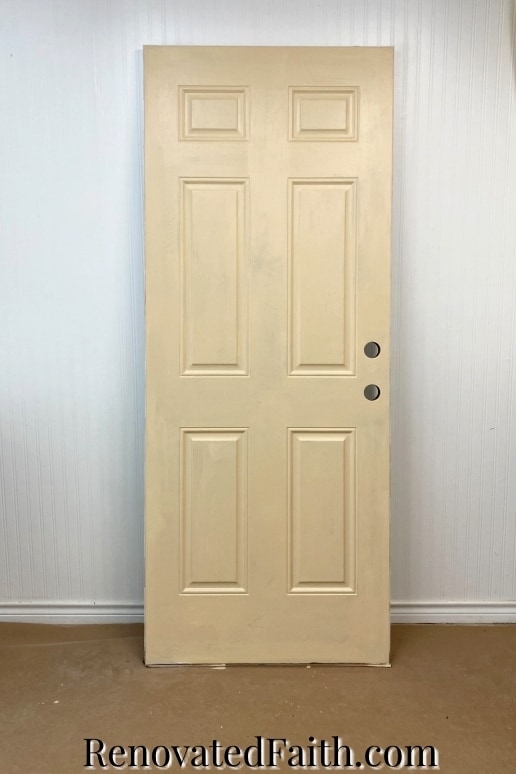
Now, it’s time to apply your base coat. The shade I’m using is Rustic Mahagony so Flaxseed is my base shade.
You can either brush it on or a small roller it on and then brush out the roll marks in the direction of the grain.
How to Make a Metal Door Look Like Wood Grain – Brush Strokes!
Rolling it on is always faster and I brush out the roll marks because this is one of the few times I want brush strokes in the surface because they will mimic the feel of wood grain. You can see how I do this in the video.
When painting a door, I like to paint the panels first and then move to the flat surfaces, always brushing in long horizontal strokes in the direction of the grain. Since this is a metal door that has no grain, I’m usually brushing length-wise as you can see in the video.
One coat will be enough. If you have some streaks where the paint didn’t cover completely, that is perfectly fine and will add to the effect when we get to the glazing step.
Let the base coat dry overnight.
Step 4: Glazing – The Secret To Making Metal Doors Look Like Wood
This step is all about teaching you how to glaze each section and on the next step, we will tape off and glaze different sections of the door.
You will now mix your clear mixing glaze, water and paint in this proportion for each paint color. Since the Rustic Mahogony has two glaze coats, I will mix two separate mixtures with this ratio using the paint colors SW Van Dyke Brown and SW Turkish Coffee.
Glaze Mixture Ratio:
2 Parts Paint
1 Part Water
2 Parts Clear Mixing Glaze
I usually start with 1 Part equaling 2 TBS and you can always mix up more later. I like to use a paper cup and a plastic spoon.
I mixed two separate glaze mixtures. With the first mixture, Van Dyke Brown is the paint color and with the second, Turkish Coffee is the paint color.
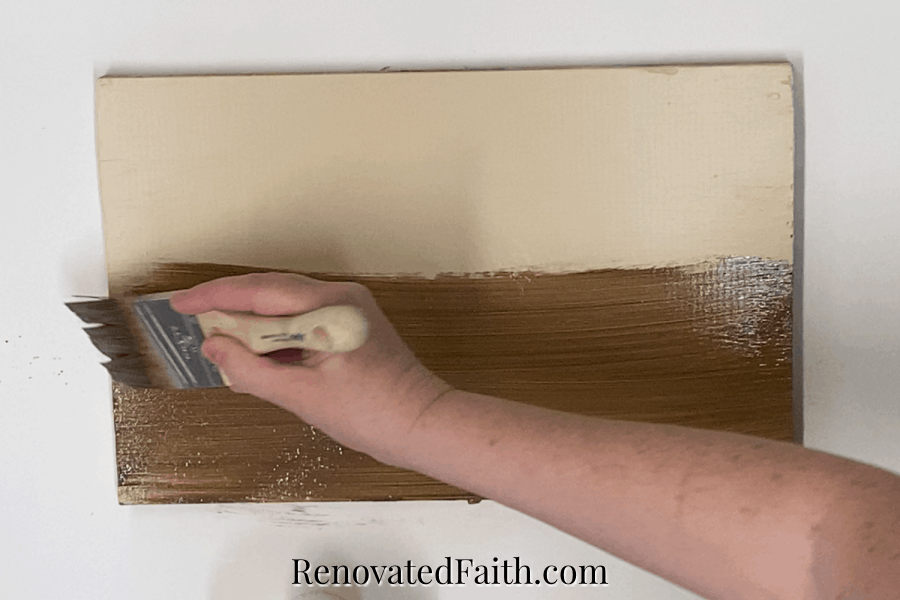
Now that I’ve got two glaze mixtures mixed, each with my two latex paint colors, I can start the first coat. Normally, we will tape off a small area first but I’m going to show you what to do on a wood sample. Be sure to watch the video for this section and if you have trouble seeing it in this post, you can see here: How To Paint A Door To Look Like Wood, YouTube
How to Apply Both Glaze Mixtures To Your Metal Door
- As shown in the video, brush on the first glaze mixture until you get full coverage on the surface or taped area.
- Now, wipe any excess glaze mixture off your brush with a paper towel. Start brushing lengthwise in the direction the grain would go. Use long strokes on this section so that you start your start at one end and you don’t pick up your brush until it has passed the section.
- Keep brushing in long strokes and you will start to see the appearance of wood grain. Wipe off your brush with a paper towel after every few passes. NOTE: If small dots form in your brush strokes a few seconds after brushing on the mixture, your mixture is too thin so add some paint.
- Once you like the look of the first glaze coat stop painting and let it sit untouched for 2 hours.
- When it’s dry, repeat Steps 1-4 with the second glaze mixture. Do the exact same process above with the second glaze mixture shade on top of the first coat.
STEP 5: Create Wood Grain That Runs In Different Directions by Taping
Next, we will take off sections of our door to give the same look of a real hardwood door that has been constructed out of different pieces of wood. To create the effect of a wooden door, we will apply two glaze mixtures on those sections, let them dry, and then tape and glaze other sections.
Taping and Glazing Paneled Sections of Your Door
First tape off the paneled area with your Yellow Frog Tape.
Do the entire glazing process (above) to just the paneled areas going up and down.
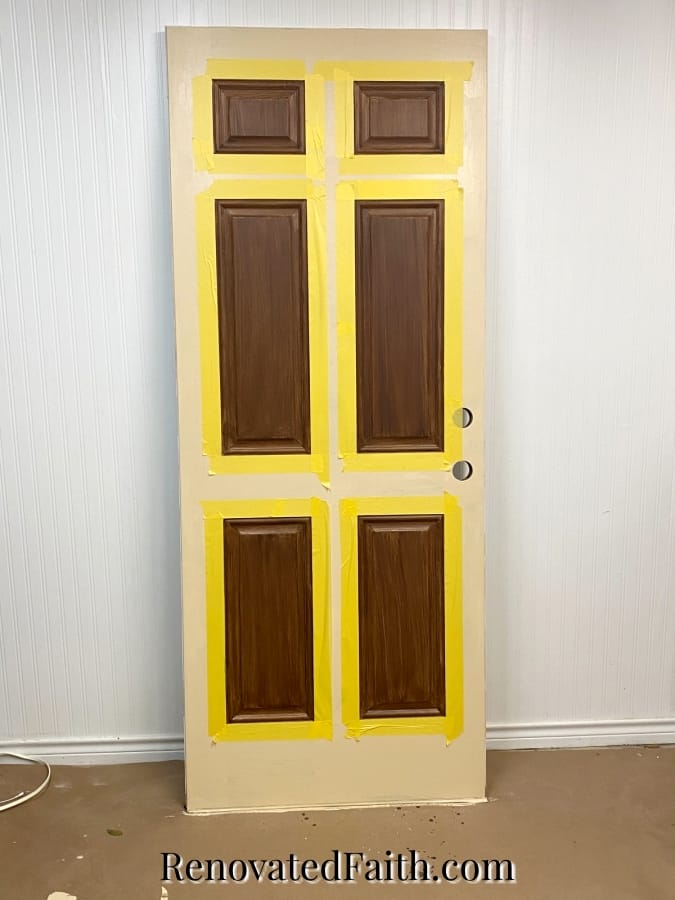
Pro Tip: You’ll notice that the top and bottom “trim sections” of each panel are technically going horizontal. On each of your last glaze passes, you can brush over just these areas vertically. This is optional but it will give your door an even more authentic look.
Remember to do the first glaze mixture, let it dry two hours and then do the second glaze mixture. As soon as you finish the application of the second glaze coat, you can start peeling off the tape.
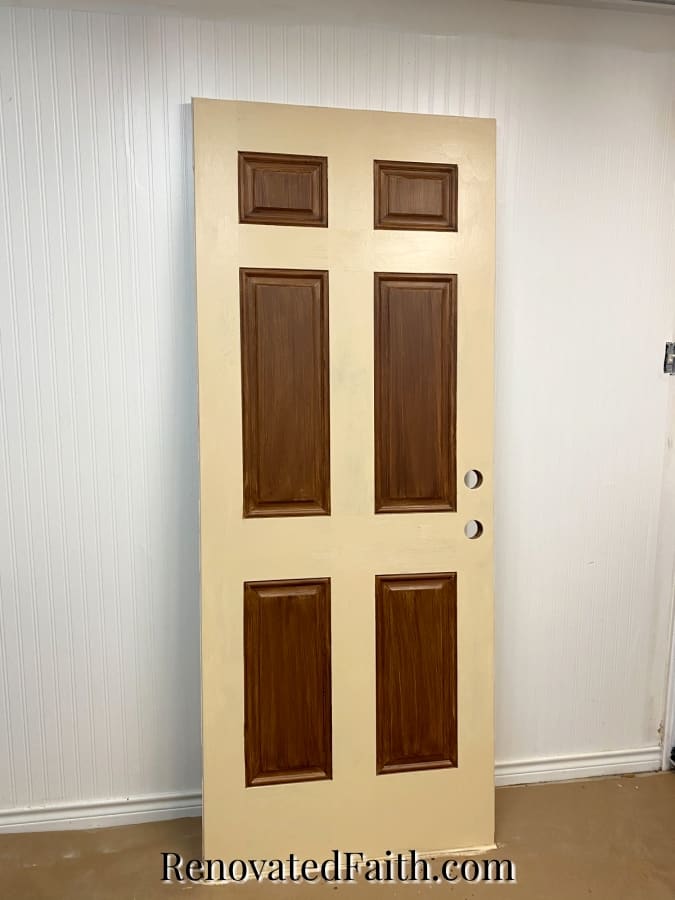
Use a wet rag or paper towel to touch up any bleed-through areas and let it all dry at least an hour. If you have minor bleed through on areas, don’t worry about touching it up. The next coats will cover it.
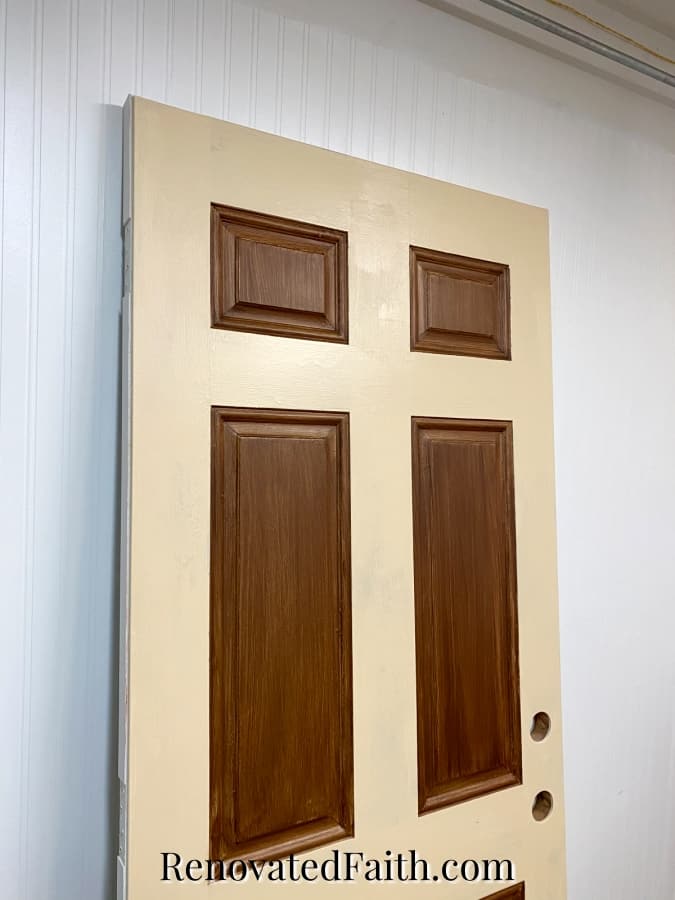
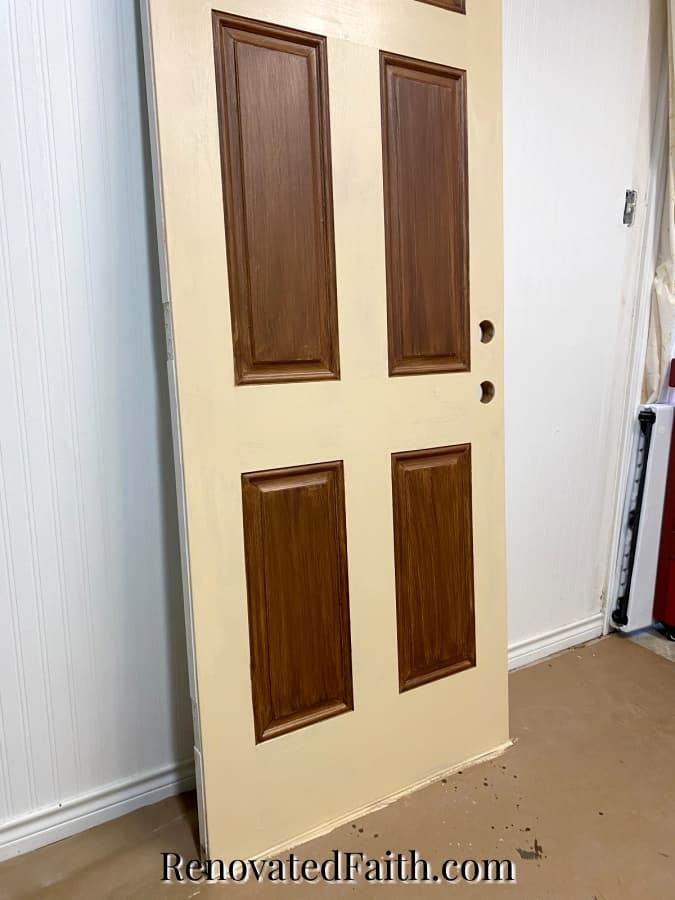
Taping and Glazing Horizontal Sections of Your Door
Tape off the top horizontal sections of your door.
IMPORTANT – When taping areas that are already painted, put the tape on so a small seam of the painted portion is exposed as I do here. You won’t have to worry about this the first time with the panels but will with the horizontal and vertical sections.
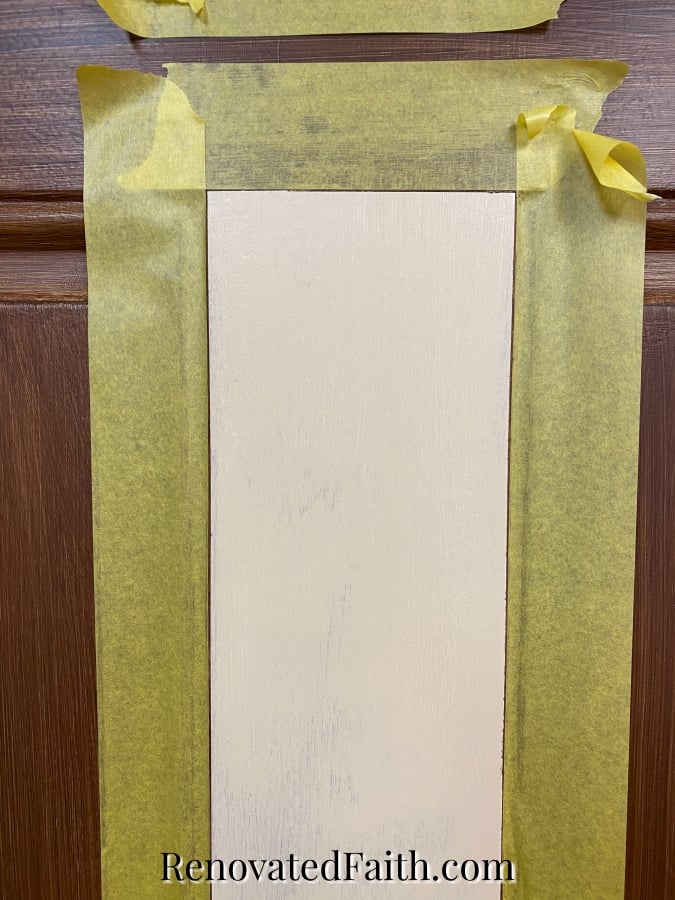
Once all your horizontal sections are taped, do the full glazing process on each section but make sure to brush left to right this time.
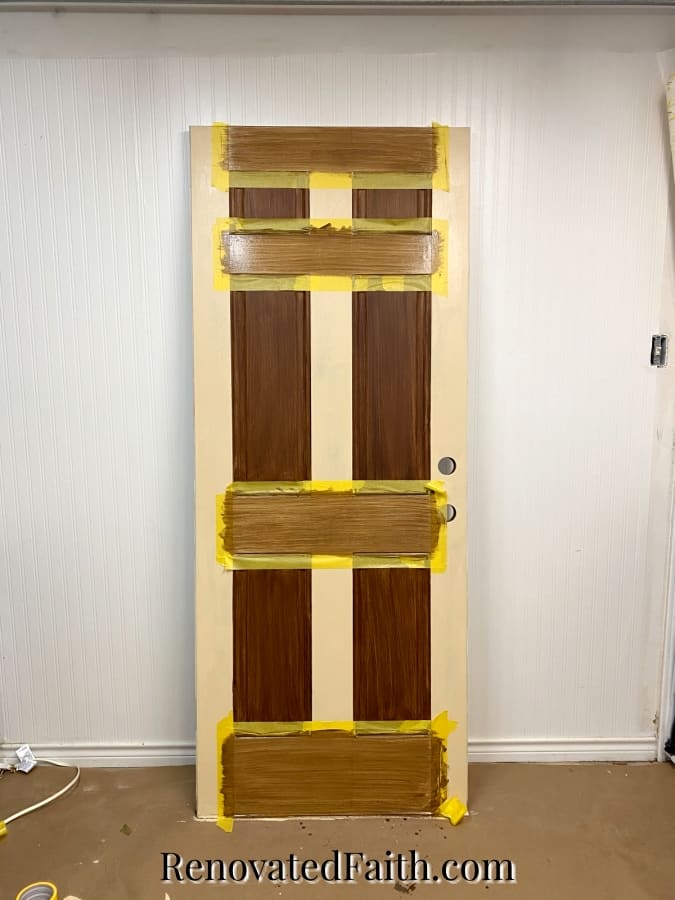
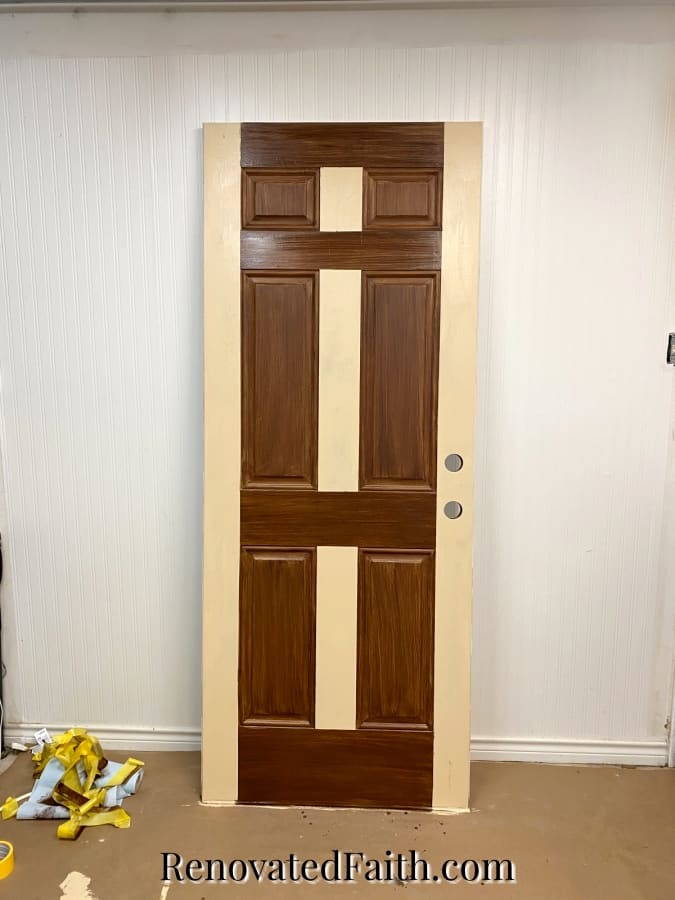
Again, take off the tape immediately after finishing the final brush strokes on your second glaze step. Touch up any major bleed-throughs.
Taping and Glazing Vertical Sections of Your Door
For the last time, tape your vertical sections being sure to leave a visible paint line along the edges of the last sections you painted. I also tape the edges of the door because I want the corners to be painted but not the entire side of the the door.
Do the full glazing process on the vertical sections brushing up and down.
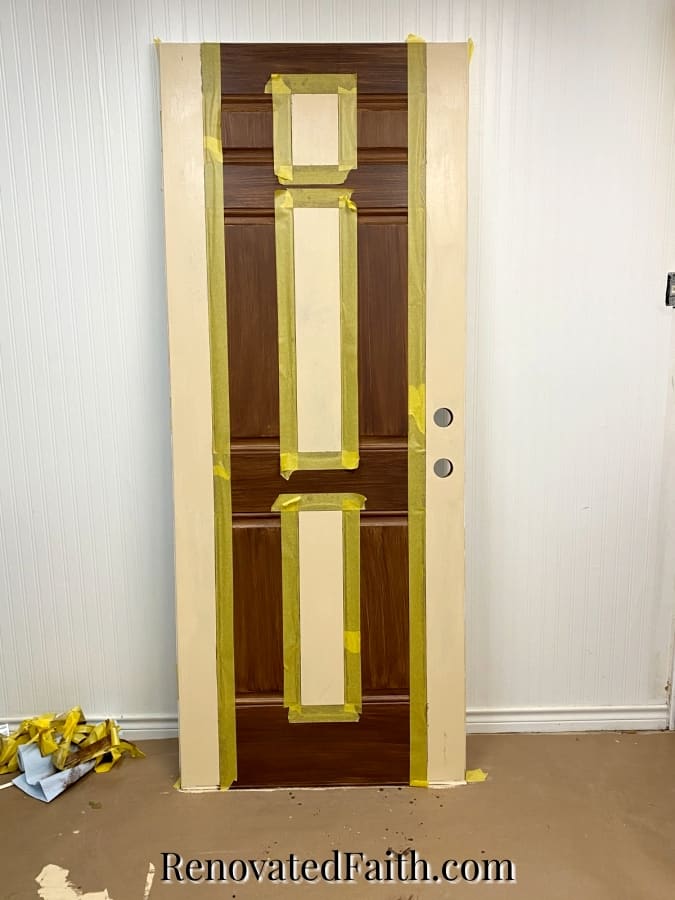
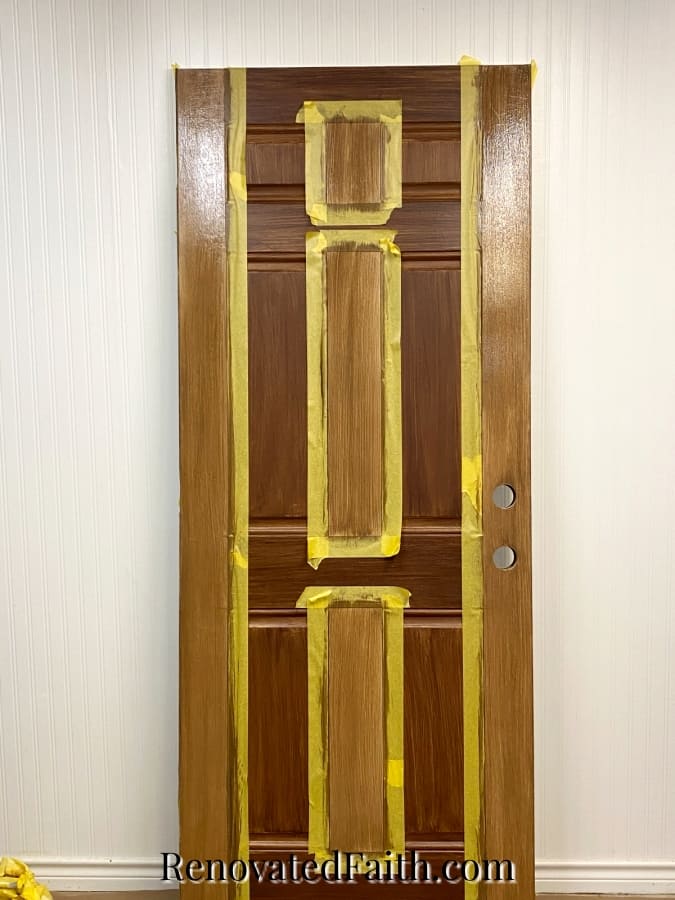
If you have any areas that weren’t covered well, take a tiny brush and brush on a little of your second glaze mixture.
Let your whole door dry overnight.
STEP 6: How to Paint a Door to Look Like Wood So It Lasts!
The final step is to apply a top-coat to protect the end product. Use the right clear coat for your DIY project – Varathane Waterbased Polyurethane for interior doors and Varathane Waterbased Spar Urethane for exterior doors. I don’t like using oil-based products outside because they often crack eventually and also if you are doing this process on a garage door an oil-based product could void your garage door warranty.
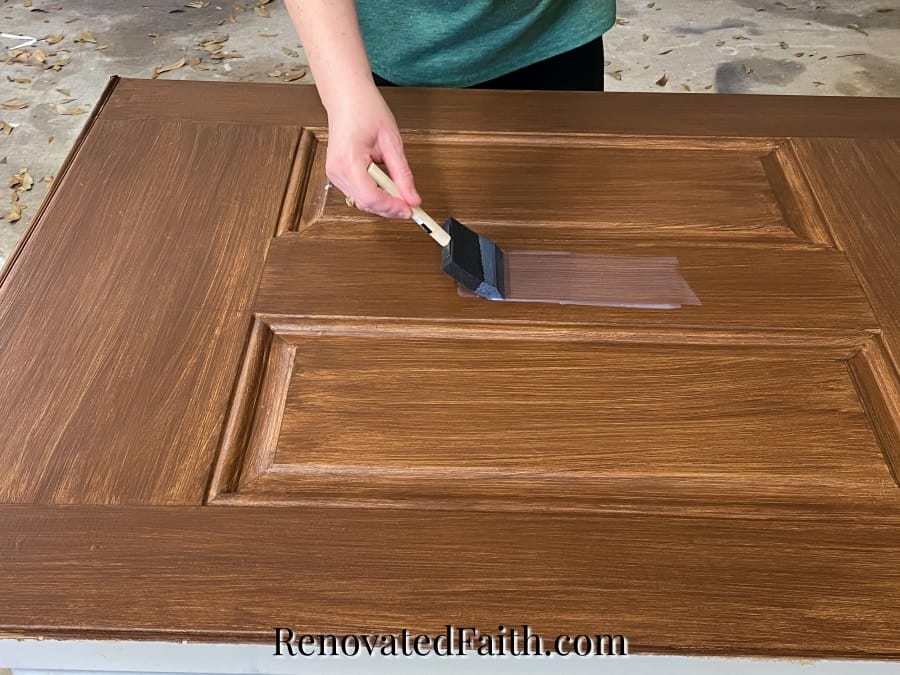
Stir (don’t shake) the can of clear coat. I like to use large foam brushes because they don’t leaf brush strokes and they are super cheap so I just throw them away after each coat. You can also use one and store it in a baggie in your frig until you do the next coat. This will keep it wet.
Put on three coats all within 24 hours. I usually wait an hour or two between each.
UPDATE YOUR DOORKNOBS TOO!
This is a great time to update your knobs or handles with spray paint. After lots of experimenting, here’s how to spray paint door hardware so it outlasts the house: The Ultimate Guide to Spray Painting Door Knobs
Let your door dry and add the hardware.
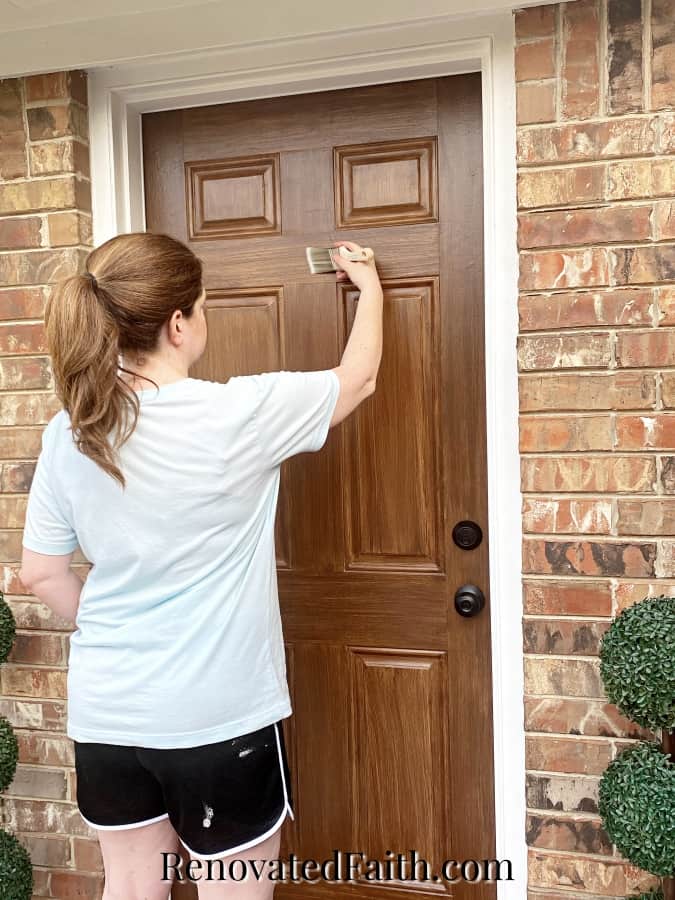
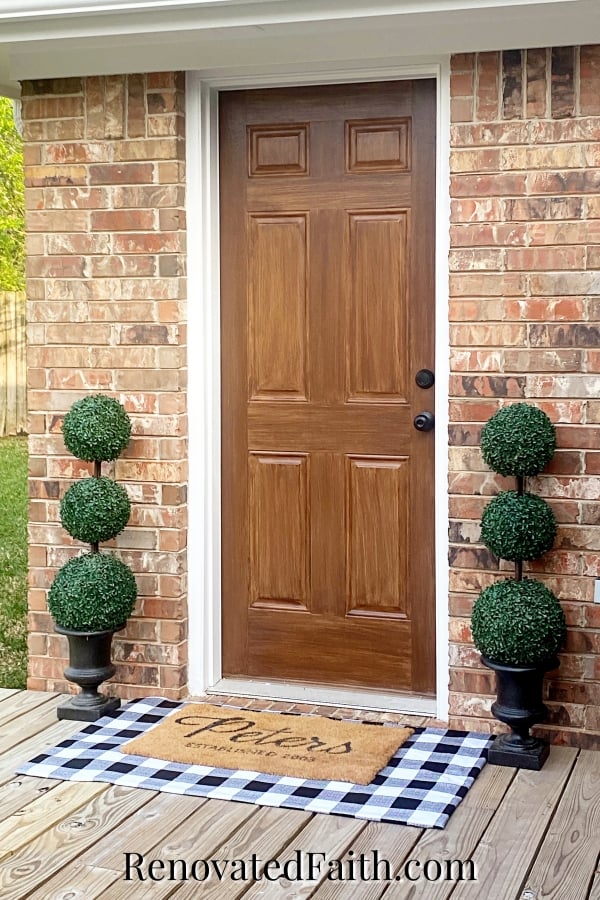
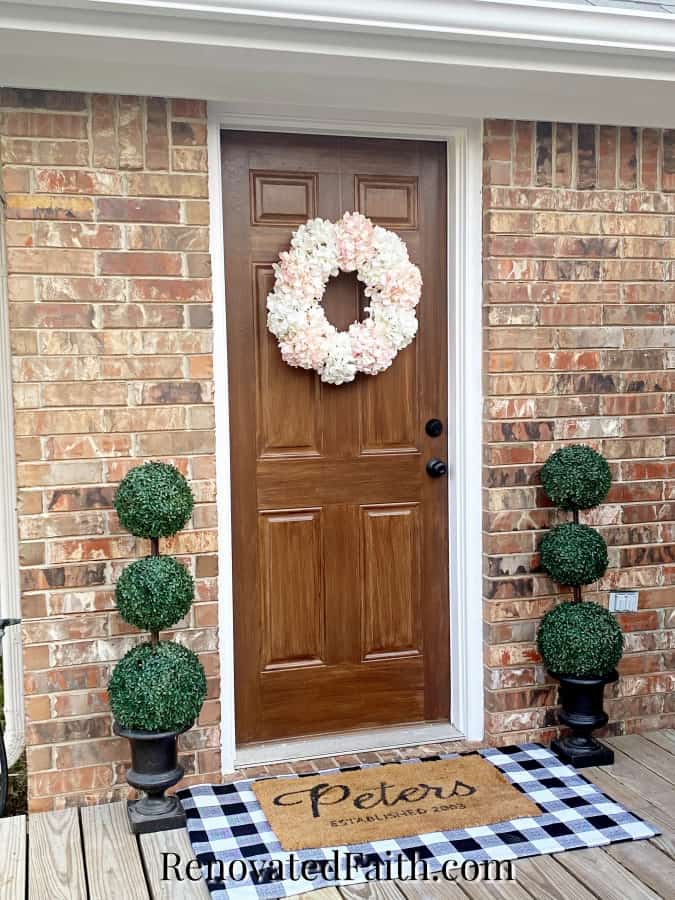
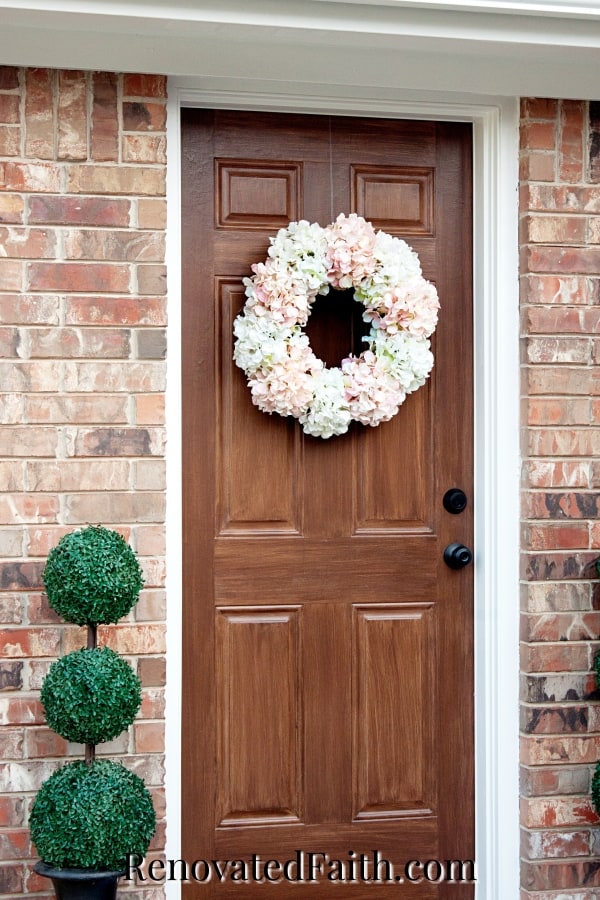
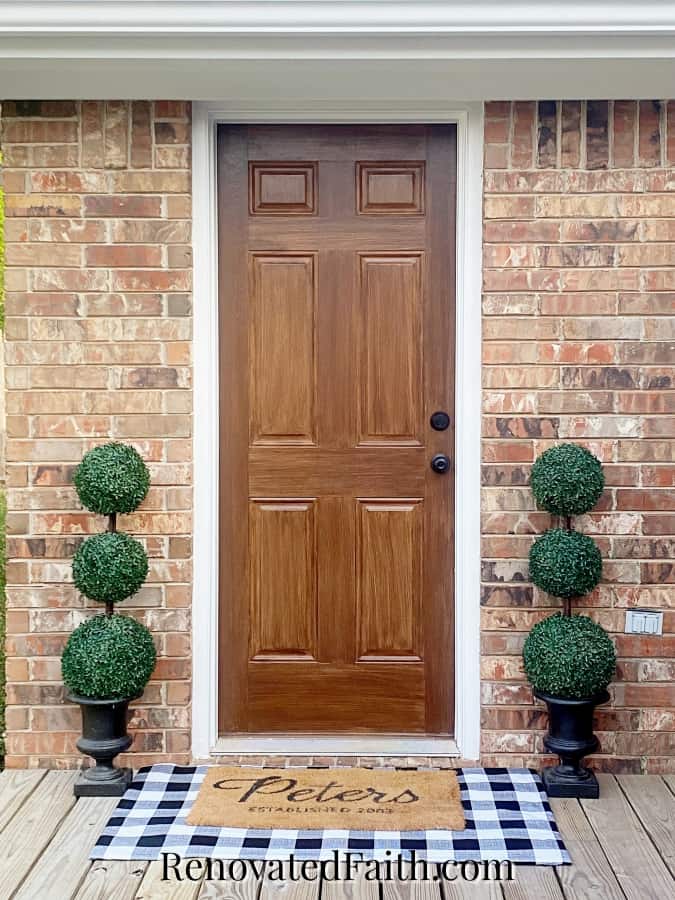
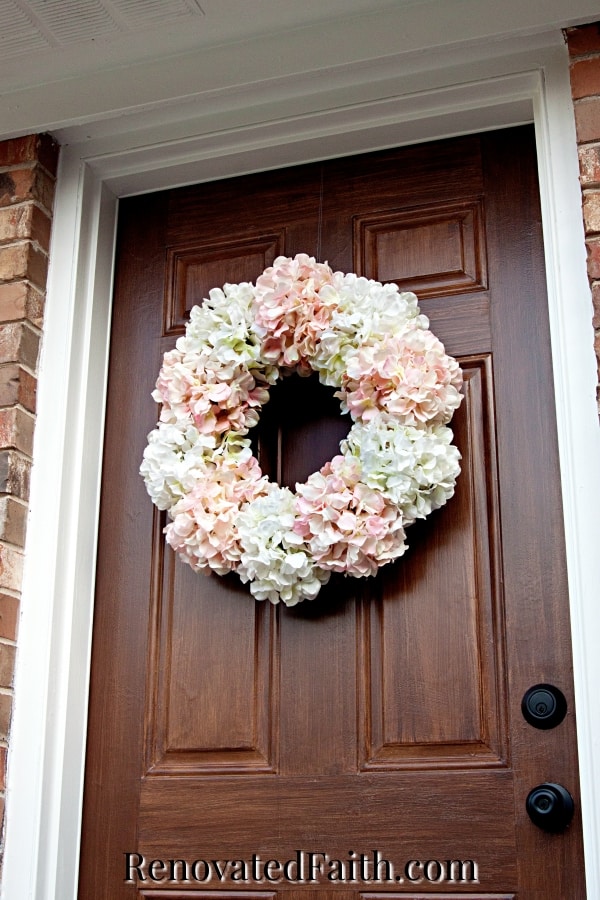
If you like my other budget-friendly back door decor, you can make your Hydrangea Wreath, Topiaries & DIY Interchangeable Layered Mats here:
- Easy Hydrangea Wreath
- Faux Boxwood Topiary Tutorial
- DIY Interchangeable Layered Door Mats for Any Season
RENOVATE YOUR FAITH: Why Doesn’t God Always Answer Our Prayers?
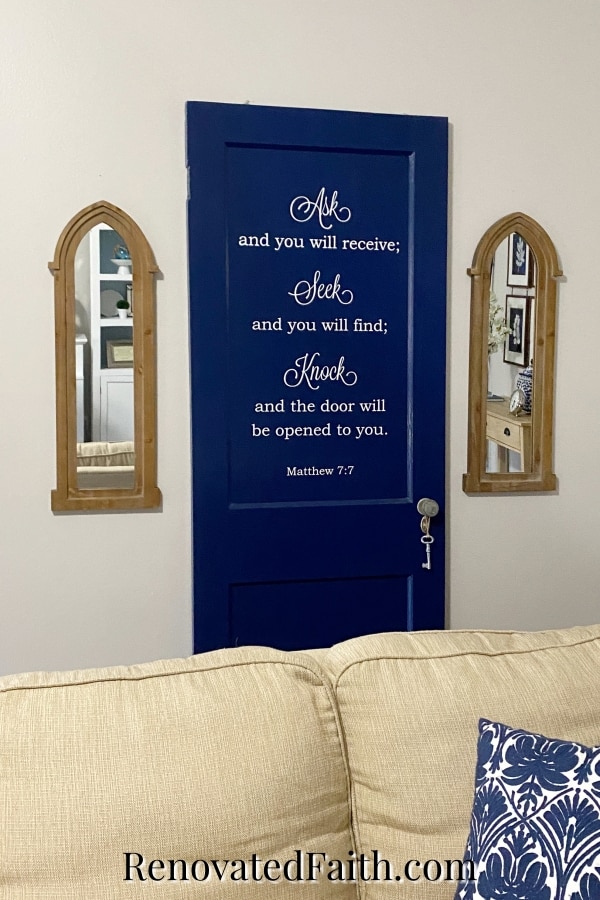
There’s another door in our home that also has multiple coats of paint on it. This door was once in the LaSalle Hotel in Bryan, Tx before it was renovated, which means it is at least 100 years old.
I first painted it red to match the décor of our old home and later painted it navy and had white lettering made for it. (This was before I figured out how to paint my own lettering the easy way.)
The verse is Matthew 7:7-8:
“Ask and it will be given to you; seek and you will find; knock and the door will be opened to you.”
Sometimes I think this verse gets a bad rap because it almost seems too good to be true. READ MORE HERE
For more spiritual encouragement, click here for the rest of my project posts that also include Renovate Your Faith devotionals.
FAQ’s: How to Make A Metal Door Look Like Wood
How Do You Make A Metal Garage Door Look Like Wood?
If you’re wondering how to paint a metal garage door to look like wood, you can use this same process. Whether your garage has wood doors, metal doors or fiberglass, the only changes are in how you tape. You will tape each section of the garage door as if it is a regular door on it’s side. Do the panels first, then the vertical parts and then the long horizontal parts. Also, be sure to avoid direct sun while painting your garage door. You can avoid this by setting up a tarp to block the direct rays of the sun.
How to Make a Metal Door Look Like Distressed Wood
If you want the rustic look of driftwood you can use the driftwood finish above. It is very similar to the traditional stain technique but at the end you dry brush with white and that gives it the gray look.
What is the Best Way to Paint Metal Doors that Are Rusty?
If your door is rusty to the point that it has structural damage, it is probably time to get a new door. If the rust on your metal door is minor, sand down the rust with your sander and a 60 grit sanding pad. Then, you want to prime your door with Rustoleum Rust Reformer (you can buy it here on Amazon) that will stop the rust and prevent more rust in the future. Once it is dry, continue the rest of the process as normal.
How Do You Paint A Door To Look Like Wood Matching Your Home Decor?
If you are painting an interior door to look like wood, you want to be sure it coordinates with your home decor. All of the sample options are neutrals but you want to take your wall color and your floor color into consideration. It’s important to get a shade that coordinates with your floor color but it doesn’t have to necessarily match it. For example, if your flooring is dark walnut, you can go lighter on your door to brighten things up a little. Also, if your walls are dark, consider the raw wood finish or Restoration hardware finish to add contrast.
How Do You Paint A Garage Door to Look Like Wood?
If you want the look of a wood garage door, you can use this same process on your metal or fiberglass paneled door. Just be sure to not use oil-based products on your garage door as it could void the warranty.
How About Painting A White Door To Look Like Wood? Do I still Need To Prime?
If your door is already white, still prime it so that the base coat can adhere well to the surface. You might be tempted to skip the base coat since not much of it shows through but the base coat also serves as a barrier to ensure the glaze mixture slides around on the surface and doesn’t absorb in too fast. On my Wire Shelving Hack, I used the raw wood finish on each shelf and thought I could just have the primer tinted to the base coat color. What I didn’t count on was how the glaze mixture absorbed into the surface too fast and I couldn’t get the look of wood grain.
Can You Make A Metal Door Look Like Wood That Matches Your Garage Door (Or Visa Versa)?
If you are working on an exterior door, keep any other exterior doors or garage doors in mind when picking out your shade. For example, if your garage door is a dark stain and you are faux painting your front door, paint the door Dark Walnut to better match your garage door. My garage door faces the front of our house but because it is not right beside the front door, I don’t have to match exactly. Just don’t paint your front door in Brown Oak if your garage door looks closest to Rustic Mahogony. They will look too different and won’t coordinate with each other.
Can You Stain a Steel Door?
You can stain any material to look like wood. If your door has no panels that you will paint off first, you will do the whole door as one panel to create a wood grain on a steel entry door. You will want one or two people to help you with both glaze steps so that it doesn’t dry up on you too fast.
Can You Use Wood Stain on a Metal Door? What About Zar Wood Stain for Steel Doors?
Traditional wood stains like Zar are oil-based so they will adhere on a wood door but they will dry up before you can create faux wood grain with your brush. In other words, as you are working with it, it will probably dry up on you and look like a mess. The water-based paint and glaze mixture gives you a lot more control and is more forgiving if you mess up
What About Giani Wood Look Paint for Front Doors?
There’s a product on the market that is used to paint doors to look like wood called Giani. It looks like they offer a few shade options as well but my personal opinion is that their wipe-on method is not as convincing in creating a faux wood grain. Also several of the reviews are pretty bad which makes me hesitant to recommend it. You are also required to get the Giani Paint Mitt to apply this product.
How To Stain a Fiberglass Door to Look Like Wood
“Can You Paint A Fiberglass Door to Look Like Wood?” You can use this process on fiberglass just as you can on a metal door or even a painted wood door. Just follow the exact same instructions above.
Can You Buy Metal Exterior Doors That Look Like Wood?
To save money, you can buy a metal door with a faux wood finish but sometimes the finish is high glass after leaving the factory. Also, it can be difficult to find a door in the right shade where as you can pick one of 9 shades with the process above.
How to Make White Doors Look Rustic
To make white doors look rustic, you can do one of two things. The great thing about the faux stain finishes above is that they can be used on any plain white door, no matter if it is wood metal or fiberglass. For old doors, be careful when sanding because there might be lead paint exposed in the sanding process. Another option is to give a plain white door a distressed look with a chip brush.
How To Make a Door Look Like Wood With Gel Stain
Another way to make any solid door look like wood is with a couple of coats of gel stain. With an orange paint base and this process, you can make any solid door look like wood: How to Gel Stain Doors to Look Like Wood
Related Posts – How Do You Make a Regular door look like wood?
Painting Tips for Exterior Trim, Fascia and Soffits
How to Apply Paint to Look Like Stain on Furniture
The Necessary Tools for Beginning DIYers
The Easiest Way to Paint and Stain Laminate Furniture
The Easy Way to Paint Furniture White
A Better Alternative to Chalk Paint
Why I Don’t Use Chalk Paint on Furniture
How To Spray Paint Door Knobs So They Outlast the House
Easy DIY Patio Cover Kids (Shipped To You!)
The Best Wood Filler for Oak Cabinets
How to Transform Acrylic Latex Paint into Fabric Paint
The Best Type of Paint for Furniture
How to Paint A Metal Door to Look Like Wood, YouTube Video
Final Thoughts on How to Paint a Door To Look Like Wood
These step-by-step instructions show you the exact easy steps and supplies to completely transform the look of your door on a budget. This process costs around $40 but a new door would cost hundreds of dollars. Be sure to check out the video to see exactly how to do each step. With this tutorial, you can have the curb appeal you have always wanted and a front door you can be proud of.
I love to hear your thoughts and questions! Scroll down to leave a comment and I WILL reply! ❤️
Blessings,

Be sure to follow the fun here!
Email Subscription | Instagram | Pinterest | Facebook | Twitter
How to Make A Metal Door Look Like Wood

Karin Peters is a DIY expert and the creator of Renovated Faith. She is a furniture painter, a home design consultant, and a tenacious problem solver determined to help you transform your house into a home. With 17 years of experience with DIY home improvement, she researches and analyses professional processes to adapt them to be easy and cost-effective for DIYers. She then tests every project and product before it appears on the site in a detailed, step-by-step format. After attending Texas A&M University, she received her Master of Divinity with Biblical Languages at Southwestern Baptist Theology Seminary. Her passions unite in Renovated Faith, which shows readers how to create a home that serves them so they can pursue their God-given purposes. About Renovated Faith | Editorial Policy | Facebook | Twitter | LinkedIn


Hi Karin!
I enjoy your easy to follow tutorials. I’m uncertain about a few things. I have a new, fiberglass door from Lowe’s that I would like to use your wood like technique . It appears to already have a primer on it. Do I prime anyways? I assuming the base coat is a latex interior paint? I cannot find in your blog, a color combo to do a Buckwheat color or a aged Oak, Base paint and stain. Thankfully, I have a couple unpainted fiberglass doors to experiment with! Could you offer a couple suggestions?
Thank you
Hey Karen, Even though the door is primed, go ahead and sand and prime it to be on the safe side. And yes, the base coat is interior latex. Can you send me a pic of the color you want to achieve? karin@renovatedfaith.com
Edit from previous comment : how do i fix a part that dried too fast and after brushing looks terrible? Do i need to sand again and start over?
Hey Doris, You might have to just leave it alone and let it dry completely and redo that area again with the base coat and then the rest of the process. So sorry it did that. You might use more glaze next time to keep it from drying up on you. Hope this helps!
Thanks for this tutorial! What sheen do you recommend for the clear coat?
Also, as I can’t find Varathane Water-based Spar Urethane here in Canada, is this product acceptable?
https://www.homedepot.ca/product/varathane-diamond-finish-premium-polyurethane-wood-finish-for-outdoor-water-based-in-satin-clear-236-ml/1000686157
Hi Charlotte, I like to use a satin sheen and the product you linked to seems like a safe bet!
Hi Karin, just found your website. We are building a log home and basically are keeping the pine wood and trim natural with the clear finish being applied. The garage and front doors naturally will be metal per code. Any suggestions on stain/paint colors to mimic the natural pine wood? I really don’t want to use the neutral paint color of the walls on the doors because the metal doors will really stand out from the wooden pine doors. Thanks for any color recommendations.
Hey Brenda, Check out my raw would faux finish on the blog for a natural wood finish!
Very nice post
Thanks
I am practicing on a spare board and I painted on the base coat (flaxseed) and then the glaze paint (van dyke brown). It looks pretty good but hasn’t dried overnight. Could it be because I put it on too heavy? I didn’t wipe much between paint strokes. Also I didn’t add any water as I didn’t see that on the instructions on the glaze.
First of all, you are so mart to practice on a board first. You have to put a little elbow grease into those brush strokes to get that grain look. You can also add more glaze to the mixture or a little water to the mixture. Let me know how that works for you Susan and if it doesn’t we’ll try something else!
Any additional pain options? Looking for something with a slightly red-brown hue.
Hi! i love this idea! but i do not think i can do it myself! can you come and paint my door for me to look like real wood???
Hello Karin,
I have found your website interesting, informative and helpful. I have one question. My front door (steel door) is currently painted burgundy. I still would like to maintain a burgundy look on my door having a wood look and, if there is a hint of black on the door, that would be fine. If possible, can you suggest how I can receive this end result and which colors and/or products to use? I’m not sure if I should paint the door a burgundy color before using a stain to give a wood look.
Thank you in advance for your time. Blessings to your family to be safe and healthy.
Kathy
Hello! I am working on painting my door that we’ve converted into a desk, following the instructions for rustic Mahagony. I followed all the instructions, but my top coat (layer 2) of Turkish coffee seemed to take over the entire door color. I wiped and wiped, even wiped off some with my paper towel. Some of the 1st glaze coat (van dkye) is showing through to give it a wood look, but not enough (for my preference). Not sure what I did wrong! I loved the look after the base and 1st glaze coat! But I don’t know what I did wrong on this 2nd glaze. Would it be bad to put another 1st glaze coat on, then try the 2nd glaze on top of that again, with more glaze or water (?) so it’s not such a strong color? I hope this all makes sense. Thank you for your time replying.
Hey Sarah, So sorry about the second glaze coat. Sometimes it can get too heavy. Go back and put the base coat over what you have already done and then go over it with one glaze coat. Let me know if that doesn’t make sense!
Hey there, love this tutorial was wondering if you have any suggestions for a grey or black ish “wood look” my shutters are black and my brick is grey so I’m afraid any of the colors you have in this tutorial are too brown. Thanks in advance!
Hey Brandie, I don’t have any ideas off hand but the nice thing about this process is that you can experiment with shades to get the exact color you want. Maybe try a light tray for the base coat. A charcoal color for the first glaze coat and a black for the second glaze coat and go really light. Just a thought!
I just ran across your post and it was so well done. My question is, I want to do this on my front porch railing. It is wood but painted white with an exterior latex paint. Would I follow these same instructions or would the process by different? Thanks so much.
Hey Nikki, The process would be the same. You might also check out this post that gives you some more color options:https://renovatedfaith.com/paint-that-looks-like-stain/
On an exterior entry or garage door, What is the durability of these products with this process?…. I really don’t want to do 4 garage doors only to redo them in 5 years. I’m not getting any younger….lol
I don’t blame you Amy! It’s been about a year and a half since I redid my door and it looks the same as when I refinished it. A few days ago we had someone pressure wash our deck and I forgot to tell him to be careful around the painted door. He ended up pressure washing a lot of the back of our house and windows but the exterior door looks great. If you do this, a clear coat is a must and I’d feel confident enough doing this on a garage door for it to last long-term. Hope this helps Amy.
Wonderful info here, however I’m wondering if I’m not understanding correctly about the directions on the Mahogany door. I love that color and want to do mine the same as yours. Anyway, you said the colors we’d need to get mixed are Flaxseed for the basecoat, Van Dyke Brown for Layer #1, and Turkish Coffee for Layer #2. Then at the end you mention Harvest for the glaze, tho’ you had already said we’d only need 3 color samples. No problem, I just want to be sure that the one glaze layer has Turkish Coffee, and a second glaze layer has Harvest. (Is the Harvest color more yellow (like wheat) to give it more of a grainy look?)
Secondly, when you advise us to start with 1 TBL spoon, are you saying to start with 1 TBL of glaze, to 1/2 a TBL of water, & 1 TBL of paint, and is that enough for the whole door? I hesitate to have to mix a second batch just in case it doesn’t come out quite the same. My front door is a metal door, which yours is, too, so I’m just wondering if that is enough for a full coat or is it better to double that? ‘Sorry, but I don’t want to end up having to strip everything off to start over, so I want to be sure I’m very clear on the directions. And thank you!
I loved the articles on the paint colors, too. I’m looking to do 3 bedrooms again and I think you’ve convinced me to go with Agreeable gray, which is one that I was considering anyway. However, I didn’t want a cold gray, so I think the little bit of greige tone will do me well. Thanks!
Looking forward to your next article!
I enjoyed your message….. right on! God’s blessings to you & yours!
Thank you so much or your comment! I corrected the post. I used to use a color named Harvest but it is actually the exact same shade as Van Dyke Brown, just a different name. To start out, I’d mix 1 part as being 2 TBS. I hope this helps and please don’t hesitate to ask any more questions. Thank you so much for your encouragement and kind words! It is much appreciated. – Karin
Do you lightly sand between the polyurethane top coats? The manufacturer instructions say to do so but as I’m doing I feel like it’s undoing some of my work…
Hey Annette, Don’t sand between the clear coat layers. You risk scratching the newly painted surface. Thanks!
Wow, that door looks so good!
Thank you so much Rhonda! I appreciate that.
Hi Karin. Thank you so much for your tutorial. How would you advice pulling off this technique if you need to keep your door on? I am very interested in updating my front door, but I know we will not want to continually be removing and replacing the door. Any suggestions?
Hey Sarah, The only reason I didn’t do this process with my door still hanging is that it was so hot during the summer (I’m in Texas) and I was worried about the paint drying up too fast while I was working with it. You can do the exact process with it hanging! Let me know how it turns out! Thanks Sarah!