The Secret To A Restoration Hardware Finish (On ANY Furniture Surface!)
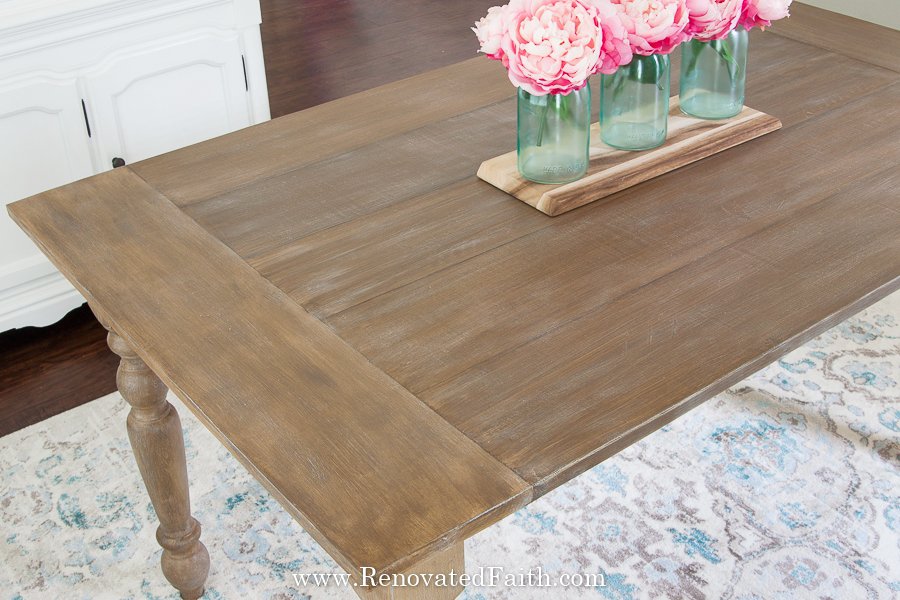
Using Latex Paint To Get A Restoration Hardware Finish
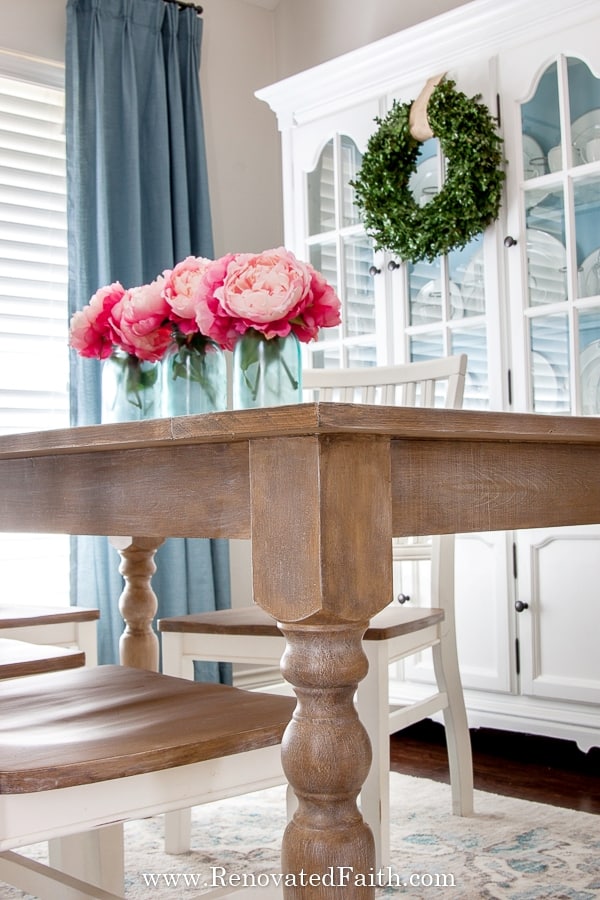
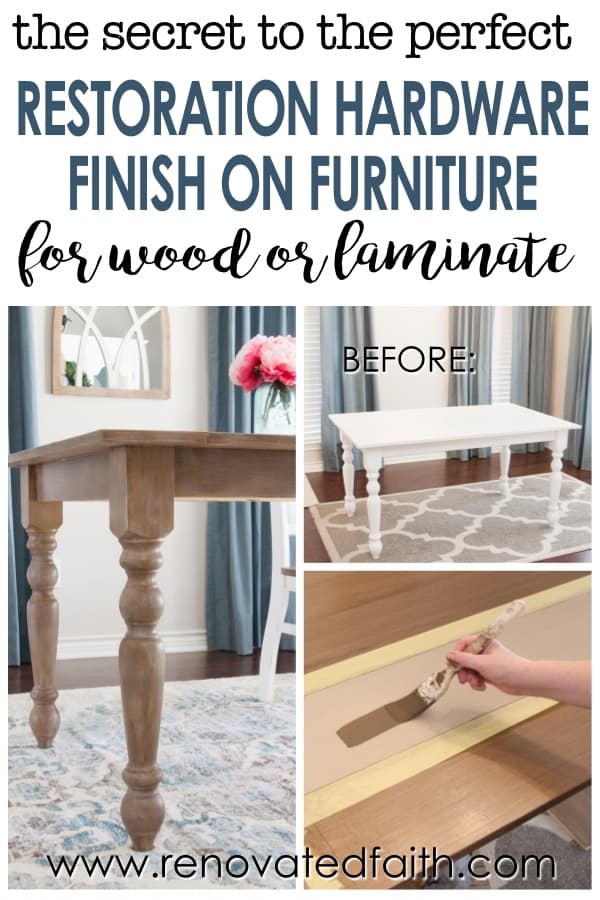
Do you love the look of a Restoration Hardware Finish but not the price? This easy faux finish will give you the same look on any furniture piece at a fraction of the price!
I don’t know about you but I don’t like surprises when it comes to furniture painting. If I am going to take the time to do a faux finish on a furniture piece, I want it to look fabulous!
My Restoration Hardware faux finish will give your outdated wood or laminate furniture piece new life in a few simple steps. This tutorial will take out all this guess-work, giving you a beautiful finish with low-cost products. You can also control how light or dark you want your final finish so you can customize it to your taste!
Every year right before Christmas, Jeremy and I take an overnight trip to Houston, which is about an hour and a half from College Station (And yes, we are proud Aggies!). We see Transiberian Orchestra, go out to eat, stay in a hotel and the next day we do a little shopping!

This is my opportunity to see two of my favorite stores at my favorite time of the year! Restoration Hardware and Pottery Barn are right beside each other in the fancy part West Houston.
Every year I go in and admire the elaborate Christmas displays but most of all I’m awed by their furniture and home decor. I always out an ornament to take home and put on our Christmas tree – because let’s be honest – an ornament is one of the only things most people can afford in both of those stores.
It was several years ago on one of these trips that I saw what is now referred to as the elusive “Restoration Hardware Finish”. I marveled at it and vowed to one-day make my own Restoration Farmhouse faux finish for other DIYers like myself to paint on furniture to their heart’s content!
Although my thought process was overly dramatic, fortunately, it wasn’t unrealistic as I’ve finally got the Restoration Hardware finish under my belt! It’s super easy and doesn’t require a chemical stripper or even fancy paints – just a little latex paint and clear glaze!
One of the things I love about this process is that it can be used on any surface. In other words, you could start with a purple laminate entry table and end with a modern farmhouse finish even Joanna Gaines would be proud of!
Quick Links to Information in this Post
- 1 Using Latex Paint To Get A Restoration Hardware Finish
- 2 Restoration Hardware Farm Table: To Buy Or DIY?
- 3 How To Achieve A Restoration Hardware Finish: Which Faux Finish Is Best?
- 4 How To Create A Restoration Hardware Finish from Latex Paint
- 5 What is a Restoration Hardware Style Finish?
- 6 Supplies Needed: DIY Restoration Hardware Finish
- 7 Restoration Hardware Finish – DIY Tutorial
- 8 RENOVATE YOUR FAITH: Accepting God’s Help in the Midst of Overwhelm
- 9 Want A More Whitewashed Restoration Hardware Look?
- 10 Restoration Hardware Finish on a Metal Door
- 11 FAQ’s: Achieving a Restoration Hardware Salvaged Natural Stain on Furniture
- 12 Final Thoughts on The Restoration Hardware Style Finish
- 13 Faux Restoration Hardware Salvaged Natural Stain
Restoration Hardware Farm Table: To Buy Or DIY?
Restoration Hardware was one of the first to come up with beautiful rustic farmhouse finishes and Pottery Barn soon followed. While the Restoration Hardware furniture is absolutely stunning, they can run anywhere from $1,800 and up depending on the style and size of the table. The faux finish in this tutorial should cost you less than $50.
Also, I noticed something interesting on Restoration Hardware’s salvaged wood table reviews. Several buyers noticed that the surface of the Restoration Hardware tables did not hold up nearly as well as they expected. Julie Blanner noted in her post entitled Restoration Hardware Table Nightmare that when using a damp rag, the finish literally wiped off.
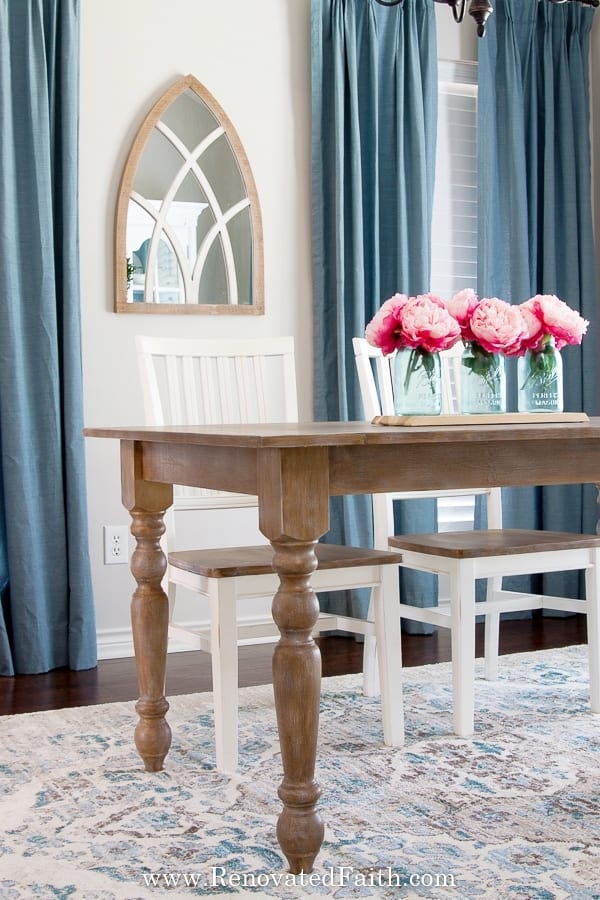
I don’t know about you, but if I pay that much for a Restoration Hardware dining table, I don’t want the finish to wipe off with a moist rag.
Restoration Hardware’s wood maintenance guide online says to finish their tables with white wax for extra protection. Well…you know how I feel about wax on furniture and I give other options here: (A Better Alternative to Wax for Furniture). There’s even a Restoration Hardware touch up kit on their site.
But my point is: why spend that much on a table whose finish will easily wipe off if you don’t seal it in?!? If you are going to have to do some refinishing on your table, why not do the entire stain yourself for about $50 and use a reliable clear coat that will withstand even the biggest of spills.
If you decide you do want to buy a Restoration Hardware table, go to this post for the best options to protect it: The Best Clear Coats for Furniture (Tested & Reviewed)
Faux Pottery Barn Gray Wash Finish
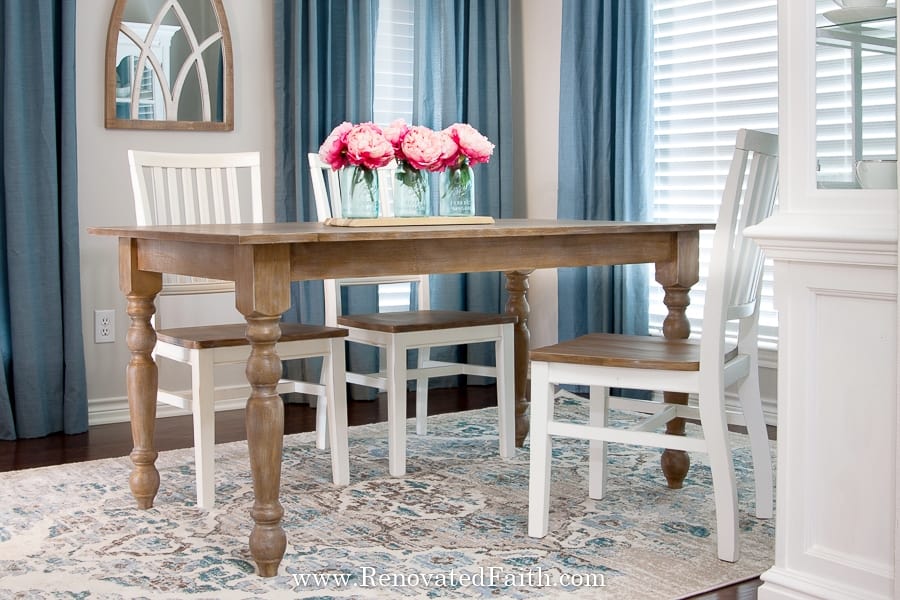
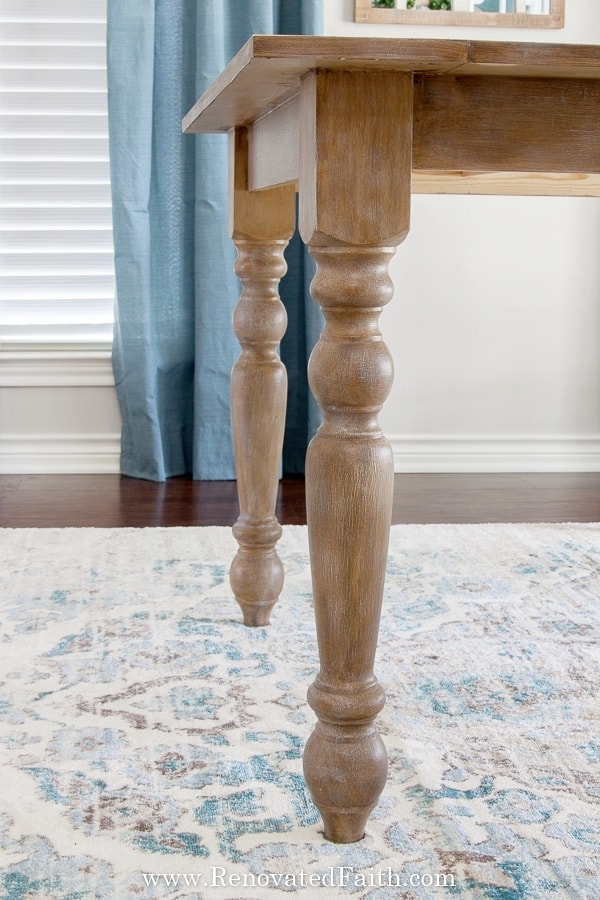
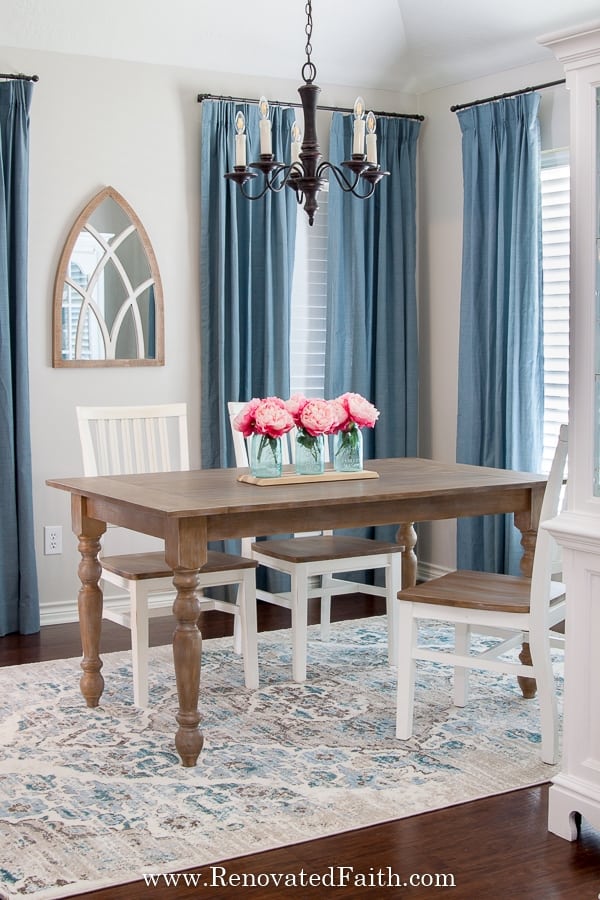
This finish is very similar to Pottery Barn’s gray wash stain. For those of you who have chosen the DIY route, I cannot wait to show you how great this finish looks on any surface! You can use it on an existing table or build your own farmhouse table with these simple plans: EASY Farmhouse Table with Turned Legs
How To Achieve A Restoration Hardware Finish: Which Faux Finish Is Best?
There are tons of Restoration Hardware dupes online and all have pros and cons. A few ways to get the Restoration Hardware look are with stain, chalk paint, or even vinegar. But not all faux finish techniques are created equal.
How To Create A Restoration Hardware Finish from Latex Paint
My favorite rustic staining techniques always involve latex paint. Why latex paint? For one thing, you have lots of flexibility with it and it’s extremely durable. This process does not build upon your table’s existing stain shade. You can start with a white painted piece of furniture and get the same Restoration Hardware FInish as if you applied this process to a furniture piece with a dark stain – it is that versatile!
WANT MORE STAIN OPTIONS? Don’t forget you can find more stain shade options here: How to Paint Furniture to Look Like Wood
Latex paint comes in hundreds of shades so you can get exactly the color you are looking for! Unlike some rustic wood finishing techniques, this process is super affordable as it involves a few sample containers of latex paint and a container of Valspar Clear Mixing Glaze (Click here for the current price).
To give you an overview of this process, we will apply a base coat and then a glaze/paint mixture that we will wipe on. Last, we will dry brush it in white. Don’t worry, I give you all the details below in my Restoration Hardware finish tutorial to ensure your table is just as beautiful as one you would see on a showroom floor!
What is a Restoration Hardware Style Finish?
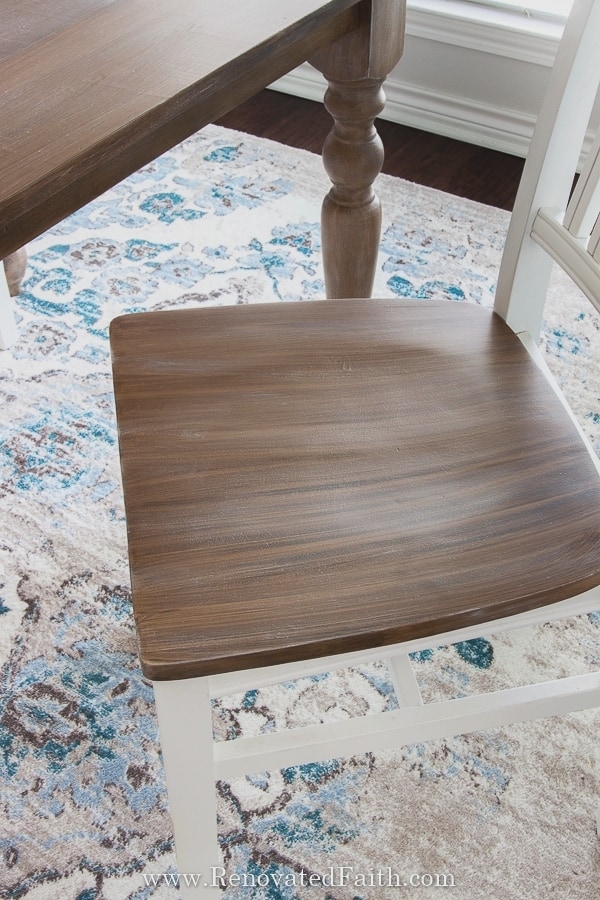
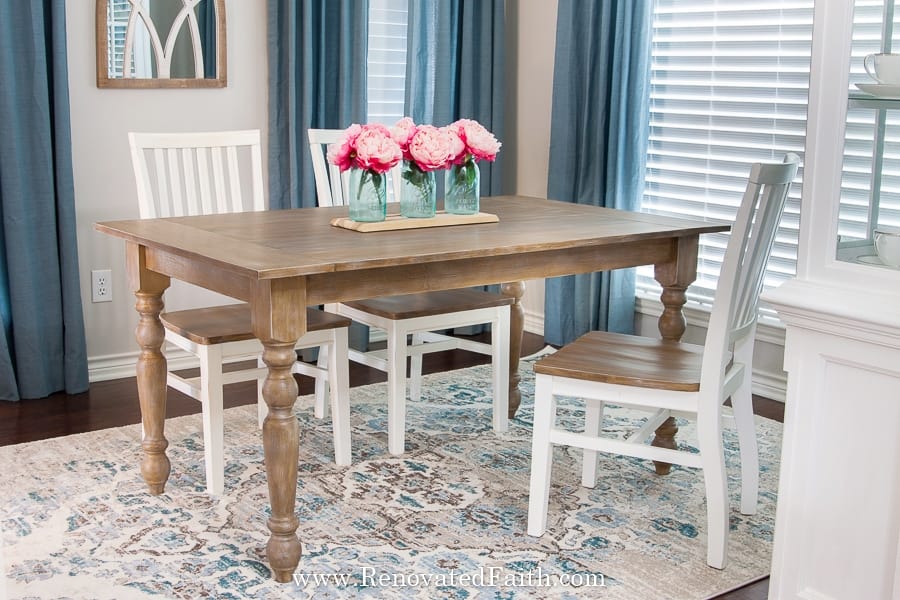
There are several Restoration Hardware colors to choose from so it’s important to define terms. A “Restoration Hardware Finish” is similar to a natural wood finish but darker and still weathered. This medium stain is popular for modern farmhouse and rustic decor while still being sophisticated. On the other hand, it’s not as dark as a traditional wood stain (you can see my faux traditional stains here) and it never has knotholes. Also, you might see the hint of white-washing on the surface.
Restoration Hardware Finish: The Brown Version
The Restoration Hardware wood finishes tend to lean one of two ways. This DIY tutorial is for the browner version that looks like antiqued wood. I like to think of it as raw wood that has been exposed to air for decades which makes the look antiqued. Two examples of this type of finish are: Restoration Hardware Weathered Oak Finish and Restoration Hardware Salvaged Natural Stain These are my two favorite Restoration Hardware colors! With so many popular gray paint colors, it’s nice to be able to add a little warmth to a room with this finish.
Restoration Hardware Finish: The Gray Version
There are also greyer finishes such as Restoration Hardware Salvaged Grey Stain or Restoration Hardware Burnt Oak. This finish is often known as driftwood or sometimes a weathered wood look. To achieve a grayer finish, I recommend my Driftwood Finish Tutorial. It is one of my top posts and lots of readers have had great results with it!
The browner version that looks like the Restoration Hardware Salvaged Natural Stain will be the finish I demonstrate in this post with no stripping, vinegar, or bleaching – just latex paint and a little clear glaze!
Supplies Needed: DIY Restoration Hardware Finish
MY FAVORITE PRODUCTS – CLICK HERE FOR MY TRIED AND TRUE BEST PRODUCTS FOR FURNITURE PAINTING.
Good Brushes – Click the link above.
Mouse Sander – Click the link above to find my favorite after testing several sanders. If you are unsure about using a mouse sander, it is super easy. You can read all about it here: How to Sand Furniture In Less Than 5 Minutes
Cover Stain Primer – This is an oil-based primer but it’s surprisingly low on odor that works best for faux finishes.
Latex Paint in Satin Color-Matched to “Sherwin Williams Latte” at Lowe’s– You can get a sample size but for a large piece of furniture, I would probably go with the quart.
Latex Paint in Satin Color-Matched to “Sherwin Wiliams Van Dyke Brown” – You can get a sample container and that will be plenty because we will mix this with the glaze. I used the Sherwin Williams brand at Lowe’s.
Valspar Clear Mixing Glaze at Lowe’s – This is my favorite glaze to use for furniture and I’ve tried several.
Yellow Frog Tape – This is a little more expensive than others but works SO much better
Wood Filler (Optional) – If there are any knotholes or damage in your wood, use this as a filler: Wood Filler (click here for the current price).
Baby Wipes – I like Huggles Pure Natural for this.
Clear-Coat – I’ve done a lot of testing on the best clear coat and my favorite clear coat just came out with a matte finish! Varathane’s Water-based Polyurethane in Matte (Click here for the current price.) Normally, I’m fine with a satin finish but I really like the idea of a matte finish on these farmhouse-style finishes.
Foam Brushes – I like to use these for the clear coat and they are super cheap so I just throw it away when I’m done: Pack of Foam Brushes (click here for the current price)
Roller for the Primer (optional) – You can use a roller to save time with priming. My absolute favorite is the Best 6 in. Microfiber Roller (Click here for the current price.)
FREE Furniture Painting Cheat Sheet – This free printable is available by downloading for free here.
Restoration Hardware Finish – DIY Tutorial
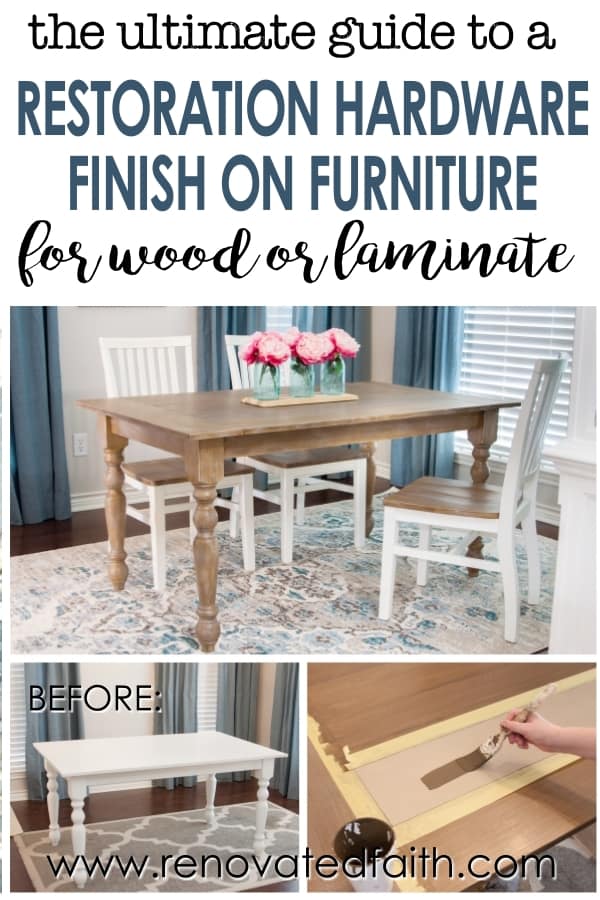
Below is the step-by-step tutorial for a Restoration Hardware finish on furniture. This tutorial will explain how to do this finish and also how to get the look of faux planks on any table. The video is supplemental to this tutorial and will show you exactly how to achieve this faux finish!
Step 1: How To Get A Restoration Hardware Finish – Prep Work
Stop! Before you do anything…take a before pic. When you are done, post the before and after pics on Instagram and tag me @renovatedfaith! I would LOVE to see how your project turned out!❤️
If you have any knotholes or damage in your furniture piece, now is the time to fill them and then sand. You can see exactly how to do that in this post: How To Fix Damaged Furniture
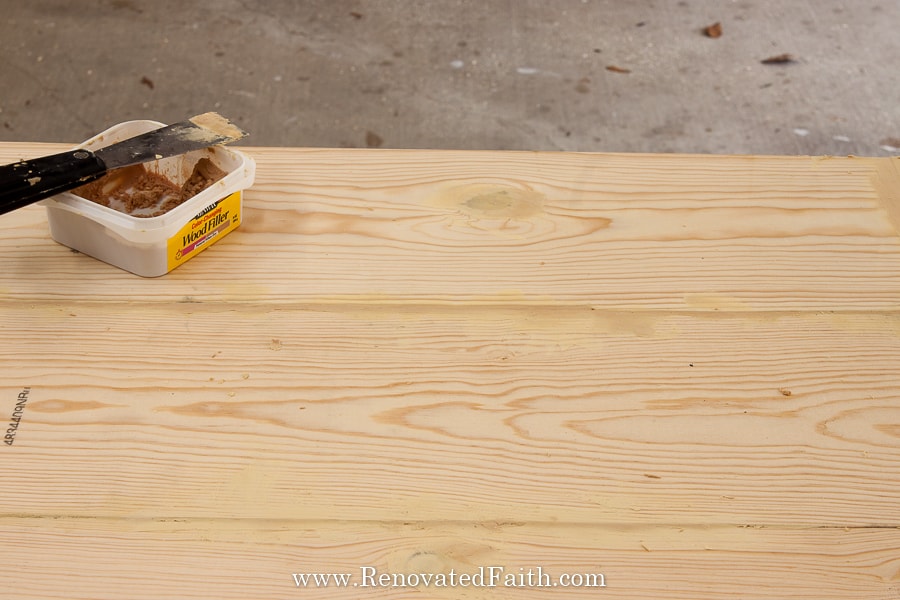
Whether your table is made from raw wood (in the case of a newly built table like ours) OR if you are refinishing a previously stained or painted table, I suggest you use a primer like Zinnser Cover stain. I learned it’s best even to use it on raw wood so that the wood won’t absorb your glaze mixture, making it hard to move the glaze around. I learned this the hard way on the wood shelf covers for my wire shelving and had to redo them!
Once you have filled and the holes, prime the entire table using a brush or roller. I usually use a cheap brush (like the ones I mentioned above) or roller for oil-based primer and just throw it away when I’m done. This is the only oil-based product we will be using for this process.
FOR LAMINATE FURNITURE:
If you are using this process for laminate or veneer. Be sure to use a higher-grit sanding pad to really rough up the surface so the cover stain will adhere well. Otherwise, the process is the same!
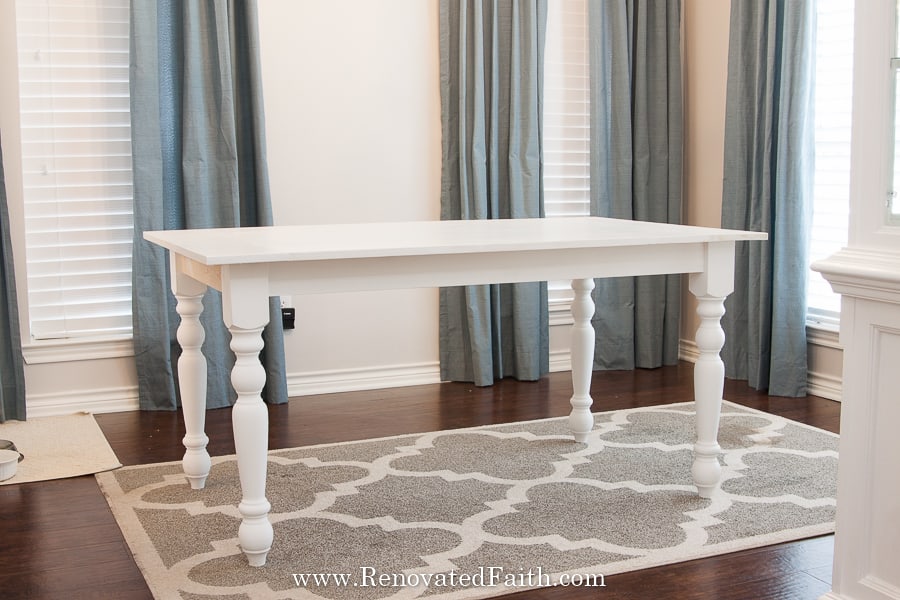
Once the primer dries, you want to sand it lightly. Don’t forget that you are just sanding lightly to smooth out the surface (How to Sand Furniture in Less Than 5 Minutes). Wipe the table down with a damp cloth to remove any sanding dust.
These preparation steps are kind of boring but I promise they will make all the difference in how the end-product looks!
Renovated Faith: What’s in a Name?
So many of my DIY projects remind me of God’s capacity to transform our brokenness and renew our hearts. If you are a work-in-progress, just like I am, check out the Renovate Your Faith Devotional at the bottom of each DIY and home décor post. Click here to get a weekly reminder of new posts by adding your email address.
Step 2: How to Paint a Restoration Hardware Finish on Furniture – Base Coat
Use one of your brushes to paint on the base coat of Sherwin Williams Latte. Be sure to paint in the direction of the grain. If you can’t tell how the grain is running or you are painting a laminate table, paint lengthwise in the direction of the longest length.
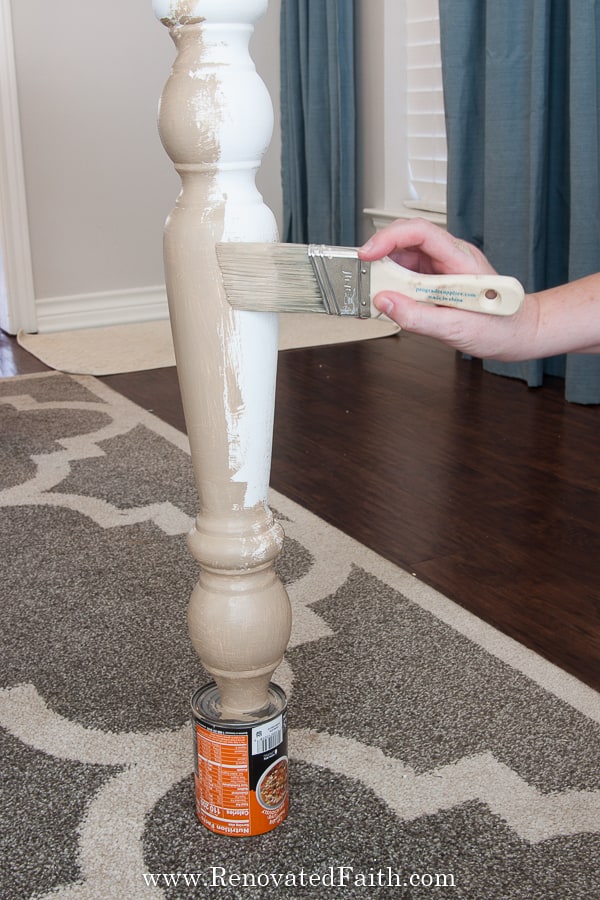
Your base coat might not completely cover. In other words, you might see a little over the primer coming through but that’s ok. Just get it to cover as best you can in one coat.
Let your base coat dry overnight.
TIME-SAVING TIP – You can get your primer tinted to the same base color and skip the base coat of latex paint completely.
Step 3: How To Paint A Restoration Hardware Finish With Latex Paint and Glaze
Now to the fun part! Be sure to watch the video to give you a better visual of the technique.
If you want to make a solid table look like it has faux planks, read the part below so you know how to add the yellow frog tape.
First I’ll go into detail about the actual technique and then I’ll explain how to make faux planks.
Be sure to watch the video before starting the process.
Paint/Glaze Technique for a Restoration Hardware Finish
Mix your Sherwin Williams Van Dyke Brown with your clear mixing glaze and water in this combination:
- 1 Part Water
- 2 Parts Valspar Clear Mixing Glaze
- 2 Parts Sherwin Williams Van Dyke Brown.
Do one plank or section at a time. Paint the glaze mixture on the plank back and forth to just get it covered.
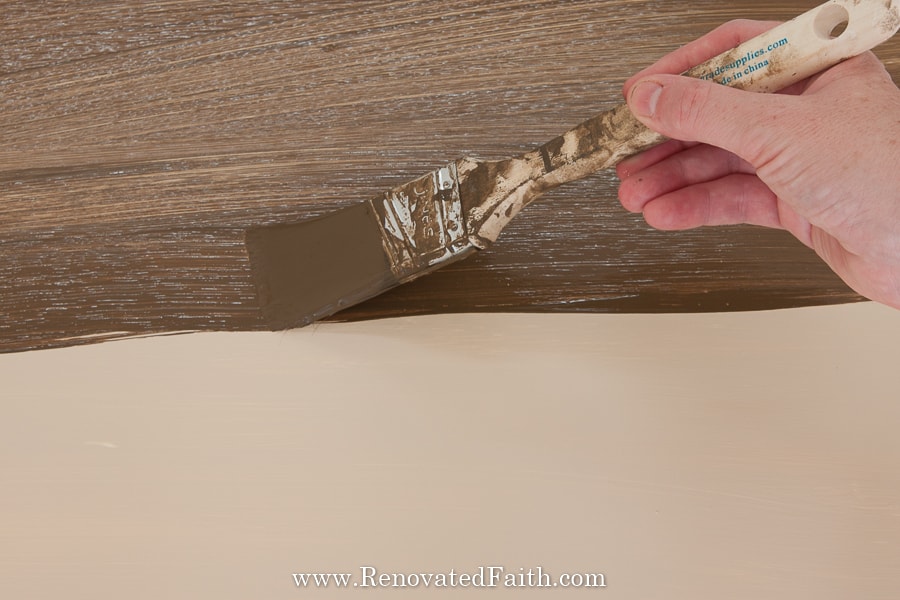
Next, use a baby wipe to wipe back and forth in long strokes lightly. See the video for this part. The baby wipe should glide back and forth on the surface. At first, just wipe back and forth from top to bottom and when you get to the last pass-over with the same baby wipe, wipe left to right and top to bottom without picking up the baby wipe in the middle.
You will see the look of wood grain start to emerge!
Let this part dry 2 hours at least before pulling off the tape before going to the next section
How to Paint Faux Planks On A Tabletop
We built this farmhouse table and it already has planks but I wanted them to look more pronounced. After the base coat of paint, the table seemed to just have a solid top without planks so we are going to add them with paint! The beauty of this method is that you can add faux planks to ANY solid tabletop in any size and made out of any material.
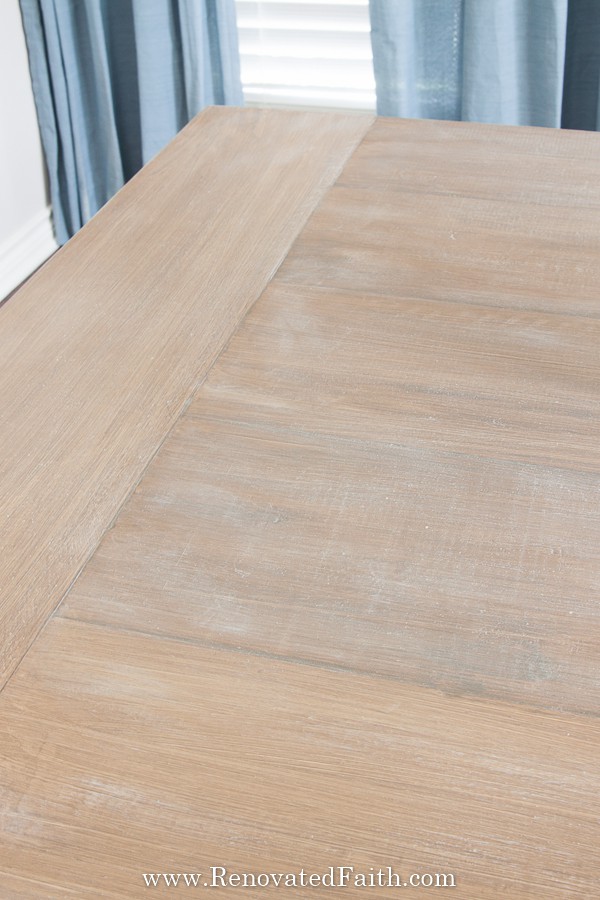
First, decide which way you want the planks to run. I suggest in the direction of the grain. Decide also if you want to simulate the look of breadboard ends like on my table. The easy way to figure out the width for the length-wise planks is to decide how many planks you want and then divide the width of the table by that number. My table has 5 long planks and a breadboard piece on each end.
Once you decide how many planks you want, measure out the lines of each plank, and trace it with a pencil along a straight edge.
We are going to do the faux finish on a few non-adjacent planks at a time so you will tape the top so every other plank is exposed. For my table, I painted the breadboard ends first, then planks 1, 3,& 5 and planks 2 & 4 last.
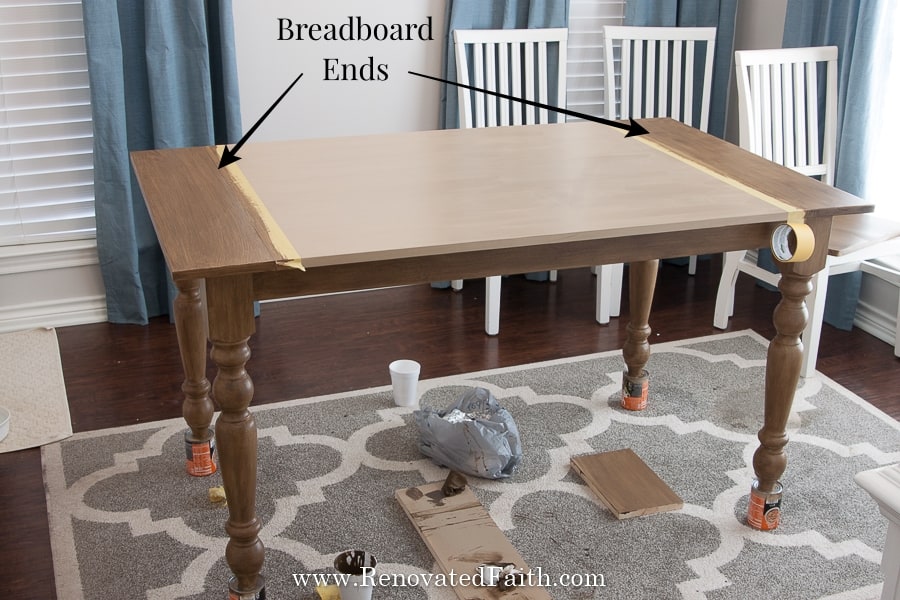
Here are planks 1,3 & 5 taped off.
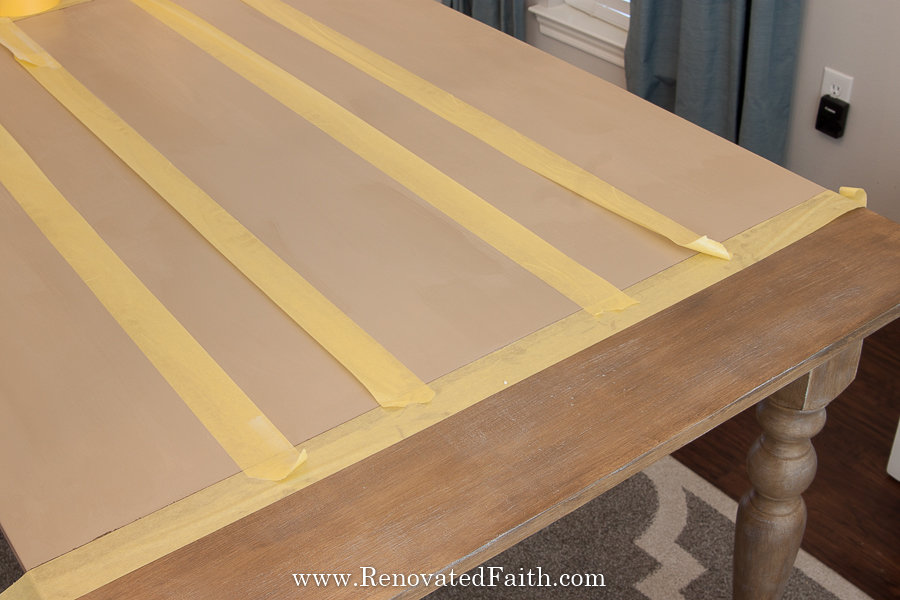
When you put the tape down on the side of the plank, place it just slightly outside the line because you want about 1/8 – 1/4″ inch of the line to be exposed and the paint to settle in those areas to be darker.
Do this full step to one plank at a time.
I taped and did this step on the breadboard ends first and let them dry a couple of hours before taking planks 1,3, & 5.
Do this step on the non-adjacent planks.
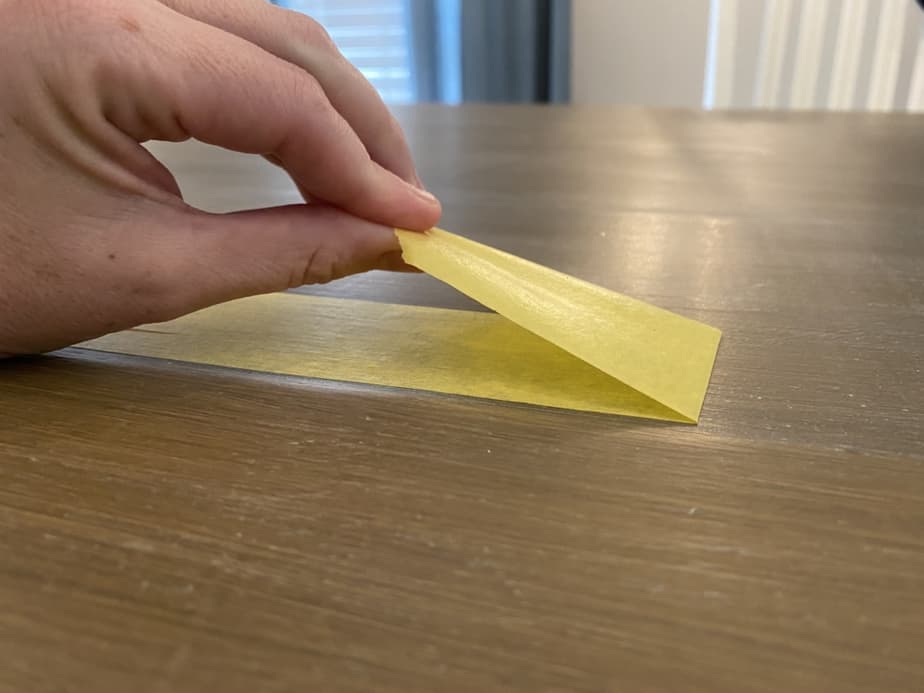
After a couple of hours carefully pull off the tape in this direction

You can see planks 1, 3 & 5 completed.
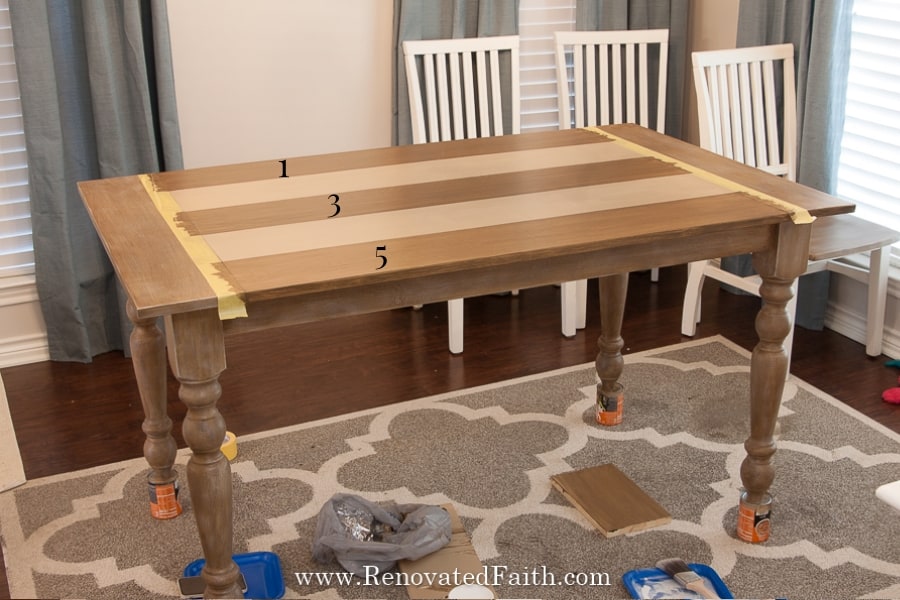
Now tape planks 2 and 4 and repeat the process.
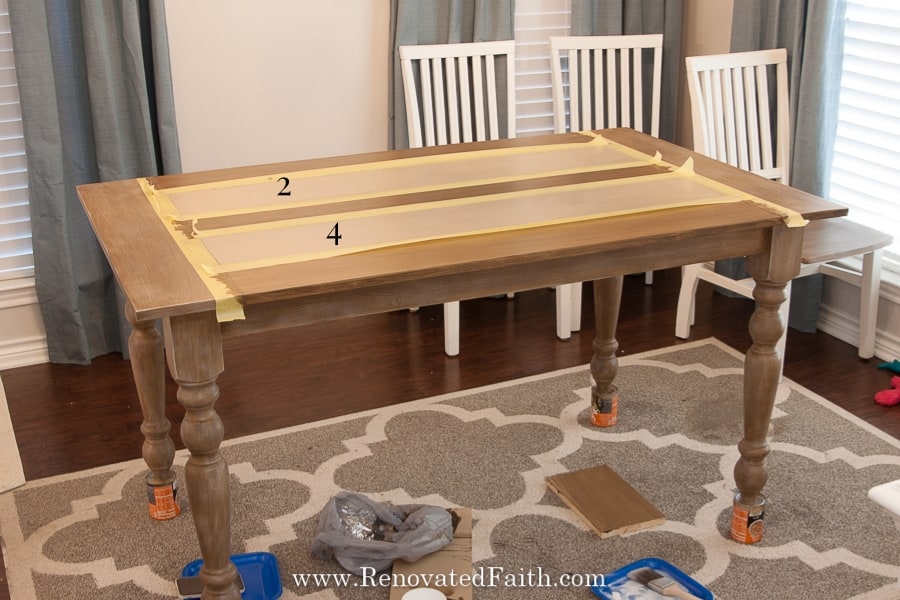
Once each set of planks has been painted, let them dry a couple of hours and then pull up the tape (pull in the opposite direction). Then, tape the edges of the rest of the “un-stained” planks, again taping just outside the line to leave some of it exposed.
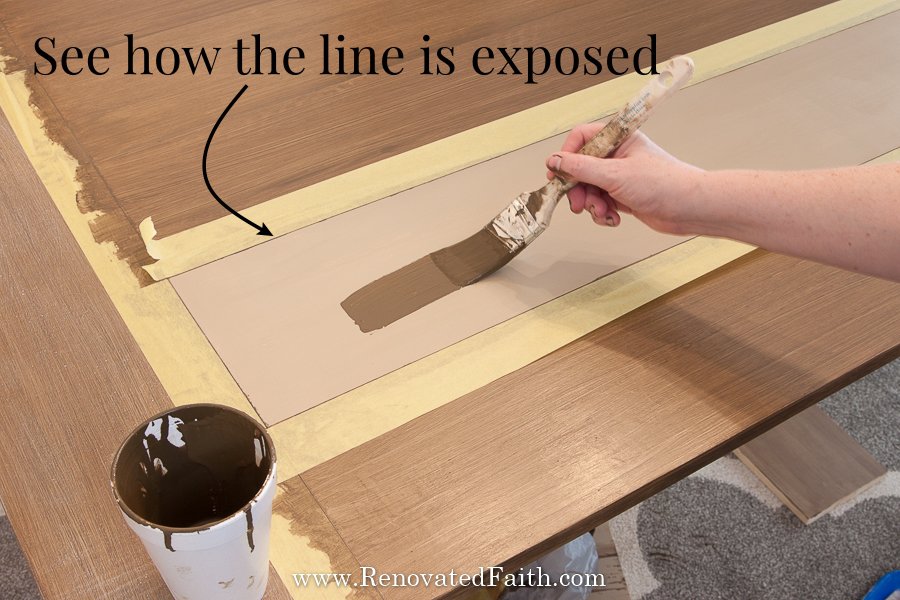
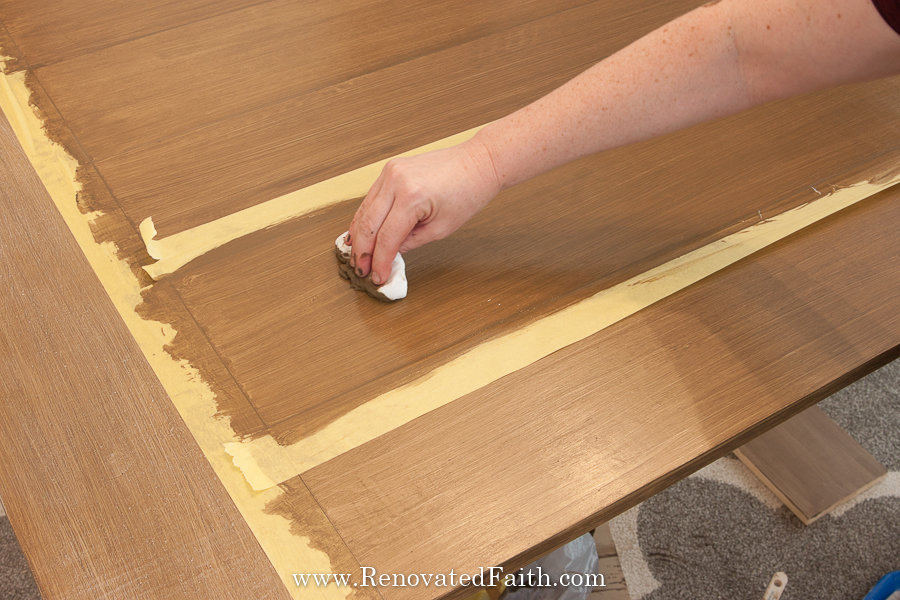
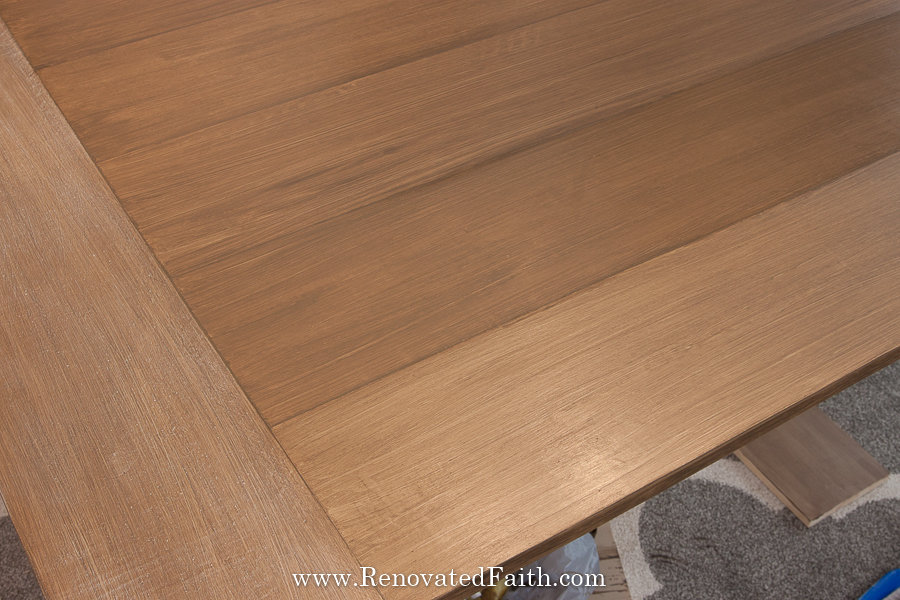
While waiting on the different sections of the top to dry, you can do the glaze/paint step to the legs and aprons. I like to work on one part at a time so they paint doesn’t dry up on me.
Step 4: Dry Brush Your Table
Mix together 2 parts clear mixing glaze, 2 parts white paint, and 1 part water. Get a brush and a colored paper plate if you have one. Dip the edge of the brush in the paint mixture and then wipe off as much as you can on the colored plate. (The full step is shown in the video).
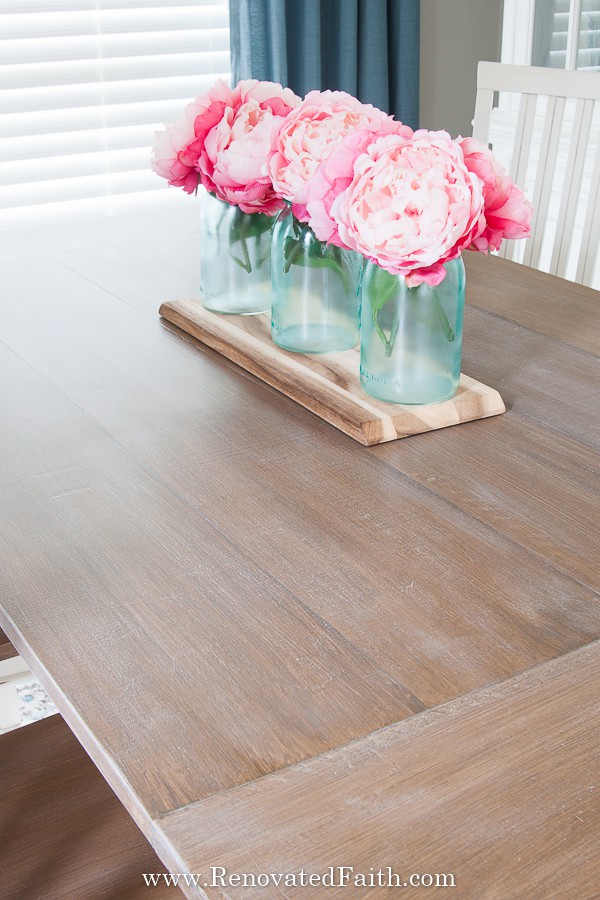
Now, dry brush back and forth on the tabletop. If you get too much on the table, you can smudge it with your finger in the direction of the grain.
Do this over the whole surface of the table at once (there is no taping of sections for this step).
This step is great for determining how dark or light you want your finish to be. Dry brush more if you want a lighter finish.
Step 5: How to Protect Your Restoration Hardware Finish with a Top Coat
I’ve done a lot of experimenting with clear coats and my absolute favorite is Varathane’s Water-Based Polyurethane in Matte (you can get it here!). Follow the directions on the back.
I like to use a foam brush. Just brush in the direction of the grain. For additional coats, just stick the foam brush end in a baggie and stick it in the refrigerator to store it. Then, when you are done with your clear coat layers, just throw it away.
RENOVATE YOUR FAITH: Accepting God’s Help in the Midst of Overwhelm
Do you ever feel overwhelmed with all that’s on your to-do list? Does it seem that as soon as one item is knocked off, five other tasks rear their ugly head?
It’s like being on a hamster wheel of frustration – always moving but never making true progress.
My thoughts were filled with overwhelm as I walked into my office from the living room. As I did, my eye caught a glimpse of a magazine on the coffee table entitled “DIY…something”.
For some reason, it hit me. The concept of “do it yourself” is one that is highly esteemed as a very American, ‘pull yourself up by the bootstraps’ way to live in today’s world of hustle.
But as someone that loves to DIY home projects and writes a DIY blog, I became starkly aware of the contrast in this concept and God’s ideal for how we are to live. READ MORE HERE
For more spiritual encouragement, click here for the rest of my project posts that also include Renovate Your Faith devotionals.

Want A More Whitewashed Restoration Hardware Look?
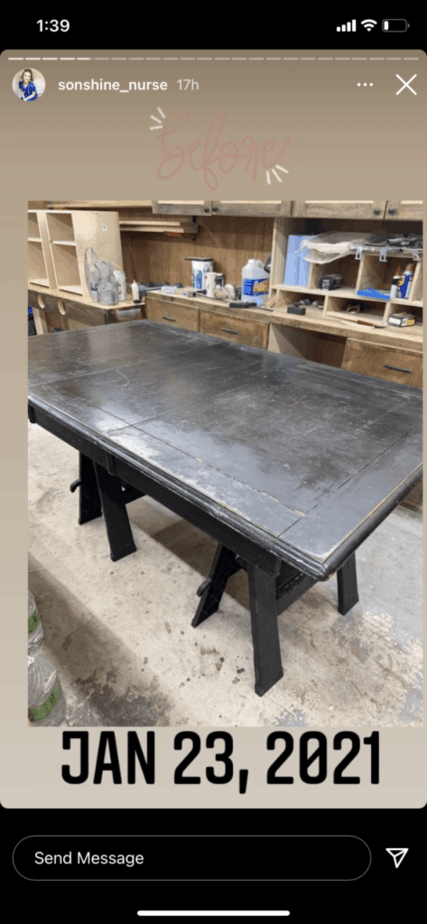
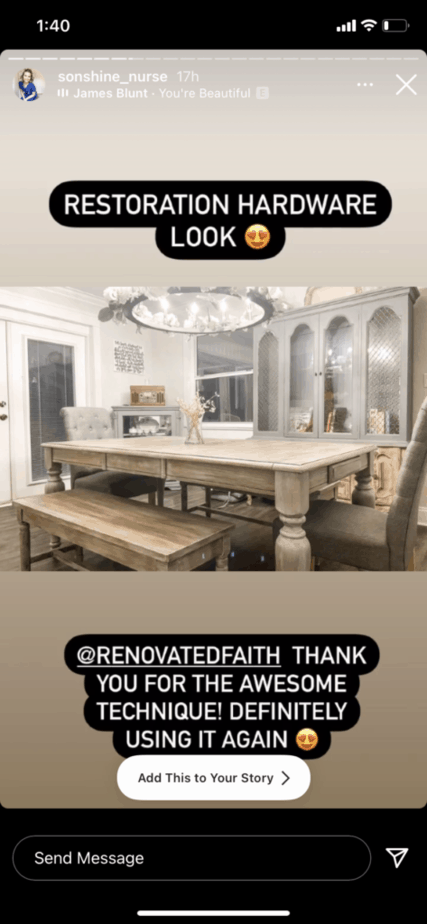
Kim, who you can find @sonshine_nurse on Instagram, followed the tuturorial to transform her black dining table and benches. Here is the before:
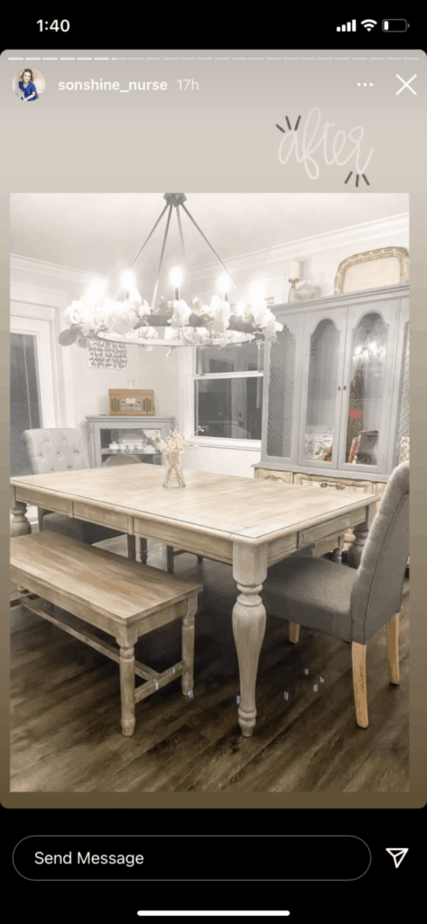
And here is how her table turned out! Doesn’t look amazing?!? I’m really tempted to add a little more of the white dry brushing to my table. For the white, she used Swiss Coffee. I’m so blown away by her transformation. Be sure to follow her on Instagram @sonshine_nurse where she helps busy women to make their health a priority.
Restoration Hardware Finish on a Metal Door
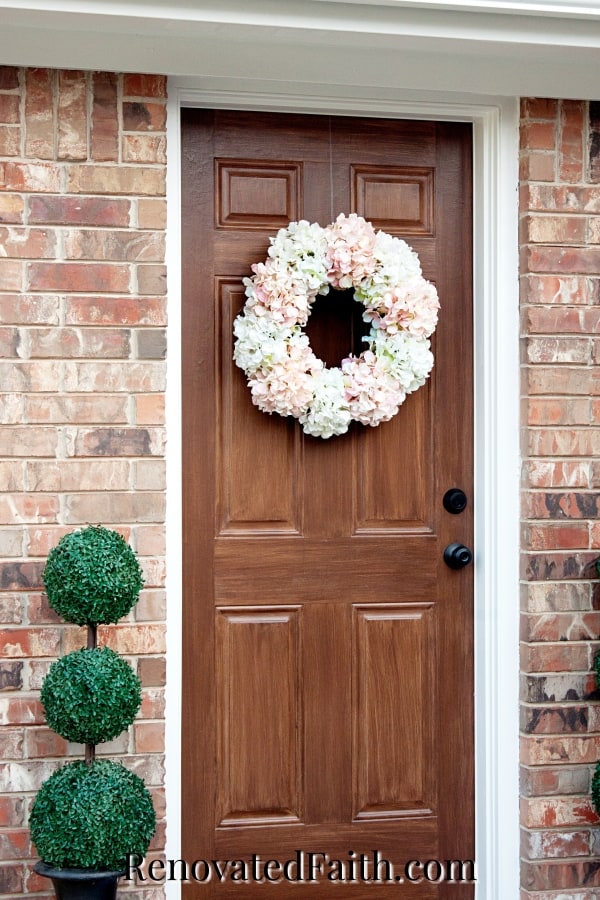
Did you know you can use any faux stain on a metal or fiberglass door to make it look like its made out of real hardwood? To see how I painted my metal back door, click here: The Easy Way To Paint Any Door To Look Like Wood
☑️ My All-Time Best Furniture Painting Tips & Tricks (FREE PRINTABLE)
Don’t forget to download the FREE step-by-step printable checklist that shows you the entire process I’ve used on dozens of furniture pieces while saving you time and money!
DON’T FORGET TO TAKE A PICTURE!
Now that you are done, I’d love to see how it turned out! ❤️ Post your before and after photos here!
FAQ’s: Achieving a Restoration Hardware Salvaged Natural Stain on Furniture
What About Getting A Restoration Hardware Finish With Stain?
Some use stains to get the look of your favorite finish on furniture. The problem with stain is that it penetrates the surface of the wood. Because absorption rates will be different for the moisture level and type of wood, you don’t really know how much stain is going to absorb and therefore you don’t have a lot of control over the final product.
If the furniture piece you are working with already has a stain then the new stain will go on top of it making it darker. So, using stain to achieve a Restoration Hardware finish isn’t a great option especially if your table already has a medium to dark stain. Also, combining stains can be tricky!
Can You Get A Restoration Hardware Finish with Chalk Paint?
Creating a Restoration Hardware finish with chalk paint is a step in the right direction but chalk paint can be pretty cost-prohibitive. Also, you don’t have the same color options, durability and flexibility as you do with latex paint: Why I Don’t Use Chalk Paint on Furniture
What if I want a DIY weathered wood stain?
If you want a grayer, more distressed wood stain, I would take a look at my Driftwood Finish with Latex Paint. It is a gray, weathered faux finish that a lot of my readers have had great results with!
How Does Restoration Hardware Finish Their wood?
I’m not sure of the exact process but I know they don’t use any sort of protective coating on your wood. So, if you are going to use your table like well, a table, it’s going to need some kind of protective topcoat like Varathane’s Water-based Polyurethane in Matte (click here for the current price.) After lots of testing, this is my go-to clear coat for all furniture!
How Do You Get A Restoration Hardware Finish with Chalk Paint?
You could use chalk paint to get a similar finish using the process above but chalk paint comes in fewer color options so you wouldn’t get the exact shade. Also, cost paint is much more expensive than latex and would require more glaze. Read more about why I prefer latex over chalk paint here: 7 Reasons I Stopped Using Chalk Paint on Furniture
More Posts Related to a Faux Restoration Hardware Finish On Furniture
How to Build a Farmhouse Table (The Easy Way!)
The Absolute Best Furniture Paint (24 Brands Blind-Tested & Reviewed)
How To Paint and Stain Laminate Furniture
Easy, Raw Wood Faux Finish (No Bleach or Stripper Needed!)
The Best Clear Coats for Furniture (Tested and Reviewed)
A Beginner’s Guide to Furniture Painting
Easy Turned Leg Coffee Table (Kreg Jig Plans!)
Why I Don’t Use Chalk Paint On Furniture
Final Thoughts on The Restoration Hardware Style Finish
Don’t forget to download my Free Furniture Painting Cheat Sheet. To get your printable, sign up for my weekly newsletter which also grants you free access to my resource library full of wall art printables, checklists, and project plans!
Before this post, you may not have realized how easy it is to achieve a Restoration Hardware style finish on any surface without stripping or bleaching. Because this process uses latex paint instead of stain, you can be sure of how the final finish will turn out! Also, there are no costly paint products. Thankfully, we are no longer limited by the money in our bank accounts to have this drool-worthy finish in our very own homes and can paint it on furniture to our heart’s content!
I love to hear your thoughts and questions! Scroll down to leave a comment and I WILL reply! ❤️
Blessings,

Be sure to follow the fun here!
Email Subscription | Instagram | Pinterest | Facebook | Twitter
How To Achieve a Restoration Hardware Finish, YouTube Video
Faux Restoration Hardware Salvaged Natural Stain

Karin Peters is a DIY expert and the creator of Renovated Faith. She is a furniture painter, a home design consultant, and a tenacious problem solver determined to help you transform your house into a home. With 17 years of experience with DIY home improvement, she researches and analyses professional processes to adapt them to be easy and cost-effective for DIYers. She then tests every project and product before it appears on the site in a detailed, step-by-step format. After attending Texas A&M University, she received her Master of Divinity with Biblical Languages at Southwestern Baptist Theology Seminary. Her passions unite in Renovated Faith, which shows readers how to create a home that serves them so they can pursue their God-given purposes. About Renovated Faith | Editorial Policy | Facebook | Twitter | LinkedIn


I think I’m going to try this process on my bathroom vanity & cabinets that are currently painted wood. Have you actually used the Zinsser primer tinted to match Valspar Hopsack and it came out exactly the same? Blessings!
Hey Jennifer, I need to make an upate in the post. Sometimes when big box stores try to color match a primer, they always get a great match. So, the sake of accuracy, I think I’d prime and then do the hopsack base.
Hi, I love this faux stain color and cannot wait to try it out on several pieces of furniture but I am concerned about the base color. I know you have had questions about this already, but your pictures of the base color do not look anything like the Sherwin Williams Hopsack color which is a much darker orange/brown. Your pictures look much lighter and much more similar to the Valspar color. I am considering using the Valspar color just because it looks more like the pictures because I am concerned the SW color I got will be much too dark. It is darker than the latte base color I used for the Dark Walnut faux stain, in fact the SW Hopsack was so dark that Lowes was unable to tint the primer that color. Can you please verify this again? I am just wanting mine to turn out as well as yours! Thanks
Hey Courtney, Thank you so much for bringing this to my attention. I think you are right. I think I did use the Valspar Hopsack because the Sherwin Williams Hopsack just looks too dark. I just corrected the post and thank you so much for letting me know!
Have you tried or know anyone that has used the faux restoration hardware technique on stained oak stair rails and handrails? Mine is 25 yrs old and needs an update!
I don’t know of someone using that faux stain in particular but I know of someone that used another stain shade. You might get a small piece of wood and do the whole process on it to get a better idea of how much time it takes. Thanks Kellie!
I have a follow up to Christy’s July question about Valspar Hopsack being lighter than SW.
SW is dark and a bit on the orange side. Because my local SW did not have the paint in stock that they could mix Hopsack into I went to Home Depot (that’s the closest to me-Lowe’s is another 10 miles away) and bought a quart of SW hopsack in Behr Cabinet & trim paint. I did not remember the color in your picture being much lighter-now I’m trying to determine if it will work. It always seems a lighter color is the base. The color you used looks light in the picture. I do have on hand SW pro classic perfect griege regular latex paint and also SW canvas tan in Valspar Cabinet/furniture paint, if I need to use one of those as a base. I am painting a kitchen island. Any suggestions will be appreciated.
Hi! I have a dining table from Pier 1 that appears to be maybe not totally real wood. It has a glossy finish. Would this method work on a table that’s not real wood?
Yes it will but I would sand the surface a little more and use Zinnser Cover Stain as your primer. It will work but you want to get rid of that sheen of the laminate so the paint adheres.
Hi! At Lowe’s the Valspar Hopsack is a different color than the Sherwin Williams Hopsack. The Valspar color looks closer to what you used. Do you think that’s the right one? Thanks!
Christy, Thank you SO much for bringing that to my attention. It’s definitely the Sherwin Williams color.
How do I know how to mix the paint/glaze mixture. What is 1 part equivalent too?
Hey Kacey, Try 1/4 cup as 1 part. That will give you plenty of the glaze mixture! 🙂
I love your tutorial and am going to try this. I’m wondering what paint colors you’d suggest since I prefer the RH salvaged coffee finish instead of the salvaged natural. Is a make up wipe OK instead of a baby wipe? Love your website as well 🙂
Hey Vicki,
You can check out this post for some different finish options: https://renovatedfaith.com/paint-that-looks-like-stain/ I don’t know if I would use a makeup wipe because it would probably remove the paint. Let me know if you have any other questions Vicki! – Karin
Thanks for answering all of my questions on your other pages! This is my first time using latex paint on furniture instead of chalk paint. I’m halfway through doing the restoration hardware finish on my dining room table. I’m still undecided on whether I like latex paint better than chalk paint for furniture.
Anyway–during the glazing step my baby wipe started to fall apart and chunks ended up embedded. I tried to wipe the chunks out while the glaze was still wet but I guess it was drier than I thought and I ended up removing too much color from the faux plank I created. I tried adding more glaze but since it was pretty dry it ended up being a big mess.
What would you suggest for removing chunks of baby wipes on the table(I used the Huggies Natural)? And how do I fix the section? Do I let it completely dry and then add more of the glaze mixture for that plank?
Also, do I have to do “step 4: Dry brush your table” if I like the color I achieved with the paint/glaze in Step 3?
Hi, I’m sure you’ve already finished your table but I am in the process of working on mine. When the baby wipes would fall apart, I ended up missing wiping off a few of the pieces and they were actually easier to remove when it dried. It didn’t mess with the finish or anything. I thought I’d share in case anyone else is in the process and sees this comment. Obviously, I would be careful to not get the pieces of baby wipes in it, but if a few are there, wait until it’s fairly dry and they will wipe right off… or even blow off.
Such a great tip Cynthia! Thank you so much for taking the time to share!
I’m a little confused about when to sand. I want to paint a Restoration Hardware finish on my already (dark) stained dining room table. There are a few deep scratches that I will fill with wood filler. Do I lightly sand AFTER the wood filler dries and BEFORE I put the cover stain primer on?
Hey Juliett, Great question. Go ahead and fill the deep scratches, then sand, wipe if off and then do the cover stain. Please let me know if you have any other questions! -Karin
What type of white paint do you use? Just an satin white? I didn’t see it in the item list
Hi Kathryne, I like to use either Behr Marquee or Sherwin Williams ProClassic both in satin. Let me know if you have any more questions. Thanks Kathryne! – Karin
Hi Karin, thanks for all this info. I want a beach you vibe. My dining table and china cabinet is only 15 years old and in great condition. The color is dark. I want to white wash in a light linen finish. I’m wandering if I can just use a glazing technique only. And of course a Matt finish to protect it. I’m afraid to get into sometng way over my head. I would hate to ruin this beautiful piece. It’s not a high end set . However it did cost $2000. new.
Sincerely , Sandra Marks.
Ps any tips on what I should do to get this look would be greatly appreciated
Yes, you can absolutely try a whitewash effect of just french linen mixed with glaze. Try it on the back of the piece first to see how you like it. Then, if you don’t like the effect, no harm done! Thanks Sandra! – Karin
I’ve been following your faux refinishing tutorials with gratitude! But I wonder how long you allow your glaze/paint faux treatments to cure before sealing with poly top coat?
Thank you so much Sara and great question! I like to let the final step of the faux finish dry overnight before putting on the topcoat. Let me know if you have any other questions! – Karin
Has anyone done the restoration hardware finish WITHOUT dry brushing at the end? Did you like it?
It’s so funny you are asking this. I’m about to do this on my coffee table!