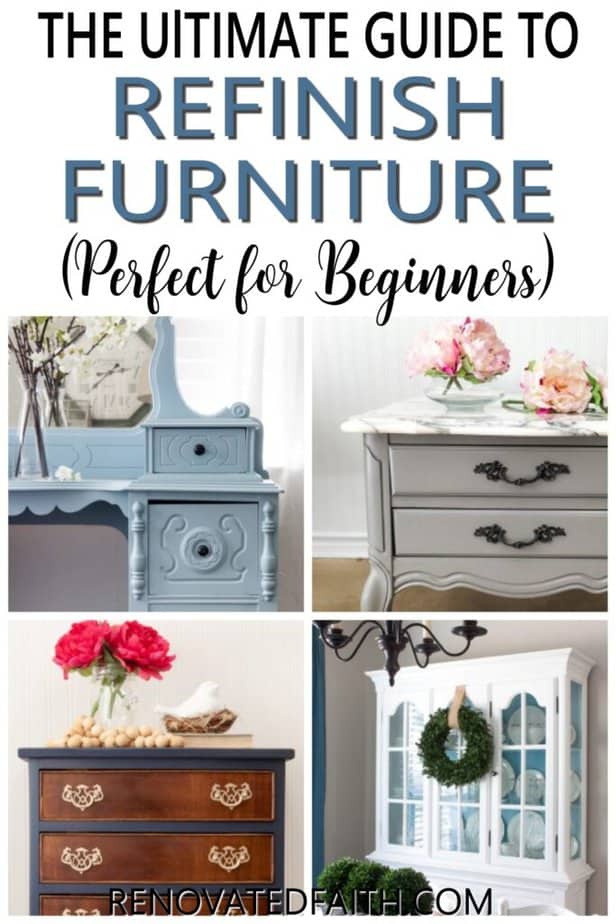
The Ultimate Beginner’s Guide to Refinishing Furniture (DIY Tutorial & Video)
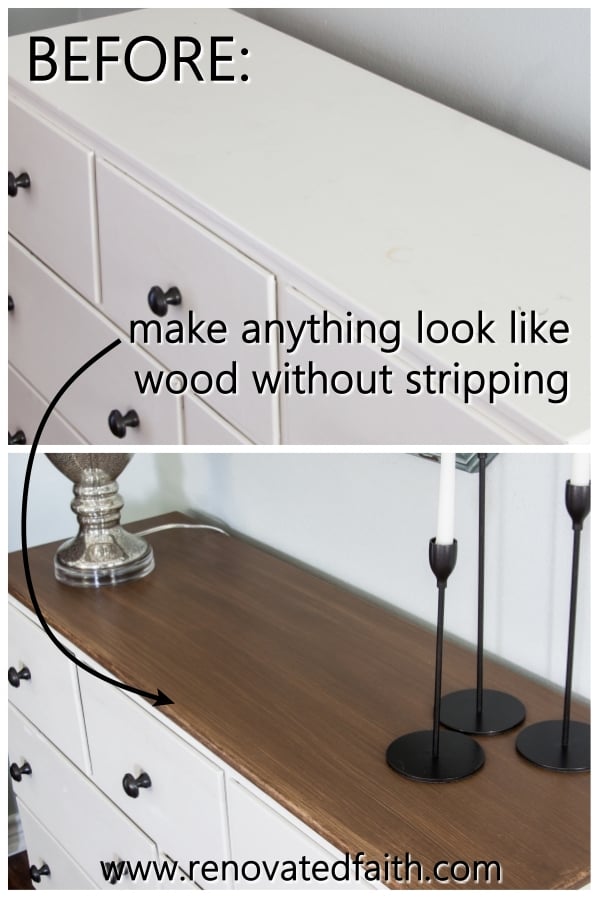
How to Refinish Wood Furniture Without Stripping
Learn how easy it is to refinish wood furniture without stripping off the old finish. This easy furniture refinishing DIY tutorial is perfect for beginners!
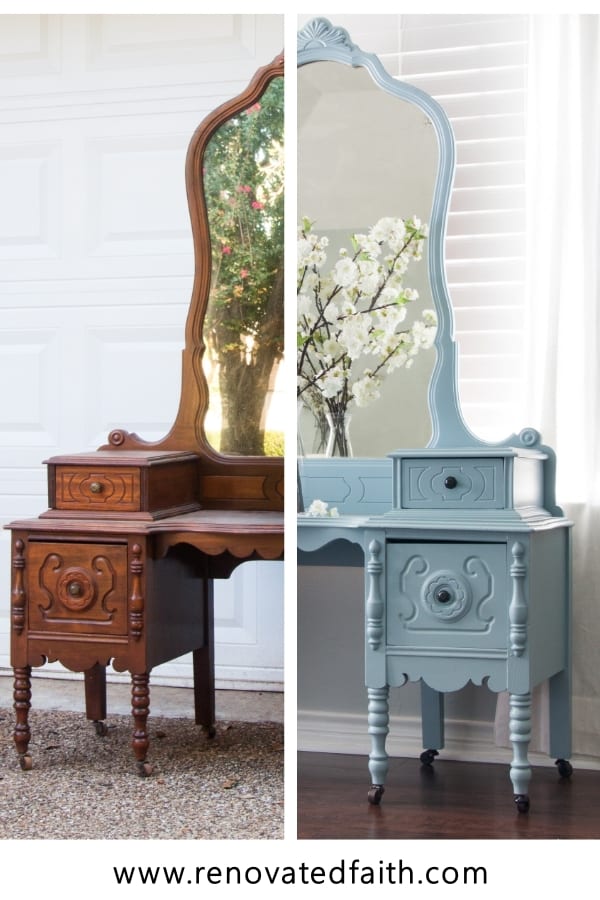
Refinishing furniture is so much easier than you think if you know the right products and process! In this beginner tutorial, I’ll show you the easiest way to apply pro tips for painting or staining furniture whether it’s a family heirloom or roadside rescue.
Giving a piece new life means more than just making it pretty. Not every painting process will ensure that your furniture piece’s new finish will be as durable as it is beautiful.
Using the wrong products may mean refinishing the entire piece when the paint peels. Also, the most expensive furniture paints are not the best!
After dozens of furniture projects and blind-testing 24 furniture paints, I’ll show you a great, low-cost process, the absolute best paint, and some time-saving hacks I’ve learned along the way.
LET ME SHOW YOU:
- How to paint and stain furniture without using a chemical stripper
- The best way to paint furniture so it lasts and looks beautiful!
- An easier way to stain furniture than traditional stain
- Encouragement to know what God really thinks of you in this week’s Renovate Your Faith devotional at the bottom of this post.
Quick Links to Information in this Post
- 1 How to Refinish Wood Furniture Without Stripping
- 2 Supplies Needed: My Favorite Furniture Refinishing Products
- 3 A Beginner’s Guide to Furniture Refinishing (DIY Tutorial and Video)
- 4 RENOVATE YOUR FAITH: Are You Overplanning Your Life Away? Here’s How to Reclaim It!
- 5
- 6 FAQ’s: Restoring Wood Furniture Without Stripping
- 7 Related Posts On Refurbishing Furniture
- 8 Final Thoughts on Refinishing Furniture for Beginners
- 9 Furniture Refinishing DIY Tutorial, Youtube Video
- 10 A Beginner’s Guide to Furniture Refinishing (DIY Tutorial and Video)
Can I refinish furniture myself?
But while refinishing furniture might seem daunting, the good news is that you don’t have to settle for beauty or durability. You can absolutely have both so your thrift store find will be even more durable than a brand-new furniture piece!
Whether you want to paint or stain your furniture piece, I’ll walk you through the entire process step by step!
Is it worth it to refinish old furniture?
When considering whether to refinish wood furniture pieces, it can be very tempting to buy new pieces instead. Sometimes this is the right option but more often you’ll find that there is not a lot of GOOD solid wood furniture out there at a reasonable price.
And if you do buy a brand new piece of furniture, chances are it’s not going to have the waterproof, durable finish that this furniture refinishing tutorial will give you.
With that said, refinishing a piece of old solid wood furniture is going to give you more bang for your buck. My less practical side also loves the thought of giving an antique furniture piece another chance at life so you can add to its already extensive history
Can You Refinish Furniture Without Stripping?
As I’ve mentioned in my chalk about Why I Don’t Use Chalk Paint, I don’t use chemical strippers. There’s nothing that seems more miserable to me than putting on rubber gloves and slathering a smelly paint stripper all over a piece of furniture and scraping it off a little at a time. No thank you!
Fortunately, is easier to go OVER the old finish instead of removing it. It will also give you a smoother and longer-lasting finish.
Do you have to sand furniture to refinish it?
Yes, BUT sanding furniture is not nearly as difficult or messy as you may think and I’ll show you how to do it in less than 5 minutes over your entire furniture piece.
You might have heard the saying that an ounce of prevention is worth a pound of cure. Sanding is the best way to ensure that your finish adheres. If your new finish doesn’t adhere to the old paint or stain, you have to redo the entire process all over again after removing the peeling paint!
Supplies Needed: My Favorite Furniture Refinishing Products
Primer
Paint Brush
4 Inch Roller
Electric Sander – This is a great tool to have at your disposal and you can find a great power sander in the link above or here: The Best Sander for Furniture Refinishing
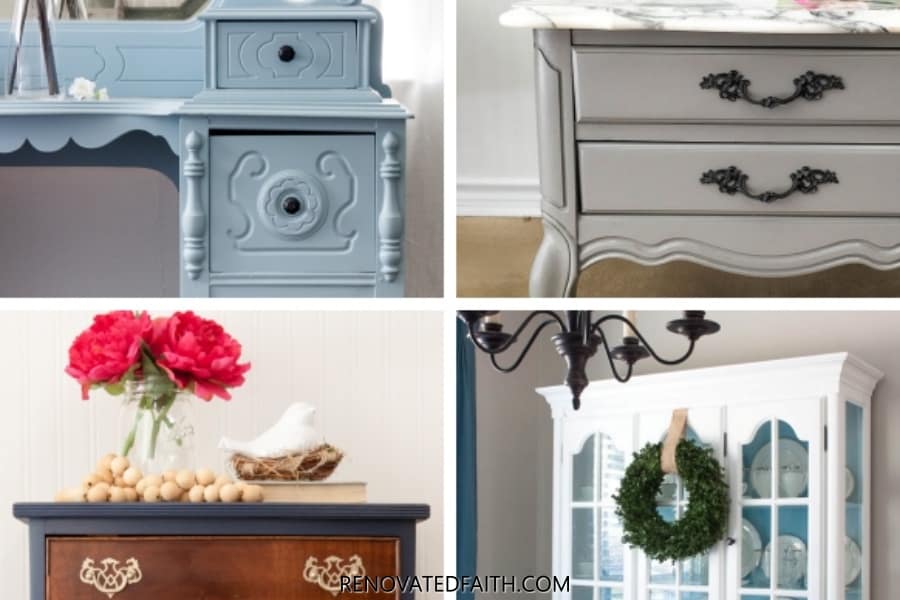
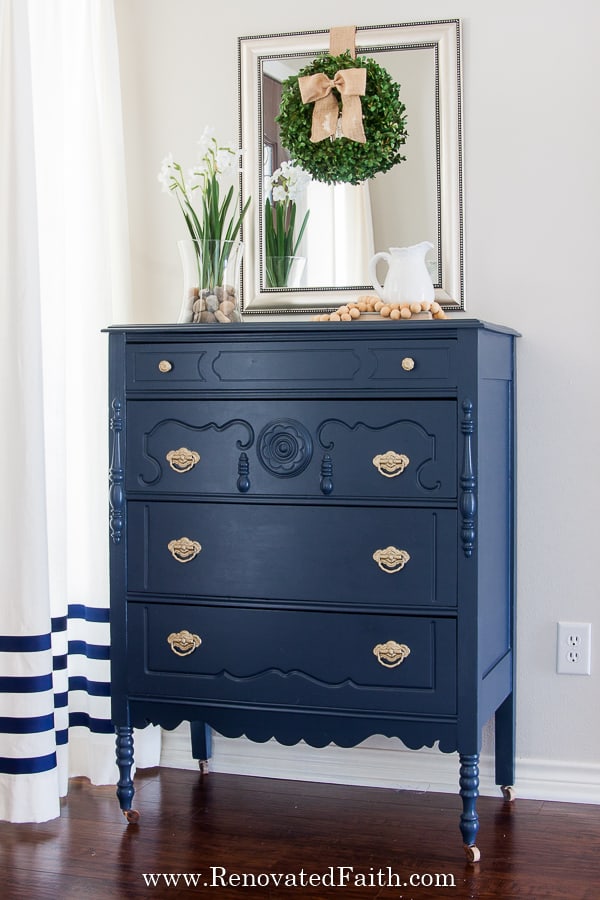
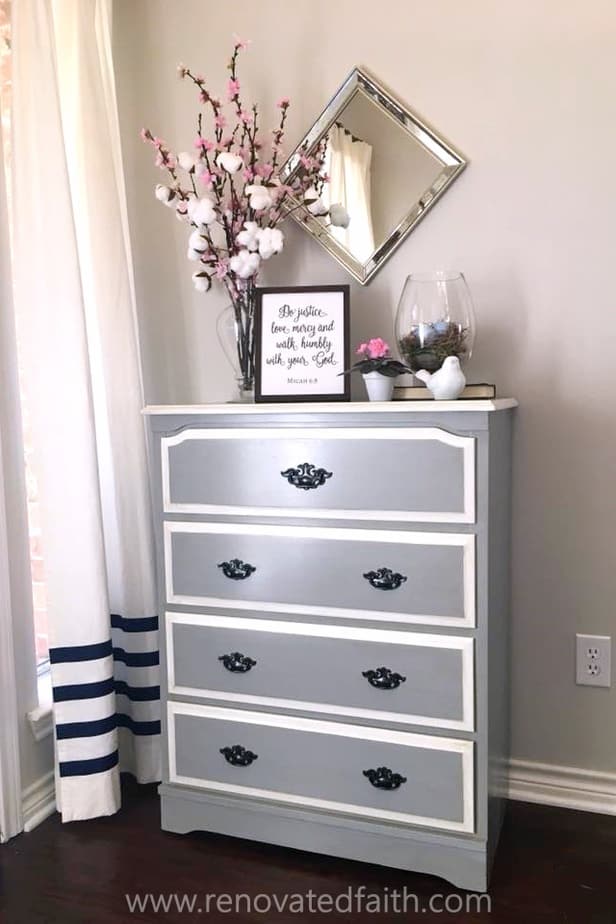
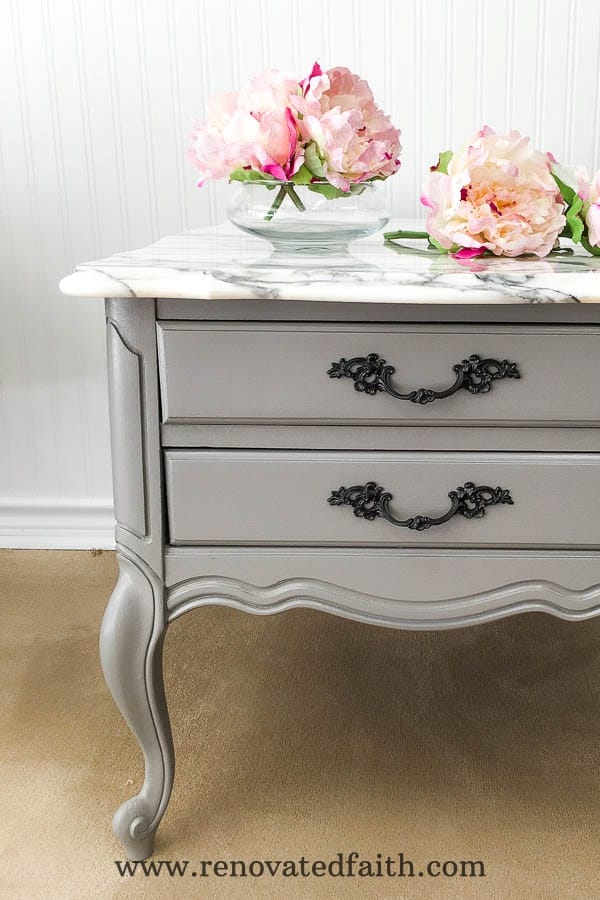
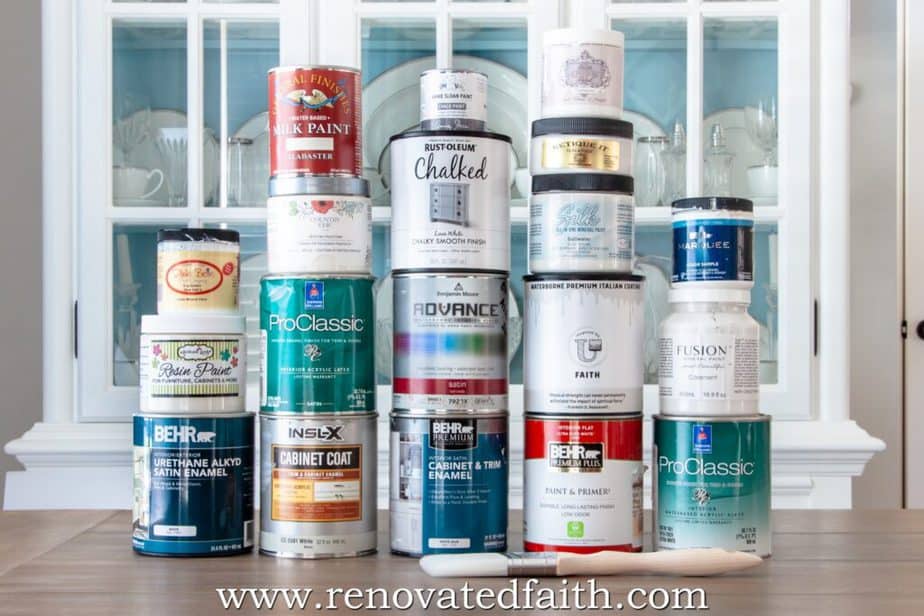
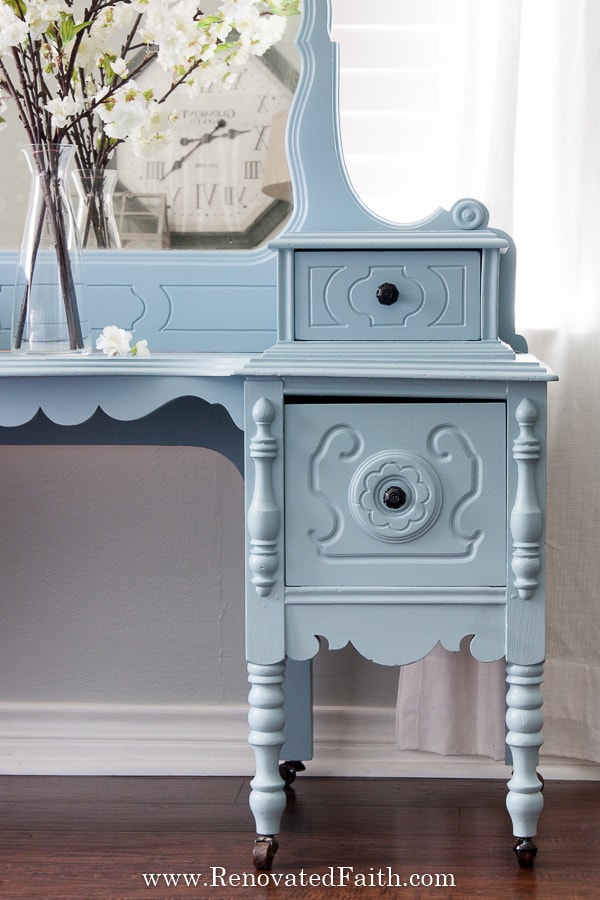
Paint – In my post on the Best Paint for Furniture, I tested over 24 different brands of furniture paint and the one that came out on top was Benjamin Moore Advance in Satin. (The color was color matched to Sherwin Williams Meditative.) I used a quart for this project and had plenty left over.
FREE Must-Have Furniture Painting Tips – You can download my best hacks for a super smooth finish, which are available in my resource library – get the password using the form below.
Note: If you don’t want to buy a sander, you can buy and sandpaper or use steel wool.
Dish Soap and a Clean Rag or Krud Kutter Pre-Paint for dirtier furniture pieces.
IMPORTANT: Does your furniture piece have any damage like deep scratches, gaps, or chipped drawers? Check out this post for an easy fix: The Ultimate Guide to Fixing Wood Furniture Before Refinishing
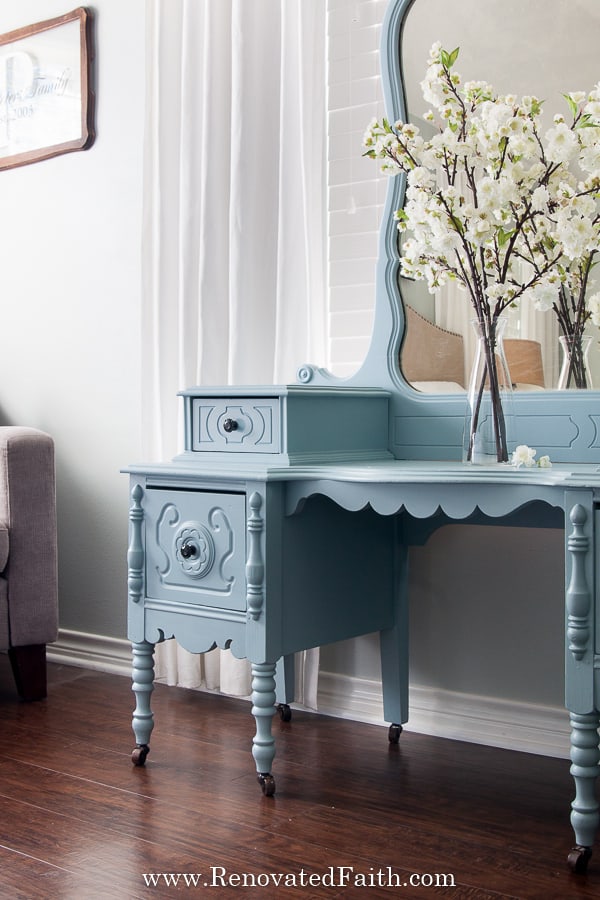
For my vanity repairs, I used: Dap White Caulk, Wood Filler & Metal Corner Brackets for Structural Support
A Beginner’s Guide to Furniture Refinishing (DIY Tutorial and Video)
In this process, I’ll show you the best way to paint furniture and a better alternative to staining than traditional stain. To see the step-by-step paint process for painting my vanity in detail, you can follow along with the video: How to Refinish Wood Furniture Without Stripping (YouTube Video)
Step 1: How to Clean Furniture Before Refinishing
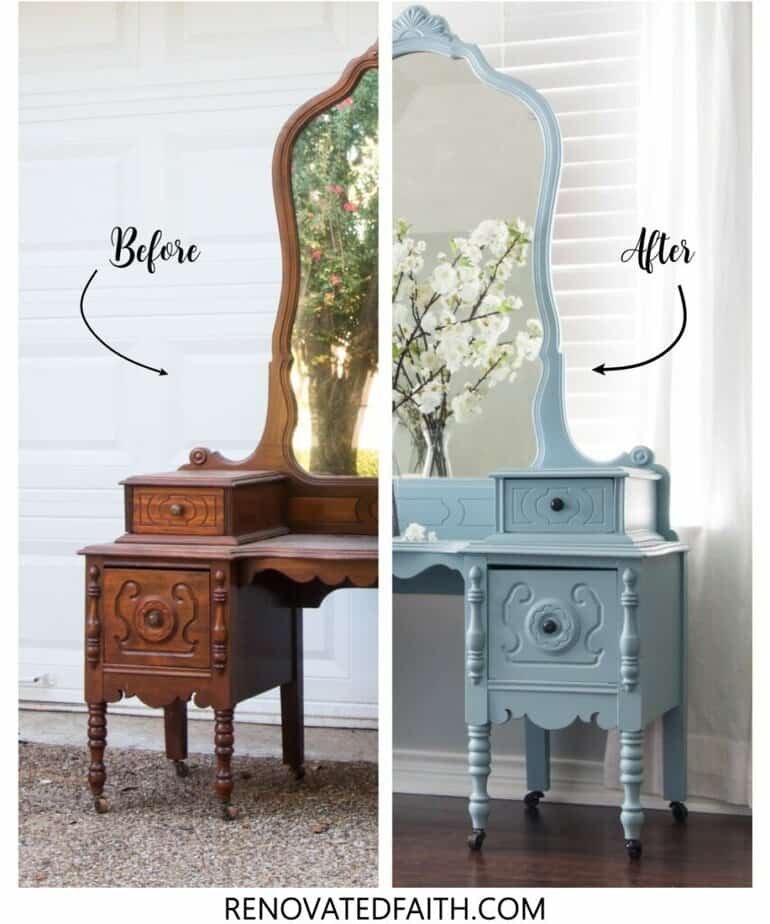
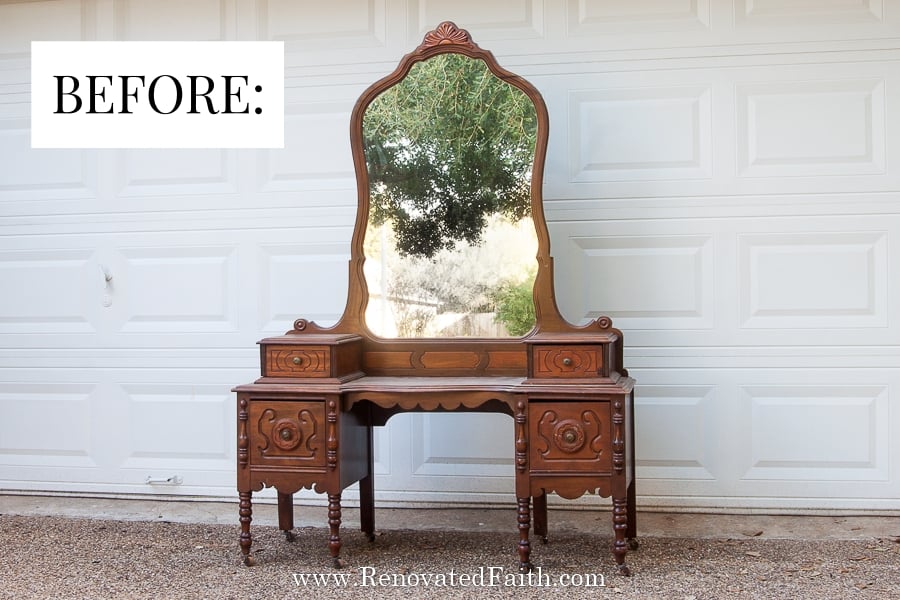
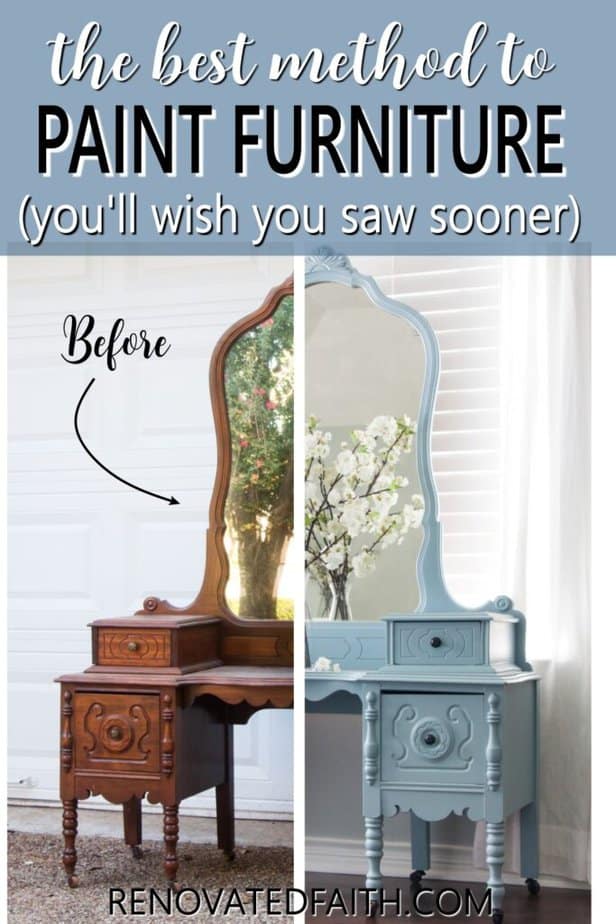
The first thing you want to do is take a BEFORE pic. Trust me! You will want to have physical proof of how your antique furniture piece actually looked before its amazing restoration process!
Remove all the hardware and put it in a baggie for safe keeping. (Don’t forget you can spray paint your old hardware using these free tips here.)
The first step is to clean the furniture piece with a damp cloth moistened with warm water. Add some dish soap and wipe down the entire piece.
If your piece has an unusual amount of grease or dirt, use a product like this Greased Lighting which I used to clean my cabinets before refinishing them.
While the damp wood surface is air drying, prepare your work area by putting down some old sheets or a drop cloth.
The next step is to lightly sand your wood furniture piece. Sanding is important but it’s not hard and you can sand the entire piece in less than 5 minutes. To do this here’s a great low-cost electric sander: My Favorite Electric Sander for Wooden Furniture
(If you don’t want to buy a sander, no worries! You can use a piece of folded sand paper or steel wool.)

If I had to pick one power tool I would never be without I’d pick my power sander. It’s great for sanding furniture quickly and getting into tight corners.
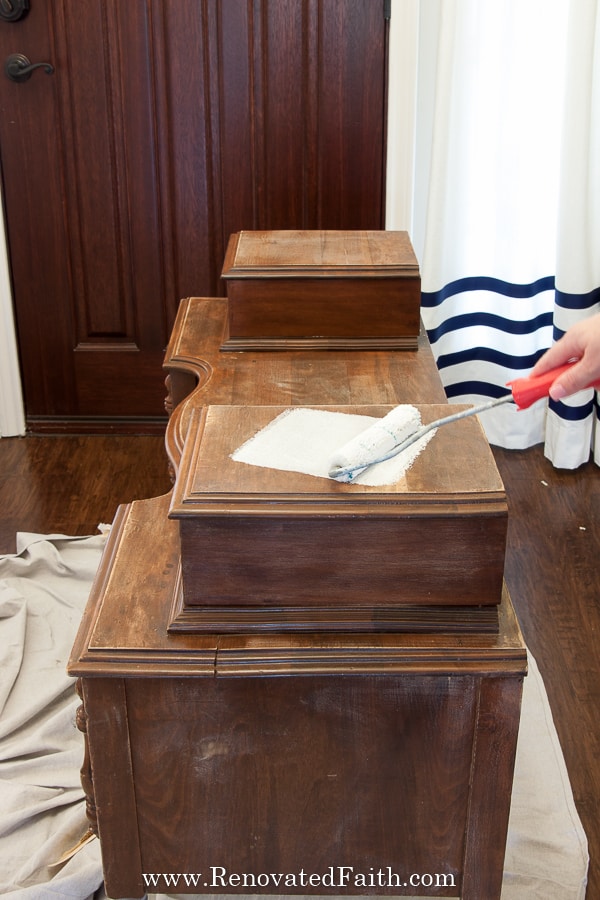
When sanding furniture, we are not removing the current finish. We are simply scuff sanding enough to take the sheen off the old surface so that the primer grips the paint and does not peel.
Add a course sandpaper pad (lower numbers are courser) to your sander and move in little circles along the grain of the wood just enough to remove any gloss. If you see any swirl marks, don’t push down as hard. Don’t worry, that will get filled with paint.
IMPORTANT: If the paint on your furniture piece was peeling, use a putty knife to scrape off any loose paint or paint that is actively peeling. Just sand the remaining finish as I explain above.
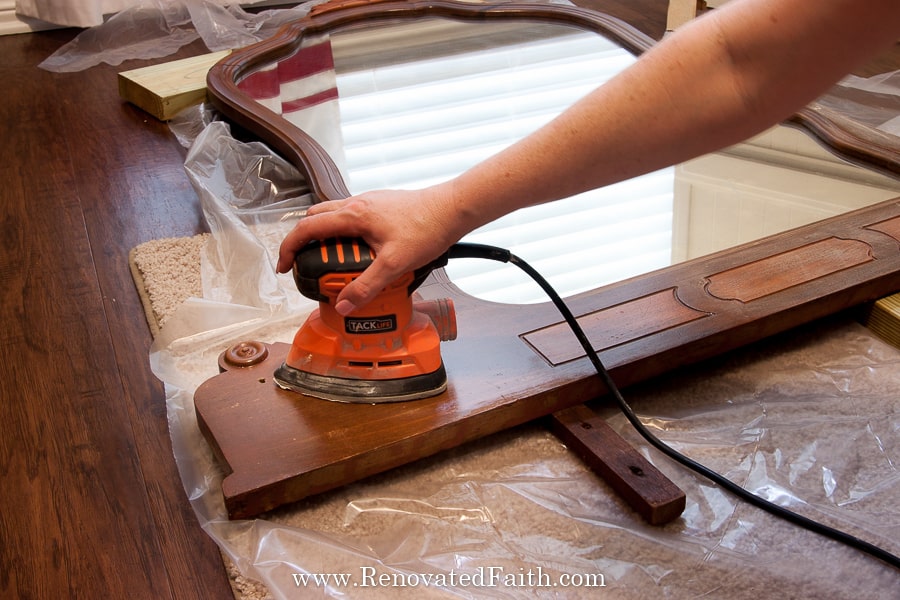
Just run the sander over the flat areas of your furniture piece. Super detailed areas can be sanded with a piece of sandpaper. Be sure to wipe off any sanding dust with a damp rag after you are done.
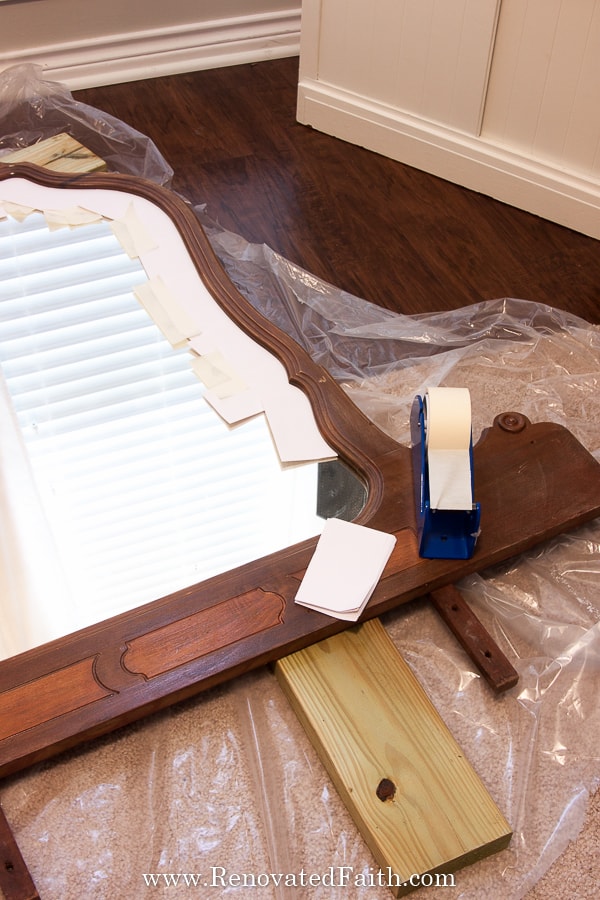
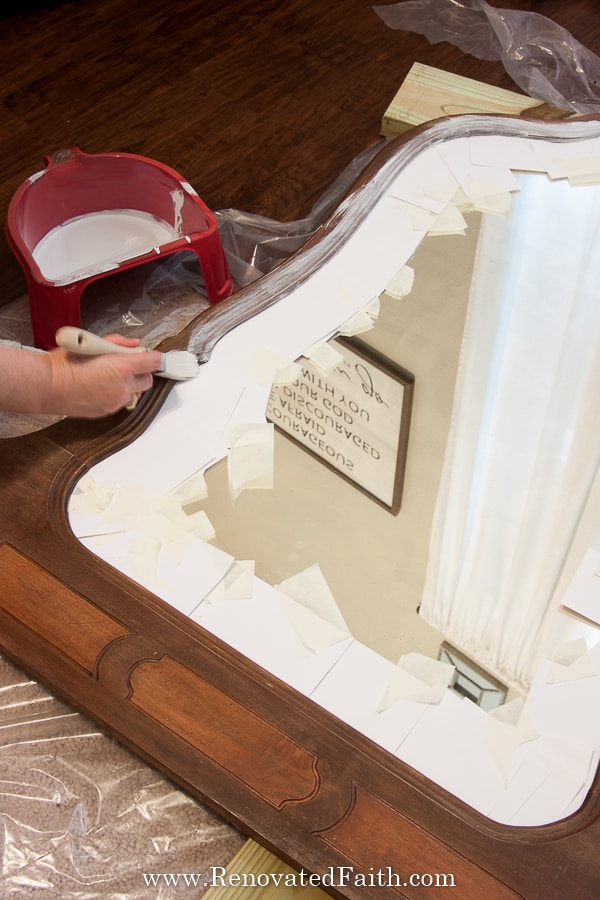
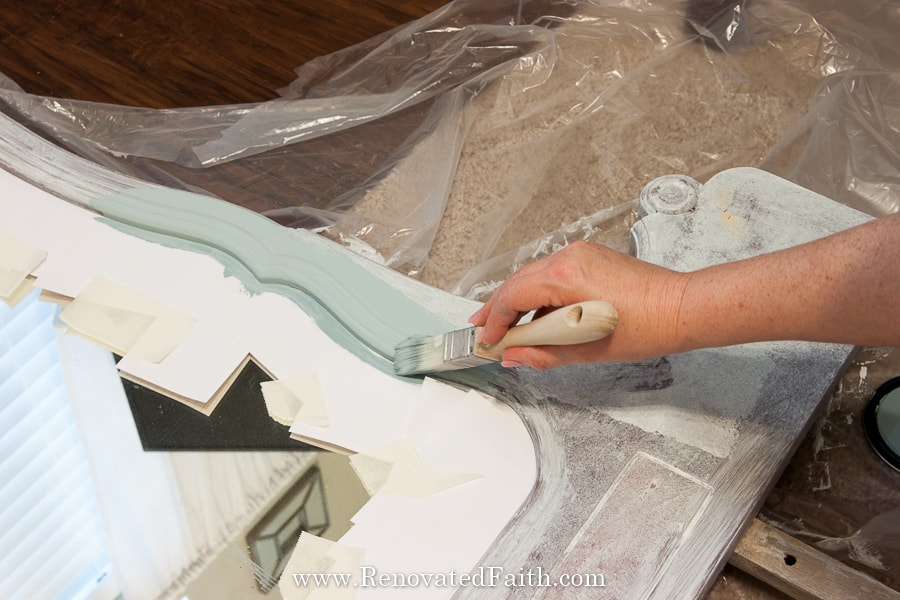
Before priming my vanity, I put index cards under the edge fastened with masking tape to avoid getting primer and paint on the mirror. This was much less time-consuming than painter’s tape.
Step 3: Prime Your Furniture Piece
“Do you have to prime furniture before you paint it?”
Priming ensures that your paint sticks to your furniture piece. Primer and paint have two different functions. Paint is good at being durable and smooth but it’s not great at adhering to things on its own.
Primer is kind of chalky (like chalk paint) so it adheres well to surfaces but is not a good durable finish on its own (also like chalk paint). Related: Why I Don’t Use Chalk Paint on Furniture
I like to say that primer sticks to things and paint sticks to primer.
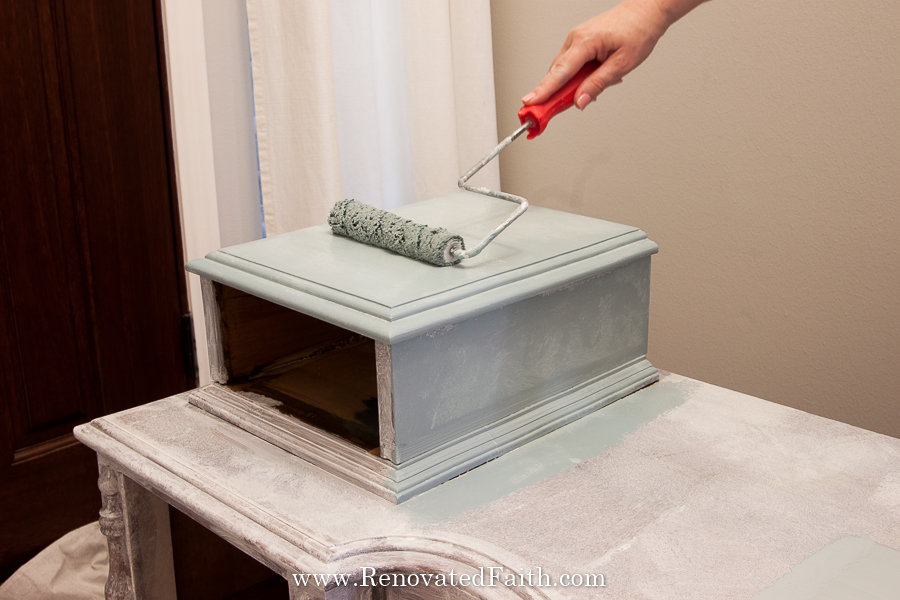
Roll on a pretty thick coat of Zinnser Bullseye 123 onto the flat surfaces in the direction of the grain. This is a water-based primer which means it is low odor and has easy clean up.
Once you have rolled your primer on the larger flat surfaces, use a brush to paint the corners and detail areas more easily.
TIME-SAVING TIP: If your final paint color is dark, have your primer tinted a color slightly lighter than your paint. This will give you better coverage and save you from having to paint on an extra coat of your latex paint. Just ask the person at the paint counter for help. Related: More Tips for Painting Furniture in Dark Colors
Step 4: Furniture repair and refinishing
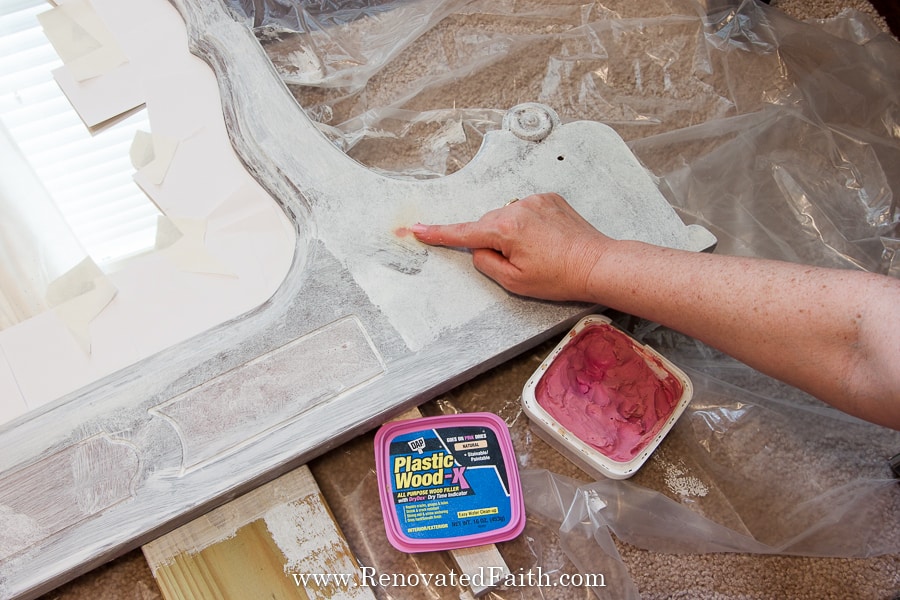
Now is a great time to assess your furniture for any necessary repairs which are usually needed, especially if you are refinishing a really old piece of furniture
TIME-SAVING TIP: You might be wondering why we primed first before making repairs. That’s because the white color of the primer brings to light any irregularities with the surface. It literally highlights any holes that need to be filled or cracks that can be caulked later
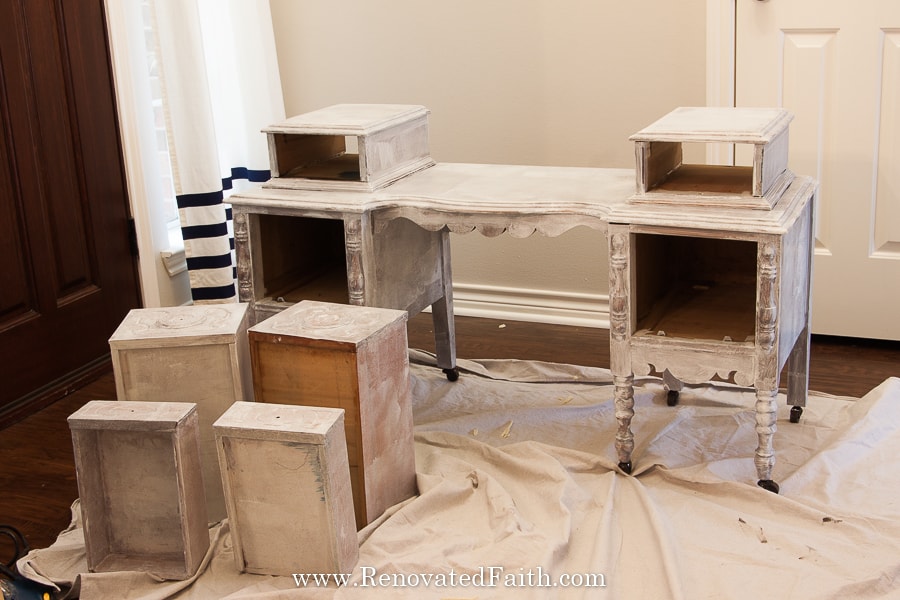
It’s truly amazing what a little wood filler and a putty knife or plastic scraper can do to fill holes so that even the ugliest piece can look absolutely pristine!
You can see step-by-step instructions and a video on how to fill any holes or deep gouges here: How to Fix Furniture Damage Easily.
For any chipped drawers or structural issues, you can find out how to use epoxy putty at the same link above. If you have a really open wood grain that you want to smooth out, go here: How to Fill An Open Grain on Furniture and Cabinets
Wanting to change out your hardware? Here’s the easy way to get fill the old hardware holes and drill new holes: A Beginner’s Guide to Installing Hardware Handles and Knobs
Step 5: Restoring Wood Furniture Without Stripping
Whether you are painting or staining furniture, either of the tried-and-true furniture refinishing techniques below will help you get the exact look you want on your paint project.
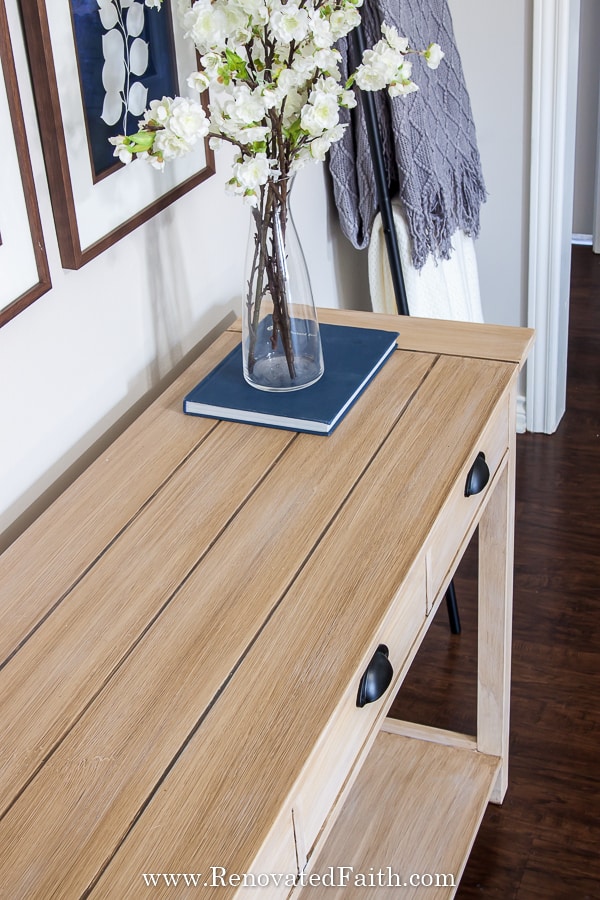
How to Refinish Wood Furniture With Stain
If you want to stain your furniture, piece you can stain it using a faux stain with latex paint. I never use traditional oil-based stains anymore because they are messy, smell, and are unpredictable.
And re-staining usually means stripping the existing finish. But with this technique, you can apply the new stain OVER the old wood stain. Here are several shades to choose from:
My Faux Stain Techniques With Latex Paint
9 Traditional Faux Stains Shades
Restoration Hardware Faux Finish
How to Stain Over Paint With Gel Stain
To stain your piece, go to any finish you want in the links above.
How To Refinish Wood Furniture With Paint
Now, back to painting… To paint your furniture piece, we first want to sand the primer very lightly just to help the paint stick. Wipe off any dust with a tack cloth or a clean rag.
The Best Paint for Furniture
Now you’ll apply your first coat of paint in the same way you applied the primer. Roll on the paint in the direction of the grain on all the flat surfaces. Then get detailed areas or corners with the brush.
You might not get full coverage with this coat and that’s ok! A couple of light coats of paint will ensure a super smooth finish. Paint detailed areas with your brush just like you did with the primer.
It’s a good idea to walk around your furniture piece and check for drips a few minutes after you paint it.
Check the can to make sure you leave enough time for you the first coat to dry.
Once the first coat dries completely, I like to go over the flat surfaces with my sander very very lightly. This is not required but I’m a stickler when it comes to getting a smooth finish on furniture.
Before your final coat, wipe off the surface with a soft cloth in case any dust collected. Add your final coat, rolling very lightly, and brush the details the same as before.
Let your furniture piece dry overnight before the last step, re-installing your hardware.
Should I Apply A Clear Coat After Refinishing Furniture?
If you used a durable paint like Benjamin Moore Advance, you should not need a top coat but if you want some extra protection for high-use furniture pieces like kitchen tables or coffee tables, check out this post: The Best Clear Coat for Furniture (Beginner Application Tips!)
RENOVATE YOUR FAITH: Are You Overplanning Your Life Away? Here’s How to Reclaim It!
At the beginning of December, I went a little too overboard with planning and setting goals for this year. I ordered an expensive planner and even watched the goal-setting videos that came with it. Before I knew it, I had every little aspect of my life planned and listed in bullet-point form.
When I took a closer look at what appeals to me so much about planning and listmaking, I realized that an overabundance of lists gives me a false illusion of control – that if I complete all my tasks, my life will be as it should…or at least “good enough”.
But when you make a list of “rules” for you to fulfill, your list becomes your taskmaster and you are its slave.
For more spiritual encouragement, click here for the rest of my project posts that also include Renovate Your Faith devotionals.


FAQ’s: Restoring Wood Furniture Without Stripping
Should you refinish old furniture?
Some people strongly feel that you should only restore furniture to its original stained state as opposed to painting it a solid color. However, furniture is a part of your home and the items in your home should facilitate the life you want to live. Your home should serve you instead of you trying to serve it.
When we are allowing outside influences to tell us what our home décor should or should not look like, we miss out on creating a home that encourages and embraces the person God has created us to be. So with that said, refinish your furniture exactly how you want it.
Even if it’s a family heirloom, and maybe your grandmother wouldn’t love the color slate gray for her china cabinet, I think she would love that you refurbished in a way that made you happy by embracing your unique God-given tastes and style
Is it better to use an orbital sander or mouse sander for furniture?
Either an orbital or detail sander is good for furniture but I feel like a detail sander (or mouse sander) gives you a lot more control and you can get a lot more detailed whereas an orbital sander can’t get trim details and corners.
How to refinish furniture without sanding
There are several ways to go about painting furniture without sanding but not all of them will ensure that your finish will not peel off a few hours after you paint the furniture surface.
I’m not a huge fan of chalk paint (Why I Don’t Use Chalk Paint on Furniture) but if you want to go that route, use this chalk paint and a good topcoat. You can check out my list of the best paints for furniture where I blind-tested chalk paints, mineral paints, and latex paints: The Best Paint for Furniture
I fully recommend a good bonding primer like the one I mentioned above. Soon I’ll be experimenting with a liquid sander/deglosser so be sure to subscribe to the weekly email here so you don’t miss it!
How to Refinish a Wood Table with a Faux Stain
You can easily stain furniture without using a chemical stripper. Check out this post to see how I used a faux Restoration Hardware finish on my dining table: Easy Restoration Hardware Finish
How To Strip and Refinish Wood Furniture
If you are in a situation where you need to strip a furniture piece before refinishing, I recommend a product called Citristrip.
It’s a paint and varnish stripping gel and although it is more natural than using mineral spirits, be sure to still use safety precautions like rubber gloves, and goggles and also do the stripping process in a well-ventilated area.
Brush or wipe on a coat of stain and use an old cloth to wipe off any excess. Be sure to check out this post on water-based stains
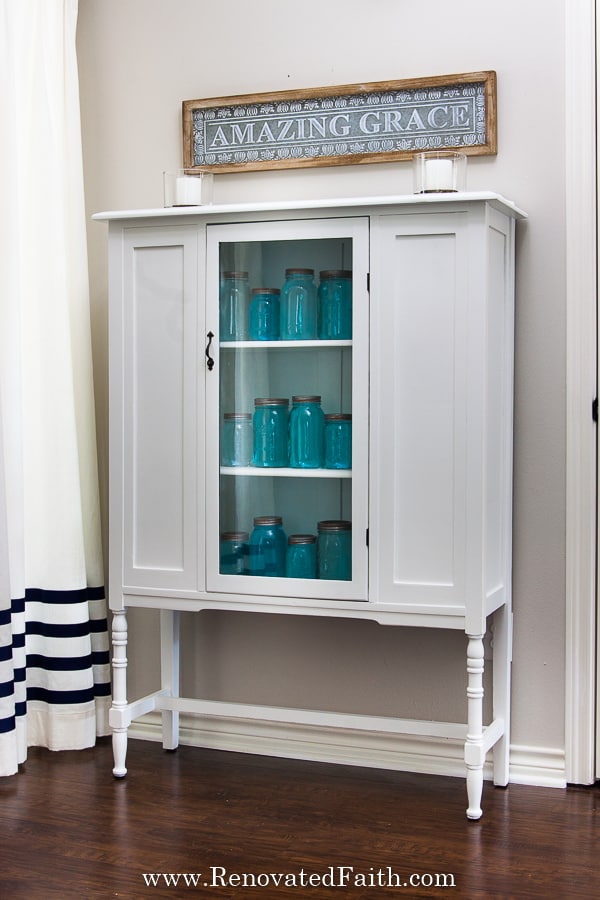
Related Posts On Refurbishing Furniture
A Beginner’s Guide to the Easiest DIY Projects That Make The Biggest Impact
4 Easy Steps to a Raw Wood Finish on Furniture with Paint
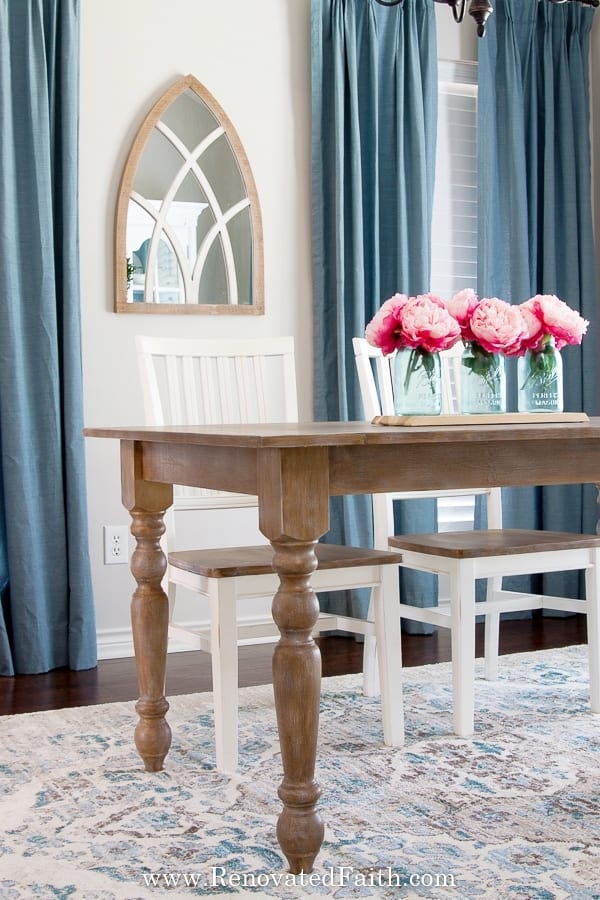
The Best Way to Build a Wood Dining Room Table (The Easy Way!)
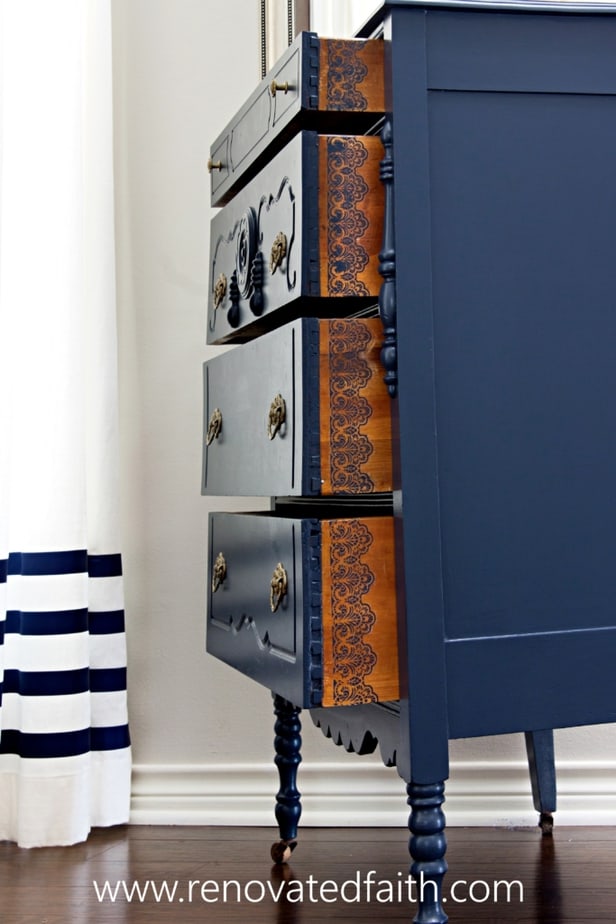
Tips to Refinish a Dresser in Black or Navy
How to Refinish A Door to Look Like Wood With Latex Paint
The Best Type of Lumber for A Wood Table
Easy Ways to Refinish Furniture with Gel Stain
Easy Ways to Update Furniture with Paint (Before and After Furniture Reveals)
How to Paint IKEA Furniture Easily
Final Thoughts on Refinishing Furniture for Beginners
The simple steps will ensure that you can transform any old furniture piece to it’s former glory. Whether you are refinishing a valuable antique or a thrift store find, it’s amazing what a fresh coat of paint can accomplish! For more furniture restoration projects and DIY ideas, be sure to subscribe to my weekly email list here!
I love to hear your thoughts and questions! Scroll down to leave a comment and I WILL reply! ❤️
Blessings,

Be sure to follow the fun here!
Email Subscription | Instagram | Pinterest | Facebook | Twitter

Furniture Refinishing DIY Tutorial, Youtube Video
A Beginner’s Guide to Furniture Refinishing (DIY Tutorial and Video)

Karin Peters is a DIY expert and the creator of Renovated Faith. She is a furniture painter, a home design consultant, and a tenacious problem solver determined to help you transform your house into a home. With 17 years of experience with DIY home improvement, she researches and analyses professional processes to adapt them to be easy and cost-effective for DIYers. She then tests every project and product before it appears on the site in a detailed, step-by-step format. After attending Texas A&M University, she received her Master of Divinity with Biblical Languages at Southwestern Baptist Theology Seminary. Her passions unite in Renovated Faith, which shows readers how to create a home that serves them so they can pursue their God-given purposes. About Renovated Faith | Editorial Policy | Facebook | Twitter | LinkedIn
Thank so much for all your great information. I’ll be refinishing my bureau and vanity soon and you’ve given me so much faith in accomplishing it the right way
Blessings ❤️🙏
Thank you so much Renee. Your comment made my day. Let me know if you have any questions.
So happy to hear that Renee! Everything is figure-outable and things always seem so much harder than they really are.
Hi Karen! Thank you for all your great tips! I am getting ready to paint my front door, faux finish my fireplace mantle with the wood grain painting technique, and refinish a side table all in the next few weeks. I will absolutely be using all of your helpful ideas. Later this spring, I am planning to repaint my kitchen cabinets. I am thrilled with your page on how to do that! It is giving me confidence. I did it myself about 6 years ago and said I would NEVER do that again. However, after reading your page on How To Paint Kitchen Cabinets, I have decided to give it a go again. Mainly, because I did it all wrong the first time. Anyway, thank you so much for everything! I’m excited to get started.
Hey Lisa, Thank you so much for your sweet comment! I said I would never paint cabinets again after our first house too! lol Just know that it will be a long process but it will be worth it in the end. Find some podcasts you want to catch up on or audible books. It will definitely help you through the process. Thank you so much for your kind words Lisa and please let me know if I can ever be of any help in any way!
I like your devotions. You always know the right topic and you make them very relatable.
Thank you so very much for that Kim! Sometimes I wonder if I’m the only one that can relate to them so thank you for taking the time to write this comment!