DIY Closet Desk Ideas & Tutorial (For ANY Closet!)
A Beginner’s Guide to Adding a DIY Floating Desk to Any Closet
Quick Links to Information in this Post
- 1 A Beginner’s Guide to Adding a DIY Floating Desk to Any Closet
- 2 The Purpose of My Own Cloffice Space
- 3 Personalize Your DIY Closet Desk to YOUR Needs
- 4 Stunning DIY Floating Desk Ideas
- 5 Supplies Needed: Easy Plywood Floating Desk
- 6 How Do I Attach a Floating Desk to the Wall?
- 7 How to Build An Easy DIY Closet Desk (with Video Tutorial)
- 8 RENOVATE YOUR FAITH: Our Greatest Power To Affect Change
- 9
- 10 FAQ’s: DIY Floating Closet Desk
- 11 More Posts Related Wood Floating Desks in Closets
- 12 Final Thoughts on DIY Closet Desks
- 13 DIY Closet Desk, YouTube Video
- 14 DIY Floating Desk Instructions and Ideas
Need extra workspace at home? With these DIY closet desk ideas and step-by-step tutorial, you’ll learn how to add a DIY floating desk to any size closet!
As more and more people are working from home, adding a cloffice (closet + office) has been an incredibly effective way to create another work area if you have limited space. This space gives you the room you need to work but can be personalized to your own style so your time there is not only productive but enjoyable!
Just because your home doesn’t have an extra bedroom or dedicated office space doesn’t mean you can’t have your own secluded office space to get things done. Instead of shuffling papers around on your bed or cluttering up an already-cramped desk in your home, transform a seldomly-used closet into a workspace!
And even if you have a home office, a cloffice can give you ample space as a homework(or home school) area for your kids, a separate office space for your spouse, or a craft/hobby area for you!
By adding a floating desk to a closet, you not only get a secluded workspace to yourself but you also save versus buying a traditional desk. A solid wood desk that lasts you for years will be way more expensive than this floating desk for less than $40.
And if your cloffice gets messy, it can easily be hidden with a curtain if guests are coming. There are so many fun possibilities when adding a desk to a closet to give you the extra workspace you need!
LET ME SHOW YOU:
- How to determine where to put your cloffice and how to match your won style
- The easy way to build a diy floating desk in any closet
- Design inspiration for your diy closet desk so your time isn’t only productive but enjoyable
- Encouraging words on why prayer is so much more powerful than it seems in this week’s Renovate Your Faith devotional at the bottom of this post
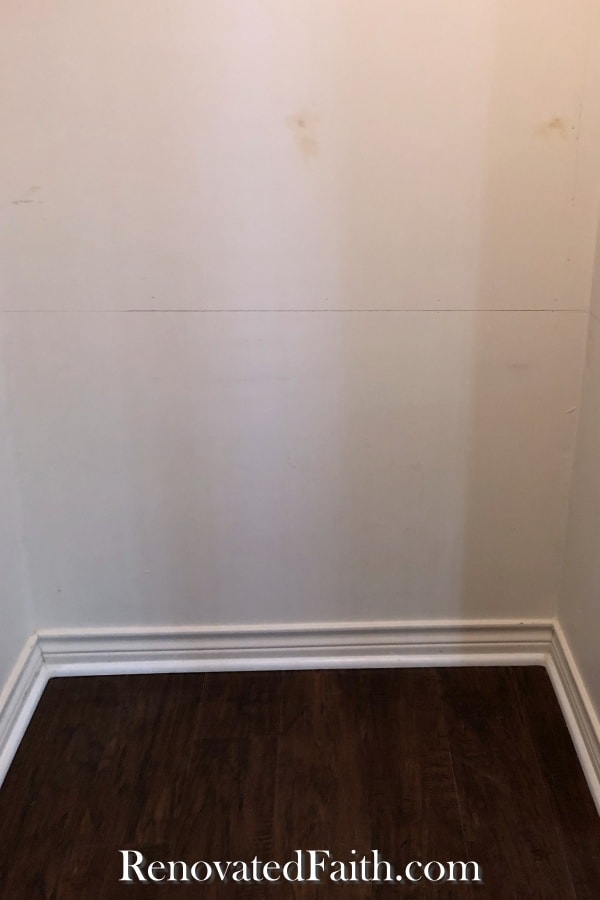
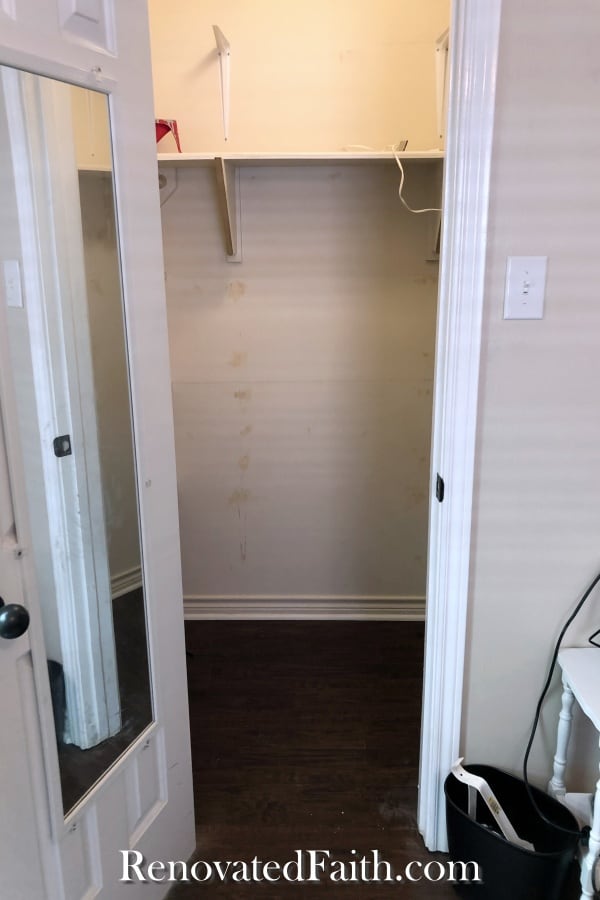
In this post, I’ll be showing you ideas for how to design your own DIY closet desk and will show you how I transformed a small walk-in closet into a cloffice.
The Purpose of My Own Cloffice Space
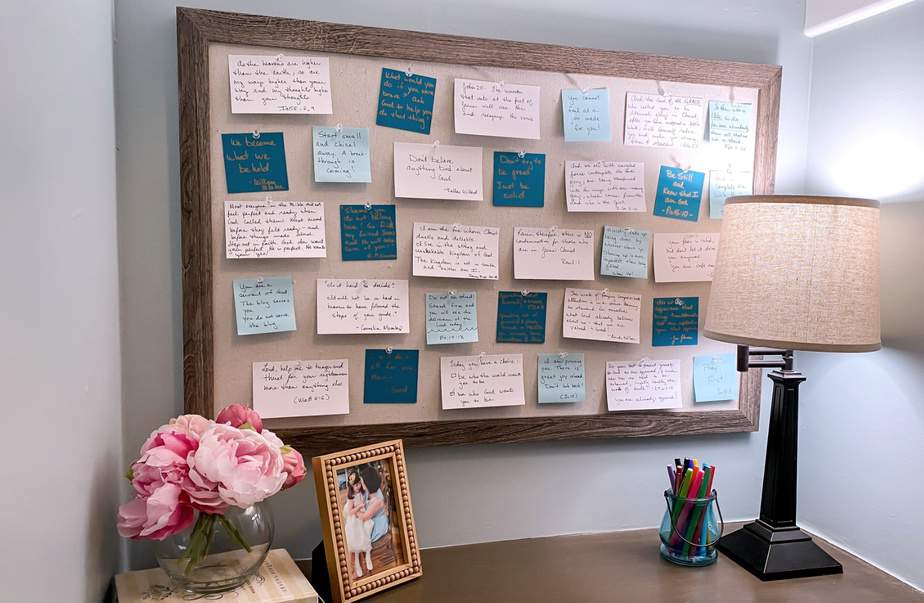
I use my “desk-made-from-a-door” for blogging in my home office. Because I don’t like to move all of my blogging paperwork daily, I was doing my daily quiet time at our kitchen table. I got tired of having to move my Bible study supplies every day for dinner only to get them out again the next day, so the closet in my office is a space I use for prayer and Bible study.
So many of my DIY projects remind me of God’s capacity to transform our brokenness and renew our hearts. If you are a work-in-progress, just like I am, check out the Renovate Your Faith Devotional at the bottom of each DIY and home décor post. Click here to get a weekly reminder of new posts by adding your email address.
Now…on to planning your own cloffice space!
Personalize Your DIY Closet Desk to YOUR Needs
First of all, what is the function of your space? Do you want it to be a work area with a computer desk, or even a dual-purpose space? Will it be a craft area to do something you enjoy? Do you want a home office space in your master bedroom closet? Or could you use an unused closet in your guest room? Does it need storage?
The only limitation is your own imagination. Just make sure to use this opportunity to make a space that is not only great for getting things done but enjoyable for YOU to spend time in. Trust me when I say you will get more accomplished if you are in a space you love!

Stunning DIY Floating Desk Ideas
Now that you’ve found the perfect place for your closet office and you know how you want to use the space, here are some DIY closet desk ideas for inspiration. Whether you are more traditional or like contemporary designs, these ideas can be implemented in any style of space.
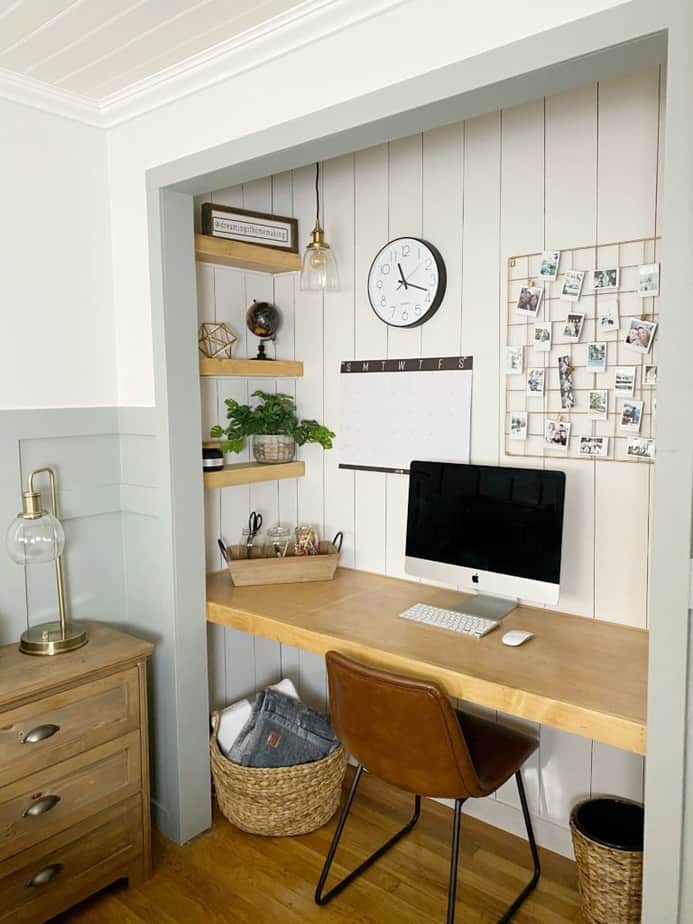
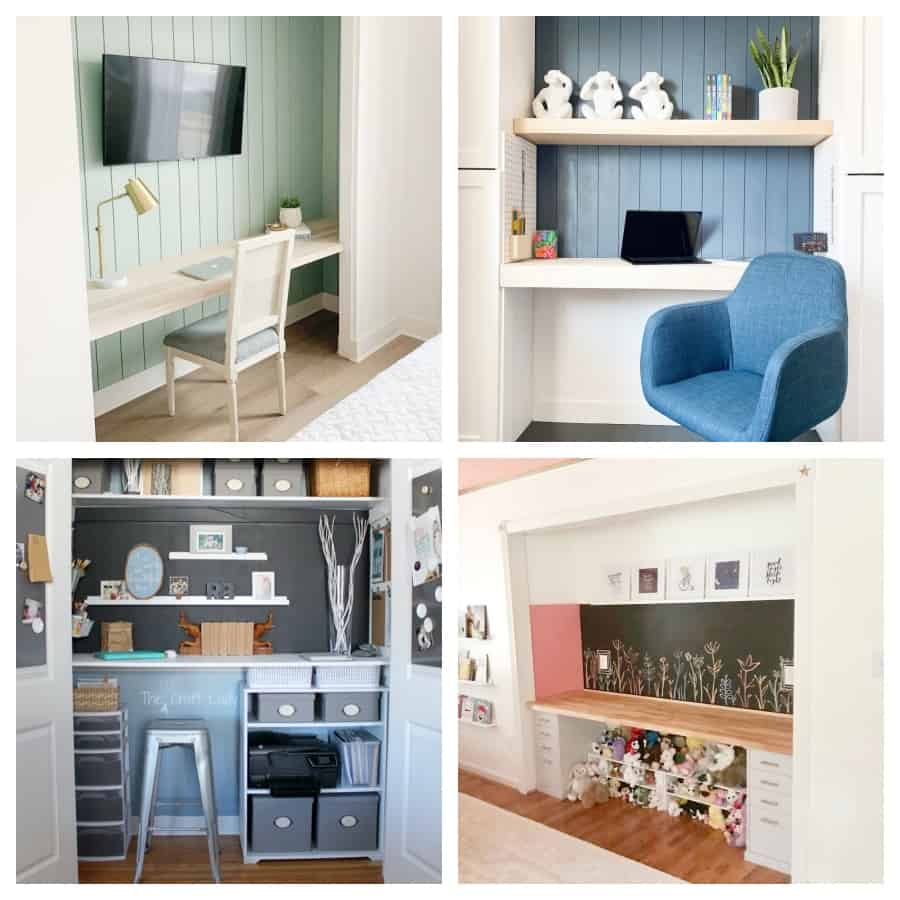
Wall Mounted DIY Floating Desk by Dreaming of Homemaking
I love this DIY built-in desk and shelves made by Sarah at Dream of homemaking. She did an amazing job of integrating the décor of her DIY closet desk with the rest of the room – so much so that you don’t need a curtain! I especially love this long desk that gives you lots of work space as well as the wall shelves on either side for storage space. You can see exactly how she create this BLANK by clicking here: Desk Reveal by Dreaming of Homemaking
Closet with Desk Built-in by @wonderwoodmom
Marga at Wonderwoodmom put her woodworking skills to good use when she made this DIY closet desk with vertical shiplap for her son to do distance learning. I love how she incorporated the blue accent color that coordinates with the chair. You can see more of this desk on her Instagram account here: Wonderwoodmom’s DIY Homework Cloffice

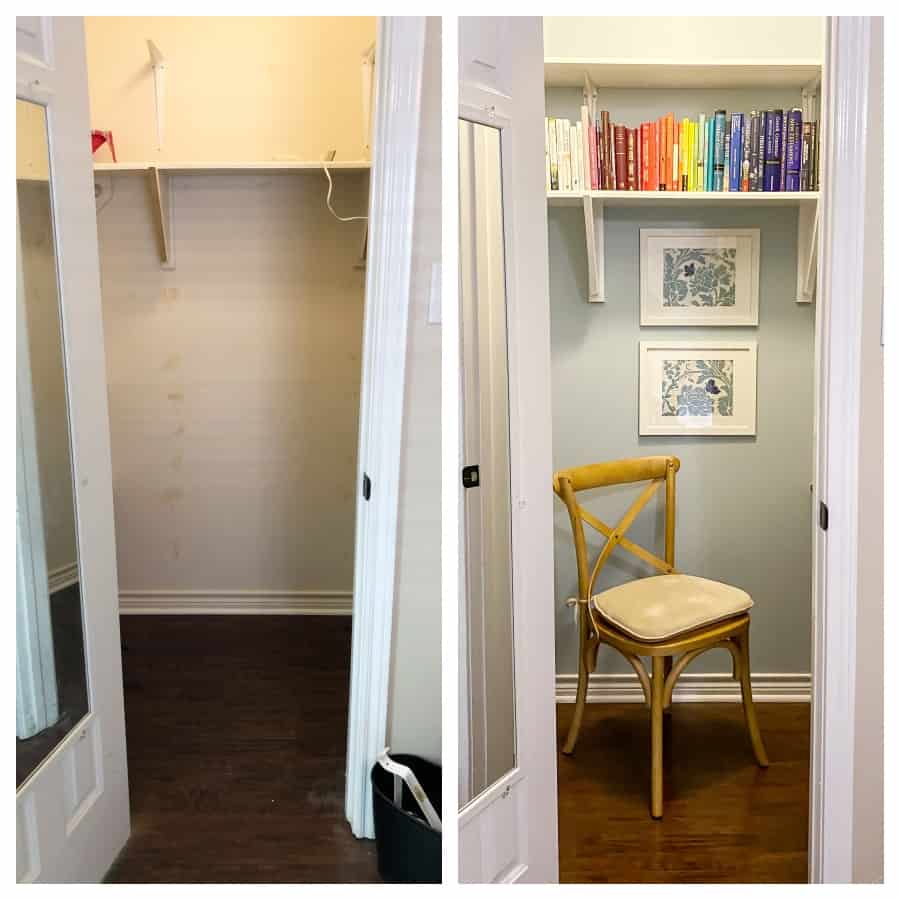
Small Office Closet by @home.sweet.wimmer
Danielle with Home.sweet.wimmer on Instagram shows that you can add a DIY closet desk to any size closet. With the overstuffed chair and adding storage space with wicker baskets, she makes a cloffice that is as comfortable and cute as it is functional. You can see the before picture here: Small Cloffice Space @home.sweet.wimmer
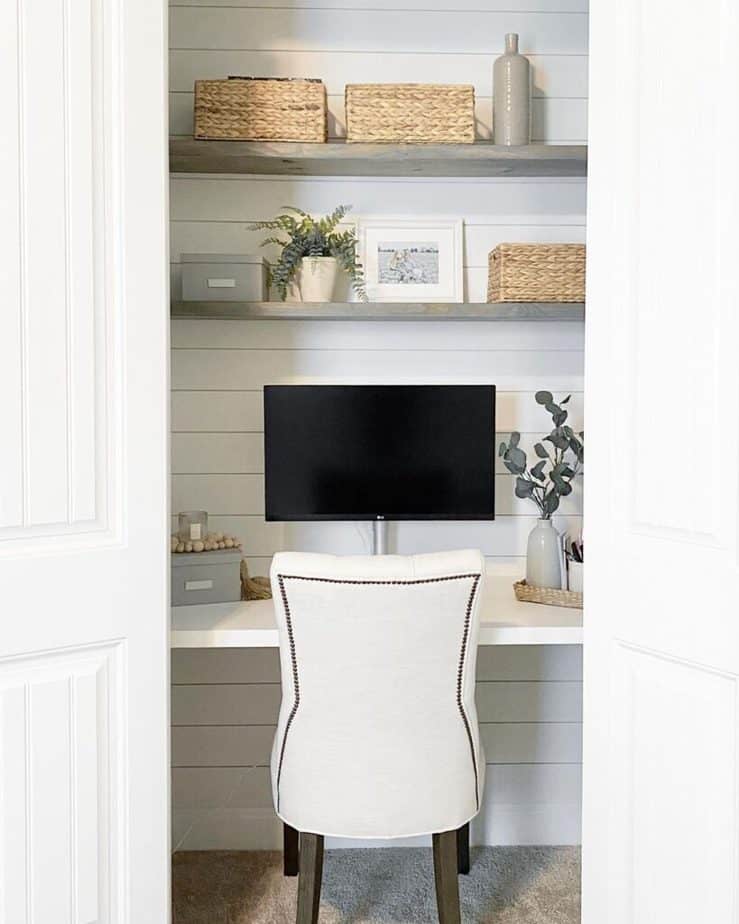
DIY Wall Mounted Desk in Closet by @danicaliforniainteriors
I absolutely love the simple design of this DIY floating desk in a guest bedroom closet by Dani California Interiors. This concept is genius in terms of making the most of a space. Her closet triples as a work area, TV mount, and even a green accent wall. You can see the before picture here: Dual Purpose Cloffice Space by @danicaliforniainteriors

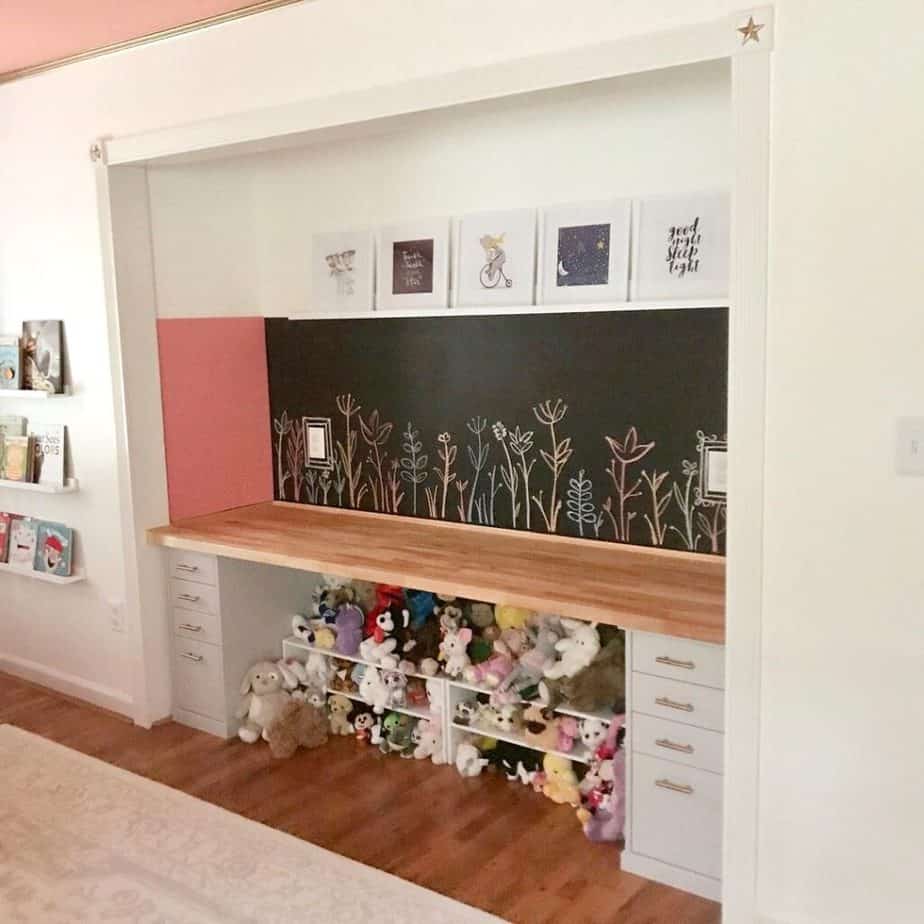
Closet with DIY Floating Desk with Storage for a Kid’s Room
Speaking of genius design concepts, I adore how Lauren at @limwalle on Instagram maximized the functionality of this closet for her little girl’s room. It features a long desk with enough space for making artwork, storage from the IKEA Klimpen “filing cabinets” AND stuffed animal storage! Her husband moved the wall switches so they are now their daughter’s height and the last touch was adding chalkboard paint! You can see more details at her IG account here: DIY Closet Desk with Toy Storage by @limwalle
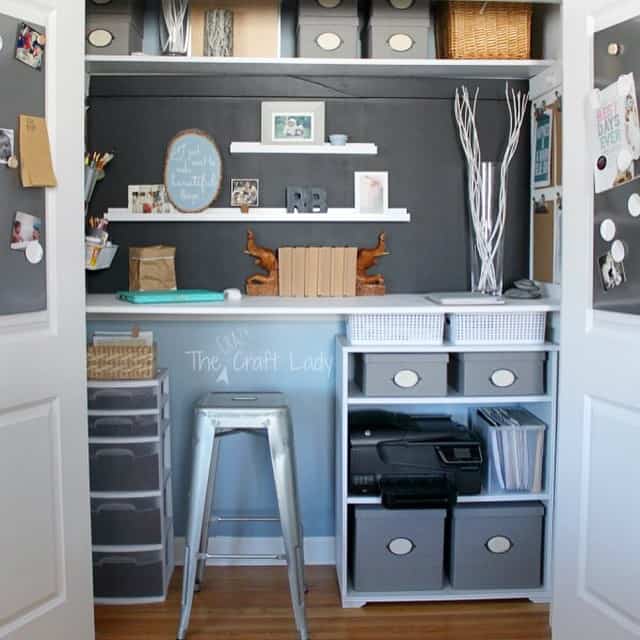
DIY Craft Closet Desk
This closet organizer with a desk from Remodalaholic provides the same functionality as a craft room in a fraction of the space! Not only do you have more than enough storage space for craft supplies and extra room to work, but this is also such a fun space to spend time in. You can see more of this transformation here: Remodalaholic’s Craft Cloffice
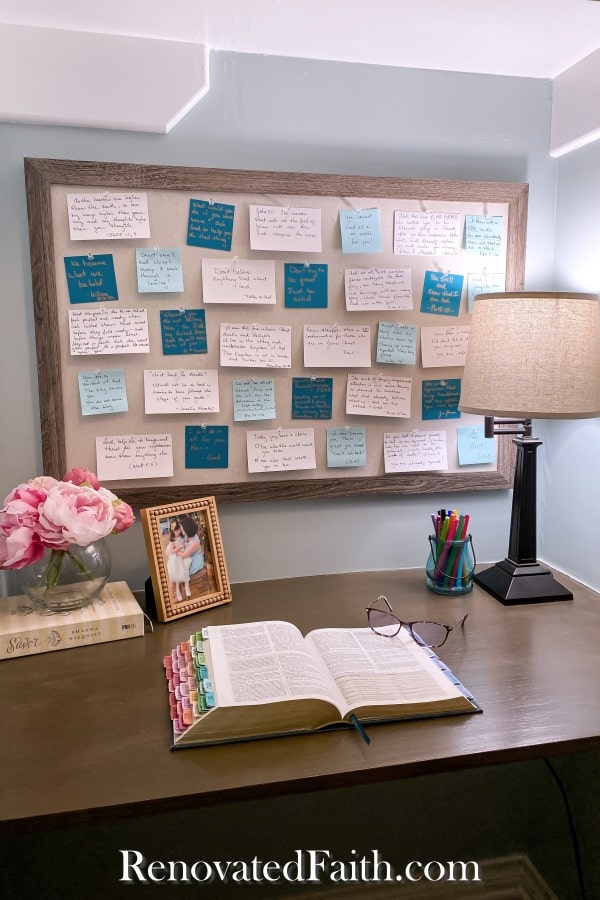
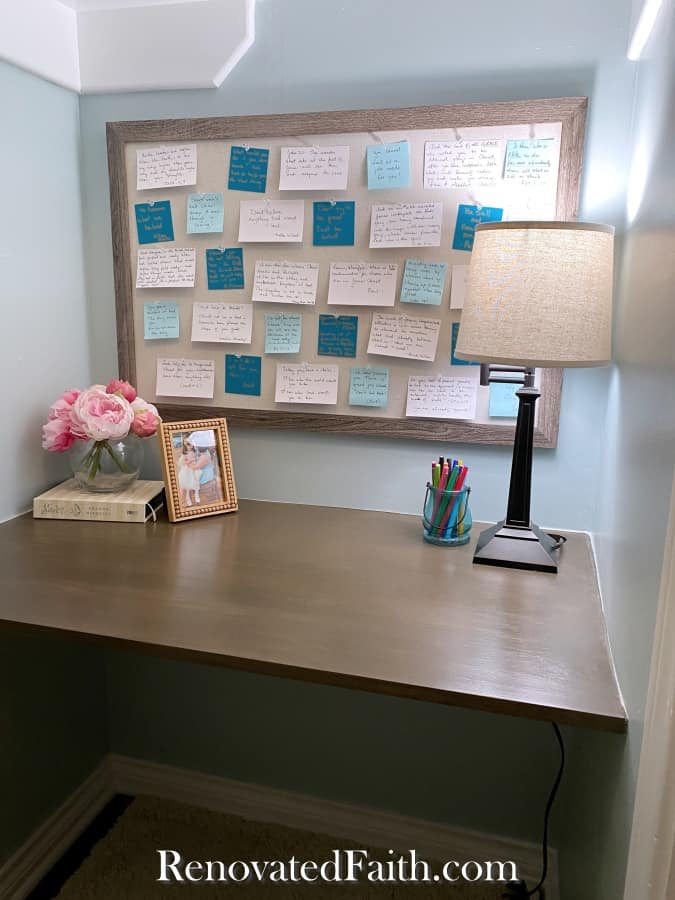
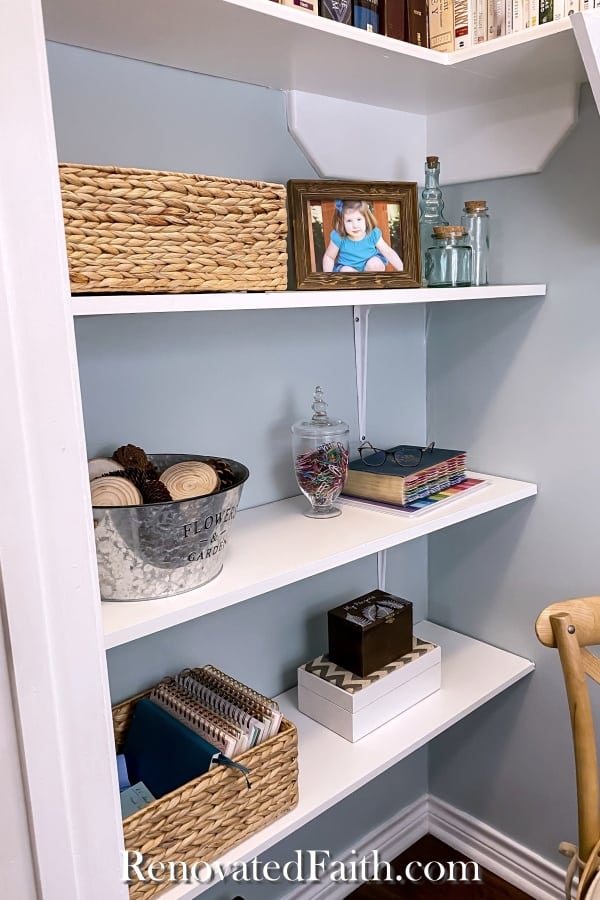
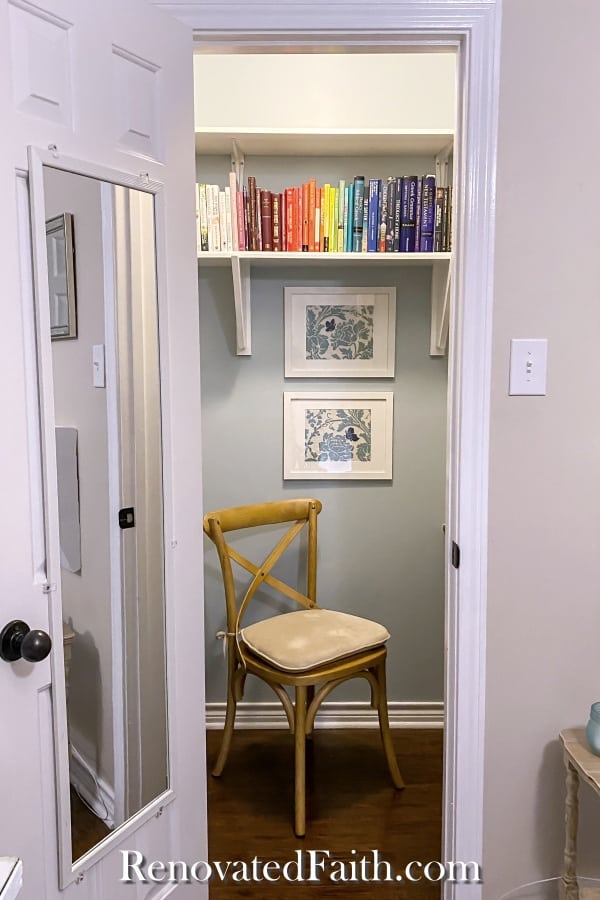
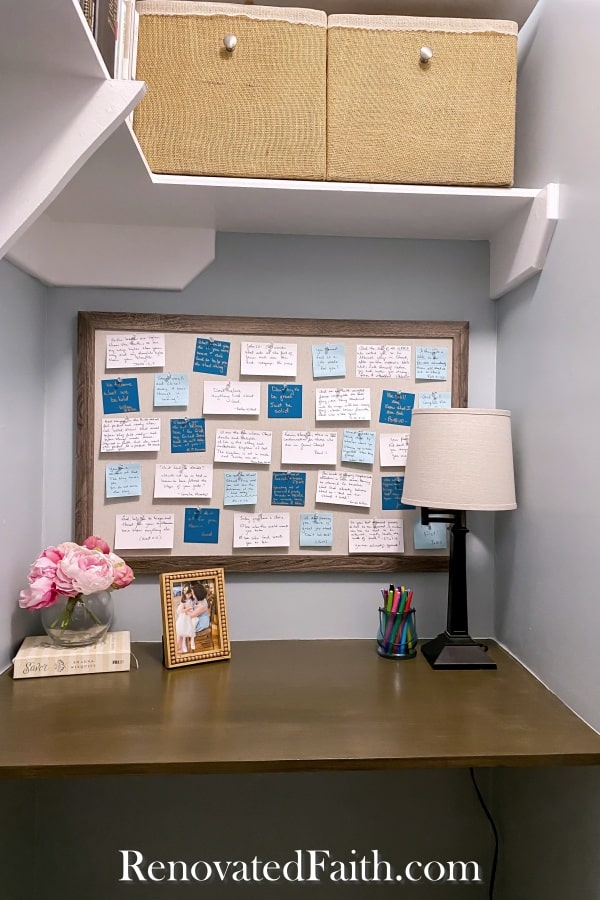
Cloffice Space as a DIY Prayer Closet (Walk-in Cloffice)
A DIY closet desk in a walk-in closet is a great way to have a mini workspace without the cost and hassle of remodeling. As I mentioned before, I use my walk-in closet office as a workspace for my quiet times. Once a day, I’ll go into my fun little closet and spend some time in prayer and Bible study. It’s nice that it’s so isolated from the craziness of the rest of the house.
Some people might refer to it as a DIY prayer room or war room after the popularity of The War Room movie. My daughter refers to it as “mom’s quiet room”
Supplies Needed: Easy Plywood Floating Desk
Now that you’ve taken inventory of your available closet space and have a plan, it’s time to get your materials.
Sheet of Plywood – I got a sheet of plywood with a finished edge for my desk front. If you want the thicker look of a butcher block countertop, another option is to use a nail gun or brad nailer to attach a 1 x 2” endcap.
1 x 2’s – These are for the supports under the desktop. You’ll need enough for the back wall support and two sides.
1 Long Nail – The nail should be 2-3 inches to mark where to put the drywall anchors.
Dry Wall Anchors
Wood Glue
Caulk
Stain – Faux Stain Materials To Make Plywood look Like High-End Hardwood With Paint or Traditional Stain
Clear Coat – My hands-down favorite is this one: Varathane’s Water-based Polyurethane After lots of testing, don’t waste your money on others on the market.
Tools:
You can see my top pics for tools: The Best Beginner Tools for Your Toolkit
Level
Magnetic Studfinder (optional)
Tape Measure
Hammer
Drill
Drill Bit for a 2-3” hole or I used my Jigsaw
Lighting – If you don’t have adequate lighting in your space, consider low-cost LED strip lighting which stays hidden and is also dimmable with a remote : How To Install LED Strip Lights Under Floating Shelves
How Do I Attach a Floating Desk to the Wall?
You might see desks held up by floating desk brackets. These metal brackets are easy to install but don’t give you a lot of horizontal support which is why I like having a 1×2 for support on each wall. The wood supports are just as easy to install and give much more stability. If you need to do this project as low-budget as possible, you could forgo the plywood and join pine boards end to end with a Kreg jig and pocket hole screws to make a planked desktop.
How to Build An Easy DIY Closet Desk (with Video Tutorial)
Here is a step-by-step video tutorial that goes along with this post. If you have trouble seeing the video popup, you can find it here: DIY Closet Desk, YouTube VIdeo
Step 1: Measure and Decide The Height of Your Cloffice Desk
The first step is to measure the length and depth of your closet so you know what size to cut your top piece and support pieces. This is also a good time to decide how much wall space you might need between any floating shelves.
Decide the height of your floating desktop. The standard height is 28-30”, but be sure to take into account your chair height when deciding on the exact measurement.
So many of my DIY projects remind me of God’s capacity to transform our brokenness and renew our hearts. If you are a work-in-progress, just like I am, check out the Renovate Your Faith Devotional at the bottom of each DIY and home décor post. Click here to get a weekly reminder of new posts by adding your email address.
Step 2: Pre Work For Your DIY Floating Desk
Stop! Don’t forget to take a pic. When you are done, post the pic on Instagram and tag me @renovatedfaith! ❤️
Cut your plywood board with a circular saw or jigsaw to fit the size of your closet and set it aside.
Want to know how to make straight cuts with a jigsaw? Click Here: A Beginner’s Guide to Using a Jig Saw
Your longest brace piece should be about 4-6 inches shorter than the length of the back wall. The side brace pieces should be 4-6 inches shorter than the side wall.
I used a miter saw to cut my brace pieces.
Step 3 – Draw a Level Line and Find Studs
Mark your desk height in several dashes along all three walls and then use a straight edge to draw a straight line on all three walls. Use a level to make sure is the line is, well…level.
Step 4 – Mark and Drill Holes in the Wood Braces
The first thing we should do before mounting our braces is to check for wall studs because screws drilled into studs will be able to handle more weight than the screws in drywall anchors.
You can use a magnetic stud finder to find the studs in the wall. Once you zone in on where the stud is, you can try putting a large nail in the wall to verify that it’s there or that you aren’t hitting the edge of the stud. (Remember that any nail holes you put in the wall will be completely covered by the brace pieces so you’ll never see them.)
Mark your studs with a vertical pencil line a few inches high. Then put your 1×2 on the wall where you want it to be attached and mark with a vertical line where the stud lines up on the 1×2. (Make sure to label which wood piece – I labeled mine “L”, “R”, and “B” with my pencil.)
If you don’t have a lot of studs to drill directly into, you can use drywall anchors in addition like I did. I made marks on the walls where I wanted to put drywall anchors and again held up my support braces and marked where the anchors would be on the wall.
Once you have the marks made, drill screw holes along each mark and in the center of the 1×2. Drill a wide enough hole for the screws to fit through easily.
This ensures that the holes in the brace piece line up with the studs you marked and the hole locations of the drywall anchors. (You will drill a hole for every screw whether it is going to go into a stud or a drywall anchor.)
Step 5: Adding DryWall Anchors to Support A DIY Closet Desk
(This step is just for the screws that are not going through studs, which is where you want to add drywall anchors for extra support.)
Once you have drilled all the holes in the 1×2’s, hold them up against the wall. Using an icepick, long nail, or something sharp and skinny, mark the center of where the drywall anchor hole should be.
Use an awl or your drill to make a pilot hole in the drywall that is slightly smaller than the end of the drywall anchor so it’s snug. Push the plastic drywall anchors into the holes. Now you will push the drywall anchors into the wall. The anchors should line up with the holes you already made in the 1 x 2.
Drywall itself will not hold much weight but using drywall anchors makes these screws so much stronger.

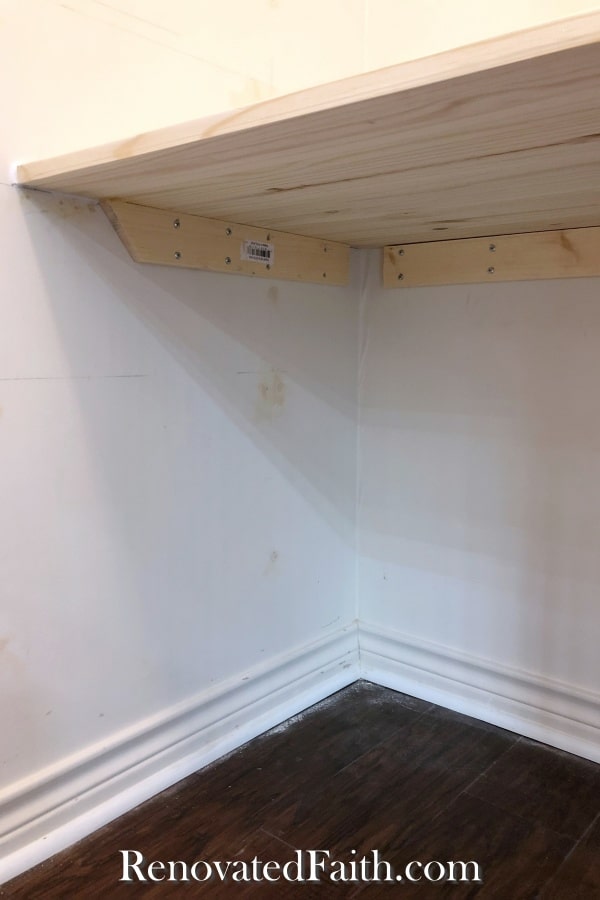
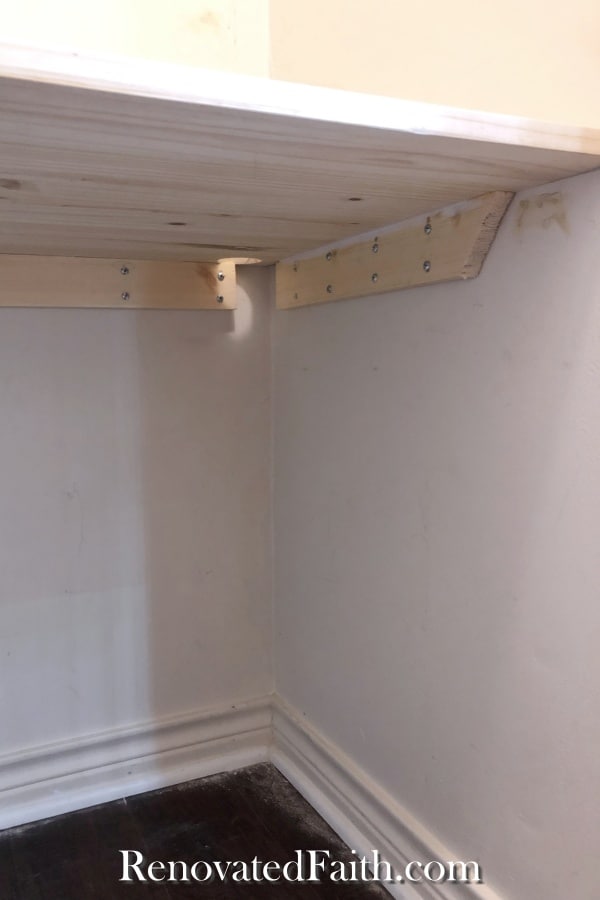
Step 6: Attach the Wooden Braces to the Wall
Attach the braces to all three walls with the screws going into the drywall anchors first as you see in the video.
Now you can make a pilot hole in your 1×2 where the stud is and drill a hole to get the screw started. Last drill your wood screw through the brace and into the wall stud.
My husband Jeremy gave me a hard time about how many drywall anchors I put into the wall because he said it was overkill. But personally, I would rather my desk be able to handle much more weight than it needs to than not enough. Also, I know the safest place into the house to hide if we are ever hit by a tornado!
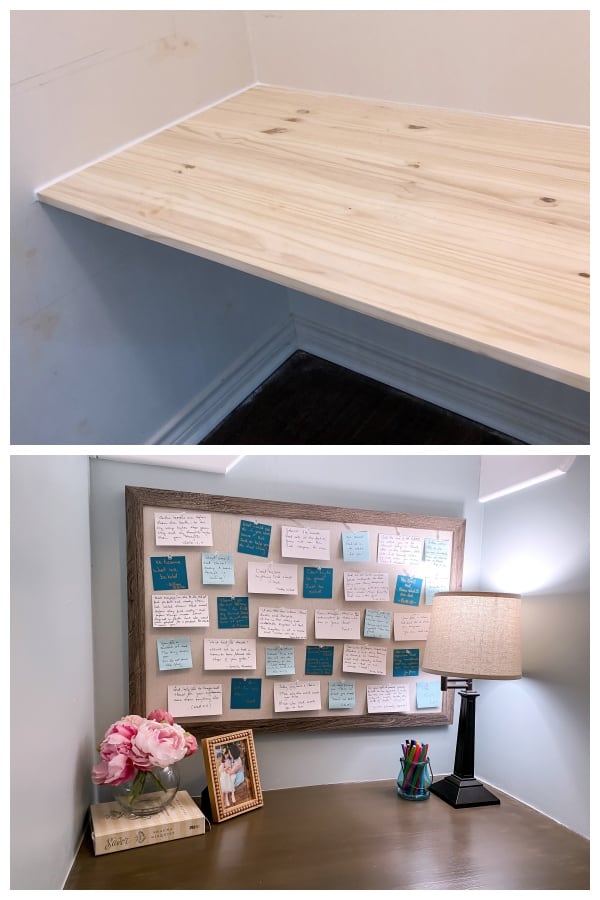
Step 6 -Prep The Top Of Your DIY Closet Desk
Use the smoothest side of your plywood for the desk top.
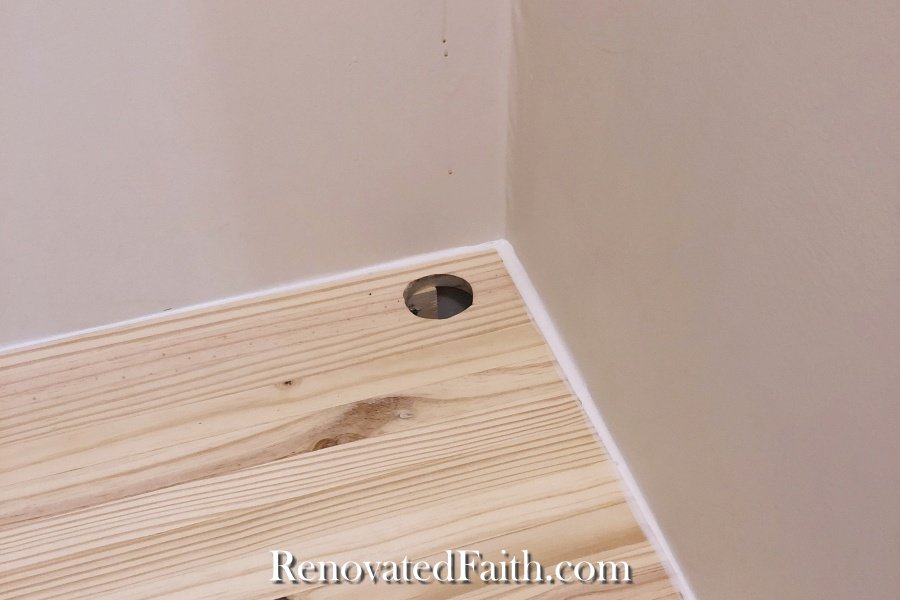
Now is a good time to add a hole for any cords in the corner of you wood desk top. I used my kreg jig to make a hole but you could also use a drill bit for making holes. The hole in my desk top is about 2 inches.
Plywood boards are notorious for having some cosmetic damage so take a look at the surface looking for any dents or scratches. You will want to fill those with wood filler so the top of your DIY floating desk is perfectly smooth.
Use a putty knife to add some wood filler to the surface. Spread the wood filler on so it is a little thicker than what is actually level with the rest of the surface. Let it dry and sand it smooth. For in-depth details on how to repair wood and damaged furniture, click here: How to Repair Furniture Before Refinishing
While you are sanding over the dried wood filler, you’ll also want to sand over the desk to get it as smooth as possible. For my best sanding tips, click here: How to Sand Furniture in Five Minutes Flat
Use a clean cloth to remove any sanding dust.
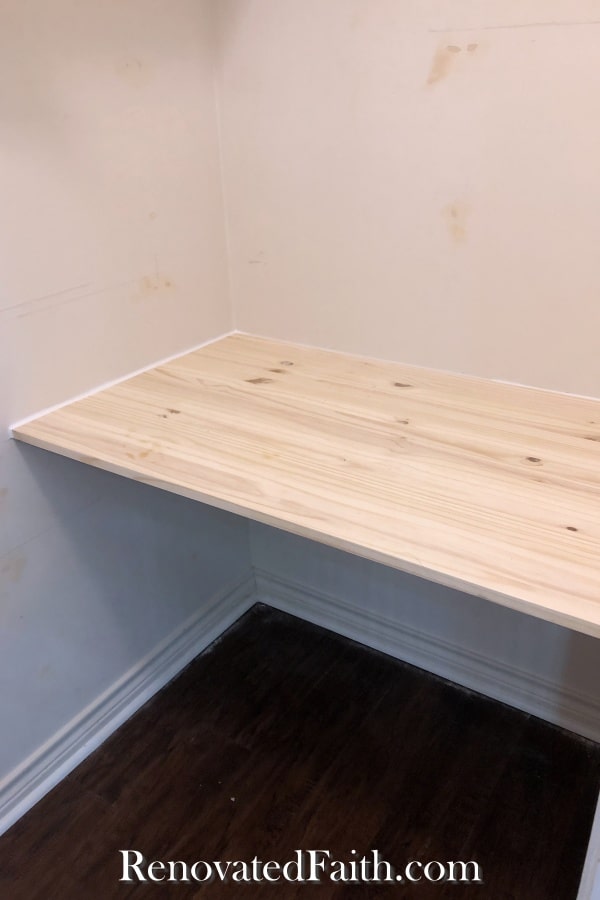
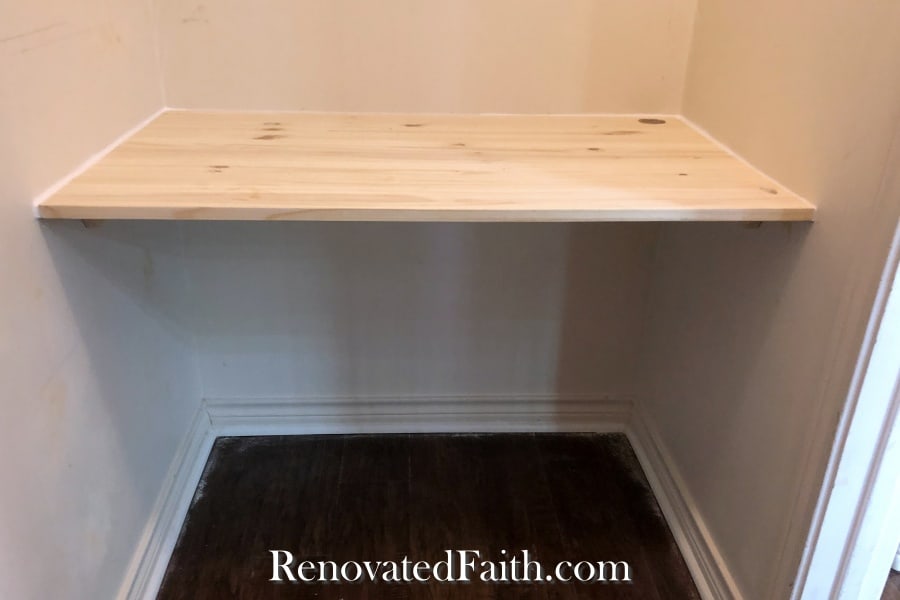
Step 7 – Install the Top of Your Closet Desk
Put wood glue along the top edge of the braces. Set the top in place and put some heavy objects on top to help it to stay in place as it dries. Watch for any glue drips underneath.
After a few hours, caulk any edges of the top where there is a slight gap between the wall.
Step 8 – Finish and Clear Coat Your DIY Floating Desk
As you see in the video, be sure to tape around the edge of the wall so prevent any stain or paint from getting brushed on the wall.
How Do you Make a Plywood Desk Look Like Real Wood?
Even if you use select pine, I don’t always love the way pine stains. Also, if you have filled any holes in the wood’s surface, the transluscense of the stain will actually highlight them!
Also, traditional stains can be a little unpredictable as they absorb into different types of wood differently yielding different shade options, meaning the color on the can is not necessarily what you are going to get!
So, I like to use a faux stain technique that I have used on dozens of furniture projects. The benefit of the faux stain is that you can make any surface (even metal) look like one of 9 shades of hardwood. By using a faux stain with latex paint, you completely cover any knot holes or filled-in holes in the wood leaving you a perfectly smooth finish.
Also, when you look at the price of hardwood tables and desktops, you’ll find that they are very expensive. Using a faux stain not only gives you a beautiful and predictable finish, but it saves you a ton of money.
Here is where you can see the full step-by-step tutorial and 9 shade options that range from a natural wood color to a dark espresso finish with lots of farmhouse finishes in between:
How to Stain Wood with Paint for a Perfect Finish Every Time
You’ll also want to use a good clear coat and after lot’s of testing, I’ve found that this one never lets me down: Varathane Waterbased Polyurethane in Satin
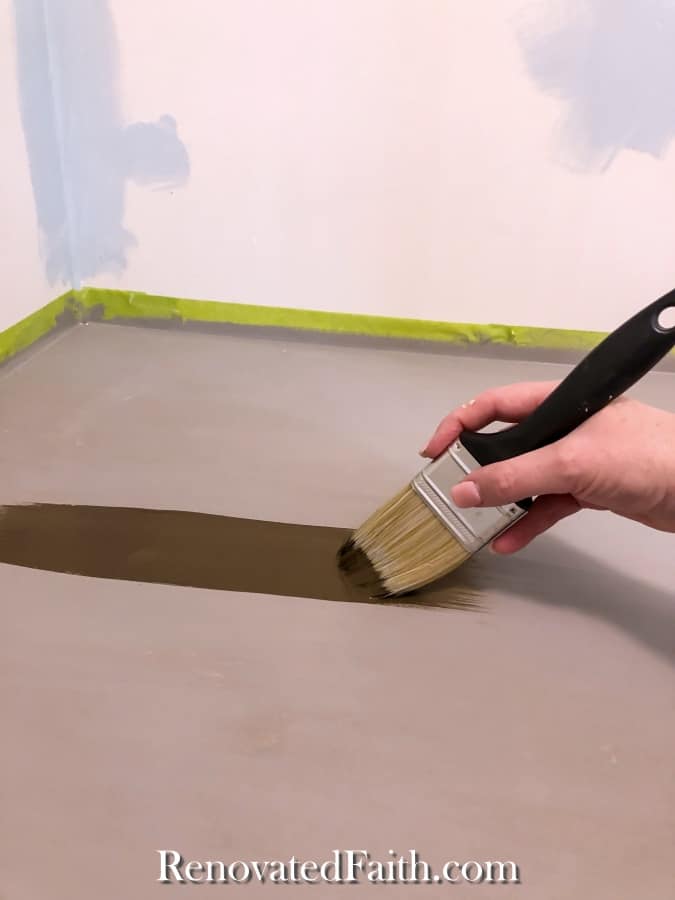
Step 9 – Paint The Walls Of Your Cloffice
Now’s the time to paint your Blank. The next day after clear-coating your desktop, tape the edge of the desk to prevent any paint from getting on it.
Also, be sure to get some white paint in case you need to touch up your trim for a much more finished look!
I don’t have an electrical outlet in my closet so for now I’m running an extension under the edge of the door’s molding. I have the excess extension cord gathered with a cable tie and hung under the bottom of the desk.
You can also add a curtain to your blank coffice or leave it open like many of the design ideas above. I opted to leave my closet door on so that I have some peace and quiet if I needed it.
If you need a low-cost curtain rod option to hang above the inside of your door, be sure to see this option: The Easiest Way to Make Low-Cost Curtain Rods
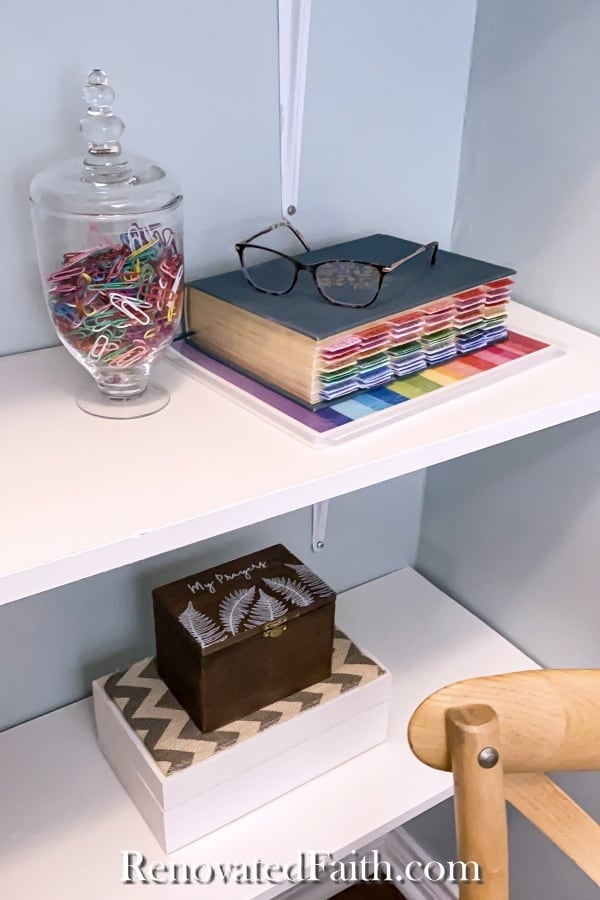
My favorite part of this cloffice transformation was decorating with accessories. Be sure to add accessories that coordinate and make your time at your new DIY closet desk enjoyable. You’ll be that much more productive if you are in you enjoy!
RENOVATE YOUR FAITH: Our Greatest Power To Affect Change
Recently I was on a video call with a tutoring program so my daughter Morgan could have some extra help. The owner of this program shared all the virtues of his curriculum and why their curriculum was so helpful for kids with dyslexia. At one point, he made the statment “we don’t just pray about results, we make results happen.”
That small statement really stuck with me and made me reevaluate my own prayer life. I get where he was coming from. I think prayer can seem like it is ineffective and that by “doing something” we are really creating the results we want.
But in reality, that can’t be farther from the truth.
“The prayer of a righteous man is powerful and effective.” James 5:16
I think sometimes we hear verses like that and assume we need to be righteous enough for God to answer our prayers or even hear them. But “righteous” there refers to the righteousness that comes from God once we enter into a relationship with Him. It is God’s righteousness imparted on us.
In the same way, prayer isn’t made powerful by our own conduct and spirituality, but prayer is powerful because of Who we are praying to!
“Our prayers may be awkward, our attempts may be feeble. But since the power of prayer is in the One who hears it and not in the one who says it, our prayers make a difference.” – Max Lucado
Prayer affects change much more than human effort ever could. We need to use it as our greatest resource even though we might not fully understand it.
The most powerful way to affect change in our lives is through prayer, not because of our accomplishments but because of God’s grace to impart us with His righteousness when we have a relationship with Him.
God loves you more than you could ever comprehend and He WANTS His dearly loved children to hand His problems to Him. Because of his great love for us, the most effective way to influence change is through prayer.
For more spiritual encouragement, click here for the rest of my project posts that also include Renovate Your Faith devotionals.

FAQ’s: DIY Floating Closet Desk
How do you make a simple floating desk without bracket?
By using wooden braces attached to the wall, you have a much more laterally stable desktop than you do with using metal brackets. I recommend drilling into the studs, using drywall anchors, or a combination of both.
What kind of wood should I use for a floating desk?
Any wood will work. The easiest and most cost-effective option is to use pine and use a faux finish on the desk. That way you get the look of any hardwood you can think of without the high cost and possible warping that can issue with some hardwoods.
Can I make a floating desk out of laminate?
You can make a floating desk out of laminate as long as you get a piece of laminate that is deep enough. You can either leave it plain or paint it but be sure to follow these steps: How to Paint Laminate Furniture Easily
How do you make a floating desk with plywood?
You can use plywood for desktops as long as you use the smoother edge, sand it, and either stain it or apply a faux stain as I mention above. I like to use wood filler to fill any holes or deep scratches and then the faux stain completely covers any areas I’ve repaired.
Can you add a desk in a closet with clothes?
If you have a long closet, you can absolutely use it as a multi-purpose space for a small desk and hanging clothes. I would use one side of the closet as a desk area and the other half for clothes by hanging a rod on the top and bottom. I would drill into the studs to attach the metal brackets for the rods.
Then, I’d attach one side of the desk to the wall and have the other side supported by a small filing cabinet like the Ikea Klimpen tower that I used for my desk made out of a door.
How Do You Build a Desk In A Closet You Can’t Drill Into?
For a desk in an apartment closet where you can’t put holes in the walls, use two filing cabinets as support and a piece of plywood as the top. You can even use a small door for your desktop as I did here: How to Make A Desk Out of a Door
More Posts Related Wood Floating Desks in Closets
How to Spray Paint Door Knobs So They Last
Easy Farmhouse Dining Room Table (Free Beginner Plans!)
The Best Wood For Your Kitchen Table Build
Easy Farmhouse Light Fixture Makeovers with Spray Paint
The Best Light Greige Paint Color for Your Living Room
Final Thoughts on DIY Closet Desks
Turning a closet into an office desk space is really the best option to add more home office space on a budget. Sometimes adding a desk to an existing room just adds to the clutter but this is the easy way to create a workspace on a budget. A DIY desk isn’t only easy to build but it’s so much cheaper and more space-efficient than adding a standard desk to a closet. No matter if you are using your Diy floating desk for work, crafts, Bible study, or your kids’ school work, this is an easy solution to create another work area by maximizing the space you already have!
DIY Closet Desk, YouTube Video
I love to hear your thoughts and questions! Scroll down to leave a comment and I WILL reply! ❤️
Blessings,

Be sure to follow the fun here!
Email Subscription | Instagram | Pinterest | Facebook | Twitter
DIY Floating Desk Instructions and Ideas

Karin Peters is a DIY expert and the creator of Renovated Faith. She is a furniture painter, a home design consultant, and a tenacious problem solver determined to help you transform your house into a home. With 17 years of experience with DIY home improvement, she researches and analyses professional processes to adapt them to be easy and cost-effective for DIYers. She then tests every project and product before it appears on the site in a detailed, step-by-step format. After attending Texas A&M University, she received her Master of Divinity with Biblical Languages at Southwestern Baptist Theology Seminary. Her passions unite in Renovated Faith, which shows readers how to create a home that serves them so they can pursue their God-given purposes. About Renovated Faith | Editorial Policy | Facebook | Twitter | LinkedIn
In the upper part of this post, you mentioned cord storage with what sounded like I should be able to click on the words “cord storage option” for more information but I could not. Should I have be able to?
I am really enjoying your blog/posts! You are a true blessing 🙂
I LOVE this! I’ve been looking for a spot in my house to turn into a prayer room. Thanks for the inspiration!
Absolutely, Rachel! I’d love to see how it turns out! – Karin