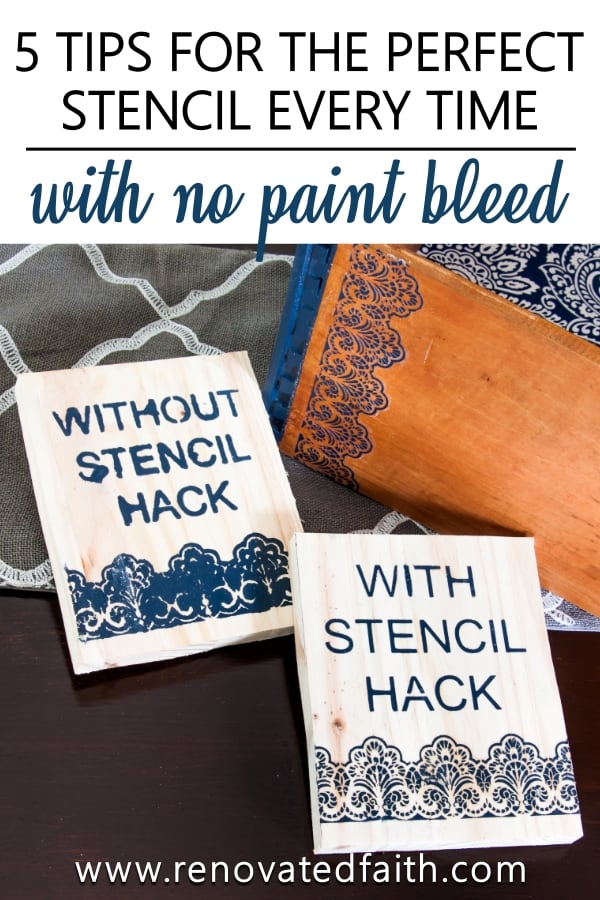
How To Stencil on Wood (Ultimate Guide & Video)
How Do You Stencil on Wood Without Bleeding?
Stenciling wood without bleedthrough is easy with a few simple hacks! In this post, I show you how to stencil on wood perfectly every time.
Imagine yourself sitting down in front of your favorite Netflix series on a Saturday afternoon for some craft time. You plan on adding a stencil to a stained family antique or even a sign made of reclaimed wood.
But after you paint over the entire stencil and pull it up, you finally realize the paint bled underneath the stencil and now you have to start all over again!
After LOTS of experimenting, I found the best way to ensure the paint doesn’t bleed through your stencil, giving you great results on any project!
With these simple tips, you can use even the most detailed laser stencils without frustrated bleedthrough.
LET ME SHOW YOU:
- How to stencil on uneven surfaces like Barnwood
- The best paint to use for stenciling on wood
- How to keep stencils from bleeding on wood signs
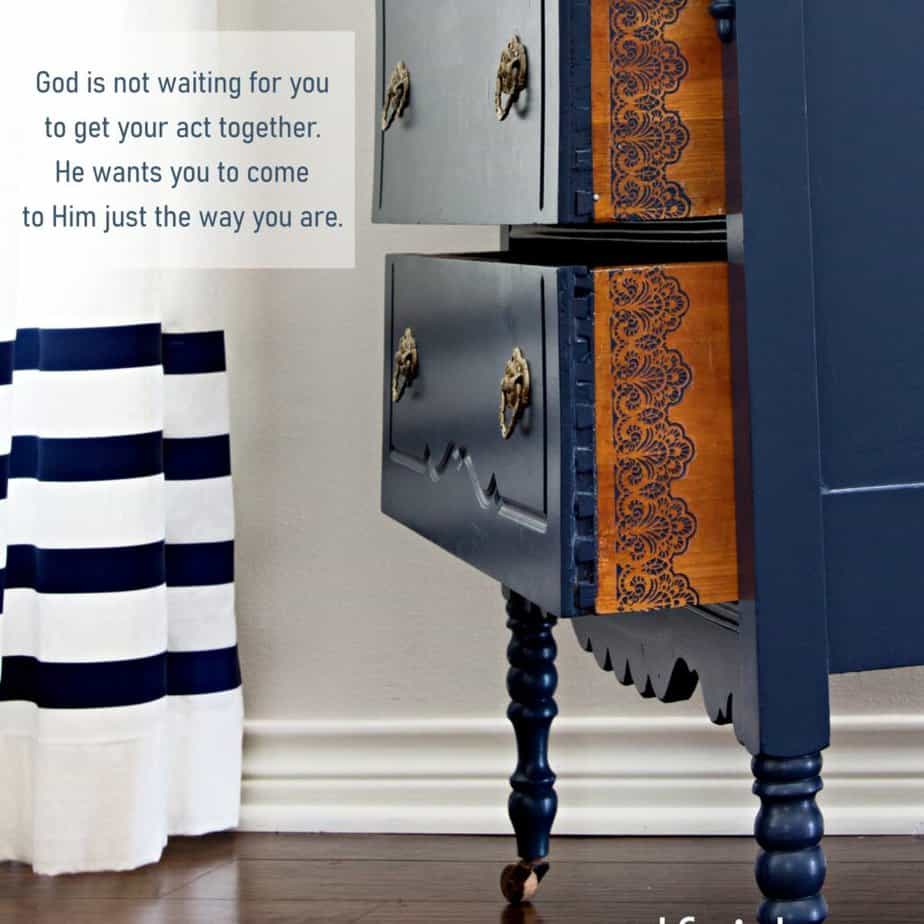
- Why you don’t need to get your act together before seeking the Lord (Check out the Renovate Your Faith Devotional at the end of this post!)
Quick Links to Information in this Post
- 1 How Do You Stencil on Wood Without Bleeding?
- 2 How to Stencil on Wood without Bleeding
- 3 How to Stencil on Wood Furniture without Bleeding – Craft Supplies:
- 4 How to Stencil on Wood Without Bleeding – The Process:
- 5 Renovated Faith: What’s in a Name?
- 6 The Best Way to Paint With Stencils
- 7 FAQ: How Do You Get Clean Lines with Stenciling on Wood?
- 8 Final Thoughts – What is the Best Way to Stencil on Wood?
- 9 How to Stencil on Wood, YouTube Video:
- 10 How to Stencil on Wood Without BLeeding
How to Stencil on Wood without Bleeding
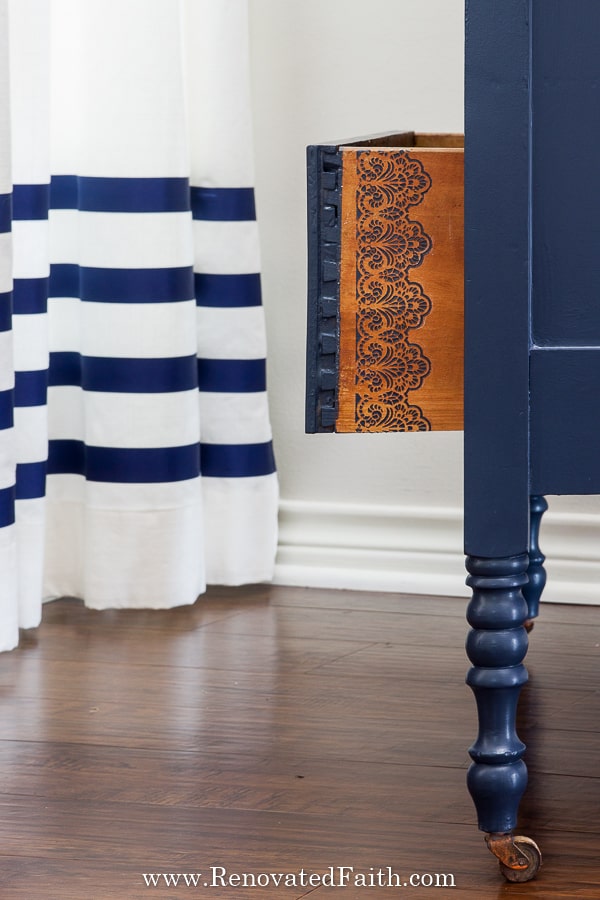
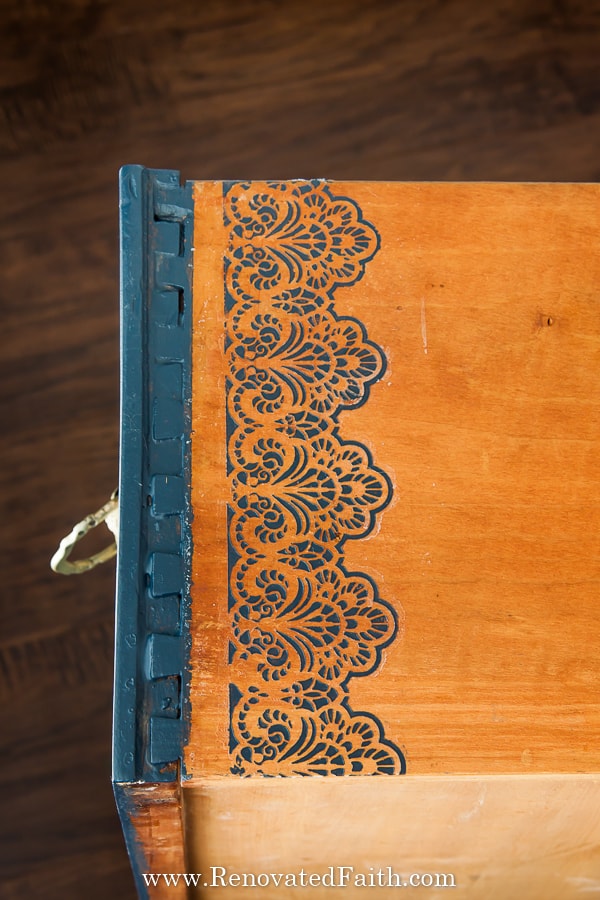
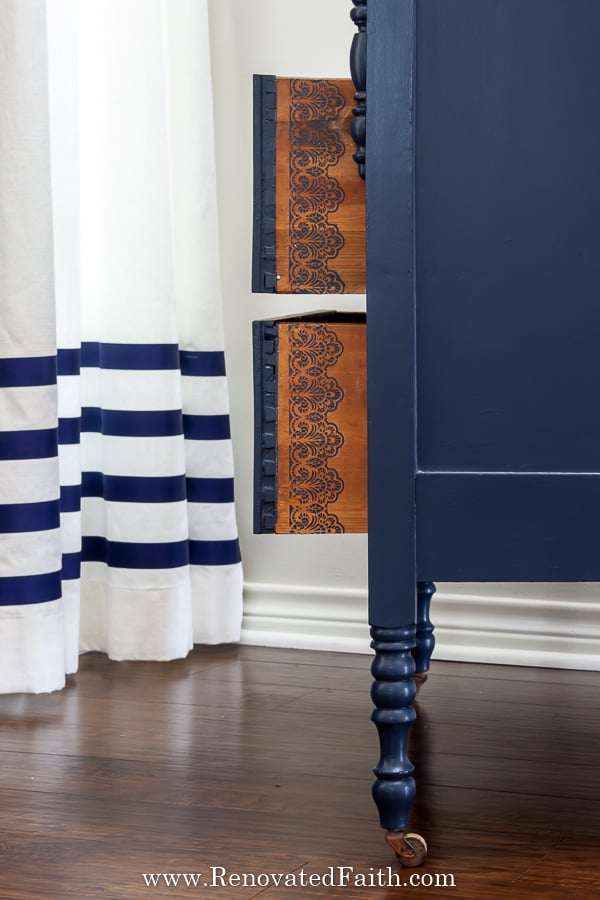
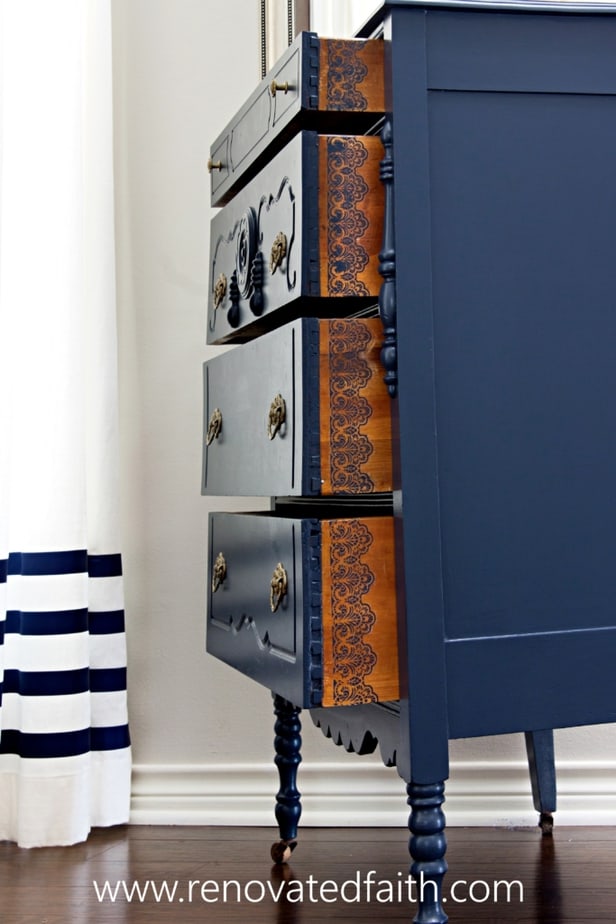
On my grandmother’s old dresser (see the full reveal below), I decided that I wanted to stencil lace onto the side of every drawer.
My grandma, Cornelia Mosely, was a seamstress and as I mention in the video, I specifically remember her sewing fancy lace on the hems of dresses. I even have a container of some of her old lace as a keepsake.
Because of this special memory, I wanted to add a lace stencil on each drawer of her old dresser.
Can You Stencil Over Stained Wood?
Adding a stencil to stained wood is not an easy feat. For one thing, you can’t touch up mistakes with paint as you could on a painted piece of furniture or sign.
The wood on the sides of the drawers was pretty old and had minor water damage making it uneven and cracked in spots. I wanted to leave the sides of the drawers in their original state so that would mean I had to get the stencil right the first time, without any paint bleed.
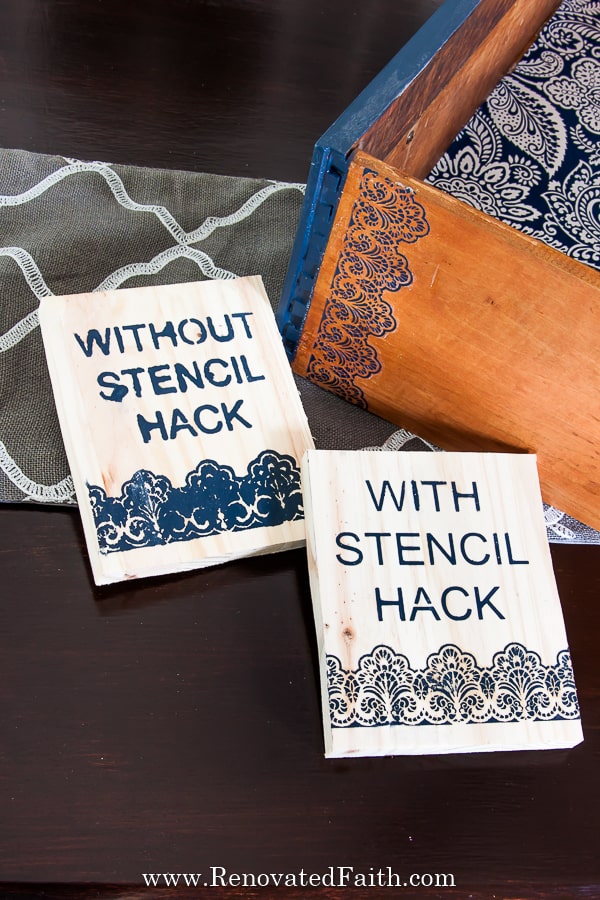
What made this process a little more difficult was the fact that the stencil I chose was SO DETAILED. I think I probably picked the most ornate laser stencil in existence.
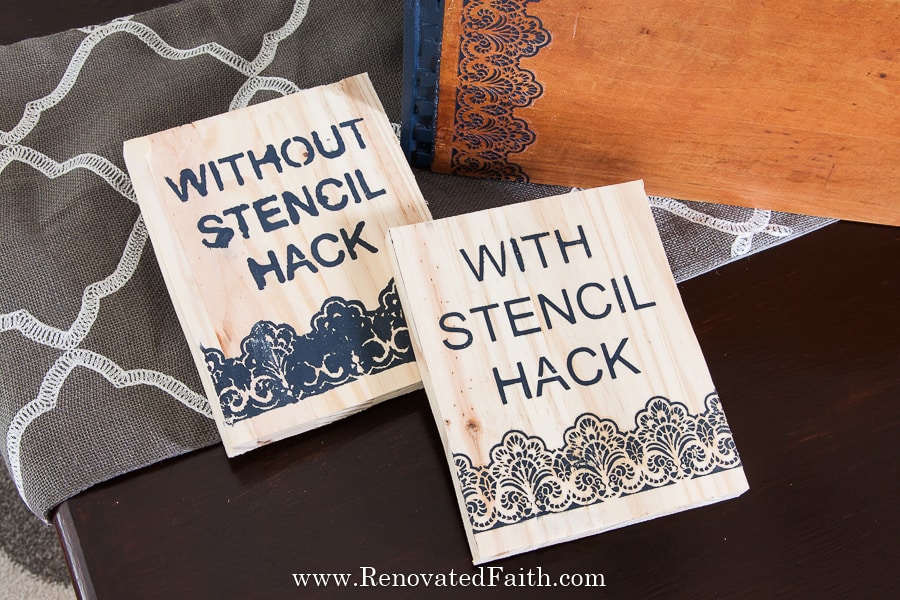
Detailed laser stencils are more prone to bleedthrough, unfortunately, but fortunately, there are some easy stencil hacks to help you get great results on your next paint project!
The Best Way to Stencil on Wood
Because I tend to overdo things, I did a lot of experimenting with every stencil hack I could find. Then, when I discovered the ones that worked best, I found out which ones worked well in combination for a perfect stencil every time. I have no doubt that you will have the same success with your own project!
How to Stencil on Wood Furniture without Bleeding – Craft Supplies:
Acrylic Paint or Latex Paint – The first thing you need is good paint – either latex or acrylic paint. (After I blind-tested and reviewed 24 furniture paints, I recommend Benjamin Moore Advance. You can see the full results for each paint brand here: The Absolute Best Paint for Furniture )
Stencils for Wood Furniture (Reusable) – I found the lace stencils I used on Amazon.
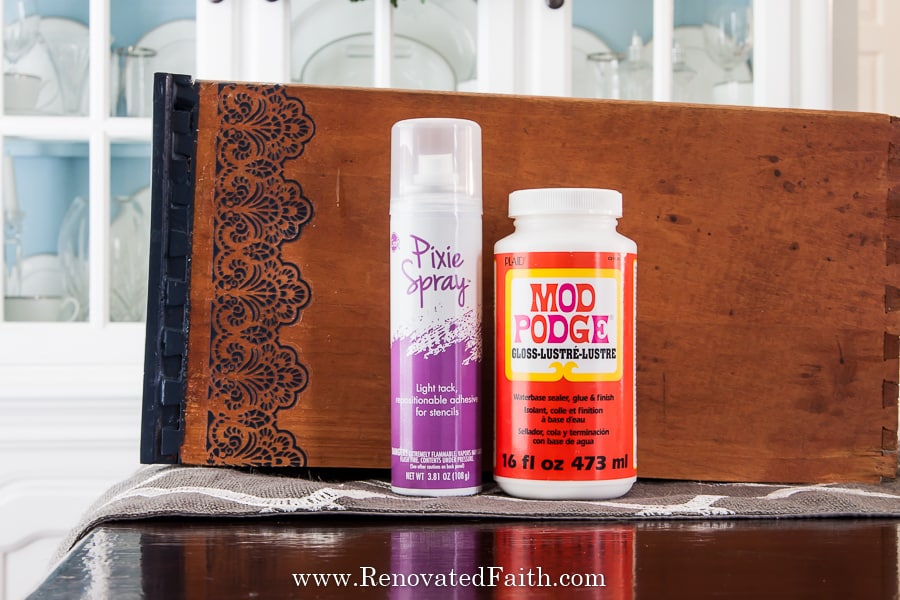
Repositionable Stencil Spray – I highly recommend using this stencil spray as others can gunk up your stencils permanently. Ask me how I know!
Mod Podge – You can use any sheen but the matte sheen is ideal.
Spouncer or Stencil brushes –
Clear-Coat for Wood (optional) – After testing several clear coats, this is my absolute favorite clear coat for furniture: Varathane Waterbased Polyurethane
Paper Towels and Paper Plates (to use as a paint tray)
Painter’s Tape (Optional)
Scraper Tool for Cleaning Your Stencil (Optional)
Cutting Mat (Optional)
FREE Must-Have Painting Tips for Furniture – Be sure to download my time-saving tips for painting furniture projects available in my free resource library. You can get them at the bottom of this post.
How to Stencil on Wood Without Bleeding – The Process:
Here is a full step-by-step video showing from start to finish. There is also a video tutorial that goes along with this post and if it doesn’t pop up you can access it and my other DIY videos here: How To Stencil on Wood, YouTube Video
Step 1: How to Stencil on Old Barn Wood – Surface Prep
Barn wood, pallet wood, and reclaimed wood are usually very uneven with prominent grain marks or cracks. This rustic look is great but it makes it really hard to stencil on uneven wood without the paint bleeding.
The first step is to prep the surface before you start painting to ensure as few uneven areas as possible when it is time to paint.
When to Sand before Stenciling on Wood (Optional)
If you are adding a stencil to a painted sign or painted furniture piece, be sure to sand before the first coat of paint. (This will also work for new raw wood but not stained wood).
Sanding will ensure the wood surface is already as even as possible and the paint can’t bleed through any cracks. Sanding is so easy and I would be lost without my electric stander. To find out how easy it is to sand signs and furniture, click here: How to Sand in Less Than 5 Minutes.
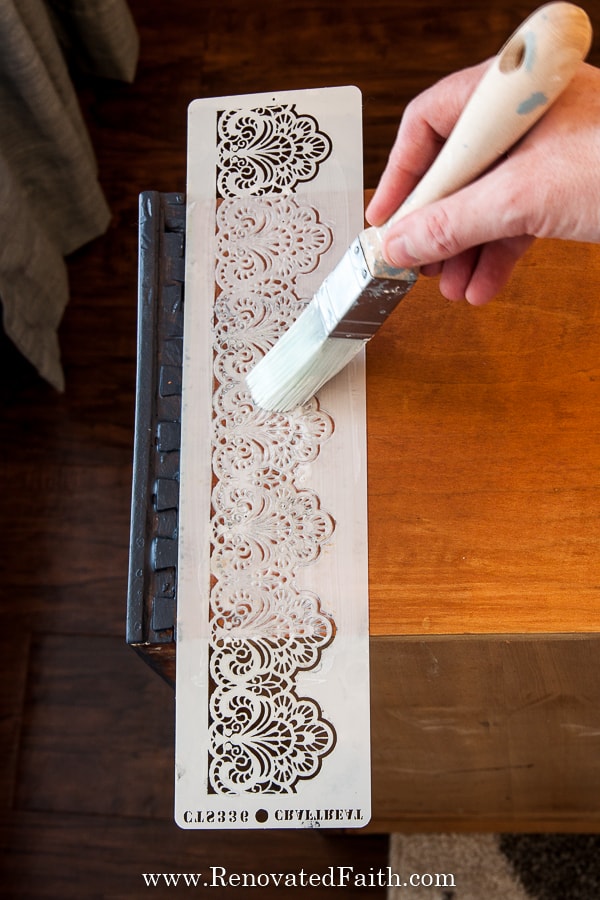
How TO Stencil on Rough Wood – Add a Clear Coat (Optional)
Whether you are working with furniture from a thrift store or a piece of barn wood, many of the hard surfaces you want to stencil will have deep wood grains.
For paint projects where you are worried about stencil bleed on rough wood, you can use a clear coat to prevent the new paint from seeping into those cracks.
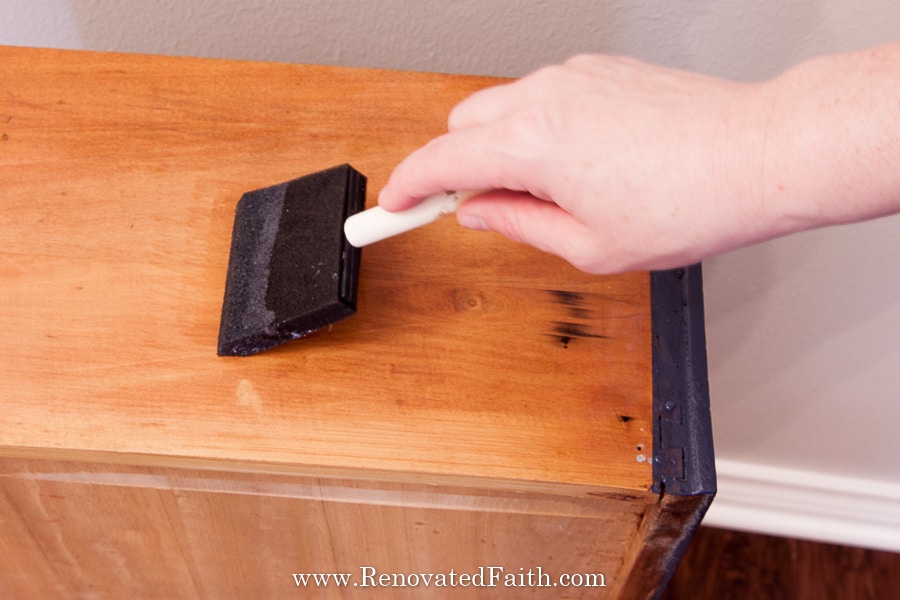
Like the dresser drawers on my Grandma’s old dresser, I wanted to leave the sides in their completely natural state. So for that reason, I didn’t want to sand the sides of the drawers.
Instead, I brushed on my favorite clear coat (see why here) before stenciling for two reasons. For one thing, it will fill in uneven areas in the wood where paint could bleed through. Also, it seals the wood so that if I do have some bleedthrough, I can easily wipe it off of the clear-coated wood surface.
This step is totally optional but if you can’t sand, you can protect the wood while avoiding stencil bleed with this polyurethane: Varathane Water-Based Clear Coat
Renovated Faith: What’s in a Name?
God loves us too much to leave a project half-done…He continually works on each one of us, as a lavish expression of His amazing love and grace. DIY projects remind me of how God renovates our hearts. If you are a work-in-progress, just like I am, check out the Renovate Your Faith Devotional at the bottom of this post. Click here for a weekly reminder of new posts by email.
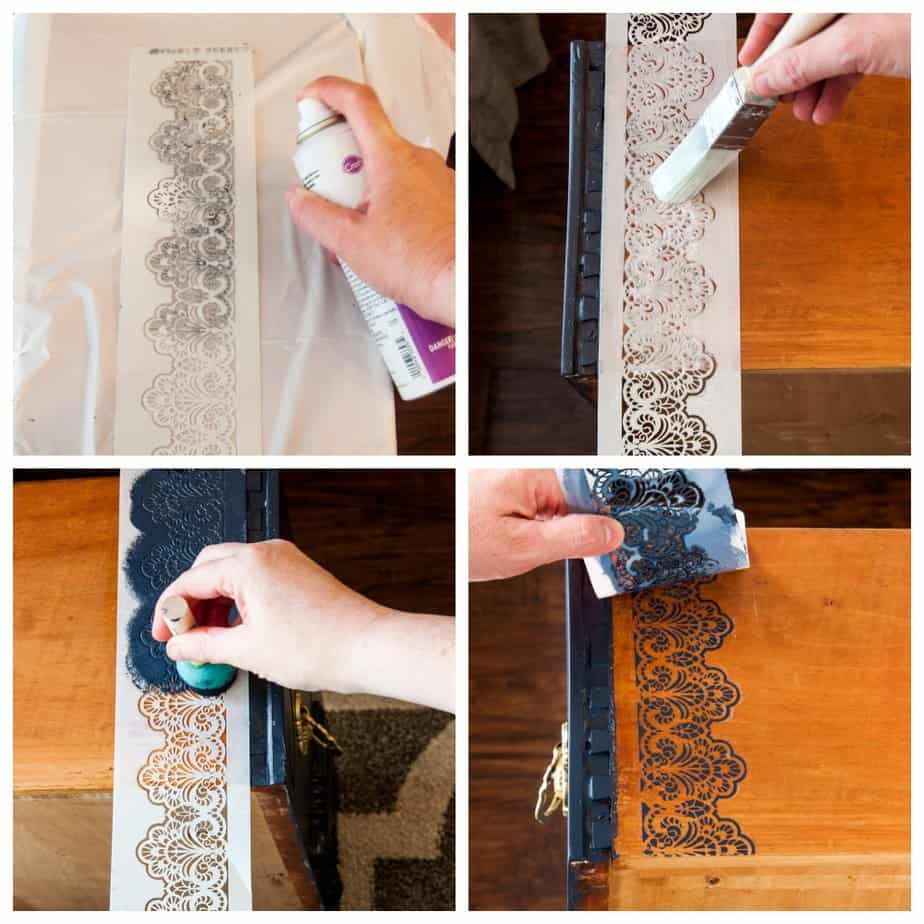
Step 2: How to Prevent Bleeding with Wood Signs & Furniture with Spray Adhesive
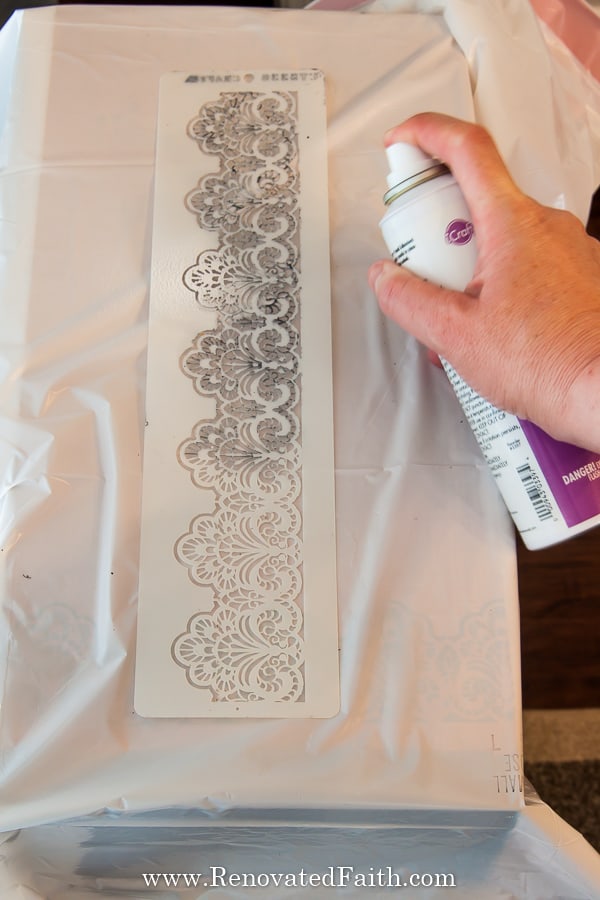
To temporarily attach your stencil to the wood surface, you want to use a spray adhesive. But not all spray adhesives are created equally.
Initially, I used one that worked great at first but when I reused my stencil, the spray gunked up my stencil and I couldn’t remove it even with mineral spirits.
So, using the right stencil adhesive will ensure that your stencil sticks to the surface and you can reuse the stencil over and over.
When you are ready to place your stencil on the wood, spray a light coat of spray onto the underside of the stencil keeping the can about 12 inches away. Be sure to spray your stencil over the sink or a trash bag as I do in the video.
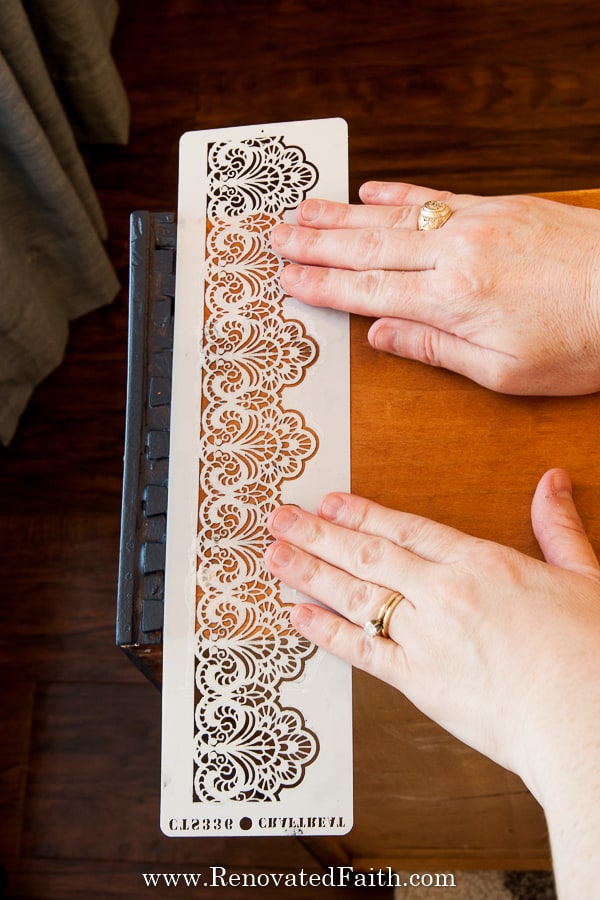
Step 3: Applying the Stencil on Wood or Furniture
For the next step, place the sprayed stencil on your wood surface. I like to press down in the middle and then wipe towards the outside of the stencil to make sure it is nice and flush so no paint can bleed underneath.
Step 4: How to Stencil on Wood with Mod Podge
The best way to stencil on wood always involves this important step using mod podge!
The mod podge creates a barrier between the edge of the stencil and the paint and since it dries completely clear you can’t see it. It keeps paint from seeping under the stencil and creates a crisp edge so you get the best results every time.
Use a brush to apply a thin layer of mod podge. You’ll notice in the video that I brush lightly but in all possible directions to get mod podge in any cracks and crevices that might be hiding under the stencil.
Let the mod podge layer dry for at least 40 minutes. You can also use a hair dryer to help it dry faster but honestly, I had better results letting the mod podge air dry. (This step also works well on stenciling curtains).

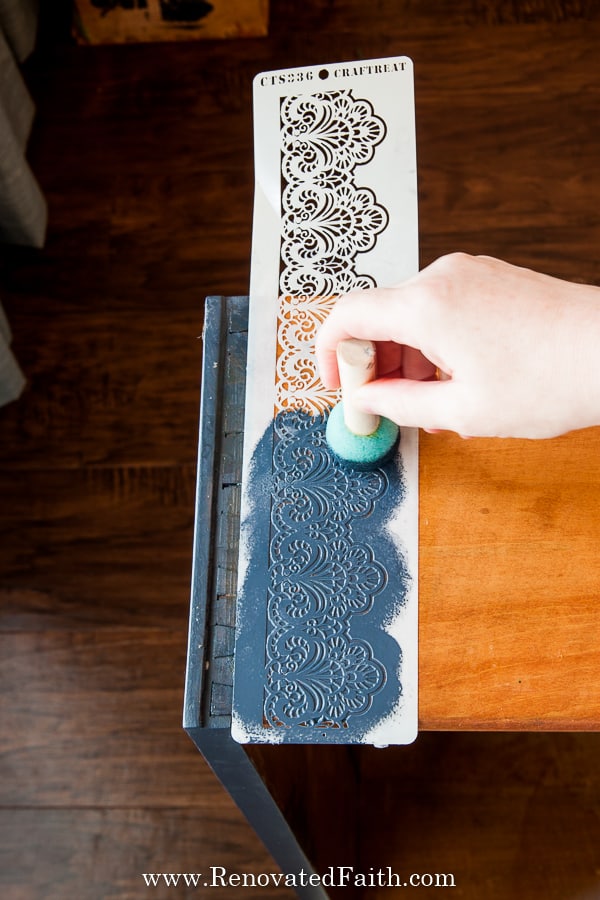
Step 5 – How To Paint With Stencils on Wood Using a Spouncer
What Kind of Paint Do You Use to Stencil On Wood?
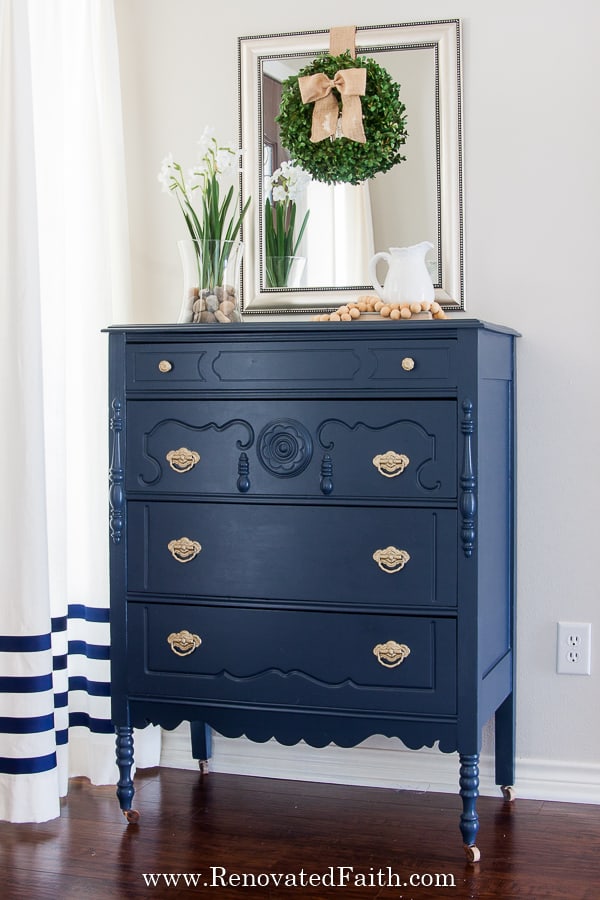
There are several different paint options for stenciling. For my grandmother’s dresser, I used latex paint in Benjamin Moore Hale Navy because that’s what I used to paint the rest of the dresser and I wanted it to match exactly.
You can also use acrylic paint too as both work well.
As far as my favorite overall type of paint, I prefer Benjamin Moore Advance after testing over 24 brands of paint here: The Best Paint for Furniture (24 Paints Blind-Tested and Reviewed)
Benjamin Moore Advance comes in quart containers in their local stores and then sample sizes that you can buy online. This is a great option if you want to match a specific paint color. Also, this paint is great if you are looking for a super smooth finish without brush strokes.
How to Stencil on Wood with Latex Paint
Instead of a brush, be sure to use a spouncer for the paint. Dip the spouncer in paint and then wipe off the excess. You want to paint on a light coat by using up and down motions as I do in the video.
Keep adding a little paint at a time until all the stencil holes are painted. Make sure there isn’t extra paint just sitting on the surface.
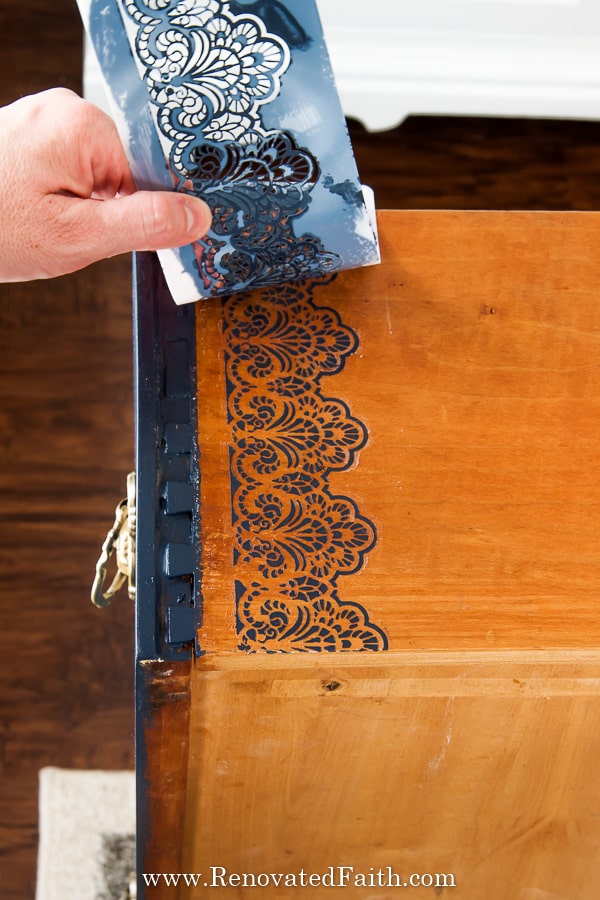
Do You Let Paint Dry Before Removing Stencil?
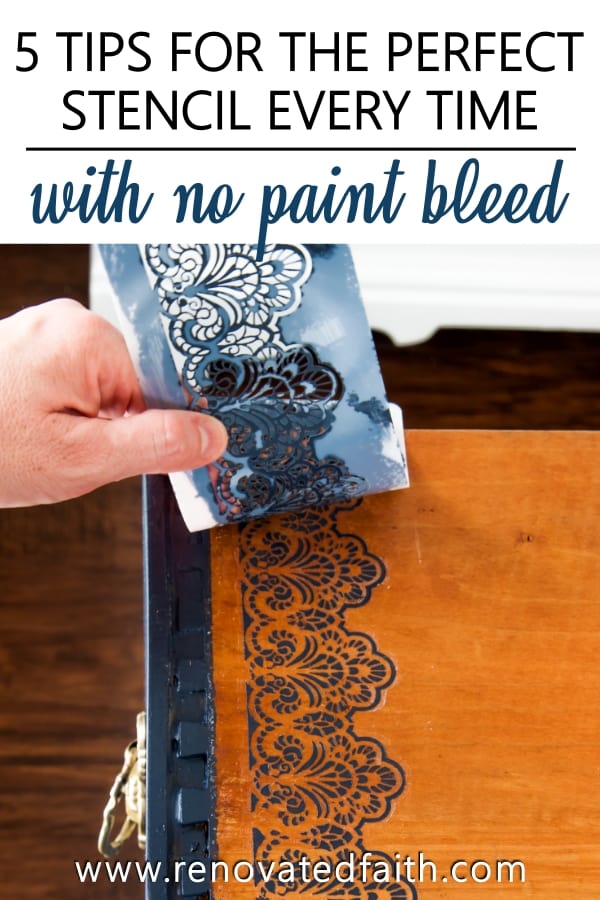
Now it’s time to remove the stencil and it’s best to do this before the paint dries. Carefully lift the stencil from one end to another.
Since the paint is still wet, it will be easy to fix any bleed-through, although you shouldn’t have any. Pulling up the stencil before the paint dries is also the best way to keep the paint from peeling with stencils.
If you have any white areas, that is just mod podge that has not dried. You can let it dry or dry it with a hairdryer to speed up the process.
How to Fix Stencil Bleed on Wood
With this process, you shouldn’t have to fix stencil mistakes but if you do, they can easily be removed. Dip a q-tip in water and dab the area that has bled through. The wet paint should come right up!
Let the paint dry according to the instructions on the can or bottle.
DON’T FORGET TO TAKE A PICTURE!
Now that you are done, I’d love to see how it turned out! ❤️ Post your before and after photos here!
RENOVATE YOUR FAITH: God Delights in Your Details
For more spiritual encouragement, click here for the rest of my Renovate Your Faith Posts.

The Best Way to Paint With Stencils
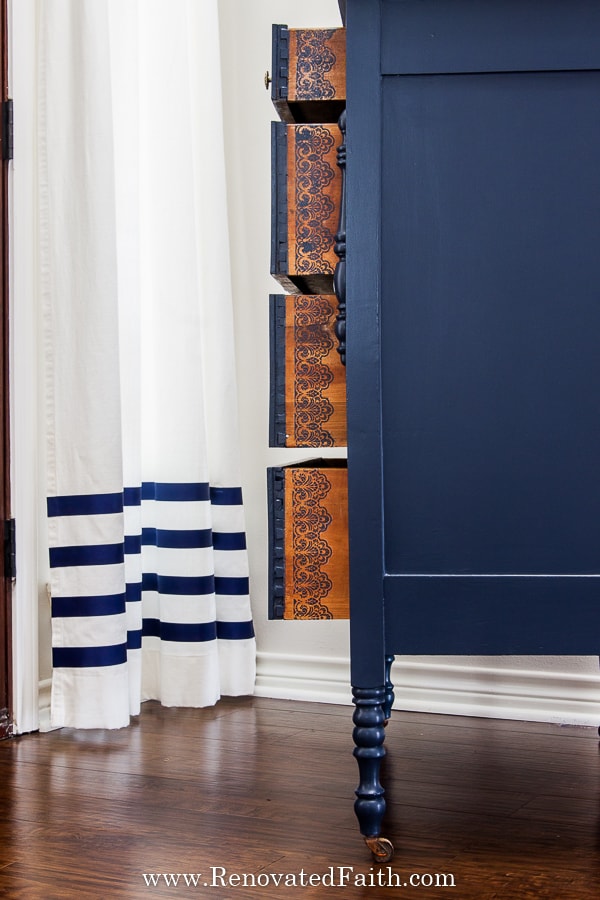
I love the way the stencils turned out on my grandmother’s dresser. I especially like how they line up when all of the drawers are pulled out. It serves as such a sweet reminder of my grandmother and her love for sewing.
To read more about my grandmother and what she stood for, you can click here: Why You Struggle to Rest (And What to Do About It)
How to Stencil on Wood Signs
You can use the same process for wooden signs, whether the wood is painted or on raw wood. Remember to sand first or use a clear coat to fill any cracks in repurposed wood boards. Follow the same process in the tutorial above for any wood sign stencils.
Free Printable Stencils for Wood Signs
Here is how to make your own stencil for wood signs and this method doesn’t require paint at all! You can read the full step-by-step tutorial on how to make any wording stencil as well as an easy way to ensure there is no bleed-through. Download the free template and see the instructions here: How to Make Wood Signs The Easy Way
To see my best tips for painting with dark colors, click here: Benjamin Moore Hale Navy Dresser Makeover.
☑️ My All-Time Best Furniture Painting Tips & Tricks (FREE PRINTABLE)
Don’t forget to download the FREE step-by-step printable checklist that shows you the entire process I’ve used on dozens of furniture pieces while saving you time and money!
You can see how to make fabric drawer liners that are paper-like, scented, and stain-resistant here: The Easy Way to Make Fabric Drawer Liners

More Posts Related to The Best Way to Paint with Stencils
Benjamin Moore Hale Navy Dresser (Tips for Painting with Dark Colors)
DIY Fabric Drawer Liners that are Paper-Like, Scented & Stain-Resistant
Must-Have Tips for Painting Furniture
Why I Stopped Using Chalk Paint on Furniture
The Easiest Way To Turn Acrylic Paint Into Fabric Paint
Easy Christmas Front Porch Decor on A Budget
The Best Wood Grain Filler for Oak Cabinets
Easy Raw Wood Finish With Latex Paint
Easy Painted Wood Sign Tutorial (A Simple Technique Without A Cricut)
Easy DIY Closet Ideas for An Extra Office or Craft Room
FAQ: How Do You Get Clean Lines with Stenciling on Wood?
How To Stencil on wood with Chalk Paint
If you are wanting to use chalk paint for your stencil, be sure to use a good clear coat or wax on top of the stencil. As I described in my post, Why I Stopped Using Chalk Paint On Furniture, you will need to protect the chalk paint somehow. That’s especially the case if you are stenciling on a furniture piece that might get some wear and tear.
How to Stencil on Wood with Acrylic Paint
I happen to use latex paint with this project but 9 times out of 10 I use acrylic paint when stenciling. It’s actually a little easier to use acrylic paint when stenciling wood because it’s slightly thicker and less likely to bleed under the stencil edge. Still, make sure that a small amount of excess paint doesn’t settle on the inside edges of the stencil pattern. This will ensure you have smooth, crisp lines after your stencil paint dries.
To avoid this, use light coats of acrylic craft paint with your spouncer or foam brush. If you do get too much paint on the stencil, wipe extra paint off your brush and brush the edges of the stencil until there’s not much paint. Pull up the stencil after a few minutes and let the acrylic paint completely dry for a couple of hours.
How To Stencil on Wood Signs Without Bleeding
You can use this same blog post tutorial on DIY wood signs. I have had so much fun making my own wood signs with important Scripture verses and quotes using this technique: How To Make Your Own Wooden Signs (No Equipment Needed)
When it comes to making your own stencils, using a Silhouette Cameo or Cricut is a such an easy way to cut vinyl for stencil projects like painted wood signs. For beautiful signs without bleedthrough, be sure to add a clear cut to hard surfaces that have a lot of wood grain.
How To Get a Rustic Look With a Stencil
One of my favorite ways to get a rustic-aged look on stencils is with a dry brush technique. You can paint on your base color just like this tutorial details. Leave the stencil attached to the board and let it dry for at least an hour.
Then dab a brush in a little gray paint and use a paper towel or paper plate to wipe off most of the paint. Next, brush the gray onto the surface working consistently in the same direction. This will give you more of an aged, rustic look to make your sign look older.
How to Clean Stencils
Sometimes the mod podge and paint can dry on the back of your stencil but the good news is that you can use an old credit card (or a scraper like this) to remove it. Just let the stencil soak in warm water with dawn a few minutes to soften the paint and then scrape it off the stencil.
How to Stencil on Wood With Spray Paint
You can also use spray paint to stencil but know that the paint will probably permanently adhere to your vinyl stencil. Adhere the stencil to your surface, skip the mod podge step and spray paint your project outdoors. Make sure to cover all the rest of your project that you don’t want to be painted because spray paint can drift pretty far.
How to Stencil on Wood for Woodburning
When stenciling for woodburning, you will have to use a pencil to trace the inside of your stencil before using the wood burner. The woodburner can’t come in contact with the stencil because it will melt the stencil.
What is Better for Stenciling, a Brush or Sponge?
How Do You Attach a Stencil to Wood?
When making your own custom stencil, you can still make the back of the stencil sticky by spraying on Pixie Spray in a light coat. You can also use a large piece of transfer tape or print your design on contact paper before cutting it out.
How Do You Stencil On A Custom Design?
To make your own custom stencils, you have a few options. You can make a custom stencil design by uploading it into the Cricut software and using your Cricut cutting tool to cut the actual stencil. You can also use this method that doesn’t require any special equipment to make a special stenciled design: How To Make A Custom Stencil Easily For Your Own Wood Signs
Final Thoughts – What is the Best Way to Stencil on Wood?
With these tips, you can prevent paint from bleeding through your stencil, no matter how detailed! These hacks are super helpful especially when you are painting on uneven surfaces like Barnwood, repurposed wood, or vintage furniture. These tips on how to stencil wood will ensure your project turns out perfect every time!
I love to hear your thoughts and questions! Scroll down to leave a comment and I WILL reply! ❤️
Blessings,

Be sure to follow the fun here!
Email Subscription | Instagram | Pinterest | Facebook | Twitter

How to Stencil on Wood, YouTube Video:
How to Stencil on Wood Without BLeeding

Karin Peters is a DIY expert and the creator of Renovated Faith. She is a furniture painter, a home design consultant, and a tenacious problem solver determined to help you transform your house into a home. With 17 years of experience with DIY home improvement, she researches and analyses professional processes to adapt them to be easy and cost-effective for DIYers. She then tests every project and product before it appears on the site in a detailed, step-by-step format. After attending Texas A&M University, she received her Master of Divinity with Biblical Languages at Southwestern Baptist Theology Seminary. Her passions unite in Renovated Faith, which shows readers how to create a home that serves them so they can pursue their God-given purposes. About Renovated Faith | Editorial Policy | Facebook | Twitter | LinkedIn
The lace pattern on the sides of the drawers really adds fashion to the dresser! What a great idea! And then I see you did something similar to the inside of the drawer as well. What a wonderful tribute to your grandmother!
And thank you for relating old throwaways to us following Christ! Great analogy!
How wonderful to stumble upon your tutorials- God truly knits together believers when we let go of our expectations!
Blessings for your journey that you are sharing with us 🙏🏼
Hi, thanks for the post. However I was wondering, will this procedure work on freshly stained wood? I want to do a stencil design in green acrylic paint over my stained wood. And if the procedure works, once the stencils are done, do you apply a top coat of polyurethane to your stencils? Also, does the pixie spray leave residue on your wood, does it need cleaned off?
Thanks for your time.
Hey Nikki – I like Varathane’s waterbased clear coat because polyurethane seems to leaves streaks at times. If the pixie spray leaves any residue you can just wipe it off. And yes, it will work on freshly stained wood. I’d just make sure the stain is completely dry. Thanks Nikki!
After years of being obsessed with Pinterest, this will be the very first time that I enjoyed a post so much that I just had to slow down and leave a comment. Before anyone asks, yes, it should make you feel special because lady, you are brilliant. I loved every inch of your blog. I was caught hook, line, and sinker all together from the last bullet at the beginning of the entry. Its placement stopped my speed reading instantly, so caught off guard that I just about read it again before realization hit. I started laughing so loud and abruptly that I scared everyone around me and with a public AMEN, became a fan. Thank you and as always let’s pray to end US homelessness. 💗
Wow, Becki….what a huge compliment. You are TOO kind and I think you so much for taking the time to encourage me! This truly made my day and I appreciate you!
great video, thanks. Just wish you had explained the products you used:
1. to initially seal the wood with the foam brush and
2. how mogepoge works so that the paint adheres permanently to the wood but not the mogepoge.
3. also how to clear coat over the stenciled area and if you had to “rough up the stenciling prior to putting on the final clear coat.
4. oh yes, since you mentioned letting the first coat of stenciling DRY prior to applying another coat, then you said to remove the stencil before the paint DRIES….how do you do that.
Thanks Again!!
Hi Glenn, Sorry I didn’t asnwer your questions to your satisfaction.
1. Clear Coat – Varathane Waterbased Polyurethane in Satin
2. The mod podge fills the gaps between the stencil and the wood instead of the paint filling those gaps. The mod podge dries clear so you never see the mod podge.
3. Use a foam brush to apply the clear coat in long strokes. Stir it first. Do not rough up your stencil before the clear coat. The clear coat adheres well without i t.
4. I recommend just one coat of paint for the stencil. Remove it before the paint dries.
Hi Karin,
I need to use the stencil multiple times and I read in your previous answers that you recommended to clean stencil between applications. My question is do you clean both sides or only the top? The bottom still has pixie and sticky, so not sure what to do in this case. I clean the top easily, but the part with pixie spay is not cleaning well.
p.s. I loved the meaning of the name of your website and the messages.
Hey Claudia! Thank you so much for your kid words! Try letting the stencil soak a couple minutes in hot water and dawn. I know it’s not ideal but this helped to loosen the Pixie Spray.