Easiest China Cabinet Hutch Makeover Tutorial (2025)
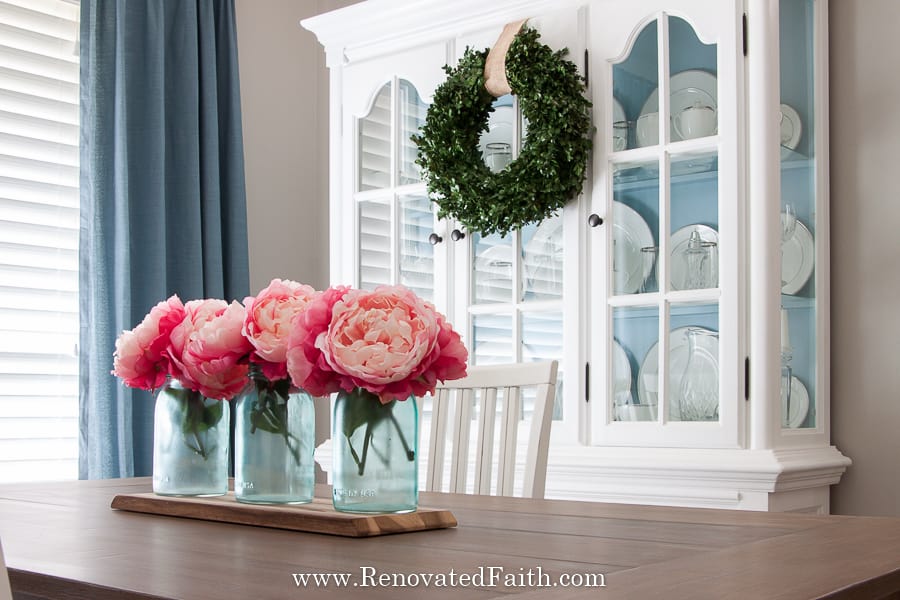
How to PAINT a China Cabinet Like a Pro
Is a new china cabinet WAY too expensive? Check out my easy tutorial on how to do a china cabinet hutch makeover that lasts!
Doing your own china cabinet makeover allows you to incorporate your personal style while also saving you a ton of money! Here are 7 steps to update an old hutch or china cabinet with a little encouragement along the way.
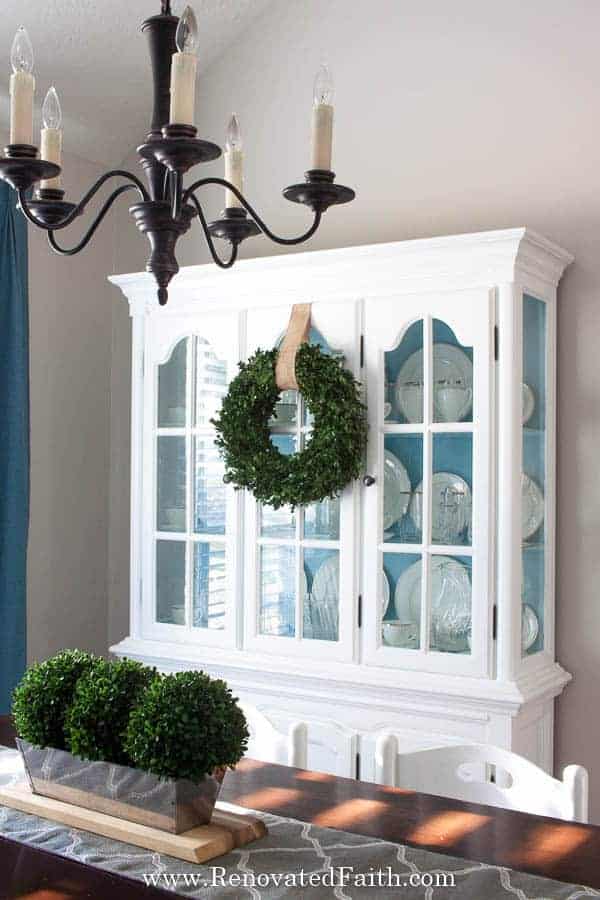
Easy China Hutch Makeover ON A Budget
On the way home one night, I saw a very tall, almost ominous, object on the curb of a neighbor’s house. In my rearview mirror, I realized it was a huge piece of furniture that would get picked up by the trash truck the next morning.
It had been a long day… I had been at the hospital with my mom who just had her second round of chemo. We were almost home, but I knew I needed another look.
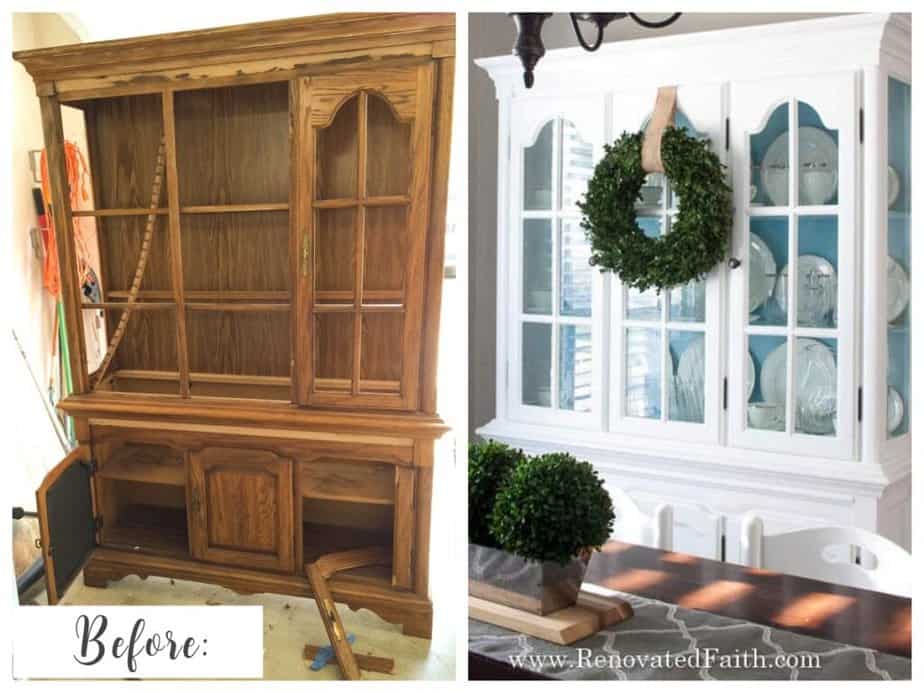
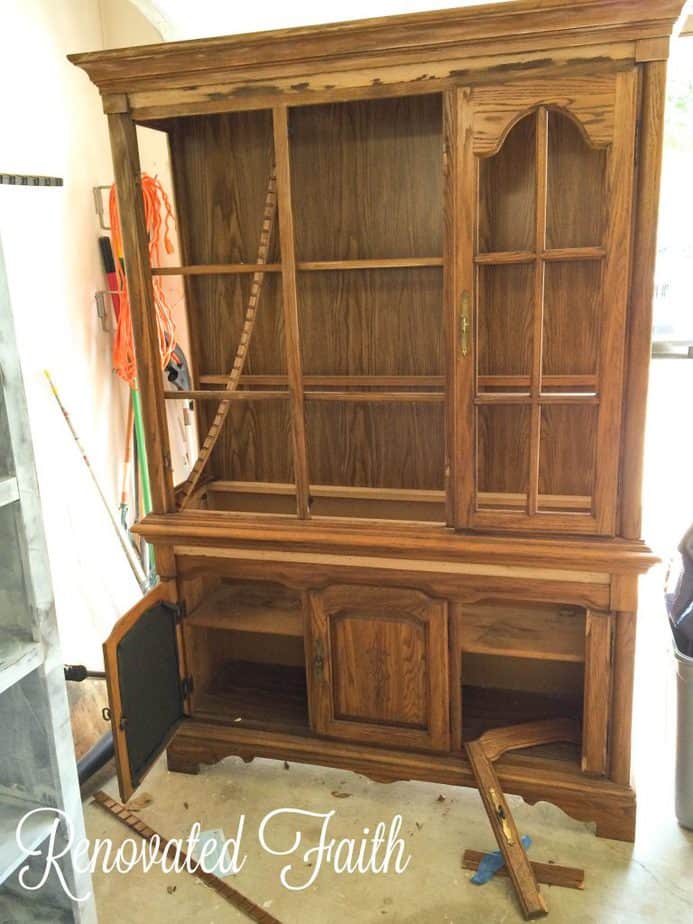
We circled around to find a dingy oak china cabinet. Several of the cabinet doors were broken, it was dirty and even had water damage at the bottom. Despite its orange stain, outdated molding, and horrible smell, I saw potential in that old piece. It was just begging me to take it home and make it new again.
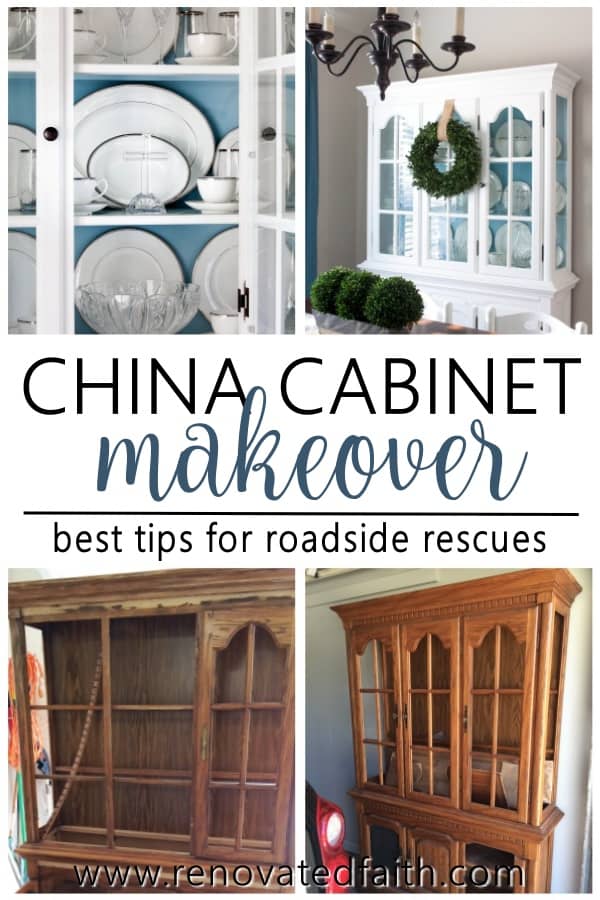
How Do You MOdernize an Old China Hutch?
So, I did what any good Southern girl without a truck would do…I called my daddy! I think he was relieved to have a mental break from my mom’s illness (she is now fine by the way!!!) and somehow my husband and dad wielded the six-foot monstrosity into our garage that night.
I was determined to save this 1980’s china cabinet ‘impending doom’ upon trash pickup the next morning. Of course, everyone thought I was crazy for wanting to save it, but it already had a place in my home…and heart.
Painted China Cabinet Makeover, Before and After
Let the China Cabinet Makeover Begin
So the process started…
I surveyed the damage, dusted it off, and cleaned it up. I was even lucky enough to find an old mousetrap on the top (fortunately it was empty). My dad rebuilt the broken doors at the bottom, I ripped off some of the molding to replace with new and I restored one of the shelves inside.
It had a musty odor which I was able to get rid of with some tips here: How to Destank Old Furniture
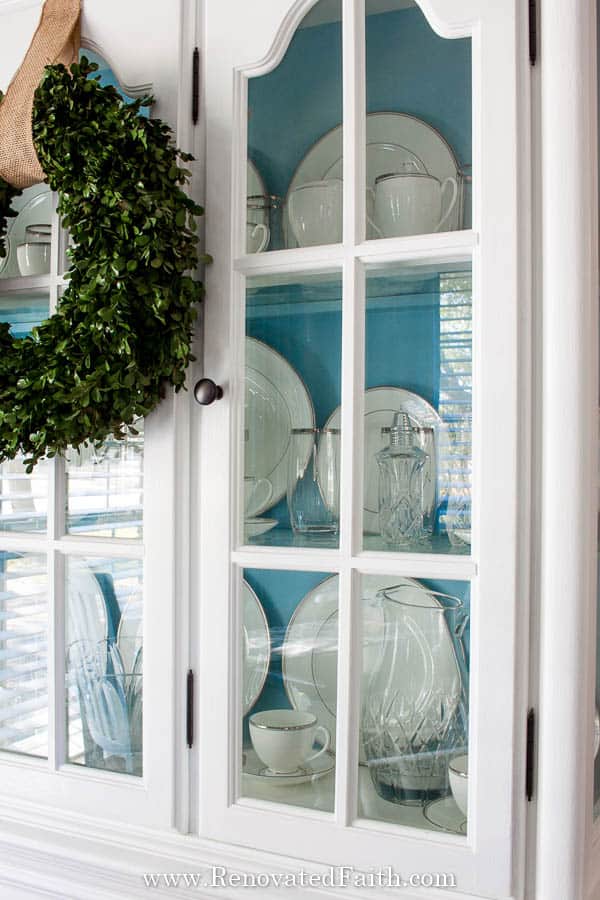
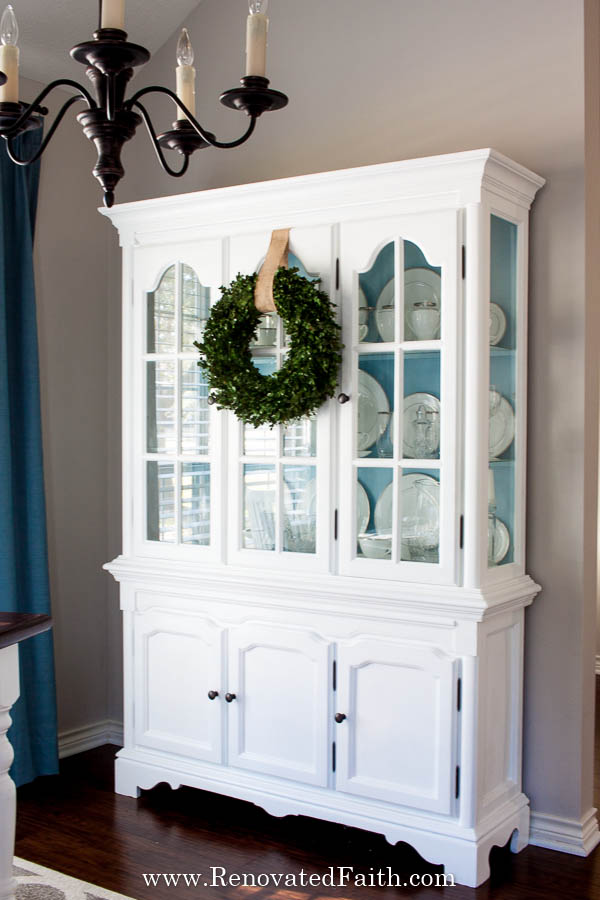
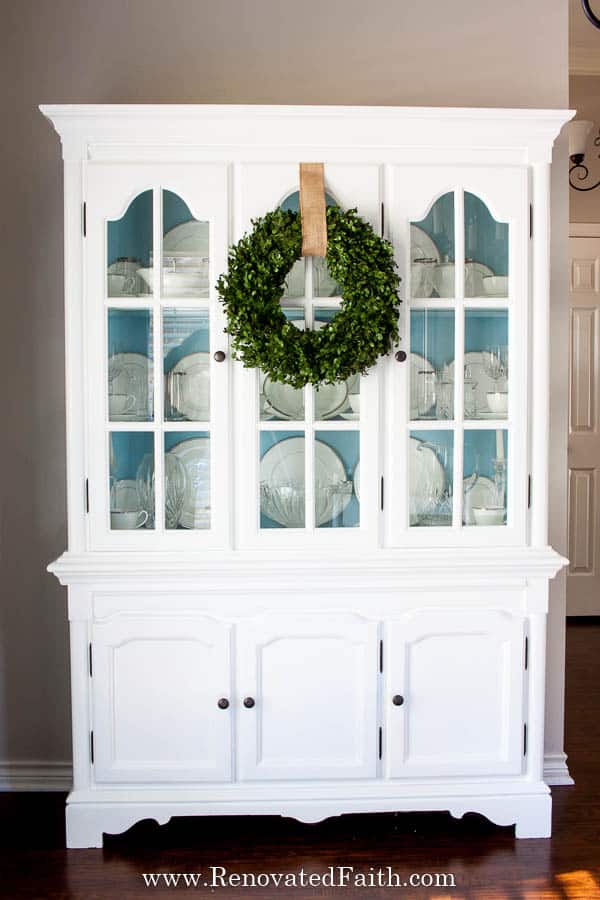
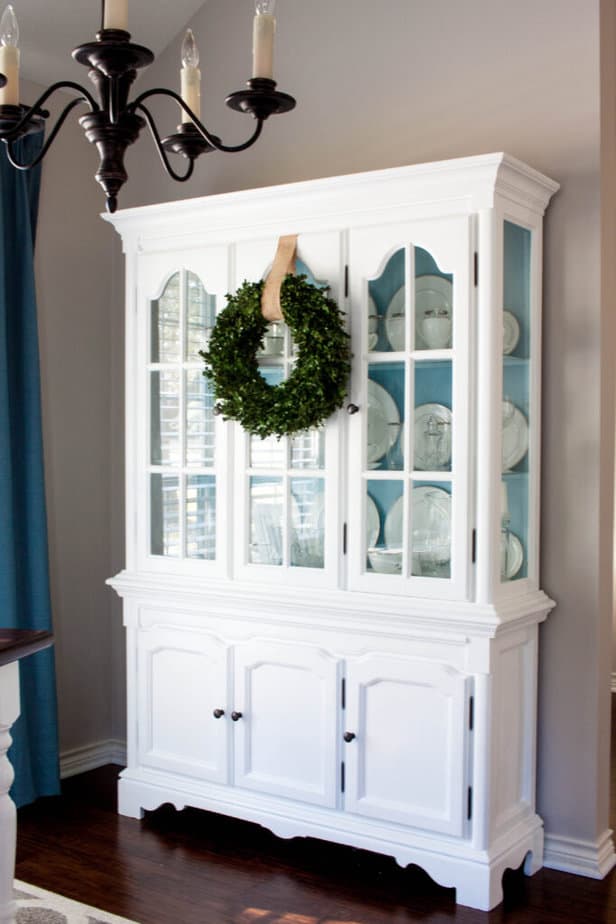
After some sanding, a layer of heavy-duty primer, a coat of paint, and a little caulk, it now sits in my dining room as a permanent fixture in our new home.
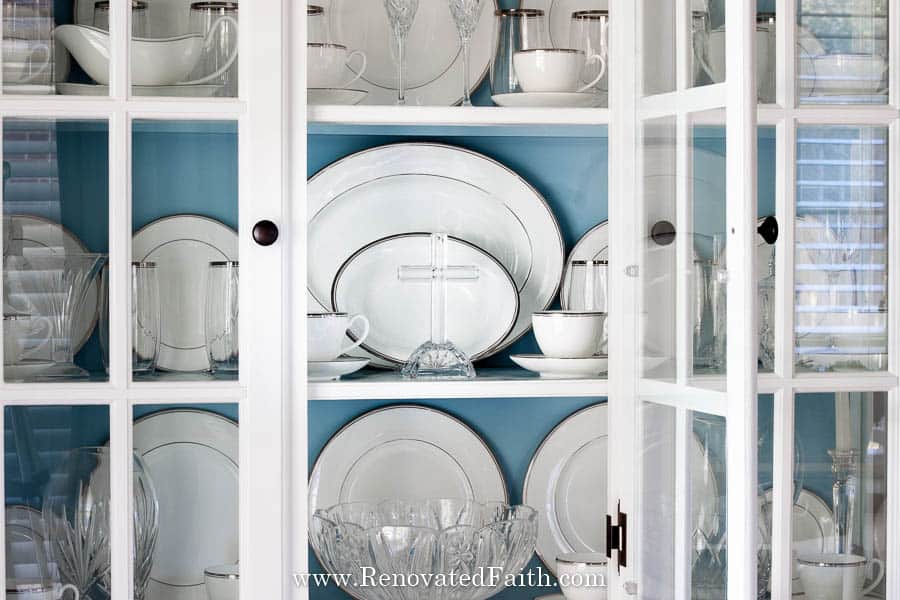
After 12 years of marriage, I’ve never had a china cabinet before and I am so pleased with how it turned out. Finally, I could unpack all of our wedding crystal and china. It still brings me joy to think about its transformation.
How to Refinish a Hutch or China Cabinet
Now that I’ve shared a little bit about what this vintage china cabinet means to me and what it symbolizes, I want to share with you the process so you can enjoy your own furniture transformation.
I shopped around and the china cabinets I saw were over $1000 but I spent well under $50 for this makeover!

China Cabinet Decorating Ideas – Color Inspiration
The first step is to make a game plan! The beauty of refinishing a china cabinet yourself is that you can pick any style or colors you want! To get great ideas on different colors and hardware combinations, I recommend checking out some of these sites:
China Cabinet Makeover Before and After Ideas
- China Cabinet Hutch Color Options
- Two-Tone Hutch Makeover Ideas
Supplies Needed For My China Cabinet Hutch Makeover
MY FAVORITE PRODUCTS – CLICK HERE FOR MY TRIED AND TESTED FURNITURE PAINTING PRODUCTS, INCLUDING THE BEST BRUSH, SANDER & PRIMER
A Good Brush
Mouse Sander Click the link above or read my Reviews on the Best Sanders
Benjamin Moore Advance Paint in Satin
*IMPORTANT – Since writing this blog post, I have tested all of the top furniture paints to find out that Benjamin Moore Advance gave me the best results at the best price point. See the full blind testing and reviews here: The Best Paint for Furniture (24 Brands Blind-Tested & Reviewed)
Primer – If your paint is light or a crisp white, don’t tint the primer. If it is dark, tint the primer the same paint color. Just ask them to help you at the paint counter. It doesn’t have to be an exact match – just darker than white to give you better coverage. I opt for a shade a little lighter than my final coat. This tip will save you from having to add an additional coat in many cases.
Caulk – Optional
Painter’s Tape – Optional
Lint-Free Cloth
Must-Have Furniture Painting Checklist Download my time-saving tips and tricks for painting furniture!
RELATED POST: The Easy Way to Paint Furniture as a Beginner
7 Steps to Update A China Cabinet
Step 1: China Cabinet Makeover Prep Work
Stop! Before you do anything…take a before pic. When you are done, post the before and after pics here, so I can see the amazing work you’ve done! ❤️
Dust off with a damp rag and remove all hardware. Replace any molding that is out of date. If your wood furniture piece smells musty, check out some of my tips here: How to Remove Smells from Old Furniture Pieces
Start sanding. It is well worth your money if you don’t have a palm sander. I have used it on countless projects and it’s my favorite tool! (You can read my best sander reviews if you are unsure of which is best for you.)
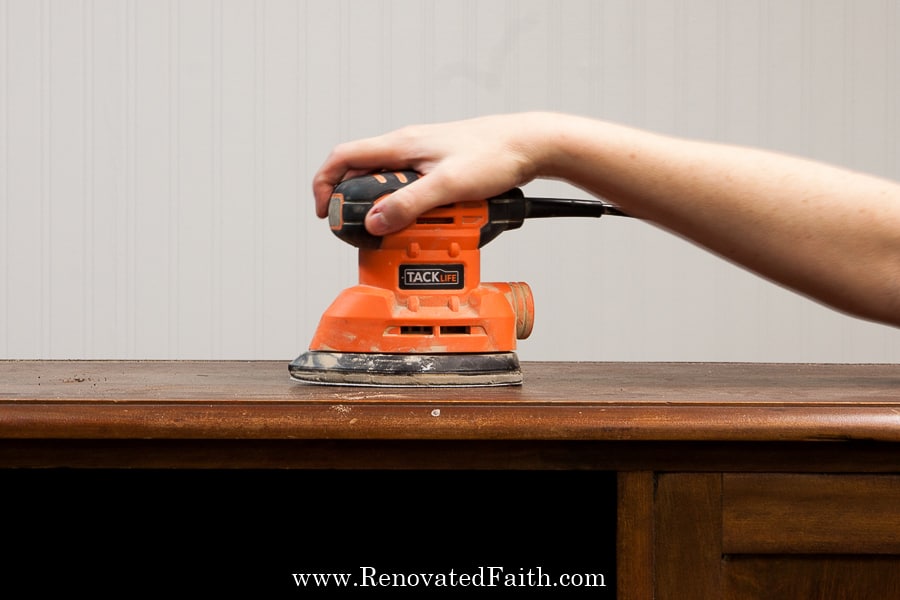
How to Sand Furniture in Less Than 5 Minutes – Last week’s post explains how you are not sanding to take off the old stain or paint. You are just merely roughing up the old surface so the new paint sticks.
Renovated Faith: What’s IN A Name?
Step 2: The Best Primer for a White China Cabinet Makeover
The next step is to apply a primer to help the first coat of paint adhere to the china hutch. I’ve used several of Zinsser’s primers and decided on the Zinsser Bullseye 123 Water-based Primer. It has great adhesion, cleans up easily, has low odor, and settles well into cracks, which is great for old oak furniture. Also, it takes only an hour to dry before your next coat of paint. See my tips in the supplies list on saving time when painting with darker paint colors.
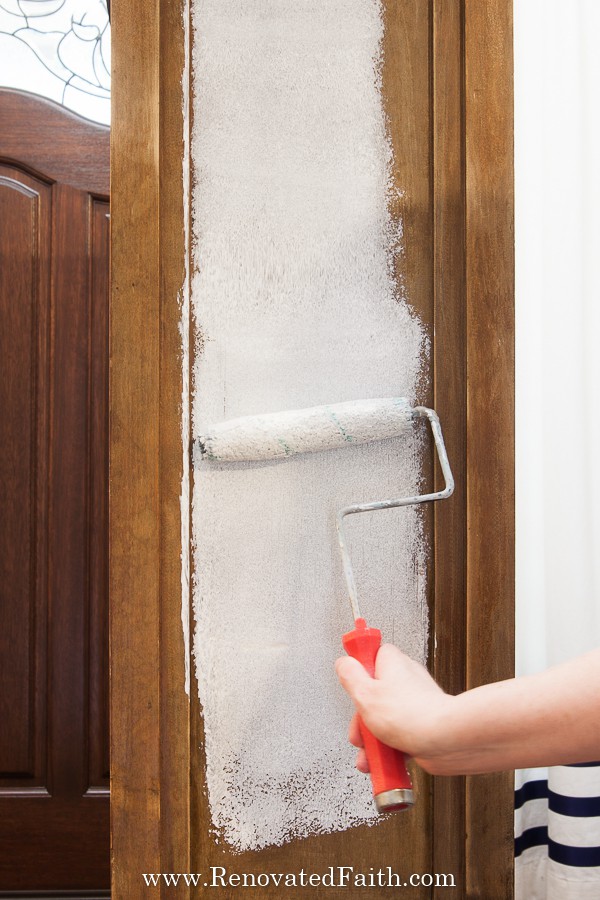
Step 3: How to Paint a China Cabinet
I used Behr Premium Plus Pure White in Satin but since doing this transformation I tested furniture paints and now my favorite furniture paint, Benjamin Moore Advance.
It might take you two coats depending on the piece. (You can check out my BEST time-saving furniture painting tips through this link: Must-Have Painting Tips.)
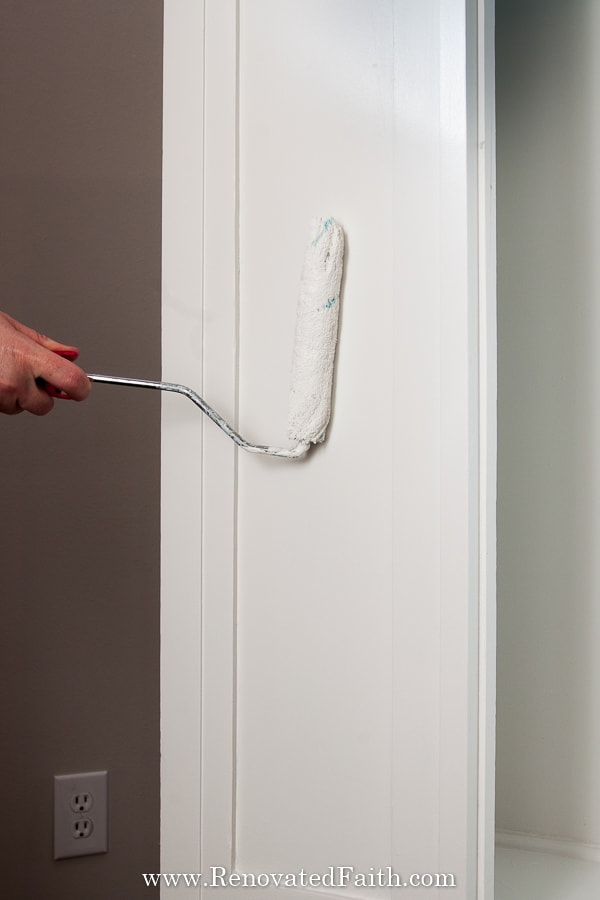
I painted the inside back in Behr Sonata in a Satin Finish to give my china cabinet a pop of color and the white plates some nice contrast. This is the same blue that I used for my blue pumpkins here.
The Best Paint for Furniture
For painting glass doors without getting paint on the glass, check out a trick with index cards here: Vintage Vanity Makeover
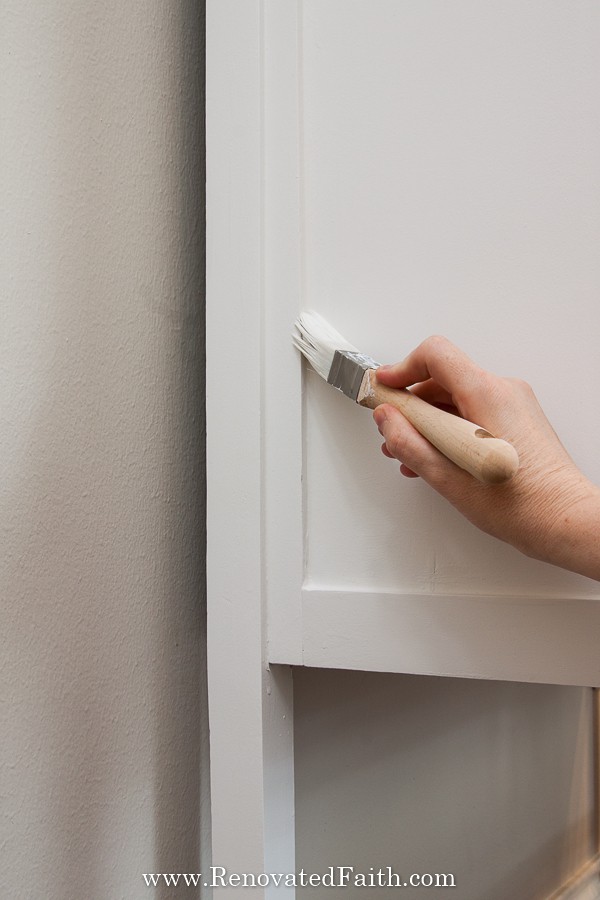
Step 4: ReFurbished China Cabinet Hinges
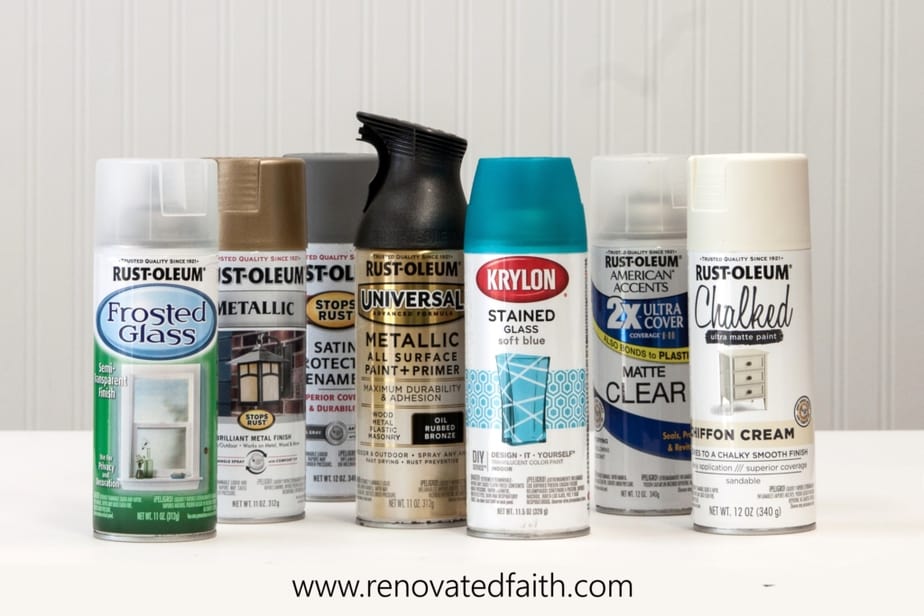
I spray-painted the hinges using Rustoleum’s Universal Metallic in Oil-Rubbed Bronze. It is the best oil-rubbed bronze spray paint on the market and so durable that I just used it to spray paint my metal shower frame.
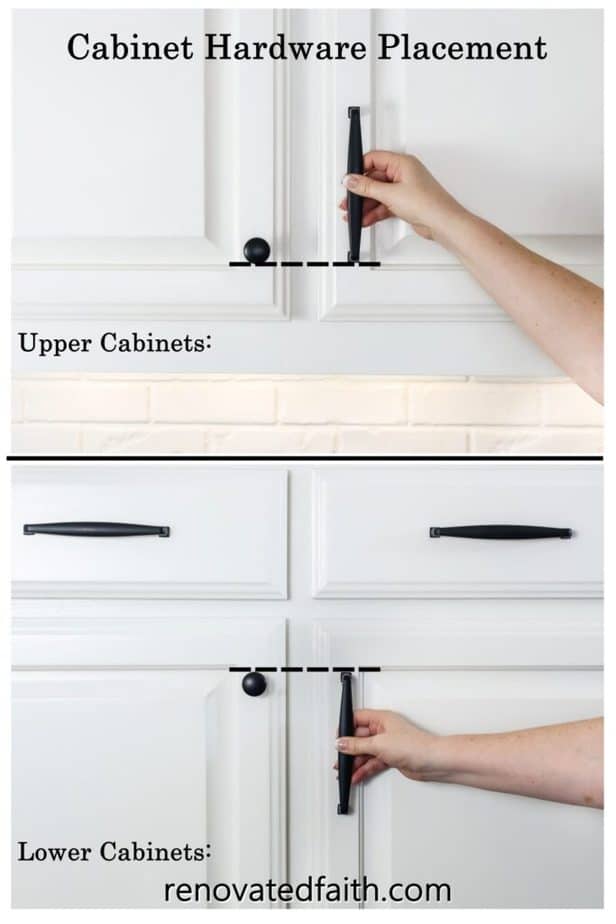
Step 5: How TO Paint a China Cabinet’s Hardware With Spray Paint
I took the opportunity to use completely replace the knobs with these here. For a good price on more options on furniture knobs, see this link: Inexpensive Furniture Knobs and Handles
You also have the option of spray painting your existing hardware as the Rustoleum spray paint I mentioned above comes in a number of metallic finishes.
My Best Tips for Spray Painting
For my favorite tips and tricks on getting a flawless new paint job every time with spray paint, click here for your free checklist: Best Tips & Tricks for Spray Painting Anything
Step 6: China Cabinet Hutch Makeover Finishing Touches
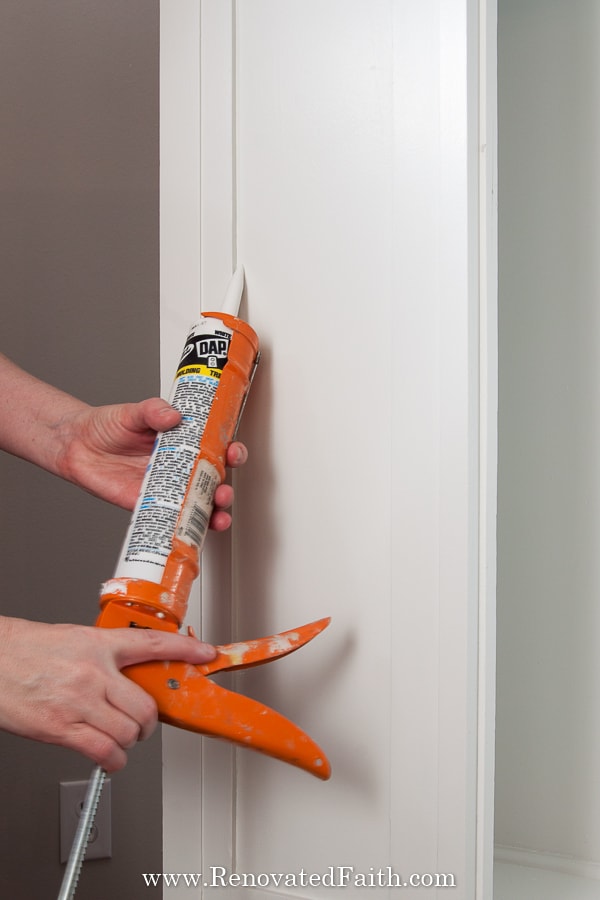
Caulk any cracks or gaps. (I like Dap caulk). Caulking any seams can really give your piece a more finished, high-end look. This is one of those times the details make all the difference! (Caulking Tip: When the caulk dries, paint over those areas so the caulk doesn’t attract dirt later on.)
Step 7: Add LED Lighting to A Refurbished China Cabinet
Add some LED lighting so your china really pops. Here is the link for what I used (LED Under Cabinet Puck Lights) and you can see more LED options by clicking here: China Cabinet Lighting Options (LED). Several options stick on the surface and some are even wireless, which means not having to drill small holes for wiring.
Renovate Your Faith: Made Over Inside and Out
More than a fun project, the china cabinet serves as a reminder of how far I have come
In the same way, God also saw me in the darkness. He saw that I was dirty, broken, and in a state of disrepair. But that didn’t stop Him.
God never needs to take a second glance at your brokenness because He has never taken His eyes off you since the beginning.
Through no effort of my own, He delivered me from my sin and certain destruction through Christ’s death and resurrection. Upon accepting Christ as my Savior, my eternal status is secure with Him and I have a permanent place in His heart and home.
Now, He is “renovating” me to be more and more like Him every day.
God has had to clean me up, release me from my baggage, repair my brokenness and He continues sanding my rough edges to make them smooth. Fortunately, God never leaves a project half-done…He continually works on each one of us, shaping us to be a useful tool for Him to use.
That’s what the Christian life is. It is a process of transformation that can only be done by His Hands. We all have areas where we need work.
However, God wants to renovate our hearts and minds by taking our brokenness and turning it into something beautiful.
Sleek, new furniture pieces sit on the showroom floor to absorb the attention of potential buyers, but it’s the broken furniture on the side of the road that will never catch a second glance. Fortunately, brokenness is not something God rejects but embraces so He can make us whole and new again.
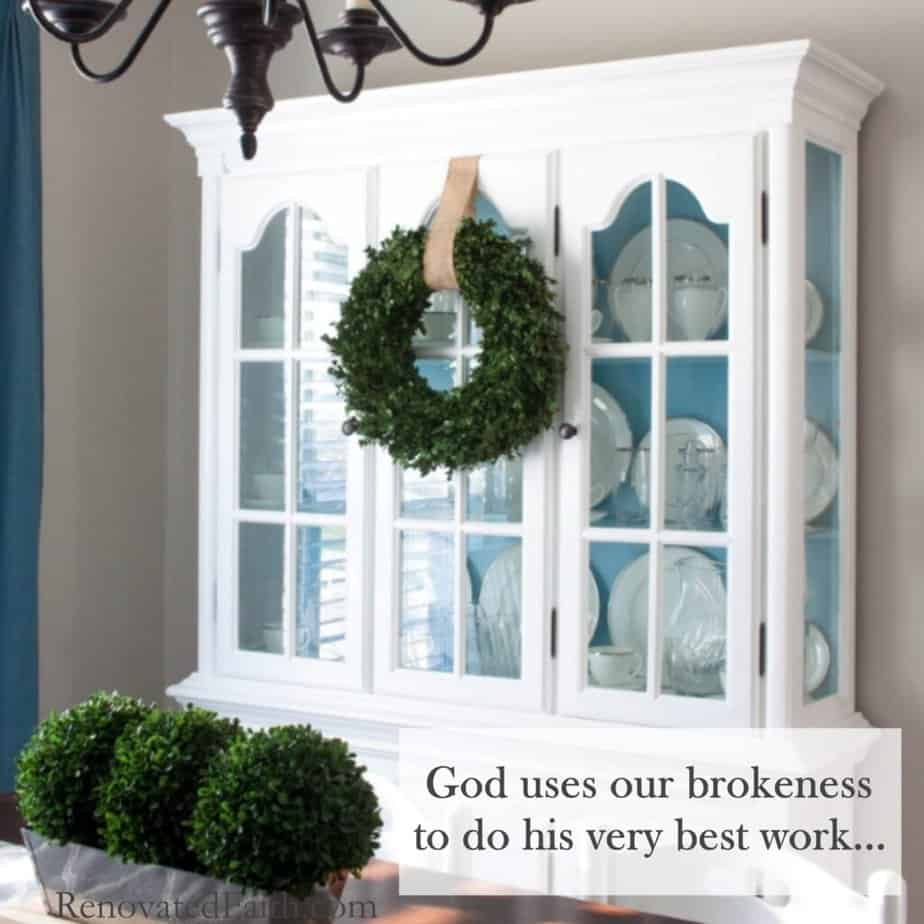
What I realized in this china cabinet transformation is how God uses our brokenness to do His very best work.
Most home improvement projects are messy and can take longer than we previously thought. You might even uncover issues that you weren’t previously aware of and you may need to make several calls for help. However, at the end of the project, the results are breathtaking and the struggle is behind you. You have replaced this hang-up with new habits and the results are amazing.
And like most renovation projects, you might even ask yourself “Why didn’t I tackle this sooner?”
For this reason, I have entitled the blog Renovated Faith… The Lord wants to help you take off your old self and put on your new self.
You take off the lies and put on the truth.
You take off your cultural perspective and put on a biblical perspective
You might take off what you learned growing up and put on what the Bible says about your situation.
Once you come to know Christ as your Savior, that is just the beginning.
You have a whole new life ahead of you. God still has a lot of refinishing work to do on me and I invite you to join me on this journey as He gives us a makeover from the inside out.
“Behold, I am doing a new thing; now it springs forth, do you not perceive it? I will make a way in the wilderness and rivers in the desert.” Isaiah 43:19
Other Possible Additions to Your China Hutch Update:
China Cabinet Lock Sets
- China Cabinet Glass Retainer CLIPS (FOr Glass Shelves)
China Cabinet Knobs and Handles
China Cabinet Lighting Options
FAQ’s: China Cabinet Hutch Makeover
How Do I Update My Old China Hutch?
Whether you have a garage sale fixer-upper or a 1980’s china cabinet that’s a family heirloom, you can use the above tutorial to give you the furniture piece you’ve always wanted.
For more detailed instructions on how to refurbish a china cabinet, check out this post here: Beginner’s Guide to Painting Furniture The good thing about this process is that you can use the exact same steps on a similar project.
Are China Cabinets Out of Style?
China cabinets are not out of style but sometimes the original finishes of older china cabinets are outdated. A new coat of paint or stain can not only give your china cabinet a better look, but there are so many creative ways to repurpose china cabinets to better meet your needs. Whether you have a hutch or built-in china cabinet, consider using it for craft supplies, storage for your small business, a way to display quilts or even a DIY plant stand. Don’t forget that you can always “accessorize” with a wreath at the center of the cabinet.
If your china hutch has a dark stain and you want a more modern stain, it’s a good idea to consider this easy method on how to get a solid wood look without using a furniture stripper: How to Faux Stain Furniture With Latex Paint
how do I update my traditional china cabinet without Painting?
The worst thing you can do is paint a china cabinet without doing the proper prep work. If you do some light sanding and use a primer, the results will be gorgeous and last you a long time. In an upcoming post, I’ll share about what happens if you don’t sand furniture. It can mean having to completely redo the piece because the paint didn’t adhere.
For large pieces, it’s going to take a lot of time to completely strip, sand, and repaint the whole furniture piece. As much as I don’t want to add more to your DIY to-do list, proper prep can save you a lot of time and hard work later on.
Also, consider taking some of the more ornate woodwork off the piece. My grandmother’s secretary had some decorative scroll woodwork at the top of the cabinet and simply removing it made a huge difference to the overall look of the finished piece. If you have a china cabinet with a removable top, consider taking it off and using the china cabinet base as a console table.
Can A China Cabinet Be Painted Without Prep?
By doing a little prep work you can ensure your china cabinet’s finish is beautiful for years to come but by not doing some prep, you take the chance of the paint not adhering and having to redo the whole piece after it dries.
It’s so important to sand the entire cabinet first thing before painting. Fortunately, sanding the right way will only take a few minutes: How To Sand Furniture In Less Than 5 Minutes
How do you refurbish an Old China Cabinet So It Lasts?
Painting a china cabinet is not the only way to update a flea market find or family heirloom. Updating the back panel can go a long way in giving it a new look. You can add beadboard wallpaper or any kind of patterned wallpaper to the back of the cabinet while still maintaining the original look of the china cabinet.
You can always update the look of a particular piece by adding new hardware. Consider replacing the original hardware with new knobs or drawer pulls that are unique and more detailed. Hobby Lobby and small businesses on Etsy are great places to find cute hardware options like new pulls or fun knobs for a particular piece.
How Do You Refurbish an Old China Cabinet So It Lasts?
For big projects you spend a lot of time refinishing, you want to make sure your paint finish lasts. So, I recommend using the best type of paint. After lots of time testing the best paint for furniture, I found that Benjamin Moore Advance provides the most durable and smoothest finish. I like using a satin finish of paint because it’s more durable than matte or flat.
If you have already painted your china cabinet and are concerned about the durability of the finish, use a good top coat. After testing different top costs for furniture, Varathane Water-Based Polyurethane had the best results and it is so much easier to use than clear furniture wax. Also, it’s more durable and doesn’t require buying a wax brush.
Repurposed China Cabinet Ideas
What else can you put in china cabinets besides china?
There are several options to give you new uses for old hutches. Some include fancy bathroom storage, and craft room organization and I’ve even seen someone put led lighting for house plants inside each shelf to use it as a huge terrarium.
Most of all I like the idea of using china cabinets to beautifully display decor items. People don’t register for china and crystal like they used to, but that doesn’t mean you can display some beautiful pieces in your china cabinet. Here’s a fabulous post by Kim at Savy Southern Style with lots of ideas on other uses for china cabinets instead of just white dishes.
How Do YOu Style a China Cabinet in a Modern Way: Dining Room Display Ideas for China Cabinets
So you have just finished your china cabinet and now it’s time to put all that wedding china and crystal in it. But what is the best way to arrange it???
There are two things I would keep in mind when arranging dishes in a china cabinet. For one, symmetry is your best friend and two, don’t overdo it. In other words, don’t try to fit every single piece of china you own inside of it or it will look cluttered and dated instead of fresh and classy.
Take inventory of what you have and start by putting some plates in the back. Go for symmetry which makes this process MUCH easier.
Now, put in some of your larger or more important pieces, and then use coffee cups and glasses as fillers on the sides. I promise it is easy once you get started. For more inspiration, here are some great china cabinet display ideas with pictures!
Can a Hutch Without Glass Still Be Refinished?
I’ve had a couple of readers tell me they found a china cabinet with broken glass but didn’t know if it was still viable for refinishing. Absolutely it is!
You have a couple of different options here:
Replace China Cabinet Glass – If your glass panels are not curved, you can easily get a quote from a local glass dealer to see how much it would cost to replace the panels and then use the china cabinet retainer clips I mentioned to keep them in place. Plexiglass would be a cheaper option, but scratching can be a real issue.
Leave the Glass Out – I’ve seen some really pretty china cabinets that did not have the glass. Also, if you are going for a more casual look, you can use chicken wire over your openings like Denise at Salvaged Inspirations in her post Replace Glass with Chicken Wire the Safe Way! You can also leave off the doors and just have open shelving.

What about China Cabinet Makeovers with Chalk Paint?
Would I ever chalk paint a china cabinet? Nope. I have nothing against chalk paint but as I wrote in my post about a better, cheaper, and more durable alternative to chalk paint, I would probably opt for this painting process instead of chalk painting any furniture piece. It’s just my personal preference and what works best for me and my budget! If you want a chalky finish, just use a matte paint: The Best Paint for Furniture
But if you are a fan of chalk paint here is a video that will help!
How to Chalk Paint a Hutch or China Cabinet
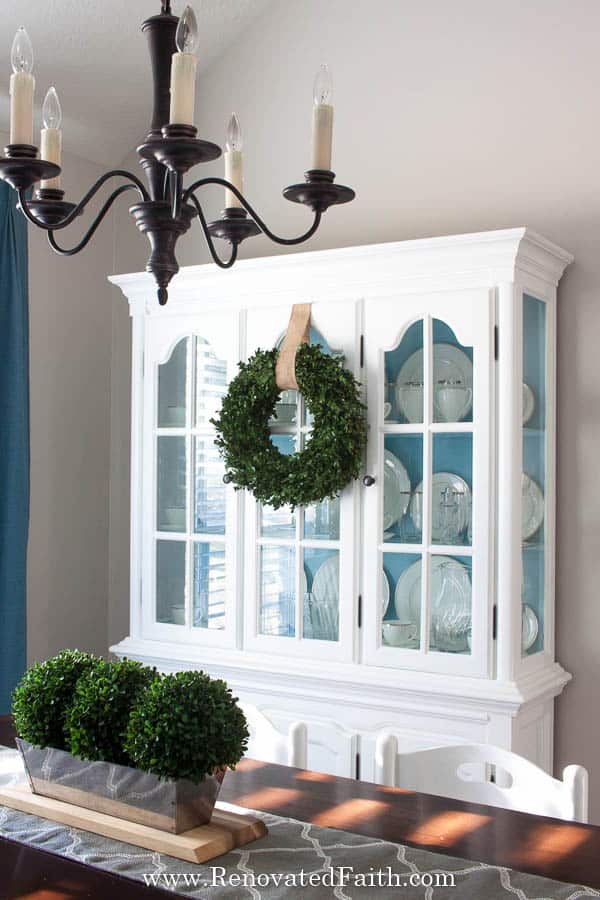
Another White China Cabinet Makeover
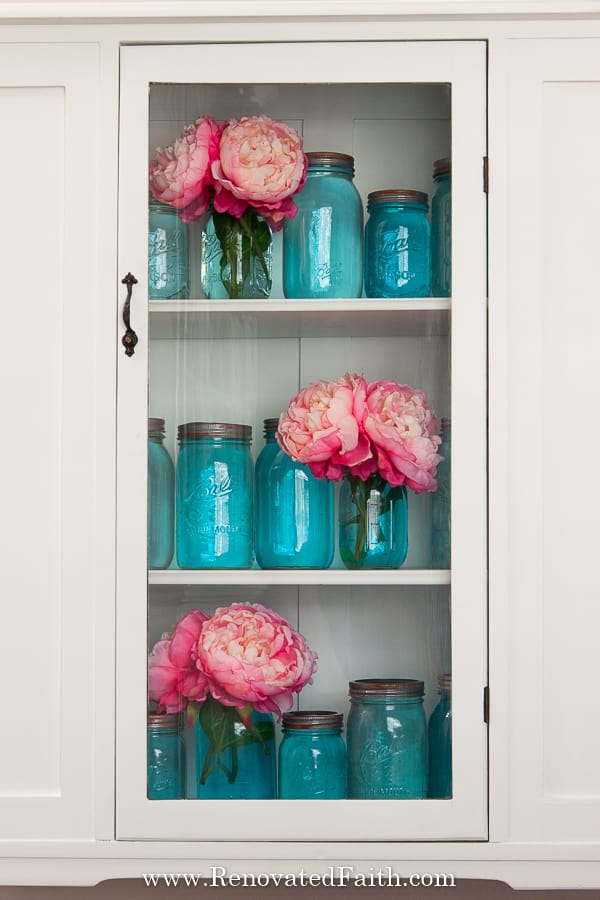
To see another china hutch transformation, check out this post: How to Paint Furniture White (Easy China Hutch Makeover)
Where is the Best Place to Find a China Hutch?
Refinishing a china hutch is a great way to personalize a large piece of furniture with your own design style. Facebook Marketplace is a great place to find traditional pieces in good condition. The only thing about Facebook Marketplace finds is that you can’t smell it first. Lingering odors can be hard to get rid of but this will help: How to Remove Musty Odor From Furniture
Don’t commit to buy the furniture piece until you actually see and be sure to check inside of the drawers to make sure they are working properly and that also check from the bottom to the top of a china cabinet for any damage. Even if it has layers of paint or a distressed look, don’t let that discourage you. The most important thing is to get an item without any structural damage. Also, make sure you leave with any wood shelves that go inside.
How Do You Paint a China Hutch Without Sanding It?
On a couple of future projects, I plan on experimenting with a liquid deglosser so I don’t have to sand. This is a great option if your china hutch has lots of unique details that you don’t want to round off by sanding. I usually prefer sanding furniture pieces to ensure the finishes lasts. I like to use an electric sander which allows me to sand a piece in less than 5 minutes as opposed to sanding the hard way with a piece of sandpaper. If you have damage or small holes on your piece, you will have to sand a little bit to smooth out any dried wood filler
More Posts Related to My White China Hutch Makeover
The Best Sanders for Wood Furniture
How to Repair Small Holes and Scratches in Furniture Projects
Easy Coffee Table Build (Beginner Tutorial & Video)
The Best Furniture Makeovers (Before and After Reveals)
Effective Ways to Update Home Decor with Spray Paint
How to Get the Look of Dark Wax on Furniture with Glaze
Creative Ideas to Give Furniture A Fresh New Look (Before and After Reveals)
The Best Paint Greige for a Living Room (and Neutral Colors)
The Best White Paint Colors for Cabinets (Crisp Whites to Creamy Shade Options)
My Favorite Furniture Paints (24 Blind-Tested and Reviewed)
Milk Paint vs Chalk Paint vs Latex
Easy Topiary Tree Tutorial on a Budget
Stylish and Inexpensive Light Fixture Makeovers

Final Thoughts on How to Paint A China Cabinet
Buying a brand new china cabinet can cost you well over $1000 but you can spend less than $100 by refinishing a china cabinet or hutch yourself. Plus, you get to add your own specific style! Now, head out to your local used furniture store or thrift store and use this tutorial to turn it into a statement piece. And as you are looking, remember God sees the same potential in you, loving you not for what you will one day become but how you are right now!
Click below to save this china cabinet hutch makeover for later:
What are your thoughts, my friend? Do you think the makeover was worth it? Can you relate to what it feels like to be broken? I love to hear your thoughts! Scroll down to leave a comment and I WILL reply! ❤️
Blessings,

Be sure to follow the fun here!
Email Subscription | Instagram | Pinterest | Facebook | Twitter
Quick Links to Information in this Post
- 1 How to PAINT a China Cabinet Like a Pro
- 2 Painted China Cabinet Makeover, Before and After
- 3 How to Refinish a Hutch or China Cabinet
- 4
- 5 Supplies Needed For My China Cabinet Hutch Makeover
- 6 7 Steps to Update A China Cabinet
- 7 Renovate Your Faith: Made Over Inside and Out
- 8
- 9 FAQ’s: China Cabinet Hutch Makeover
- 10 More Posts Related to My White China Hutch Makeover
- 11 Final Thoughts on How to Paint A China Cabinet
- 12 EASY DIY China Cabinet Hutch Makeover
EASY DIY China Cabinet Hutch Makeover

Karin Peters is a DIY expert and the creator of Renovated Faith. She is a furniture painter, a home design consultant, and a tenacious problem solver determined to help you transform your house into a home. With 17 years of experience with DIY home improvement, she researches and analyses professional processes to adapt them to be easy and cost-effective for DIYers. She then tests every project and product before it appears on the site in a detailed, step-by-step format. After attending Texas A&M University, she received her Master of Divinity with Biblical Languages at Southwestern Baptist Theology Seminary. Her passions unite in Renovated Faith, which shows readers how to create a home that serves them so they can pursue their God-given purposes. About Renovated Faith | Editorial Policy | Facebook | Twitter | LinkedIn

I am about to paint a china cabinet white with a darker blue interior. I read on the general finishes top coat page to not use a clear topcoat on bright white paint because it can cause yellowing. Do I need to worry about that? I intend to use the same Behr paint in pure white as you did and the same top coat that is suggested in this article. Like mentioned, I have 2 small children, so I’m trying to be proactive in keeping things clean, but I sure don’t want a dingy yellow cabinet after all of my hard work!
Hey Christi, Use Benjamin Moore Advance and you don’t have to use a topcoat. It’s a little more expensive but worth every penny in terms of durability. I tested furniture paints and it came out on top. https://renovatedfaith.com/best-furniture-paint/
I love your intro- I must have needed to hear that message! Thank you.
I inherited my mother’s china cabinet which looks exactly lime yours. However- hers is not hard wood. more pressed wood or something. I am not sure about sanding it as it seem it will be to particle board or some other substance. This cabinet was my mother’s pride and joy. she showed every visitor in her home her “treasures”. She had a hard life and this was her first new piece and housed her precious items so I can’t do this wrong. do you think liquid sandpaper then zinser primer?
Thank you so much Deborah! When you sand with the sander, you should be ok. You are just very lightly sanding to take the shine off the surface so I feel pretty confident it wouldn’t take off the surface. Please let me know if you have any other questions and thank you so much for your kinds words. Your encouragement is much appreciated, Deborah!
Karin,
The China Cabinet is beautiful as your whole article!
God Bless You:)
when painting a hutch do you paint the back (if doing a different colour than the rest ) first or last?
Great question. I like to paint the inside first, let it try and then paint the rest. Thanks Susan! – Karin
Karin,
What a beautiful china hutch. I love how you explain all the process and I have a hutch that I want to paint but it is shiny and slick. Do you have suggestions on what I need to do first. It is solid wood but the finish is shiny and slick. I love your blog site and enjoy your relating our life to how God can change a person to a new being inside and out. I’m going back to your blog the other week about the Bible study. I know I kept it and I want to start doing that. You have such a beautiful way of relating life and I enjoy all your blog posts. Keep up the good work. If you have time, maybe you can get back to me about the china hutch i have and what to do first. Thanks so much,
your new blog friend,
jean
Hey Jean! Thank you for your very kind words and I’m so glad you find the blog encouraging. I really appreciate it. As far as your shiny finish, use the same process I used ins post: A Better Alternative to Chalk Paint You will find the whole process there but feel free to ask me any questions along the way! Thank you again Jean!
I love this cabinet makeover. I am looking for a smaller China cabinet like this. I like your article about chalk paint. Now I have a big question.. I bought a wood pine cabinand painted it with fusion mineral paint. Now I want to remove this paint and white wash the wood. What’s the best approach to get all of the paint off and out of the crevices so I can get this whitewash pine look I want?
Hmmm… That’s a great question Becky. I would recommend this technique – https://renovatedfaith.com/2018/10/09/diy-driftwood-finish/ . Or the only other option I know is to use a chemical stripper to get off all the old paint. Thanks for stopping by Becky and let me know how it goes!
I am a pastor’s wife and we often save furniture from the trash heap or people offer it to us before they put it there themselves!! We live in Hong Kong, where EVERYTHING is expensive, so I’m glad we can be the recipients of used furniture. I would LOVE to transform our second-hand china cabinet, but I am so intimidated by the project. Your cabinet looks so beautiful and I really appreciate how you wove the gospel into your post. So good. Thank you!!
Absolutely beautiful work, Karin! And I love your comparison between broken furniture and broken people. Great post.
I love the comparison between the china cabinet and us. Beautifully written and the china cabinet is beautiful as well. You did a great job!
Thank you so much Julia! The china cabinet was just meant to be and so was what God showed me through it. Thanks for stopping by.
Love how you weaved these together; the broken cabinet and the broken human! The transformation turned out great with the cabinet and we know the transformation of broken people will turn out perfect in Heaven too! Visiting from #BHG Facebook group
Thanks Julie! I appreciate your encouraging words.