Easy DIY Farmhouse Table (Best Tutorial for Beginners with Video!)
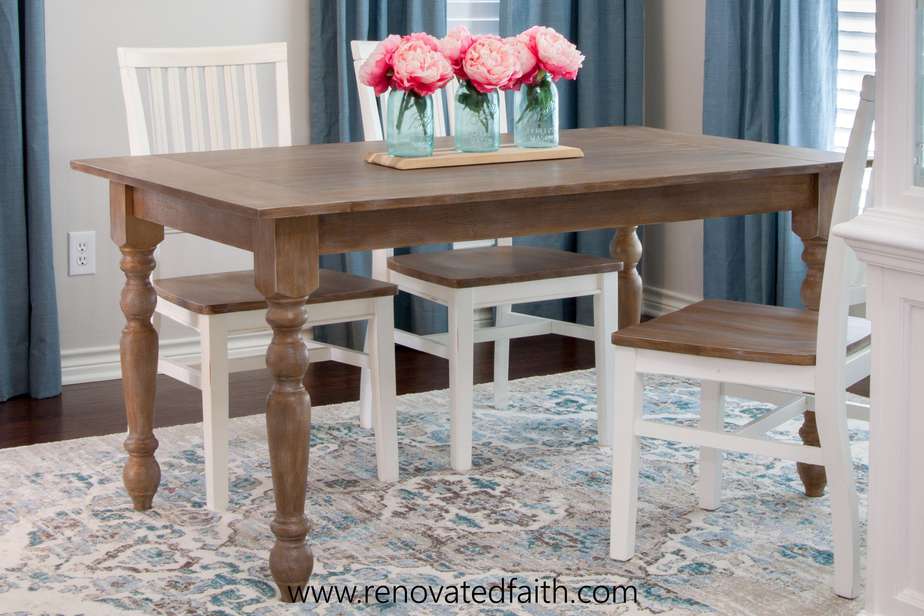
A Simple Guide With Free Farmhouse Table Plans
Building a farmhouse table is easy with the right plans! This DIY farmhouse table tutorial will give you the look you want for less!
Those stunning farmhouse tables with their milled legs and gorgeous modern farmhouse finishes boast a pretty high price tag in any furniture store.
But you don’t have to have a huge budget for a new dining table or be a master woodworker to have your own breathtaking table.
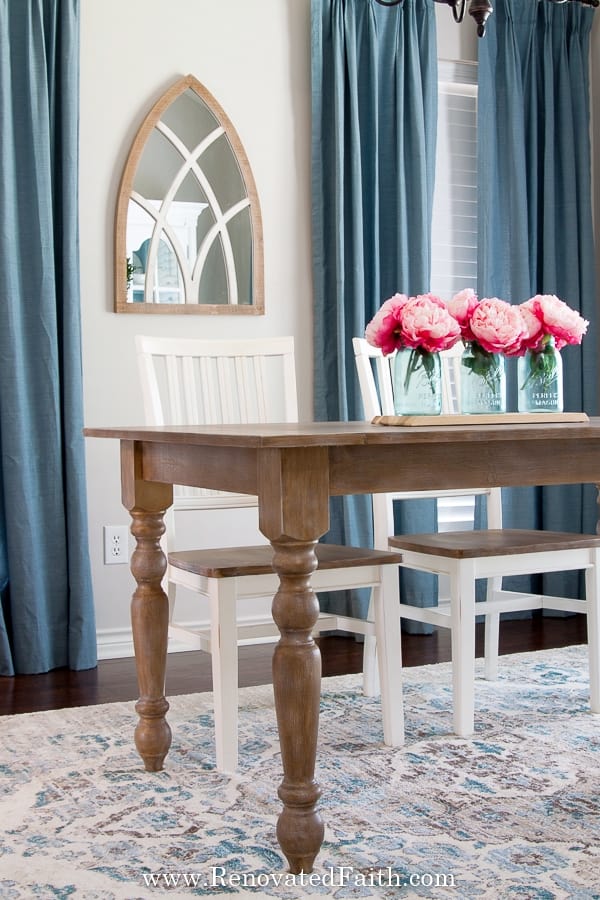
With this beginner tutorial, video and free plans, you would be shocked to know how easy it is to make your own dining table.
I’ll also show you an array of farmhouse faux finishes and the best clear coat so that you have a smooth finish that can endure the heavy daily use that comes with having kids. If you need a large dining table, these plans are easily customized to a bigger size to fit your family’s needs.
In this post, I can’t wait to show YOU how you can build a simple table you can be proud of while spending a fraction of the cost you’d spend on a new dining room table in a furniture store.
LET ME SHOW YOU:
- How to build a DIY farmhouse table with modern farmhouse style for less than $150
- The easy way to customize your table to your own style and to the perfect size!
- Why a faux stain can save you a ton of money (and from a few headaches!) on DIY furniture projects
- Some encouragement for when events in life cause us to resort to our “Plan B’s” (Check out the Renovate Your Faith Devotional at the bottom of this post.)
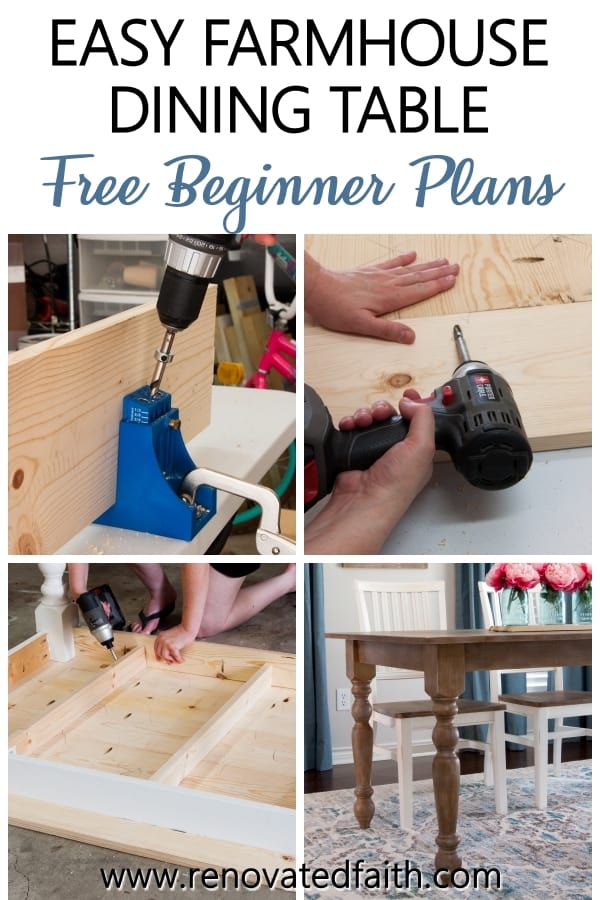
Quick Links to Information in this Post
- 1 A Simple Guide With Free Farmhouse Table Plans
- 2 DIY Farmhouse Table Dimensions
- 3 Shopping List: DIY Farmhouse Table Plans
- 4 Common Materials FOr Your DIY Farm Table
- 5 Cut List: How to Make Your Own Farmhouse Table
- 6 Tools Needed For Building a Farmhouse Table
- 7 How to Build Farmhouse Table: The Process
- 8 RENOVATE YOUR FAITH: Embracing “Plan B”
- 9
- 10
- 11 FAQ’s: DIY Farmhouse Table with Pocket Holes
- 12 More Posts Related to Building a Farmhouse Table
- 13 Related Links: Instructions On How To Build a Farmhouse Table with Turned Legs
- 14 Final Thoughts on DIY Farmhouse Tables
There’s something so satisfying about building your own dining room table.
The first solid piece of furniture we built was our turned-leg coffee table (see it here).
I love that our family gathers around both tables on a daily basis and that they were both built by my husband Jeremy and me. Not only are these tables the most functional pieces of furniture in our home, but they are both the most sentimental.
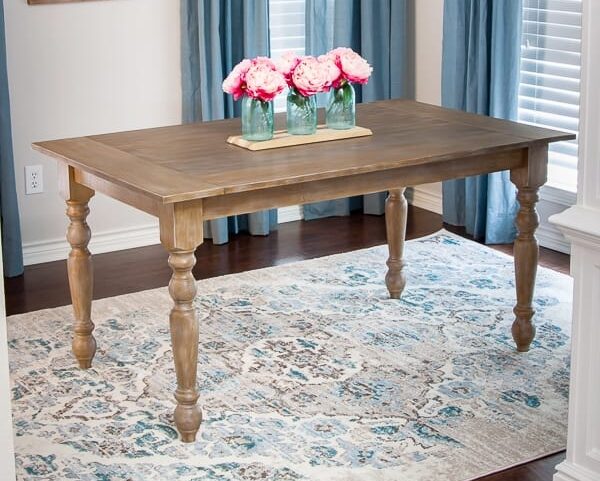
It is Easy to Build a Farmhouse Table?
When we built our previous dining table, we used an old butcher block top attached to a table apron and 4 turned legs I bought online. Unfortunately, the dense, heavy wood of the butcher block top was way too heavy for those dainty turned legs and we eventually decided the butcher block top had to go.
“Plan B” was to reuse the same legs and build the rest of the table with a Kreg jig. And thus, our DIY farm table plans were born.
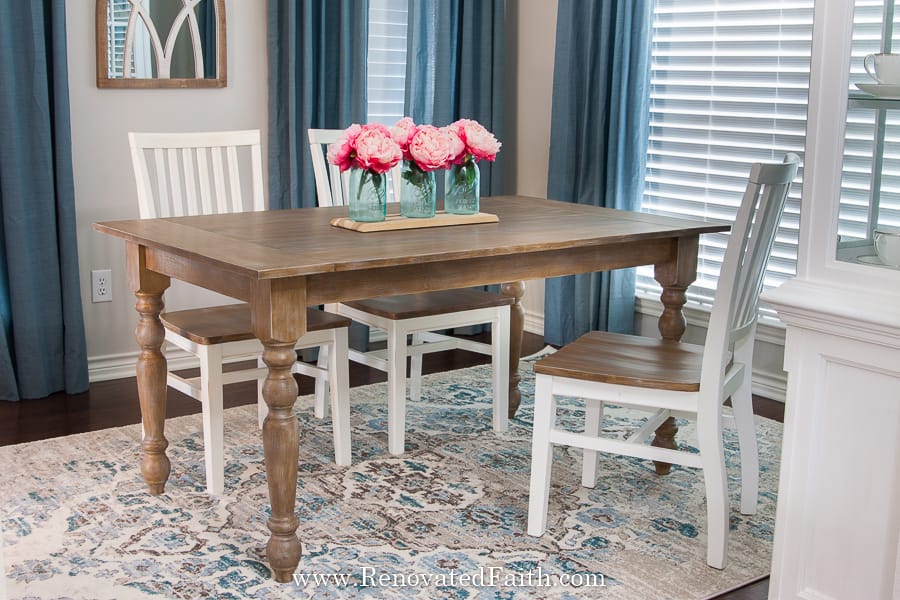
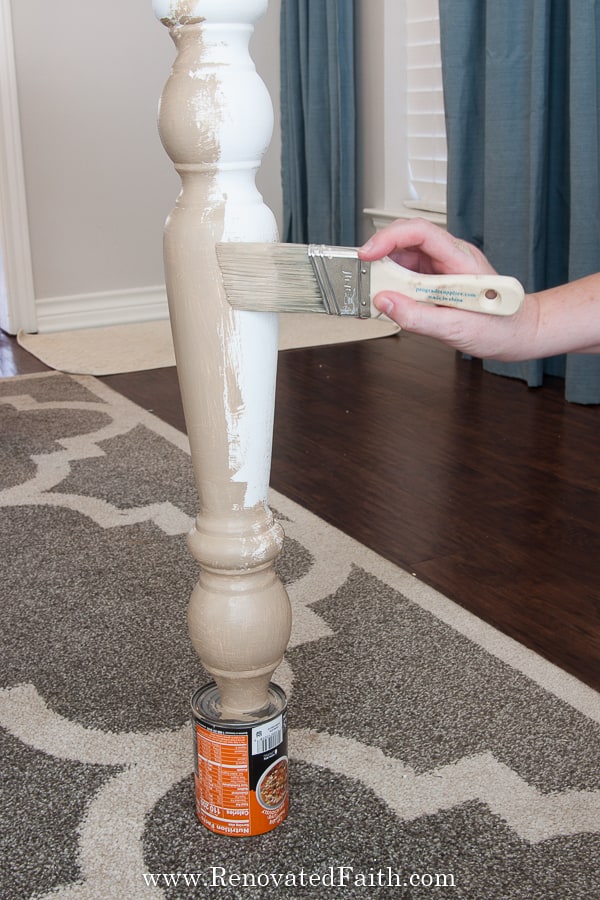
JUST FYI: Our dinner table has a white base and white legs because they are reused from a previous table I had painted. For the same of this tutorial, I’ll be explaining this as if we are building the table from scratch – since we essentially are.
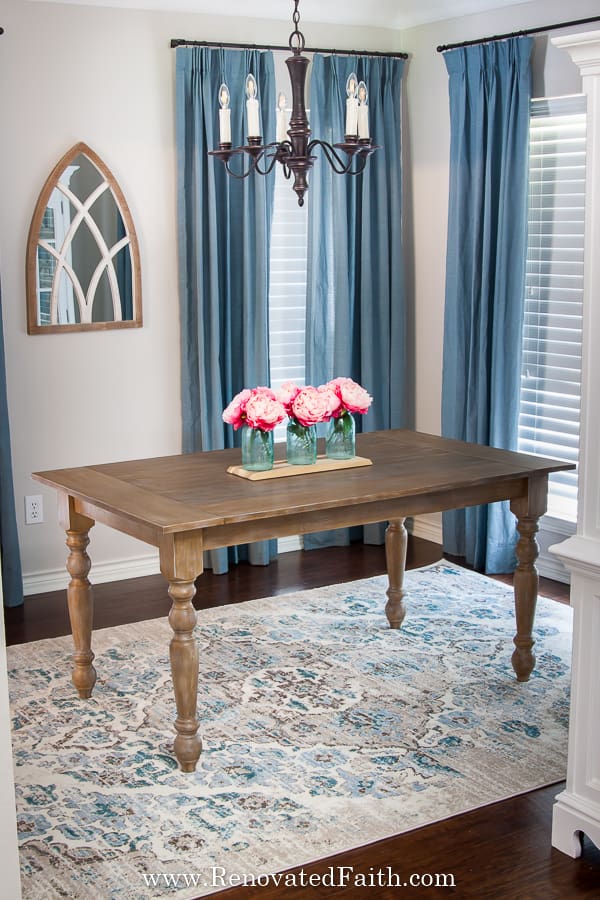
Fortunately, our Plan B turned out SO much better than Plan A. I don’t usually say this about my own projects but I am SO stinkin’ proud of how it turned out! These plans are easy for beginners and give you the look of a high-end table in any furniture store.
I love the look of this table much more than the old one! It’s probably not a good idea to get emotionally attached to furniture, but every time I pass by it, it puts a big smile on my face!
How To Make A Farmhouse Table That Is Durable
If you want farmhouse table plans for beginners, you have come to the right place, my friend! These instructions explain how to build a farmhouse table with pocket holes. In other words, you will use a Kreg jig to join together pieces of wood with pocket screws.
Kreg Joinery is an incredibly fast, strong, and simple way of joining wood together. It essentially involves drilling holes at 15-degree angles into one workpiece and then joining it to a second workpiece with self-tapping screws. Not only is the Kreg jig easy to use it’s an incredibly strong method of wood joinery that rivals techniques that are much more advanced.
While it may seem simple, the technique is revolutionary because of how easy it is. When you’re done assembling, there’s no need to leave your joint clamped up for hours, glue is completely optional, and there are no frustrating alignment problems to deal with.
Kreg Jig projects are so simple they can be built in just a few easy steps – it’s as easy as drill, drive, and you’re done!
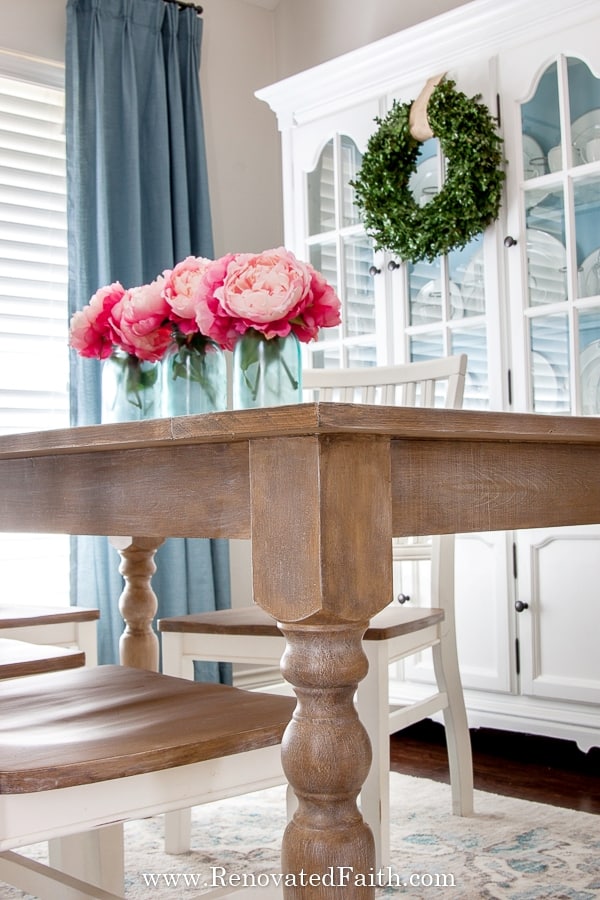
One consideration is how thick you want your tabletop. These diy farmhouse table plans are for a tabletop with 1 x’s (the wood was an inch thick before it was milled and now is really 3/4″ thick). Many farmhouse kitchen table plans use thicker wood for the tops.
However, I love how the thinner top matches the sophisticated look of the turned legs. Because the top is a little bit thinner, it’s important to add stringers underneath the table for extra support so your boards don’t warp.
This is a super easy project because of the Kreg jig and my farmhouse dining table instructions will show you exactly what to do.
What Kind of Wood Should I Use to Build a Farmhouse Table?
One of the most important considerations is what type of wood to use to build your farmhouse table. Your biggest limitation is of course cost. I used common pine on this table and my coffee table instead of a higher-grade wood.
The faux stain technique I used covered all of the knot holes and blemishes giving me the look of high-end wood but with a low-cost price tag. To read more about options of solid wood, click here: What Wood Is Best For A Dining Table?
How TO Save a Ton of Money While Still Getting the Look You Want
You can save a lot of money by building a farmhouse dining room table yourself instead of buying new. But you can save even more money by just getting a common material like pine instead of the higher-grade pine or white oak and using a faux finish.
In the past, I have opted for the higher grade wood because I don’t like the look of knotholes in my furniture pieces. Common pine is durable and cheap but always has lots of knotholes and irregularities.
The higher-grade wood is quite a bit more expensive so I decided to buy common pine (knot holes and all!). The good thing about a faux stain is that it covers all knot holes and imperfections. A traditional stain will always allow knot holes to show through but my faux stains give the look of a very high-grade wood while spending quite a bit less on wood.
How Do You Make A Table Look Like A Farmhouse Table – With Faux Stains!
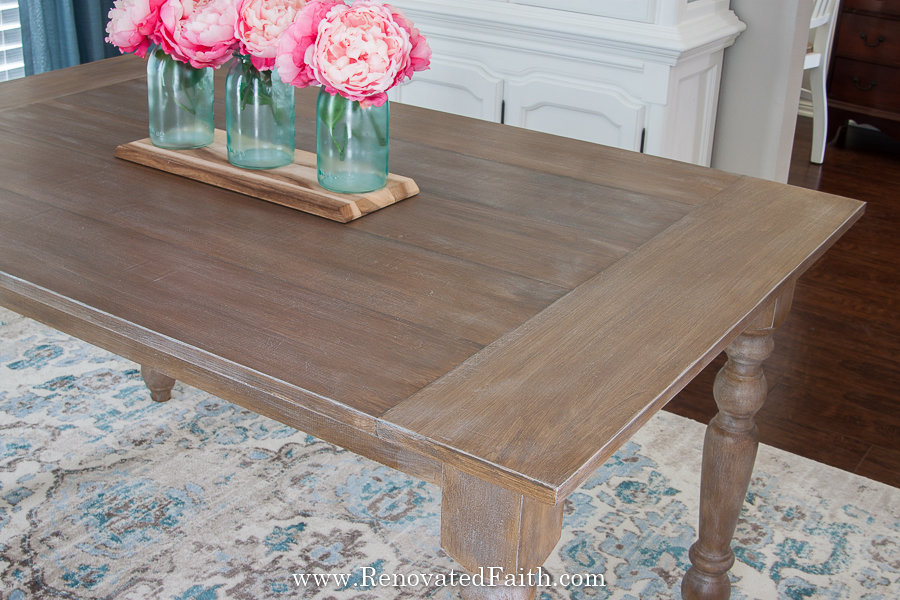
In addition to the curvy milled legs, faux finishes go a long way in helping any table to have that farmhouse furniture aesthetic. You won’t believe the end result – all thanks to low-cost pine and a faux stain using latex paint samples from Home Depot! Here are some awesome ideas on how to refinish your farm table:
DIY Farmhouse Table Ideas
Restoration Hard Ware Finish (the finish for this table) | Driftwood Finish | Traditional Stain Faux Finish Options | Whitewashed Raw Wood Finish | Rustic Dining Table with Dark Gel Stain
Also, a traditional stain can be pretty unpredictable as it doesn’t always absorb the same on pieces that have been sanded more than others. Uneven moisture levels in the wood can also cause issues with unevenness in the absorption of traditional stains. With the above faux stains, you have total control of what your final product will look like.
How Much Does it Cost to Build a Farmhouse Table?
The total cost breakdown using common pine and a faux stain to hide knotholes was less than $150. The legs are by far the greatest expense. If I used a higher grade wood like oak without knot holes, there would be a significant extra cost involved. Most similar farmhouse tables online cost anywhere from $500 to $2000 or more.
How to Build a Farm Table with Pocket Holes
Before I first used a Kreg jig, I was so intimidated but once I started I was amazed at how much time it says, how precise the hole placement was, and also the strength of the joints.
After using a Kreg jig to build furniture, I’d never consider another method of furniture building. It is that easy and you can be confident your furniture piece will last for years to come.
NEW TO WOODWORKING? The first step is setting up your Kreg for the thickness of the wood. I used 1x 8’s for my tabletop so I adjusted the Kreg jig to wood with a thickness of 3/4″. That also meant that I would need … pocket holes. You can see some great instructions here to get you started: How To Set Up and Use a Kreg Jig
DIY Farmhouse Table Dimensions
- Height – 30″
- Width – 36.5
- Length – 60.25″
How To Build A Large Dining Room Table Customized To Your Needs
We built a small farmhouse table but if you need a big table for a large family, the dimensions can be adapted to best fit your space needs. To make adjustments for a long table, add the same length to the lengthwise tabletop boards and to the long pieces of the apron.
To change the width of the table, you can add more center planks. To get the desiredt width, you can swap out multiples of 1×6’s or 1×4’s but make sure to get more pocket hole screws if you go with these smaller boards.
Shopping List: DIY Farmhouse Table Plans
3.5″ wide turned coffee table legs – I use these farmhouse table legs in pine from Osborne Wood.
4 – 1×8 @ 8 feet long
2 – 1×4 @ 8 feet long
1 – 1×3 @ 8 feet long
Paint to Faux Stain Your Dining Table (CLICK HERE For My Traditional Faux Stains and you can CLICK HERE for the Restoration Hardware Finish).
FREE MUST-Have Painting Tips For Furniture – These are my all-time best tips for painting furniture and you can download them here free.
Common Materials FOr Your DIY Farm Table
1-1/4” Pocket Hole Screws
Gorilla Wood Glue – Optional
Elmer’s Wood Filler
Caulk – Optional
Cut List: How to Make Your Own Farmhouse Table
5 – 1×8 @ 45.5” (tabletop boards)
2 – 1×8 @36.5” (breadboard ends)
2 – 1×4 @ 48” (long aprons)*
2 – 1×4 @ 24.5” (short aprons)
3 – 1×3 @ 28 1/8” (stringers)
*Cut 1 short apron and 1 long apron out of each 8 ft. 1×4.
Tools Needed For Building a Farmhouse Table
Tape Measure
Speed Square
Pencil
Safety Glasses
Ear Protection
Kreg Jig
Clamps
Drill and Drill Bits
Mouse Sander (see a low-cost option here) medium-grit sandpaper or steel wool
FREE Furniture Painting Cheat Sheet – This free printable is available in my resource library. Get access to it and all my other free printables, templates and wall art by filling out the form at the bottom of this post.
How to Select the Best Lumber for Your DIY Farmhouse Table
When you select boards from your local lumber yard or local hardware store, to buy the best pieces for your project. Be sure that the boards you select are straight boards by looking down the end of each. Also, don’t get boards with a green tint because those boards are brand new and will contract some as they dry.
How to Build Farmhouse Table: The Process
This process is so easy but so you can better see the details of this woodworking project, I’ve included a video. We were able to finish the entire table in a couple of hours. After a break from the heat, I started the faux stain process the next morning. You won’t believe how great it turned out!
Here is a full step-by-step video showing everything from start to finish. If you don’t see it pop up, you can also find it here: Make a Beautiful DIY Farmhouse Table, YouTube Video
Step 1: How to Make a DIY Farmhouse TableTop
One of the first things you need to do is to lay out your cut boards side-to-side. I like to alternate the grain direction of my boards as this will help to ensure the top of the table does not warp over time. See how each board’s grain is going in the opposite direction of the one next to it.
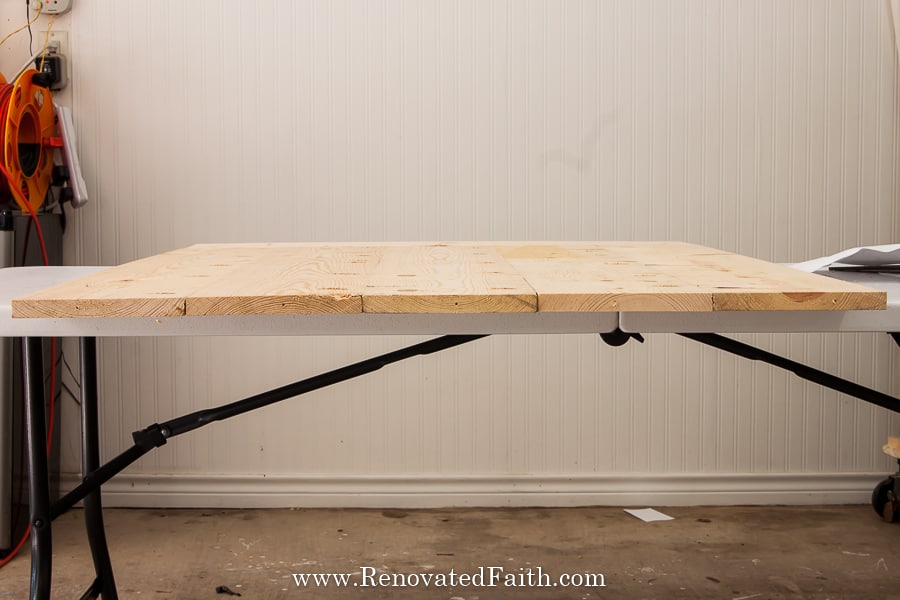
Using the right tools makes all the difference! If you are brand new to the concept of building a farmhouse table with pocket holes, check out this video: How to Use a Kreg Jig
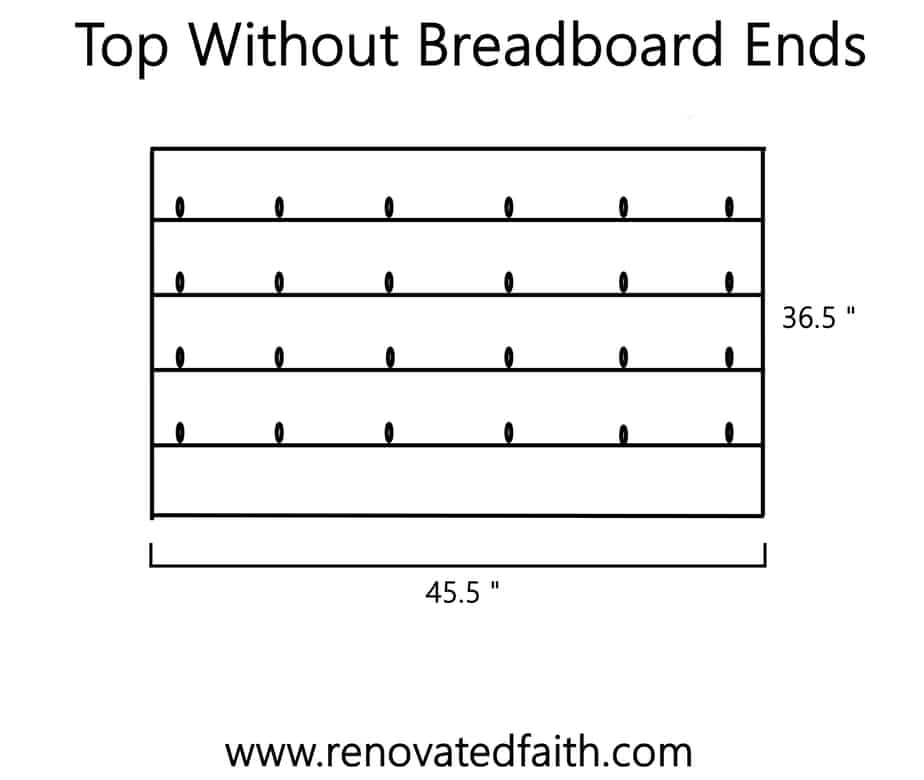
Now it’s time to drill your 3/4″ pocket holes into all of the boards except one as shown in the diagram below. Once you have drilled screw holes in each board, you can join them together with your 1 1/4 pocket hole screws. Be sure to do this on clean level surface so the surface of the boards line up evenly.
I like to use this clamp (click here for the current price) to overlap the boards as I put in the wood screws to ensure the top is as smooth as possible.
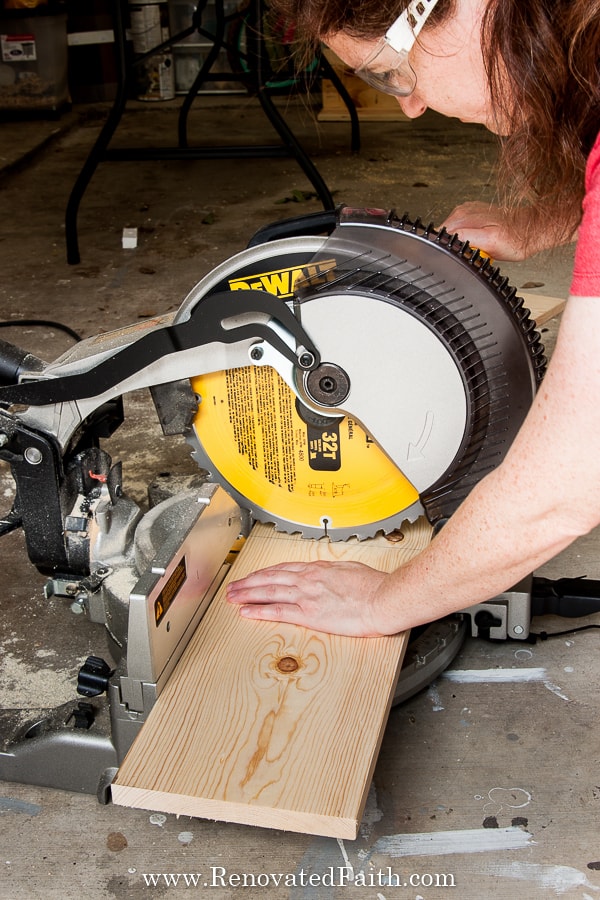
We used a compound miter saw (this one) to make straight cuts along each cut line. You can also use a table saw for your parallel cuts. If you are using a circular saw and the ends of the tabletop boards aren’t exactly the same, you can simply trim off the extra lengths with your circular saw.
Best Power Tools for DIYers
Wondering what other tools you might need? Here is a list of the 7 Best Power Tools for DIYers and beginning woodworkers. This guide will give you low-cost options on quality tools that will grow with you as your skills advance: Essential Tools for Beginners (A Non-Intimidating Guide to Power Tools)
Should You Glue Pocket Hole Joints?
Before you join your wood together, you have the option to add some glue in between each board for an even stronger joint. If you do, make sure to wipe off the excess glue that squeezes out between the boards
Renovated Faith: What’s in a Name?
God never leaves a project half-done…He continually works on each one of us, as a lavish expression of His amazing love and grace. So many of my DIY projects serve as a reminder of how God renovates our hearts. If you are a work-in-progress, like I am, be sure to check out the Renovate Your Faith Devotional at the bottom of this post. Click here to get a weekly reminder of new posts by email.
Step 2: HOw To Add Breadboard Ends To The Farm Table
The next step is to add the breadboard ends, which are the boards at each end of farmhouse table tops. It helps to give the table top a clean, finished look.
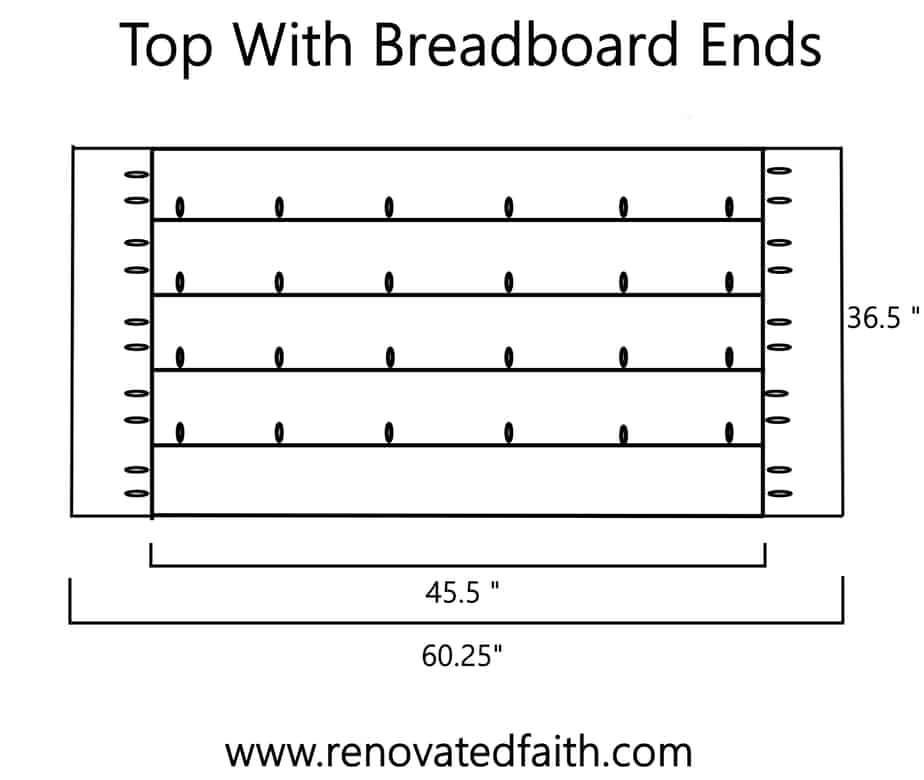
IMPORTANT TIP: Hold each breadboard end to the edge of the table and mark where your pocket holes should be. Make sure to avoid putting holes where the other table top boards meet. We put extra holes in the breadboard ends because you are drilling into the end of the wood and the screws are slightly more apt to strip out. With the extra holes, it doesn’t matter if one or two strip out because you’ve built in some insurance for yourself.
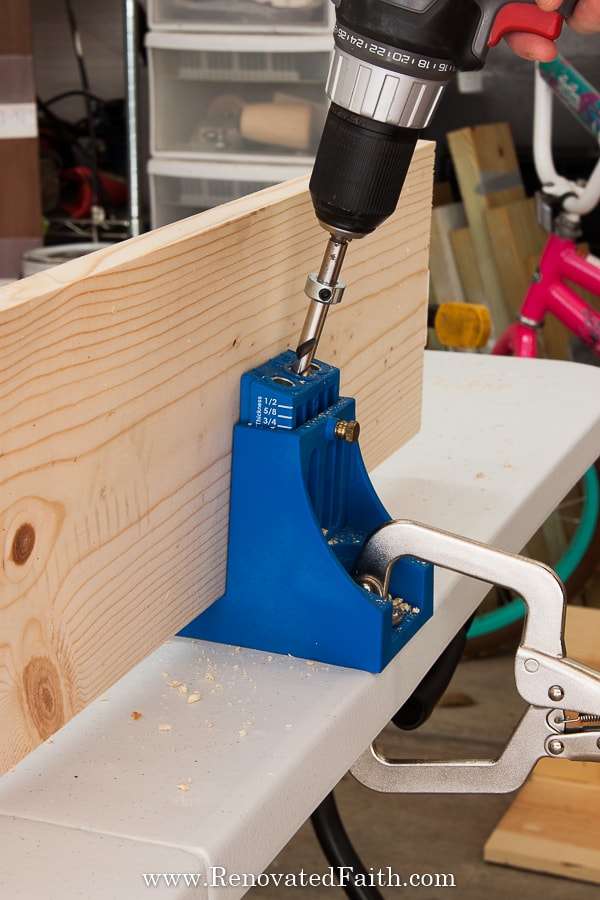
Once you have made holes in each of your breadboard ends, you can attach those ends to the table with your pocket hole screws. Use a clamp (or a friend) to hold the boards even.
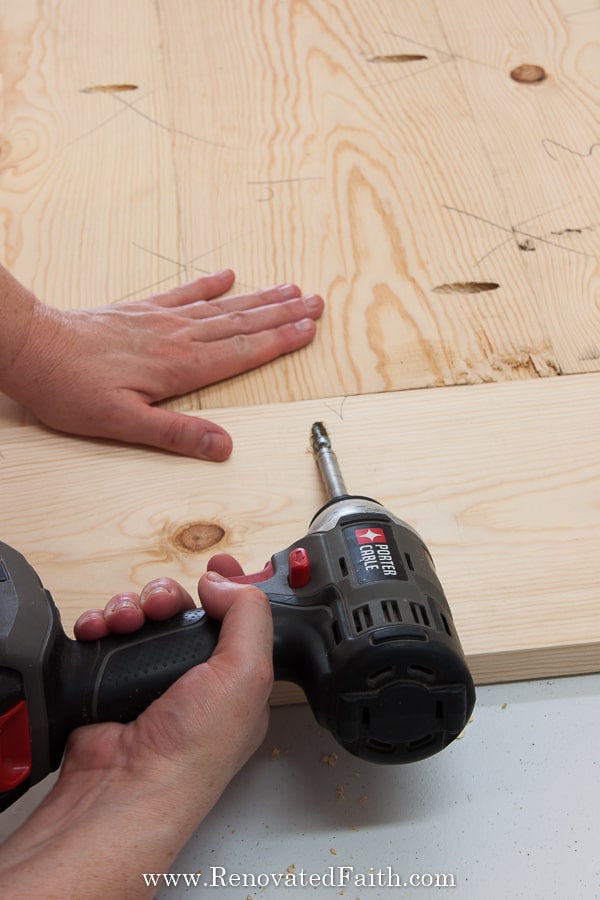
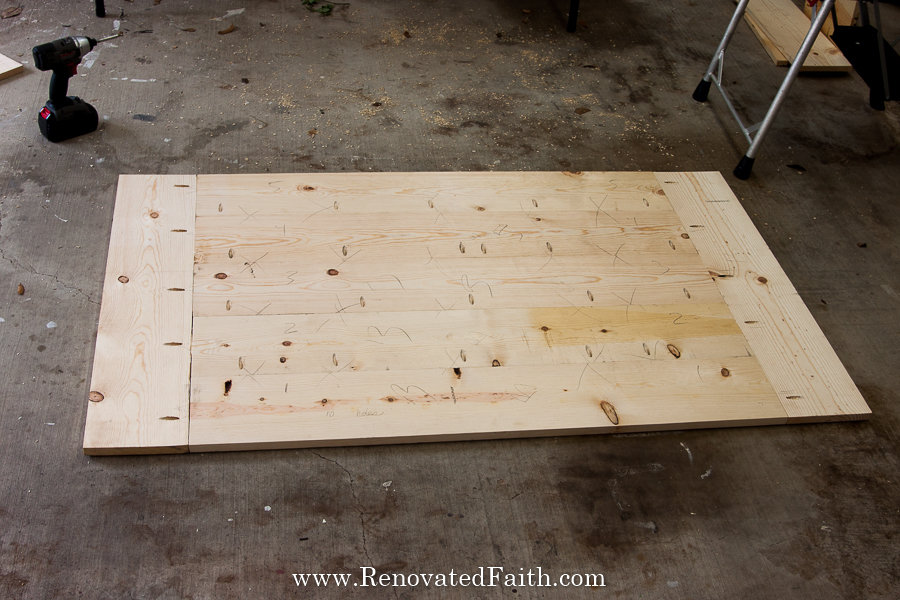
You can now see your farmhouse dining table taking shape. Most of the work is done and you won’t believe how great your table will look when it’s done!
Step 3: How to Make A Farmhouse Table Base
Now that you are finished with the top, it’s time to move on to the frame which includes the legs and 4 aprons or skirt boards. Add pocket holes to your apron boards like so:
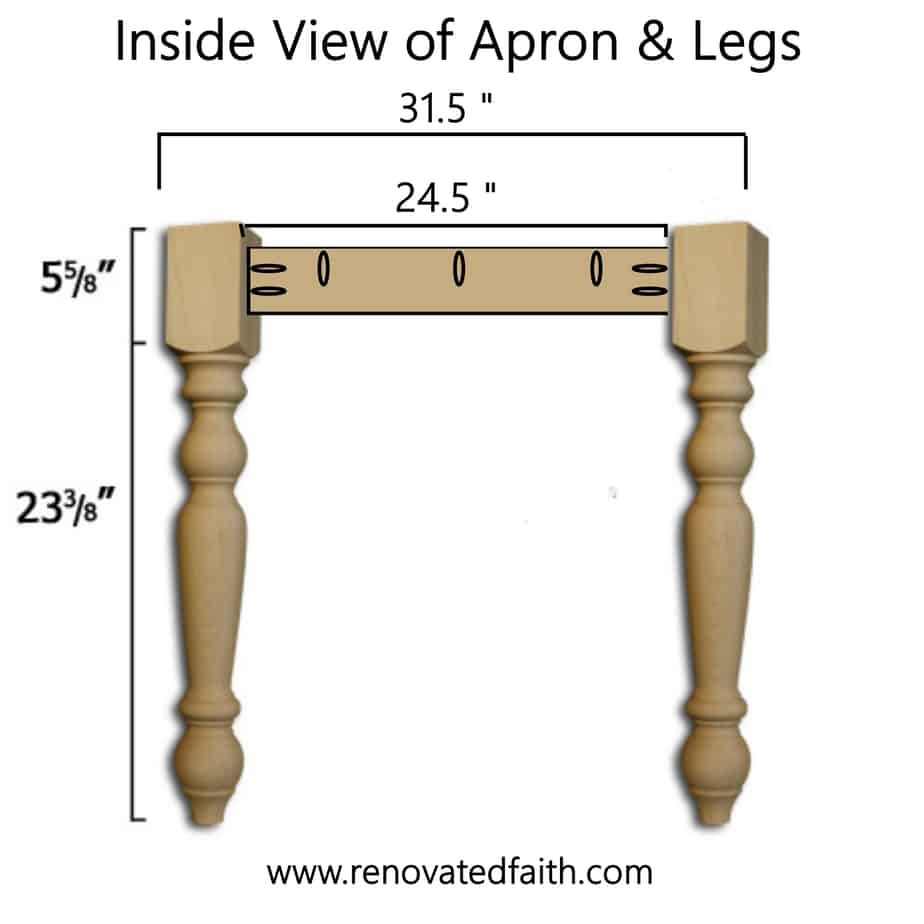
When it was time to attach the aprons to the legs, we used a scrap piece of wood that was 3/4″ deep to offset the apron from the leg. You can better see how we did this in the video.
Do the same with all four legs and apron boards.
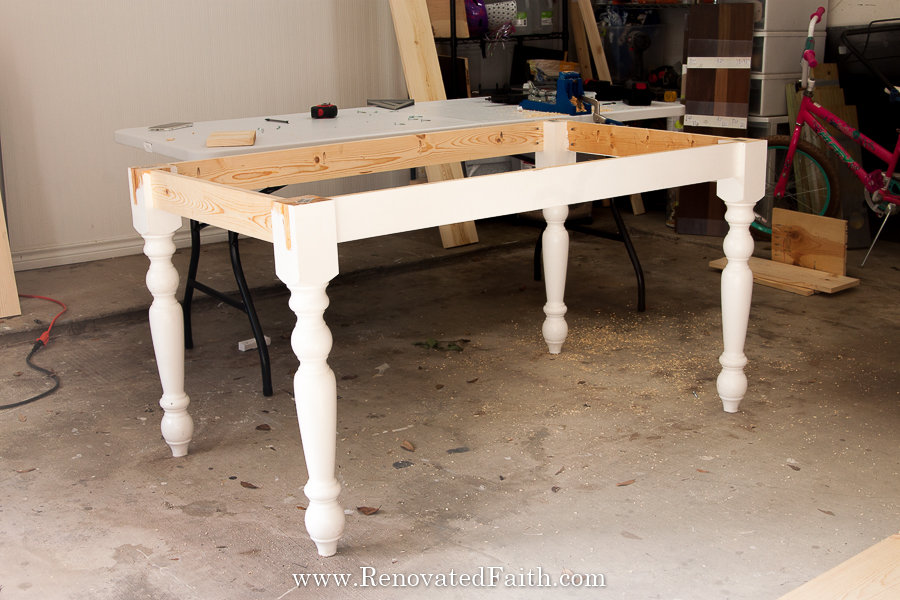
Where to Find Legs for a Farmhouse Dining Table
My favorite place to buy table legs is Osborne Wood. No matter your style, they have unlimited choices in legs for any big project. You can see the full selection of turned dining table legs here: Turned Farmhouse Dining Table Legs
Step 4: Attach the Table Top to the Frame of The Farm Table
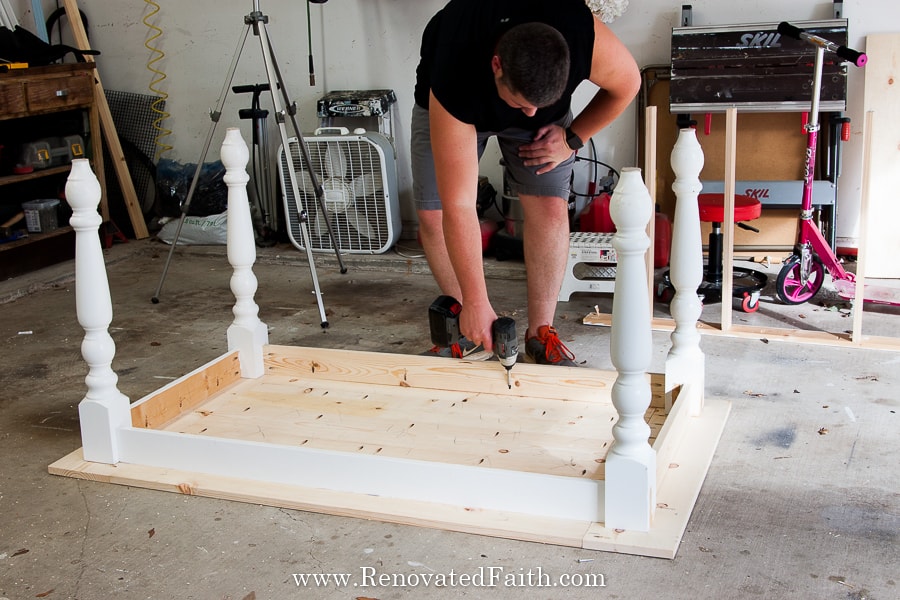
Finally, you can attach your tabletop to your frame. Lay the tabletop (bottom side up) on the grown and put the frame on top as shown in the video.
Center the frame and then attach it to the top with pocket hole screws.
Step 5: DIY Farmhouse Table That Won’t Warp – Add Supports
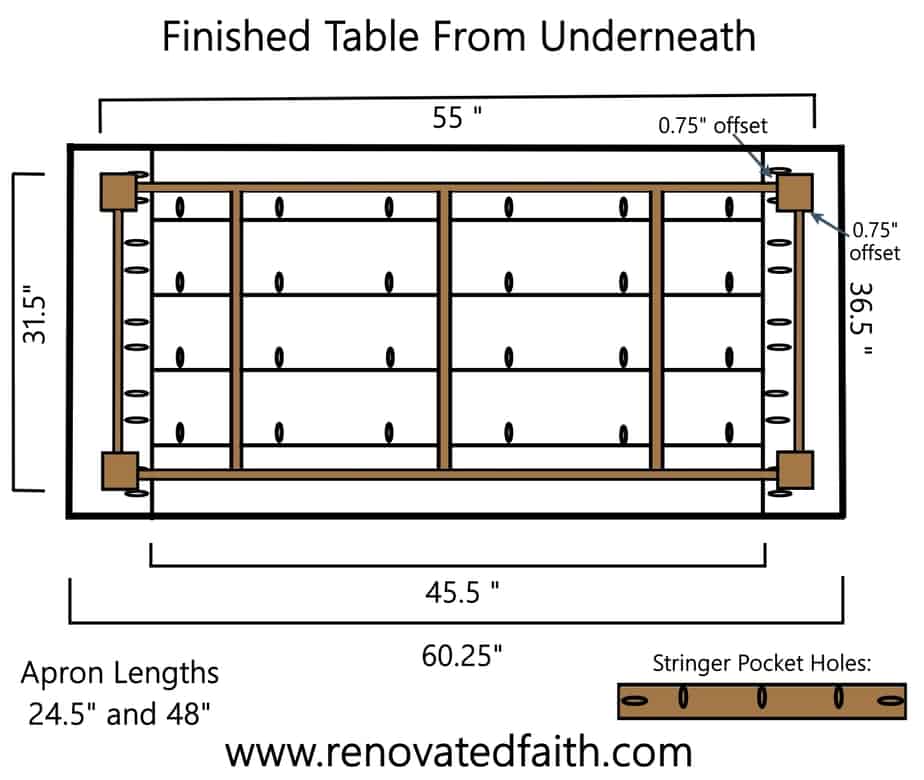
Support stringers are simply cross pieces under the tabletop that help to ensure the top boards stay in place and do not warp over time. For our farmhouse dining table, we added 3 supports. Add pocket holes to each support stringer as shown in the image above.
Once you’ve added the pocket holes, attach each to your dining table frame.
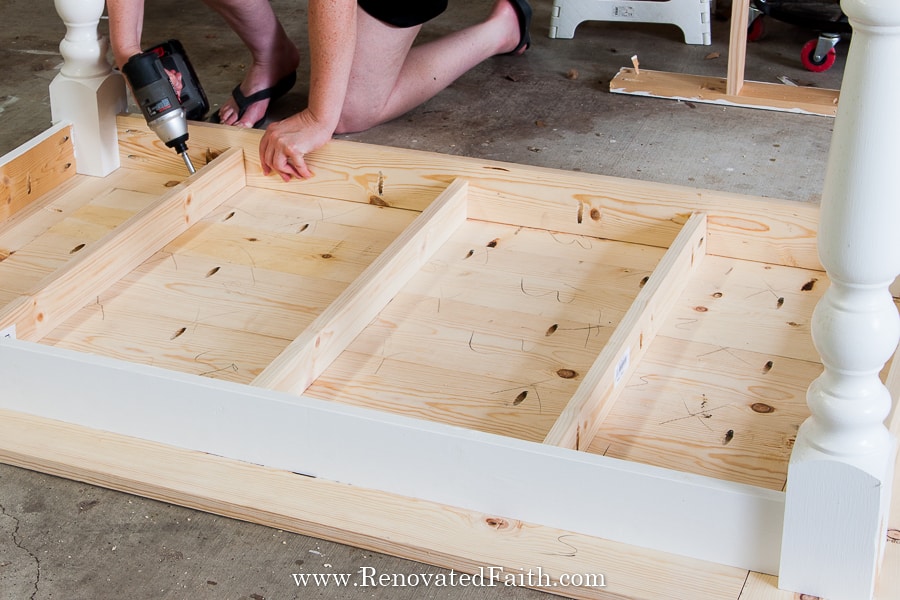
Step 6: How to Build DIY Farmhouse Table – Final Touches
The final step is to prepare your table for stain – whether it is a faux stain like the one on my table or a traditional stain.
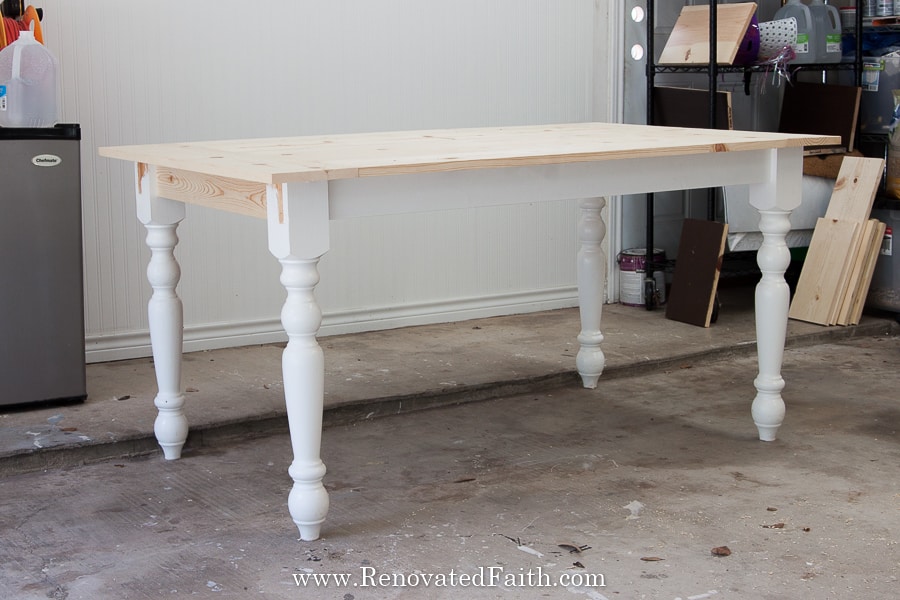
Prep When Using a Traditional Stain:
Use a stainable wood filler to fill any holes. You will still be able to see the hole because oftentimes the stainable wood filler doesn’t match the wood exactly. Also, be sure to use a wood conditioner before staining so the stain absorbs evenly.
Prep When Using a Faux Stain With Latex Paint
Use wood filler to fill any holes, large gaps, and knot holes to your heart’s content. (See how to fill holes in furniture here.) Even the knot holes will not show through the final faux stain. If you are painting your piece white, go over knot holes with Zinnser BIN primer. I used a primer over the whole piece but this is optional when you are working with raw wood or a piece painted with latex paint.
Sanding Your DIY Dining Room Table
Sand the table evenly with a high-grit sanding pad on your mouse sander. This is to remove any splinters and make the surface smooth. I also like to run the sander over each corner of the tabletop a couple of times to round the sharp, straight edges. If you are unsure about how to use a mouse sander, check out this post here: How to Sand Furniture in Less Than 5 Minutes

You can also use a belt sander or orbital sander but I like how much control the mouse sander provides.
DIY Farmhouse Table : Easy Faux Stain Technique
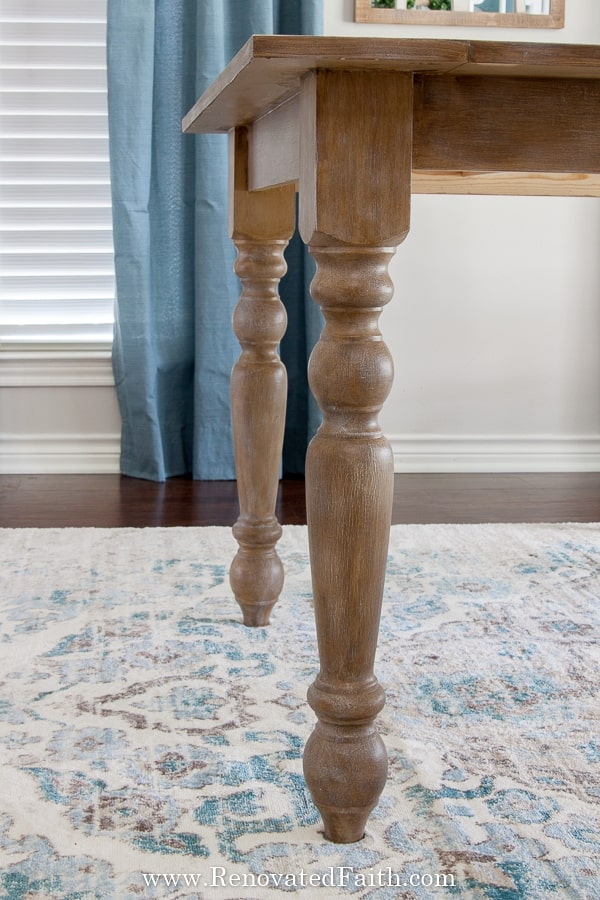
Here is the full tutorial for the Restoration Hardware-Style Faux Stain that you see on my table: Easy Restoration Hardware Finish It is so easy and you can easily make the stain lighter or darker. I also have some more traditional stains to choose from, whether you like a classic look or rustic look: Faux Stain Techniques with Latex Paint
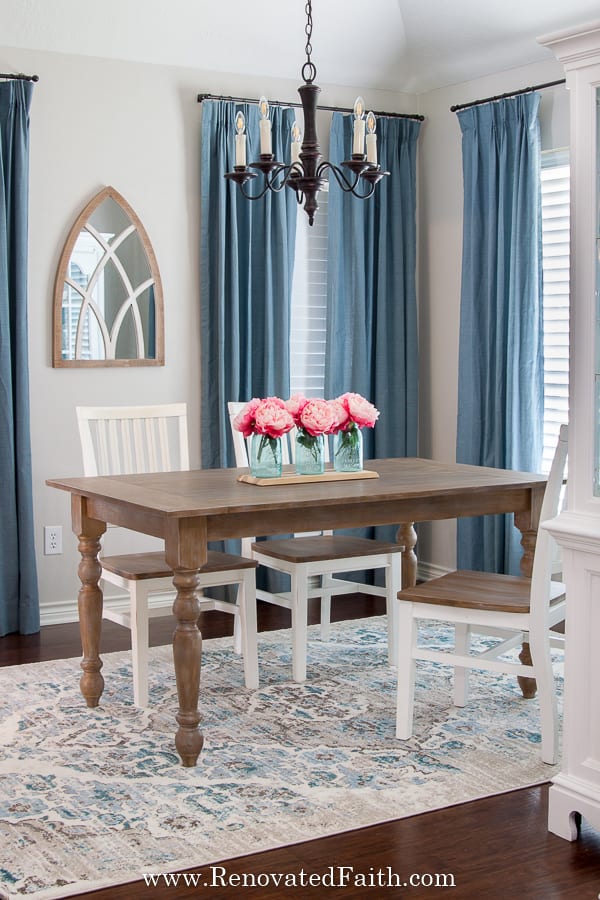
DON’T FORGET TO TAKE A PICTURE!
Now that you are done, I’d love to see how it turned out! ❤️ Post your before and after photos here!
RENOVATE YOUR FAITH: Embracing “Plan B”
As I mentioned earlier, the plans for this farmhouse table were born out of our previous table whose butcher block top was way too heavy for these turned legs.
If the first table was never wobbly and unstable, we would have never built our current dining table which I actually love so much more.
I don’t know about you but I like to mentally have my ducks in a row. I find great joy in list-making and planning because it gives me a sense of control. But when my original plan fall through and I have to resort to another path, I get frustrated and thrown off balance.
So often I can identify with Peter in the Bible because he is always a man with a plan.
This was definitely the case on the Mount of Transfiguration. In Matthew 17, we see Jesus taking Peter, James and John up the mountain by themselves:
“There he(Jesus) was transfigured before them. His face shone like the sun, and his clothes became as white as the light. Just then there appeared before them Moses and Elijah, talking with Jesus.”
And at this moment, when the other two disciples stook in awe, Peter said to Jesus:
In the midst of this moment of divine splendor, Peter got so carried away with his “big plan” that God The Father had to step in and say, “This is my Son, whom I am well-pleased. LISTEN TO HIM.”
Peter practically had everyone’s suitcases packed for them to live together on the mountain in perfect harmony. Maybe he figured they could walk on water together in their spare time.
But Peter’s “Plan A” was not God’s plan.
With the uncertainty of the world today, I’m willing to bet that a lot of us are having to pivot and resort to our “Plan B’s”.
This year is not at all like we thought it would be. Maybe you are a teacher that is nervous about what this coming school year will bring. Possibly you have been furloughed from your job. Or perhaps your small business is at risk.
Regardless, we can rest in knowing that when God escorts us to “Plan B”, it’s because He loves us too much to waste eternal blessings for our temporary sufferings.
In other words, God has the big picture in mind. He can see over the horizon of this valley of uncertainty onto blessings that will be well worth the wait.
But at the same time, God doesn’t make light of our suffering but hurts alongside of us. Psalm 56:8 says, “You keep track of all my sorrows. You have collected all my tears in your bottle. You have recorded each one in your book.”
As you navigate through the unexpected obstacles of 2020, know that God is working for your good. He is not indifferent to your pain but cares in detail about what’s troubling you. Know that He knows you better than you know yourself and He can be a source of rest and peace during this difficult time.
For more spiritual encouragement, click here for the rest of my DIY project posts that also include Renovate Your Faith devotionals.
Modern Farmhouse Table Decor
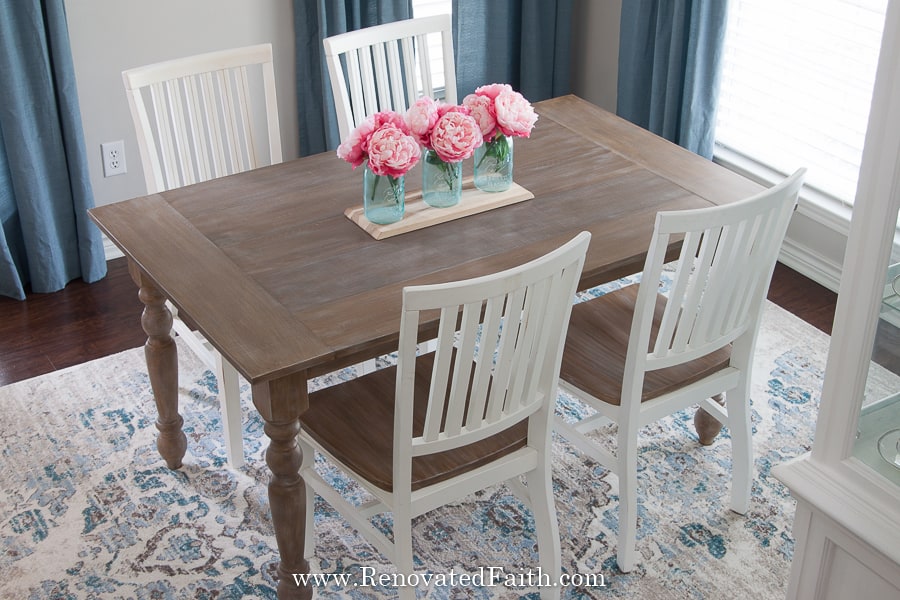
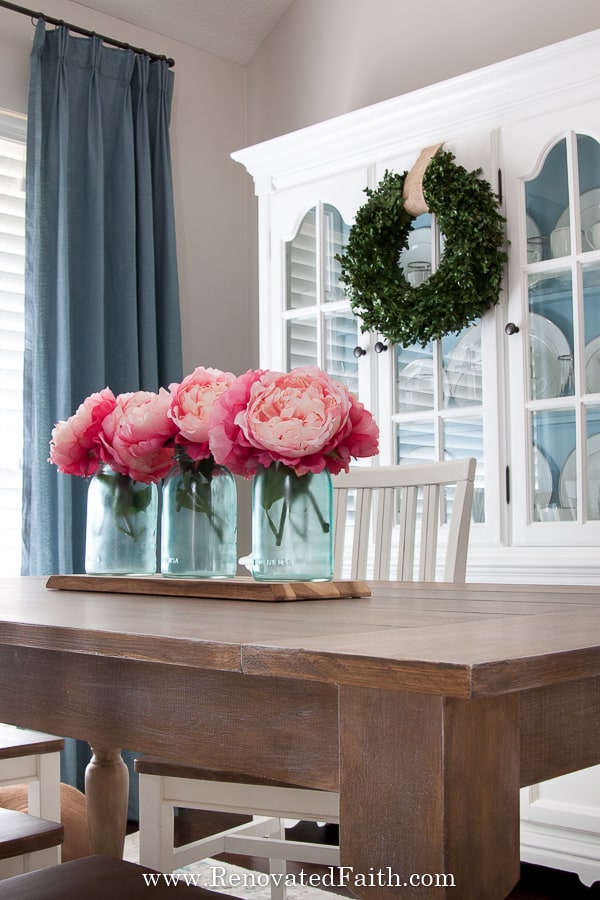
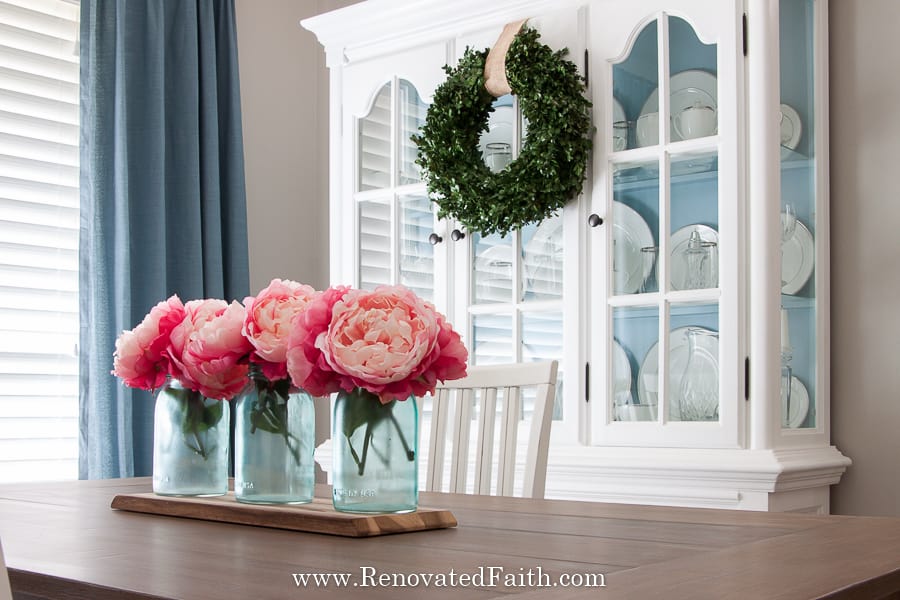
What farmhouse dining table would be complete without some cute farmhouse decor to compliment your dining area. If you want to paint mason jars and use them as flower vases, check out this post here: How To Spray Paint Mason Jars You can also find a pre-made table decor here: Farmhouse Centerpieces and Decor I got the peonies (click here) and cheese board (similar here) from Target.
For more options as far as table linens, click here: Farmhouse Dining Table Runners and Placemats
One easy way to achieve a farmhouse look is to add a little oil-rubbed brass hardware. My old chandelier was brass so I updated it and a few other light fixtures with spray paint in this post here: Farmhouse Light Fixture Makeovers
Another way to accent your beautiful DIY farmhouse table is with a rug. You can see the rug I recently bought here: Distressed Cream and Blue Area Rug and other farmhouse rugs here: Farmhouse Rugs
☑️ My All-Time Best Furniture Painting Tips & Tricks (FREE PRINTABLE)
Don’t forget to download the FREE step-by-step printable checklist that shows you the entire process I’ve used on dozens of furniture pieces while saving you time and money!
FAQ’s: DIY Farmhouse Table with Pocket Holes
How to Build a Farmhouse Table for Outside
You can use these same plans to build a farmhouse table for an outdoor table or picnic table. While the building process is the same, you need a tougher clear coat for outdoor furniture to ensure it lasts a long time. I highly recommend this topcoat for your outdoor dining table: The Best Exterior Clear Coat for Furniture
When Are Pocket Holes An Appropriate Wood Joinery Technique / How Do You Make A Farmhouse Table for Beginners?
Pocket holes are not only strong and an easy woodworking technique but they are great for beginners. If you make a mistake with the placement of a pocket hole screw, you can easily unscrew it and add a new pocket hole. For beginners, this is really appealing because it gives you a lot of flexibility other than more permanent joinery methods. This particularly came in handy as we used the legs from our old table to build this table. It was really easy to simply unscrew the old pocket hole screws.
Can You Spray Paint a FarmHouse Dining Table?
I wouldn’t use spray paint on larger pieces of furniture because it is cost-prohibitive and you won’t get an even finish. For small pieces of wood furniture, like a small bench or stool, spray paint can be a good option. For my best tips on using a spray primer to speed up the process, click here: Time-Saving Tips for Painting Table Legs
How Do You Make a Small Farmhouse Table?
The farmhouse table in this build is on the smaller side as our dining room is small and there are only three of us in our family. However, you can use the plans to make the table as long as you’d like if your space allows. Simply adjust the length of the boards and 2 long aprons.
How Wide Should A Farmhouse Table Be?
A farmhouse table should be between 36″ and 40″ wide which gives you ample space for placemats and a centerpiece. But as always adapt your dining room table woodworking plants to adapt to the needs of your dining area.
How Thick Should Wood Be For A Table top?
Most farmhouse tables are made with 2x’s but there weren’t many options online for a farmhouse dining table with a 1x top. I love the thinner top because it better accents the sophisticated turned legs of this particular dining room table. For a 1x top, add at few stringers to ensure the top doesn’t warp. This is my second table to build with a thinner top and I’ve never had any problems.
How Do You Make a Cheap Table Look Fabulous?
No matter how many knotholes or how orange the stain, you can make a cheap farmhouse table look amazing with a new faux stain. With these methods, you don’t have to strip off the old finish and it covers all blemishes in the wood: How to Faux Stain Wood With Latex Paint
How Do You Make Wood Look Rustic?
To add more of a weathered look, you can add a driftwood finish to your farmhouse table. Here are the step by step plan and instructions to add a weathered look with latex paint: Easy Driftwood Finish on Furniture
How Do YOu Get The Look Of a Modern Dining Table?
If you want something a little sleeker with straight lines, you can’t be the stylish look hairpin legs. Here is a great tutorial on how to make a modern table with the same planked top from this tutorial: DIY Modern DIning Tabe Plan With Hairpin Legs
More Posts Related to Building a Farmhouse Table
Gorgeous Farmhouse Coffee Table (Free Woodworking Plans)
Insanely Easy DIY Industrial Shelves (Wire Shelving Hack)
Why I Don’t Use Chalk Paint on Furniture
How to Spray Paint Mason Jars in Any Color
Easy Farmhouse Light Fixture Makeovers on a Budget
The Best Way to Paint Curvy Table Legs
The Best Clear Coat For Furniture
The Easy Way to Whitewash a Brick Fireplace
The Best Light Greige for A Living Room
Related Links: Instructions On How To Build a Farmhouse Table with Turned Legs
DIY Farmhouse Table and Bench Plans
How to Build a Farm Table Without Chalk Paint
How to Build a Farmhouse Table With Leaves
Simple Farm Table Plans for Large Spaces
Ana White Farmhouse Table – No Pocket Holes
Building a Farmhouse Table With a Waterproof Surface
How to Build a Farmhouse Table Bench
DIY Farmhouse Table with a Kreg Jig
The Best Type Wood for Dining Tables
Final Thoughts on DIY Farmhouse Tables
Don’t forget to download my Free Furniture Painting Cheat Sheet to help you refinish your new dining table. To get your printable, sign up for my weekly newsletter which also grants you free access to my resource library full of wall art printables, checklists, and project plans!
Before this blog post, you may not have realized how easy it is to build your own table. One of the best things about building furniture is the feeling of satisfaction you get. Also, with a little time and effort, it’s an easy solution to getting a gorgeous farmhouse table without the high cost. I hope this project will help you feel empowered to tackle more woodworking projects in the future. With this simple design and step-by-step guide, you have a beautiful piece of furniture for your family without spending a fortune!
Good luck with building your very own farmhouse table! I love to hear your thoughts and questions! Scroll down to leave a comment and I WILL reply! ❤️
Blessings,

Be sure to follow the fun here!
Email Subscription | Instagram | Pinterest | Facebook | Twitter
DIY Farmhouse Table: YouTube Video

Karin Peters is a DIY expert and the creator of Renovated Faith. She is a furniture painter, a home design consultant, and a tenacious problem solver determined to help you transform your house into a home. With 17 years of experience with DIY home improvement, she researches and analyses professional processes to adapt them to be easy and cost-effective for DIYers. She then tests every project and product before it appears on the site in a detailed, step-by-step format. After attending Texas A&M University, she received her Master of Divinity with Biblical Languages at Southwestern Baptist Theology Seminary. Her passions unite in Renovated Faith, which shows readers how to create a home that serves them so they can pursue their God-given purposes. About Renovated Faith | Editorial Policy | Facebook | Twitter | LinkedIn


Thank you for your “Plan B” devotional. It was just the gentle reminder I needed!
Thank you so much for taking the time to let me know Anne! I hope you have a great rest of the week.
Thank you! I appreciate that you included the design plan with sizes and distances with each step, that can really help out a lot!
Absolutely! Let me know if you have any questions along the way.
Hey Jodi,
I’m so sorry you had trouble. I just checked my can in the garage and it is the Sherwin Williams Hopsack – it has an almost orangey undertone. Thanks! – Karin
Amazing job!! Your detailed instructions are wonderful.
Thank you so much Cecilia! I really appreciate that. My biggest fear is leaving someone hanging with not enough instructions or details in how to do a project.