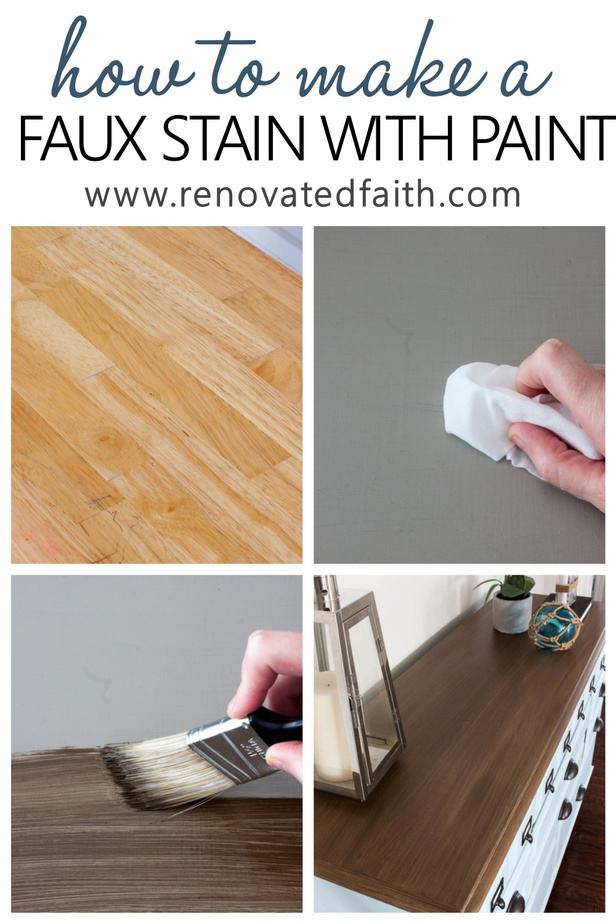
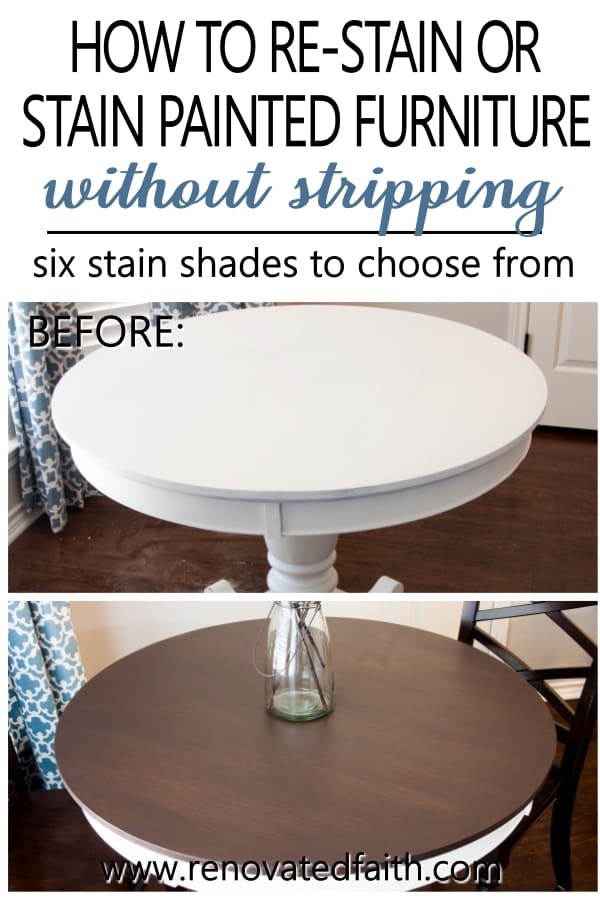
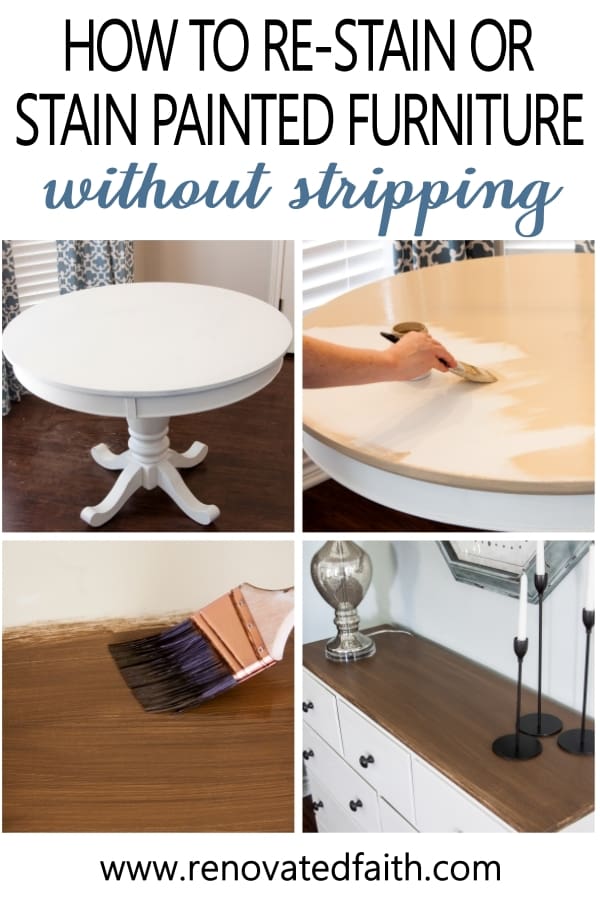
How to Apply Paint that Looks Like Stain (9 Shade Options!)
How to Paint Furniture to Look Like Wood
If you want to stain a previously stained or painted furniture piece, check out this tutorial and video where I show you how to easily apply paint that looks like wood stain with nine color options.
So everyone deals with stress in different ways, and this year has absolutely been an “opportunity” to start some new hobbies for stress relief.
Most people have learned a new love for bike riding, working in the yard, or DIY projects. But once again, I’m not like most people…
One Sunday afternoon in March, I decided to experiment with different stain options with my faux stain technique. My original Barnwood stain was a big hit, but I wanted to give readers more color options.
I sat down and started mixing paints and creating samples like the DIY version of a mad scientist. Before I knew it I had created over 3 dozen different stain samples and there were even more little bottles of paint scattered all over my kitchen table. Who knew this would be my best option to de-stress during the craziness of this year?
And become I didn’t want to overwhelm you with TOO many options, I have condensed the options into the top 8 shades – 9 if you include my driftwood stain.
This technique has never let me down on several of my own furniture pieces, and I hope it will be of some use to you too!
(As an Amazon affiliate I earn from qualifying purchases. Please see my full disclosure HERE I only use affiliate links for products I use and love).
Quick Links to Information in this Post
- 1 How to Paint Furniture to Look Like Wood
- 2 Is There a Paint That Looks Like Wood?
- 3 The Easiest Way to Paint Furniture to Look Like Stain: Faux Stain Over Latex
- 4 How to Apply a Faux Stain to Painted Furniture: Supplies
- 5 How to Paint Furniture to Look Like Wood: The Process
- 6
- 7
- 8 RENOVATE YOUR FAITH: Freedom Through Transparency
- 9 How to Faux Stain a Metal Door To Look Like Wood
- 10
- 11 How to Faux Stain with Latex Paint: FAQ’s:
- 12 Traditional Stain Vs Faux Paint Stain for Wood
- 13 Need Chairs for Your Newly Painted Dining Table?
- 14 Paint that Looks Like Wood Stain – Related Posts:
- 15 Painting Furniture To Look Like Stained Wood: Final Thoughts
- 16 Paint That Looks Like Wood Stain
Is There a Paint That Looks Like Wood?
If you have ever searched online for a stain paint for wood, you probably had a hard time finding what you were looking for. That’s because no one solid paint can mimic the look of wood grain.
If you look at a piece of wood, there are actually several shades of brown among grain lines that move in one direction to create the natural beauty of the wood grain.
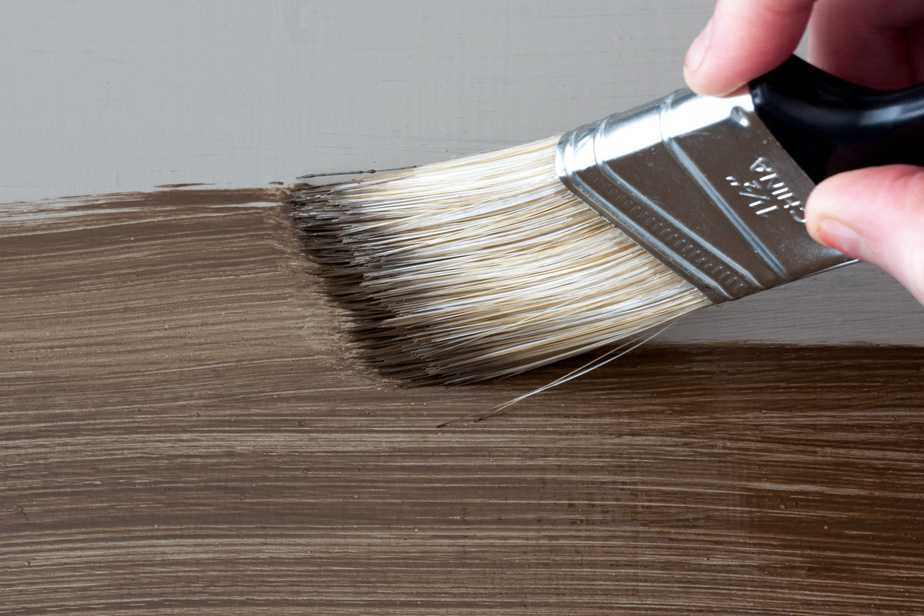
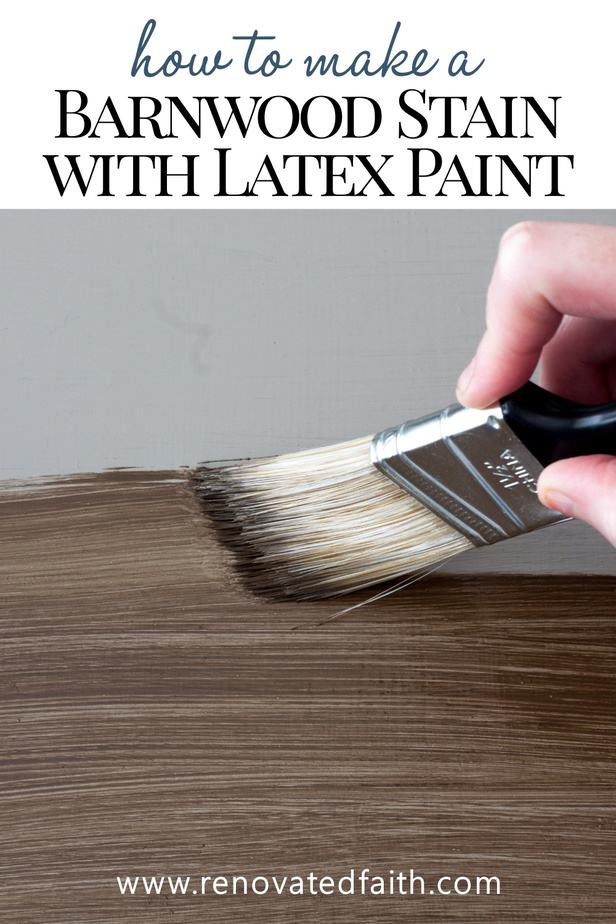
That’s why this process is the closest thing to a “stain paint” for wood because it consists of a base coat and one or two thin glaze coats to give you the look of a natural grain. The base coat is usually a light tan and the glaze mixtures are darker browns.
This effect mimics the grain of the wood because the initial base coat color can be seen through the glaze layers and the strokes in one direction give the appearance of wood fibers.

WANT MORE STAIN OPTIONS? Don’t forget you can find more stain shade options here: How to Paint Furniture to Look Like Wood
The Easiest Way to Paint Furniture to Look Like Stain: Faux Stain Over Latex
Now on to my favorite technique to achieve a beautiful faux stain finish. This technique involves applying a base coat and then latex paint mixed with a water-based glaze and then an optional topcoat.
Is there such a thing as “wood Stain Paint?”
This is the closest thing to a “stain paint” in a can. Except unlike just brown paint, this technique gives the undertones and variation of wood grain.
This paint-over–stain technique is not a stain at all but because you paint in one direction, the base coat shows through in such a way to look like wood grains, providing a subtle barn wood finish to an existing piece.
This technique has less sheen than gel stain and because you are using latex paint, you get the same results every single time. It’s also not nearly as messy, no strong-smelling stains are used and it’s so easy to use.

Stain Furniture without Sanding off the Old Finish
One of the advantages of this technique is that you can stain furniture without sanding off the old finish. There is minimal sanding in this process but it takes you less than 5 minutes as you are just roughing up the surface.
Stain Furniture without Stripping
I love that you can also stain furniture without stripping by using this latex paint stain method. “Furniture stripper” is not in my DIY vocabulary and fortunately, it doesn’t have to be part of achieving a beautiful stained finish.
How To Save a Ton of Money on Woodworking Projects
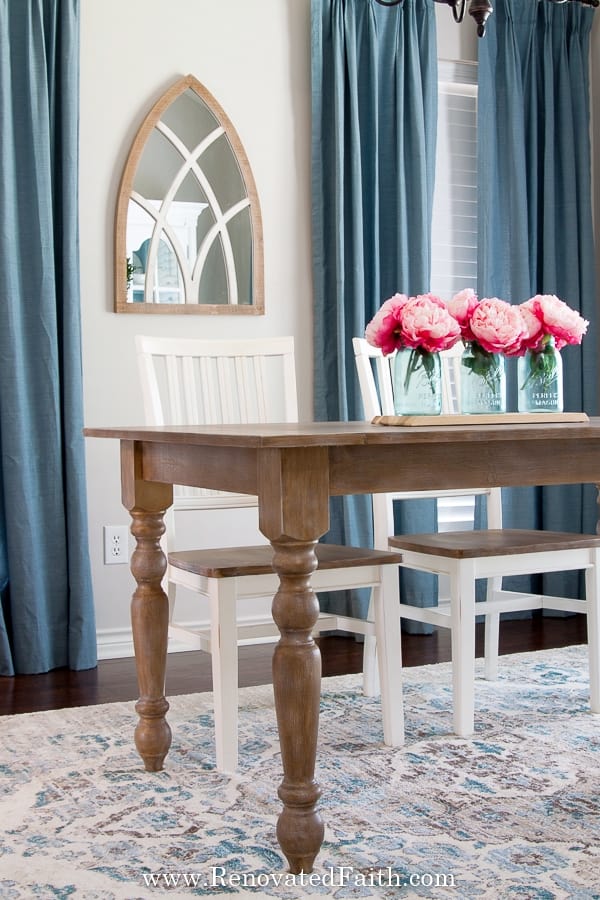
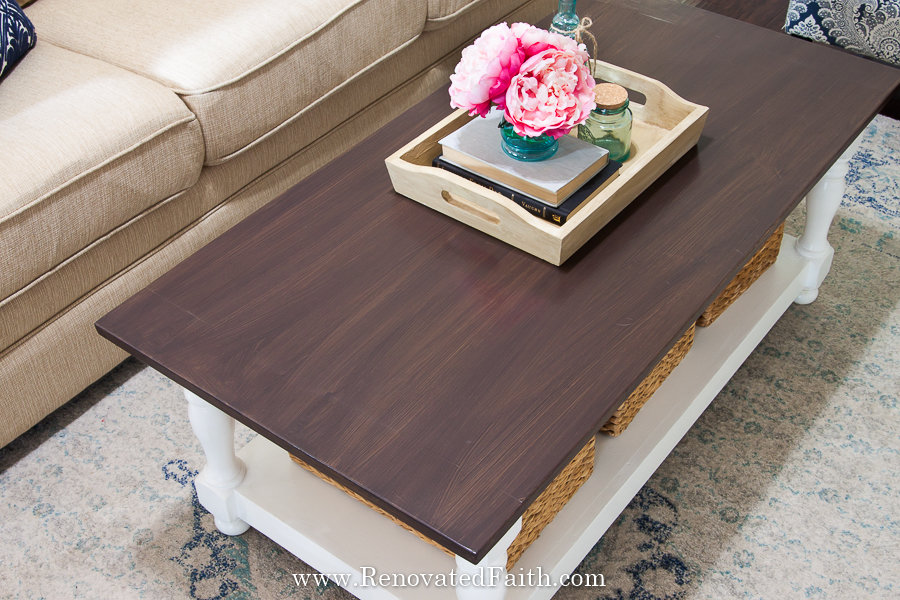
I saved so much money on my Turned Leg Coffee Table by using this faux paint stain technique. If I was going with a traditional stain, I knew I would need to get more expensive lumber without any knotholes or blemishes.
But because latex paint isn’t transparent like a traditional stain, I saved almost half the cost of lumber because I was able to use common boards. They are just as strong but have some knotholes. I filled the knotholes that needed filling (How To Fix Damaged Wood Furniture) and used the faux paint stain to completely cover them.
PHEW!!! I went a little bit overboard there, but, of all the staining methods, this one is pretty great. Every time I go back to the traditional way I finish the project saying “never again!”
How to Apply a Faux Stain to Painted Furniture: Supplies
MY FAVORITE PRODUCTS – CLICK HERE FOR MY TRIED AND TESTED BRANDS OF FURNITURE PAINTING PRODUCTS
Primer – See the link above.
Sander or 120 grit Sandpaper for Light Sanding – See my post on the Best Sanders for Furniture or the link above for my favorite.
Base Coat – See the information below for the right base color for your shade of faux paint stain. Usually, I just get the sample containers of acrylic latex paint at Lowe’s that are around $5. At Lowe’s they are usually the Valspar color samples and at Home Depot it’s the Behr. Satin or flat paint usually works best for this.
Amy Howard At Home Glazed Over (Water-based Glaze)
Latex Paint Sample for Layer 1- You will mix Layer 1 by combining the glaze above, water, and latex paint (sample container) based on the stain color you pick below. Don’t worry; it’s super easy to mix!
Latex Paint Sample for Layer 2 – Again, you will mix this by combining the glaze, a little water, and latex paint (sample size again). See the mixing instructions below in step 4.
Paint Brushes Synthetic bristle brushes work great for the base coat and glaze coats but I like to use foam brushes for the clear coat.
Baby Wipes (for Driftwood Finish only) – I recommend Huggies Natural Care because I can guarantee the chemicals in those wipes will not wipe away the dried base coat.
Foam Brushes (Optional) – I like to add my topcoat with a foam applicator to get a smoother finish but you can also use one of your regular brushes. They are super cheap compared to regular brushes.
Top Coat (Recommended) – If your budget is pretty tight and your piece doesn’t get tons of use (like a kitchen table) you can skip the topcoat. However, I like to seal in the finish with a clear coat. My favorite is Varathane’s Water-Based Top Coat in Satin. Click my favorite products link above for the best prices.
FREE FURNITURE PAINTING CHEAT SHEET– This free printable is available in my resource library. Get access to it and all my other free printables, templates, and wall art by filling out the form at the bottom of this post or CLICK HERE.
*When to Prime First:
The primer is only if you are doing a piece that is previously finished and that finish is not latex paint. As I detail in my post A Better Alternative to Chalk Paint, you can skip the base coat on pieces that need a primer by getting your primer tinted to be the same color as the base coat would have been.
At the Lowe’s paint counter, just hand them the Zinnser primer and tell them you want it tinted to your basecoat color. Then, continue the instructions as normal without the base coat! The color might be slightly darker but it won’t matter because the base coat is under two layers of paint and won’t be seen that easily.
How to Paint Furniture to Look Like Wood: The Process
Before You Get Started: Pick Your Stain Color
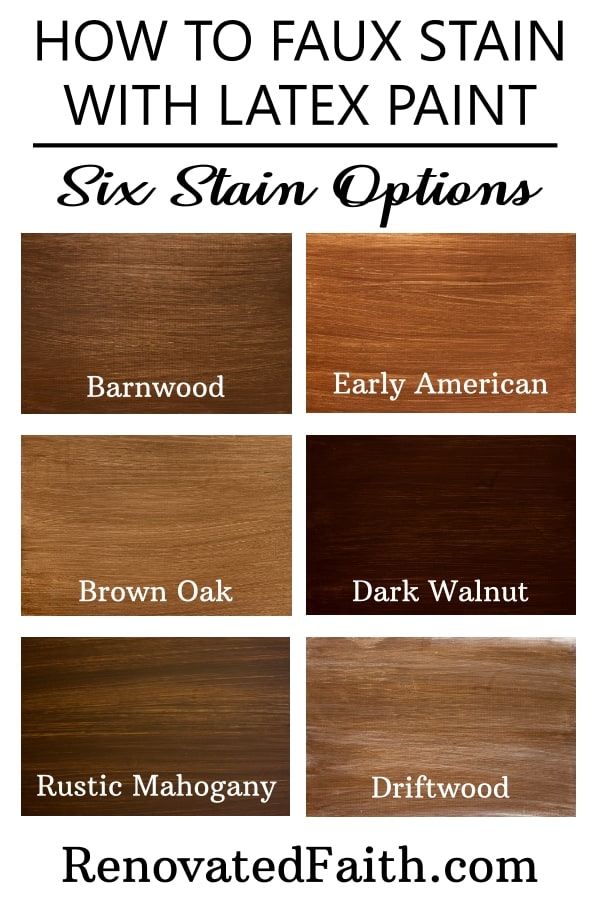
This paint/stain process has 9 different options to choose from and they all look stunning. There are lighter and darker colors to give you a full-color range to make finding the perfect color easy. You can see examples of some of these shades on furniture at the bottom of this post.
The process for each stain color is the same, just slightly different paint colors are used for each stain. After you have picked your stain color, see the information below on what sample containers of latex paint to buy.
The stains above can all be made darker by adding more stain paint. So if you are looking for a darker version of one of the stains above, it’s easy to get that look!
Now that you know what shade you are going to paint on your furniture piece, you can find out what sample colors you will need below.
For each of the colors listed, you will need to get a half-pint sample size of paint that looks like this in the Sherwin Williams paint at Lowe’s. You can use any latex paint as long as it is color-matched to those colors but the glaze is only sold at Lowe’s.
If you are new to getting paint at the paint counter, no worries! Just go into your nearest Lowe’s and tell them you want a Sherwin Williams Sample container in (whatever color). The samples always come in a satin sheen so they probably won’t ask you what sheen. I usually tell them I’ll be back and loiter around the store for a few minutes until my paint is done.
SHADE OPTION 1: Rustic Mahogany Faux Stain
This rich color is the warmest shade of the dark browns. As one of my most popular finishes, it’s hard to believe that the stain is just latex paint and a little glaze. See the main square sample below and in the video for a better example. To me, this color looks a lot like Pottery Barn’s Mahogany. This is one of my favorites and I’ll soon be painting my metal back door in this color: You can See My Faux Stained Metal Backdoor HERE!
BASE COAT: HGTV Sherwin Williams Flaxseed at Lowe’s
LAYER 1: HGTV Sherwin Williams Van Dyke Brown Color Sample at Lowe’s
LAYER 2: Sherwin Williams Turkish Coffee Sample at Lowe’s
Mix the paint, glaze and water in the ratio listed in step 4.
For example, if I pick Rustic Mahogany as my shade, I’ll be buying three samples of paint at the paint counter, and don’t forget your glaze.
SHADE OPTION 2: Dark Walnut Faux Stain
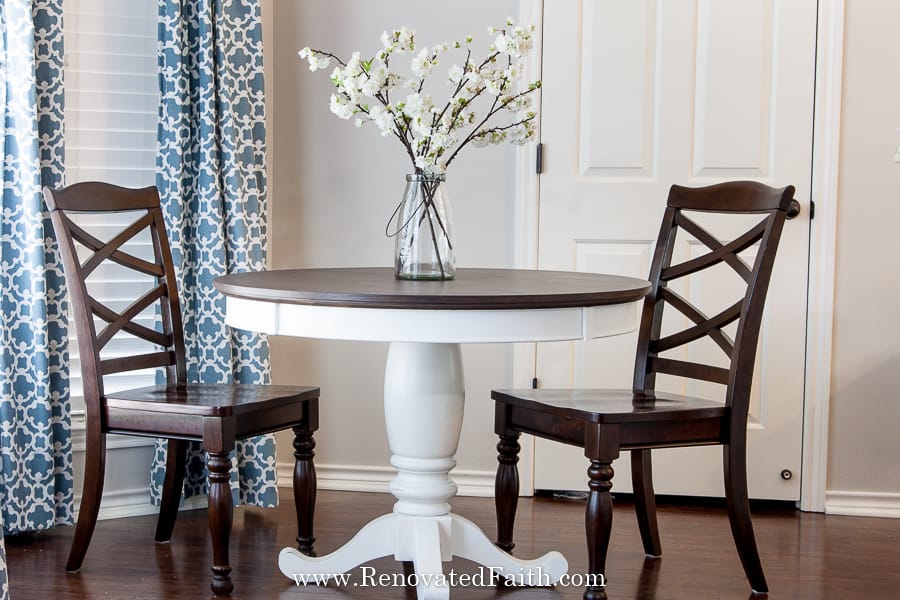
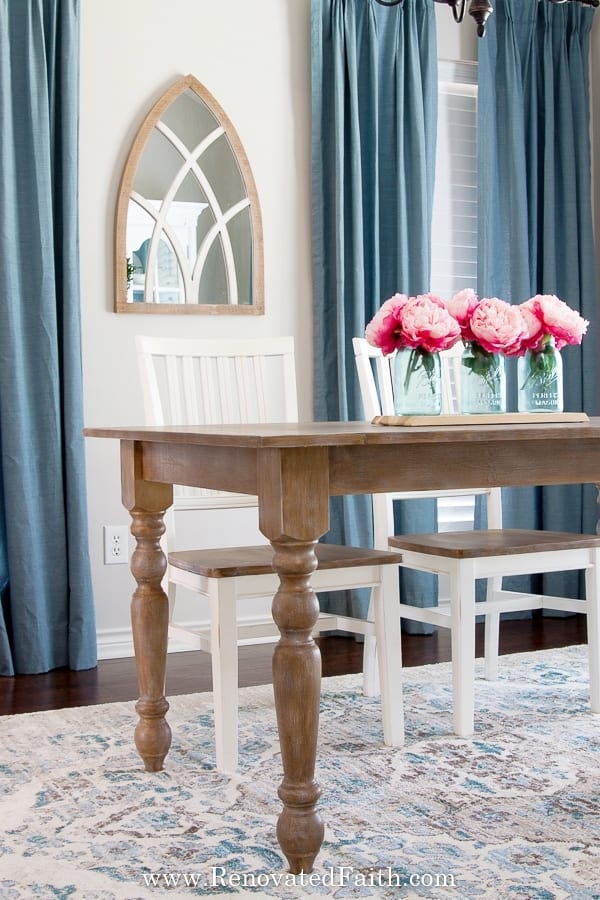
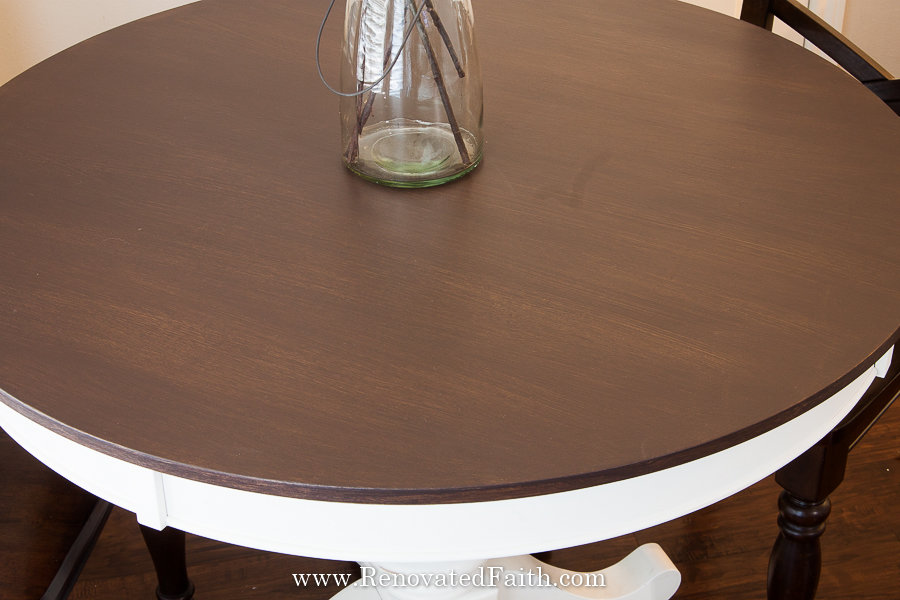
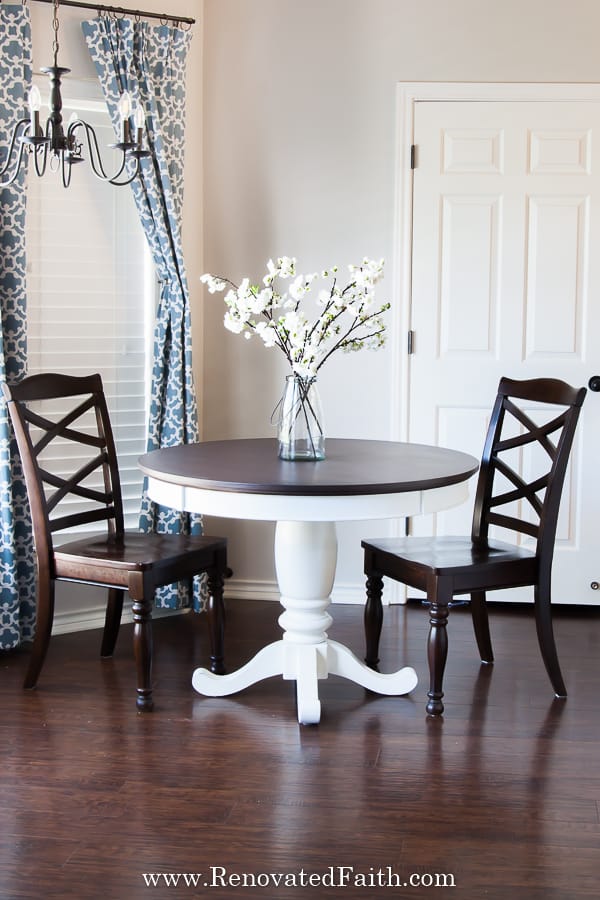
This color stain is the deepest of all the darker browns and is perfect if you are wanting a more espresso finish that is comparable to darker stains. You can see below that I refinished my breakfast table and the coffee table in my living room with this darker color.
BASE COAT: Sherwin Williams Latte
LAYER 1: Sherwin Williams Van Dyke Brown
LAYER 2: Sherwin Williams Black Bean – This goes on really dark and looks almost like a black stain but it will dry to the paint’s actual color – a deep brown. Also, on one project, this almost had a purple hue after I put it on but once it dried, it looked great!
Mix the paint, glaze and water in the ratio listed in step 4.

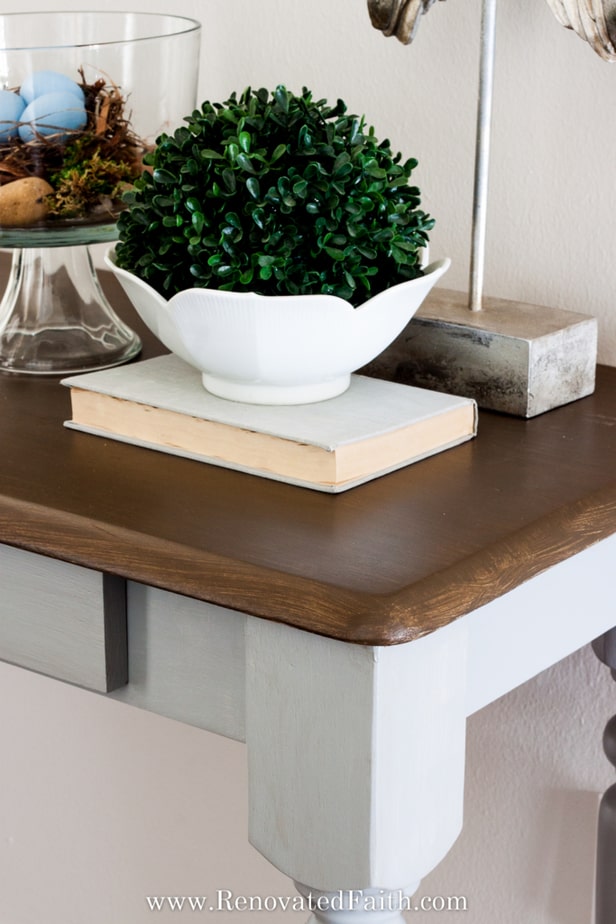
SHADE OPTION 3: Barnwood Faux Stain
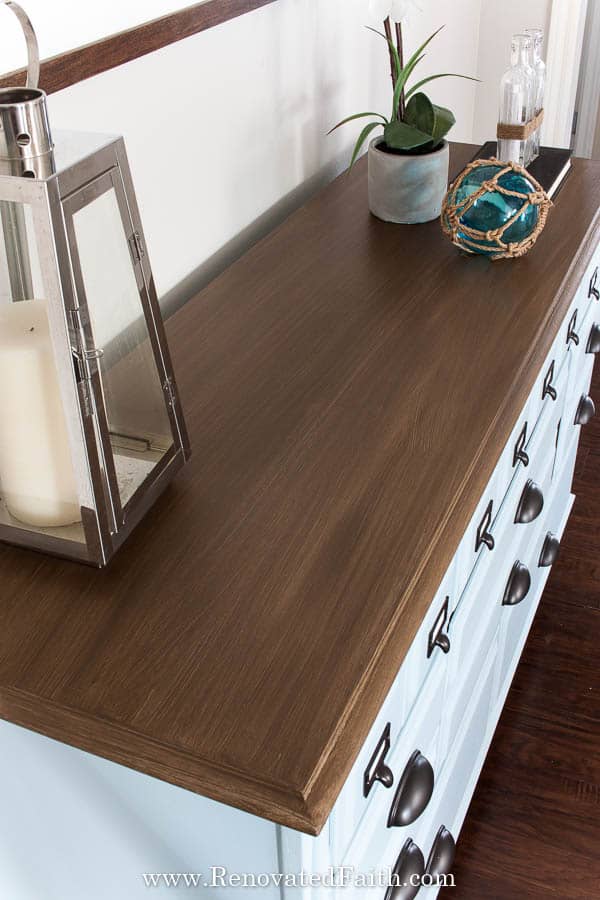
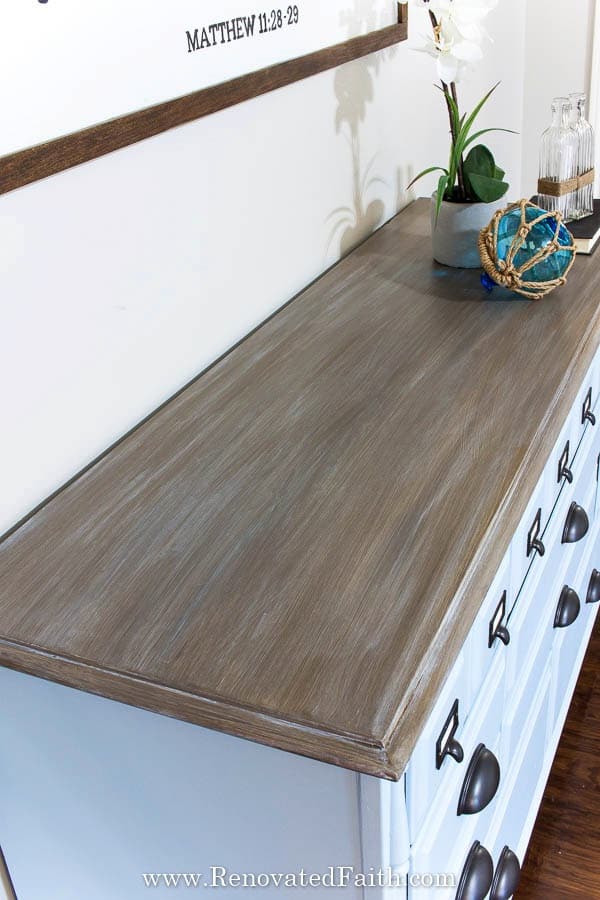
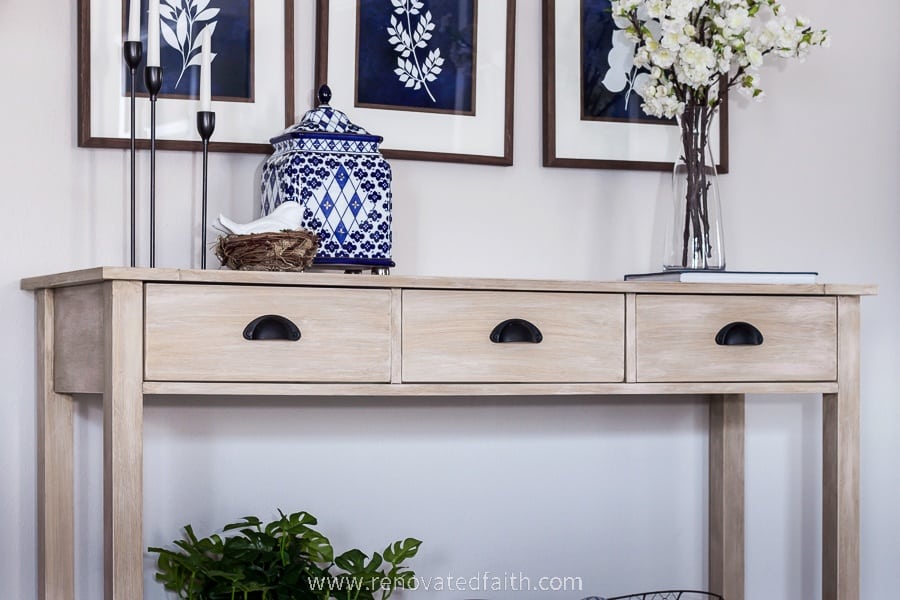
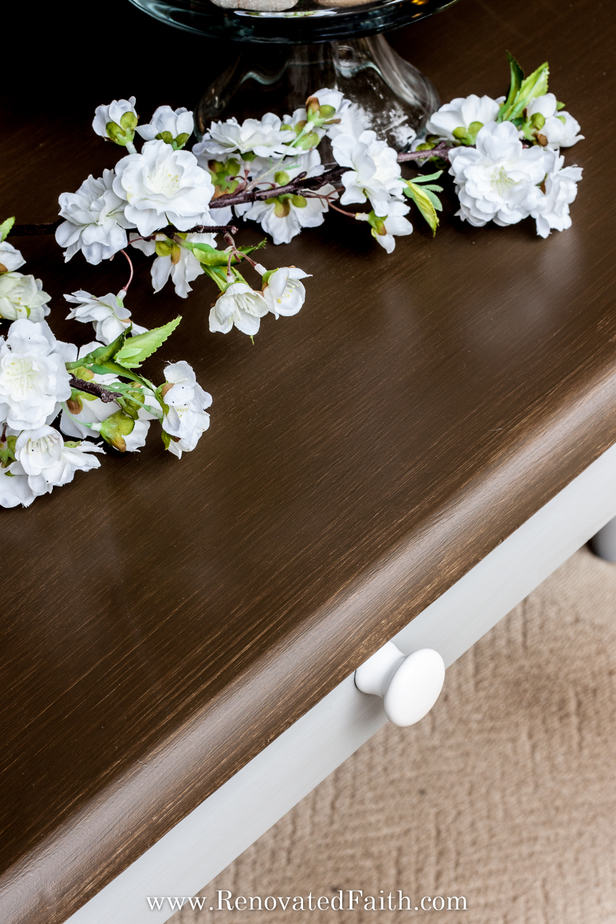
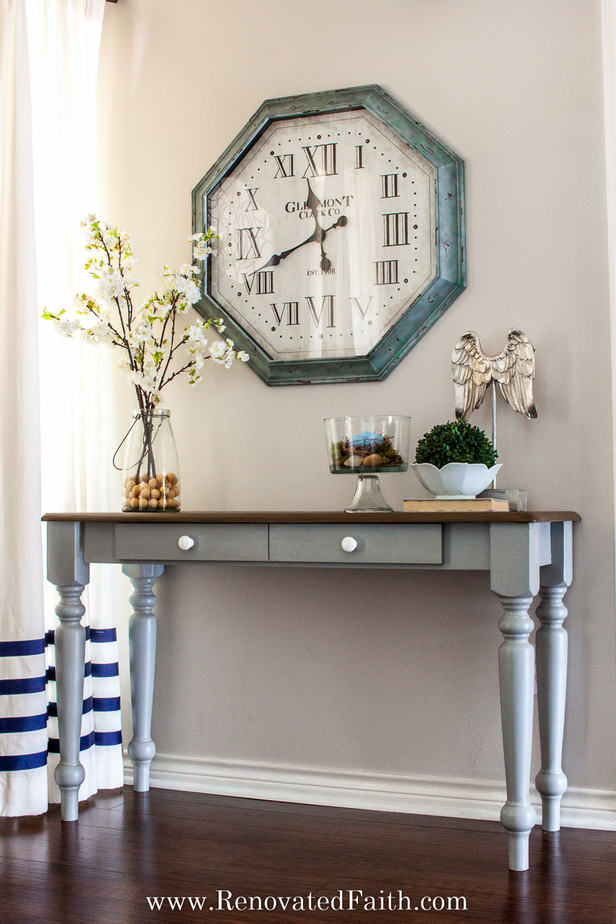
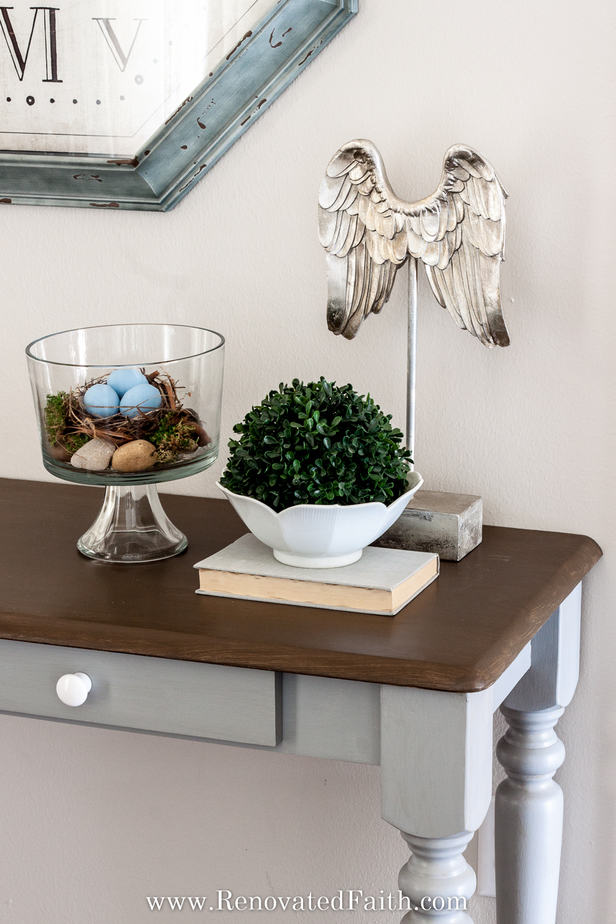
This is a versatile stain that works well for a traditional look or a more rustic farmhouse style. This is the original faux stain shade I started with and you can see examples below with the blue dresser’s top and also the gray entry table’s top.
BASE COAT: Valspar Coastal Villa – This is a Valspar color but you can also get it in a SW sample. Either is fine.
LAYER 1: Sherwin Williams Van Dyke Brown
LAYER 2: This color and also Driftwood has the same shade (Sherwin Williams Van Dyke Brown) for layer one and two. So, you only need one sample container of SW Van Dyke Brown.
Mix the paint and glaze in a 1:1 ratio as listed in step 4.
SHADE OPTION 4: Driftwood Faux Stain
This is a great stain shade if you want the more weathered look of a light gray stain to match rustic farmhouse or coastal decor. It has an entire post devoted to it that you can see here: Faux Driftwood Finish on Latex Paint.
There is one difference with this shade and that is that you dry brush white on the finish as a final step which I explain below. Because of the additional step, get a sample size container of Sherwin Williams Pure White or just use any white/cream latex paint you have on hand. By dry brushing on a small amount of paint with a chip brush, you create a weathered wood look. Be sure to see the video I mention in that post to see the dry brush technique.
BASE COAT: Valspar Coastal Villa – This is a Valspar color but you can also get it in a SW sample. Either is fine.
LAYER 1: Sherwin Williams Van Dyke Brown
LAYER 2: Sherwin Williams Van Dyke Brown again.
Mix the paint and glaze in a 1:1 ratio as listed in step 4.
Don’t forget a sample container of white paint for the driftwood stain!
SHADE OPTION 5: Brown Oak
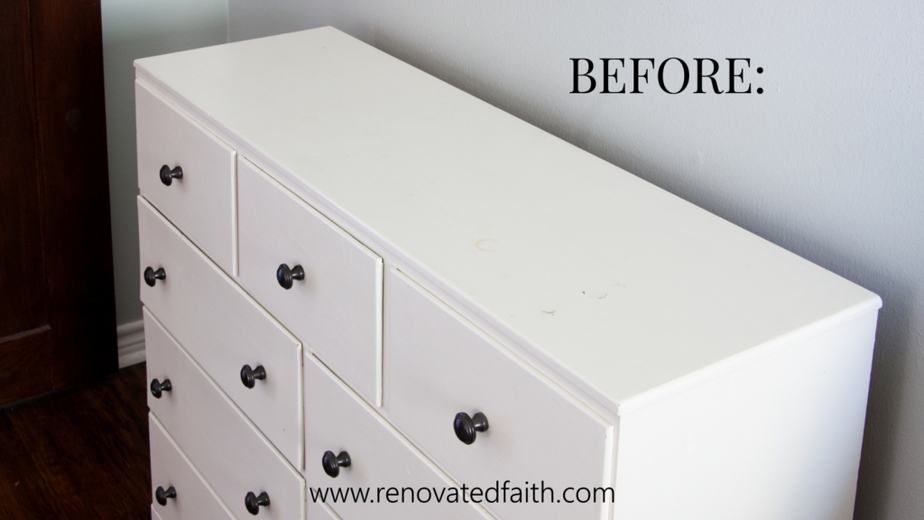
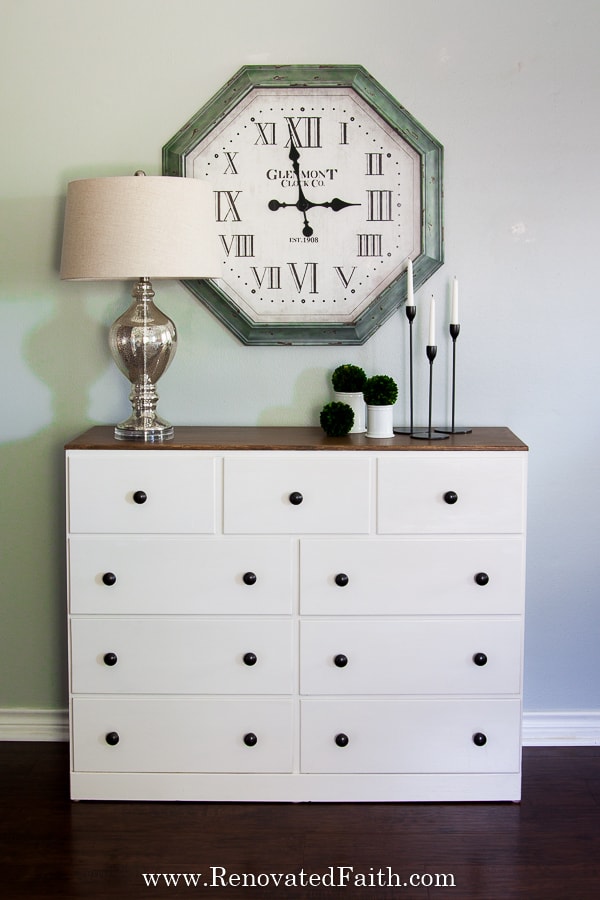
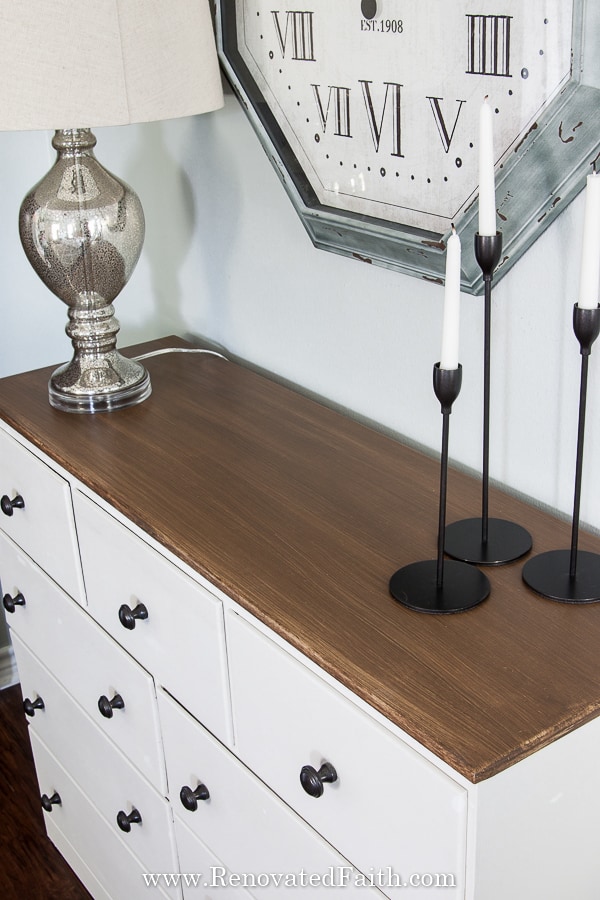
If you want more of a rustic farmhouse vibe, then this is your stain color! I love how it looks on the top of my dresser below.
BASE COAT: HGTV Sherwin Williams Flaxseed at Lowes
LAYER 1: Sherwin Williams Van Dyke Brown
LAYER 2: There is no layer 2 step for this shade. You can move directly to the clear coat step!
Mix the paint, glaze and water in the ratio listed in step 4.
SHADE OPTION 6: Early American Faux Stain
This is a really pretty option if you like the rustic depth of Brown Oak but want something a little warmer.
BASE COAT: HGTV Sherwin Williams Flaxseed at Lowe’s
LAYER 1: Sherwin Williams Java
LAYER 2: There is no layer 2 step for this shade. You can move directly to the clear coat step!
Mix the paint, glaze and water in the ratio listed in step 4.
Shade Option 7: Restoration Hardware Finish
If you want a lighter faux stain option with a warm weathered look, you might like this Restoration Hardware Faux Finish here. The process is slightly different but it’s the same concept with the same supplies. This stained wood look is so popular now and the price tag is a lot less compared to buying a table from Restoration Hardware.
Shade Option 8 and 9: Raw Wood Finish
The natural wood look is so popular especially on farmhouse furniture now. You can get the same look of a raw wood finish on large or small projects with this easy faux finish. I have painted several pieces of furniture in this finish in the past year and I have been so happy with how they mimic the natural beauty of raw wood surfaces. You can see how to do this natural color finish here: Easy Raw Wood FInish.
To get the natural color of bleached raw wood, you can also follow the directions in the above post by adding one easy step.
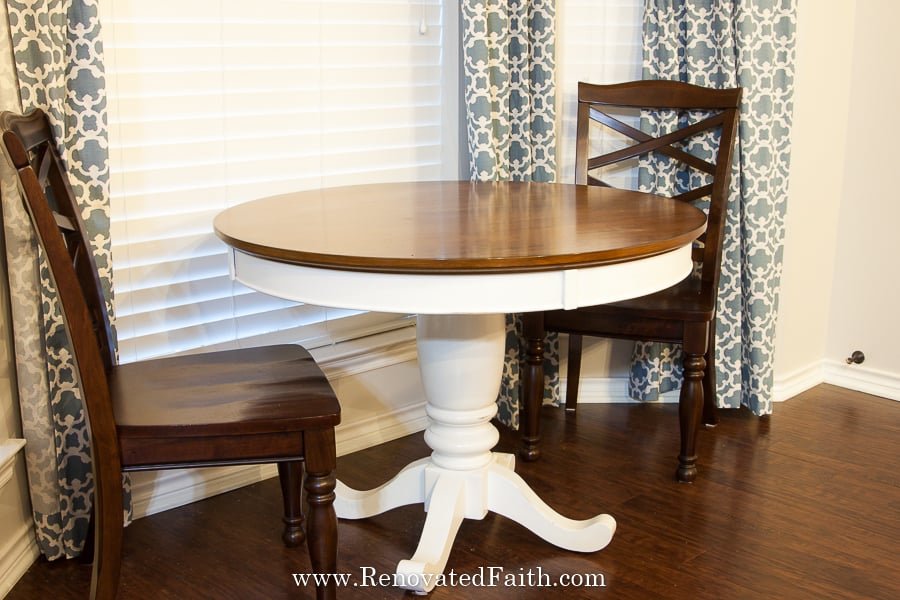
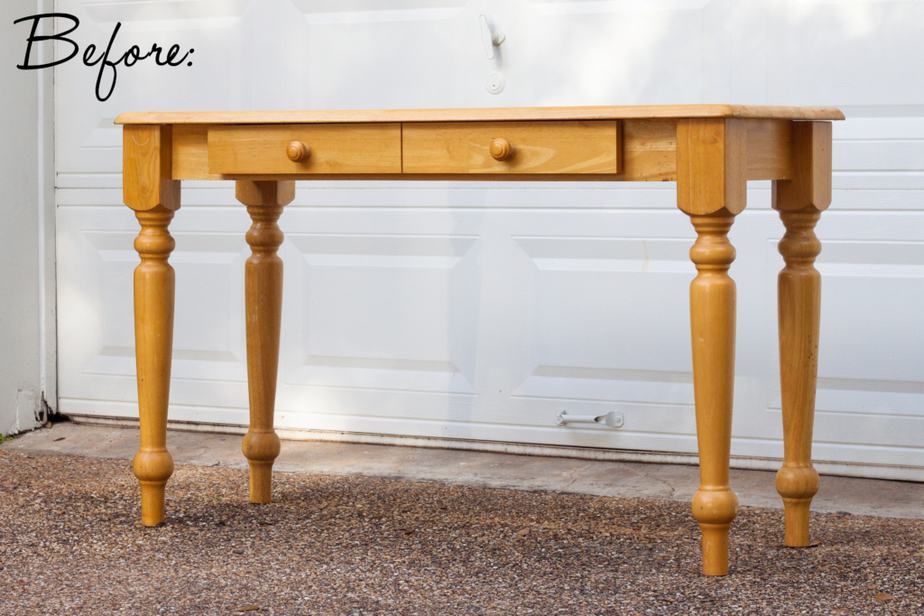
Breakfast Table BEFORE Using The “Paint That Looks Like Wood” Technique
You can see in the pictures below that there are some areas where the stain is peeling up and also the cloudy areas are heat stains.
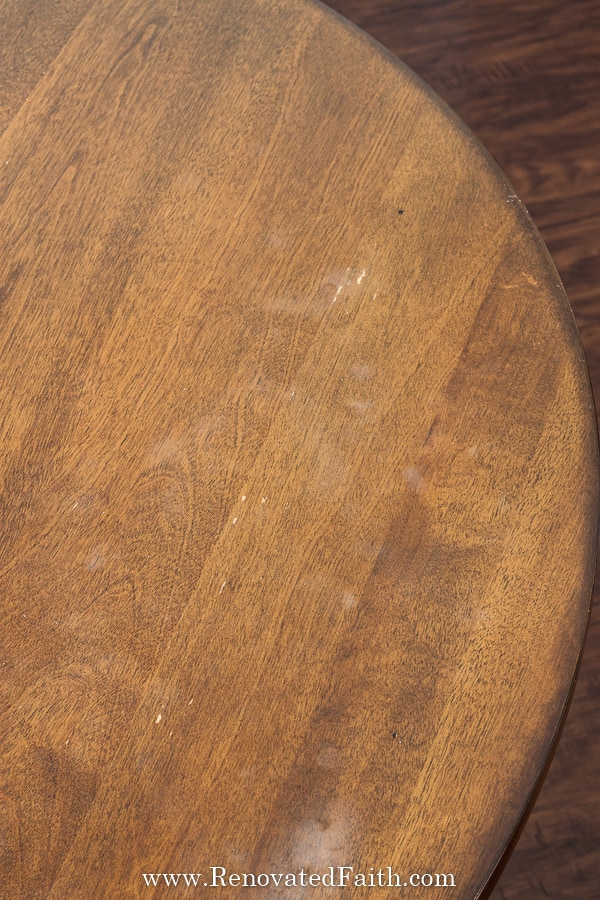
It’s not that noticeable but I got these chairs after getting the table and the stains don’t exactly match. That’s why I picked the Dark Walnut stain to match my two chairs! Ok, so now that I look at the picture, it is pretty noticeable that the stains don’t match.
Step 1: How to Faux Stain Over Paint: Surface Prep Work
Stop! Before you do anything…take a before pic of your furniture piece. When you are done, post the before and after pics here, so I can see the amazing work you’ve done! ❤️
If you are new to furniture painting, my best piece of advice is to use a piece of scrap wood as a sample board. You can stay one step ahead on the sample board so you can practice and gain confidence. If you mess up, it’s no big deal because you’ve only messed up a piece of scrap wood.
Be sure to lay down drop cloths to protect your work area so any excess stain doesn’t get on your garage floor.
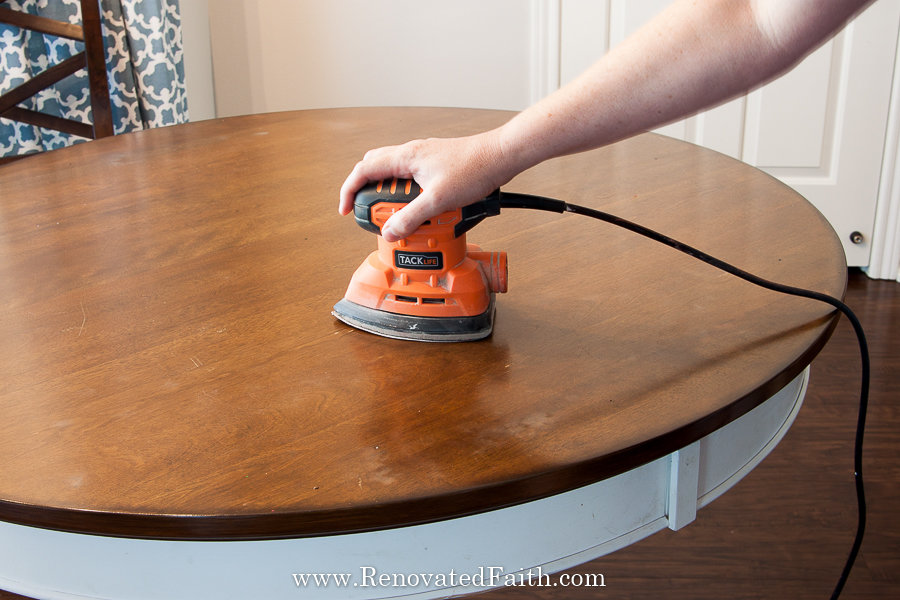
Now, lightly sand your piece to a smooth finish and then wipe off the sanding dust with a lint-free cloth, or moist paper towel. It’s important that the wood surface is in good condition for this painting technique. If you have any damage on your furniture piece be sure to check out this post on How to Fix Furniture Damage so you fill any holes or scratches with wood filler to a smooth surface for your faux finish.
I like to use a mouse sander and you can see which I prefer here: Best Sanders for Wood Furniture. You are not sanding off the existing finish. You are just simply scuffing up the surface to accept paint and it will take less than 5 minutes with very little effort. I give a full tutorial on how to sand here: How to Sand Furniture in 5 Minutes or Less
Renovated Faith: What’s in a Name?
God never leaves a project half-done…He continually works on each one of us, as a lavish expression of His amazing love and grace. So many of my DIY projects remind me of how God renovates our hearts. If you are a work-in-progress, just like I am, check out the Renovate Your Faith Devotional at the bottom of this post. Click here to get a weekly reminder of new posts by adding your email address.
Step 2: Brush On A Primer (Optional)
If you are starting with raw wood, you don’t need a primer. If you are starting with a surface that you know was painted with latex paint, you don’t need a primer. If you aren’t sure of the paint or have a stained surface, you definitely need a primer to prevent bleed-through and to help the paint adhere. I like to use a quart of Zinnser Bullseye 123 but if your piece is laminate or veneer, go with something a little more hardcore like Zinsser Cover Stain.
Normally, I’d use a roller to roll on primer and paint as I mention in my FREE Must-Have Painting Tips For Furniture. But for this process, the brush strokes are going to mimic the texture of wood grain.
Brush your primer on in the direction of the wood grain. If your piece is laminate and doesn’t have a true wood grain, brush lengthwise. The most important rule for this entire project is to brush in the direction of the grain.
Follow the dry time on the can before you go to the next step.
TIME-SAVING TIP: If you have to use a primer, you can get your primer tinted the same color as your base coat. Then, your primer will also act as your base coat. Just ask them to tint it at the paint counter. This will save you a step! If you go this route, continue on to step 4.
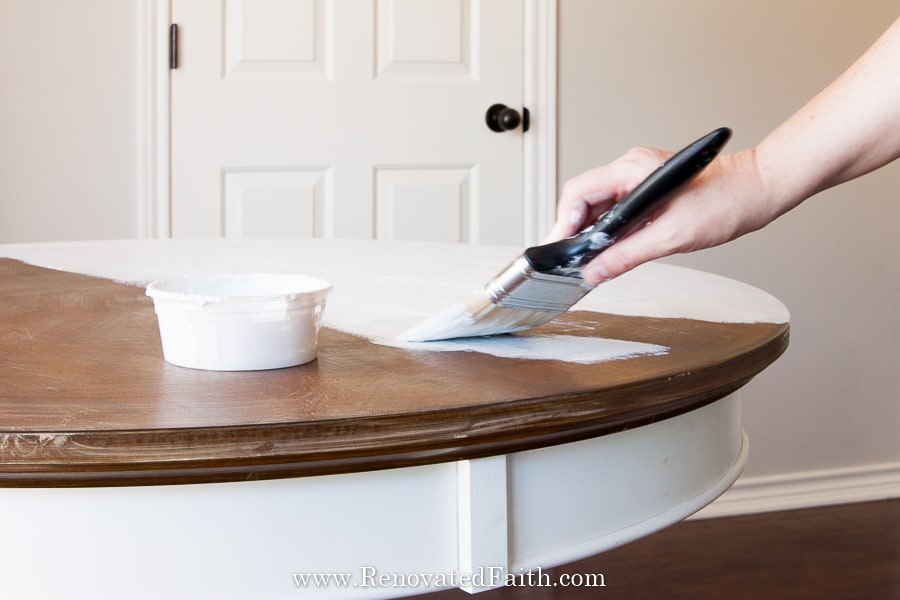
Step 3: Apply a Base Coat for the Faux Wood Stain
The base coat is the foundation of our faux finish and is the only solid color. The additional coats are mixed with a glaze so they are semi-transparent.
Brush on the coat of latex paint using long strokes in the direction of the wood for the best finish. You shouldn’t need more than one coat of paint because even if you don’t have great coverage, you won’t be able to tell with the finished project. So don’t worry if you see some streaks. That’s totally fine and will probably add dimension to the final stain.
Once you have applied your base coat, it’s a good idea to let it dry overnight, especially if you are in an area with high humidity.
While you are waiting for the top to dry, this is a good time to paint the rest of your piece if you are doing the “stained-top look”. To get a smooth and durable finish, check out my post: A Beginner’s Guide to Furniture Painting
For the Dark Walnut Faux Paint Stain, the base coat is SW Latte.
Step 4: Mixing Your Paint That Looks Like Wood
While the base coat is drying, now is a good time to mix your layer 1 and layer 2 stain mixtures. Be sure to check which latex paints to use for your shade.
The process to mix the stain mixtures for both layer 1 and layer 2 is the same.
Faux Stain Mixture (You will use this ratio for all 6 shades of stain paints)
- 1 Part Amy Howard Glazed Over Water-based Glaze
- 1 Part Latex Paint (Get your paint color for your shade above.)
For my round tabletop, I used 2 tablespoons of glaze, and 2 heaping tablespoons of paint and it was enough for one layer on the tabletop. For large areas, go ahead and mix more than you think you’ll need so you don’t have to stop mid-process.
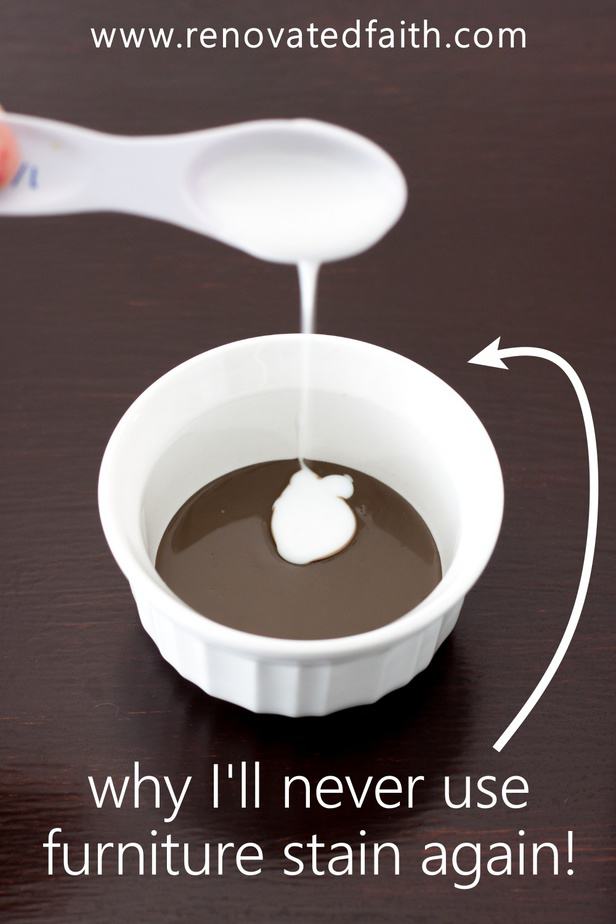
You can see in the video that the paint mixture will be pretty runny and that’s what you want. You will follow the same recipe above for Layer 1 and 2.
I used plastic cups for each mixture and mixed them with plastic spoons. Then I just put foil over the top of each cup until I was ready to use them. Don’t forget to label your stain mixtures!
If Your Paint-Glaze Mixture is Too Thick
If your paint-glaze mixture seems to be drying up on you before you have a chance to work with it, add a little water to the mixture.
If Your Paint-Glaze Mixture is Too Thin
If your paint-glaze mixture seems to be too thin to make deliniated grain lines, almost having a water-color effect, add more paint to your mixture. If you see lots of little bubbles in your finish, do the same.
Why Make a Faux Stain with Latex Paint
You could use a traditional oil-based stain like gel stain at this point and it will work well just like in my post How to Stain Over Stain but if I have to pick, I prefer mixing my latex paint with a glaze to make a faux stain.
I like that the glaze and latex combination is water-based which has less odor during the application process and it just less messy. Also, latex is so cheap and comes in almost any shade imaginable if you want to adjust the shade. Ok, back to the process!
Step 5: Refinish Furniture so it Looks Like Wood by Creating a Faux Wood Grain (Layer 1)
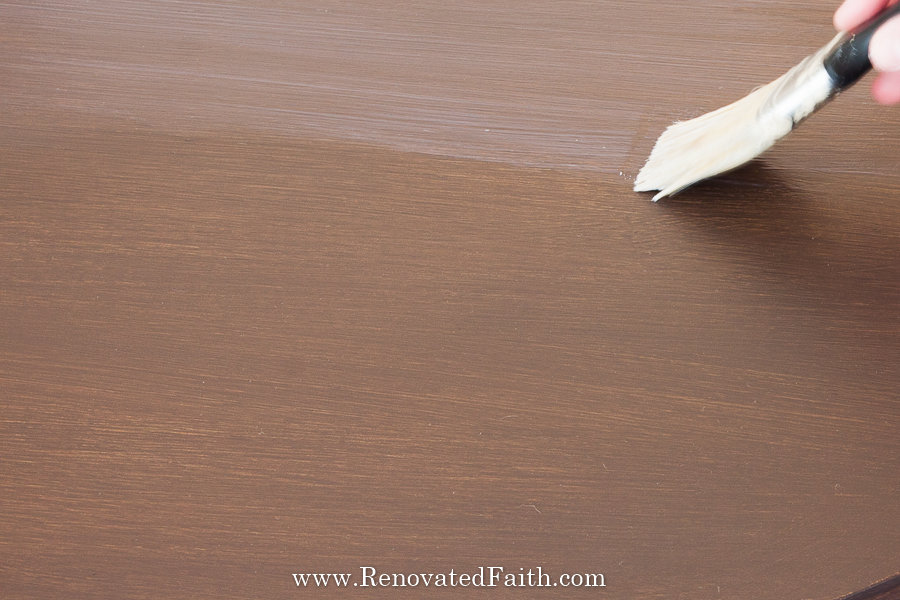
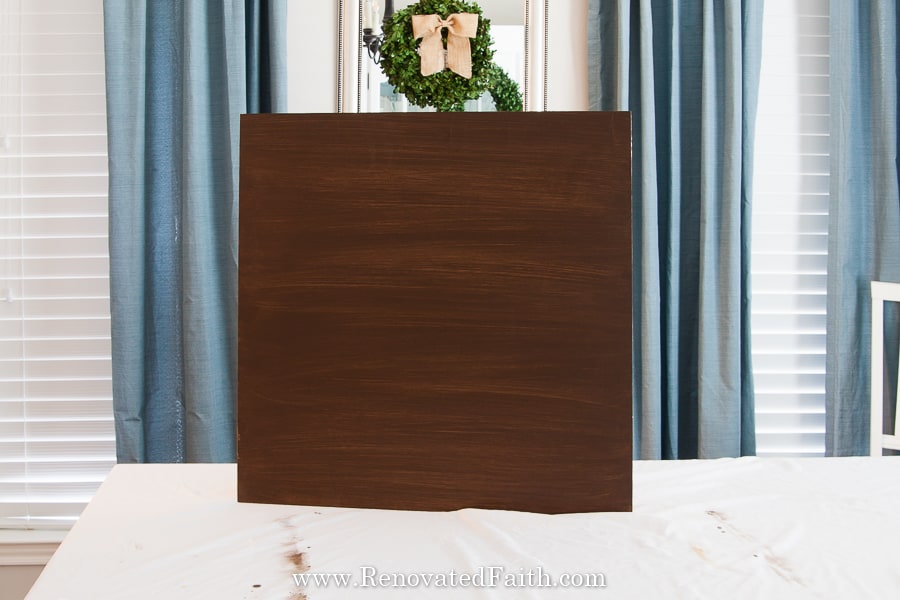
Be sure to watch the video as I paint on a sample piece of wood with the Rustic Mahogany Stain.
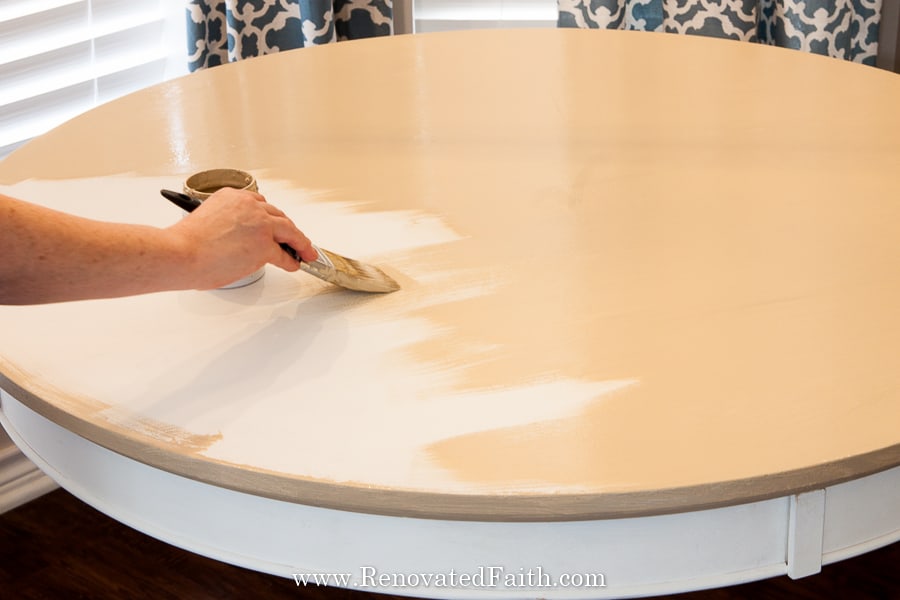
First, cover your painted surface with your layer 1 mixture. You first just want to get it on the full surface.
Once the surface is covered with the layer 1 stain mixture, start at the top and move from left to right. Make sure you start your brush at the very left edge of the surface and don’t bring your brush up again until you have brushed the full length of the surface.
This sounds so much harder than it is so that’s why you need the video to see how easy it really is. Basically, you are going from left to right in long strokes. If you start or stop your brush in the middle of the surface it will leave a weird brush mark.
Every few brush strokes, dab your brush on some paper towels to get some of the excess paint off. This will give you a really nice faux grain effect. Keep brushing and dabbing off the excess paint until you get nice translucent strokes that resemble wood grain.
The video shows you how easy this is and how it’s impossible to mess up if you make a mistake. The glaze really helps to keep the paint mixture workable so it doesn’t dry up too soon.
Let layer 1 dry 2 hours. If you have any minor imperfections in the first coat, we will cover them in layer two.
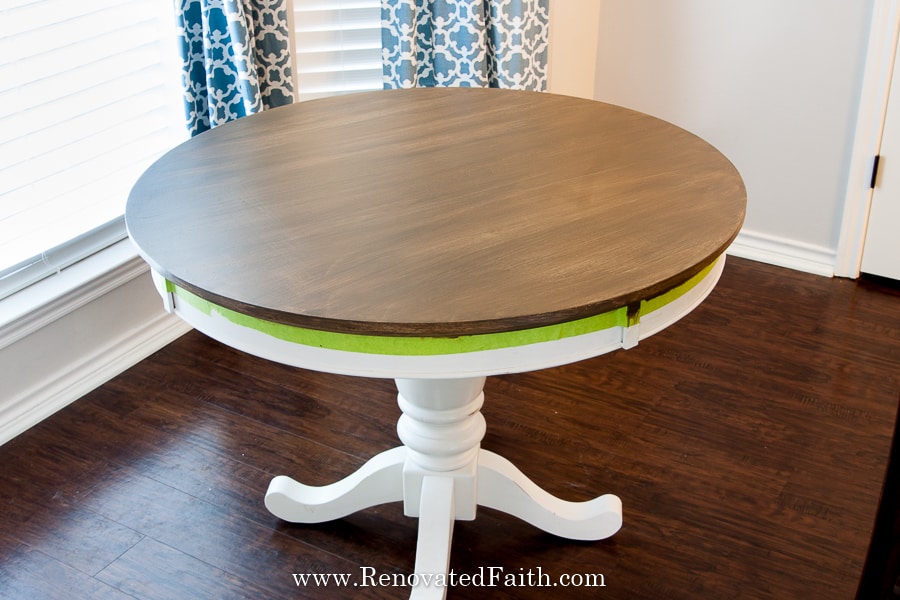
Here’s how my table looked after layer 1. (To be honest, I really liked how it looked at this point but I knew I needed to add layer 2 to get it dark enough to match my two chairs.

Step 6: Brush On The Layer 2 Mixture
Apply the second coat of stain with the corresponding “layer 2 mixture” for your stain color. Repeat the exact same process in Step 5 when we painted on the glaze the first time. But this time, you might want to go a little thinner so you can see more of layer 1 show through this layer. If you want a darker stain, go heavy with layer two.
For the Dark Walnut stain, it kind of looks purplish after brushing on layer 2 but I promise it dries in a beautiful rich brown. All of the stains dry a little lighter and more contrasty than when the paint is wet.
DRIFTWOOD FINISH FINAL STEP: If you are doing the driftwood finish, you have one step to add to your paint job before you add a clear coat. Let layer 2 dry overnight and mix 1 part glaze and 1 part white paint. You will now dab the very tips of your bristles on the white glaze paint mixture and then use a paper plate to wipe off most of it.
When you are sure you have almost no paint on your brush, brush back and forth in the direction of your paint to give a light dry-brush effect. You can see the full tutorial for this paint finish here: Easy Driftwood Finish on Furniture
Step 7: How to Clear Coat Your Faux Stained Finish
I recommend using a finishing coat to protect your beautiful faux finish. Before you start, wipe down the wood surface with a clean cloth to remove any dust. Brush clear coat on the entire piece in light coats with a foam brush in the direction of the grain. It will go on with a white-blue tint but it will dry to a clear thin film. (I like using a foam brush instead of a polyester brush because it goes on so much smoother. (Also, the foam brushes are so cheap you can throw them away when you’re done or you can just clean them with warm water.)
Even though you want to brush on a few coats of clear coat, it doesn’t take a lot of time because each coat dries quickly. In the long run, you’ll be happy with the great results you get from using a good clear coat on top of wood.
As I experimented with which clear coats hold up best to cold glasses in my post The Best Choice of Clear Coat for Furniture, I found that one clear coat rose to the top when sealing interior surfaces. Varathane’s Water-based Polyurethane yielded the best results and is my only choose for protecting furniture projects. I especially love the satin finish. If you want a matte finish, you can use General Finishes High Performance Top Coat in Flat .
Follow the directions on the back of the can. Be sure to be careful with your furniture piece at first in terms of putting cold drinks on it. I noticed that the first couple weeks, it would leave a temporary ring that would disappear after a few minutes but after a few weeks this stopped happening so I’m assuming it needs a few weeks to cure.
(If you decide to use a different clear coat like teak oil, danish oil or any gloss enamel sheens, brush them on an inconspicuous area first to see how they look on the surface. For high-use furniture like kitchen tables or cabinet doors, opt for the Varathane Water-based clear coil instead of a natural oil.)
Dark Walnut Stain Examples: Breakfast Table and Coffee Table
Brown Oak Stain Example: Dresser
Rustic Mahogany Stain Example: Sample Piece From Video
Barnwood Stain Examples: Entry Table and Blue Dresser
Driftwood Stain Example:

RENOVATE YOUR FAITH: Freedom Through Transparency
“One of the reasons we are not free is because we are trying to be good for Jesus. We are trying to be good PR for God. I think my best PR moments are when I am weak, and He is strong in me.” – Sara Groves
I have learned that there is nothing I can do to make God look good…He’s God and He doesn’t need me or anyone to accomplish that. READ MORE HERE
For more spiritual encouragement, click here for the rest of my project posts that also include Renovate Your Faith devotionals.

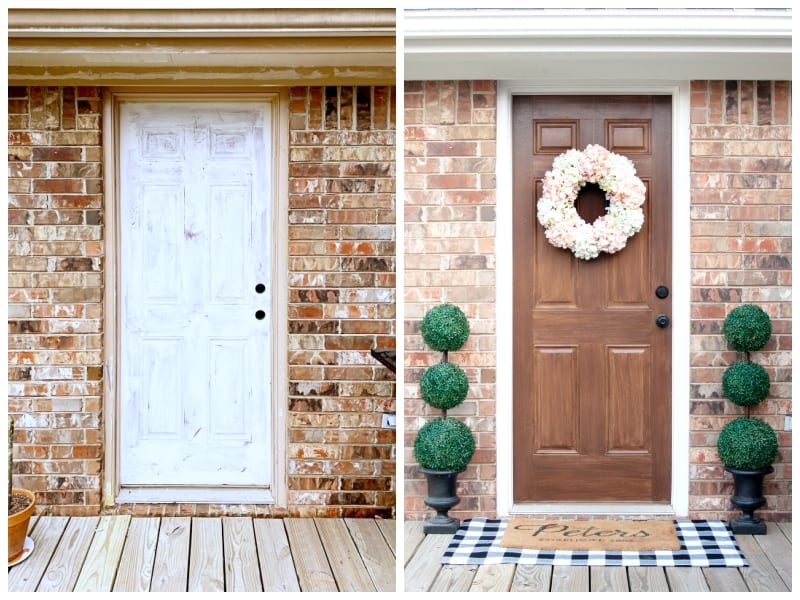
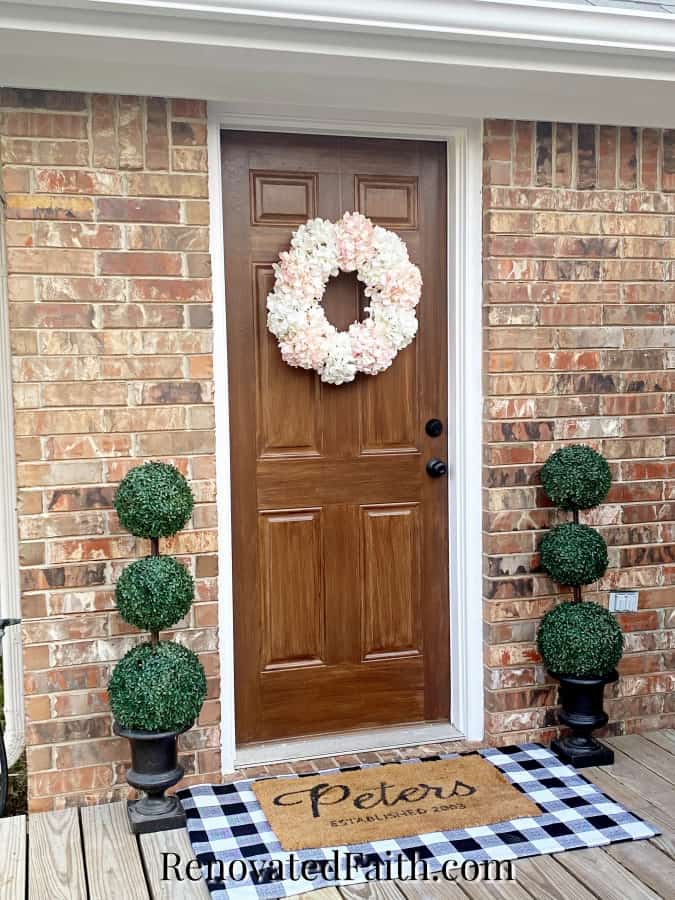
How to Faux Stain a Metal Door To Look Like Wood
Did you know you can use any faux stain on a metal or fiberglass door to make it look like its made out of real hardwood. To see how I painted my metal back door, click here: The Easy Way To Paint Any Door To Look Like Wood
☑️ My All-Time Best Furniture Painting Tips & Tricks (FREE PRINTABLE)
Don’t forget to download the FREE step-by-step printable checklist that shows you the entire process I’ve used on dozens of furniture pieces while saving you time and money!
How to Faux Stain with Latex Paint: FAQ’s:
Traditional Stain Vs Faux Paint Stain for Wood
There’s more than one way to get the look of stain on furniture, but one yields a much better result than others with less effort and expense:
Traditional Oil Stains on Unfinished Wood
For an unfinished piece of furniture, this involves light sanding and applying one or multiple coats of a stain. Sometimes two colors of stain can be used to achieve the right shade.
A problem arises with even the best wood stains because there is no absolute way to know how the stain will look after it penetrates the surface. Traditional wood stain colors go into the wood’s pores, and the reaction causes a permanent tint to the wood’s surface. The more the wood absorbs the stain, the darker the tint.
In addition, I have had trouble with different types of wood as they all absorb stain differently so the shade you want isn’t always what you get. Another complication with conventional products like Minwax is when the moisture of different pieces of wood varies. Drier pieces of wood absorb stain better than fresher, moister cuts of wood which can leave you with different shades of stain on one piece of furniture.
Bottom Line: A traditional interior wood stain often yields unexpected results.
Traditional Oil Stain On Previously Stained or Painted Wood
There are two conventional methods for staining a finished piece of furniture, whether it has an existing stain or is painted.
One option is to completely sand off the entire finish of the old surface so that you get down to the bare wood. This is extremely time-consuming, laborious and messy as you have to sand off ALL of the old finish so that the new stain can penetrate.
You can also use a furniture stripper to remove the old stain or paint. Unfortunately, that involves slathering on lots of caustic, strong-smelling chemicals over your piece, then letting it sit a while before wiping or scraping off the old finish. Needless to say, it’s messy!
Wood Oxidation Staining Method
Wood oxidation is the process of expediting the weathering process that would normally happen in nature much like iron reactions with the elements to rust. To read more about oxidation, click here: Wood Oxidation.
It usually involves vinegar, steel wool, and a strong tea stain to give a weathered wood finish. This will yield a very natural, rustic barn wood stain but you have to start with unfinished wood unless you want to strip/sand off the old finish.
Also, you don’t know what the final finish will look like. And because the oxidation is subtle, it will probably take a few coats at least.
Stain Over Paint Technique with Gel Stain (DIY Paint Stain for Wood)
You can stain over a stained piece by using another type of stain called gel stain. It requires only very light sanding and no stripping. You apply a base coat in a paint color that looks like pine and then one or two coats of the gel stain from one side of the furniture piece to the other.
The base coat shows through slightly giving the illusion of wood grain. Also, the gel stain comes in lots of color options so you can be sure that the color you pick will be the true wood color of the piece when you are done.
Gel Stain is usually a darker finish and looks great on more traditional pieces. Also, the gel coat is a tad on the shiny side. If you are looking for more of a traditional-looking faux paint stain and don’t mind a semi-gloss sheen, then gel stain is a great option. You can read more about it in my post: The Easy Way to Gel Stain Furniture. However, if you want a more matte, rustic-modern finish, you have come to the right place…
What Finish is This Faux Stain Technique?
If you have a high reflective finish on this technique, it’s going to look fake, which is why I like to use a clear coat in satin so it’s not too shiny.
Can this Technique Be Used On Metal Doors?
This process does not only work on wood doors but fiberglass and metal doors. Right now my back door is covered in orange peeling paint but I will soon refinish it with the Rustic Mahogony – the same sample color in the video on the dining room table.
I love how the two layers of stain imitate wood grain without the use of a wood grain tool. I’ll also include a section in that post entailing how to use this faux wood finish on garage doors and any other metal door. I recommend using this wood stain paint technique outdoors in moderate weather from January or April as direct sun can cause the paint to dry too fast.
How to Paint Trim to Look Like Wood
If you are looking for paint that looks like a stain for trim, you can use this method also. Just make sure to test a small area and work in six-foot sections to ensure the wet glaze doesn’t dry before you can work with it to give the trim the wood grain effect. I would use a clear coat on trim since trimwork gets a lot of wear and tear like this one: Varathane Waterbased Polyurethane
Can I Use Paint Over Chalk Paint?
You can use latex paint over chalk paint BUT you CANNOT use latex paint over wax. All chalk paint has to be sealed as I discuss in my post Why I Don’t Use Chalk Paint on Furniture. Most chalk paint is sealed with wax so if you know the furniture piece has been waxed, you need to sand lightly and use a primer.
If you are unsure if the piece has been waxed, I’d use a primer just in case. The last thing you want to do is use this faux stain process only to have it chip or even peel off later because of the wax underneath.
Can You Use the Faux Paint Stain Method with Chalk Paint?
There are methods for faux staining with chalk paint but latex is a fraction of the cost of chalk paint, not to mention you have limited color options. With chalk paint, you have to use a clear coat or some type of sealant like wax where one is not always required with latex paint.
Can You Make Painted Outdoor Furniture Look Like Wood?
You can use this same process to mimic exterior wood stains on outdoor furniture, decks, and other exterior wood surfaces. You can see how I followed the same faux stain process on my back door here but it can also be used for garages or front doors. By applying this mixture, I was able to save hundreds of dollars by not having to buy a new door and hardware. Since outdoor projects need more protection from UV light and the weather, I use an exterior clear coat (Varathane’s Spar Urethane For Exterior Use)so your finish lasts a long time.
You can also use gel stains on outdoor furniture and they are a good choice if you know you want a darker look. The gel stains have protective qualities but e sure to still use the exterior clear coat I mention above. The only negative about gel stains is that it will take mineral spirits to clean up as it is an oil-based product and there are higher VOC’s (volitile organic compounds). YOu can see how to create a faux stain finish with gel stain here.
For refinishing a wooden deck, this process would be too labor-intensive so I recommend a solid or semi-transparent wood stain for best results. Solid wood stains will hide any irregularities in the old surface and are easier for large areas. I really like Behr Exterior Stains for Decks.
What are the Different Types of Wood Stains?
Most of the traditional stains are oil-based stains like Varathane Classic or minwax products. Gel stains are another oil-based stain but they are much thicker than conventional stains and are semi-transparent. The nice thing about our faux interior stains is tht they are more predictable as they don’t absorb into the wood. Also, they make for easier clean up with less VOC emissions.
Need Chairs for Your Newly Painted Dining Table?
If you just refinished your dining table, you might be interested in updating the look of your chairs. Chairs can be one of the most time-consuming furniture pieces to paint, so I have put together a buyer’s guide for my favorite dining chairs here: The Best Cross Back Chairs Less Than $100
Why cross back chairs? Also, known as x-back chairs they work well for any rustic style whether farmhouse, French country or coastal decor. They also come in several different shades to easily coordinate them with a newly stained table.
Paint that Looks Like Wood Stain – Related Posts:
The Secret To A Restoration Hardware Finish (On ANY Furniture Surface!)
How to Apply Paint that Looks Like Stain (9 Shade Options!)
How to Paint Laminate Furniture to Look Like Wood (Easy Beginner Guide)
DIY Faux Pottery Barn Seadrift Finish With Paint (Easiest Technique!)
How To Paint a Door to Look Like Wood Stain {12 Shade Options}
Easiest Raw Wood Finish with Paint (No Stripping Needed!)
Painting Metal to Look Like Wood Is Easier Than You Think (My Foolproof Method!)
How to Paint Plastic to Look Like Wood (The Ugly Fountain Makeover You Have to See)
How to Use Gel Stain on Furniture Makeovers
DON’T FORGET TO TAKE A PICTURE!
Now that you are done, I’d love to see how it turned out! Post your before and after photos here!
Painting Furniture To Look Like Stained Wood: Final Thoughts
Don’t forget to download my Free Furniture Painting Cheat Sheet. To get your printable, sign up for my weekly newsletter which also grants you free access to my resource library full of wall art printables, checklists, and project plans!
Before this post, you may not have realized that traditional stain could be so problematic. With this faux stain technique, you can easily refinish old furniture in one of nine shades.
A fresh coat of paint can transform any furniture piece but what if you want to stain a painted furniture piece without stripping? I have refinished 7 pieces of furniture with this stain painting technique and they are all holding up beautifully. In finding the perfect shades options for this post, I went a little overboard in experimenting. Who knew that testing out faux stains would be my main form of stress relief during the craziness of 2020. And these 7 easy steps will help you to have a stunning stained finish that will last you for years to come.
I love to hear your thoughts and questions! Scroll down to leave a comment and I WILL reply! ❤️
Blessings,

Be sure to follow the fun here!
Email Subscription | Instagram | Pinterest | Facebook | Twitter

Paint That Looks Like Wood Stain

Karin Peters is a DIY expert and the creator of Renovated Faith. She is a furniture painter, a home design consultant, and a tenacious problem solver determined to help you transform your house into a home. With 17 years of experience with DIY home improvement, she researches and analyses professional processes to adapt them to be easy and cost-effective for DIYers. She then tests every project and product before it appears on the site in a detailed, step-by-step format. After attending Texas A&M University, she received her Master of Divinity with Biblical Languages at Southwestern Baptist Theology Seminary. Her passions unite in Renovated Faith, which shows readers how to create a home that serves them so they can pursue their God-given purposes. About Renovated Faith | Editorial Policy | Facebook | Twitter | LinkedIn
Hello where do I find the colors you used for each stain?
They are towards the bottom of this post. Thanks Colleen!
Hello! I have two questions for you: Have you ever used this technique on window molding? What would techniques\colors would you suggest for a cherrywood finish? Thanks!
I haven’t used it on windows but it will definitely work for that application. I don’t have a redder cherry shade but you can always just experiment with one of the shades I have listed but make one of the glaze layers a “redder” cherry shade to bring in those undertones. Thanks Andrew!
I think I decided to do the faux stain for my cabinets- the gel stain is going to be way too time consuming! I fell in love with some cabinets at home depot- they are almost a taupe grey look. Im trying to figure out what colors would make this work best! (I also think you should post all 13 stain colors you made, lol). Im not 100% sure this is the right color (I have a picture) but its close….
https://www.kraftmaid.com/browse-cabinets-products/cabinets/color/translucent-monument-grey
Seems like a comprehensive website. I didn’t get the chance to view it though because as soon as I began scrolling I get a pop-up. I close the pop-up and seconds later I get an even bigger one. Pop-ups are annoying. I only came back here to tell you it’s too bad I didn’t get the opportunity to check out the whole article. Have a great rest of everything else.
You should have only seen one pop up from me after about 1 minute of scrolling. Any other pop ups are from ads and you should try a popup blocker.
Hi Karin,
I am so thrilled to find your site. What kind of faux finish would you suggest to tie in warm (Early American) and cool (Rustic Mahogany) colored wood tones in my bedroom. My bed is an Early American color wood tone which I am keeping, and my trim looks very close to Rustic Mahogany. I am thinking of painting my end tables and 5 drawer chest a faux wood color on the tops, and the rest a white, such as Simply White by Benjamin Moore. Any suggestions would be greatly appreciated! Thank you and have a blessed day!
Hey Angela, Thank you so much for your kind words! I am thrilled to hear you like Renovated Faith. I think you should go with whatever shade you like most for the end tables regardless of what other wood looks like in the room. I feel like Rustic Mahogany and Early American are different but I think they can still work well together in the same room – especially after you get more accessories in the room. You could also go with one of the shades that is closest to a middle road between those two colors. Then, you can be sure everything will coordinate. Let me know if you have ANY other questions and feel free to send a pic to karin@renovatedfaith.com. Thanks Angela!
I am trying to do the barnwood faux wood finish. As I understand it, this is the order:
prime coat
base coat in Valspar Coastal Villa
layer 1 : mix water, glaze and coastal villa
layer 2: mix water, glaze and Van Dyke Brown
polyurethane
I that right?
Laurie P.
Hey Laurie, Actually, Layer 1 is the same as layer two. You do the Van Dyke Brown mixture twice.
Can you post the number codes for the Sherwin Williams paint shades? I don’t live near a Lowe’s, and a different hardware store told me they need the number in order to mix the color samples.
I didn’t use a primer on base coat & having trouble getting good coverage. I sanded over a previous coat of paint & didn’t think I needed it. Would it hurt to put on another light base coat of flaxseed for mahogany finish ? Old paint was a medium shade of blue. I appreciate any suggestions. I’m very new to any method of furniture painting. Thank you, Mary Beth
Hi Karin,
I am trying to paint my sons bed frame, probably white to your Rustic Mahogany color. I noticed in your video, you did a primer, then I believe it was the base coat (Flaxseed) then you add your stain on top to create the texture. In your instructions in shows that there’s two layer; van dyke brown and Turkish coffee. I was wondering how to apply each color to create what you did in the video. Thanks!
Yes, you are exactly right. I do the primer, base coat, then glaze coat 1 in one color and then glaze coat 2 in the other color. You mix and apply the glaze coats in the same way. Please let me know if that does not answer your question. THank you Jenny!
Hi.. went to lowes to have them tint the zinnser primer with sherwin Williams flaxseed and they told me the couldn’t do it.. if that can’t be done should I get the primer and then topcoat in the flaxseed color and just do both steps?? Thanks
Hi.. I have just left lowes and they are telling me they can’t add flaxseed color to tint the Zinsser primer.. any other suggestions?
Ugh, so sorry to hear that Angela. They were able to tint mine. You might just have to prime with the white and then put a base coat with latex pain in flaxseed over it. Let me know if you have any other questions!
My pastor says that I should not paint my kitchen table top because it will not hold up. He says that factory furniture has a baked topcoat and when you do it yourself, you can’t get it that tough and hard. What has been your experience on how this holds up on a table top?
Would gel stain hold up better than faux done with latex?
I have used Varathane Water-based Polyurethane (see the link above) topcoat on our coffee table, breakfast table and dining table and all of them look GREAT! We are pretty rough on our furniture and they were painted with this process over 2 years ago. 🙂 Let me know if you have any other questions Elizabeth!
Hi! Have you tried to do this on a wall before? We have a support beam that is not wood, but made out of dry wall and I would love to try and make it look like a wooden beam instead!
It would work as long as the drywall is completely flat. If it has any texture you probably won’t get the same effect. If you decide to use this technique, I’d love to see a picture!
Yes you can use this technique on a wall. Just make sure to sand it smooth first! I did this on my soffit in my kitchen to match the existing cabinets. Then I added wood moulding using same technique. Beautiful. Have pictures if you care to see them!
Oops! I see it on the can now – will work under oil-based or latex. Yay! I’m not experienced with paint, and my husband (who has more experience) gave me a scare halfway into my project! Thanks so much for all your helpful info!
Please help! Can I use Cover Stain (oil-based) under latex paint? Or do I need to change to an oil-based paint if I am using Cover Stain? I don’t want my hard work to peel right off! Thank you!
Hi Karin I will be using you faux stain, and have read instructions but cannot find where to watch video link please help and be blessed connie
Hey Connie! Sorry about that! Try this link and please let me know if you have any questions! https://www.youtube.com/watch?v=vfDXUfd_C_s
Hi Karin !
I just ordered the glaze – but will have to pick up in store as they say they are no longer offering it online. Thought you would want to know to pass on to your followers. Also am having trouble finding
the Sherwin Williams Black Bean paint. Not sure if out of stock, or if maybe they have changed the name of this shade. Is there another shade close to it that would be a close match ?
Thanks ,
MJ
Hey MJ,
Try this link. Lowe’s added a new listing for the Valspar Clear Mixing Glaze on their website. It’s the exact same thing but one listing is available online and one is not for some reason. Also, Black Bean is a Sherwin Williams Color but you might have to ask for it at the paint color. I’ve never seen it pre-mixed. Please let me know if you have any other questions at all MJ! Blessings,
Karin https://www.lowes.com/pd/Valspar-Clear-Satin-Water-based-Clear-Glaze/1000380325
Can you post the number codes for the Sherwin Williams paint shades? I don’t live near a Lowe’s, and a different hardware store told me they need the number in order to mix the color samples.
I have a question for my kitchen table. I want to do the faux stain technique. I want to know how to do it if the table has a leaf in the middle. There are three parts then with two “lines” or edges in the table, its not just a flat one piece top. Do I seperate them when working on it or do it all then seperate to catch drips in between if there are any? Please help! Thank you!
Hey Laura,
I would separate the table and take out the leaf. Then set the leaf off to the side and refinish it separately. So, you will be refinishing 3 different surfaces – both sides of the table (leave a big gap as you refinish) and then the leaf. Let me know if you have other questions Laura! Blessings, Karin
Thanks. I did separate the parts and faux stained and all looks great except one spot. Idk what happened. I think something was stuck there and went I went to move it, the paint came up! It’s about a thumb tack size spot. Oh what to do??
Ok, Laura! Don’t worry. This is fixable. Let everything dry completely – one or two days. Now, use a small brush to cover over the spot with the second glaze color. If you haven’t clear coated it, clear coat it now. If you already clear coated it, mix some clear coat (as long as it’s the water-based Varathane Poly) in with the second glaze color when you touch up. Let me know if this doesn’t work and we will try something else! Thanks Laura. Blessings, Karin
Thanks! I did clear coat 4 times today. I’ll try it after it drys well like you said.
Karin,
Thanks for this article, and for your faith-based values.
The reason I’m reaching out to you is to ask if I can use your same faux stain technique for furniture….but, my work is outside, not inside.
First of all, I’m a novice to DIY projects. How much of a novice? Well, rebuilding the ramp and landing to our guest house is the first extensive carpentry project I’ve done in my life (56 years). After construction, I used a Ready Seal Dark Walnut stain.
My wife originally asked if I could install shutters on the 3 windows. However, I’m on a very tight budget, and didn’t see any shutter options I could go with. So, that leads me to another option:
Could I use the faux stain technique that you describe, and apply it to the trim boards around the 3 windows, attempting to match the dark walnut stain for the ramp and landing? If so, what (if anything) would I do differently to both apply, and protect, the faux stain outside?
Thank you,
Dan Mach
Hey Dan, I am actually working on a post about using this faux finish on an exterior door. It will be ready next week! But the only real change I made to the process was using an exterior clear coat. I used Varathane’s Water-based Spar Urethane in Satin. Let me know if you have any other questions! I’d love to see pictures when you are done! You can send them to karin@renovatedfaith.com. Blessings, Karin
I used your Dark Walnut faux stain on our mantle and I’m wondering if it’s necessary to add the top coat? It’s not technically furniture and won’t be used as such but I will have it decorated and dust (from time to time-haha). Since the color is so beautiful, I am toying with the idea of do this same project on our 2 staircase hand rails, which are painted as well.
I am new to your site but I am enjoying reading and learning how to do new projects I’ve been petrified of in the past! I am a firm believer that God leads us when we ask for wisdom and I feel like that’s what happened when I found your site.
Thank you!
Hey Stephanie,
Thank you so much for your sweet encouragement. Isn’t it amazing how God is into the details of our lives?!? That’s a great question! I wouldn’t worry about clear coating a mantel. My general rule is that if a drink will likely be set on it, then I clear coat it, otherwise, don’t worry about it! Please let me know if you have any other questions! Blessings – Karin
I’m so excited to try the bar wood faux stain. Your post references a video several times that demonstrates how to do the paint strokes but I do not see video link in the post. Can you direct me to it please ?
Here ya go Suzanne! Let me know if you have any questions: https://www.youtube.com/watch?v=vfDXUfd_C_s