The Ultimate Chandelier Makeover Tutorial (5 Big Makeovers)
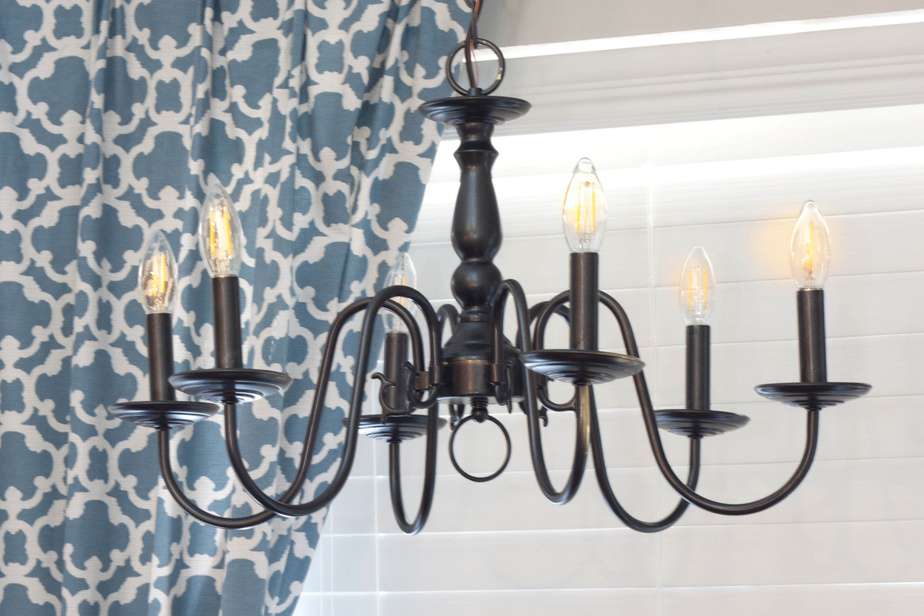
How To Update Old Light Fixtures So They Look Chic, Not Cheap
You don’t have to spend a lot to have a stunning light fixture! Here’s how to update old light fixtures & great chandelier makeover ideas.
Imagine getting “new” kitchen and dining room light fixtures for only a fraction of the cost. Also, imagine that feeling when you blow most of your kitchen renovation budget on lighting alone.
The sticker shock from pricing out light fixtures online motivated me to update my current lighting with a few simple hacks. If you are ready to do some light fixture makeovers, I explain the steps of my DIY light fixture updates that will modernize your lighting instantly!
[toc]
DIY Light Fixture Updates & Chandelier Makeover
This post actually contains 4 different DIY projects to give you lots of options for light fixture makeovers in your home. This way you can customize DIY your light fixture updates to your home’s style and also your budget.
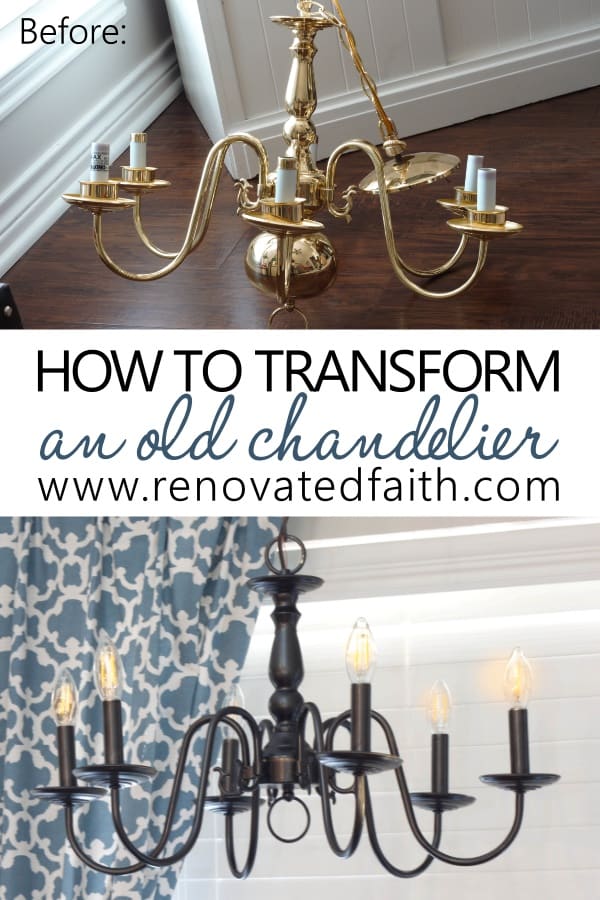
How to Update A Chandelier
My favorite DIY light fixture update is this brass chandelier makeover using an old dining room chandelier I found at Restore. If you haven’t been to your local Restore, they are a great place to find old light fixtures that just need a little love.
It’s also where I got the ceiling fan blades for my windmill wall art and the chandelier for my hummingbird feeder. You can also find great old brass fixtures on Facebook Marketplace.
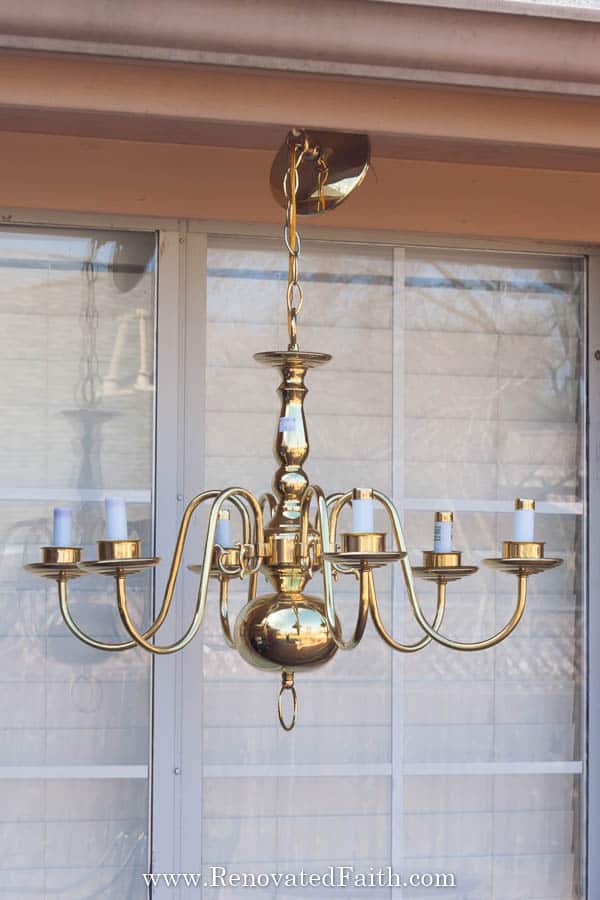
I got this baby for $10! When I saw it, I knew it had some major potential to look like one of those elegant, feminine chandeliers you might see on Fixer Upper.
What Can I Do With An Old Chandelier?
Even the ugliest brass light fixture can turn into the most fabulous chandelier makeover in a few simple steps! Sometimes big changes don’t take a lot of effort. If you have an outdated chandelier with shades, you can opt for smaller drum shades for a whole new look. If your outdated light fixtures are discolored or rusted a new color of spray paint can give them a completely different look
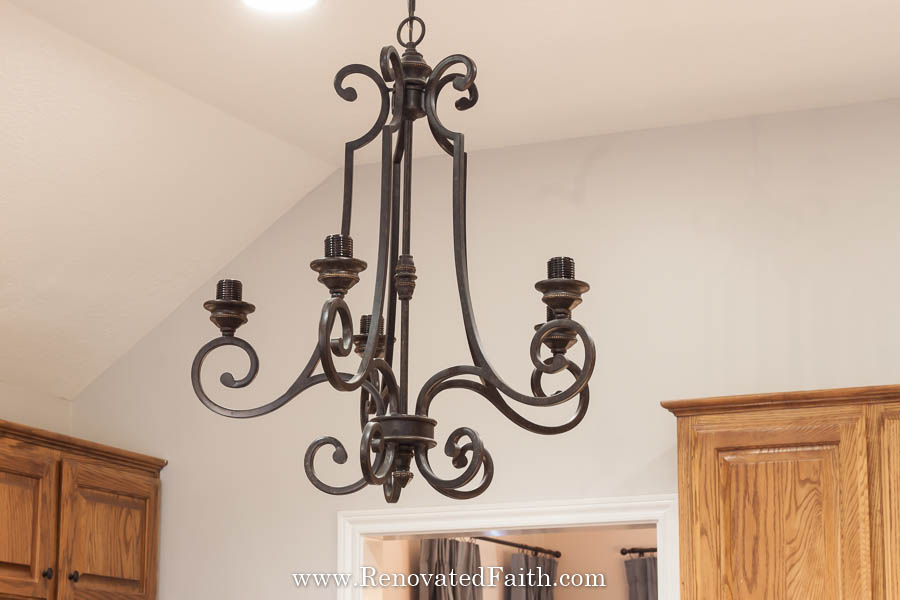
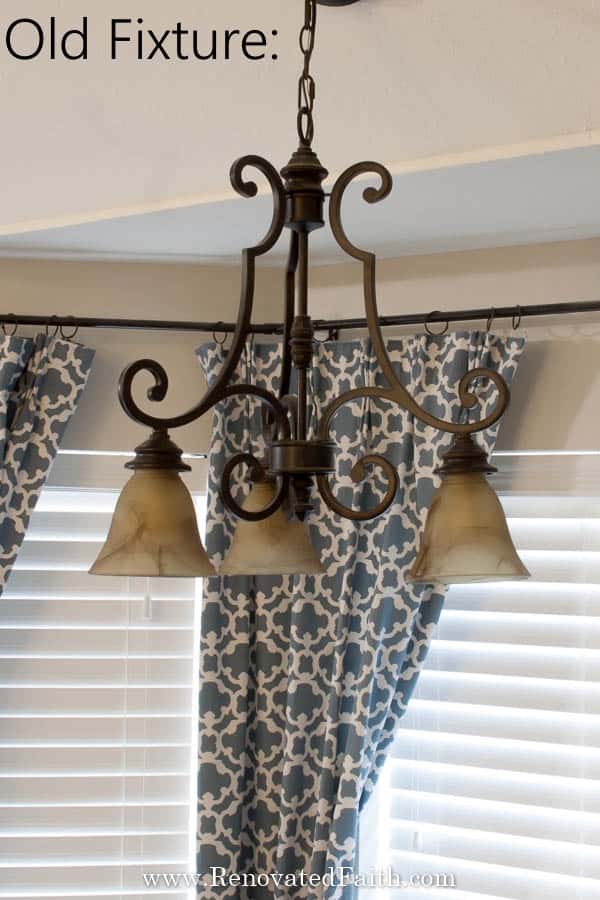
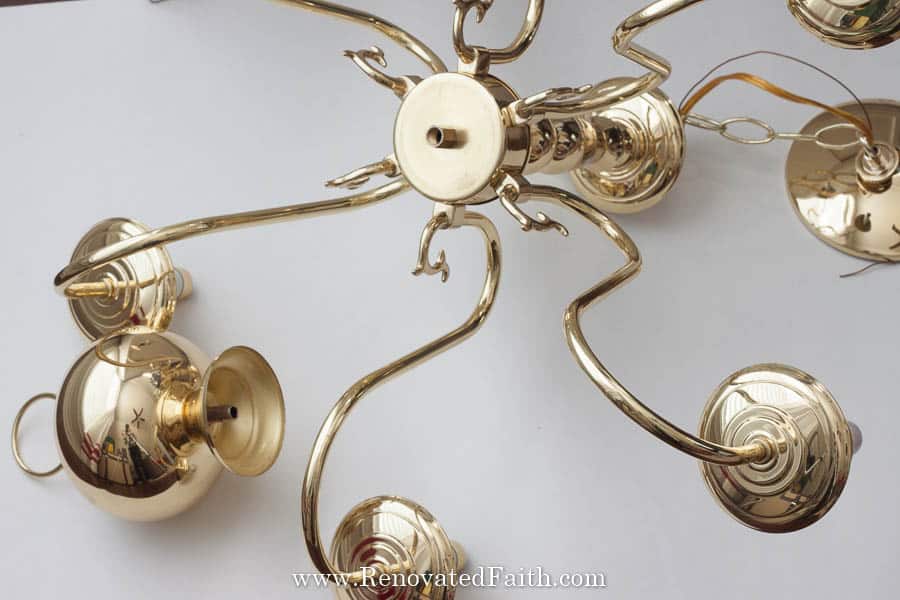
Here is the chandelier that was already over our little breakfast table. I knew I could just replace the sconces, but honestly, I’ve never been a fan of the entire chandelier…. so, it had to go!
Easy Brass Chandelier Makeover – Supplies:
MY FAVORITE PRODUCTS – CLICK HERE FOR MY TRIED AND TESTED PAINTING PRODUCTS
Spray Paint – Click above for my favorite spray paint for metal.
Chandelier Bulbs
Chain to Match Your Light Fixture (optional)
Painter’s Tape
New Chandelier Shades (Optional)
Best Spray Painting Tips & Tricks – For my best spray painting tips for a flawless finish, fill out the form by clicking here.
RELATED: How to Transform Your Home Decor with Spray Paint
How to Update a Brass Chandelier So It Looks Like New
Step 1: How To Prep a Dining Room Chandelier for a Makeover
Since these chandeliers were my inspiration, I knew I’d need to make some adjustments to give it a modern farmhouse chandelier makeover.
I took those little cups off of the bottom of the candle covers and also removed the tiny caps at the top of the candles.
This gives it a sleeker, simpler look. For the same reason, I removed that large bulb part at the bottom. It turns out it just unscrewed and I add that ring back on the bottom of the chandelier. Now it’s time to paint!!!
Step 2: Get The Look of a New Chandelier With Paint
One of the first things you should do before painting is to wipe down the chandelier with a damp rag to remove any dust. Mine even had some dead bugs hiding in places. Also, use painter’s tape to tape off the portion where the light bulbs screw in just to ensure that the paint doesn’t gunk up any of the connections or internal threads.
What Is the Best Paint for a Chandelier Makeover?
Spray paint is always the best option for a metal chandelier makeover. If you want the look of a certain color like Paris Gray (Annie Sloan Chalk Paint) there is a color here that is a really close match that is actually made for metal: Rustoleum Universal Metallics Spray Paint
RELATED: 7 Reasons I Don’t Use Chalk Paint
I learned when making my DIY Hummingbird Chandeliers that it is best to paint chandeliers by spraying the bottom first.
Lean the chandelier against something so you can spray the bottom with spray paint or cover the surrounding area with a drop cloth.
Do one coat with the Rustoleum Universal Metallic and then come back about 10-15 minutes later for a second coat.
For my best spray painting tips for a flawless finish, fill out the form here:
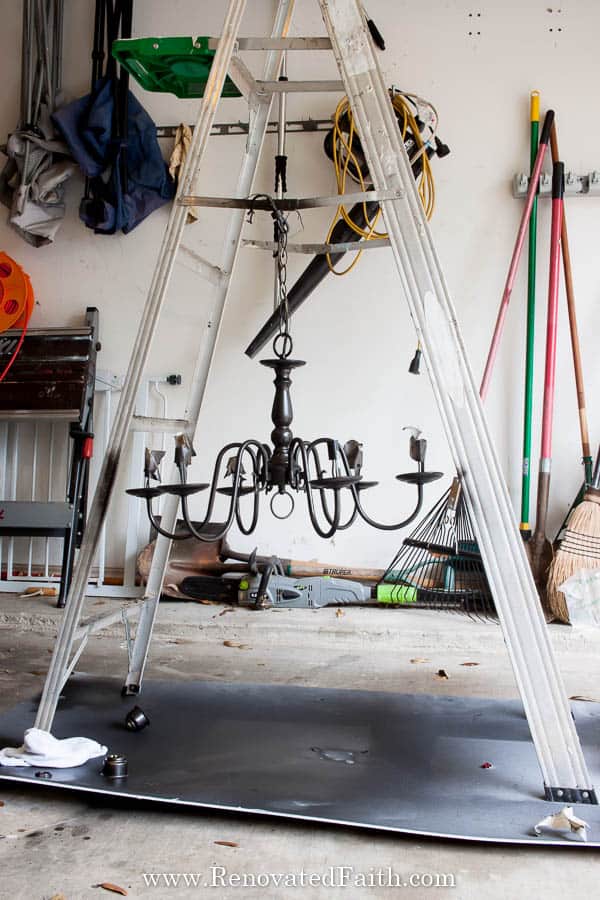
After the second coat on the bottom has dried take an old piece of wire and attach the top of the chandelier to part of a swing set, tree limb, or the underside of a ladder, as I did here. (Just know there is a good chance spray paint will get on whatever is close by.)
Now put your first coat of spray paint on the rest of the chandelier. Wait 10-15 minutes and do the second coat before letting it dry for 48 hours. After your last coat has dried, then you can add your candle sleeves and screw in the new bulbs.
Step 3: Hang Your Updated Chandelier
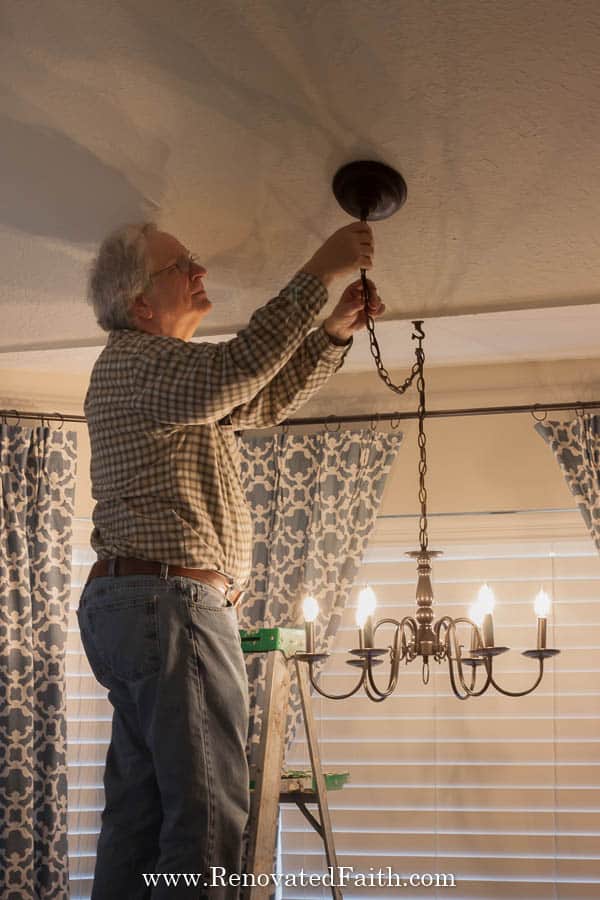
With the help of my dad, “we” hung the chandelier and I just screwed in the new bulbs. I love these new bulbs because they look like Edison bulbs but are much more long-lasting. You can find them cheaper here than in your local home improvement store.
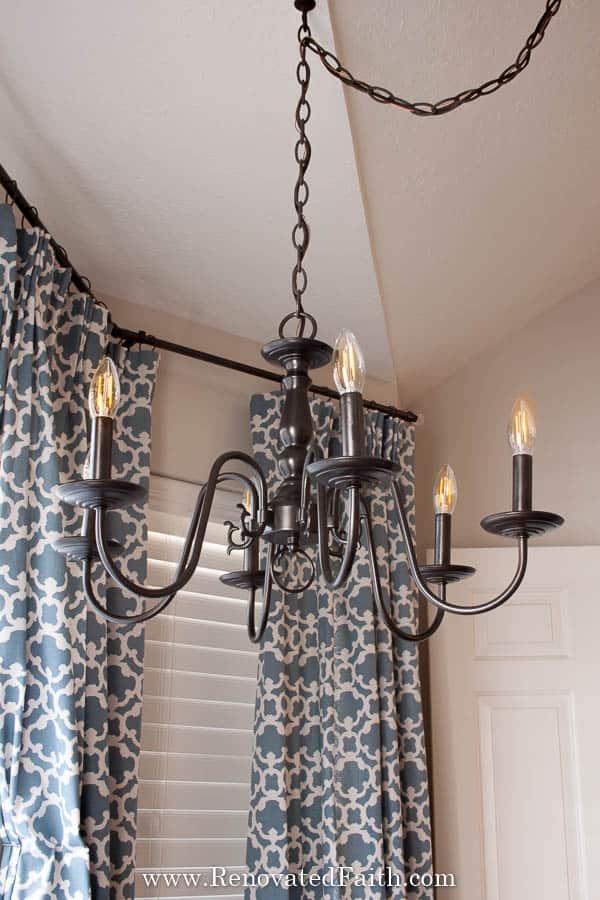
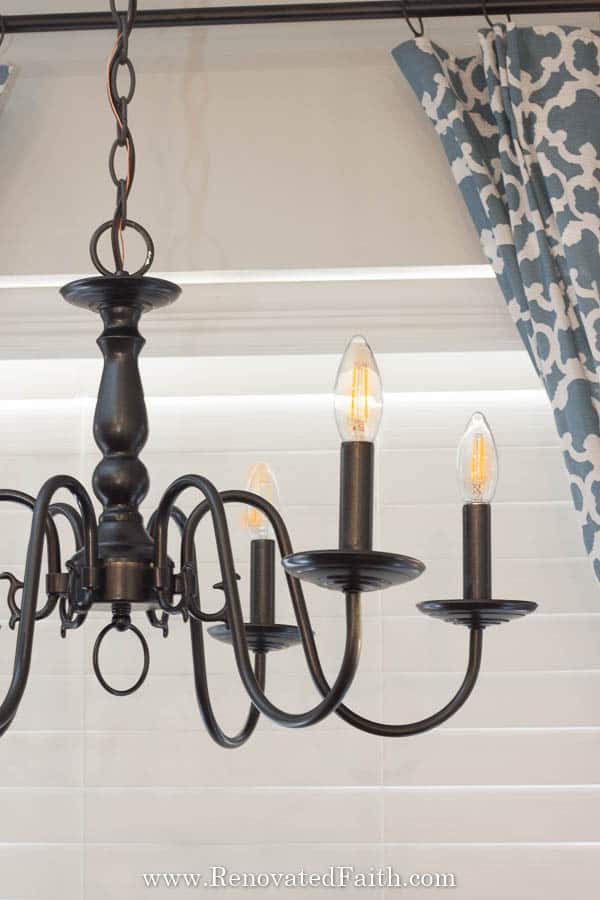
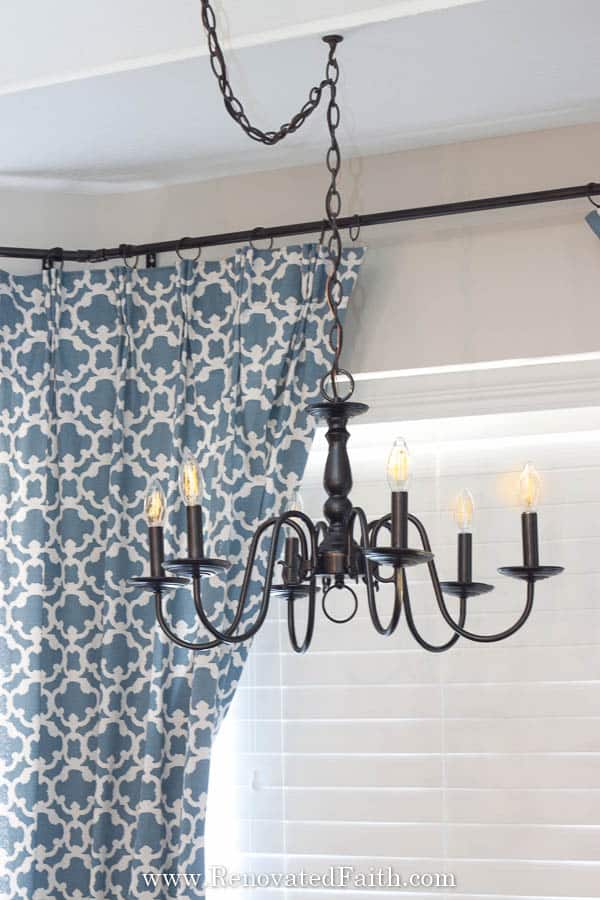
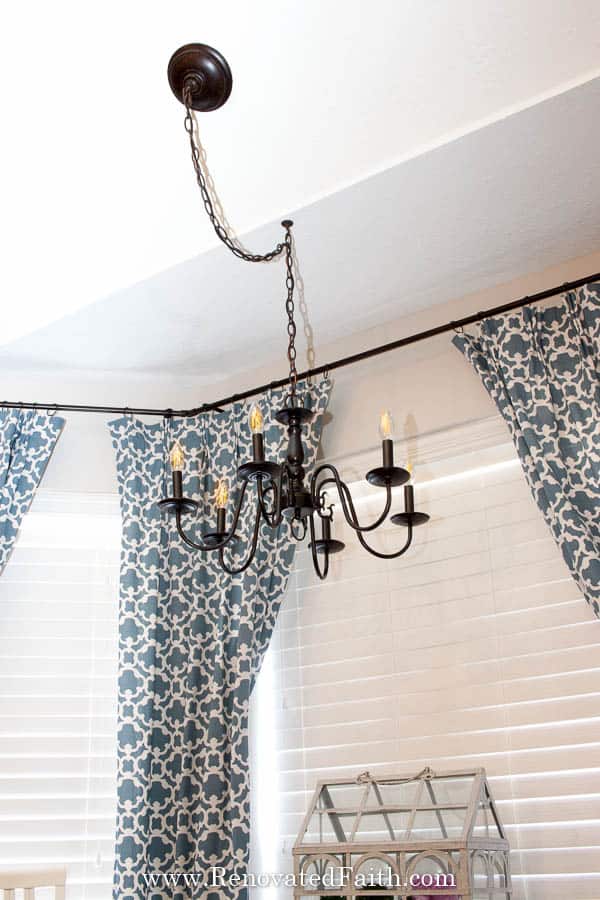
I love how it turned out and that it is similar to the chandelier in our dining room in front of the restored china cabinet. However, this one only cost us just over $10!
More Ideas to Redo Chandeliers
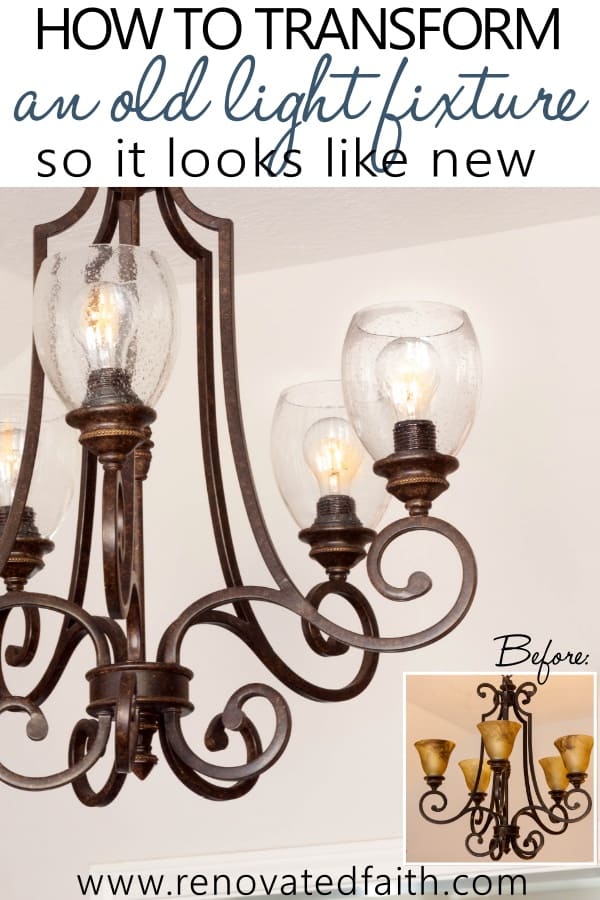
It was now time to turn my attention to the chandelier over my island. It is huge and gives a dramatic effect but those coffee-colored shades HAD to go.
Instead of replacing the whole fixture, you can often just replace the shades (the glass sconces) and it will make a drastic change to the look of the whole light fixture.
How to Update Light Fixture Shades – the Right Way!
Supplies Needed:
Glass Light Shades – These clear seeded glass shades are the cheapest at Lowe’s here and there are also options online here: Glass Scone Replacements
Rustoleum Universal Metallics Black Spray Paint – You can get it here or at most home improvement stores.
Small Paint Brush
Sharp scissors – I love these and have two pairs.
LED Light bulbs – the new ones that look like Edison bulbs you can find cheap here.
Best Spray Painting Tips & Tricks – To get flawless results when spray painting, fill out the form here for your free checklist!
Step 1: Remove the Bulb and Old Light Fixture Shade
Turn off the light and unscrew the light bulb. Now unscrew the little ring that holds the glass in place. Hold onto the glass as you unscrew it. There might also be a spacer ring behind it.
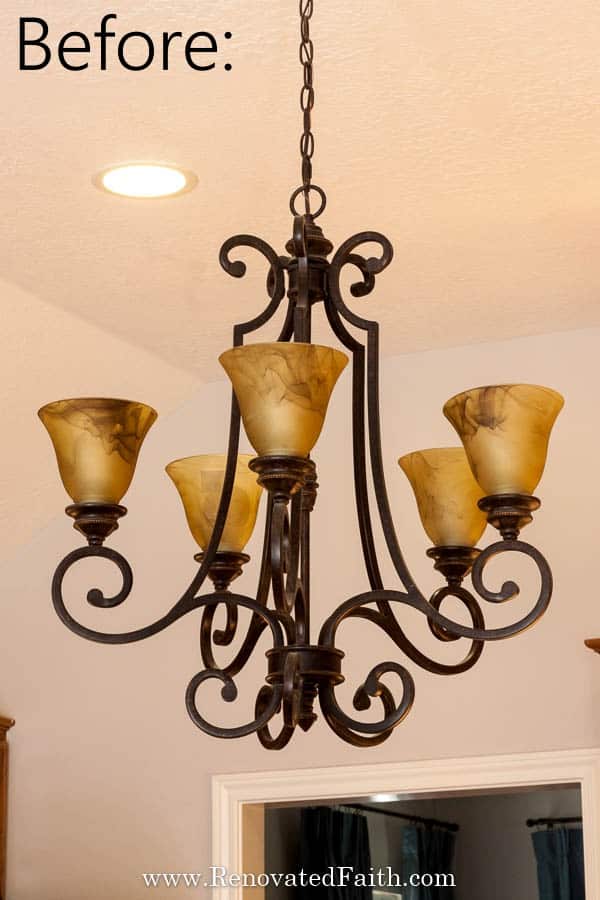
Step 2: Spray Paint the “Hardware”
Now you are going to spray paint your rings, spacers, and thread covers.
Lay them out flat on a piece of cardboard and lightly spray them with the same Rustoleum Universal Metallics Spray Paint. Let them dry for 15 minutes and then add another coat if needed. Then let them dry for 24-48 hours.
(During the drying phase, now is a good time to dust those light fixtures and Windex the new shades.)
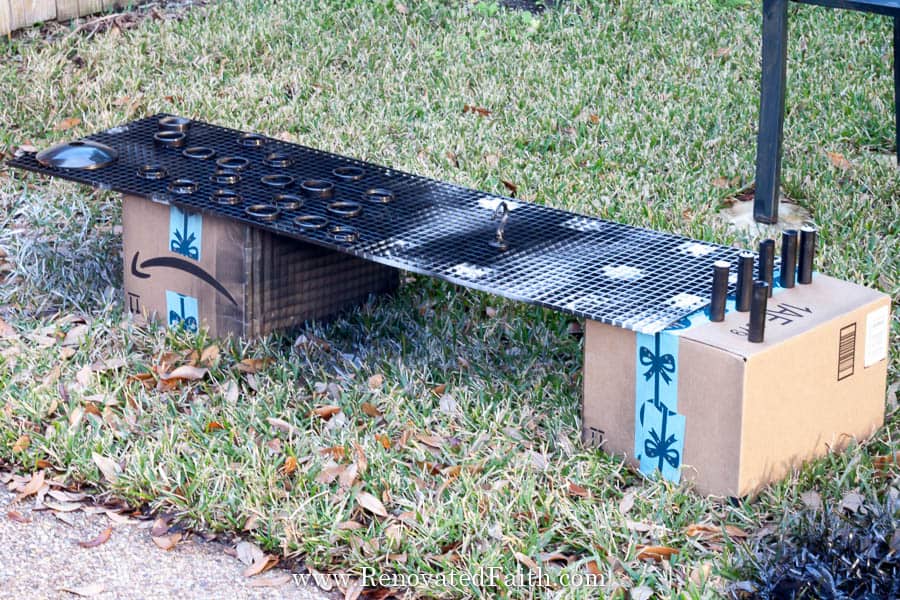
For my best spray painting tips for a flawless finish, fill out the form at the bottom of this post.
Step 3: Paint the Threaded Sockets of Your Light Fixture
I’m updating my light shades to clear seeded glass. There’s only one problem with clear glass – you are going to see those white socket threads and white rings underneath your light bulb.
This is not a huge deal but I like the idea of covering those so everything about the fixture looks intentional and has a consistent look throughout. Trust me, it will make all the difference!
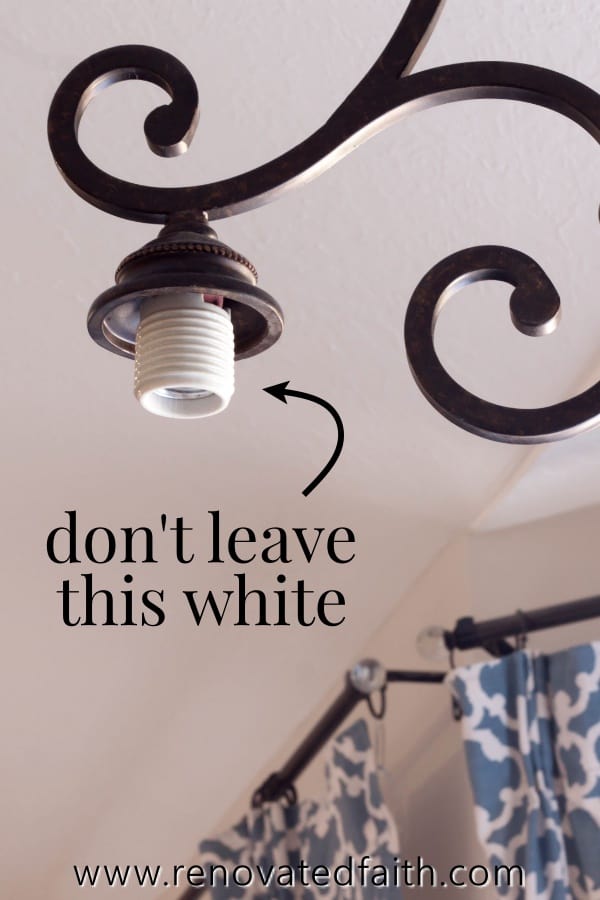
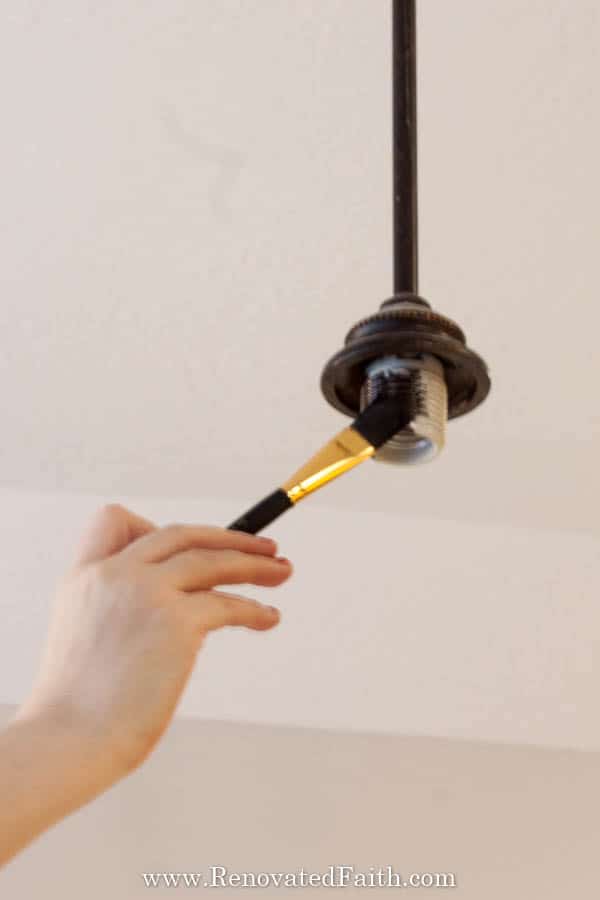
So, the easiest solution is to paint them in the same color as your chandelier. You can do this one of two ways.
One option is to go outside and spray some of your spray paint into a plastic cup (don’t use a foam cup, because the spray paint will disintegrate it!). Then, use a small paintbrush to paint the sockets
The second option is to buy this* instead of using spray paint. This product is basically spray paint in a can and is not as messy as spraying into a cup. It’s also nice to have on hand for any oil-rubbed bronze touch-ups later on around your home. *(I know I’ve seen this at Home Depot cheaper than buying online)
Just paint the sockets with a small brush and throw away the brush when you are done.
Don’t they look better now?!? Oh, how I love consistency!
Step 4: Light Fixture Makeover Assembly
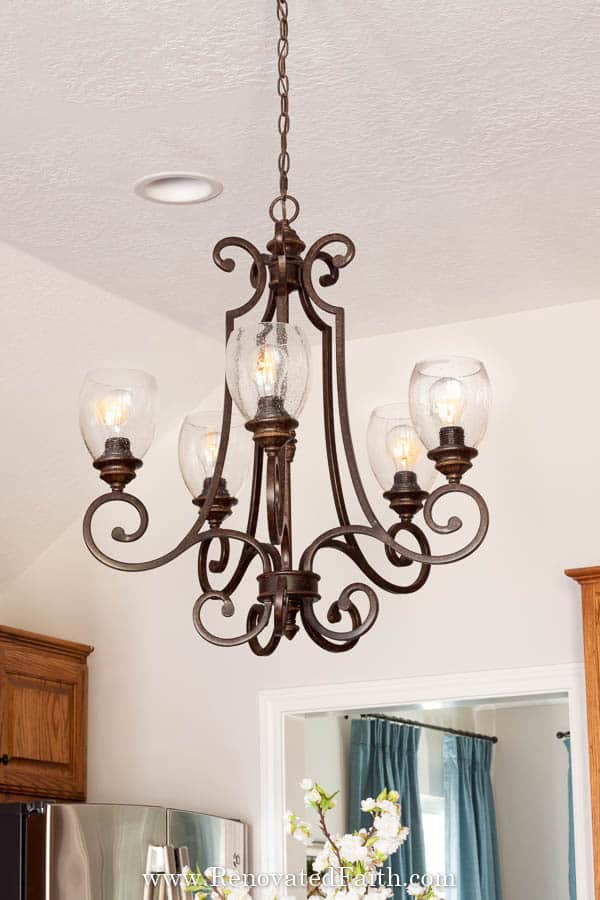
Now, add your new glass shades, your spacer (if you have one), and the ring before screwing in the LED light bulb.
Turn on your light and see what a fabulous change this has made to your entire light fixture makeover!
Pendant Light Update – What To Do With An Old Light Fixture
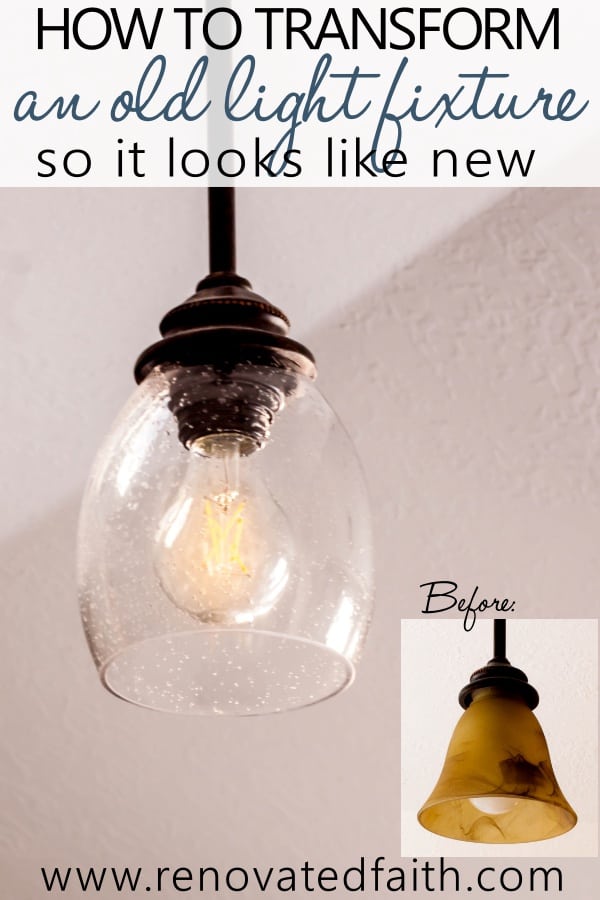
When a reader asks me how to paint an old light fixture, I’m quick to ask them how their lighting would look if they just changed the shades (the glass sconces).
After the master bath makeover, I knew I could give these pendant lights a new look at a fraction of the cost. Instead of buying new pendant lights or spray painting the entire fixture, you can more easily modernize your kitchen lighting by adding a new sconce shade like the process above.
Here are how my pendant lights looked before their makeover.
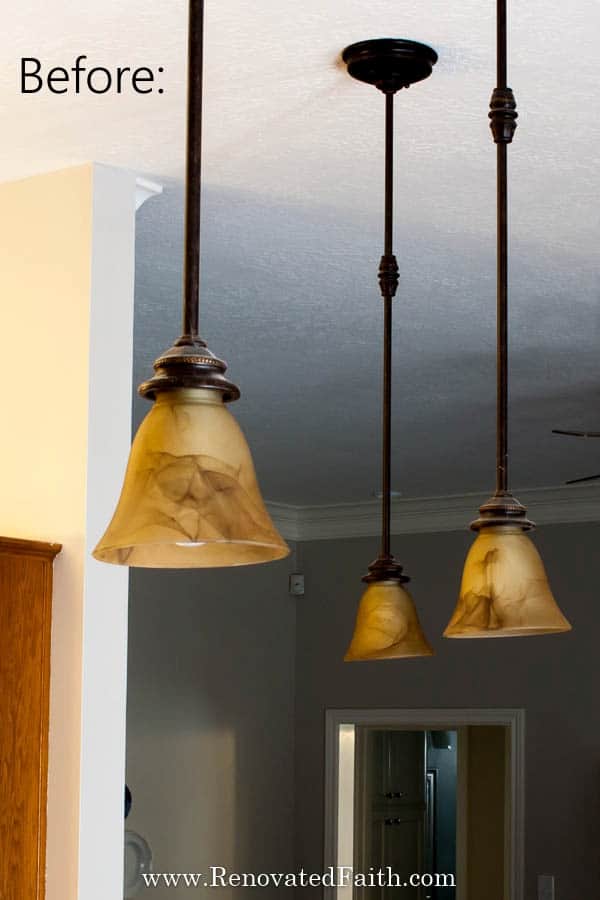
Yes, you can say it; they were horrible!
Here is how they looked after using the same process as I used for the chandelier over my island.
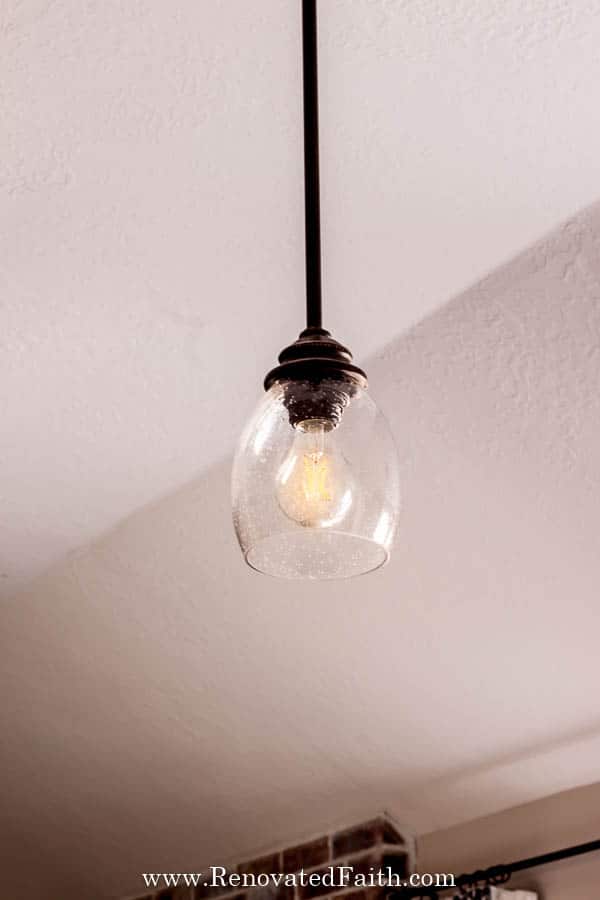
It’s amazing how a small change can make such a huge difference.
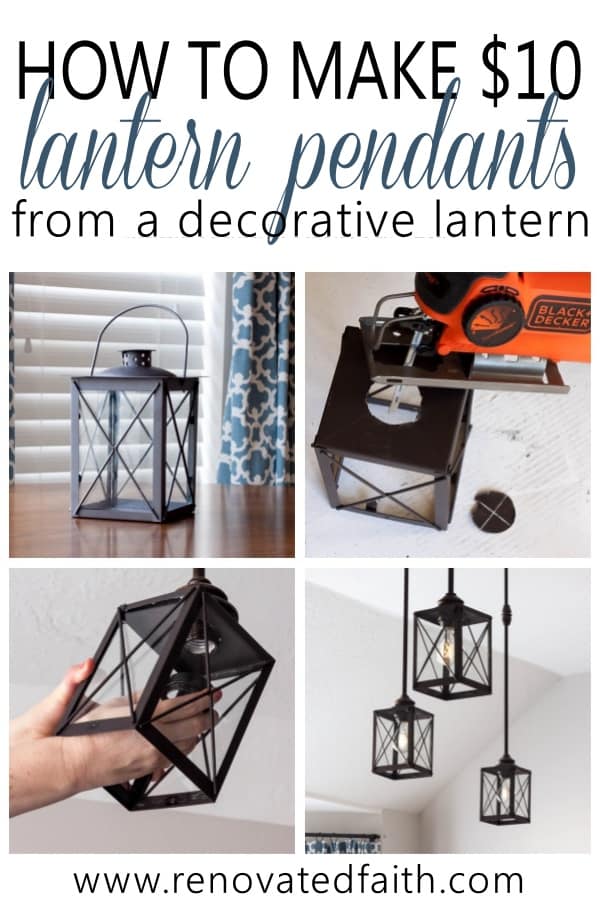
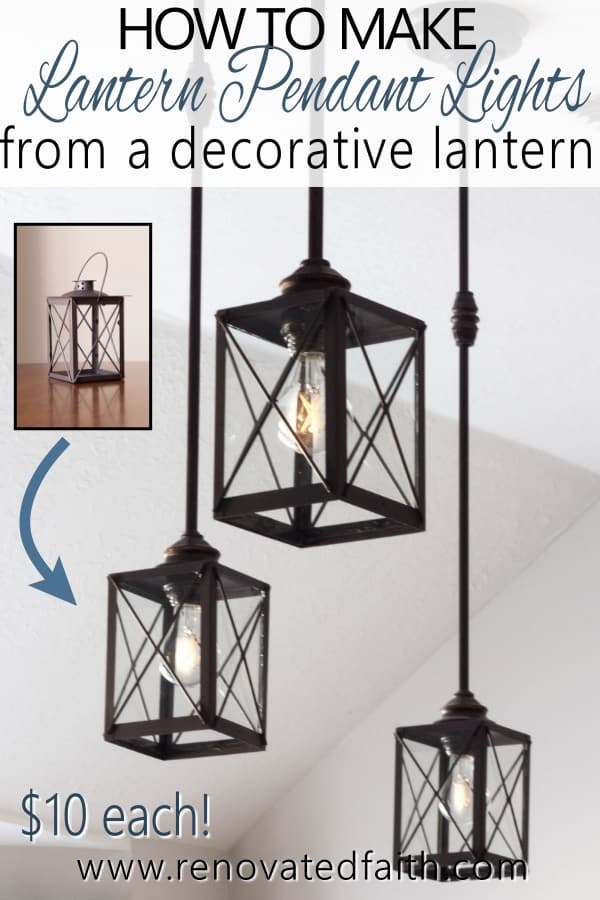
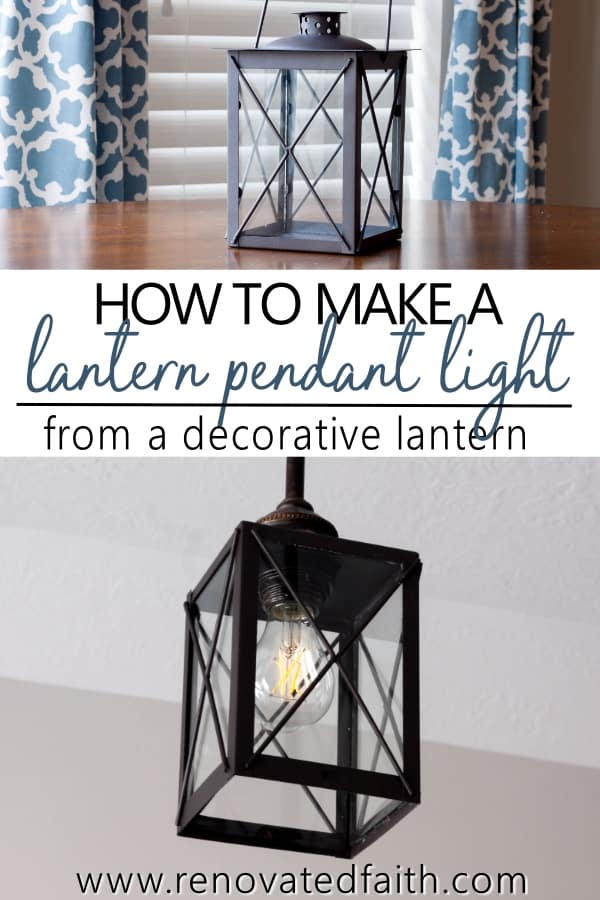
How to Make a Pendant Light Cover from a Decorative Lantern
Because clearly, I can’t leave well enough alone, I decided I wanted the look of those adorable lantern light fixture covers for the pendant lights over the counter.
Here is my inspiration but I’m not so inspired by the steep price tag.
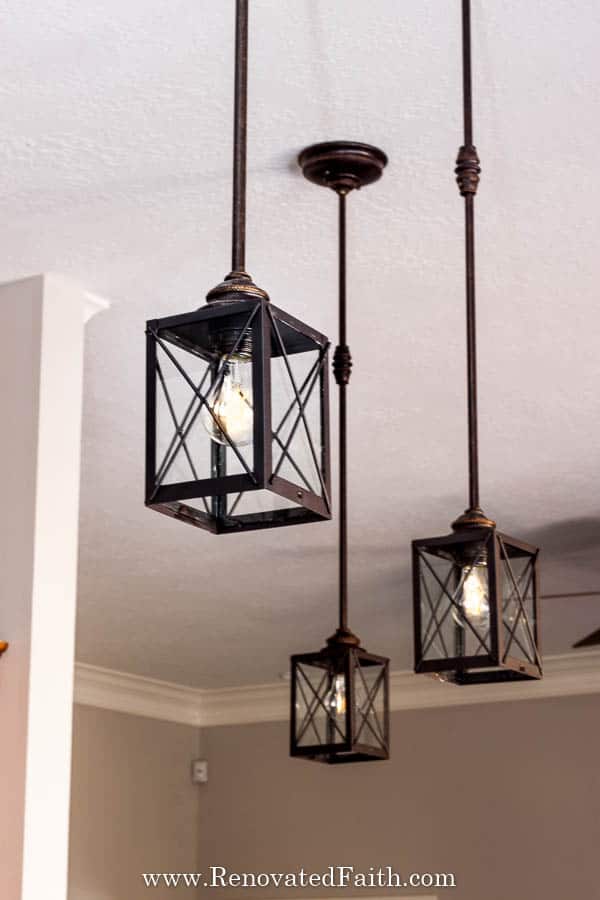
So for this DIY light fixture update, I made my own out of decorative lanterns I got online here!


DIY Light Fixture Covers for Pendants Using Lanterns- Supplies:
Decorative Lanterns – I used these (check the current price here). If that one is not available, this one will work just as well. The price is definitely right as they aren’t much more than clear light shades. (If you decide on another lantern, make sure the top is removable.
Jig Saw – This is what I use and it is inexpensive. You can also see some tips on how to use a jigsaw here: A Beginner’s Guide to Using a Jigsaw
Rustoleum Universal Metallics Black Spray Paint
LED Light bulbs – the new ones that look like Edison bulbs can be found cheaper here.
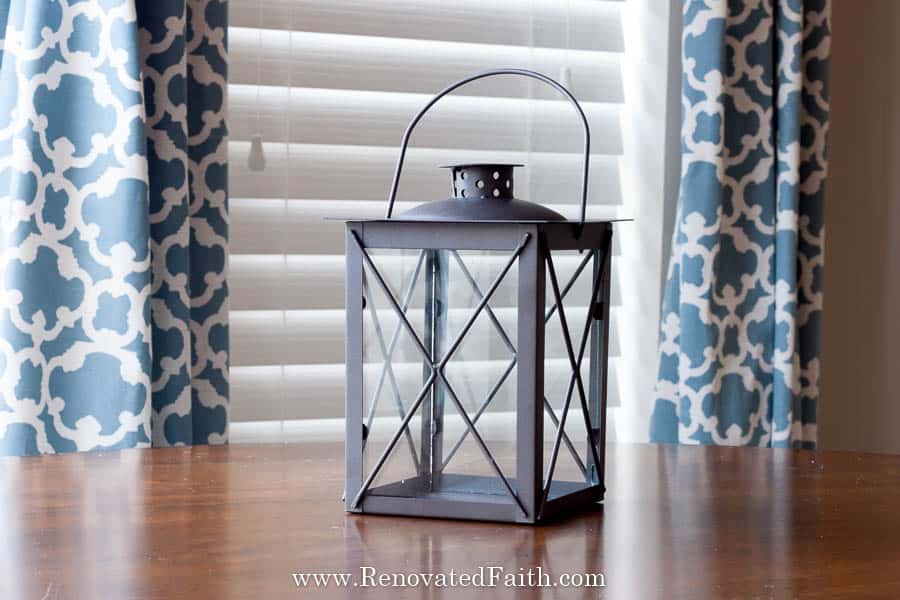
Step 1: Remove the Old Light Shade
Unscrew the bulb and while holding the shade with one hand, unscrew the metal ring with the other.
Step 2: Spray Paint the “Hardware”
Now you are going to spray paint your rings, and spacers.
Lay them out flat on a piece of cardboard and lightly spray them with the same Rustoleum Universal Metallics Spray Paint for the last DIY light fixture update. Let them dry for 15 minutes and then add another coat if needed. Then let them dry for at least 24 hours.
(During the drying phase, now is a good time to dust those light fixtures and Windex the new shades.)
Step 3: Paint the Threaded Sockets
Just like the instructions for the last light fixture makeover, you are now going to paint those threaded socket covers since they will be showing.
Use either your spray paint or the quart of Rustoleum ultra cover listed above and paint the sockets with a small brush and throw away the brush when you are done.
Step 4: Cut a Hole in the Bottom
Here is a video of the whole process:
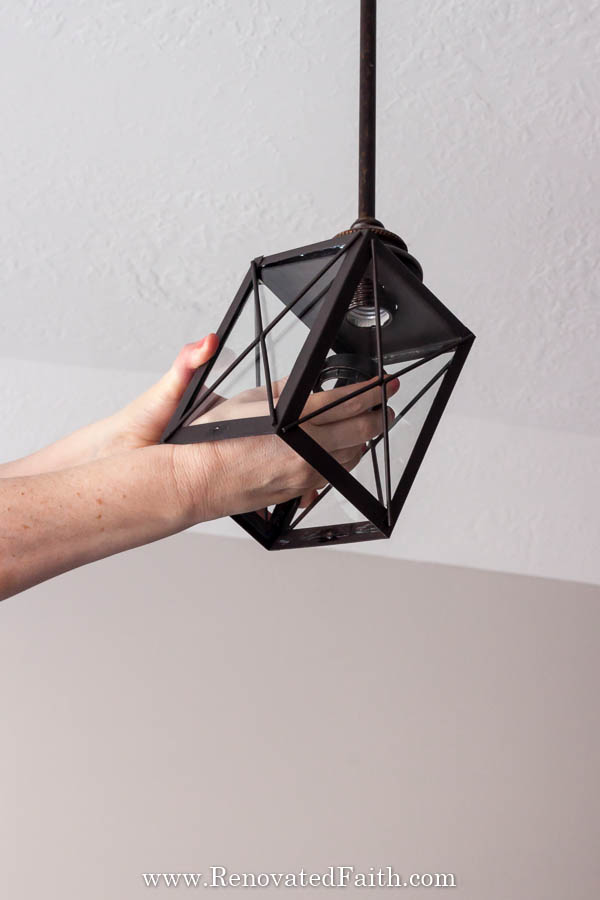
The original plan was to use these lanterns right side up but they worked better upside down. We are flipping the lantern over at this point and the bottom will now become the top.
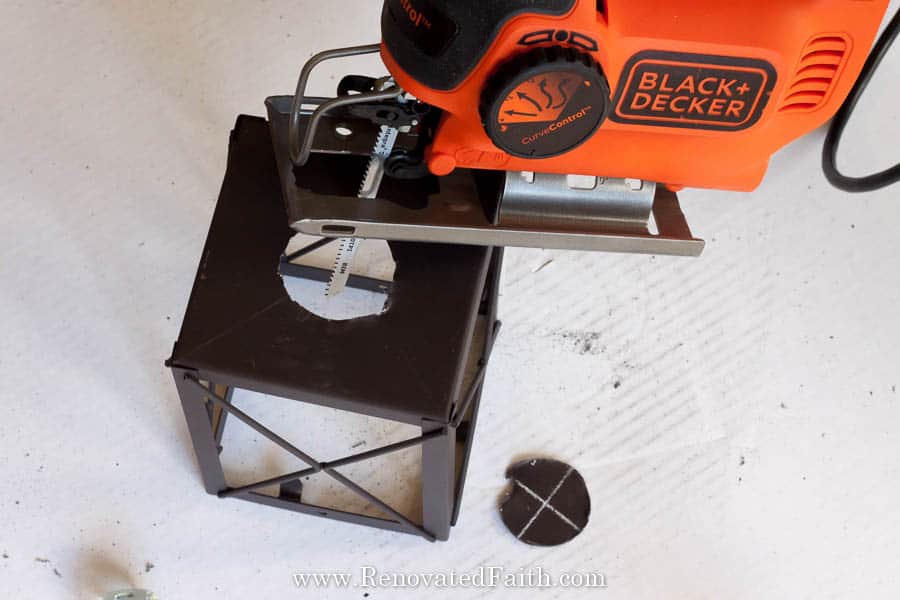
While those are drying, you are going to make a hole in the top of your lantern with a jigsaw and jigsaw blade.
Take out the glass panes and set them aside.
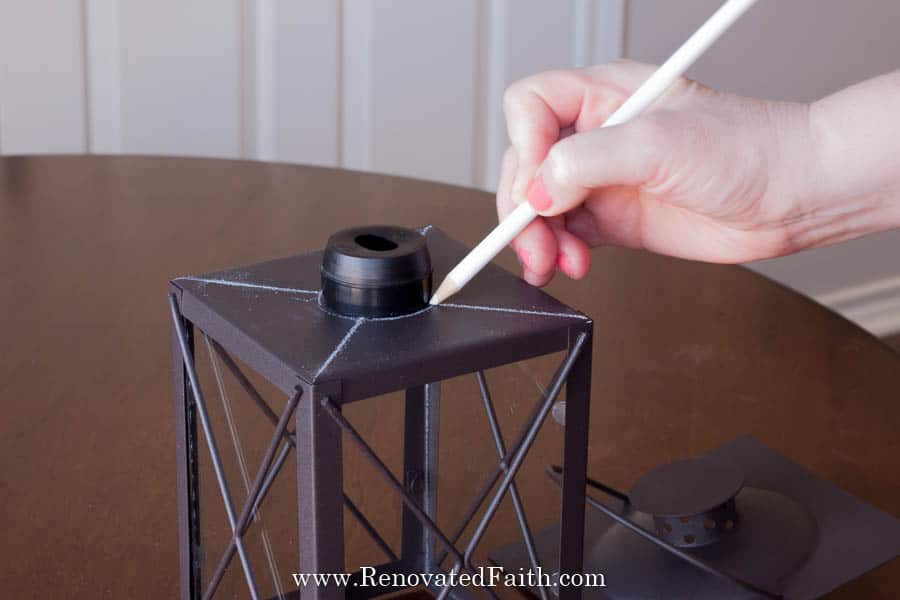
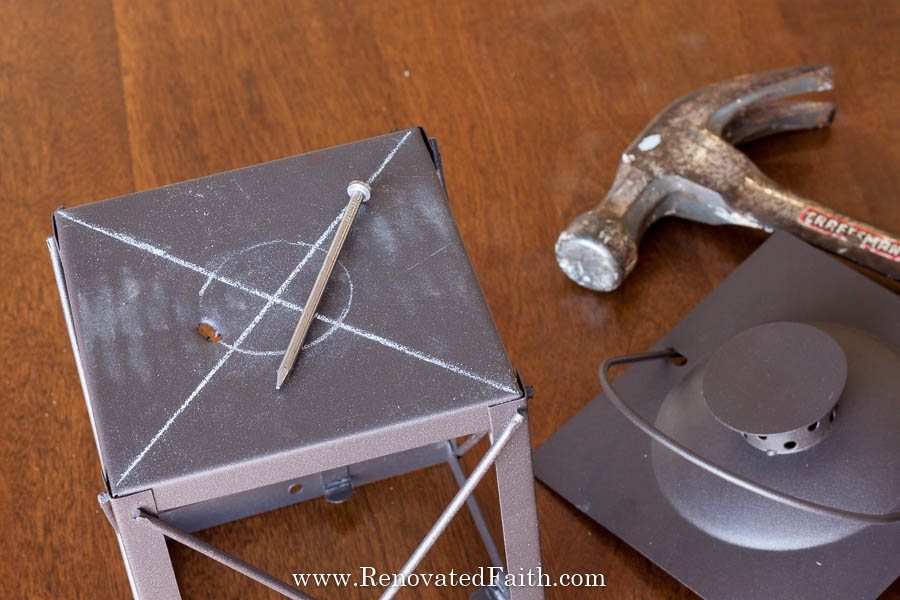
See my post on how to use a jigsaw here where I show you how easy they are to use. Cutting through metal is the same as cutting through wood, you just use a different blade like this one and it’s a little louder so you might wear earplugs.
I cut a hole that was 1.25″ in diameter and marked the hole with a pencil, making sure it was in the center.
I started the small hole by hammering two nail holes into the top of the lantern along the line so the blade will have a place to go in.
Step 5: Light Fixture Update – Reinstall
At this point, you can add the glass panes in again and then use glass cleaner to wipe off any fingerprints
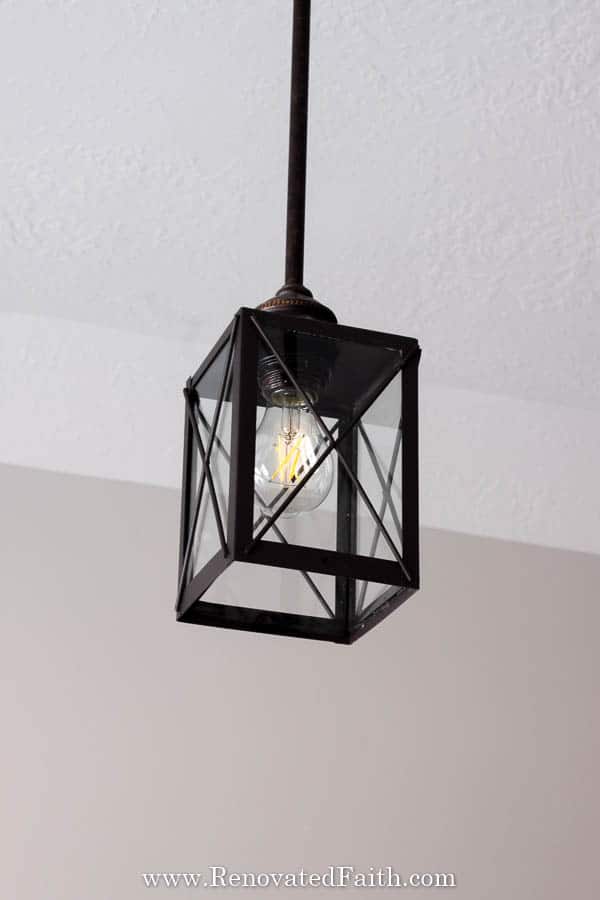
Now you can secure the lantern with the ring that you spray painted earlier. Simply add a light bulb and you are done!
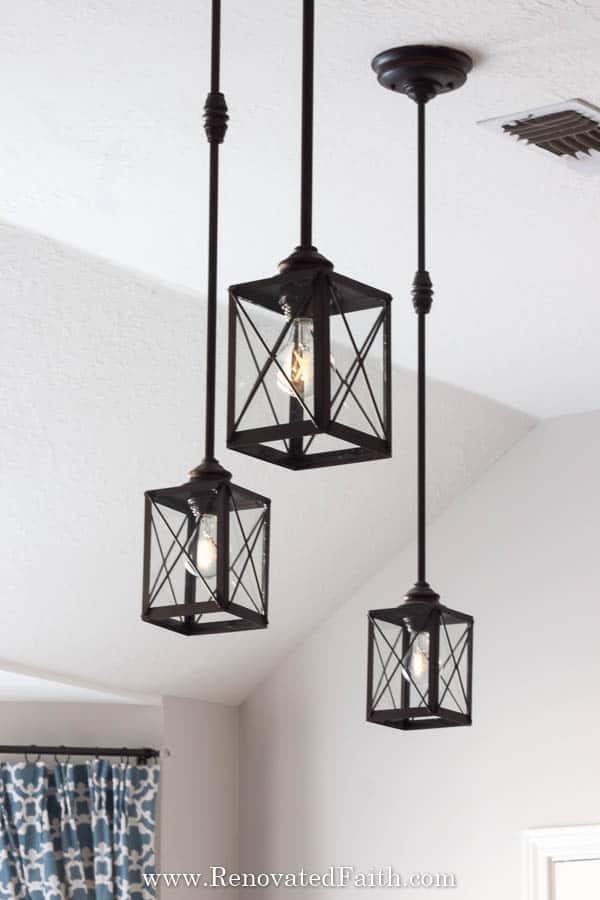
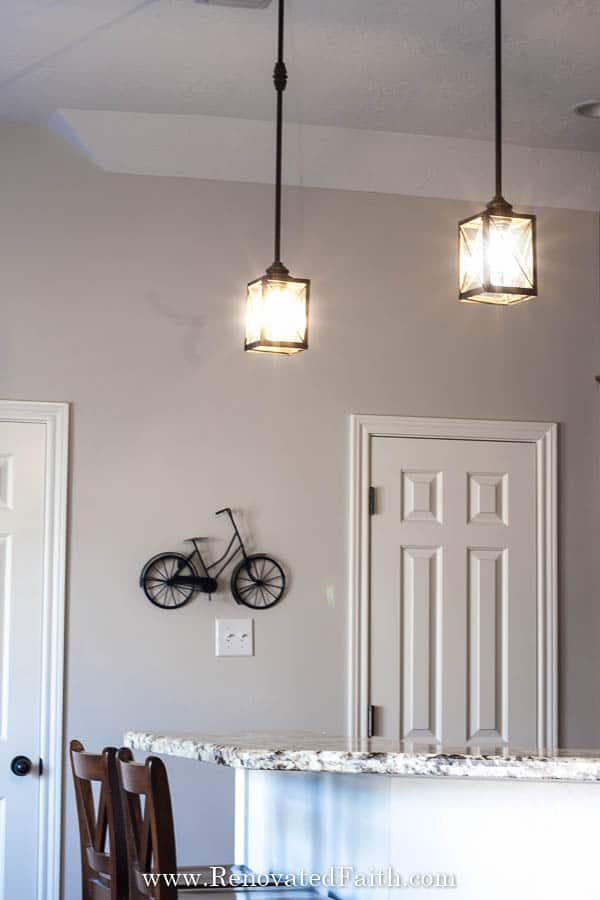
This transformation gives you a whole new way to DIY a gorgeous pendant light for a fraction of the cost!
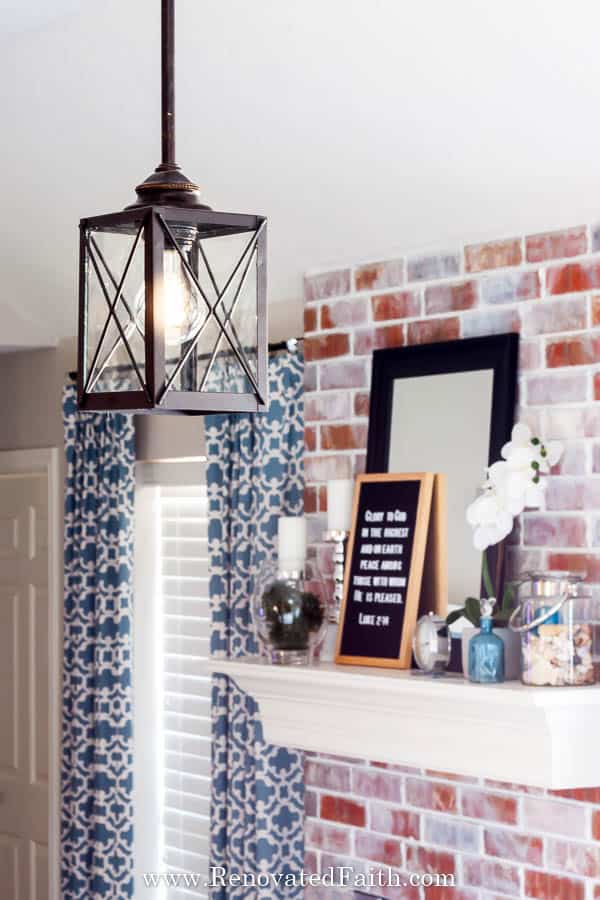
Renovate Your Faith: God Shines Light Into Dark Places
There is something inherently good about light, isn’t there? Everyone wants their home to be ‘light and airy’. No one is scouring Pinterest for pins showing them how to make their living rooms ‘dark and dreary.’
As I took pictures of the new light fixtures I was noticed my little African Violet in the terrarium on the breakfast table. I have to be careful to turn it every few days, because if I’m not careful all of it’s leaves will turn towards the light and the plant will look lop-sided.
Have you ever noticed that no matter how many times you try to turn a plant, it will always grow towards the light?
That plant doesn’t have a brain, a weekly planner or even an alarm clock but it knows that no matter what, it needs to turn it’s leaves toward the window if it wants to grow and thrive.
As I was hanging up my new light fixtures, I couldn’t help but wish I could be like that little plant – always turning towards God, day in and day out – no matter the situation.
But sometimes I turn away… I turn away from the one thing I need most because sometimes I feel a little overexposed.
What about you? Do you hide your feelings or problems from God? Do you feel like what you have to offer Him isn’t worthy of the light of day?
But fortunately, there is nothing too dark or twisted to share with Him – no worry, concern or fear He can’t subside.
We lie to ourselves when we feel like we can hide from Him. For nothing is hidden from the warm embrace of His love. He waits for you ready to bear your burdens, ease your pain and forgive your sin.
From the beginning of time, He foreknew what would hide in your shadows but sent His Son to die for you anyway. He wants you to walk with Him, head held high and turned towards Him. For in the light of His presence, we find forgiveness and fellowship with Him, without the darkness of shame, burden, or regret.
No matter what lies ahead, may we follow our Heavenly Father with confidence, enjoying the warmth of His love in the light of His presence.
“This is the message we have heard from him and declare to you: God is light; in him there is no darkness at all. If we claim to have fellowship with him and yet walk in the darkness, we lie and do not live out the truth. But if we walk in the light, as he is in the light, we have fellowship with one another, and the blood of Jesus, his Son, purifies us from all sin.If we claim to be without sin, we deceive ourselves and the truth is not in us. If we confess our sins, he is faithful and just and will forgive us our sins and purify us from all unrighteousness.” 1 John 1:5-9
Light Fixture and Brass Chandelier Makeover FAQs
1. What are the Best Light Bulbs for Overhead Lighting?: Update a Chandelier with Edison Bulbs
LED light bulbs are definitely here to stay. They are long-lasting and safer than incandescent bulbs AND compact fluorescents. However, the lighting from LED bulbs can be pretty harsh and not very flattering. Also, the white plastic covering on the bottom half of many LED’s makes them look tacky in clear fixtures.
Related: DIY Plant Stand with LED Lights
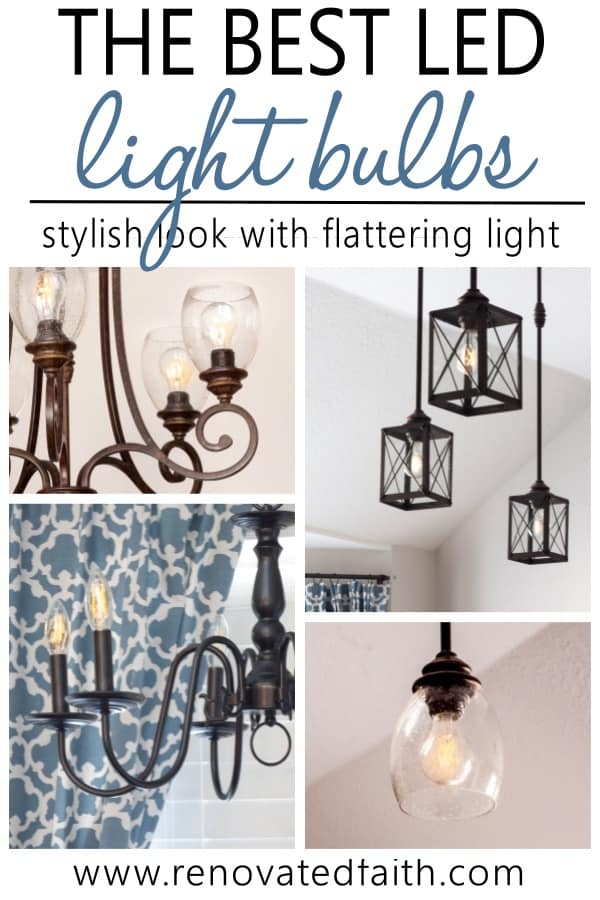
Fortunately, I stumbled upon a new type of LED called Filament LED, or Edison LED bulbs. They have the appearance of Edison bulbs but are true LED’s instead of just fancy incandescents. They come in various shades of lighting and are not nearly as harsh as their LED counterparts. They are more expensive than the traditional LED bulbs but not by much. To see the specific bulbs I used for my light fixtures, go to the supplies list at the top.
Click the link below for Amazon listings cheaper than in home improvement stores.
BEST PRICE ON FILAMENT LED BULBS
2. How to Update a Wall Sconce
All the information in this blog post also applies to wall light fixture makeovers. Just simple changes make a big difference to an old chandelier with shades, you can change pendant light shades for island and wall sconce makeovers.
You might have unsightly wall sconces in your halls or entryways. These can be updated with the lanterns or even the new pendent light covers I described above. Read over those tutorials at the beginning of this post to see what option best fits your style.
3. What to do with Old Wall Sconces
After these projects, I have an old light fixture and over a dozen old glass shades lying around. I plan on donating them to my local Restore where they can resell them and use those funds to build homes for people in need.
4. Are Crystal Chandeliers Out of Style?
If you run across an old chandelier with crystals, consider keeping the crystals for the final look. A crystal chandelier is classic and it will add some drama and depth to ANY space.
5. How Do You Modernize a Crystal Chandelier?
How Do You Restore A Crystal Chandelier Yourself?
To update a chandelier with crystals, carefully remove the crystals and set them to the side before painting. Spray paint your chandelier and let it dry for 48 hours before adding the crystals. This is a great time to add a new piece of wire for each crystal as the old ones are often rusty. You can also clean the crystals with Windex to restore their shine. If the crystals are in bad shape themselves, it’s best to consult a professional:
Chandelier Restoration Near Me
6. Can You Paint a Crystal Chandelier?
You can absolutely paint a vintage chandelier with crystals. Spray paint will remove the look of shiny brass. Choose a spray paint that matches your own style to get the look of a metal chandelier. If you are wondering how to paint a crystal chandelier, be sure to remove the crystals before painting and consult free spray painting tips printable here: 21 Best Tips and Tricks for Spray Painting
7. Glass Panel Chandelier Makeover
“I got an old chandelier but it has glass panes, how do I paint it?” There are several different kinds of chandeliers. Updating an existing chandelier with glass panes makes for a really pretty chandelier makeover. For glass lighting fixtures, you don’t want to just spray paint the whole thing. Removing the panes first is a whole lot easier than trying to cover the glass with painter’s tape. If you can’t remove the panes, use a layer of newspaper or painter’s tape. Don’t use pieces of plastic bags because the spray paint will eat through it onto the surface of the glass.
8. Can you update a brass ceiling fan?
Brass ceiling fans can come a long way with a coat of spray paint to get rid of the metallic look. Remove the old fan blades, spray paint the metal parts, and install new blades. New ceiling fan blades are low-cost and can change the entire look of your fan.
RELATED: A Good Way To Recycle Old Ceiling Fan Plates (Easy Windmill Wall Art)
9. What About Craft Ideas With Old Light Fixtures?
An easy way to update old light fixtures is to add mason jars and spray paint the clear glass blue so they look vintage: The Best Blue Paint for Vintage Mason Jars
You can also do something completely different with old light fixtures as I did with this chandelier makeover: DIY Hummingbird Feeder Chandelier Makeover
10. Can You Do a DIY Ceiling Light Makeover in Other Rooms?
My favorite thing about this thrifty makeover is that it is such a good way to give a more modern look to any room in your house at very little extra cost. You can update the existing chandelier or light fixture in your guest rooms, and update the sconces on dining room walls or even make updates to outdoor light fixtures.
11. What is the Average Lighting Fixture Upgrade Price?
It depends a lot on what you are doing, but you can spray paint a light fixture for less than $7. Adding new shades or sconces will add more to the makeover cost but in most cases, it is still substantially less than buying a new light fixture
How to Spray Paint Anything – Best Tips & Tricks For Painting Light Fixtures
For a free checklist to get a flawless finish when spray painting, fill out the form below and get free access to my printable library!
Related Posts to Farmhouse Light Fixture Makeovers
The Ultimate Guide to the Best Paint for Cabinets
How To Paint Kitchen Cabinets Like A Pro
How to Paint Wrought Iron Furniture With Spray Paint
Insanely Easy DIY Industrial Shelves (Wire Shelving Hack)
21 Spray Painting Tips & Tricks
The Best Spray Paints for Glass (Tip & Reviews)
How to Spray Paint Mason Jars in Any Color
The Best Paint for a Living Room
How to Hang Beadboard Wallpaper
The Best Way to Paint Furniture
Best Podcasts for Christian Women
Easy Farmhouse Dining Room Table Tutorial
DIY Pinch Pleat Curtains (Add a Pinch Pleat to Store-Bought Curtains)
Whether you are making updates to your home or getting ready to sell, these four light fixture makeovers have hopefully given you ideas to instantly update your current fixture while saving a ton of cash that can be used elsewhere in your home budget.
Who knew you could get a perfect chandelier or light fixture with a few simple changes. If you are new to spray paint, no worries! The spray paint brand I used above is SUPER easy to work with. I promise you will have flawless results. Now, head to your local Re-Store or home improvement store to start your own DIY light fixtures updates!
Have a great day and feel free to ask me any questions below!
Blessings,

Be sure to follow the fun here!
Email Subscription | Instagram | Pinterest | Facebook | Twitter

Karin Peters is a DIY expert and the creator of Renovated Faith. She is a furniture painter, a home design consultant, and a tenacious problem solver determined to help you transform your house into a home. With 17 years of experience with DIY home improvement, she researches and analyses professional processes to adapt them to be easy and cost-effective for DIYers. She then tests every project and product before it appears on the site in a detailed, step-by-step format. After attending Texas A&M University, she received her Master of Divinity with Biblical Languages at Southwestern Baptist Theology Seminary. Her passions unite in Renovated Faith, which shows readers how to create a home that serves them so they can pursue their God-given purposes. About Renovated Faith | Editorial Policy | Facebook | Twitter | LinkedIn




Awesome DIY! Just wondering how you removed the cup portion at the base of the candles on the brass chandelier?
Hey Jerrica, For mine, I did. Fortunately, they were easy to remove. It’s really a matter of what looks best for your chandelier since they are all a little different. Let me know if you have any other questions! Blessings, Karin
I am OBSESSED with the lantern pendant lights! The lantern you used and the other you recommended are both no longer available on Amazon. I am having a very difficult time finding options with removable tops. Do you have any suggestions or links to lanterns I could check out? Thank you!
I love your tutorials but mostly I come here for Your sweet thoughts on faith and God. Thanks for taking the time to share your faith and minister to us all.
Georgia, you are too kind! Thank you for making my day. I wish you all the best! – Karin
Where did you find the fabulous glass for the seeded glass pendants?
Hi Simone, I got those at Home Depot! Let me know if you have any other questions.
Thanks for this! How cool. Where did you get the ring to replace the bulb on the chandelier that was originally brass? Thank you!
Hey Karen! Which light fixture are you referring to? I know on one of them I just spray-painted the old one. Apparently, spray painting is my love language. – Karin
Love your ideas!!! I would love to recreate the hanging lights and the scroll chandelier. Do you know where I would be able to find the chandelier?
Thank you so much. Try your local ReStore or thrift store. They usually have lots of old chandeliers.
Hi~
May I know the new glass shades is buy or you made it?
I got the new glass shades at Lowe’s for around $6 each. There were also several options at Home Depot. Thanks Ann!
Hi was wondering where you found the glass to replace the globes on your chandelier. I have something similar and trying to find some.
Thanks its gorgeous
Lou
I found those at Lowe’s. Thanks Lou!
Wow, what an awesome page. Glad I found you.
I have a similar chandelier but it’s slightly bigger. It has two tiers of lighting. Six lights at the bottom and 3 above. The glass shades are a bit over 7″ high. Is there a rule of thumb as to what size shade I can use? I love the clear beveled ones you used. Do you think I can use the same one’s.?If you think it will work I’ll get them.
Hey Nitza,
I don’t think there is a hard and fast rule as far as light shade size. I would take one of the old shades into the home improvement store with you to make sure that any new shades have the same size hole. Also, it just needs to be long enough so you can’t see the top of the light bulb from the side. I hope this helps! I’d love to see an after pic!
I’m so glad I found you! It is so refreshing to go onto a site where there are beautiful projects, clear directs without alot of “filler” and not a single curse word!! Thank you!!
That makes my day! Thankk you so much Revonda! Welcome!!!
Dear Karin,
I came across your info on pinterest and from the first words you said I could only think I needed to reach out and tell you what a blessing you are. I know you have heard this many times before, but the way you share your love for the Lord in what you do, in such an open and elegant way really blessed me!
I just want to be your friend 🙂
May God continue to inspire and bless everything you do!
Love in Him who loved us first,
grace
Wow, I’m really just humbled by this and can’t thank you enough for your kind words. I appreciate it more than you know!
Karin,
All your light fixture conversions are great improvements. You did a good job. Thank you for your words of inspiration.
Thank you so much Robin! I so appreciate that and I’m praying for your recovery!